Table of Contents
Advertisement
Quick Links
Advertisement
Table of Contents
Troubleshooting

Related Manuals for Honeywell A700


Summary of Contents for Honeywell A700
- Page 1 Voice Device and Headset Hardware Reference Guide...
- Page 2 Disclaimer WARNING Honeywell International Inc. (“HII”) reserves the right to make changes in specifications and other information contained in this document without prior notice, and the reader should in all cases consult HII to determine whether any such changes have been made. The information in this publication does not represent a commitment on the part of HII.
-
Page 3: Table Of Contents
A700/A700x Battery Charging an A700/A700x Battery in a Device Charging an A700/A700x Battery in a Charger Inserting a Battery into a Talkman A700/A700x Device Removing a Battery from a Talkman A700/A700x Device Battery Warm-Up Time Installing the USB Driver on Windows... - Page 4 Adjusting the Voice on A700/A700x Adjusting the Pitch on A700/A700x Adjusting the Volume Using Voice on A700/A700x Adjusting the Volume Using Device Buttons on A700/A700x Adjusting the Speed on A700/A700x Changing the Speaker's Gender on A700/A700x Options for Hearing Impaired Users...
- Page 5 Infomail Intelligent Mail Codabar Code 93 Code 39 Code 128 Interleaved 2 of 5 Matrix 2 of 5 MSI Code Plessey Code Standard 2 of 5 Telepen Code 11 EAN / UPC PDF417 Codablock TLC 39 GS1 DataBar Maxicode Datamatrix QR Code GS1 Composite IATA 2 of 5...
- Page 6 Data Editing Talkman A700/A700x VMT Installation Guide Review A700/A700x VMT Installation Best Practices Do not remove Talkman A700/A700x devices from VMT configurations Protect Talkman devices from damage Consider additional options from RAM® Mounts Lock parts into place if they might be moved during normal operations...
- Page 7 Connect to the Side Battery Terminal Fasten the Ground Wire Attach the A700/A700x VMT to the Vehicle Remove the A700/A700x VMT from the Vehicle Chapter 2 - Wireless Headsets Choosing the Right Headset Honeywell Wireless Headset Features Care and Use...
- Page 8 Headset Mode LED Pattern Tone Mute User Action Headset Mode LED Pattern Tone Unmute User Action Headset Mode LED Pattern Tone Force disconnect for manual pairing in low power mode User Action Headset Mode LED Pattern Tone Switch to high power pairing when pairing in low power mode has failed User Action Headset Mode LED Pattern...
- Page 9 Headset Mode LED Pattern Tone Update headset software User Action Headset Mode LED Pattern Tone SRX2/SRX3 Modular Design Sharing the SRX2/SRX3 Headset Operator Profiles and Shared Headsets SRX2/SRX3 Headset Compatibility SRX3 SRX2 SRX2/SRX3 Headset Battery Charging SRX2/SRX3 Wireless Headset Batteries Inserting a Battery into the SRX2/SRX3 Wireless Headset Removing a Battery from an SRX2/SRX3 Wireless Headset SRX2/SRX3 Battery Warm-Up Time...
- Page 10 Pairing Methods TouchConnect Auto pairing Manual pairing VoiceConsole pairing Screen-Based pairing Pairing an SRX2/SRX3 Headset Pairing with A700/A700x Using TouchConnect™ Auto Pairing with A700/A700x Manual Pairing with A700/A700x Screen-Based Pairing with a Handheld Device Voice Device and Headset Hardware Reference Guide...
- Page 11 Handheld Device Pairing Status Icons Pairing by VoiceConsole Pairing More about SRX2/SRX3 Pairing Modes Placing Headsets in Pairing Modes Breaking a Pairing Wearing an SRX2/SRX3 Wireless Headset Installing the Stability Strap on the SRX2/SRX3 Wireless Headset Replacing an Earpad on the SRX2/SRX3 Headset Chapter 3 - Wired Headsets Choosing the Right Headset Headset Features...
- Page 12 Chapter 5 - Chargers Tips for Use A700/A700x Chargers Talkman 6-Bay Device Charger Talkman Battery Charger A700/A700x Battery Charger LED Indicators Charger Port Indicators Battery Port Indicators Talkman Device Charger and Battery Charger Wall Mount Voice Device and Headset Hardware Reference Guide...
- Page 13 Mounting the A700/A700x Battery Charger SRX2/SRX3 Headset Battery Charger SRX2/SRX3 Headset Battery Charger Specifications SRX2/SRX3 Battery Charger LED Indicators Charger Port Indicators Battery Port Indicators Headset Battery Charger Wall Mount Mounting the SRX2/SRX3 Battery Chargers Chapter 6 - Peripherals Bluetooth Peripherals...
- Page 14 Configure task and VoiceConsole Scanner as Initiator Configure task and VoiceConsole Intermec SF51 Scanner Device as Initiator Configure SF51 Scanner Configure task and VoiceConsole Scanner as Initiator Configure SF51 Scanner Configure task and VoiceConsole Intermec SF61B Scanner Device as Initiator Configure SF61B Scanner Configure task and VoiceConsole Scanner as Initiator...
- Page 15 Device as initiator Configure Task and VoiceConsole ProGlove MARK 2 Wearable Scanner Device as initiator Configure Task and VoiceConsole Printers Honeywell RP2D Printer Configure RP2D Printer Configure task and VoiceConsole Honeywell RP4D Printers Configure RP4D Printer Configure task and VoiceConsole...
- Page 16 Bluetooth Security Bluetooth Scanner Considerations Bluetooth Printer Considerations Basic Bluetooth Roles and Concepts Bluetooth with Talkman A700/A700x Solution Configuring Bluetooth Capabilities with VoiceConsole Pairing Initiated by a Talkman Device Pairing Initiated by a Bluetooth Device Barcode Identifier Label for Pairing Scanners...
- Page 17 A720 Specifications A730 Specifications A700x Product Battery Specifications Electrical Specifications Mechanical and Environmental Specifications Battery Notifications A700 6-Bay Device Charger Specifications A700 12-Bay Battery Charger Specifications SRX2/SRX3 Specifications SRX3 Wireless Headset Specifications SRX3 Hard-Hat Headset Specifications SRX3 High Noise Headset Specifications...
- Page 18 Important Precautions Powering Off Handling Used Batteries About Sending Equipment Back for Repairs Packaging Items for Return to Honeywell Appendix D - Troubleshooting Equipment Problems I Can't Hear Anything Through the Headset The Scanner will not Scan The Device Beeps Every Few Seconds...
- Page 19 Bluetooth Range Bluetooth Device Roles Bluetooth Security Bluetooth Scanner Considerations Bluetooth Printer Considerations Basic Bluetooth Roles and Concepts Bluetooth with Talkman A700/A700x Solution Configuring Bluetooth Capabilities with VoiceConsole Pairing Initiated by a Talkman Device Voice Device and Headset Hardware Reference Guide...
- Page 20 The Pairing with the Talkman Breaks Often We Have Incorrect Pairings and RF Interference Troubleshooting Wired Scanners Troubleshooting Bluetooth Printers Troubleshooting Wi-Fi Printers Appendix E - Honeywell Regulatory Compliance Statement of Agency Compliance Federal Communications Commission Compliance RF Exposure Statement Canadian Compliance...
- Page 21 Imager Compliance and Precaution (U.S.A., Canada ) Imager Compliance and Precaution (Europe) Declaration of Conformity: RoHS Directive 2011/65/EU EU Declaration Of Conformity A700x EU Declaration Of Conformity A700 EU Declaration Of Conformity SRX2 Voice Device and Headset Hardware Reference Guide...
- Page 22 Voice Device and Headset Hardware Reference Guide xxii...
-
Page 23: Chapter 1 - A700/A700X Voice-Enabled Devices
The A700x and A700 share a similar design. The main differences are: Operating system: A700x has a Linux kernel OS while the A700 has a Microsoft Windows CE Device color: The A700x is primarily black. The A700 is primarily blue. -
Page 24: Introduction
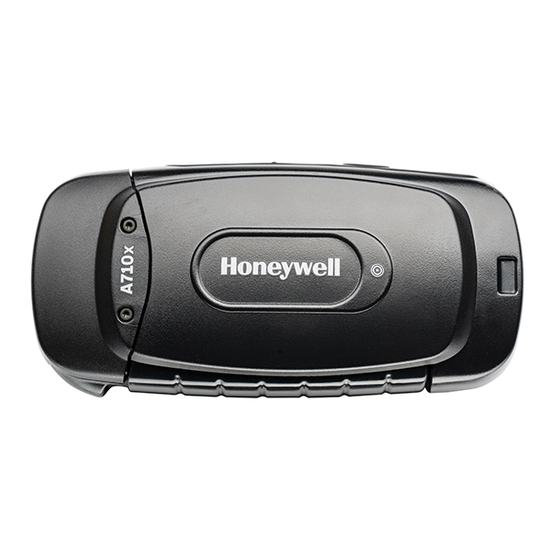
Honeywell A710, A720, and A730 Honeywell A710x, A720x, and A730x For more details, refer to the "Device Specifications" Introduction Getting to Know the Vocollect Talkman® A700 and A700x Devices Voice Device and Headset Hardware Reference Guide... - Page 25 A700 and A700x Components 1. Device state indicator 8. Network connectivity indicator 2. Play/Pause button 9. Operator button 3. Battery indicator 10. End cap: Varies by model 4. Plus button 11. TouchConfig/TouchConnect area Voice Device and Headset Hardware Reference Guide...
-
Page 26: A700 And A700X Led Indicators
7. Near Field Communication indicator 14. Maintenance port The Talkman® A700/A700x solution is a set of voice-centric appliances, each of which is a unique tool designed for a specific set of DC workflows, so each customer can pick the best tools for their needs. - Page 27 Color Blink Pattern Device State Small Green segment Sleep pulse Small Green segment on Green Solid ring Charging complete Green Fast blink Touch Config or TouchConnect successful Voice Device and Headset Hardware Reference Guide...
- Page 28 Color Blink Pattern Device State Loading or changing operator Loading or changing task Yellow Rotating ring Loading or changing voice Starting up Yellow Solid ring Charging Small The device is running in Platform only Yellow segment mode pulse Small Yellow TouchConfig sender mode entered segment on Large...
-
Page 29: Battery Charging Indicator
Color Blink Pattern Device State Firmware load Rotating ring Shutting down Ring on Early boot Charging fault or in charger or connected to power supply without battery Fast blink TouchConfig or TouchConnect not successful Battery Charging Indicator Color Blink Pattern Battery State Not seated in charger or charger not on Yellow... -
Page 30: Battery Health Indicator
WARNING Replace a battery only with another battery that has been authorized by Honeywell for the product you are using. Use of an unqualified battery may present a risk of fire, explosion, leakage, or other hazard. See also... -
Page 31: Bluetooth Indicator
Blink Pattern NFC State Blink TouchConfig sender or receiver mode entered On (for one second then off) The device successfully read a tag. Slow pulse Readable - act as a tag Bluetooth Indicator Blink Pattern Bluetooth State Bluetooth radio is disabled. Device is searching for other Bluetooth devices. -
Page 32: Network Indicator
Blink Pattern Bluetooth State Pulse Bluetooth is connected to a peripheral. Discoverable Device Bluetooth is discoverable by other devices. Blink Pattern Bluetooth is on and enabled, but is not connected, not in Slow Pulse discovery or paging mode, and not discoverable. Network Indicator Network Indic- Network State... -
Page 33: Touchconfig: Bringing Additional A700/A700X Devices Online
IMPORTANT TouchConfig can only be used with similar devices. An A700x can TouchConfig other A700x devices but cannot TouchConfig A700 devices. Similarly, an A700 device can only TouchConfig other A700 devices. NOTE TouchConfig uses near field communication (NFC). Data sent through NFC is not encrypted nor does it follow any specific safety protocol. -
Page 34: A700/A700X Battery
A700/A700x Battery CAUTION A700x and A700 batteries are interchangeable, though the color may differ. However, these device batteries and other Honeywell batteries are not interchangeable. If you try to insert the wrong battery into a device, you may damage the device and the battery. -
Page 35: Charging An A700/A700X Battery In A Device
A700x and A700 devices use a Honeywell Charger that charges the high-performance battery while still seated in a device and a separate charger for charging batteries that have been removed from the device. Charging an A700/A700x Battery in a Device... -
Page 36: Charging An A700/A700X Battery In A Charger
6. When the ring LED indicator turns a solid green, the battery is fully charged. Pull the battery off the charger port to insert it into the device. Inserting a Battery into a Talkman A700/A700x Device Make sure the battery to be inserted is fully charged. -
Page 37: Removing A Battery From A Talkman A700/A700X Device
Make sure the battery is firmly in place and can't be removed without pressing the battery release button. WARNING Replace a battery only with another battery that has been authorized by Honeywell for the product you are using. Use of an unqualified battery may present a risk of fire, explosion, leakage, or other hazard. See also... -
Page 38: Battery Warm-Up Time
2. Press the battery release button all the way down until the top of the battery pops out from the battery compartment. 3. Lift the battery out of the compartment. Battery Warm-Up Time If a battery has been used in a cold environment, it will not begin charging until it warms up sufficiently. -
Page 39: Installing The Usb Driver On Windows
Installing the USB Driver on Windows When you connect an A700x or A700 device to your Windows PC, the PC will search for a USB driver to install. If the PC is configured to search for drivers online and the connection succeeds, the driver will install automatically and the A700x or A700 device will be ready to use. -
Page 40: Turning Off An A700/A700X
4. After a brief pause, it says, "Please wait." After another pause, the device begins asking questions or providing instructions. Turning Off an A700/A700x Powering Off by Using the Play/Pause Button Press and hold the Play/Pause button until the LED indicator turns red. The ring rotates red and the device will store any data that has not been transmitted. -
Page 41: Precautions
If a device is turned off in this state, it may not be ready to use when it is turned back on. Loading an Operator's Templates on A700/A700x You need a device with a charged battery, headset, and any other equipment (belt, bar code reader) you are going to use. - Page 42 3. Press the Operator button. 4. The device says, "Please wait" and retrieves a list of operators and teams. Wait for the device to say, "Select team". If the device says "Current operator is (operator name). Change operator", skip to step 8. 5.
-
Page 43: Adjusting The Voice On A700/A700X
"Current operator is (your operator name). Good night." The device then goes to sleep. The next time you turn the device on, it will be ready to use. Adjusting the Voice on A700/A700x Each Vocollect Talkman device uses Vocollect Voice software to provide instructions to the operator and prompt him or her for responses. - Page 44 1. Press the Operator button. The device says "Current operator is operator name. Select menu item." 2. Press the + or — button until the device says "Change pitch." 3. Press the Operator button. If you use the + button to scroll through the options, Change Pitch is the fifth menu item in the list.
-
Page 45: Adjusting The Volume Using Voice On A700/A700X
2. When the voice is as loud or as soft as you want it, say "Talkman continue" to return to work. Adjusting the Volume Using Device Buttons on A700/A700x Make sure the device is on or sleeping. The device should have a solid green ring segment (on) or a rotating green ring (sleeping). - Page 46 1. Press the Operator button. The device says "Current operator is operator name. Select menu item." 2. Press the + or — button until the device says "Change speed." If you use the + button to scroll through the options, Change Speed is the fourth menu item in the list.
-
Page 47: Changing The Speaker's Gender On A700/A700X
5. When the voice is speaking as quickly or as slowly as you want, press the Operator button to save the new speed setting. Changing the Speaker's Gender on A700/A700x Make sure the device is on or sleeping. The device should have a solid green ring segment (on) or a rotating green ring (sleeping). -
Page 48: Options For Hearing Impaired Users
The audiologist should be made aware of the options that Honeywell products offer with pitch, volume, and sidetone so that he or she can make appropriate recommendations that may benefit the user without possible side effects. -
Page 49: Cleaning Procedures For Honeywell Equipment
There are a variety of parameters that can further increase output levels of the Talkman device. Honeywell does not recommend changing any of these settings in a way that increases sound output levels without consulting a qualified audiologist. Changing these settings without qualified medical supervision could result in additional hearding damage. -
Page 50: Cleaning Contacts
A final alcohol wipe after this should ensure a clean contact. Never bend or manipulate battery contacts. Contact an authorized Honeywell Service Center to repair or replace contacts that are extremely corroded, bent, or missing. Understanding Talkman Commands The Talkman device prompts the operator for responses that are specific to the voice-directed work he or she is performing. -
Page 51: Template Training Options
Spoken Com- You want to... mand "Talkman battery check the remaining charge on a Talkman A700 battery (VoiceCatalyst 2.0 status" and newer only) "Talkman help" hear instructions for your response to the current prompt "Talkman help" hear a list of vocabulary words that you can say at the current prompt "Talkman report... -
Page 52: Visual Training Devices
The LED indicator turns red and rotates for a few moments. The ring segment then turns green. The device says, "Please keep quiet for a few seconds." After a pause, the device says, "Please say zero." 2. Say "Zero." The device says "One." 3. -
Page 53: Training Using A Printed List Of Words
3. If necessary, on the printed list, circle commonly misheard or confusing words. Printed List with Commonly Misheard or Confusing Words Circled 4. Honeywell recommends the new operator review the list prior to training so he or she is familiar with the words that will be used If templates have not been trained for the task the new operator is going to use, have the supervisor or current operator train templates for that task and perform the steps above. -
Page 54: Scanning With The Talkman A730/A730X Device
Scanning with the Talkman A730/A730x Device See the Compliance Section of this document for Laser and Imager Compliance and Precaution information. The scanner can only be used at points in the task where it is allowed, such as a check digit or product verification prompt. -
Page 55: Symbology Specific
Data manipulation parameters provide for the manipulation of data after the barcode is scanned. Symbology Specific Symbology specific parameters enable, disable, and configure the specified symbology. Parameter support is identified as follows: X = Parameter is supported and available via Device Profile settings. N/A = Parameter is not supported on this device. -
Page 56: British Post Office (Bpo)
ü = Parameter is supported and available via the Scanner Options tab in the device profile. = Parameter is not supported on this device. NYI = Not Yet Implemented. These parameters should be considered unsupported, though they can (with knowledge) be set via the CCI or advanced settings. IMPORTANT A730 and A730x support for symbologies and parameters may differ. -
Page 57: Canada Post
Default Registry Key A730 A730x Description Value Enables the British Post Office BPOActivation ü ü symbology. A single character inserted before the BPOCodeMark 0x2a bar code data to indicate the ü ü symbology. BPOCheckDigitTransmission Enable transmission of the check digit. ü... -
Page 58: Japan Post
NYI = Not Yet Implemented. These parameters should be considered unsupported, though they can (with knowledge) be set via the CCI or advanced settings. IMPORTANT A730 and A730x support for symbologies and parameters may differ. Refer to the table below for details. The registry keys in the table below are located under: [HKEY_LOCAL_MACHINE\Software\Vocollect\Imager\Australian Post] Default... -
Page 59: Sweden Post
Default Registry Key A730 A730x Description Value JapanPostCheckDigitTransmission Enable transmission of the check digit. ü User-defined symbology identifier. JapanPostUDSI ü ü Range is 0-4 characters. Dutch Post Support for the parameters in the table is labeled as follows: ü = Parameter is supported and available via the Scanner Options tab in the device profile. = Parameter is not supported on this device. -
Page 60: Infomail
IMPORTANT A730 and A730x support for symbologies and parameters may differ. Refer to the table below for details. The registry keys in the table below are located under: [HKEY_LOCAL_MACHINE\Software\Vocollect\Imager\Sweden Post] Default Registry Key A730 A730x Description Value SwedenPostActivation Enables the Sweden Post symbology. ü... -
Page 61: Intelligent Mail
Intelligent Mail Support for the parameters in the table is labeled as follows: = Parameter is supported and available via the Scanner Options tab in the device profile. ü = Parameter is not supported on this device. NYI = Not Yet Implemented. These parameters should be considered unsupported, though they can (with knowledge) be set via the CCI or advanced settings. - Page 62 Default Registry Key A730 A730x Description Value CodabarActivation Enables the Codabar symbology. ü ü A single character inserted before the CodabarCodeMark 0x44 bar code data to indicate the ü ü symbology. CodabarCheckDigitVerification Enables calculation of the check digit. ü ü Length value L1.
-
Page 63: Code 93
Code 93 Support for the parameters in the table is labeled as follows: = Parameter is supported and available via the Scanner Options tab in the device profile. ü = Parameter is not supported on this device. NYI = Not Yet Implemented. These parameters should be considered unsupported, though they can (with knowledge) be set via the CCI or advanced settings. - Page 64 IMPORTANT A730 and A730x support for symbologies and parameters may differ. Refer to the table below for details. The registry keys in the table below are located under: [HKEY_LOCAL_MACHINE\Software\Vocollect\Imager\Code 39] Default Registry Key A730 A730x Description Value Code39Activation Enables the Code 39 symbology. ü...
-
Page 65: Code 128
Default Registry Key A730 A730x Description Value Enables transmission of start/stop Code39StartStopTransmission ü ü characters. Selects start character, where 1 = '$', Code39AcceptedStartCharacter ü 2 = '*', and 3 = '$' and '*'. Enables extended character set through the use of control characters, Code39FullASCIIConversion where ü... - Page 66 Default Registry Key A730 A730x Description Value Unconventional decoding mode bitfield, where UnconventionalGS1-128 bit 0 = allow decode of double FNC1, ü ü bit 1 = FNC2 append disabled, bit 2 = FNC4 ASCII extensions disabled. Enables Vesta algorithm decoding for Code128ReadingRange ü...
-
Page 67: Interleaved 2 Of 5
Default Registry Key A730 A730x Description Value Limits valid GS1-128 bar codes to GTINProcessingforGS1-128 GTIN (Global Trade Item Number)- ü compliant format. User-defined symbology identifier. Code128UDSI ü ü Range is 0-4 characters. User-defined symbology identifier. GS1-128UDSI ü ü Range is 0-4 characters. Interleaved 2 of 5 Support for the parameters in the table is labeled as follows: ü... -
Page 68: Matrix 2 Of 5
Default Registry Key A730 A730x Description Value Tolerance for reading "hard to read" bar codes, where Interleaved2of5ReadingTolerance 0 = high, ü 1 = medium, and 2 = low. Length value L1. Range is 0x0 to 0xFF Interleaved2of5BarCodeLengthL1 ü ü (0 to 255). Length value L2. -
Page 69: Msi Code
Default Registry Key A730 A730x Description Value Enables special ChinaPost mode, Matrix2of5StartStop where a specific start/stop is required ü and the checksum is transmitted. A single character inserted before the Matrix2of5CodeMark 0x44 bar code data to indicate the ü ü symbology. -
Page 70: Plessey Code
Default Registry Key A730 A730x Description Value A single character inserted before the MSICodeMark 0x44 barcode data to indicate the ü ü symbology. Enables various check digit calculations, where MSICheckDigitVerification ü ü 1 = modulo 10 and 2 = double modulo 10. Length value L1. -
Page 71: Standard 2 Of 5
Default Registry Key A730 A730x Description Value PlesseyActivation Enables the Plessey symbology. ü ü PlesseyUnconventionalStop Not documented. ü ü A single character inserted before the PlesseyCodeMark 0x44 barcode data to indicate the ü ü symbology. Length value L1. Range is 0x0 to 0xFF PlesseyBarCodeLengthL1 ü... -
Page 72: Telepen
Default Registry Key A730 A730x Description Value Enables the Standard 2 of 5 Standard2of5Activation ü ü symbology. A single character inserted before the Standard2of5CodeMark 0x44 barcode data to indicate the ü ü symbology. Enables modulo 10 calculation of Standard2of5CheckDigitVerification ü ü... -
Page 73: Code 11
Default Registry Key A730 A730x Description Value TelepenActivation Enables the Telepen symbology. ü ü A single character inserted before the TelepenCodeMark 0x2a barcode data to indicate the ü ü symbology. Length value L1. Range is 0x0 to 0xFF TelepenBarCodeLengthL1 ü ü... -
Page 74: Ean / Upc
Default Registry Key A730 A730x Description Value A single character inserted before the Code11CodeMark 0x2a bar code data to indicate the ü ü symbology. Number of check digits to verify. Code11CheckDigitVerification ü ü Range is 1 to 2. Length value L1. Range is 0x0 to 0xFF Code11BarCodeLengthL1 ü... - Page 75 Default Registry Key A730 A730x Description Value UPC-EActivation Enables the UPC-E symbology. ü ü EAN-8Activation Enables the EAN-8 symbology. ü ü EAN-13Activation Enables the EAN-13 symbology. ü ü Converts EAN-13 bar codes starting with "978" or "979" (except for "9790") ISBNConversionforEAN-13 ü...
-
Page 76: Pdf417
Default Registry Key A730 A730x Description Value Enables conversion of UPC-A to EAN- UPC-ATransmittedasEAN-13 ü ü UPC-ETransmittedasUPC-A Enables conversion of UPC-E to UPC-A. ü ü Enables conversion of EAN-8 to EAN- EAN-8TransmittedasEAN-13 ü Add-on digit requirement, where 0 = EANUPCAdd-OnDigits ü... -
Page 77: Codablock
Default Registry Key A730 A730x Description Value PDF417Activation Enables the PDF417 symbology. ü ü MicroPDF417Activation Enables the "micro" variant of PDF417. ü ü Enables the reading of labels for a PDF417IrregularPDF ü symbol length descriptor of 0. Certain Micro PDF417 codes are read PDF417Code128Emulation ü... -
Page 78: Tlc 39
IMPORTANT A730 and A730x support for symbologies and parameters may differ. Refer to the table below for details. The registry keys in the table below are located under: [HKEY_LOCAL_MACHINE\Software\Vocollect\Imager\Codablock] Default Registry Key A730 A730x Description Value Enables the Codablock A (Code 39- based) symbology (if enabling this CodablockAActivation ü... -
Page 79: Gs1 Databar
Default Registry Key A730 A730x Description Value Enables the TLC 39 symbology TLC39Activation (requires Micro PDF417 and Code ü ü 39 to be enabled as well). Ignores Micro PDF417 data and TLC39 only transmits the Code 39 ü LinearOnlyTransmissionMode portion. Selects how much time is spent looking an ECI number if the Code TLC39ECISecurity... -
Page 80: Maxicode
Default Registry Key A730 A730x Description Value A single character inserted before the DatabarOmniDirectionalCodeMark 0x2a bar code data to indicate the ü ü symbology. A single character inserted before the DatabarLimitedCodeMark 0x2a bar code data to indicate the ü ü symbology. -
Page 81: Datamatrix
Default Registry Key A730 A730x Description Value Header for Mode 0 labels, where MaxicodeMode0Header 0 = regular (AIM) and ü 1 = extended (same as mode 2/3). A single character inserted before the MaxicodeCodeMark 0x2a bar code data to indicate the ü... -
Page 82: Gs1 Composite
NYI = Not Yet Implemented. These parameters should be considered unsupported, though they can (with knowledge) be set via the CCI or advanced settings. IMPORTANT A730 and A730x support for symbologies and parameters may differ. Refer to the table below for details. The registry keys in the table below are located under: [HKEY_LOCAL_MACHINE\Software\Vocollect\Imager\QR Code] Default... -
Page 83: Iata 2 Of 5
Default Registry Key A730 A730x Description Value Enables GS1 Composite with a CC-A or CompositeABActivation ü ü CC-B (Micro PDF417) 2D component. Enables GS1 Composite with a CC-C CompositeCActivation ü ü (PDF417) 2D component. Enables emulation of the GS1-128 CompositeGS1-128Emulation ü... -
Page 84: Tri-Optic
Default Registry Key A730 A730x Description Value IATA2of5Activation Enables the symbology. ü Length value L1. Range is 0x0 to 0xFF IATA2of5BarCodeLengthL1 0x06 ü (0 to 255). Length value L2. Range is 0x0 to 0xFF IATA2of5BarCodeLengthL2 0x00 ü (0 to 255). Length value L3. -
Page 85: Code 32
Default Registry Key A730 A730x Description Value User-defined symbology identifier. TriOpticUDSI ü Range is 0-4 characters. Code 32 Support for the parameters in the table is labeled as follows: ü = Parameter is supported and available via the Scanner Options tab in the device profile. = Parameter is not supported on this device. -
Page 86: Korea Post
The registry keys in the table below are located under: [HKEY_LOCAL_MACHINE\Software\Vocollect\Imager\China Post] Default Registry Key A730 A730x Description Value ChinaPostActivation Enables the symbology. ü Length value L1. Range is 0x0 to 0xFF ChinaPostBarCodeLengthL1 0x04 ü (0 to 255). Length value L2. Range is 0x0 to 0xFF ChinaPostBarCodeLengthL2 0x00 ü... -
Page 87: Usps 4-State
Default Registry Key A730 A730x Description Value Length value L1. Range is 0x0 to 0xFF KoreaPostBarCodeLengthL1 0x04 ü (0 to 255). Length value L2. Range is 0x0 to 0xFF KoreaPostBarCodeLengthL2 0x00 ü (0 to 255). Length value L3. Range is 0x0 to 0xFF KoreaPostBarCodeLengthL3 0x00 ü... -
Page 88: Coupon Code
Coupon Code Support for the parameters in the table is labeled as follows: = Parameter is supported and available via the Scanner Options tab in the device profile. ü = Parameter is not supported on this device. NYI = Not Yet Implemented. These parameters should be considered unsupported, though they can (with knowledge) be set via the CCI or advanced settings. -
Page 89: Han Xin Code
Default Registry Key A730 A730x Description Value IdTagActivation Enables the symbology. ü A single character inserted before the IdTagCodeMark 0x2A bar code data to indicate the ü symbology. User-defined symbology identifier. IdTagUDSI ü Range is 0-4 characters. Han Xin Code Support for the parameters in the table is labeled as follows: ü... -
Page 90: Message Format
NYI = Not Yet Implemented. These parameters should be considered unsupported, though they can (with knowledge) be set via the CCI or advanced settings. Message Format Additional information added to barcode data Support for the parameters in the table is labeled as follows: ü... -
Page 91: Imager
[HKEY_LOCAL_MACHINE\Software\Vocollect\Imager\Decoding Security] Default Registry Key A730 A730x Description Value Only decodes a bar code if it is in the CenterDecoding ü ü center of the frame. Amount of tolerance for what is considered the "center". Range is 0x0 - CenterDecodingTolerance ü... -
Page 92: Data Manipulation
Default Registry Key A730 A730x Description Value For 1D bar codes, sets the initial search area. 0 = center, 1 = upper half, Initial1DSearchArea ü ü 2 = lower half, 3 = full, 4 = "smart raster" (better for non- horizontal). - Page 93 [HKEY_LOCAL_MACHINE\Software\Vocollect\Imager\Multicode] Default Registry Key A730 A730x Description Value Activates the ability to read multiple barcodes with one trigger press. If this value is set to 1 (enabled), then barcodes that don't match the masking criteria can be returned MulticodeActivation independently of other barcodes (normal operation).
- Page 94 Default Registry Key A730 A730x Description Value Intermec-specific symbology identifier MulticodeIDForBarcode8 (0x0 is disabled). See manufacturer's website for details. Specifies a fixed number of characters for this symbology. Range is 0x0 to MulticodeLengthForBarcode1 0xFFFF (0 to 32767), where 0x0 is any length.
-
Page 95: Data Editing
Default Registry Key A730 A730x Description Value A regular expression, up to 26 characters, to filter what barcodes are MulticodeMaskForBarcode3 included in the multicode. See manufacturer's website for details. A regular expression, up to 26 characters, to filter what barcodes are MulticodeMaskForBarcode4 included in the multicode. - Page 96 IMPORTANT A730 and A730x support for symbologies and parameters may differ. Refer to the table below for details. The registry keys in the table below are located under: [HKEY_LOCAL_MACHINE\Software\Vocollect\Imager\Data Editing] Default Registry Key A730 A730x Description Value ActivationForScenario1 Enables the bar code editing scenario. ActivationForScenario2 Enables the bar code editing scenario.
- Page 97 Default Registry Key A730 A730x Description Value Specifies a fixed number of characters for this symbology. Range is 0x0 to BarCodeLengthForScenario2 0xFFFF (0 to 32767), where 0x0 is any length. Specifies a fixed number of characters for this symbology. Range is 0x0 to BarCodeLengthForScenario3 0xFFFF (0 to 32767), where 0x0 is any length.
-
Page 98: Talkman A700/A700X Vmt Installation Guide
Talkman A700/A700x VMT Installation Guide The A700/A700x Vehicle Mounted Terminal (VMT) is an A700/A700x device with a dock mounted to a vehicle, such as a forklift or motorized pallet jack. After the device is mounted, the dock is connected to the vehicle’s power source. -
Page 99: Review A700/A700X Vmt Installation Best Practices
This step-by-step guide shows how to install the Talkman VMT in a vehicle. Please refer to the " Review A700/A700x VMT Installation Best Practices" for further guidance. Review A700/A700x VMT Installation Best Practices Talkman devices and accessories are designed to provide reliable service when used as recommended. The thousands of Talkman VMT equipment users around the world who have... -
Page 100: Consider Additional Options From Ram® Mounts
CAUTION Do not mount the device in the driver's area of the vehicle or areas where it can distract the driver. Consider additional options from RAM® Mounts In particular, the following standard RAM Mounts parts provide additional mounting flexibility. Part Description Part Number Usage Image... -
Page 101: Secure Vmt Cabling
Select A700/A700x VMT Mounting Option The Talkman A700/A700x VMT is designed to be installed using RAM® Mounting Systems hardware. Honeywell supplies a mounting bracket for the device and mounting hardware from RAM Mounting Systems. Additional hardware mounting bracket options can be purchased directly from RAM Mounting Systems (www.ram-mount.com) to customize the installation. -
Page 102: Clamp Mount
Assembled screw-on mount Clamp Mount The Clamp Mount is clamped to a stationary surface on a vehicle or surface using the following parts. Clamp mounting parts IMPORTANT Use only the four supplied screws to attach the Ram ball to the dock. See "Install_Dock". Voice Device and Headset Hardware Reference Guide... -
Page 103: Claw Mount
Assembled clamp mount Claw Mount The Claw Mount is also clamped to a stationary surface, but can be clamped to oddly-shaped or horizontal or vertical surfaces using the following parts. Claw mounting parts IMPORTANT Use only the four supplied screws to attach the Ram ball to the dock. See "Install_Dock". Voice Device and Headset Hardware Reference Guide... -
Page 104: Talkman Vmt Parts And Accessories
Assembled claw mount Talkman VMT Parts and Accessories The following device-mounting options are supplied by Honeywell. Order one part from each line for your configuration. Vehicle-Powered Vehicle Mount Configurations A700/A700x BL-904 - POWERED VEHICLE DOCK, A700 SERIES Voice Device and Headset Hardware Reference Guide... - Page 105 (R) T5 SERIES BL-710-103 - VEHICLE MOUNT, CLAMP, TALKMAN(R) T5 SERIES BL-710-104 - VEHICLE MOUNT, CLAW, TALKMAN(R) T5 SERIES Order one of: BT-901 - BATTERY, A700 SERIES, STANDARD BT-902 - BATTERY, A700 SERIES, HIGH-CAPACITY Voice Device and Headset Hardware Reference Guide...
-
Page 106: Battery-Powered Vehicle Mount Configurations
851-810-001 AC Adapter stand-alone (wall plug) power use 137cm (4.5’) NOTE A700/A700x devices may be used in VMT configurations using a Honeywell battery without connecting to the vehicle’s power source. The BL-903 unpowered vehicle dock, which has no power components, should be used in lieu of the BL-904. No wiring or power converters are required;... -
Page 107: Positioning The Talkman A700/A700X Vehicle Dock
BL-710-103 - VEHICLE MOUNT, CLAMP, TALKMAN(R) T5 SERIES BL-710-104 - VEHICLE MOUNT, CLAW, TALKMAN(R) T5 SERIES Order one of: BT-901 - BATTERY, A700 SERIES, STANDARD BT-902 - BATTERY, A700 SERIES, HIGH-CAPACITY Positioning the Talkman A700/A700x Vehicle Dock Determine the best position for the device and all the associated components. If a similar device was previously installed, check to see if the position it used is suitable for the device. -
Page 108: Position The Talkman A700/A700X Vmt
WARNING The device must be mounted in accordance with accepted aftermarket practices and materials supplied by Honeywell and/or RAM Mounting Systems. Honeywell does not support Talkman devices which are not mounted in an approved manner. Please note that not mounting Talkman devices in an approved manner may also violate local safety laws and possible cause a safety hazard by damaging Talkman devices and batteries. -
Page 109: Mounting Brackets For A Talkman A700/A700X Vehicle Dock
Mounting Brackets for a Talkman A700/A700x Vehicle Dock The following parts are supplied by Honeywell for attaching the screw-on mount: Quantity Description Vehicle Mount, Holder/Base Screw On Attachment Vehicle Mount, Arm Vehicle Mount, Holder The following parts are supplied by Honeywell for attaching the clamp-on mount:... -
Page 110: Route The Electrical Cables
IMPORTANT All components used in in the electrical connection to the vehicle must be UL Listed. One fuse holder from Cooper Bussman. Honeywell recommends using a Cooper Bussmann HFA series in line waterproof fuse. Voice Device and Headset Hardware Reference Guide... -
Page 111: Precautions
Always follow the vehicle manufacturer's recommendations for electrical accessories connection. Honeywell recommends choosing unswitched power as the source for the power supply. This will allow Talkman devices to be powered for software updates as well as prevent Talkman devices from accidentally being unpowered if the vehicle is switched off unintentionally. -
Page 112: Connect To The Top Battery Terminal
4. Install heat shrink tubing on the battery cable jacket. 5. Insert and secure the fuse in the fuse holder assembly. 6. Assemble the negative wire: a. Strip 0.60 cm (0.25 in) of insulation from the green and white wires. b. -
Page 113: Connect To The Side Battery Terminal
1. Remove the nuts and bolts from the positive battery terminal. 2. Place a 3/8-inch washer onto each end of the battery clamp bolt. 3. Slide the positive fuse link terminal ring from the input power cable onto positive battery clamp bolt. -
Page 114: Fasten The Ground Wire
4. Scrape off a small circle of paint around the hole to make sure bare metal is exposed. 5. Secure the wire with a #8 5/8-inch screw and flat washer. Attach the A700/A700x VMT to the Vehicle Voice Device and Headset Hardware Reference Guide... -
Page 115: Remove The A700/A700X Vmt From The Vehicle
Talkman VMT components are designed for easy removal for occasional vehicle service, maintenance or flexible operational needs. The Talkman A700/A700x may be easily removed by sliding the device out of the dock and replaced by sliding it back in. Care should be taken to assure that the contacts of the Talkman device are on the underside and facing so they engage with the contacts of the vehicle dock. - Page 116 Voice Device and Headset Hardware Reference Guide...
-
Page 117: Chapter 2 - Wireless Headsets
CHAPTER WIRELESS HEADSETS A Honeywell speech recognition headset with an attached microphone allows the operator to hear the device's instructions or questions. The operator talks to the device to request information and enters data by responding to the device's prompts. -
Page 118: Honeywell Wireless Headset Features
Care and Use The headsets and microphones used with the Honeywell Voice system are delicate pieces of electronic equipment. Proper care will ensure that they work well for a long time. See... -
Page 119: Introduction To The Srx2 And Srx3 Headsets
The SRX2 and SRX3 share most accessories. The SRX2 and the SRX3 headsets use the same battery. NOTE Older batteries may have a Vocollect logo while newer batteries have a Honeywell logo. The batteries are interchangeable. The SRX2 battery charger charges both SRX2 and SRX3 batteries. -
Page 120: Headset Functions And Led Patterns For Srx2/Srx3
SRX2 and SRX3 batteries are interchangeable and are charged in the SRX2/SRX3 battery charger Modular design lowers cost through shared use of headset electronic modules across shifts Unique Features: The SRX3 Headset features an intuitive flip-to-mute microphone boom The SRX2 uses Bluetooth Version 4.2; the SRX3 uses Bluetooth Version 5.0 The SRX3 supports 128-bit Bluetooth encryption The SRX3 supports Hands Free Profile (HFP) version 1.7 for Android compatibility Headset Functions and LED Patterns for SRX2/SRX3... -
Page 121: Power Off
Power off User Action Hold Power button for one second Headset Mode Headset powers off LED Pattern Solid green, then off IMPORTANT Do not remove the battery until the LED is off. Tone Low pitch double beep Increase volume User Action Press the Plus (+) button Voice Device and Headset Hardware Reference Guide... -
Page 122: Headset Mode
Headset Mode LED Pattern Tone Two tone ascending sequence. If connected, device says, "louder." When using the headset with Guide Work, only the tones are played. Decrease volume User Action Press the Minus (-) button Headset Mode LED Pattern Tone Two tone descending sequence. - Page 123 Mute NOTE This applies to the SRX3 Headset only. This feature is not available on the SRX2 Headset. User Action Flip microphone boom up 90 degrees (vertical) Headset Mode LED Pattern Tone Unmute NOTE This applies to the SRX3 Headset only. This feature is not available on the SRX2 Headset. User Action Flip microphone down to mouth level.
- Page 124 Headset Mode LED Pattern Tone Force disconnect for manual pairing in low power mode User Action With headset connected, press the Plus (+) and Minus (-) buttons Headset Mode Headset disconnects current pairing and enters low power pairing mode LED Pattern Solid green Voice Device and Headset Hardware Reference Guide...
- Page 125 NOTE This mode is recommended only if low power pairing fails. IMPORTANT Honeywell does not recommend this pairing mode for Talkman devices. This mode greatly increases the likelihood that your headset will pair with the wrong device. LED Pattern Rapid flash...
-
Page 126: Headset Mode
Slow flashing green (on 25%, off 75%) Tone Three descending tones when the connection to the master device is dropped Update headset software User Action Connect headset to computer running Honeywell Accessory Update Utility (HAUU) Voice Device and Headset Hardware Reference Guide... -
Page 127: Headset Mode
The SRX2 and SRX3 Wireless Headsets feature a modular design. The potential for shared use of electronic modules across multiple shifts can lower the cost per user. To avoid passing germs between operators when sharing headsets, Honeywell recommends sharing only the electronic module. Assign each operator his or her own headband, ear pad, and microphone cap. -
Page 128: Sharing The Srx2/Srx3 Headset
Shared Electronic Module Personal (non-shared) Parts Sharing the SRX2/SRX3 Headset By separating the parts of the modular SRX2/SRX3 headset, operators can share electronic modules in a multi-shift operation. The electronic module detaches easily from the headband . The microphone cap detaches from the electronic module and docks in the mic cap pocket on the headband. -
Page 129: Operator Profiles And Shared Headsets
Vocollect Voice Software (VoiceClient and VoiceCatalyst), along with VoiceConsole provide a feature called Automatic Operator Load. This feature enables a Honeywell device to recognize and load the profile of the operator who last used the headset, based on the unique ID of the electronic module. -
Page 130: Srx2/Srx3 Headset Compatibility
SRX2/SRX3 Headset Compatibility SRX3 Honeywell has tested the SRX3 Wireless Headset with the following devices and Vocollect Voice Software versions. Support and compatibility of the SRX3 headset is not limited to these products, but the customer assumes risks related to untested configurations. -
Page 131: Srx2/Srx3 Headset Battery
SRX2/SRX3 Headset Battery NOTE The SRX2 and SRX3 headsets use the same battery. The headset is powered by a rechargeable lithium ion battery pack. A fully depleted headset battery will be fully recharged in less than 6 hours. The headset user will hear the following warnings when the battery charge is low. -
Page 132: Inserting A Battery Into The Srx2/Srx3 Wireless Headset
A battery is fully charged and can be removed from the charger when the ring LED indicator light for that port on the charger is green. If you insert a fully charged battery into a charger, the charger will analyze the battery's status and then "top off"... -
Page 133: Removing A Battery From An Srx2/Srx3 Wireless Headset
WARNING Replace a battery only with another battery that has been authorized by Honeywell for the product you are using. Use of an unqualified battery may present a risk of fire, explosion, leakage, or other hazard. See also... -
Page 134: Srx2/Srx3 Battery Warm-Up Time
3. With your other hand, hold the battery at the end of the electronic module opposite the mic boom. 4. Press and hold both battery latches at the same time, squeezing them into the sides of the electronic module until the battery releases from the electronic module. SRX2/SRX3 Battery Warm-Up Time If a battery has been used in an extreme hot or extreme cold environment, charging will not start immediately. -
Page 135: Installing The Srx2/Srx3 Hard-Hat Clip
The SRX2/SRX3 Hard-Hat headset attaches to the side of a hard hat using a clip that must be mounted on the hard hat. Honeywell offers two clip styles, one designed to insert in a hard-hat slot and one that mounts over the side brim of a non-slotted hard hat. Other hard-hat clips may be purchased and used provided that they fit the hard hat and attach correctly to the SRX2/SRX3 earcup. -
Page 136: Attaching The Srx2/Srx3 To A Hard Hat
Align the tab of the clip to fit into the slot. Slide the clip into the slot until the tab clicks in place and it is firmly seated. Mounting a brim-mount clip on a hard hat Loosen the screws that secure the two clip brackets to the clip. For large brim hats, it may be necessary to remove the brackets completely in order to fit them over the brim without the clip in place. -
Page 137: Wearing The Srx2/Srx3 Hard-Hat Headset
1. Insert the disk into the hard-hat clip from the top. 2. Slide the disk into the clip until it snaps into place. To remove the headset, apply pressure to the tab at the top of the hard-hat clip to release the disk from the clip. -
Page 138: Storing The Srx2/Srx3 Hard-Hat Headset
6. Push the electronic module into the earcup pocket until it is firmly seated. Storing the SRX2/SRX3 Hard-Hat Headset Honeywell recommends storing the hard hat with the headset earcup moved up on the side of the hat (see figure below) to reduce the risk of damage. -
Page 139: Replacing An Earpad On The Srx2/Srx3 Hard-Hat Or High-Noise Headset
Replacing an Earpad on the SRX2/SRX3 Hard-Hat or High-Noise Headset 1. Remove the electronic module from the earcup. 2. Pry the earcup apart by grasping the inside and outside sections of the earcup and pulling the two sections apart. 3. Remove the worn foam earpad from the inside plate. 4. -
Page 140: Replacing An Earpad On The Srx2/Srx3 Hard-Hat Or High-Noise Headset
NOTE The high-noise headset has microphone cap storage located on the headband and above the headset earcup. A stability strap is available for this model. Replacing an Earpad on the SRX2/SRX3 Hard-Hat or High-Noise Headset 1. Remove the electronic module from the earcup. 2. -
Page 141: Using The Srx2/Srx3 Headset
SRX3 Flip-To-Mute Feature NOTE This feature requires VoiceCatalyst 4.2 or greater (A700x). This feature requires VoiceCatalyst 2.5 or greater (A700). The SRX3 Headset has a flip-to-mute feature. When the microphone boom is down (i.e., horizontal, at mouth level), the microphone is active. -
Page 142: Flip-To-Mute And Voicecatalyst
IMPORTANT The flip-to-mute feature only works when the SRX3 electronic module is installed in an SRX3 headband. Flip-to-mute does not function when the SRX3 electronic module is installed in an SRX2 headband. Flip-to-Mute and VoiceCatalyst Refer to the following parameters to configure flip-to-mute behavior: SleepWhenSRXBoomRaisedWhenWorking FliptoMuteEnabled Within the VoiceCatalyst menus... -
Page 143: During Noise Sample Or Training/Retraining Templates
If the microphone boom is down, the options for noise sample and retrain templates appear in the device menu During Noise Sample or Training/Retraining Templates These options can only be accessed while the microphone boom is down. If the microphone boom is moved up during any of these options, the device goes to sleep. During Tasks The operator can progress through the task only when the microphone boom is down. -
Page 144: Removing The Electronic Module From A Headband
The audiologist should be made aware of the options that Honeywell products offer with pitch, volume, and sidetone so that he or she can make appropriate recommendations that may benefit the user without possible side effects. -
Page 145: Headset Parameters
Honeywell products, and their default options, have been measured and qualified to ensure audio safety for common work flows and for the general population. The default audio parameters should not be changed without explicit direction from a qualified audio professional. -
Page 146: Pairing-Related Configuration Parameters
For example, if the user takes the headset out of range of the paired device or powers it off, the device will notice the connection loss and try to reconnect. The two remain paired throughout this process. Pairing-related Configuration Parameters PersistSrxPairingAcrossPowerCycle Set to 0 for the device to delete the pairing when it is powered off. -
Page 147: Srx2 Pairing Modes
Bluetooth-enabled handheld device. Pairing Methods TouchConnect An SRX2/SRX3 headset and an A700/A700x device can be paired by turning on the device and headset and touching them together. No button presses are required. NOTE See "Pairing with A700/A700x Using TouchConnect™"... -
Page 148: Manual Pairing
No headset reboot is necessary. The headsets accept connections from any device that was previously paired to it. Pairing with A700/A700x Using TouchConnect™ The A700/A700x device can use TouchConnect to connect to an SRX2/SRX3 Wireless Headset when: the A700/A700x device is running VoiceCatalyst... - Page 149 SRXHeadsetEnable is set to 1 (Enabled), the default the parameter SrxAutoPairEnable is set to 0 (Disabled), the default For best performance when using an SRX2/SRX3 headset with a Talkman A700/A700x device, use the latest SRX2/SRX3 software version. Obtain the latest headset software from your Honeywell portal or reseller and use the Honeywell Accessory Update Utility to upgrade your SRX2/SRX3 headset.
- Page 150 4. If you are not sharing headsets at your site: You only need to pair the device to the SRX2/SRX3 electronics module: Touch the side of the A700/A700x device that has the symbol and the oval area of the SRX2/SRX3's keypad section together, aligning the ovals on each and holding...
-
Page 151: Auto Pairing With A700/A700X
If the device state indicator blinks red, the NFC read was not successful, and you should attempt to perform the read again. 5. When the device starts the task, VoiceConsole recognizes the pairing. Auto Pairing with A700/A700x Prerequisites: The headset is powered off. -
Page 152: Manual Pairing With A700/A700X
Plus (+) and Minus (-) buttons on the headset control panel. 6. Press the Play/Pause button on the Talkman device to confirm the number. 7. Press the Play/Pause button again to begin working. Manual Pairing with A700/A700x Prerequisites: The headset is powered off. -
Page 153: Screen-Based Pairing With A Handheld Device
5. Verify that the number matches the serial number on the Talkman device. If you need to attempt the pairing again, re-enter pairing mode by press the Plus (+) and Minus (-) buttons on the Talkman device again. 6. Press the Play/Pause button on the Talkman device to confirm the number. 7. -
Page 154: Pairing By Voiceconsole Pairing
Icon Status A wireless headset is not paired to the device The device is searching for a headset The device is paired with a headset but not yet connected The device is connected to the headset Pairing by VoiceConsole Pairing The VoiceConsole pairing method should only be used if the device/headset pairing will be performed once and never changed. -
Page 155: Placing Headsets In Pairing Modes
TouchConnect You can pair an A700 or A700x device and an SRX2 or SRX3 headset by touching them. This method essentially eliminates the chance of cross pairing and it is quicker and easier than the other methods. -
Page 156: Breaking A Pairing
Breaking a Pairing There are several methods to break a pairing between a Vocollect wireless headset and a Bluetooth device. Method Description A device can break a pairing with a wireless headset by initiating a new search for headsets. The user can initiate the device query by holding down From the the Plus (+) and Minus (-) buttons on the device. -
Page 157: Wearing An Srx2/Srx3 Wireless Headset
Wearing an SRX2/SRX3 Wireless Headset 1. Put the headset on and adjust the ear pad to fit snugly over your ear. 2. Position the t-bar directly above, and as closely as possible to, your other ear. 3. If installed, adjust the stability strap so it fits securely across the back of your head. 4. - Page 158 4. Turn the headset so that the t-bar pad faces you. 5. Locate the slot on the end of the headband near the t-bar. 6. Align the knob at the free end of the strap with the slot on the headband. Voice Device and Headset Hardware Reference Guide...
-
Page 159: Replacing An Earpad On The Srx2/Srx3 Headset
7. Slide the knob into the slot until it snaps into place. 8. Position the strap to go around the back of your head. The strap swivels freely on the two knobs so that it can be positioned at the back of the head for either right-ear or left-ear wearing of the headset. - Page 160 5. Place the new earpad and earpad plate assembly onto the headset earpiece. 6. Rotate the assembly to the right pressing gently into the earpiece until the assembly locks into place. Voice Device and Headset Hardware Reference Guide...
-
Page 161: Chapter 3 - Wired Headsets
CHAPTER WIRED HEADSETS A Honeywell speech recognition headset with an attached microphone allows the operator to hear the device's instructions or questions. The operator talks to the device to request information and enters data by responding to the device's prompts. -
Page 162: Headset Features
Headset Features Honeywell offers a variety of wired headsets designed for different environments and wearing preferences. The SR-20 tends to be the most popular general use headset. Other models provide behind-the-head, light industrial, and hardhat options. Headset features include: Bidirectional noise-canceling microphones for optimal noise cancellation. -
Page 163: Sl-14 Headset Specifications
NOTE These lightweight, non-repairable headsets may be damaged if the "Proper Use and Care" instructions are not followed. See the "Proper Use and Care" document included with the headset for information. The behind-the-head SL headsets are light-industrial headsets designed specifically for speech recognition. -
Page 164: Wearing The Sl-14 Behind-The-Head Headset
Damage may be caused to the equipment when used or maintained in an improper manner. Honeywell will not honor repair or replacement requests for damages caused by improper use, maintenance, negligence or abuse, including, but not limited to, those specifically identified below. -
Page 165: Sr-15 Headset Specifications
Honeywell strongly recommends securing the cord to clothing with clips provided for both operational safety as well as to enhance headset stability. If the cord can not be easily secured, Honeywell recommends that it be clipped near the center of the headband to evenly distribute any weight caused by a loose cord. -
Page 166: Wearing The Sr-15 Behind-The-Head Headset
NOTE Packaging varies for product shipments. Generally, packing materials are about 15% of the total shipment weight. Wearing the SR-15 Behind-the-Head Headset 1. Loosen the cable at the headband cord clip on the back of the headband to allow enough slack to move the speaker away from the earloop. -
Page 167: Attaching The Sr-15 Headset Adjustment Strap
4. Repeat these steps for the clip on the other side. Attaching the SR-15 Headset Adjustment Strap 1. Align the keying rib on the plunger with the slot in the barrel. 2. Push the plunger all the way down until the plunger top lip contacts the top of the barrel, making sure the keying rib is inside the keying rib slot. -
Page 168: Replacing The Ear Pad On The Sr-15 Headset
4. Insert the supplied screws (3) through the holes in clip assembly part 1 and into part 2. 5. Tighten the screws with 3.0 in-lbs (0.34 Nm) torque so that there is no gap between parts 1 and 2. 6. Using the plunger, attach the cord to the cord clip. Replacing the Ear Pad on the SR-15 Headset 1. -
Page 169: Sr-20 Headset Specifications
The SR-20 Vocollect Lightweight Headset is able to withstand heavy use in challenging warehouse conditions, such as extreme temperature differences, condensation and accidental drops. The SR-20 Headset also remains comfortable during a full shift. The SR-21 Headset is a universal version designed to be used with handheld devices. SR-20 Headset Specifications SR-20 with Straight Cord Specification... -
Page 170: Sr-21 Headset Specifications
Specification Details Operating temperature -40 °F to 122 °F (-40 °C to 50 °C) Storage temperature -40 °F to 158 °F (-40 °C to 70 °C) Enclosure rating Meets IP67 Humidity 100% condensing Noise Reduction Rating Not applicable NOTE Packaging varies for product shipments. Generally, packing materials are about 15% of the total shipment weight. -
Page 171: Sr-30 Vocollect High-Noise Headset
2. Hold the headset by the yoke in one hand. With the other hand rotate the earpiece counter- clockwise 10 degrees. 3. Disengage the earpiece section from the headset. 4. Remove the worn foam cover. 5. With the black O-ring gasket facing out, place a new ear pad over the ear pad mounting disk. -
Page 172: Sr-31 Headset Specifications
Specification Details Storage temperature -40 °F to 158 °F (-40 °C to 70 °C) 15 drops from 7 feet (2.1 m) at minimum and maximum operating temperatures Drop Tested 50 drops from 6 feet (1.8 m) at minimum and maximum operating temperatures Enclosure rating Meets IP67... -
Page 173: Replacing The Ear Pad On The Sr-30, Sr-35 And The Sr-40 Headsets
Replacing the Ear Pad on the SR-30, SR-35 and the SR-40 Headsets 1. With headset removed and disconnected, hold the headset in one hand. 2. At the seam on the bottom of the ear cup housing where the ear pad connects to the plastic ear cup, pull the ear pad and plastic mounting plate outward until it disconnects. -
Page 174: Sr-35 Headset Specifications
SR-35 Headset Specifications Specification Details 6.2 oz (175 g) with cable Weight 4.7 oz (133 g) without cable Operating temperature -40 °F to 122 °F (-40 °C to 50 °C) Storage temperature -40 °F to 158 °F (-40 °C to 70 °C) 15 drops from 7 feet (2.1 m) at minimum and maximum operating temperatures... -
Page 175: Sr-40 Vocollect Dual-Cup Headset
SR-40 Vocollect Dual-Cup Headset The SR-40 Vocollect Dual-Cup headset is designed for extremely loud work environments. The two ear cups block out intrusive noise. SR-40 Headset Specifications Specification Details 9.6 oz (272 g) with cable Weight 8.1 oz (229 g) without cable Operating temperature -40 °F to 122 °F (-40 °C to 50 °C) Storage temperature... -
Page 176: Replacing The Ear Pad On The Sr-30, Sr-35 And The Sr-40 Headsets
Replacing the Ear Pad on the SR-30, SR-35 and the SR-40 Headsets 1. With headset removed and disconnected, hold the headset in one hand. 2. At the seam on the bottom of the ear cup housing where the ear pad connects to the plastic ear cup, pull the ear pad and plastic mounting plate outward until it disconnects. -
Page 177: Chapter 4 - Accessories
CHAPTER ACCESSORIES Honeywell offers a variety of accessories for wearing, protecting, and facilitating the operations of Talkman and other devices. Belts and Holsters IMPORTANT To comply with government safety standards, Vocollect devices must be mounted in an approved manner using a belt, holster, or vehicle mounted terminal configuration. Devices in a non-approved holders are loose, non-secured powered objects in the workplace, which poses a safety issue. -
Page 178: A700 Holster Specifications
Non-replacable Using the Talkman Scanning Device Holster A700x/A700 devices have two slots that run the length of the body. These can be used to attach the device to a belt. 1. Put the belt on with the clip either on your right or left side. -
Page 179: Using The Talkman Device Holster
Inline Adapter Cables: Talkman and Handheld Devices A device-specific inline adapter training cable, also referred to as a "Y" or splitter cable, must be used with third-party handheld devices in order to connect both a Honeywell headset and listening system to the device. -
Page 180: Connecting Inline Adapter Training Cables
Training Cable (TR-603-102) for Talkman, Wired Scanner, and Listening Ki Connecting Inline Adapter Training Cables 1. Connect your Vocollect SR-Series headset's connector to the matching end of the training adapter cable. 2. Connect the 3.5 mm jack on the training cable to the input jack on your listening device. 3. -
Page 181: Chapter 5 - Chargers
Honeywell recommends that a protective device, such as an uninterruptible power supply with surge protection and lightning arrestor capability, be used with battery chargers. A700/A700x Chargers Talkman 6-Bay Device Charger The A700 6- bay device charger can be used with A700 or A700x devices. Voice Device and Headset Hardware Reference Guide... -
Page 182: Talkman Battery Charger
The A700 6-bay device charger can charge up to 6 Talkman devices at one time without having to remove the batteries. Refer to the Charging a Battery in a Talkman Device topic for more information. The Talkman device charger is designed to be placed on a desktop or mounted on a wall using a DIN rail. -
Page 183: Charger Port Indicators
Charger Port Indicators Additionally, each battery port has two LED indicator lights that apply to the status of the resident battery. The ring LED is a circular light that indicates the battery's charge status. The alert LED, in the shape of an exclamation point (!), indicates that there is a battery condition requiring attention. -
Page 184: Talkman Device Charger And Battery Charger Wall Mount
Talkman Device Charger and Battery Charger Wall Mount The A700 device charger and the A700 battery charger are ready for mounting on a standard DIN rail without any customer modifications. A DIN rail must be installed on a wall in a suitable location. -
Page 185: Mounting The A700/A700X Battery Charger
Mounting the A700/A700x Battery Charger You will need: Drill Fasteners Screw driver DIN rail, slotted steel 35 mm X 15 mm, Honeywell Part #CM-1000-20-101 or customer- supplied DIN rail meeting the following specifications : Number of Minimum chargers on cut lengths... -
Page 186: Srx2/Srx3 Headset Battery Charger
3. Attach the charger to the DIN rail by hanging the two hooks on the back of the unit on the top lip of the rail. 4. Slide the charger horizontally to the desired position on the rail, and rotate the locking arms into the locked position - flush with both sides of the unit. -
Page 187: Srx2/Srx3 Battery Charger Led Indicators
20-Bay Charger 6-Bay Charger Height Approximately 15.7 cm (6.18 in.) Approximately 12.06 cm (4.75 in.) Power supply input voltage: 90VAC Power supply input voltage: 100VAC to 264VAC, 50/60Hz to 240VAC, 50/60Hz Input Power supply input current: 2A max Power supply input current: 2A max Power supply output voltage: 12V Power supply output voltage: 5V Power supply output power: 80W... -
Page 188: Charger Port Indicators
Solid green LED: Charger power is on No light: Charger power is off Solid red LED: Charger is experiencing a power fault NOTE If the charger LED indicator is red, unplug the charger power supply from the power source, and remove all batteries. Plug the power supply into the power source again. If the LED remains red, the charger may require repair or replacement. -
Page 189: Headset Battery Charger Wall Mount
Mounting the SRX2/SRX3 Battery Chargers You will need: Drill Fasteners Screw driver DIN rail, slotted steel 35 mm X 15 mm, Honeywell Part #CM-1000-20-101 or customer- supplied DIN rail meeting the following specifications : Voice Device and Headset Hardware Reference Guide... - Page 190 Number of Minimum chargers on cut lengths DIN rail specs Standard DIN rail rail for rail Single unit length 550 mm; weight 331.5 g (11.6933 oz) 550 mm 1101 mm 1652 mm 1. Install the DIN rail on the wall in the desired location. Ensure that the secure installation, supporting surface, and mounting hardware will safely support the weight of a fully loaded charger, at 25 lbs.
-
Page 191: Chapter 6 - Peripherals
PERIPHERALS NOTE The peripherals below have been tested with the A700/A700x using the latest VoiceCatalyst release for each device type. Additional solutions should be discussed with Product Management, Sales, and Tech Support to determine if any unlisted peripherals may work with the A700/A700x solution or may be considered for inclusion in future releases. -
Page 192: Configure Task And Voiceconsole
1. Restore factory defaults by scanning the Remove Custom Defaults and Activate Defaults bar codes. 2. Scan the Host Reconnect Mode bar code. 3. Scan the bar code to add a carriage return and line feed as termination characters. Additional information: The 8680i User Guide contains bar codes to set other combinations of termination characters. -
Page 193: Configure Task And Voiceconsole
IMPORTANT The bar code may be different from the one included in earlier versions of VoiceCatalyst 4.x Release Notes. For an 8680i running firmware version EE000071BAC or greater - this bar code is required. For an 8680i running earlier versions of the firmware - this bar code is recommended although the bar code provided in earlier versions of the release notes does work with these earlier firmware versions. -
Page 194: Unpairing The 8680I
The 8680i must be set to Host Reconnect Mode (the device will attempt to connect to the device host, and if disconnected the device will manage the reconnection). The 8680i must be configured to add termination characters (i.e., <CR><LF>). The 8680i User Guide contains bar codes to set other combinations of termination characters. -
Page 195: Honeywell 8670 Wireless Ring Scanner
3. The device speaks "Unpairing Bluetooth scanner". The device ring LED begins spinning yellow. The device buttons are disabled while unpairing the scanner. 4. The device will speak "Scanner unpaired" and then "Goodnight". Honeywell 8670 Wireless Ring Scanner NOTE Refer to the 8670 User Guide for additional information and configuration bar codes. -
Page 196: Configure Task And Voiceconsole
Configure task and VoiceConsole 1. Set the following advanced parameter in Task config barcodeport = bt_scan 2. Turn on Bluetooth on the device. 3. View the properties of the device and ensure Bluetooth is enabled. If it is not enabled, click Edit this device and set Bluetooth Enabled to "enabled". -
Page 197: Configure Task And Voiceconsole
9. The 8670 scanner indicates a successful connection with the following indicators: The LED on the scanner flashes green and a beep is sounded. The LED on the Bluetooth module is solid blue. Honeywell Granit 1911i Scanner NOTE Refer to the... -
Page 198: Configure Task And Voiceconsole
3. Scan the bar code to add a carriage return and line feed as termination characters. Additional information: The Xenon/Granit User Guide contains bar codes to set other combinations of termination characters. To add a different termination suffix, scan the SUFBK2 (Add Suffix) bar code, then scan the bar codes for the desired suffix. -
Page 199: Configure Task And Voiceconsole
Software > Barcode Scanners > Printer Drivers > Intermec Windows driver using the link below These items can be downloaded from the Honeywell Technical Support Downloads portal: https://hsmftp.honeywell.com. 2. You must have an account to download software. Create an account if you don't already have one. -
Page 200: Configure Task And Voiceconsole
3. If you have not previously installed the Honeywell Download Manager, you must download and install it before downloading EasySet. 4. After installing EasySet, start the program and select your scanner model. 5. Generate a restore factory settings bar code by selecting 2. Reset all parameters >... -
Page 201: Configure Task And Voiceconsole
EasySet (to generate configuration bar codes for the scanner), download from Software > Barcode Scanners > Printer Drivers > Intermec Windows driver using the link below This can be downloaded from the Honeywell Technical Support Downloads portal: https://hsmftp.honeywell.com. Voice Device and Headset Hardware Reference Guide... -
Page 202: Configure Task And Voiceconsole
10. Click Pair with peripheral to initiate pairing. Scanner as Initiator Configure SF61B Scanner To use this scanner with a Honeywell Voice device, you need to generate and scan configuration bar codes: 1. Install the following on your PC: EasySet (to generate configuration bar codes for the scanner), download from Software >... -
Page 203: Configure Task And Voiceconsole
2. You must have an account to download software. Create an account if you don't already have one. 3. If you have not previously installed the Honeywell Download Manager, you must download and install it before downloading EasySet. Voice Device and Headset Hardware Reference Guide... -
Page 204: Configure Task And Voiceconsole
2. You must have an account to download software. Create an account if you don't already have one. 3. If you have not previously installed the Honeywell Download Manager, you must download and install it before downloading EasySet. 4. After installing EasySet, start the program and select your scanner model. -
Page 205: Configure Task And Voiceconsole
7. If using security: a. Use EasySet to generate a security enabled bar code by selecting 3. Interface > Bluetooth > Security > Enable. b. Scan the bar code. c. Optional: generate and scan a bar code to set a custom pin by selecting 3. Interface > Bluetooth >... -
Page 206: Configure Task And Voiceconsole
c. Insert the battery into the scanner while continuing to hold the Restore key. d. After approximately 5 seconds a chirp is heard and the scan LEDs flash green. This signals the RS5100 is set to the default factory configuration. 3. -
Page 207: Zebra Rs6000 Scanner
Zebra RS6000 Scanner NOTE The process below connects the peripheral using the Default profile. To use the Master profile, set the following: [HKEY_LOCAL_MACHINE\Software\Vocollect\NetworkD\RadioSettings] TerminalRoleSRX=master TerminalRoleOther=master Scanner as Initiator Configure RS6000 Scanner 1. Download and install the following on your PC from the Zebra website: Zebra 123Scan: https://www.zebra.com/us/en/products/software/scanning-systems/123scan.html Zebra PC Tool:... -
Page 208: Configure Task And Voiceconsole
Configure Task and VoiceConsole 1. Set the following advanced parameter in Task config barcodeport = bt_scan 2. Turn on Bluetooth on the device. 3. View the properties of the device and ensure Bluetooth is enabled. If it is not enabled, click Edit this device and set Bluetooth Enabled to "enabled". -
Page 209: Device As Initiator
2. You must have an account to download software. Create an account if you don't already have one. 3. If you have not previously installed the Honeywell Download Manager, you must download and install it before downloading these items. 4. After the items above are installed on the PC, power on the RP2D printer. -
Page 210: Configure Task And Voiceconsole
2. You must have an account to download software. Create an account if you don't already have one. 3. If you have not previously installed the Honeywell Download Manager, you must download and install it before downloading these items. 4. After the items above are installed on the PC, power on the RP4D printer. -
Page 211: Intermec Pb22 Printer
2. You must have an account to download software. Create an account if you don't already have one. 3. If you have not previously installed the Honeywell Download Manager, you must download and install it before downloading these items. 4. After the items above are installed on the PC, power on the PB22 printer. - Page 212 9. The wizard detects the connected PB22 printer and it is then shown under "My Printers" in PrintSet 4. 10. Double-click Bluetooth in the Properties tab. 11. In the Bluetooth Settings window, complete these items under Security: Require Security = "Enable" Passcode = (user selected 4-digit PIN) Voice Device and Headset Hardware Reference Guide...
-
Page 213: Configure Task And Voiceconsole
InterDriver_7.4.3_M-3 (to allow the PC to detect the printer when the printer is connected to the PC), download from Software > Printers > Printer Drivers > Intermec Windows driver using the link below These items can be downloaded from the Honeywell Technical Support Downloads portal: Voice Device and Headset Hardware Reference Guide... - Page 214 2. You must have an account to download software. Create an account if you don't already have one. 3. If you have not previously installed the Honeywell Download Manager, you must download and install it before downloading these items. 4. After the items above are installed on the PC, power on the PB50 printer.
-
Page 215: Configure Task And Voiceconsole
10. Double-click Bluetooth in the Properties tab. 11. In the Bluetooth Settings window, complete these items under Security: Require Security = "Enable" Passcode = (user selected 4-digit PIN) You may wish to record the MAC address (shown as Device Address in this window) as the printer's MAC address is necessary to complete the paring process. -
Page 216: Zebra Ql320 Plus Printer
7. In the Bluetooth Address field enter the Bluetooth MAC address of the scanner. This 12- character ID is found From the PB50 display under Bluetooth settings From PrintSet 4 (when the PB50 is attached to a PC) under Bluetooth Settings in the Device Address field. -
Page 217: Configure Task And Voiceconsole
Configure task and VoiceConsole 1. Set the following advanced parameter in Task config printerport = bt_print 2. Turn on Bluetooth on the A700x. 3. View the properties of the A700x and ensure Bluetooth is enabled. If it is not enabled, click Edit this device and set Bluetooth Enabled to "enabled". -
Page 218: Additional Peripheral Connection Information
A700/A700x. Honeywell Dolphin CT60 The Honeywell Dolphin CT60 is an Android™-based hand-held computer that can be used as a training device. For CT60 configuration information refer to the product documentation online. To use the CT60 as a training device: 1. -
Page 219: Vocollect Connector For Wired Scanners
RFID readers, label printers, and serial device controls. Your Honeywell Representative can help you understand which specific versions of hardware and software products are best suited for operations with other devices. -
Page 220: Connecting Peripherals To A Talkman Device
Connecting Peripherals to a Talkman Device 1. Attach the cable to the device as shown in the image below. 2. Make sure the peripheral is off. 3. Connect the cable to the peripheral. 4. Turn the peripheral on. Disconnecting Peripherals from a Talkman Device CAUTION Never pull on the cable or twist the connector to disconnect it from the device. -
Page 221: Data Encoding
Vocollect offers cables with the TCO and RJ-11 connectors as well as those without any RJ-11 connectors. For those without RJ-11 connectors, customers can attach any RJ-11 connector they have wired to match their own scanner’s specific pin assignments. These cables are discussed in the Cable Options Available from Vocollect section. -
Page 222: Wearable Printers
Wearable Printers It may be more convenient or necessary for individual workers to be able to print from their location for the purposes of affixing labels as part of their work operations. Wearable printers, such as the PB50 from Intermec, can be an ideal choice for this type of operation. These printers typically offer various interface modes including RS-232, WLAN or Bluetooth. -
Page 223: Understanding Bluetooth
Bluetooth for scanning, printing and display on the A700/A700x devices uses the serial port protocol. The Talkman Bluetooth devices identify themselves by a unique 12 hexadecimal digit address, typically specified in pairs of numbers separated by a colon (i.e. -
Page 224: Bluetooth Scanner Considerations
VoiceConsole. In applications using several scanners, Honeywell recommends associating (pairing) the reader with its base unit during idle periods, or turning it off. Typically, pairing with the charging base is done by scanning the bar-code at the reader’s charging base or a code break (unpair) the... -
Page 225: Bluetooth With Talkman A700/A700X Solution
A700/A700x devices. Options may be changed in VoiceConsole or in the Talkman device profile. Whenever possible Honeywell recommends using options placed in the device profile. The general checklist for enabling and using Bluetooth for the A700/A700x devices for scanning and printing includes:... -
Page 226: Configuring Bluetooth Capabilities With Voiceconsole
More information can be found in the Voice Console Online Help. Configuring Bluetooth Capabilities with VoiceConsole You can enable Bluetooth on Talkman A700/A700x devices using VoiceConsole. Once enabled, the Talkman can be paired with a Bluetooth peripheral. The pairing can be initiated by either the device or the peripheral. -
Page 227: Pairing Initiated By A Bluetooth Device
This method of pairing is useful if a scanner or printer will be used with more than one Talkman A700/A700x device. It is usually more advantageous to allow a device to actively pair with the Talkman as opposed to having Talkman initiate the pairing, permitting any Talkman to be used with any device. ... -
Page 228: Barcode Identifier Label For Pairing Scanners
sending repeated bursts of Bluetooth radio traffic through the air. Either pairing the scanner with its base station or setting the scanner to an “acceptor” mode will stop this behavior. Barcode Identifier Label for Pairing Scanners If you want a scanner to initiate pairing with a Talkman device, you must generate the barcode specific to that scanner. -
Page 229: Appendix A - Device Specifications
APPENDIX DEVICE SPECIFICATIONS A710x Specifications Specification Details Operating System Linux Kernel 5.6 oz (158.76 g) Weight With standard battery: 8.4 oz (238.14 g) With high-capacity battery: 10.2 oz (289.17 g) Length 5.4" (13.7 cm) 2.5" (6.35 cm) Width With high-capacity battery: 3.046" (7.74 cm) Depth 1.7"... -
Page 230: A720X Specifications
Specification Details Operating -22 °F to 122 °F (-30 °C to 50 °C) Temperature Storage Temperature -40 °F to 158 °F (-40 °C to 70 °C) Meets MIL-STD-810F method 514.6 In addition, the device has been tested to the following specifications: Drop Tested 24 drops at 5 feet (1.5m) to steel... - Page 231 Specification Details Operating System Linux Kernel 5.8 oz (166.81 g) Weight With standard battery: 8.7 oz (247.09 g) With high-capacity battery: 10.5 oz (298.61 g) Length 5.3" (13.56 cm) 2.5" (6.35 cm) Width With high-capacity battery: 3.046" (7.74 cm) Depth 1.7"...
-
Page 232: A730X Specifications
A730x Specifications Specification Details Operating System Linux Kernel 6.65 oz (188.39 g) Weight With standard battery: 9.5 oz (268.67 g) With high-capacity battery: 11.3 oz (320.2 g) Length 5.9" (14.99 cm) 2.5" (6.35 cm) Width With high-capacity battery: 3.046" (7.74 cm) Depth 1.7"... - Page 233 Specification Details Humidity 100% condensing Enclosure Rating IP67 Wavelength 650 nm Vertical Field Angle +/- 33.0 degrees Beam divergence Horizontal Field Angle +/- 42.4 degrees Pulse pattern (pulse duration, 16.8 mSec repetition rate) Maximum power or energy output 1 mW Location of laser apertures Imager window on front of device List of controls, adjustments of...
-
Page 234: A710 Specifications
A710 Specifications Specification Details ® ® Operating System Microsoft Windows CE 7 5.6 oz (158.76 g) Weight With standard battery: 8.4 oz (238.14 g) With high-capacity battery: 10.2 oz (289.17 g) Length 5.4" (13.7 cm) 2.5" (6.35 cm) Width With high-capacity battery: 3.046" (7.74 cm) Depth 1.7"... -
Page 235: A720 Specifications
Specification Details Meets MIL-STD-810F method 514.6 In addition, the device has been tested to the following specifications: Drop Tested 24 drops at 5 feet (1.5m) to steel 12 drops at 6 feet (1.8m) to steel Humidity 100% condensing Enclosure Rating IP67 NOTE Packaging varies for product shipments. - Page 236 Specification Details 5.8 oz (166.81 g) Weight With standard battery: 8.7 oz (247.09 g) With high-capacity battery: 10.5 oz (298.61 g) Length 5.3" (13.56 cm) 2.5" (6.35 cm) Width With high-capacity battery: 3.046" (7.74 cm) Depth 1.7" (4.32 cm) USB maintenance port with audio out and virtual serial support I/O Ports Headset port (yellow)
-
Page 237: A730 Specifications
A730 Specifications Specification Details ® ® Operating System Microsoft Windows CE 7 6.65 oz (188.39 g) Weight With standard battery: 9.5 oz (268.67 g) With high-capacity battery: 11.3 oz (320.2 g) Length 5.9" (14.99 cm) 2.5" (6.35 cm) Width With high-capacity battery: 3.046" (7.74 cm) Depth 1.7"... -
Page 238: A700X Product Battery Specifications
Specification Details Meets MIL-STD-810F method 514.6 In addition, the device has been tested to the following specifications: Drop Tested 24 drops at 5 feet (1.5m) to steel 12 drops at 6 feet (1.8m) to steel Humidity 100% condensing Enclosure Rating IP67 Wavelength 650 nm... -
Page 239: Electrical Specifications
Although the batteries may differ in color, the A700 and A700x batteries are interchangeable. Battery Type Weight Standard Battery Weight 2.8 oz (79.38 g) High-Capacity Battery Weight 4.6 oz (130.41 g) Electrical Specifications Cells: The high capacity battery pack uses two lithium ion cells. -
Page 240: A700 6-Bay Device Charger Specifications
A700 6-Bay Device Charger Specifications NOTE The A700 device charger holds the A700x or A700 device and charges standard or high capacity batteries installed in the device. Although the batteries may differ in color, the A700 and A700x batteries are interchangeable. -
Page 241: A700 12-Bay Battery Charger Specifications
A700 12-Bay Battery Charger Specifications NOTE The A700 battery charger charges standard or high capacity batteries for the A700 and the A700x. Although the batteries may differ in color, the A700 and A700x batteries are interchangeable. Specification Details Length 22.1" (56.1 cm) Depth 5.83"... -
Page 242: Srx2/Srx3 Specifications
SRX2/SRX3 Specifications SRX3 Wireless Headset Specifications Specification Detail 1.95 oz (55.4 g) electronic module only Weight 3.00 oz (85.0 g) electronic module and battery 3.89 oz (110.4 g) Standard headband only Operating -22 °F to 122 °F (-30 °C to 50 °C) temperature Storage -40 °F to 158 °F (-40 °C to 70 °C) -
Page 243: Srx3 Hard-Hat Headset Specifications
NOTE Packaging varies for product shipments. Generally, packing materials are about 15% of the total shipment weight. SRX3 Hard-Hat Headset Specifications Specification Detail 2.94 oz (70 g) Hardhat headband only Weight 0.37 oz (10.6 g) Slotted hardhat mount clip 1.01 oz (28.5 g) Non-slotted hardhat mount clip Operating -22 °F to 122 °F (-30 °C to 50 °C ) temperature... -
Page 244: Srx3 High Noise Headset Specifications
Specification Detail Storage -40 °F to 158 °F (-40 °C to 70 °C) temperature Excludes clips and attachment 12 drops from 7 feet (2.1 m) at minimum and maximum Drop Tested operating temperatures 24 drops from 6 feet (1.8 m) at minimum and maximum operating temperatures Enclosure rating Meets IP54... -
Page 245: Srx2 Wireless Headset Specifications
Specification Details Storage -40 °F to 158 °F (-40 °C to 70 °C) temperature 12 drops from 7 feet (2.1 m) at minimum and maximum operating temperatures Drop Tested 24 drops from 6 feet (1.8 m) at varying angles and at minimum and maximum operating temperatures Enclosure rating Meets IP54... - Page 246 Specification Details 6.84 oz (194 g) with stability strap Weight 6.46 0z (183 g) without strap Operating -22 °F to 122 °F (-30 °C to 50 °C) temperature Storage -40 °F to 158 °F (-40 °C to 70 °C) temperature 24 drops from 6 feet (1.83 m) at minimum and maximum operating temperatures Drop Tested...
-
Page 247: Srx2 Hard-Hat Headset Specifications
SRX2 Hard-Hat Headset Specifications Specification Details Weight 2.47 oz (70 g) Operating -22 °F to 122 °F (-30 °C to 50 °C ) temperature Storage -40 °F to 158 °F (-40 °C to 70 °C) temperature Excludes clips and attachment 12 drops from 7 feet (2.1 m) at minimum and maximum operating Drop Tested temperatures... -
Page 248: Srx2 High Noise Headset Specifications
Specification Details Noise Reduction ≥10.5 dB Rating NOTE Packaging varies for product shipments. Generally, packing materials are about 15% of the total shipment weight. SRX2 High Noise Headset Specifications Specification Details Weight 3.74 oz (106 g) Operating -22 °F to 122 °F (-30 °C to 50 °C ) temperature Storage -40 °F to 158 °F (-40 °C to 70 °C) -
Page 249: Srx2/Srx3 Battery Specifications
The battery pack contains custom electronic that provide performance, temperature, and pack identification to the device. This information is made available to voice management software. Battery Charging: The battery pack must be charged only in a Honeywell designated charger. Mechanical and Environmental Specifications Drop-test specifications: The battery meets the transient drop criteria. -
Page 250: Battery Notifications
Environmental specifications: The battery functions properly in the following conditions: Temperature: -22 °F to 122 °F (-30 °C to 50 °C) Humidity: 95% non-condensing Rain/dust: IP54 Battery Notifications The battery triggers two warnings based on remaining runtime: Battery Condition Audio Warning When battery voltage is low "Headset battery is getting low."... - Page 251 20-Bay Charger 6-Bay Charger Uses wall adapter with switchable Cord Uses standard IEC 60320 plug plugs provided in kit Operating 32 °F to 104 °F (0 °C to 40 °C) 32 °F to 104 °F (0 °C to 40 °C) Temperature Storage -40 °F to 158 °F (-40 °C to 70 °C)
- Page 252 Voice Device and Headset Hardware Reference Guide...
-
Page 253: Appendix B - Part Numbers
Part Numbers: Talkman Accessories Honeywell Part Num- Accessory A700x, A700 Device Belt BL-801-X A700 Device Standard Holster (for A710x, A710, A720x, A720) BL-901 A700 Device Scanner Holster (for A730x, A730) BL-902 A700x, A700 High Capacity Battery BT-902-3 replaces prior batteries and can be used in either A700x or BT-902-3 A700. -
Page 254: Part Numbers: Wireless Headsets
Honeywell Part Num- Accessory A700x, A700 High Capacity Battery, Box of 24 BT-902-3-100B A700x, A700 Standard Battery BT-901-3 replaces prior batteries and can be used in either A700x or BT-901-3 A700. A700x, A700 Standard Battery, Box of 24 BT-901-3-100B A700 Maintenance Cable, USB micro-B to Type A... -
Page 255: Part Numbers: Wireless Headset Accessories
Part Part Number Part Numbers: SRX2 High Noise Headset Wireless Headset Accessories SRX-SL Complete Headset HS-1100-1 Part Numbers: Wireless Headset Accessories Part (SRX2/SRX3 Wireless Headset) Part Number SRX3 Electronic Module HD-1500-101 SRX2 Electronic Module HD-1000-101 SRX3 Headband with Stability Strap (not assembled) HD-1500-102 SRX2 Headband with Stability Strap (not assembled) HD-1000-102... - Page 256 Part (SRX2/SRX3 Wireless Headset) Part Number SRX3 Hard Hat Headset High Noise Earcup (Requires hard hat clip, HD-1500-112 fork attachment, electronic module, and battery) SRX2 Hard Hat Headset High Noise Earcup (Requires hard hat clip, HD-1000-112 fork attachment, electronic module, and battery) SRX3 High Noise Headset High Noise Headband with Earcup HD-1500-113 (Requires electronic module and battery)
-
Page 257: Part Numbers: Wired Headsets
Part Numbers: Wired Headsets Part Part Number SR-15 behind the head headset, straight cord HD-708-1 SR-20 lightweight headset , straight cord HD-700-1 SR-20 lightweight headset , coiled cord HD-700-2 SR-30 high-noise headset, single cup, straight cord HD-702-1 SR-30 high-noise headset, single cup, coiled cord HD-702-2 SR-35 high-noise hard hat headset, single cup, straight cord HD-704-1... - Page 258 Part Part Number Foam Earpads SR-20 (bag of 50 earpads, 25 mounting discs) HD-700-105b T-Bar Pads SR-20, SR-30 (Bag of 25) HD-700-106b Foam Earpads SR-20 (Bag of 25) HD-700-107b Mounting Disks SR-20 (Bag of 10) HD-700-108b Headband Pads SR-20 (Bag of 30) HD-700-109b Foam Earpads #2 (55mm) Assembled with Mounting disks SR-20 HD-700-125b...
-
Page 259: Part Numbers: Chargers
Part Numbers: Chargers Charger - Device Vocollect Part Number A700/A700x 6-Bay Device Charger and Power Supply CM-901 A700/A700x12-Bay Battery Charger and Power Supply CM-902 A700/A700xCharger Power Supply CM-901-101 A700/A700xCharger Mounting Rail CM-1000-20-101 Charger - Headset Honeywell Part Number CM-1000-20, HCG1000-01, HCG1000-... - Page 260 Voice Device and Headset Hardware Reference Guide...
-
Page 261: Appendix C - Care And Use
APPENDIX CARE AND USE Cleaning Procedures for Honeywell Equipment Honeywell Solutions products have a long service life if they are maintained properly. Follow recommended cleaning practices. While Honeywell equipment is manufactured and tested to be resistant to normal dirt and deposits from the workplace environment, the build-up of residue can damage the equipment and degrade performance over time. -
Page 262: Cleaning Contacts
A final alcohol wipe after this should ensure a clean contact. Never bend or manipulate battery contacts. Contact an authorized Honeywell Service Center to repair or replace contacts that are extremely corroded, bent, or missing. Care and Use of Voice Equipment... -
Page 263: Using Headsets In Freezer Environments
Always use pads and windscreens with Honeywell headsets to protect the equipment and ensure optimum speech recognition performance. Honeywell recommends changing headset windscreens every 90 days to ensure the best performance. CAUTION Use only a solution of 70% isopropyl alcohol and 30% water to clean the hard plastics on equipment. -
Page 264: Cleaning Headsets
3. Squeeze out the excess water and let it air dry thoroughly. The comparison shows how an unprotected microphone cannot make clear distinctions between speech and silence, while a clean microphone can. Cleaning Headsets The foam pads used with Vocollect headsets were designed for both comfort and hygiene. The materials naturally inhibit the growth of bacteria and can be cleaned by rinsing with water and drying. -
Page 265: Cleaning The Headband Pad
Honeywell devices are type approved and do not require the user to obtain license or authorization before using them. Changes or modifications not expressly approved by Honeywell could void the user's authority to operate the equipment. -
Page 266: Important Precautions
Do not short-circuit the battery or allow metallic or conduction objects to touch any of the battery contacts simultaneously. Replace a battery only with another battery that has been authorized by Honeywell for the product you are using. Use of an unqualified battery may present a risk of fire, explosion, leakage, or other hazard. -
Page 267: About Sending Equipment Back For Repairs
Only equipment purchased directly from Honeywell can be returned to Honeywell for repairs. If you purchased Honeywell equipment — for example, a headset in the SR-Series — from a Honeywell reseller, contact the reseller. If you are using Vocollect VoiceClient on a handheld device, contact the reseller or device manufacturer if you have questions or issues concerning the device. -
Page 268: Packaging Items For Return To Honeywell
Packaging Items for Return to Honeywell NOTE Properly packaged RMA items facilitate faster repair and return of Honeywell products. Honeywell appreciates your assistance and adherence to these policies. 1. Pack items so that no items can come into direct contact with one another or with the sides, bottom, or top of the shipping container. -
Page 269: Appendix D - Troubleshooting Equipment Problems
Follow the steps in sequence until the issue is resolved; start with the first option and see if that solves your problem before moving on to the second. If none of the listed steps resolve the problem, contact Honeywell to send the equipment back for repair or to speak with a support representative. -
Page 270: The Device Beeps Every Few Seconds
Toggling the Talkman on/off will typically correct this condition. 8. Try connecting the scanner to a different device. 9. If the scanner is damaged, send it back to Honeywell for repair. The Device Beeps Every Few Seconds 1. Wait for a few minutes. The voice engine may just be communicating with the host. -
Page 271: The Device Keeps Shutting Off
3. Check the battery compartment on the device to make sure it is not damaged. If it is damaged, send the device back to Honeywell for repair. 4. Check VoiceConsole for crash dump files with this device's specific serial number. -
Page 272: Understanding Device Connections
Q: The users at my site do not have assigned headsets and devices, so they could get a different headset at every shift. Which pairing process would you recommend? A: With an A700 or A700x device (VoiceCatalyst only) and an SRX2 or SRX3 headset, you can use TouchConnect to pair the device and headset. -
Page 273: Vocollect Connector For Wired Scanners
RFID readers, label printers, and serial device controls. Your Honeywell Representative can help you understand which specific versions of hardware and software products are best suited for operations with other devices. -
Page 274: Connecting Peripherals To A Talkman Device
Connecting Peripherals to a Talkman Device 1. Attach the cable to the device as shown in the image below. 2. Make sure the peripheral is off. 3. Connect the cable to the peripheral. 4. Turn the peripheral on. Disconnecting Peripherals from a Talkman Device CAUTION Never pull on the cable or twist the connector to disconnect it from the device. -
Page 275: Data Encoding
Vocollect offers cables with the TCO and RJ-11 connectors as well as those without any RJ-11 connectors. For those without RJ-11 connectors, customers can attach any RJ-11 connector they have wired to match their own scanner’s specific pin assignments. These cables are discussed in the Cable Options Available from Vocollect section. -
Page 276: Wearable Printers
Bluetooth for scanning, printing and display on the A700/A700x devices uses the serial port protocol. The Talkman Bluetooth devices identify themselves by a unique 12 hexadecimal digit address, typically specified in pairs of numbers separated by a colon (i.e. -
Page 277: Bluetooth Device Roles
VoiceConsole. In applications using several scanners, Honeywell recommends associating (pairing) the reader with its base unit during idle periods, or turning it off. Typically, pairing with the charging base is done by scanning the bar-code at the reader’s charging base or a code break (unpair) the... -
Page 278: Basic Bluetooth Roles And Concepts
A700/A700x devices. Options may be changed in VoiceConsole or in the Talkman device profile. Whenever possible Honeywell recommends using options placed in the device profile. The general checklist for enabling and using Bluetooth for the A700/A700x devices for scanning and printing includes:... -
Page 279: Configuring Bluetooth Capabilities With Voiceconsole
More information can be found in the Voice Console Online Help. Configuring Bluetooth Capabilities with VoiceConsole You can enable Bluetooth on Talkman A700/A700x devices using VoiceConsole. Once enabled, the Talkman can be paired with a Bluetooth peripheral. The pairing can be initiated by either the device or the peripheral. -
Page 280: Pairing Initiated By A Bluetooth Device
This method of pairing is useful if a scanner or printer will be used with more than one Talkman A700/A700x device. It is usually more advantageous to allow a device to actively pair with the Talkman as opposed to having Talkman initiate the pairing, permitting any Talkman to be used with any device. ... -
Page 281: Barcode Identifier Label For Pairing Scanners
1. Generate a bar code for pairing. See Barcode Identifier Label for Pairing Scanners for more information. If the scanner can be paired with a single bar code, that sequence can be printed as a label and placed on the Talkman device. Workers who need to pair the scanner can then simply pick up the Talkman and scan this code. -
Page 282: About Pairing Other Peripheral Devices
Many scanners use a code referred to as “FNC3” to initiate a programming sequence. FNC3 can be entered using the numeric keypad (not regular keys) while holding down the ALT key and entering 0179. The numeric keypad must be used to enter this combination; it will not work using the regular number keys. -
Page 283: Numbered Error Messages
NOTE Not all numbered error messages displayed in VoiceConsole have a corresponding spoken message. Numbered Error Messages Number Text Solution 1. Turn the device off and then turn it back on again. 0x020a Event detect initialization failed. 2. Reboot the device. 3. - Page 284 Number Text Solution 0x1204 Operator load failed. — 0x1205 Corrupted operator data. — 0x1206 Noise sample failed. — 0x1207 There are no operators in this team. — 0x1208 Unable to retrieve operator files. — 0x1209 Internal error loading operator. — 0x120a Task load failed.
- Page 285 Number Text Solution 1. Turn the device off and then turn it back on again. Communications error: Process message 2. Reboot the device. 0x1403 service send error. 3. Reload VoiceClient. 1. Turn the device off and then turn it back on again. Communications error: Process message 0x1406 2.
- Page 286 Number Text Solution 1. Turn the device off and then turn it back on again. 2. Reboot the device. 3. Reload VoiceClient. 4. Reload the task. 0x1426 Socket service name or port bad. 5. Verify the task's output data records (ODRs) and lookup tables (LUTs) have correct and valid socket host and service information.
- Page 287 Number Text Solution 1. Turn the device off and then turn it back on again. Process history data process message 2. Reboot the device. 0x1a03 service retry failed. 3. Reload VoiceClient. 1. Turn the device off and then turn it back on again. Process history data file descriptor 2.
-
Page 288: Spoken Error Messages
Number Text Solution Flash failed to open the specified file in 0x210c — RAM. Flash failed to read the specified file 0x210d — from RAM. Flash failed to write the specified file to 0x210e — RAM. 0x210f Flash library failed while opening a file. —... - Page 289 Error Message Solution 1. Go to an area of known good coverage. 2. Turn the device off and then turn it back on again. "Failed to load task audio file. Task load failed." 3. Reload the task. 4. Reboot the device. 5.
- Page 290 Error Message Solution 1. Reload the task. 2. Turn the device off and then turn it back on again. "No task list file found. Task unchanged." 3. Reboot the device. 4. Reload VoiceClient. 1. Sample noise again. 2. Go to a quieter location and perform another noise sample.
-
Page 291: Troubleshooting Peripheral Problems
Error Message Solution 1. Turn the device off and then turn it back on again. 2. Reboot the device. "Unable to retrieve operator files." 3. Reload VoiceClient. 1. Turn the device off and then turn it back on again. "Unable to send output data." 2. -
Page 292: The Talkman Device Does Not Receive Scanned Data
Toggling the Talkman on/off will typically correct this condition. 8. Try connecting the scanner to a different device. 9. If the scanner is damaged, send it back to Honeywell for repair. The Talkman Device Does Not Receive Scanned Data Scenario: The Bluetooth scanner appears to successfully pair with the Talkman device. -
Page 293: We Have Incorrect Pairings And Rf Interference
The scanner will also try to re-pair by paging or sending repeated bursts of Bluetooth radio traffic through the air. This spurious Bluetooth RF can interfere with other transmissions. Resolutions: Honeywell strongly recommends that operators unpair scanners and Talkman devices when they are finished using them. 1. Break the pairing between scanner and Talkman. -
Page 294: Troubleshooting Bluetooth Printers
2. Using VoiceConsole verify that under “Advance Settings” of task the barcodeport is set to “red” for its scanning connection. 3. Verify that for the Talkman A720/A720x baud rate set is 19200 . Troubleshooting Bluetooth Printers If the printer does not pair or appear to work: 1. -
Page 295: Appendix E - Honeywell Regulatory Compliance
APPENDIX HONEYWELL REGULATORY COMPLIANCE This section contains the regulatory compliance information for Honeywell products. Voice Device and Headset Hardware Reference Guide... -
Page 296: Statement Of Agency Compliance
Honeywell devices and wireless headsets are designed to be compliant with the rules and regulations in the locations into which they are sold and are labeled as required. Honeywell devices are type approved and do not require the user to obtain license or authorization before using them. - Page 297 Les appareils et casques sans fil Honeywell Vocollect Solutions sont conçus pour être conformes aux règles et réglementations en vigueur là où ils sont vendus et sont étiquetés conformément aux exigences.
- Page 298 I dispositivi e le cuffie wireless Honeywell Vocollect Solutions sono concepiti e costruiti nel rispetto delle norme e dei regolamenti dei paesi nei quali vengono venduti e come tali sono etichettati. Attenzione: eventuali modifiche o cambiamenti non espressamente approvati dal produttore possono invalidare il diritto dell'utente all'uso dell'apparecchio.
- Page 299 Vocollect, Inc. nije izričito odobrio mogu poništiti korisničko odobrenje za rad sa opremom. Honeywell Vocollect Solutions enheter och trådlösa headset uppfyller alla regler och lagar på de platser där de säljs och de är märkta i enlighet med detta. Varning: Ändringar eller modifikationer som inte uttryckligen godkänts av tillverkaren kan äventyra användarens tillstånd att använda...
- Page 300 บอนุ ญาตอย่ างชั ดแจ้ งจาก Vocollect, Inc. อาจทำ ให้ ผู ้ ใช้ หมดสิ ทธิ ์ ในการใช้ งานอุ ปกรณ์ นั ้ นๆ Пристрої та бездротові гарнітури Honeywell розроблені у відповідності до правил і норм регіонів, у яких вони продаються, і позначені необхідними етикетками. Пристрої Honeywell схвалені...
-
Page 301: Federal Communications Commission Compliance
Consult the dealer or an experienced radio/TV technician for help. RF Exposure Statement WARNING Honeywell Wireless products comply with International Commission on Non-Ionizing Radiation Protection (ICNIRP), IEEE C95.1, Federal Communications Commission Office of Engineering and Technology (OET) Bulletin 65, Canada RSS-102, and European Committee for Electrotechnical Standardization (CENELEC) limits for exposure to radio frequency (RF) - Page 302 When not in use, the Honeywell devices should be powered off. In addition, the device should be worn in accordance with the instructions for this device.
- Page 303 Honeywell Device Card Manufacturer and P/N FCC ID# Canadian ID # Maximum SAR Value Appareil de Fabricant de la carte et P/N La valeur maximale Honeywell 1 gm 10 gm avg. avg. SRX2 CSR BlueCore 5-Multimedia MQO- 2570A- 0.254 0.186 W/kg...
-
Page 304: Canadian Compliance
Canadian Compliance Conformité à la règlementation canadienne This device contains license-exempt transmitters(s)/receiver(s) that comply with Innovation, Science and Economic Development Canada’s license-exempt RSS(s). Operation is subject to the following two conditions: 1. This device may not cause interference. 2. This device must accept any interference, including interference that may cause undesired operation of the device. -
Page 305: Japanese Compliance
日本語の準拠 Brazilian Compliance Conformidade brasileiro Modelo TAP910-01 TAP920-01 TAP930-01 (A700 Series Devices): Este equipamento opera em caráter secundário, isto é, não tem direito à proteção contra interferência prejudicial, mesmo de estações do mesmo tipo e não pode causar interferência a sistemas operando em caráter primário. -
Page 306: United Arab Emirates Compliance
United Arab Emirates Compliance اﻻﻣﺘﺜﺎل اﻟﻤﺘﺤﺪة اﻟﻌﺮﺑﻴﺔ اﻹﻣﺎرات Voice Device and Headset Hardware Reference Guide... -
Page 307: Chinese Compliance
Chinese Compliance 中国合法规遵从性 Terminals and Headsets 产品中有害物质的名称及含量 (Names and content of Hazardous Substances in the Product) 有害物质 (Hazardous substance) 部件名称 (Part name) A710x TAP1010-01 铅 汞 镉 六价铬 多溴联苯 多溴二苯醚 (PB) (Hg) (Cd) (Cr6+) (PBB) (PBDE) 条码阅读器 (2D Imager) 印刷电路板 (PCB) 连接线... - Page 308 产品中有害物质的名称及含量 (Names and content of Hazardous Substances in the Product) 有害物质 (Hazardous substance) 部件名称 (Part name) A720x TAP1020-01 铅 汞 镉 六价铬 多溴联苯 多溴二苯醚 (PB) (Hg) (Cd) (Cr6+) (PBB) (PBDE) 条码阅读器 (2D Imager) 印刷电路板 (PCB) 连接线 (Cables) 外壳 (Battery) 本表格依据 SJ/T 11364 的规定编制。 (This table is created in accordance to SJ/T 11364 ) o: 表示该有害物质在该部件所有均质材料中的含量均在...
- Page 309 产品中有害物质的名称及含量 (Names and content of Hazardous Substances in the Product) 有害物质 (Hazardous substance) 部件名称 (Part name) A710x TAP910-01 铅 汞 镉 六价铬 多溴联苯 多溴二苯醚 (PB) (Hg) (Cd) (Cr6+) (PBB) (PBDE) 条码阅读器 (2D Imager) 印刷电路板 (PCB) 连接线 (Cables) 外壳 (Battery) 本表格依据 SJ/T 11364 的规定编制。 (This table is created in accordance to SJ/T 11364 ) o: 表示该有害物质在该部件所有均质材料中的含量均在...
- Page 310 产品中有害物质的名称及含量 (Names and content of Hazardous Substances in the Product) 有害物质 (Hazardous substance) 部件名称 (Part name) A730x TAP930-01 铅 汞 镉 六价铬 多溴联苯 多溴二苯醚 (PB) (Hg) (Cd) (Cr6+) (PBB) (PBDE) 条码阅读器 (2D Imager) 印刷电路板 (PCB) 连接线 (Cables) 外壳 (Battery) 本表格依据 SJ/T 11364 的规定编制。 (This table is created in accordance to SJ/T 11364 ) o: 表示该有害物质在该部件所有均质材料中的含量均在...
- Page 311 产品中有害物质的名称及含量 (Names and content of Hazardous Substances in the Product) 有害物质 (Hazardous substance) 部件名称 (Part name) SRX2 HBT1000-01 铅 汞 镉 六价铬 多溴联苯 多溴二苯醚 (PB) (Hg) (Cd) (Cr6+) (PBB) (PBDE) 条码阅读器 (2D Imager) 印刷电路板 (PCB) 连接线 (Cables) 外壳 (Battery) 本表格依据 SJ/T 11364 的规定编制。 (This table is created in accordance to SJ/T 11364 ) o: 表示该有害物质在该部件所有均质材料中的含量均在...
-
Page 312: Chargers
Chargers 产品中有害物质的名称及含量 (Names and content of Hazardous Substances in the Product) 部件名称 (Part name) 有害物质 A700 / A700X Chargers (Hazardous substance) TCH901-01 TCH901-02 铅 汞 镉 六价铬 多溴联苯 多溴二苯醚 TCH902-01 (PB) (Hg) (Cd) (Cr6+) (PBB) (PBDE) TCH902-02 条码阅读器 (2D Imager) 印刷电路板... - Page 313 产品中有害物质的名称及含量 (Names and content of Hazardous Substances in the Product) 有害物质 部件名称 (Part name) (Hazardous substance) A700 / A700x VMT 铅 汞 镉 六价铬 多溴联苯 多溴二苯醚 TVM904-01 (PB) (Hg) (Cd) (Cr6+) (PBB) (PBDE) 条码阅读器 (2D Imager) 印刷电路板 (PCB) 连接线 (Cables) 外壳...
-
Page 314: Batteries
Batteries 产品中有害物质的名称及含量 (Names and content of Hazardous Substances in the Product) 部件名称 (Part name) 有害物质 A700 / A700X Batteries (Hazardous substance) TBA901-01 TBA901-03 铅 汞 镉 六价铬 多溴联苯 多溴二苯醚 TBA902-01 (PB) (Hg) (Cd) (Cr6+) (PBB) (PBDE) TBA902-03 条码阅读器 (2D Imager) 印刷电路板... -
Page 315: Taiwan Compliance
備考3.〝-〞係指該項限用物質為排除項目。 Note 3: The “−” indicates that the restricted substance corresponds to the exemption Honeywell Taiwan LTD, Address: (23553) 10F., No.168, Liancheng Rd., Zhonghe Dist., New Taipei City 235, Taiwan (R.O.C.), Tel: +886 2 22451000#325 NCC caution HBT1500-01: (1) 經型式認證合格之低功率射頻電機,非經許可,公司、商號或使用者均不得擅自變更頻率、加大功... -
Page 316: Russian Compliance
Made in Mexico, сделано в Мексике Ratings (voltage), Напряжение : 100-240V ~ 2A, 50/60Hz Представитель в РФ: ЗАО «Хоневелл», 121059, г. Москва, ул. Киевская, 7 Compliance agent: ZAO Honeywell, 121059, Moscow, Kievskaya str. 7 Модель (Model) Инвентарного номера (Part Номер модели (Model Number) Number) Голос... - Page 317 Made in Mexico, сделано в Мексике Ratings (voltage), Напряжение : 100-240V ~ 2A, 50/60Hz Представитель в РФ: ЗАО «Хоневелл», 121059, г. Москва, ул. Киевская, 7 Compliance agent: ZAO Honeywell, 121059, Moscow, Kievskaya str. 7 Модель (Model) Инвентарного номера (Part Номер модели (Model Number) Number) Беспроводная...
-
Page 318: Ce Marking & European Compliance
Directives and European Normes (EN) as follows. Amendments to these Directives or ENs are included. A700 Products intended for sale within the European Union are marked with the CE Mark, which indicates compliance to applicable Directives and European Normes (EN) as follows. - Page 319 European Community operation. In order to ensure compliance with the latest European standards, VoiceCatalyst 2.1.1 or newer or VoiceClient 3.9.1 or newer voice software must be loaded on A700 devices. Nominal Channel Bandwidths 2.4 Ghz band 802.11b: 22 MHz 2.4 Ghz band 802.11g/n: 20 MHz...
- Page 320 2.4 GHz WLAN/Wi-Fi Channel Availability (802.11 bgn) Channel Lower Freq Center Freq Upper Freq Europe ETSI North America Japan Number 2401 2412 2423 2406 2417 2428 2411 2422 2433 2416 2427 2438 2421 2432 2443 2426 2437 2448 2431 2442 2453 2436 2447...
- Page 321 5 GHz WLAN/Wi-Fi Channel Availability (802.11 an) Channel Number Frequency MHz Europe ETSI North America FCC Japan 5180 Indoors 5200 Indoors 5220 Indoors 5240 Indoors 5260 Indoors/DFS/TPC DFS/TPC 5280 Indoors/DFS/TPC DFS/TPC 5300 Indoors/DFS/TPC DFS/TPC 5320 Indoors/DFS/TPC DFS/TPC 5500 Indoors/DFS/TPC DFS/TPC 5520 Indoors/DFS/TPC DFS/TPC...
- Page 322 802.11g Nominal Power Values Channel Frequency (MHz) Transmitter Power (EIRP) ERP + Antenna Gain (2.18 dBi) at worst case levels Average (dBm) Limit (dBm) Margin (dB) 2412 17.7 20.0 -2.3 2442 17.6 20.0 -2.4 2472 18.1 20.0 -1.9 802.11n Nominal Power Values Channel Frequency (MHz) Transmitter Power (EIRP) ERP + Antenna Gain (2.18 dBi) at worst case levels Average (dBm)
-
Page 323: Srx2 Srx3
-30C to 50C A720 TAP920-01 -30C to 50C A730 TAP930-01 -20C to 50C EU/CE Contact: Honeywell Productivity Solutions B.V. Lagelandseweg 70 6545CG Nijmegen The Netherlands SRX2 SRX3 Products intended for sale within the European Union are marked with the CE Mark, which indicates compliance to applicable Directives and European Normes (EN) as follows. -
Page 324: United Kingdom Contact
Electrical and Electronics Engineers (IEEE) and the American National Standards Institute Communications Commission (FCC). The Bluetooth word mark and logos are owned by the Bluetooth SIG, Inc. and any use of such marks by Honeywell is under license. Other trademarks and trade names are those of their respective owners. Honeywell... -
Page 325: Laser Compliance And Precaution (U.s.a., Canada )
1040). This product has a maximum output of 1 mW at 630-680 nm. CAUTION There are no user serviceable parts inside the A700. Use of controls or adjustments, or performance of procedures other than those specified herein, may result in hazardous laser light exposure of up to 1 mW at 630-680 nm. -
Page 326: Imager Compliance And Precaution (U.s.a., Canada )
Imager Compliance and Precaution (U.S.A., Canada ) LED Safety - The scan engine in the A730x complies with IEC 62471:2006-07. The scan engine in A730x is classified as Risk Group 1. Exempt (No photobiological hazards based on the limits defined in the standard) Risk Group 1 (Low-Risk –... -
Page 327: Imager Compliance And Precaution (Europe)
Imager Compliance and Precaution (Europe) LASER Safety - The scan engine in the A730x complies with IEC 60825-1:2007 / IEC 60825- 1:2014 Class 2 (1 mW, 630-680 nm). LED Safety - The scan engine in the A730x complies with IEC 62471:2006-07 / EN 62471:2008 The scan engine in the A730x is classified as Risk Group 1. -
Page 328: Declaration Of Conformity: Rohs Directive 2011/65/Eu
Annex of the RoHS Directive. Third Party products sold by Honeywell Honeywell has obtained verification from all suppliers of all third party products that versions of those products shipped by Honeywell as of 1 January 2012 to destinations where the DIRECTIVE... - Page 329 Document: 1004859 Rev A Hereby, Honeywell, declares that the A700x Series Devices A710x TAP1010-01, A720x TAP1020- 01, and A730x TAP1030-01 are in compliance with the essential requirements and other relevant provisions of Directive 2014/53/EU. The full text of the EU Declaration of Conformity is available at the following address: www.honeywellaidc.com/compliance...
-
Page 330: Eu Declaration Of Conformity A700
EU Declaration Of Conformity A700 Document: 1004616 Rev A Hereby, Vocollect by Honeywell, declares that the A700 Series Devices A710 TAP910-01, A720 TAP920-01, and A730 TAP930-01 are in compliance with the essential requirements and other relevant provisions of Directive 2014/53/EU. -
Page 331: Eu Declaration Of Conformity Srx2
01, and A730 TAP930-01 è conforme ai requisiti essenziali ed alle altre disposizioni pertinenti stabilite dalla Direttiva 2014/53/UE. Por medio de la presente Vocollect by Honeywell declara que el A710 TAP910-01, A720 TAP920-01, and A730 TAP930-01 cumple con los requisitos esenciales y cualesquiera otras disposiciones aplicables o exigibles de la Directiva 2014/53/UE. - Page 332 Document: 1004618 Rev A Hereby, Vocollect by Honeywell, declares that this SRX2 HBT1000-01 is in compliance with the essential requirements and other relevant provisions of Directive 2014/53/EU. The full text of the EU Declaration of Conformity is available at the following address: www.honeywellaidc.com/compliance...
- Page 333 Por medio de la presente Vocollect by Honeywell declara que el SRX2 HBT1000-01 cumple con los requisitos esenciales y cualesquiera otras disposiciones aplicables o exigibles de la Directiva 2014/53/UE. Vocollect by Honeywell declara que este A500 TAP802-01 está conforme com os requisitos essenciais e outras disposições da Directiva 2014/53/EU.
- Page 334 Voice Device and Headset Hardware Reference Guide...