Table of Contents
Advertisement
Quick Links
Important Information
- This manual is designed to help you to operate and maintain the CRF-362.
Please read, understand and keep this manual in a safe and convenient
place.
- Do not operate the CRF-362 until you read and understand the instructions
in this manual.
- Horizon International Inc. shall not be liable for incidental consequential
damages resulting from: improper or inadequate maintenance by the cus-
tomer, unauthorized modification or misuse, or operation outside of the
environmental specifications for the product.
- Horizon International Inc. pursues a policy of continuing improvement in
design and performance of the product. Therefore, the product design and
specifications are subject to change without prior notice and without our
legal obligation.
- All rights are reserved. No part of this manual may be photocopied, repro-
duced or translated to another language without the prior written consent
of Horizon International Inc.
150722/CRF-362/11E/CF,TF,CY/IDCS5.5/ICS5/PXI
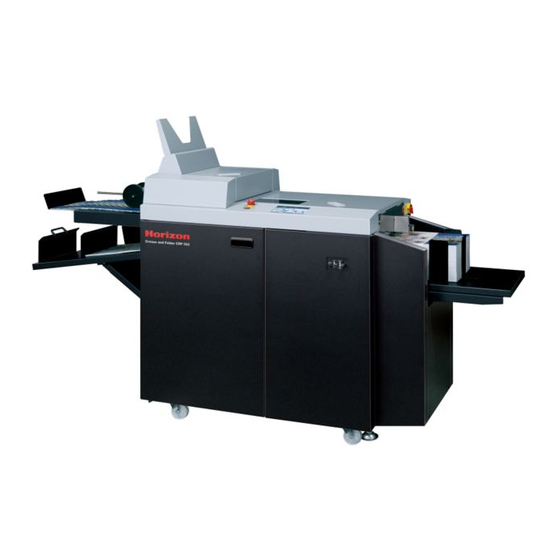
Crease and Folder
CRF-362
UM203090-11(000)
Advertisement
Table of Contents

Related Manuals for Horizon Fitness CRF-362


Summary of Contents for Horizon Fitness CRF-362
- Page 1 Crease and Folder CRF-362 Important Information - This manual is designed to help you to operate and maintain the CRF-362. Please read, understand and keep this manual in a safe and convenient place. - Do not operate the CRF-362 until you read and understand the instructions in this manual.
-
Page 2: Safety Precautions
Do not operate the machine when any covers are removed. Some of the drawings in this manual show the machine uncovered to help in explaining the de- tails inside the machine. CRF-362... -
Page 3: Basic Safety Precautions
• Also, do not use blanket cleaner or recovery agents for printers. They may cause damage or expansion of the rubber. ●CAUTIONS for Maintenance CAUTIONS • Use only the recommended lubricating oil and grease. Other kinds of oil or grease may re- duce the life of the machine or cause damage. CRF-362... - Page 4 • The CRF-362 weighs 345 kg (760.6 lb). Transport and install the machine safely, and keep the weight of the machine in mind. Install the machine in a place which can support its weight.
-
Page 5: Daily Safety Inspection
Error screen. • When the safety covers are closed and is pressed, the Error screen disappears. When the Error Icon Is Not Displayed • There is a problem with the safety circuit. Stop using the machine and call your local dealer. CRF-362... -
Page 6: Warning Label Locations And Meanings
Warning Label Locations and Meanings There are electric parts inside. Take care when opening the cover. Other- wise, an electric shock can cause severe personal injury. CRF-362... -
Page 7: Table Of Contents
Information - Administrator - Administrator Settings Screen ........44 1-3-22 Information - Administrator - Input Signal Enable/Disable Settings Screen ..... 45 1-3-23 Information - Administrator - Motor Enable/Disable Settings Screen ....... 46 1-3-24 Administrator - Crease and Fold Correction Screen ..........47 1-3-25 Error Screen ......................48 CRF-362... - Page 8 There Is Frequent Double Feeding ..............89 4-3-3 There Is Frequent Sheet Jam................90 Crease Is Not Made Correctly ................91 4-4-1 The Crease Is Not Made in the Set Position ............91 4-4-2 The Crease Is Skewed ..................91 4-4-3 The Crease Is Shifted ...................91 CRF-362...
- Page 9 Cleaning the Fold Rollers ..................102 Cleaning and Replacing the Air Filter ..............105 Replacing the Creasing Unit ................106 6 Installation Installing the CRF-362 ..................110 Attaching the Sheet Tray ................... 112 Installing the Delivery Conveyor ................ 112 Attaching the Accessory ..................113 When the Sheet Length Is 650 mm/25.59"...
- Page 10 This page is intentionally left blank.
-
Page 11: General Description
General Description This section describes the parts of the ma- chine and the touch panel screen. -
Page 12: Features Of The Machine
Features of the Machine 1-1-1 Variations of Folding and Creasing The CRF-362 can do wide variety of folding and creasing jobs by only selecting on the touch panel screen. Attention The sheet size is limited depending on the fold pattern. -
Page 13: Crease/Fold Mechanism
If the sheet has once, the sheet passes wrinkles, adjust the roller through the 1st fold unit, gap. (See page 75 for and is transported to the details.) 13130 10102C1 2nd fold unit. 13130 First Fold Unit 10102D1 Second Fold Unit CRF-362... -
Page 14: Limitation Of Fold Pattern And Sheet Size
69 mm / 2.7" or longer. Also, the distance shown below should be 255 mm / 10.0" or shorter. 255 mm / 10.0" or 69 mm / 2.7" 13130 10103H1 shorter or longer 13130 10103J1 CRF-362... -
Page 15: Machine Description
There are two creasing units in the creasing section. Sheets are transported from the register transport section and creased here. Up to ten creases can be placed on a sheet. See Quick Start Guide for details. Fold Section Cover CRF-362... -
Page 16: Feed Section - Part 1
Sheet Guide be bent. Set these guides at the rear edge of the sheets on the feed table. They prevent sheets from being scattered by fluff and separation air. Feed Table Stack the sheets here. CRF-362... -
Page 17: Feed Section - Part 2
Feed Belt Suction Air Adjusting Lever This lever adjusts the air pressure that feed belts suction the sheet. When the lever is pulled, the air pressure is reduced. CRF-362... -
Page 18: Register Transport Section
If the sheet is so heavy that the sheet cannot be aligned with the register guide, the crease and folding may be skewed. If this hap- pens, adjust the pressure of the transport rollers so that the sheets align with the register guide. CRF-362... -
Page 19: Creasing Section
If jams occur, remove the wing bolts and remove the 2nd creasing unit. Adjust two dials in the front this guide. See the Quick Start Guide for details. and rear of the unit evenly. See page 72 for details. CRF-362... -
Page 20: Fold Section
This unit folds sheets. Sheets are folded on a the sheet will be letter folded. See the Quick Start crease by the fold unit. The 2nd fold unit is used Guide for details. at all times when the folding job is done. CRF-362... -
Page 21: Delivery Section - Part 1
When a creased sheet is folded, the sheet is delivered here. 13130 10206A1 Stack Plate Catch Rollers Creased and folded sheets are delivered here. This rollers stop the delivered sheets and keep This plate prevents sheets from falling on the them until the sheets reach specific amount. floor. CRF-362... -
Page 22: Delivery Section - Part 2
Use this stopper when the sheet length is 650 Set the guides to match the sheet size. mm/25.59" or longer. Standard Stopper Side Guide This stopper is at the end of sheet tray. This is the Set the guides to match the sheet size. normal position. CRF-362... -
Page 23: Control Panel
This is used to operates the machine. The control If this button is pressed, the machine stops as panel is touch-screen. Operate the machine using soon as possible. Turn this button clockwise to buttons on the screen. release it. CRF-362... -
Page 24: Screen Descriptions
You can select the count-up method using the Administrator screen. • The preset counter counts sheets fed for a test. • If a jam occurs, the number of fed sheets of the preset counter is corrected for the number of the jammed sheets when the operation is started again. CRF-362... -
Page 25: Run - Main Screen - Part 2
Clear the number of Double Feed Detection fed sheets Number of Number of sheets Whether the double feed detection is turned on is displayed. fed sheets in each set Offset Distance This sets how long the delivery conveyor run at high speed. CRF-362... -
Page 26: Run - Main Screen - Part 3
Stop Button The alarm icon is displayed when the Emergency Stop button is pressed. When this button is pressed, the CRF-362 stops feeding sheets. After all the sheets in the machine ARCNET Error Icon are processed and delivered, the machine stops. -
Page 27: Run - Settings Screen
OK button is pressed on the Set- ting - Mode Selection screen. Transport Speed This sets the transport speed. Transport Interval This sets the transport interval. CRF-362... -
Page 28: Setting - Mode Selection Screen
Press this button when folding sheets after creasing. The settings on this screen are saved and the Run - Fine upper part of the screen becomes active and you can select a Adjustment screen is displayed. fold pattern, a standard sheet size and a custom sheet size. CRF-362... -
Page 29: Run - Roller Gap Instruction Screen
Setting - Mode Selection screen. See page 3 in the Quick Start Guide for the CRF-362 for details. Scale of Adjusting Knob This indicates the value to set the roller gap adjusting knob. -
Page 30: Run - Fine Adjustment - Creasing And Fold Screen
When this button is pressed, the settings on this fold position and a positive crease is placed on the val- screen are saved and the Run - Fine Adjustment - ley fold position. Turn this mode off when reversing the Manual Screen is displayed. creases. CRF-362... -
Page 31: Run - Fine Adjustment - Creasing For Cover Screen - Part 1
Select off when you want to set the ing point and the sheet edge. left or the right flap length individually. You can change the fold positions by pressing Flap Length This indicates the length of the left and right flaps. CRF-362... -
Page 32: Run - Fine Adjustment - Creasing For Cover Screen - Part 2
Positive/Negative Reverse Mode Normally, a negative crease is placed on the mountain fold position and a positive crease is placed on the val- ley fold position. Turn this mode off when reversing the creases. CRF-362... -
Page 33: Run - Fine Adjustment - Manual Screen
Page Selection Press this button to go to the other Run - Fine Adjustment - Manual screen. All Clear Button When this button is pressed, the settings on this screen are reset to default. CRF-362... -
Page 34: Memory Screen
Button for Details of the Job Delete the Job The Job Details screen which shows detailed Press here to delete the job you selected in the information for the selected job is displayed. list. See page 61 or details. CRF-362... -
Page 35: Memory - Job Details - Creasing And Fold Screen
Positive/Negative Reverse Mode Go to the Memory Screen This indicates whether the positive/negative re- Press this button to return to the Memory screen. verse mode is on or off. ON : Creases are reversed. OFF: Creases are not reversed. CRF-362... -
Page 36: Memory - Job Details - Creasing For Cover Screen
This indicates whether the positive/negative re- verse mode is on or off. Flap Distance ON : Creases are reversed. This indicates the distance between the corner of OFF: Creases are not reversed. the spine and the flap. CRF-362... -
Page 37: Memory - Job Details - Manual Screen
1+2: The sheets are folded by the 1st and 2nd fold units. Totally the sheets are folded twice. The sheet is not creased. Page Selection Press this button to go to the other Memory - Detail - Manual screen. CRF-362... -
Page 38: Information - Main Screen
This button should be used by the service techni- case of a service call. cian only. • Panel Control ROM Ver: The version of the panel control software. • Main Control ROM Ver: The version of the main control software. CRF-362... -
Page 39: Information - Monitor Screen
The main sheet sensors are located as shown below. B50 Upper Exit Sheet Pass Sensor B51 Lower Exit Sheet Pass Sensor B43 Sheet Leading Edge Sensor for 2nd Fold B30 Creasing Section Sheet Leading Edge Sensor B14 Transport Section Sheet Sensor 13130 10312A1 CRF-362... -
Page 40: Information - Single Operation Screen - Part 1
Go to the Information - Main Y10 Feed Valve Screen The feed valve closes. The feed valve opens. If the feed valve opens while the blower motor is running, the feed belts pick up sheets when the blower motor is turned on. CRF-362... -
Page 41: Information - Single Operation Screen - Part 2
The gate becomes level off. The 1st fold knife moves to the set The gate rises. position. M50 Conveyor Motor The motor stops running. Motors start running. Page Selection Press this button to go to the other Information - Single Operation screen. CRF-362... -
Page 42: Information - Error History Screen
12 errors are shown on each page, and a total of 36 errors are recorded. If an additional error oc- curs (for a total greater than 36), the information for the oldest error will be deleted. Go to the Information - Main screen CRF-362... -
Page 43: Information - Administrator - Main Screen
The Information - Administrator - Crease and Fold The Information - Administrator - Input Signal Correction screen is displayed. Enable/Disable Settings screen is displayed. See See page 47 for details. page 45 for details. Go to the Information - Main Screen The administrator password is “1111”. CRF-362... -
Page 44: Information - Administrator - Administrator Settings Screen
These distances differ in right and left. The distance in The two spine corners are shifted to parallel if you enter the correction value. this position. The distance in The distance in this position. this position. Go to the Information - Main Screen 13130 10316A1 CRF-362... -
Page 45: Information - Administrator - Input Signal Enable/Disable Settings Screen
Upper Exit Sheet Pass Detection Go to the Information - Main If you turn this signal off and do a folding job, Screen the machine does not detect the sheet delivery. Therefore the machine continues running even if the sheets are jammed. CRF-362... -
Page 46: Information - Administrator - Motor Enable/Disable Settings Screen
M41 1st Folding Motor If you turn off this motor, you cannot do folding with 2nd fold unit. You can do creasing jobs only. M30 Creasing Section Trans- port Motor M31 Creasing Motor Go to the Information - Main Screen CRF-362... -
Page 47: Administrator - Crease And Fold Correction Screen
Correction Value for 1st Creasing is folded once or twice, enter the correction value here. ( See page 77 for details.) Unit If the positive crease position is shifted, enter the correction value here. ( See page 77 for details.) CRF-362... -
Page 48: Error Screen
Screen Descriptions 1-3-25 Error Screen About Font License The IPA Font is used in the control panel. See the URL below for the detail of the IPA FONT Agreement. http://ipafont.ipa.go.jp/ipa_font_license_v1.html#LicenceEng CRF-362... -
Page 49: Advanced Operation
Advanced Operation This chapter explains the procedure for us- ing convenient functions. -
Page 50: Folding / Creasing A Specific Number Of Sheets
When you do not want to count sheets fed for test, press before pressing The preset counter also If necessary, press here to counts sheets fed during reset the counter after the (test feed). test feeding. Press to finish the operation. CRF-362... -
Page 51: Delivering Sheets With Offsetting
Available range: 1 through 999 sheets When you change the number, press and enter the number again. Press Input the number of sheets. Enter the number of → The value is entered and the Run - Main sheets. screen is displayed. CRF-362... - Page 52 The machine starts running. The delivery belts run at high speed for a specified time after the number of the delivered sheets reaches the number set by the offset coun- ter. The machine repeats this cycle until the Stop button is pressed. CRF-362...
-
Page 53: Creasing Cover Sheet For Binding
No Flap :180 through 865 mm/ 7.090" through 34.055" Left or Right Flap :291 through 865 mm/ 11.690" through 34.055" Double Flaps :360 through 865 mm/ 14.110" through 34.055" Input the cover Enter the cover sheet length. sheet length. CRF-362... - Page 54 When you select the creasing pattern with a flap, the Run - Roller Gap Instruction screen is displayed. See page 3 in the Quick Start Guide for the CRF-362, adjust the roller gap, and then press Enter the spine width and the registering point distance.
-
Page 55: Making Creases At Regular Intervals
Transport Direction 13130 20401A1 Press → The Setting - Mode Selection screen is dis- played. Press , and then press → The Setting - Manual screen is displayed. Press on line "01". → The Numeric Keypad screen is displayed. CRF-362... - Page 56 Press to enable the crease set- ting again. Creasing Direction Button to Disable Crease Setting Press on line "01". → The button turns blue. Press on the line "01". → The Numeric Keypad screen is displayed. Repeat Repeat Number CRF-362...
- Page 57 Input the number of times. Enter the number of times. Press → The value will be entered and the Setting - Manual screen will appear on the display again. The repeat function can be used only for one crease position setting. CRF-362...
-
Page 58: Using Job Memory
Press → The Job Details screen for the selected job Job Number Job Type Display is displayed. If you select the job set on the Creasing and Fold Press screen. → The Memory screen is displayed. CRF-362... -
Page 59: Loading Saved Job Settings
Run - Roller Gap Instruction screen is displayed. See page 3 in the Quick Start Guide for the CRF-362 and ad- just the roller gap, and then press → The Run - Main screen is displayed. The job number and name are displayed on the screen. -
Page 60: Saving The Job Settings
When you select that job number, the Overwrite Con- firmation screen appears. • When you want to overwrite the job settings. Press • When you do not want to overwrite the job settings. Press and select another job number. CRF-362... -
Page 61: Deleting The Job Settings
You can scroll through the screen using on the right side of the screen. Press Job Number → The Delete Confirmation screen is dis- played. Press → The job setting is deleted and the Memory screen is displayed. CRF-362... -
Page 62: Exporting The Job Data
Exporting the Job Data Copy all the job data saved in the CRF-362 to the USB thumb drive. If you have more than one CRF-362, you can export the job data from a CRF-362 and import it to the other CRF-362 to run the same job. -
Page 63: Importing The Job Memory
2-5-6 Importing the Job Memory Import the exported job data in the USB thumb drive to the CRF-362. All the job data or the selected job data can be imported. If another job has already been saved for the same job number, the job will be overwritten. - Page 64 This page is intentionally left blank.
-
Page 65: Adjustments
Adjustments This chapter explains how to make some adjustments that may be necessary. -
Page 66: Adjusting The Feed Section
Adjusting Lever 13130 30101B1 Sheet Height Sensor When the sheet width is 120 mm/4.72" or shorter Locking Knob Loosen the sheet height sensor locking knob. Then move the sheet height sensor to the operator side. 13130 30101A3 CRF-362... -
Page 67: Adjusting The Height Of The Double Feed Stop Pad Assembly
How to adjust the height of the double feed stop pad assembly from the standard posi- tion. • Set the lever in the middle position and raise or lower it gradually. 13130 Double Feed Stop Pad 30102C1 Assembly Adjusting Lever CRF-362... -
Page 68: Adjusting The Amount Of Separation And Fluff Air
• When you use thick sheets: creases. Raise the air volume adjusting lever to the upper limit and lower it gradually. • When you use thin sheets: Lower the air volume adjusting lever to the Slit lower limit and raise it gradually. 13130 30103D1 CRF-362... -
Page 69: Adjusting The Feed Belt Suction Length
Normal position 13130 30105A1 Aperture is open When double feeding occurs and feed belts suc- tion sheet by low air • Pull the feed belt suction air adjusting lever. pressure. When double feeding occurs CRF-362... -
Page 70: Adjusting The Transport Speed And Transport Interval
400 mm (15.75") or more, set the transport interval larger. The fluff air will reach the rear edge of a sheet and sheets will be fed stably. ▲ indicates the default setting. CRF-362... -
Page 71: Adjusting The Creasing Section
Each time a button is pressed, the value changes by 0.1 mm/0.004". Adjust the values. When using the Creasing and Fold Mode Press to adjust the crease position. • Each time a button is pressed, the value changes by 0.1 mm/0.004". Adjust the values. CRF-362... -
Page 72: Adjust The Creasing Depth
If you are creasing a very thick sheet, the creasing unit may be locked. 2nd Creasing Unit Match the desired number to the cutout on the dial. 1st Creasing Unit Tighten the lock levers. "9" (deep) ←→ "1" (shallow) Shallow Deep Tightening Loosening 13130 30202B1 CRF-362... -
Page 73: Reversing The Creases
Normally the positive/negative reverse mode is turned on. A negative crease is placed in the mountain fold position, and a positive crease is placed in the valley fold posi- tion. Turn this mode off when you use thin sheets. The creases are reversed. CRF-362... -
Page 74: Adjusting The Fold Section
When using the Creasing and Fold Mode Press for the 1st or the 2nd fold position setting. • Each time a button is pressed, the value changes by 0.1 mm/0.004". Adjust the positions Adjust the positions of of the 1st fold. the 2nd fold. CRF-362... -
Page 75: Adjusting The Roller Gap
If the sheet is wrinkled or skewed, check if the roller gap is even on both sides. Insert a strip of the sheet into the Roller Gap roller gap adjusting lever. Adjusting Lever Insert a strip of sheet all the way. Strip of Sheet 13130 30303A1 CRF-362... - Page 76 . Check that the drag on the strip is same on both sides. If the drag is not same. Turn the front and rear roller gap adjusting knobs to make the roller gap even on both sides. Strip of Sheet 13130 30303E1 CRF-362...
-
Page 77: Setting The Correction Values For Crease And Fold Positions Depending On The Sheet Thickness
If the crease and fold positions are shifted depending on the sheet thickness, you can set the two correction values for thick sheet and thin sheet. Set these correction values in advance so that the fine adjustment is minimalized. Setting the Correction Value Display the Administrator - Crease and Fold Correction screen. Enter the password. CRF-362... - Page 78 For example, if the sheet is folded in the position of 105 mm / 4.14" from the sheet -5.0 leading edge frequently when the sheet must be folded in the position of 100 mm / 3.94" , enter "-5.0" as the correction value. -5.0 CRF-362...
- Page 79 • When the thick sheet is selected, the correc- tion value for the thick sheet is used. • When the normal sheet is selected, the cali- bration will not be done. Thin Sheet Thick Sheet Normal CRF-362...
- Page 80 This page is intentionally left blank.
-
Page 81: Troubleshooting
Troubleshooting This chapter explains the causes and solu- tions for some possible problems. -
Page 82: If A Message Screen Is Displayed
- Creasing for Cover screen. When you press , the Manual screen is displayed. This screen is displayed if the registering point distance is too short. Enter a correct value on the Run - Fine Adjustment - Creasing for Cover screen. See page 53 for details. CRF-362... -
Page 83: If An Error Code Is Displayed
Error Error Code Description Causes and Solutions Error codes 100 through 999 are errors concerning jam and emergency stop system. Emergency Stop Release the Emergency Stop button. (Button S10) Fold Section Cover Open Close the cover. (Cover Switch S11) CRF-362... - Page 84 Before a sheet was detected by the B30 creasing section sheet leading tration Transport Section edge sensor, the next sheet was detected by the B13 double feed sen- sor. Remove the sheet. If the same error occurs repeatedly, set the transport interval larger. (See page 70 .) CRF-362...
- Page 85 (Sensor B51 is on before Remove the sheet. operation.) If this error code is displayed even though no sheets are jammed, the sensor may be dirty. Check that the sensor works properly using the Information - Monitor screen. (See page 39 .) CRF-362...
- Page 86 If the same error occurs repeatedly, call your local dealer. Initializing 7000 Error codes 8000 through 8099 are errors concerning the panel boards. Time Out Error in Initializing If the same error occurs repeatedly, call your local dealer. 8000 CRF-362...
- Page 87 Set up the Information - Administrator - Motor Enable/Disable Settings ting Mismatch Error screen again. Then, turn off the power. Wait about 30 seconds and turn on the power again. If the same error still occurs, call your local dealer. 8041 CRF-362...
- Page 88 If the same error occurs repeatedly, call your local dealer. 8111 EEPROM Board Loading Error 8112 Error codes 8800 through 8899 are errors concerning the main control board. PRO24V Cutoff Detection If the same error occurs repeatedly, call your local dealer. 8800 CRF-362...
-
Page 89: Sheets Are Not Fed Correctly
The double feed stop pads are worn. If the double feed stop pads are worn, see page 100 and replace them with new ones. The sheets are thin. See page 69 and reduce the suction air pressure. CRF-362... -
Page 90: There Is Frequent Sheet Jam
The roller gap is not set correctly • See page 75 and adjust the roller gap. The sheet size may be out of specification. • The sheet size is limited depending on the fold pattern. See Section 1-1-3 and check the sheet size. CRF-362... -
Page 91: Crease Is Not Made Correctly
See page 106 for instructions on removing the 1st creasing unit. If the detection part of the sensor is dirty, the sensor may not detect the leading edge of the 13130 sheet correctly. 40403A1 Creasing Section Sheet Leading Edge Sensor CRF-362... -
Page 92: Fold Is Not Made Correctly
Normally, when you use thick sheets, a negative crease is placed in the mountain fold position. And then a sheet is folded on the crease. Sheet Fold Knife 13130 40502B1 When you use thin sheets, a positive crease should be placed in the mountain fold position to make a quality folding. Sheet Fold Knife 13130 40502A1 CRF-362... - Page 93 2nd Fold Position 13130 1st Fold Position 40502C1 Fold a sheet with creasing and check that the sheet is folded on the crease. • If the sheet is not folded on the crease, re- peat the steps 1 and 2. CRF-362...
-
Page 94: Creasing Units Are Locked
40601C1 Return the creasing depth adjusting dials to the original positions. Close the register transport section cover. → When you use thick sheets and the creasing units are locked frequently, see page 72 and set the creasing depth shallower. CRF-362... -
Page 95: Sheets Are Jammed In The 2Nd Fold Unit
2nd fold unit. Remove the jammed sheets by hand. Install the 2nd fold unit again. • See page 102 for instructions on installing the 2nd fold unit. Close the register transport sec- tion cover and the fold section cover. CRF-362... -
Page 96: Control Panel Blacks Out
If the machine is not used for a specified time, the machine goes into power saving mode and the control panel blacks out suddenly. While the machine is in power saving mode, the power lamp blinks. When you touch the control panel, the machine returns to the normal mode. 13130 40801A1 Power Lamp Control Panel CRF-362... -
Page 97: Other Problems
The circuit breaker for blower motor for fluff air Q11may trip. separation and fluff air do not blow. Call your local dealer. The sheet is not transported. The circuit breaker for creasing section transport motor Q30 The fold rollers do not rotate. may trip. Call your local dealer. CRF-362... - Page 98 This page is intentionally left blank.
-
Page 99: Maintenance
Maintenance This chapter explains how to replace the consumables and clean the machine. -
Page 100: Double Feed Stop Pad Assembly Replacement
Good 13130 50101C1 Tighten the locking screws while pressing the assembly down to level the assembly. 13130 50101D1 See page 67 and adjust the height of the double feed stop pad assembly. CRF-362... -
Page 101: Cleaning Belts And Fold Rollers
Transport Belts You cannot lock the roller unit when it is lifted. Therefore, when you clean the trans- port belts, support the unit by hand. 13130 50201C1 Close the register transport sec- tion cover. CRF-362... -
Page 102: Cleaning The Fold Rollers
13130 50202A1 Register Transport Section Cover Open the fold section cover. Fold Section Cover 13130 50202B1 Remove the connector for the 2nd fold unit. Press here. Connector Pull the connector pressing the top of the con- nector. 13130 50202C1 CRF-362... - Page 103 Remove the two locking screws on the 2nd fold unit. 13130 50202D1 Locking Screws Remove the 2nd fold unit. 2nd Fold Unit 13130 50202E1 Remove the two locking screws on the guide. Locking Screws 13130 50202F1 Remove the guide. Guide 13130 50202G1 CRF-362...
- Page 104 Install the 2nd fold unit. Be careful that the edge of the knife for the 2nd fold unit does not hit the guide. Knife 2nd Fold Unit 13130 502020J1 Close the front cover, the register transport section cover and the fold section cover. CRF-362...
-
Page 105: Cleaning And Replacing The Air Filter
If the air filter is still covered with dust, wash it with water. Attach it after it has dried completely. If the filter is still contaminated, replace it with a new filter. Install the air filter being aware of the direction of the air filter. CRF-362... -
Page 106: Replacing The Creasing Unit
Thick: 1.3 mm Creasing Unit 0.051" 0.051" Turn off the Power switch. Open the register transport sec- tion cover. Pull here to open the cover. 13130 50401B1 Register Transport Section Cover Open the fold section cover. Fold Section Cover 13130 50401C1 CRF-362... - Page 107 5 mm ratchet wrench. 13130 50401D1 Locking Screws Creasing Depth Adjusting Dials Remove the creasing depth ad- justing dials. 13130 50401E1 Remove the creasing unit by lift- ing it straight up. 13130 50401F1 Creasing Unit CRF-362...
- Page 108 Creasing Depth Adjusting Dial screws. 13130 50401I1 Locking Screw Close the register transport section cover and the fold section cover. After replacing the creasing unit, see page 72 and adjust the crease depth. CRF-362...
-
Page 109: Installation
Installation This chapter explains how to install the ma- chine. This section includes the steps that can be done only by an authorized service technicians. -
Page 110: Installing The Crf-362
Installing the CRF-362 Installation Space 3,442 135.6" Units: mm / inch 2,742 / 108.0" 2,297 90.5" 27.6" 1,678 / 66.1" 8.5" 27.6" 9.1" 2,700 / 106.2" 2,101 82.8" 27.6" 27.6" Center of gravity 630 / 24.8" 12.9" 25.2" 25.2" 23090 60101B1 630 / 24.8"... - Page 111 Installing the CRF-362 Level the machine. • Adjust the machine setting machine is bolts so that the Torpedo Level level. • Lock each setting bolt using the locking nut. Locking Nut Setting Bolt Turn off the circuit breaker of the power distribution board.
-
Page 112: Attaching The Sheet Tray
Attach the sheet tray to the lower exit. B4-8ZP×4 B4-8ZP Attach the standard stopper, the stopper for short sheet and the side guide. Wing Bolt×2 Installing the Delivery Conveyor Insert two posi- tioning pins into the holes. Wing Bolt×2 CRF-362... -
Page 113: Attaching The Accessory
When the Sheet Length Is 650 mm/25.59" or Longer Attach the support table. Lock Remove the standard stopper. Standard Stopper Then attach the stopper for long sheet. Wing Bolt×2 Stopper for Long Sheet CRF-362... - Page 114 This page is intentionally left blank.
-
Page 115: Appendix
Appendix This chapter lists the specifications for this machine. -
Page 116: Specifications
Specifications Model CRF-362 Retail Name Creaser and Folder Style of Installation Floor Model Feeding Mechanism Air Suction Feed Belt Max. 364 x 865 mm / 14.33" x 34.05" Min. 105 x 180 mm / 4.14" x 7.09" Parallel Fold: 180 to 865 mm / 7.1" to 34.0"... - Page 117 W2,742 x D701 x H1,430 mm / W108.0" x D27.6" x H56.3" Lamax: 73.7 dB Noise Level Laeq: 72.1 dB Lcpk: 87.6 dB Machine Weight 345kg / 760.0 lb The machine design and specifications are subject to change without notice. CRF-362...
-
Page 118: Accessories
Accessories The following is the list of the accessories for the CRF-362. Stopper for Short Sheet* 1 pc Stopper for Long Sheet* 1 pc Standard Stopper* 1 pc 13130 60201C1 13130 60201A1 13130 60201B1 Stack Plate* 1 pc Side Guide*... -
Page 119: Consumables
See page 100 for instructions on how to replace it. See page 105 for instructions on how to replace it. Option The following is the list of the optional devices for the CRF-362. Creasing Unit PRF-36 Impact Perforation Unit Crease Width 0.5 mm/0.020"... -
Page 120: De-Commissioning And Dismantling
De-commissioning and Dismantling There is no specific hazardous materials and components for de-commisioning and dismantling the machine. CRF-362... - Page 121 This page is intentionally left blank.
- Page 122 Manufacturer: www.horizon.co.jp/ Phone:+81-75-934-6700, Fax:+81-75-934-6708,...