
Related Manuals for Cisco D9858


Summary of Contents for Cisco D9858
- Page 1 Cisco D9858 Advanced Receiver Transcoder Software Version 4.50 Installation and Configuration Guide...
- Page 2 Please Read This Entire Guide Veuillez lire entièrement ce guide Bitte das gesamte Handbuch durchlesen Sírvase leer completamente la presente guía Si prega di leggere completamente questa guida Important Please read this entire guide before you install or operate this product. Give particular attention to all safety statements.
- Page 3 Trademark Acknowledgments Cisco and the Cisco logo are trademarks or registered trademarks of Cisco and/or its affiliates in the U.S. and other countries. To view a list of Cisco trademarks, go to this URL: www.cisco.com/go/trademarks. Manufactured under license from Dolby Laboratories. Dolby and the double-D symbol are trademarks of Dolby Laboratories.
- Page 4 AVC/MPEG-4/H.264 Products With respect to each AVC/MPEG-4/H.264 product, Cisco is obligated to provide the following notice: THIS PRODUCT IS LICENSED UNDER THE AVC PATENT PORTFOLIO LICENSE FOR THE PERSONAL AND NON-COMMERCIAL USE OF A CONSUMER TO (i) ENCODE VIDEO IN COMPLIANCE WITH THE AVC STANDARD ("AVC VIDEO")
-
Page 5: Safety Precautions
Safety Precautions Safety Precautions Read Instructions – All the safety and operating instructions should be read before the product is operated. Retain Instructions – The safety and operating instructions should be retained for future reference. Heed Warnings – All warnings on the product and in the operating instructions should be adhered to. - Page 6 Safety Precautions Use only with a cart, stand, tripod, bracket, or table recommended by the manufacturer, or sold with the product. Any mounting of the product should follow the manufacturer’s instructions, and should use a mounting accessory recommended by the manufacturer. A product and cart combination should be moved with care.
- Page 7 Safety Precautions 13 Protective Attachment Plug – The product is equipped with an attachment plug having overload protection. This is a safety feature. See Instruction Manual for replacement or resetting of protective device. If replacement of the plug is required, be sure the service technician has used a replacement plug specified by the manufacturer that has the same overload protection as the original plug.
- Page 8 Safety Precautions 19 Servicing – Do not attempt to service this product yourself as opening or removing covers may expose you to dangerous voltage or other hazards. Refer all servicing to qualified service personnel. 20 Damage Requiring Service – Unplug this product from the wall outlet and refer servicing to qualified service personnel under the following conditions: When the power-supply cord or plug is damaged, b If liquid has been spilled, or objects have fallen into the product,...
- Page 9 Safety Precautions You may find this symbol on the product and/or in the literature that accompanies this product. It indicates a live terminal; the symbol pointing to the terminal device. You may find this symbol on the product and/or in the literature that accompanies this product.
- Page 10 Safety Precautions Règles de sécurité Protégez-vous des risques d'électrocution et protégez votre syst ème contre les endommagements éventuels. Ce produit respecte les standards internationaux de sécurité et de conception. Veuillez observer toutes les procédures de sécurité qui apparaissent dans ce guide, ainsi que les symboles de sécurité...
- Page 11 Safety Precautions Ne marchez pas sur les câbles ou les prises et n'y exercez aucune pression. Réparations effectuées à l'usine Ne confiez les travaux de réparations qu'au personnel autorisé par l'usine. Sicherheitsvorkehrungen Schützen Sie sich gegen elektrischen Schlag, und Ihr Gerät gegen Beschädigung! Dieses Gerät entspricht internationalen Sicherheits-und Ausführungsnormen.
-
Page 12: Precauciones De Seguridad
Safety Precautions Kabel Vor jeglicher Wartung des Gerätes sind alle Kabel zu entfernen. Hierzu grundsätzlich am Stecker oder Verbindungsstück und niemals am Kabel selber ziehen. Nicht auf die Kabel oder Stecker treten oder diese einer Zugbelastung aussetzen. Hersteller-Wartung Wartungsarbeiten sind nur durch vom Hersteller autorisierte Techniker ... -
Page 13: Precauzioni Di Sicurezza
Safety Precautions Cubierta No permita que la humedad penetre en este producto. No abra la cubierta del producto a menos que se indique lo contrario. No introduzca objetos a través de las aberturas de la cubierta del producto. ... - Page 14 Safety Precautions Collegare questo prodotto solamente alla fonte di alimentazione indicata sul pannello posteriore di questo prodotto. Se questo prodotto non è dotato di un interruttore principale, il cavo di alimentazione funge a questo scopo. Chiusura Proteggete da umidità questo prodotto. ...
-
Page 15: Table Of Contents
Setting t he DP M Mod e...................... 17 Chapter 3 Installation Power Connection ......................20 Installing the D9858 Transcoder ..................21 Rack Mount ed ....................... 21 Cooling ........................21 Grounding ......................21 Mou nting the D9858 Transcoder to a Rack ............21... -
Page 16: Chapter 4 Front Panel Operation
Connecting t he AC Power to the D9858 Transcoder ......... 22 Rear C onnector Panel......................23 Connecting t he I nput/Output Signals................25 Connecting t he RF Inputs ..................25 Connecting t he ASI Input ..................25 Connecting t he Video Outputs ................25 Connecting t he Balanced Audio Output............. - Page 17 Shortcuts ......................139 Modules ....................... 139 Alarms/Warnings ....................140 D9858 Menus ........................142 D9858 Web GUI Environm ent ..................144 Wind ow Buttons ....................144 Setting up Input Information ..................145 Setting up the RF Input ..................145 Setting up the ASI Input..................150 Setting up SI Receive Parameters ..............
- Page 18 Viewing Tra nscoder Version I nformation ............250 Setting up Import/Export File Information ............. 252 Setting up Import/Export FTP Information ............. 253 Managing D9858 Web GUI Accou nts ............... 255 Configuring Lock Level Settings ............... 260 Configuring Front Panel Settings ..............262 Viewing Support Inf ormation ..................
- Page 19 Viewing Alarm/ Warning History ..............267 Loading a Software Version and L icense............268 Chapter 6 Service and Maintenance D9858 Transcoder Alarm Messages ................272 Alarms ......................... 272 Warnings ......................307 Power Supply Replacement.................... 327 Chapter 7 Customer Information Appendix A Technical Specifications L-Band Input and Process ing ..................
- Page 20 RF Input ....................... 349 Tune Mode ......................350 Disaster Recovery ....................350 IP .......................... 351 Trap Destinations ....................352 Protocols ......................352 Video........................352 Audio ........................353 Captions ......................353 VBI ........................353 Subtitles ....................... 353 Decode ......................... 354 Cueing ......................... 354 TS Out - ASI ......................
-
Page 21: About This Guide
About This Guide About This Guide Objective This guide describes how to install, use and maintain the Cisco D9858 Advanced Receiver Transcoder. Note: The guide describes all available options for the D9858 transcoder. Your D9858 transcoder may only have some of the features described in this guide. -
Page 23: Chapter 1 Introduction
Chapter 1 Introduction Overview This chapter is a general introduction to the Cisco D9858 Advanced Receiver Transcoder. It describes the most common applications and interfaces of the transcoder. In This Chapter D9858 Advanced Receiver T ranscod er ..........2 ... -
Page 24: D9858 Advanced Receiver Transcoder
Coding (AVC) HD from solely MPEG-4 environments to existing MPEG-2 networks. Support for simultaneous dual-channel transcoding provides density for locations requiring more than just a single channel. The D9858 can be used to provide a down- converted standard definition (SD) MPEG-2 program instead of one or both of the available HD transcoded programs. - Page 25 Cisco Live Event Controller support Fingerprint support in transcoded output On screen display support in transcoded output Satellite Disaster Recovery support with Cisco PowerVu Network Center uplink control (Release 12.5 or higher) NIT Retune Recovery ...
-
Page 26: Software Update
Chapter 1 Introduction Software Update All software in the D9858 transcoder is stored in non-volatile memory that can be electrically programmed. New software releases for the D9858 transcoder can be downloaded via the Ethernet 10/100/1000BASE-T Management interface. -
Page 27: Transport Stream Outputs
Digital Program Insertion (DPI) information will also be available along with the video and audio PIDs (Packet Identifiers) for external ad - insertion in compressed digital format. The diagram below shows an example of the D9858 transcoder used in an ASI or MPEGoIP application. MPE Output The Multiprotocol Encapsulation (MPE) output provides a means to carry packet oriented IP protocols on top of a transport stream. - Page 28 Chapter 1 Introduction The diagram below shows an example of the D9858 transcoder used in an MPE application.
-
Page 29: Disaster Recovery
A DR symbol is displayed on the front panel, and the D9858 web GUI displays a D/R in progress status. During a disaster, the receiver will attempt to tune to a different backup transport, based on the search path configured. - Page 30 Chapter 1 Introduction For example, the disaster recovery is configured as follows: Program Origin Transport Backup 1 Backup 2 Backup 3 Entry Channel Number Transport Transport Transport Channel Channel Channel Number Number Number – 1005 When disaster occurs, the transcoder will tune to channel 11, as defined on the Backup 1 transport.
-
Page 31: Uplink Profile Settings
Disaster Recovery Uplink Profile Settings Once the transcoder detects a failure after the configured signal loss timeout (defined by the uplink), it will initiate a disaster recovery using the PNC uplink Disaster Recovery Profile settings. If the PNC uplink is set to allow local disaster recovery, the disaster recovery profile setting on the unit determines the disaster recovery setting to use (local or uplink). -
Page 32: Nit Retune Recovery
Chapter 1 Introduction NIT Retune Recovery The Network Information Table (NIT) retune recovery occurs when the tuning parameters on the uplink do not result in a successful tuning lock (for example, modulator settings or transponder signal strength). The receiver will try to tune to the new signal (NIT), and if it does not lock to the new signal during an initial engagement delay of five minutes, it will revert back to the original signal. -
Page 33: Chapter 2 Quick Setup - Read Me First
Chapter 2 Quick Setup - Read Me First! Overview This chapter provides a quick setup for your Cisco D9858 Advanced Receiver Transcoder. If you are unsure about which transcoder settings to use, contact your local service provider for assistance. In This Chapter ... -
Page 34: Connecting The Transcoder To Other Equipment
Chapter 2 Quick Setup - Read Me First! Connecting the Transcoder to Other Equipment The following displays the rear panel of the D9858 transcoder: Connect the L-Band signal to RF1. 13V or 18V LNB power is only available on the RF1 port. The factory default setting for LNB power is OFF. -
Page 35: Setting Up For Network Connection
Setting up for Network Connection Setting up for Network Connection Press MENU to display the Main menu. If the Advanced Receiver Transcoder is to be connected to a network, press move to the Setup menu. Press SELECT. Press twice to select the IP menu. Press SELECT twice to go to the IP menu. -
Page 36: Quick Setup Instructions For Rf Acquisition
Chapter 2 Quick Setup - Read Me First! Quick Setup Instructions for RF Acquisition Press MENU to display the Main menu. Press to go to the Setup menu. Press SELECT. Press to move to the TS Input menu. Press SELECT. To setup the ASI input port, go to Step 4. -
Page 37: Assigning A Program Channel To A Pe (Program Entry)
Press ADV and use the keys to scroll through the available program entries. Note: The D9858 is available in a single channel (D9858 -1) or a dual channel configuration. The single channel transcoder (D9858 -1) supports one Program Entry (PE1) only. -
Page 38: Setting Up The Asi Output
Chapter 2 Quick Setup - Read Me First! Setting up the ASI Output Press MENU to move to the Main Menu. Press to move to the Setup menu. Press SELECT. Press to move to the Outputs menu. Press SELECT. Press to move to the TS Out menu. -
Page 39: Setting The Dpm Mode
Setting the DPM Mode Setting the DPM Mode A program can be set to one of three Digital Program Mapping (DPM) modes, either Drop, Pass, Map, or Xcode. For more information, see TS Out - DPM (on page 99). LCD Setting Description Drop Removes the service and its associated PMT reference... -
Page 41: Chapter 3 Installation
Cisco D9858 Advanced Receiver Transcoder. Qualified Personnel Only appropriately qualified and trained service personnel should attempt to install, operate, or maintain the D9858 receiver. WARNING: Allow only authorized and qualified service personnel to install, operate, maintain, and service this product. Otherwise, personal injury or equipment damage may occur. -
Page 42: Power Connection
AC power, see Appendix B - Technical Specifications (on page 331). As Cisco units are designed for continuous operation, some products do not have a power switch. In this case, the main cord and/or DC power supply cable serve(s) as the main disconnect device. -
Page 43: Installing The D9858 Transcoder
Cooling The D9858 transcoder is cooled by the use of internal fans. The air intake is from the front and the air outlet is on the rear. Note: Adequate cooling must be provided equaling 107 W (maximum) at 25°C per unit to avoid overheating. -
Page 44: Connecting The Ac Power To The D9858 Transcoder
Make sure that the power cable is connected to protective ground. See Grounding (on page 21) for more information. The D9858 transcoder is equipped with one power supply located in the rear of the chassis. Note the location of the power supply in the event of alarms/warnings resulting in replacement of a power supply. -
Page 45: Rear Connector Panel
Rear Connector Panel Rear Connector Panel The following diagram show the rear connector panel of the D9858 transcoder: The following table describes the function and type of the various connectors. Connector Description Type RF Inputs Each input accepts an LNB signal input. - Page 46 Chapter 3 Installation Connector Description Type Composite Video CVBS 1 and CVBS 2 provide two identical SD composite video outputs for monitoring Outputs applications. Balanced Audio Outputs Audio 1 and Audio 2 provide two stereo Terminal Blocks pairs or four mono channels. Ground Screw.
-
Page 47: Connecting The Input/Output Signals
Connecting the Input/Output Signals Connecting the Input/Output Signals Connecting the RF Inputs Connect up to four LNB RF cables to the RF connectors labeled RF1 through RF4 on the rear of the unit. Use 75-ohm (braid/foil or braid/braid), low insertion loss coaxial cable. Each input accepts an LNB signal input. -
Page 48: Connecting The Ethernet Management Interface
D9858 transcoder directly to another Ethernet device without using a hub or switch. Set up the IP address on the D9858 transcoder (via the front panel display). For information on setting up the IP address via the front panel, see IP (on page 70). -
Page 49: Connecting The Asi Outputs
Connecting the ASI Outputs Proceed as follows to connect to the ASI outputs: Connect the output signal from the D9858 transcoder ASI OUT connectors. All three outputs, ASI OUT 1, 2 and 3 are identical. Use a Belden “Brilliance” cable with foil/braid construction. The shield must provide 99% or better shielding effectiveness. -
Page 50: Connecting The Rs-232 Data Interface
38.4 kbps (default). These outputs are user-configurable via the Setup Menu on the front panel. The interconnect cable from the D9858 transcoder to a PC should be straight through (for example, no handshaking), shielded and equipped with a DB -9 male connector at one end to mate with the rear panel RS-232 Data interface, and a female DB-9 connector to connect to the PC. -
Page 51: Configuring Open-Collector Outputs
Configuring Open-collector Outputs The D9858 supports decoding of SCTE-35 messages with DTMF descriptor. The D9858 outputs tones or sets the open collector contacts according to the content of the DTMF descriptor in the Cisco D9054 HDTV Encoder and the Cisco D9036 Modular Encoding Platform. -
Page 52: Setting Admin User Privileges Via A Telnet/Ssh Connection
Up to 10 usernames/passwords can be defined for login use via a Telnet, SSH, or web GUI (for example, HTTP) session on the D9858 transcoder. When a user logs in (via a Telnet, SSH, or HTTP connection), the user mus t provide a username and a password. -
Page 53: Adding A New User
Setting Admin User Privileges via a Telnet/SSH Connection In the Passphrase field, type the password, localadmin. Wait a few seconds, until the Use rhosts to log in is disabled. Note: The username and password are case-sensitive. The default username is admin and the default password is localadmin. d Click OK. -
Page 54: Changing A Password (Allowed By All Users)
Chapter 3 Installation At the NEW USERNAME prompt, type the new username and press Enter. Note: Ensure that the new username does not match any of the usernames already defined in the authentication table. At the ADMINISTRATOR PASSWORD prompt, type the administrator's password and press Enter. -
Page 55: Chapter 4 Front Panel Operation
Chapter 4 Front Panel Operation Overview This chapter describes how to set up the Cisco D9858 Advanced Receiver Transcoder using the front panel keys and display. This information is primarily applicable for standalone operation. In This Chapter About the Front Panel ................34 ... -
Page 56: About The Front Panel
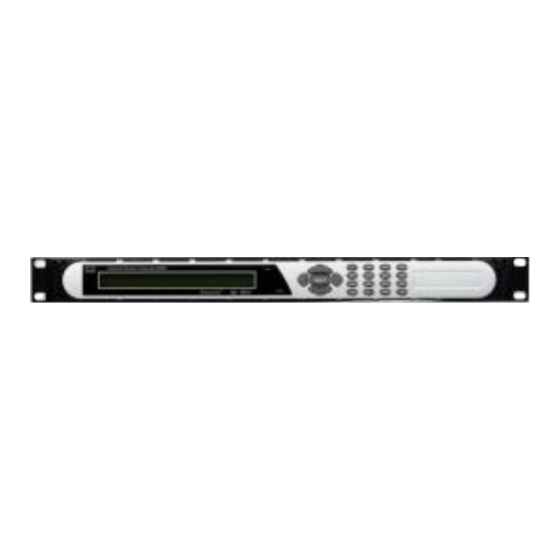
Chapter 4 Front Panel Operation About the Front Panel The D9858 transcoder is operated using controls and indicators on the front panel. These include the numeric keypad, the Navigation/Selection keypad, the LCD, the Alarm and Signal indicators. These are shown in the following illustration. -
Page 57: Navigation/Selection Keypad
About the Front Panel Signal Explanation State/Color Green Flashing indicates one of the following conditions: difficulty with an input, route, or output. one or more RF inputs, or the ASI input are not synchronized. one or more outputs are routed, but muted by a fault condition. - Page 58 Chapter 4 Front Panel Operation Button Function LEFT Arrow key When moving through menus, it highlights the menu item to the left. When entering data, it moves the cursor to the left. In some menus, it backspaces over the data entry. RIGHT Arrow When moving through menus, it highlights the menu item to...
- Page 59 About the Front Panel Button Function Alphanumeric Pressing the numeric keys 2-9 once will enter the respective Entry digit into a data entry field. Pressing these buttons again will enter the first of the letters displayed beside the number. Repeatedly pressing the button will toggle through all of the key's possible choices.
-
Page 60: Locking/U Nlocking The Front Panel
Chapter 4 Front Panel Operation Locking/Unlocking the Front Panel Depending on the customer’s default settings, the receiver is shipped with a locked or unlocked front panel. You can lock or unlock the front panel using the front panel keypad. Proceed as follows to unlock the front panel using the front panel keypad: From the Startup screen, press SELECT and then INFO. -
Page 61: Startup Screen
The LCD panel displays basic signal and program information in the LCD display, as described in the following illustration: LCD Setting Description Program Entry. The D9858 is available in a single channel (D9858-1)or a dual channel configuration. The single channel transcoder (D9858-1) supports one Program Entry (PE1) only. -
Page 62: Lcd Symbol
Chapter 4 Front Panel Operation LCD Setting Description Active RF input port. Note: ASI will be shown if the ASI input port is active. Freq: Downlink frequency of the tuned signal in GHz. Lvl: Signal level in dBm. Marg: Carrier-to-noise (C/N) margin in dB. DEGD The Degraded indicator only appears if there is degraded tuning information in use. -
Page 63: Assigning Program To The Program Entry
Startup Screen LCD Symbol Description The Left/Right symbol indicates that the RIGHT/LEFT arrow key is active; for example, pressing the RIGHT/LEFT arrow key will have an affect, such as moving the cursor to the right/left. The up/down symbol indicates that the UP/DOWN arrow key is active. -
Page 64: Deleting A Program From The Program Entry
Freq:12.658 Lvl:-50 Marg:11.6 Press to scroll through the available program entries. Note: The D9858 is available in a single channel (D9858 -1) or a dual channel configuration. The single channel transcoder (D9858 -1) supports one Program Entry (PE1) only. Press ADV again to select the channel number. -
Page 65: Main Menu
Main Menu Main Menu Operation of the D9858 Advanced Receiver Transcoder begins at the Main menu. From the startup screen, press the MENU key to view the Main menu. Main Menu Main Menu Status Setup About Versions Diagnostics Select the desired function by moving the cursor left or right by pressing the LEFT or RIGHT arrow key. -
Page 66: Status Menu
Chapter 4 Front Panel Operation Status Menu To view the Status menu from the Main menu, press the SELECT key. The Status menu indicates the status of the input and output signals, the video and audio services, and allows you to browse and/or configure the alarms and warnings. The Status menu is split into four parts;... -
Page 67: Status Menu: General
– signal level, in dBm. Select the Program Entry to view. PE1 or PE2. Note: The single channel transcoder (D9858-1) supports one Program Entry (PE1) only. Mode Indicates how the program is scrambled. Unkn, DES, DVB, BISS1, BISS2, or BISS3. -
Page 68: Status Menu: Services
Chapter 4 Front Panel Operation Menu Item Description Parameters Rate (Mbps) Indicates the bit rate of the received video – stream, in Mbps. Alarms Displays the number of active alarms. – Warnings Indicates the number of active warnings. – Browse Select to view the current active alarms –... - Page 69 Status Menu Menu Item Description Parameters 3:2 Pulldown Indicates whether the 3:2 pulldown is Yes, No or Recent detected, was recently detected, or not detected in the input video stream. Indicates the frame rate of the input Typically 25.0, 29.97, 30.0, 50.0, 59.94, 60.0, unknown or video stream.
-
Page 70: Status Menu: Ts Input
Chapter 4 Front Panel Operation Status Menu: TS Input Input Menu Item Description Parameters Input Indicates the active input port receiving RF1, RF2, RF3, RF4, or ASI the signal. Status Indicates the current signal lock status Locked - Indicates the receiver is locked to a carrier with no valid for the input. - Page 71 Status Menu Menu Item Description Parameters Pilot Present Indicates whether a Pilot is present for Yes, No, or N/A the received signal. The Pilot is set on the modulator for input signal synchronization purposes. C/N (dB) Indicates the current Carrier-to-Noise in dB ratio.
- Page 72 Program PIDs Menu Item Description Parameters Select the Program Entry to view. PE1 to PE2 Note: The single channel transcoder (D9858-1) supports one Program Entry (PE1) only. Stream Indicates the name assigned to the Up to 4 alphanumeric Program Entry. characters...
- Page 73 Description Parameters Indicates the Program Entry PE1 to PE2 number. Note: The single channel transcoder (D9858-1) supports one Program Entry (PE1) only. SR Status This displays the status of an Not Started - Indicates that an event has alternate authorized not started.
-
Page 74: Status Menu: Ts Output
Scheduled - Indicates that all transcoders will tune to the alternate program at the scheduled time. This status applies to PE1 and PE2 for D9858 or PE1 only for D9858-1. CA - Indicates that only transcoders unauthorized to view the scheduled... -
Page 75: Status Menu: Ip
The Link Status parameters display the port information, such as the status, speed, duplex, and crossover. Port 1 is the management port and port 2 is the data port. Redundancy Status The D9858 transcoder is a single-port unit. The Redundancy Status section is not supported. Global Status... -
Page 76: Status Menu: Dr
Chapter 4 Front Panel Operation Stream Status Menu Item Description Parameters PE ID Displays the program entry channel. Stream Port1/Port2 Indicates the stream status of the control port (Port Stopped, Suspended, 1) and data port (Port 2). Active, or Muted Content Overflow Indicates if the incoming transport stream rate is Yes or No... - Page 77 Status Menu Global Status Menu Item Description Parameters State Displays the current disaster recovery status. For No Disaster - D/R more information on the statuses, see Viewing the Ready, D/R in progress, D/R disabled Disaster Recovery Status (on page 161). - Maintenance Mode, D/R disabled, No Disaster - D/R Ready...
- Page 78 Chapter 4 Front Panel Operation Menu Item Description Parameters Signal Lock Timer Indicates the time, in seconds, the unit must wait 5 to 255 for a signal lock before declaring that the signal is not usable and move on to the next search location in the search path.
-
Page 79: Setup Menu
Setup Menu Setup Menu To view the Setup menu from the Main menu, press the RIGHT arrow key once and the SELECT key. The Setup menu is split into eight sections: Administration, TS Input, IP, Services, Outputs, CA, Alarms/Warnings, and Noise Cutoff. For instructions on how to select and store settings, see About the Front Panel (on page 34). -
Page 80: Setup Menu: Admin
Chapter 4 Front Panel Operation Setup Menu: Admin To view the Admin menu from the Setup menu, press the SELECT key. For instructions on how to select and store settings, see About the Front Panel (on page 34). The Admin menu has the following structure: Menu Item Description Parameters... - Page 81 Depending on the unit, the default password for all lock levels is 1234. For more information on the default password, contact Cisco customer support. Old Pwd, New Pwd, To change the password, enter the –...
- Page 82 Chapter 4 Front Panel Operation Menu Item Description Parameters LCD Contrast Adjusts the contrast of the LCD 1 (lowest contrast) to 30 (highest menu panel. contrast) DL Mode Set the unforced over-the-air Always - Unforced download will be accepted and saved in download mode.
- Page 83 Setup Menu Menu Item Description Parameters Type The type of download being None - No download is being performed. performed. Rear Panel - The rear panel download is being performed. HTTP - An HTTP download from the web GUI is being performed.
- Page 84 Chapter 4 Front Panel Operation Menu Item Description Parameters Reject Displays the number of code tables Read-only numeric value. rejected. Tables are rejected whenever validation fails due to things like CRC failure or incorrect code or receiver type. Command Select a command to issue to the Abort - Stops a download that current download.
-
Page 85: Setup Menu: Ts Input
Setup Menu Setup Menu: TS Input To view the TS (Transport Stream) Input menu from the Main menu, press the RIGHT arrow key once and then the SELECT key to reach the Setup menu. Then press the RIGHT arrow key once and the SELECT key to view the TS Input menu. For instructions on how to select and store settings, see About the Front Panel (on page 34). - Page 86 Chapter 4 Front Panel Operation Menu Item Description Parameters Tune Mode Select the tables required for the service Basic - Requires NIT to be present. list creation and signal acquisition. Auto - Uses all the service list tables and it will acquire if any service list tables are present.
- Page 87 Setup Menu Menu Item Description Parameters CA Ctl Sets how the conditional access will attempt to Std - In standard mode, descramble the scrambled programs. if a program is not authorized, even if some services are not scrambled, the whole program will not be authorized.
- Page 88 Chapter 4 Front Panel Operation Menu Item Description Parameters OrbPos This is the location in orbit of the satellite Degrees. currently being used. The satellite position (in degrees) in combination with the direction (either E (East) or W (West)) denotes the satellite position the dish connected to the current RF Input should point to.
- Page 89 Setup Menu Menu Item Description Parameters L-Band This is the L-Band operating frequency used by 950 to 2150 MHz. the receiver. This value is determined by the values set in the Freq and LO options. RF Lock Indicate whether the tuner has locked onto the Lock or NoLock.
- Page 90 Chapter 4 Front Panel Operation Menu Item Description Parameters 22kHz For dual band applications, select whether to On, Off, or Auto. transmit the 22 kHz tone Local Oscillator Auto uses the crossover control signal of RF1. frequency to determine if the tone is transmitted.
-
Page 91: Setup Menu: Ip
Setup Menu Status Menu Item Description Parameters Service List Mode Indicates if all the expected Degraded or Rigorous service list tables are present (Rigorous) or only some of the service list tables are present (Degraded) This is not supported in the current release. - Page 92 Chapter 4 Front Panel Operation For instructions on how to select and store settings, see About the Front Panel (on page 34). The IP menu has the following structure: Menu Item Description Parameters Port ID Select the Ethernet interface to 1 or 2.
- Page 93 Setup Menu Menu Item Description Parameters Gateway Sets the Network Gateway Address The IP Address/Mask and Gateway on the Network, used to expose the Address should be changed together, as a group. The following table shows receiver to a WAN. the most commonly used Subnet mask values to enter for a chosen IP address mask, which will depend on the size of...
- Page 94 Chapter 4 Front Panel Operation Menu Item Description Parameters Reset Credentials If for some reason, you cannot access – the decoder (due to a forgotten password, corrupted data, and so on), the recovery procedure for the decoder is as follows: Using the keypad, choose this field on the front panel menu.
- Page 95 The passwords must comply with the following requirements: It cannot contain username or reversed username. It cannot contain any of the following strings: cisco, sciatl, ocsic, Itaics, atlsci, icslta, or any string achieved by full or partial capitalization of letters. ...
- Page 96 Chapter 4 Front Panel Operation Protocols The Protocols menu allows you to control remote access protocols (Telnet, SSH, HTTP, DTX, and SNMP) to the IRD. Menu Item Description Port Number Parameters Telnet Controls Telnet access to the TCP port #23 Enable (default) or Disable IRD.
- Page 97 Note: The hardware firewall may impose different rules for the Management and Data ports. For example, remote access protocols, such as SSH or HTTP, are only enabled on the Management port. Redundancy The D9858 transcoder is a single-port unit. The redundancy settings are not supported.
-
Page 98: Setup Menu: Services
Chapter 4 Front Panel Operation Setup Menu: Services To view the Services menu from the Main menu, press the RIGHT arrow key once and then the SELECT key to reach the Setup menu. Then press the RIGHT arrow key three times and the SELECT key to view the Services menu. The Services menu allows you to set up all the operating parameters associated with audio, video and captions services. - Page 99 Setup Menu Video Menu Item Description Parameters PV Format Sets the primary video output format for Auto, SD, HD 720p, or HD local decoding. 1080i Stream Indicates the video format of the input video stream. This value is read-only. SD Format Selects the standard definition output Auto, NTSC, PAL-N (AR), format to use on the primary video if the...
- Page 100 Chapter 4 Front Panel Operation Menu Item Description Parameters Act Conv The actual aspect ratio conversion the None, 16:9 L/B, 4:3 P/B, 14:9, receiver will perform based on what you 4:3 CCO, 16:9 SCALE have selected. This is read-only. Refer to the Aspect Ratio Conversions table below for the conversions performed by the receiver based on your selection, and the effect on the picture displayed by...
- Page 101 Setup Menu Aspect Ratio Conv ersions The following table displays the conversions performed by the receiver based on the Act Conv selection: Stream TV A/R Conversion Act Conv Description Image None None Normal Picture Auto None No conversion 16:9 L/B None Conversion is not possible.
- Page 102 Chapter 4 Front Panel Operation Stream TV A/R Conversion Act Conv Description Image 16:9 4:3 P/B 4:3 P/B 4:3 picture is centered in a pillar-style box. 16:9 14:9 14:9 Compromises some up- sampling. Some black bars and cropping are visible. 16:9 16:9 SCALE 16:9...
- Page 103 Setup Menu Stream TV A/R Conversion Act Conv Description Image 16:9 16:9 L/B 16:9 L/B Vertically down-samples the picture and applies black bars at the top and bottom of the screen. 16:9 4:3 CCO 4:3 CCO Horizontally up-samples the center portion of the picture to fill the screen.
- Page 104 Chapter 4 Front Panel Operation Menu Item Description Parameters Stereo/Mono Sets the output mixing. Stereo - Left and Right are passed directly through to Left and Right R-MONO - Right is passed to both the Left and Right L-MONO - Left is passed to both the Left and Right Mixed - Left is passed to both the Left and Right, and Right is passed to both...
- Page 105 Setup Menu Menu Item Description Parameters If Select Language By is set to Language List ara (Arabic), btk (Batak (Indonesia), Language List, select the language ben (Bengali), bul (Bulgarian), chi (Chinese), cze (Czech), dan (Danish), for the selected audio. dut (Dutch), eng (English), fin (Finnish), fre (French), ger (German), gre (Greek), heb (Hebrew), hin (Hindi), hun (Hungarian), ice...
- Page 106 Chapter 4 Front Panel Operation Menu Item Description Parameters WSS Mode Selects the Wide Screen Signaling Auto:Create - Creates WSS to output mode. It is used to select output the correct aspect ratio, how the receiver affects PAL WSS when performing aspect ratio when it is present in the VBI line 23.
- Page 107 Setup Menu Subtitles This menu allows you to configure the type of subtitling (for example, DVB or Imitext) displayed by the transcoder, and how the transcoder displays subtitling on th e TV. Menu Item Description Parameters Op Mode Sets the subtitle mode. Off - No subtitles are displayed.
- Page 108 Chapter 4 Front Panel Operation Menu Item Description Parameters PMT Order If PMT Order was selected First to Eighth in the Select Language By menu, select the subtitle PID entry to display. This information is available from your uplink service provider.
- Page 109 Setup Menu Decode Menu Item Description Parameters Decoder Select the local decode service to Video, Audio1 to Audio4, VBI (Vertical Blanking Interval) configure. DATA (low speed data), MPE1 Note: By default, all the decode to MPE5 (Multiprotocol services are enabled. Encapsulation), STT (Subtitles), or DPI (Digital Program Insertion)
-
Page 110: Setup Menu: Outputs
Chapter 4 Front Panel Operation Setup Menu: Outputs To view the Outputs menus from the Main menu, press the RIGHT arrow key once and then the SELECT key to reach the Setup menu. Then press the RIGHT arrow key four times and the SELECT key to view the Outputs menu. The Outputs menu allows you to set up the rear panel control relays for alarms, cue tones and cue triggers, and the transport stream outputs, Digital Program Mapping (DPM), and Transcoding. - Page 111 Setup Menu Cueing Menu Item Description Parameters Cueing Mode Select whether cueing output Tone - Cue tones are standard Dual- should be DTMF tones or Tone Multi-Frequency (DTMF) tones. The tones are generated at the Cue trigger pins. Tone/Relay output on the rear panel of the receiver.
- Page 112 Chapter 4 Front Panel Operation Menu Item Description Parameters Mode Sets the tone sequence mode. * - Start tone only # - End tone only */# - Start and end tones. The end tone is signaled after waiting the time specified in Delay(sec).
- Page 113 Setup Menu TS Out - ASI Menu Item Description Parameters Name Displays the name 20-character string assigned to the transport output for ease of reference. This is read- only. Rate Control Select the output rate Auto - The output rate follows that set by the uplink.
- Page 114 Chapter 4 Front Panel Operation Menu Item Description Parameters Output Mode Select the DPM output No Output - No ASI output will be generated and mode for the current the ASI port will be disabled. output. Passthrough - All PEs will be set to Pass and other With the exception of No DPM settings will also be set.
- Page 115 Setup Menu Menu Item Description Parameters Config Type Indicates the current DPM Edited by User - DPM changes were made. configuration change by a Unmodified - No changes were made after setting user after changing the a new Output Mode. Output Mode.
- Page 116 Chapter 4 Front Panel Operation Menu Item Description Parameters Auto Map Select whether the DPM Yes or No sets the output actions for all the auxiliary PEs to Map when the Output Mode is set to Transcode. If the Fixed Output is set to Yes, the output configuration for the auxiliary PEs is...
- Page 117 Setup Menu Menu Item Description Parameters Output Mode Select the DPM output mode No Output - No MPEGoIP output will be for the current output. generated. With the exception of No Passthrough - All PEs will be set to Pass and Output and Full DPM Control, other DPM settings will also be set.
- Page 118 Chapter 4 Front Panel Operation Menu Item Description Parameters Config Type Indicates the current DPM Edited by User - DPM changes were made. configuration change by a user Unmodified - No changes were made after after changing the Output setting a new Output Mode. Mode.
- Page 119 Setup Menu Menu Item Description Parameters Auto Map Aux Select whether the DPM sets the Yes or No output actions for all the auxiliary PEs to Map when the Output Mode is set to Transcode. If the Fixed Output is set to Yes, the output configuration for the auxiliary PEs is determined by the fixed output table options when you...
- Page 120 Chapter 4 Front Panel Operation Menu Item Description Parameters MOIP Selects the transport protocol to RTP or UDP be used for the output stream. Min IP/s This selects the minimum 0, 2 to 1000 number of IP packets per second. TOS (Type Of This sets the quality of service.
- Page 121 Setup Menu TS Out - DPM To view the DPM menu from the TS Out menu, press the RIGHT arrow key. The DPM menu provides access to functionality associated with Global, ASI, and MOIP outputs. The DPM menu allows you to groom functionality on a program basis where individual service PID modifications are provided on a limited scale.
- Page 122 Chapter 4 Front Panel Operation DPM - Global Menu Item Description Parameters Resync All: Select to resynchronize all DPM output with the PMT data for all program entries on the selected output. Regenerate Selects whether to regenerate Always or As Needed the PSI tables in the output.
- Page 123 Setup Menu Menu Item Description Parameters Selects the action to perform on Pass (default) - Output channel is the same as the input channel. The the current program entry. OutCh, and PMT settings are ignored. This setting controls the overall All PID map entries are ignored DPM behavior of the PE and except for entries that explicitly drop...
- Page 124 Chapter 4 Front Panel Operation Menu Item Description Parameters Press Select to view and configure the PID map. The PID map is used to map input services to output PIDs. For more information, see PID Map Menu (on page 104). Map Mode Select the DPM mapping mode Svc ID - The elementary PIDs are not...
- Page 125 Setup Menu Menu Item Description Parameters PSI Options Select the action to perform on Pass All - Transmits the incoming PSI the PSI tables for the output Tables as is; does not modify the content and rate. The PSI Rate and stream.
- Page 126 Template - Map the input to a fixed template output. PAT/PMT Offset This is a customer-specifi c mode, only to be used if directed by Cisco. For more information, contact Cisco customer support. NIT Offset This is a customer-specifi c mode, only to be used if directed by Cisco.
- Page 127 Setup Menu Menu Item Description Parameters Select the action to perform on Map - The service selected by the OutType and Instance will be the current PID. mapped to the specified PID. This is The Drop action is always only applied if the PE action is Map performed, but the Map option and the Map Mode is Svc ID &...
- Page 128 Chapter 4 Front Panel Operation Setting Mode Options Description Default NITO Pass, Drop, PwRC Network Information Pass Table - Other Pass, Drop, Regen, PwRC Service Description Table Pass SDTO Pass, Drop, PwRC Service Description Table Pass - Other Pass, Drop, PwRC Bouquet Association Pass Table...
- Page 129 Setup Menu Use the RIGHT arrow key to move to the right and select PID to display the detailed menu level. Configure the input to output channel mapping. Video and PCR can be output on the same PID or different PIDs. If output on the same PID, they will appear identical to the input.
- Page 130 Chapter 4 Front Panel Operation Parameter Description Pass Pass Pass Pass Drop Drop Drop Drop 10 Press MENU three times to exit the TS Out menu and save the data. If the changes cannot be saved/made, a message will be displayed indicating "Bad configuration data".
- Page 131 Setup Menu Select PE Resync: All. The receiver will synchronize the PE output according to the services and then the PIDs assigned to each service. To synchronize the output to a Template: Using a template allows you to preset the input to output mapping of a PE according to the preset template.
- Page 132 Parameters This selects the transcoder PE1 or PE2 index as referenced by DPM. Note: The single channel transcoder (D9858-1) supports one Program Entry (PE1) only. Video Mode This selects the transcode Auto - Leaves the input video format and resolution unchanged.
- Page 133 Setup Menu Menu Item Description Parameters HD Bitrate This sets the transcode channel 10 to 25 Mb/s in 400 b/s output bit rate when HD increments. The default is 16.0 MPEG-4/ AVC to HD MPEG-2 Mb/s. transcoding is selected. SD Bitrate This sets the transcode channel 2 to 15 Mb/s in 400 b/s output bit rate when HD to SD...
- Page 134 Chapter 4 Front Panel Operation Menu Item Description Parameters SD AR Conv This selects the HD/SD Auto, None, 16:9 L/B (letter box), transcode channel aspect ratio 4:3 P/B (pillar box), 14:9, 4:3 CCO, conversion. This is the 16:9 SCALE or Auto AFD (Auto conversion that the transcoder setting using Active Format will perform on the output...
- Page 135 Setup Menu Menu Item Description Parameters Language List If Language List was selected in ara (Arabic), btk (Batak the Select Language By menu, (Indonesia), ben (Bengali), bul select the MPEG language to (Bulgarian), chi (Chinese), cze (Czech), dan (Danish), dut (Dutch), display.
- Page 136 Chapter 4 Front Panel Operation Menu Item Description Parameters BackGnd Sets the text background for Auto - Uses the uplink subtitling Imitext subtitles. equipment setting. Shadow - Applies an outline to the right side of each text character. No background box is applied to subtitles, that is, text is visible directly on top of video.
- Page 137 Description Parameters This selects the transcoder PE1 or PE2 index as referenced by DPM. Note: The single channel transcoder (D9858-1) supports one Program Entry (PE1) only. Apply Inband This applies the uplink Yes or No parameters for transcoding, such as bitrate, GOP and...
- Page 138 Chapter 4 Front Panel Operation The Options menu has the following structure: Menu Item Description Parameters Output Select 1 to configure the ASI 1 or 2 output or select 2 to configure the MPEG over IP output. Fixed Output Sets whether the DPM assigns Yes or No new values for all the output channels and PIDs according to...
- Page 139 Setup Menu Menu Item Description Parameters Step Offset of the subsequent PE 1 to 65535 for Use Inp Chan channel, PE PMT PID, or first 1 to 8192 for Use Inp PMT/PIDs ES PID of subsequent channel numbers. Set to Yes to assign the ES PID Use Inp Ord Yes or No according to the incoming PMT...
-
Page 140: Setup Menu: Ca
Chapter 4 Front Panel Operation Setup Menu: CA To view the CA menu from the Main menu, press the RIGHT arrow key once and then the SELECT key to reach the Setup menu. Then press the RIGHT arrow key six times and the SELECT key to view the CA menu. - Page 141 Setup Menu Menu Item Description Parameters ADP Non-Enc Pass Indicates the number of non- encrypted Addressable Data Packets successfully processed. Ideally, the ADP Non-Enc Pass and ADP Non- Enc Total numbers should be identical. ADP Non-Enc Total Indicates the total number of non- encrypted Addressable Data Packets received.
-
Page 142: Setup Menu: Alarm/Warning
Chapter 4 Front Panel Operation Setup Menu: Alarm/Warning To view the Alarm/Warning menu from the Main menu, press the RIGHT arrow key once and then the SELECT key to reach the Setup menu. Then press the RIGHT arrow key seven times and the SELECT key to view the Alarm/Warning menu. The Alarm/Warning menu allows you to browse the active alarms and warnings, and set whether the output will be disabled in the event of an alarm. -
Page 143: Setup Menu: Noise Cutoffs
Setup Menu Menu Item Description Parameters If the current alarm or warning Yes or No is enabled (Enb is set to Yes), Note: No is a read only value that select whether it will trigger the indicates the setting is Yes, but is rear panel relay when the alarm currently being suppressed because is set or cleared. - Page 144 Chapter 4 Front Panel Operation Menu Item Description Parameters Trnsprt(DVBS Marg) Sets the DVB-S and DVB-S2 -30.0 to 30.0 Carrier to Noise margins, in dB, Cutoff This setting must be below the below the transport outputs that Trnsprt(DVBS2 Marg) respective Restore value. will be muted.
-
Page 145: Setup Menu: Dr
Setup Menu Menu Item Description Parameters Audio(DVBS Marg) Sets the DVB-S and DVB-S2 -30.0 to 30.0 Carrier to Noise margins, in dB, Restore This setting must be below the above the audio outputs that Audio(DVBS2 Marg) respective Cutoff value. will be restored. Restore The default is 0.1. - Page 146 Chapter 4 Front Panel Operation Global Menu Item Description Parameters D/R Enable Choose to enable or temporarily disable Yes or No the disaster recover feature. Choose Yes (default) to enable disaster recovery. Choose No to set the disaster recovery into maintenance mode.
- Page 147 PE # The Program Entry (PE) number you are PE1 or PE2 configuring the backup transport channel. The single channel transcoder (D9858-1) supports one program entry (PE1) only. The dual channel transcoder supports two program entries (PE1 and PE2). Transport...
- Page 148 Chapter 4 Front Panel Operation Menu Item Description Parameters Backup Channel The backup channel number for the selected backup transport. Note: We recommend that you configure a minimum of one backup transport. If no backup transport is configured, an alarm is triggered, but the unit will not be able to switch to a backup transport.
-
Page 149: About Menu
About Menu About Menu To view the About menu from the Main menu press the RIGHT arrow key two times and then the SELECT key. The About menu provides basic hardware information that is useful when requesting customer support. Each parameter is described below. The About menu has the following structure: General Menu Item Description... -
Page 150: Licenses
Indicates the version number of the ISE. Serial Number Indicates the unique device serial number. Customer Code Indicates the unique Customer Code assigned to an organization by Cisco. Board ID Indicates the hardware board design identification. Revision Indicates the revision number of the board design. -
Page 151: Versions Menu
To view the Versions menu from the Main menu, press the RIGHT arrow key three times and then the SELECT key. The Versions menu provides basic software information that is useful when requesting customer support from Cisco. The menu has the following structure: Main Versions The following are the version numbers applicable to the Main printed circuit board. - Page 152 Chapter 4 Front Panel Operation Menu Item Description App Safe Indicates the version of the factory loaded safe application. App Safe Limit Indicates the version of the oldest application that can be installed on the current unit. If this value is zero, the oldest application limit is the App Safe version.
-
Page 153: Transcoder Versions
Versions Menu Menu Item Description FPGA Version, FPGA Version - Select between all versions of the FPGA code Select, Erase loaded on the current unit. Select - Select and then scroll to Yes to reboot the unit and load the selected FPGA code. You will be prompted to continue or abort this operation. -
Page 154: Diagnostics Menu
Chapter 4 Front Panel Operation Diagnostics Menu To view the Diagnostics menus from the Main menu, press the RIGHT arrow key four times and then the SELECT key. For instructions on how to select and store settings, see About the Front Panel (on page 34). -
Page 155: Psi - Frequency Plan
Diagnostics Menu Menu Item Description View DL Select to view the system download history messages. Press the UP and DOWN arrow keys to scroll through the list of downloaded messages. Press the INFO key and then UP and DOWN arrow keys to view the complete message text. -
Page 156: Psi - Tables
Chapter 4 Front Panel Operation PID of the channel's Entitlement Control Message stream. It is displayed as ---- if unavailable or not scrambled. Program Name Name of the channel. PSI - Tables This is the Tables received sub-menu. You cannot make any changes here, but you can view the PSI tables received and their settings. -
Page 157: Health Monitor
Diagnostics Menu Menu Item Description Tot Rst #, Displays the total number of times the current unit has been reset since it was manufactured. Clrbl Rst # Displays the number of times the unit has been reset since the clearable reset counter was last cleared. -
Page 159: Chapter 5 Web Gui Setup And Monitoring
Chapter 5 Web GUI Setup and Monitoring Introduction This chapter describes how to set up the Cisco D9858 Advanced Receiver Transcoder using the web GUI. In This Chapter Logging O n to the Web GUI ............138 D9858 Summary Overview .............139 ... -
Page 160: Logging On To The Web Gui
Chapter 5 Web GUI Setup and Monitoring Logging On to the Web GUI Open a web browser. Type the IP address of the D9858 Advanced Receiver Transcoder in the Address bar and press Enter. In the Username and Password fields, enter the username and password. -
Page 161: D9858 Summary Overview
D9858 Summary Overview D9858 Summary Overview Proceed as follows to access an overview of the main D9858 Advanced Receiver Transcoder settings: From the user interface of the D9858, click Summary. The Summary Dashboard page is displayed. The Summary Dashboard page displays the main settings of the D9858 Advanced Receiver Transcoder. -
Page 162: Alarms/Warnings
Chapter 5 Web GUI Setup and Monitoring You can also customize the Dashboard by clicking Add/Remove Module. The Dashboard Configuration window is displayed. The following table describes the available modules. Module Description Decoded Program Status Displays channel and service information. Audio Status Displays the current audio status information, such as the audio format and sampling frequency. - Page 163 D9858 Summary Overview To view a detailed list of alarms and warnings, click the Alarms or Warnings link and a pop-up window is displayed with a list of all the active alarms or active warnings. The following is an example: Click an alarm or warning to open the Status page for more information.
-
Page 164: D9858 Menus
Chapter 5 Web GUI Setup and Monitoring D9858 Menus The web GUI of the D9858 has menus at the top of the page. The functions for the menus are as follows: Summary From this menu, you can obtain an overview of the D9858 operation. - Page 165 D9858 Menus Set date and time formats Configure lock levels Import or export settings file Manage accounts Support From this menu, you can: View logs View contact information View and upgrade software version...
-
Page 166: D9858 Web Gui Environment
Apply Saves and applies the settings to the transcoder. Refresh Reads existing data from the D9858. If edits were made in a setup page, then unsaved changes are discarded. Reset Defaults Discards any changes made and sets data to default values. -
Page 167: Setting Up Input Information
NIT Retune Recovery (on page 10). For more information on disaster recovery, see Disaster Recovery (on page 7). From the user interface of the D9858, choose Input > Input Setup. The Input Setup page is displayed. In the RF Input Selection area, check the Use RF Input check box to activate an RF input. - Page 168 Chapter 5 Web GUI Setup and Monitoring Click the Use RF 1, Use RF 2, Use RF 3, or Use RF 4 radio button to select an RF input to activate. In the Tuning area, enter the current operating downlink frequency used by the transcoder for tuning the received digital signal in the Downlink Frequency field.
- Page 169 Setting up Input Information 14 For RF1, RF2, RF3, and/or RF4, set the higher oscillator frequency, in GHz, of the LNB in the LO2 (Ghz) column. If it is a single band oscillator, set this value to 0.0. You can enter a value in a range from 0.0 to 15.0 GHz. This value must be higher than the value for LO1.
- Page 170 Chapter 5 Web GUI Setup and Monitoring Reacquiring the Network Information Click Reacquire to re-acquire the signal using the tuning parameters from user settings. The Reacquire Network Information window is displayed. Check the Reacquire Tuning & Channel List Only check box for the decoder to tune back to the user configured input and frequency and re-acquire the PSI/SI information back to the selected channel.
- Page 171 Setting up Input Information Parameter Description Acquisition State Displays Full if the ASI and PSI tables have all been found. Otherwise, it will display Degraded if there are missing tables or None if no ASI or PSI tables have been found. Orbital Validation Status Displays the status of the last user orbital validation performed.
-
Page 172: Setting Up The Asi Input
Chapter 5 Web GUI Setup and Monitoring Setting up the ASI Input From the user interface of the D9858, choose Input > Input Setup. The Input Setup page is displayed. Click the ASI tab. Check the Use ASI Input check box to tune to the ASI input. - Page 173 Setting up Input Information Parameter Description ASI Link Indicates whether there is a transport stream link error (Error, Ok, or N/A). ASI Transport Indicates the current transport synchronization status (Error, Ok, or N/A). ASI Packet Size (bytes) Indicates the packet size (in bytes) for the ASI input (188, 204, or N/A).
-
Page 174: Setting Up Si Receive Parameters
NIT Retune Recovery (on page 10). For more information on disaster recovery, see Disaster Recovery (on page 7). From the user interface of the D9858, choose Input > SI Receive Setup. The SI Receive Setup page is displayed. - Page 175 Setting up Input Information If you choose Custom, click Configure Custom SI Recv and the Configure Custom SI Recv dialog box opens: From the Frequency Tuning Mode drop-down list, choose the mode that determines whether to use the NIT to tune to other transports, or to force the tuning to user configuration settings.
- Page 176 Chapter 5 Web GUI Setup and Monitoring 11 Click Apply. Viewing the SI Receive Status The SI Receive Status area displays all the current SI Receive settings. It also displays the source of last tuning and the last Preset Number activated. The Service List From area displays the current settings of the allowed services (BAT, NIT, SDT, PAT).
-
Page 177: Setting Up Muting Threshold Controls
Setting up Input Information Setting up Muting Threshold Controls From the user interface of the D9858, choose Input > Muting Thresholds. The Muting Thresholds page is displayed. Check the Enable Threshold Muting check box to mute the transport stream and audio in the event of an unstable, poor, or loss of signal condition. - Page 178 Chapter 5 Web GUI Setup and Monitoring The following displays the Transport Default C/N Margin Relationship: Transport Muted Transport Mute Transport C/N Margin Transport Restore Transport Restored The Audio Mute for both DVB-S C/N Margin (dB) and DVB-S2 C/N Margin (dB) sets the DVB-S and DVB-S2 Carrier to Noise margins, in dB, below the audio outputs that will be muted.
-
Page 179: Viewing The Input Status
Setting up Input Information Viewing the Input Status From the user interface of the D9858, choose Input > Input Status. The Input Status page is displayed. The Current Input Status area displays the same information shown in the Input Setup page. For more information on the parameters displayed, see Setting up the RF Input (on page 145). - Page 180 Chapter 5 Web GUI Setup and Monitoring From the user interface of the D9858, choose Input > Disaster Recovery. The Disaster Recovery Setup page is displayed. From the Enable Disaster Recovery drop-down list, choose to enable or temporarily disable the disaster recovery feature. Choose Yes (default) to enable disaster recovery.
- Page 181 Setting up Input Information Note: The PNC uplink determines whether the local disaster recovery is used, regardless of the Disaster Recovery Profile setting. For more information, see Disaster Recovery (on page 7). If the Disaster Recovery Profile is set to Local, in the Signal Lock Period field, enter the time, in seconds, the unit must wait for a signal lock before declaring that the signal is not usable and move on to the next search location in the search path.
- Page 182 Chapter 5 Web GUI Setup and Monitoring Note: The RF input in the Input Setup page must be configured to match the bandwidth of the backup parameters. Click OK. In the Search Path table, click the field to edit an enabled Backup 1, 2, or 3. The following is an example of editing the enabled Backup 1 channel for PE1: Enter a channel number and click Save.
-
Page 183: Viewing The Disaster Recovery Status
Setting up Input Information Viewing the Disaster Recovery Status From the user interface of the D9858, choose Input > Disaster Recovery Status. The Disaster Recovery Status page is displayed. The State field displays the current disaster recovery status. The table below lists the statuses. - Page 184 Chapter 5 Web GUI Setup and Monitoring State Description D/R in progress The unit has detected a loss of input and if the Configured By field displays User, it searches for a backup transport using the configured search path. The configured search path is displayed in the Backup Transport area.
- Page 185 Setting up Input Information State Description D/R in progress (Transport The disaster recovery is in progress and the unit is using the disaster recovery profile configured by the uplink. Only) The unit receives the search path with backup transport only. However, the amount of data for the backup plan service in the Disaster Recovery Table (DRT) exceeds the allowable limit from the current unit.
- Page 186 Chapter 5 Web GUI Setup and Monitoring State Description Goto RF n - OK/FAIL/No The GOTO RF command from the uplink executed successfully, failed to execute, or did not execute due to Action (where n = 1 to 4) the following: ...
- Page 187 Setting up Input Information The Signal Lock Timer, Signal Loss Timer, and Verification Timer fields display the signal lock, signal loss, and verification periods set on the Disaster Recovery Setup page if the Configured By field is set to User. If the Configured By field is set to Uplink, the disaster recovery profile settings from the PNC uplink are displayed.
-
Page 188: Setting Up The Channel Selections
From the user interface of the D9858, choose Input > Channel Selection. The Channel Selection page is displayed. The D9858 is available in a single channel (Cisco D9858 -1) or a dual channel configuration. For a dual channel transcoder, you can enter or select a channel number for up to two program entries. -
Page 189: Viewing The Channel Status
Setting up Input Information Viewing the Channel Status From the user interface of the D9858, choose Input > Channel Status. The Channel Status page is displayed. The following table describes the channel information displayed: Parameter Description PE Index Indicates the Program Entry number (PE1 or PE2). - Page 190 This status applies to PE1 and PE2 for D9858 or PE1 only for D9858-1. Cue Trigger - Indicates that only transcoders authorized by the Cue Trigger mask will tune to the scheduled program/event.
-
Page 191: Viewing The Ca Status
Setting up Input Information Viewing the CA Status From the user interface of the D9858, choose Input > CA Status. The CA Status page is displayed. The following describes the columns in the CA Status table: Status Description Index The ISE number. -
Page 192: Setting Up The Biss Mode
Chapter 5 Web GUI Setup and Monitoring Setting up the BISS Mode From the user interface of the D9858, choose Input > BISS. The BISS page is displayed. From the BISS Mode drop-down list, choose the Basic Interoperable Scrambling System for the unit (Mode 1 or Mode E). All channels assigned to the PE identified as BISS CA-controlled in the PMT will be decrypted. -
Page 193: Viewing The Psi Tables
Setting up Input Information Viewing the PSI Tables From the user interface of the D9858, choose Input > PSI Tables. The PSI Tables page is displayed. You cannot make any changes in the PSI table and can only view the PSI tables received and their settings. -
Page 194: Viewing Psi Frequency Information
Chapter 5 Web GUI Setup and Monitoring Viewing PSI Frequency Information From the user interface of the D9858, choose Input > PSI Frequency. The PSI Frequency page is displayed. You cannot make any changes in the PSI Frequency table and can only view the available frequency plans stored in the receiver. -
Page 195: Viewing The Psi Channels
Setting up Input Information Viewing the PSI Channels From the user interface of the D9858, choose Input > PSI Channel. The PSI Channel page is displayed. You cannot make any changes in the PSI Channel table and can only view the available channels and their settings. -
Page 196: Viewing The Pid Input Status
Chapter 5 Web GUI Setup and Monitoring Viewing the PID Input Status From the user interface of the D9858, choose Input > PID Input Status. The PID Input Status page is displayed. You cannot make any changes in the PID Input Status table and can only view the available channels and their settings. -
Page 197: Setting Up Audio And Video Information
Setting up Audio and Video Information Setting up the Video Parameters From the user interface of the D9858, choose Audio & Video > Video Decoding. The Video Setup page is displayed. From the Primary Video Output drop-down list, choose the format for local decoding. - Page 198 Chapter 5 Web GUI Setup and Monitoring WSS Mode Description Passthrough Passes WSS unmodified as received by the receiver. Auto:Create Creates WSS to output the correct aspect ratio when performing aspect ratio conversion. Auto:Modify If WSS is present in the input stream, it is modified to output the correct aspect ratio when performing aspect ratio conversion.
-
Page 199: Setting Up Captions
Setting up Audio and Video Information Setting up Captions From the user interface of the D9858, choose Audio & Video > Captions. The Captions page is displayed. From the Preferred Closed Caption Mode drop-down list, choose the type of closed captioning to use if there are multiple available in the stream. The default is Auto. -
Page 200: Setting Up Subtitles
Chapter 5 Web GUI Setup and Monitoring Setting up Subtitles From the user interface of the D9858, choose Audio & Video > Subtitles. The Subtitles page is displayed. From the Subtitle Control drop-down list, choose whether to display the program subtitles. The following table describes each of the available options:... - Page 201 Setting up Audio and Video Information BackGnd Option Description Shadow Applies an outline to the right side of each text character. No background box is applied to subtitles, that is, text is visible directly on top of video. Opaque Applies a black box to each text character. Semi Applies a semi-transparent box to subtitle text.
-
Page 202: Setting Up Vbi
Chapter 5 Web GUI Setup and Monitoring Setting up VBI From the user interface of the D9858, choose Audio & Video > VBI. The VBI page is displayed. Check the Enable VITS on PAL Lines 17, 18, 330, and/or 331 check boxes to enable the Vertical Interval Test Signal on PAL Lines 17, 18, 330, and/or 331. -
Page 203: Setting Up Audio Parameters
Setting up Audio and Video Information Setting up Audio Parameters From the user interface of the D9858, choose Audio & Video > Audio Decoding. The Audio Decoding page is displayed. The Audio Selection area allows you to select the audio PID for audio decoding. - Page 204 Chapter 5 Web GUI Setup and Monitoring There are two audio settings. The Audio Setup area allows you to configure the two balanced audio outputs on the rear panel (Audio 1 and Audio 2), known in the web GUI as 1 and 2, respectively. From the Audio Mode drop-down list, choose the output mixing.
- Page 205 Setting up Audio and Video Information Click List Audio PIDs to view a list of all the current audio PIDs. The following table describes the Audio PIDs information: Audio Status Description Type Displays the input audio source (AUD1 or AUD2) Detail Indicates any detail associated with the audio PID.
-
Page 206: Setting Up Cueing Parameters
Chapter 5 Web GUI Setup and Monitoring Setting up Cueing Parameters From the user interface of the D9858, choose Audio & Video > Cueing. The Cueing page is displayed. From the Cueing Mode drop-down list, choose whether cueing output should be DTMF tones or trigger pins. - Page 207 Setting up Audio and Video Information From the Relay Mode drop-down list, choose the relay mode that can be programmed to respond to an Alarm state, Warning statue, or the state of one of the eight cue trigger pins. The response is generated at the Cue Tone/Relay output on the rear panel of the receiver.
-
Page 208: Setting Up Cue Tone Test
Chapter 5 Web GUI Setup and Monitoring Setting up Cue Tone Test From the user interface of the D9858, choose Audio & Video > Cueing > Cue Tone Test. The Cue Tone Test page is displayed. In the Test Tones field, enter the three digit tone sequence. You can enter a value between 000 and 999. -
Page 209: Setting Up Cue Tone
Setting up Audio and Video Information Setting up Cue Tone From the user interface of the D9858, choose Audio & Video > Cueing > Cue Tone. The Cue Tone page is displayed. The Sequence Number lists the tone sequences. The receiver supports up to 16 tone sequences. -
Page 210: Setting Up Services
Chapter 5 Web GUI Setup and Monitoring Setting up Services From the user interface of the D9858, choose Audio & Video > Decode Enables. The Decode Enables page is displayed. Check the services to be decoded by the unit. Check or uncheck the Enable Decode Engine check box to check or uncheck all the services in the list. -
Page 211: Configuring Transport Stream Information
Configuring Transport Stream Information Configuring Transport Stream Information Configuring the ASI Output From the user interface of the D9858, choose Transport Stream > ASI Output. The ASI Output page is displayed. Note: After you make any changes, a successfully updated (session open) message appears. - Page 212 Chapter 5 Web GUI Setup and Monitoring Rate Control Description Auto The output rate follows that set by the uplink. The output rate will be the same as the input rate (including all null packets). This means the output bit rate is determined automatically based on the input source symbol rate and FEC value.
- Page 213 Configuring Transport Stream Information Output Mode Description Full DPM Control The output will be generated according to the DPM settings on the ASI Digital Program Mapping page. This is a manual control setting. Transcoding The output will be generated using the DPM MAP settings, except that the DPM Action will be set to XCode and the Descrambled mode will be set to Descrambled.
- Page 214 Chapter 5 Web GUI Setup and Monitoring Click Apply to save the resolved conflict changes. The Mode Status field indicates the current DPM configuration change by a user after changing the Output Mode. The following is a list of possible statuses: Mode Status Description Unmodified...
- Page 215 Configuring Transport Stream Information From the Enable Fixed Output drop-down list, choose Yes for the DPM to assign new values for all the output channels and PIDs according to the Fixed Output Options table when you Resynchronize All. Click Fixed Output Option to configure the ASI Fixed Output Options: From the Use Input Channel Numbers drop-down list, choose Yes to use the output channel.
- Page 216 Chapter 5 Web GUI Setup and Monitoring In the First Channel First ES PID Number field, set the first ES PID number. The default is 101. ii In the First ES PID Numbers Offset field, set the offset of the first ES PID of subsequent channel numbers.
-
Page 217: Configuring The Dpm Asi Details
P2A). The auxiliary channels automatically tune to the corresponding PE channels. If the PE is not transcoded, the auxiliary PE is dropped. Note: The D9858 is available in a single channel (D9858 -1) or a dual channel configuration. The single channel transcoder (D9858 -1) supports one Program Entry (PE1) only. - Page 218 Chapter 5 Web GUI Setup and Monitoring In the table, click the radio button of the program entry you want to edit. From the Action drop-down list, choose the DPM program action for the PE (Pass, Map, Drop, or XCode). The auxiliary programs (P1A and P2A) cannot be set to XCode.
- Page 219 Configuring Transport Stream Information 10 From the Action drop-down list, choose the action to perform on the current PID. The Drop action is always performed, but the Map option is only applied if the PE Action is Map and the Remapping Mode is Svc ID & PID in the DPM General Settings section.
- Page 220 Chapter 5 Web GUI Setup and Monitoring Map Mode Description Resynchronize Program, PMT The transcoder will synchronize the PE output according to the services and then the PIDs assigned to each PID, ES List & ES PIDs service. Resynchronize ES List The transcoder will synchronize the PE output according to the available input services only, and ignore the input to output service PID mapping.
- Page 221 Configuring Transport Stream Information Configuring DPM General Settings In the DPM General Settings area, you can configure ASI DPM transport stream settings. From the Remapping Mode drop-down list, choose the DPM mapping mode for this output. The following table describes each mode: Map Mode Description Svc ID...
- Page 222 Chapter 5 Web GUI Setup and Monitoring Svc ID Description All Ch Transmits the PSI tables for the mapped program even if the program does not exist in the input stream. All Ch is only valid if the PAT, NIT, SDT and PMT are set to Regenerate.
- Page 223 Configuring Transport Stream Information If Ctl By Table is selected as the PSI Table Output Option, click Table Options to configure the DPM table options. The DPM Table Options dialog box is displayed. Select the tables which will be passed, dropped, regenerated or passed with rate control (PwRC) from the ASI Output.
-
Page 224: Viewing The Asi Output Transport Status
Chapter 5 Web GUI Setup and Monitoring Viewing the ASI Output Transport Status From the user interface of the D9858, choose Transport Stream > Output Transport Status under ASI Output. The PID Output Status page is displayed. The Program Entry - Referenced PIDs table displays the specified PE ES PIDs information on the output. -
Page 225: Configuring The Mpegoip Output
Configuring Transport Stream Information Configuring the MPEGoIP Output From the user interface of the D9858, choose Transport Stream > Transport Handling > MPEG over IP Output. The MPEG over IP Output page is displayed. Note: Any changes made to the MOIP DPM values will automatically change the Mode Status to Edited by User. - Page 226 Chapter 5 Web GUI Setup and Monitoring Rate Control Description The output rate is specified by the User Rate field. It is determined User by the user setting regardless of the input source. Null packets are always inserted when the configured output bit rate is higher than the payload rate of the transport stream to be encapsulated.
- Page 227 Configuring Transport Stream Information Output Mode Description Transcoding The output will be generated using the DPM default settings, except that the DPM Action will be set to XCode and the Descrambled mode will be set to Descrambled. If the input is tuned to a valid channel, the PEs are automatically set to XCode.
- Page 228 Chapter 5 Web GUI Setup and Monitoring The Mode Status indicates the current DPM configuration change by a user after changing the Output Mode. The following is a list of possible statuses: Mode Status Description Unmodified No changes were made after setting a new Output Mode. Edited by User DPM changes were.
- Page 229 Configuring Transport Stream Information Setting Up the MPEG over IP Auto Synchronization Options The MoIP Auto Sync area allows you to configure the DPM without editing each output channel and PID separately. In the MPEG over IP Output page (Transport Stream > MPEG over IP Output), refer to the MoIP Auto Sync area.
- Page 230 Chapter 5 Web GUI Setup and Monitoring ii In the Channel Numbers Offset field, set the subsequent PE channel numbers. For example, if the First Channel Number is set to 100 and the Channel Numbers Offset is set to 10, then the first channel number is 100, and the second channel number is 110.
- Page 231 Configuring Transport Stream Information Setting the Maximum and Minimum Transport Packets The maximum and minimum transport packets are set in the Limits area of the MPEG over IP Output page. In the Maximum Transport Packets/Ethernet Frame field, enter the maximum number of transport packets per IP packet (1 to 7).
- Page 232 Chapter 5 Web GUI Setup and Monitoring Stream Details Description Encapsulation Selects the transport protocol to use for the output stream (UDP or RTP). Destination IP Enter the unicast (valid host IP only) or multicast destination IP address. Destination UDP This selects the destination port number (1 to 65534).
- Page 233 Configuring Transport Stream Information Advanced Settings Description If User String is selected as the Announce Title Source, enter Announce User's Title the SAP identifier (ID)/string, up to 31 characters. Click OK. Viewing Stream Details To view the stream details, click Stream Details in the MPEG over IP Output Main or Stream page.
-
Page 234: Configuring The Dpm Mpegoip Output Details
P2A). The auxiliary channels automatically tune to the corresponding PE channels. If the PE is not transcoded, the auxiliary PE is d ropped. Note: The D9858 is available in a single channel (D9858 -1) or a dual channel configuration. The single channel transcoder (D9858 -1) supports one Program Entry (PE1) only. - Page 235 Configuring Transport Stream Information Select the program entry you want to edit. If you want to configure an auxiliary PE, we highly recommend that you perform the following: From the Enable Auto Map For Auxiliary PEs drop-down list, choose Yes in the ASI Outputs page.
- Page 236 Chapter 5 Web GUI Setup and Monitoring Action Description Drop Removes the service and its associated PMT reference from the transport output. Provides the flexibility to define all the outgoing PID numbers for a PE, including those not currently on transmission. 11 In the Stream Type field, enter the stream type to map within a PE to a specified PID (0 to 255).
- Page 237 Configuring Transport Stream Information Map Mode Description Resynchronize ES List The transcoder will synchronize the PE output according to the available input services only, and ignore the input to output service PID mapping. Resynchronize ES PIDs The transcoder will synchronize the PE output according to the input PIDs only, and ignore the service assignment categories/names.
- Page 238 Chapter 5 Web GUI Setup and Monitoring Setting the DPM General Settings In the DPM General Settings area, you can configure MPEGoIP DPM transport stream settings. From the Remapping Mode drop-down list, choose the DPM map mode. The following table describes each mode: Map Mode Description Svc ID...
- Page 239 Configuring Transport Stream Information From the SI Regeneration Option drop-down list, choose the SI regeneration option that applies the PowerVu rates (consistent with the uplink). This parameter is only used if Remapping Control is set to None. The following table describes each PSI rate: PSI Rate Description...
- Page 240 Chapter 5 Web GUI Setup and Monitoring If Ctl By Table is selected as the PSI Table Output Option, click Table Options to configure the DPM table options. The DPM Table Options dialog box opens. 10 Choose the tables which will be passed, dropped, regenerat ed or passed with rate control (PwRC) from the MPEGoIP Output.
-
Page 241: Viewing The Mpeg Output Transport Status
Verify that you are receiving a valid signal and that you have set up the channels that you want to pass, drop, or map. From the user interface of the D9858, choose Transport Stream > ASI Output or MPEG over IP Output. - Page 242 Chapter 5 Web GUI Setup and Monitoring Click Apply. Choose Transport Stream > Digital Program Mapping for ASI Output or MPEG over IP Output. The ASI or MPEGoIP Digital Program Mapping page is displayed. In the DPM Program Entry Setup, click Resynchronize All. This copies the input services PIDs to the remapped output service PIDs.
-
Page 243: Setting Up Default Settings For The Transcoder
19 Click Apply. Setting up Default Settings for the Transcoder From the user interface of the D9858, choose Transport Stream > Transcoding > Transcoder Setup. The Transcoder Setup page is displayed. From the Action on Loss of Input drop-down list, choose the action that the transcoder takes when there is a loss of input signal (No Output or Black Output). - Page 244 Chapter 5 Web GUI Setup and Monitoring Setting Description Auto Leaves the input video format and resolution unchanged. For example, SD in - SD out, HD in - HD out. SD Output Down-converts from HD to SD when receiving an HD input signal. SD horizontal resolution will follow the HRes parameter set in the SD Settings area below.
- Page 245 Configuring Transport Stream Information Setting Description 1080i 1440 Full 720p 1280 720p From the Bitrate Mode drop-down list, choose the transcode channel output bitrate mode. You can select VBR or CBR. In the Rate field, enter the HD rate that sets the transcode channel output bit rate when HD MPEG-4/AVC to HD MPEG-2 transcoding is selected.
- Page 246 Chapter 5 Web GUI Setup and Monitoring Choose the transcode manual GOP format value from the User GOP drop-down list. The transcoder attempts to reuse information from the encoded bit stream to improve the video quality of the transcoded stream. Amongst others, if the incoming GOP structure is similar to that of an MPEG-2, it will reuse the frame allocations from the incoming stream as long as GOP Control is set to I Frame Sync.
- Page 247 Configuring Transport Stream Information Setting Up the Subtitle Burn-In Select the channel you want to insert subtitles to the transcoded video and click Subtitle Burn-In. The Transcoder Settings dialog box is displayed. From the Subtitle Control drop-down list, choose the control to use to display the program subtitles.
- Page 248 Chapter 5 Web GUI Setup and Monitoring b Choose Language List to select the MPEG language to display from the available list from the Language List drop-down list. The following are the available options: ara (Arabic), btk (Batak (Indonesia), ben (Bengali), bul (Bulgarian), chi (Chinese), cze (Czech), dan (Danish), dut (Dutch), eng (English), fin (Finnish), fre (French), ger (German), gre (Greek), heb (Hebrew), hin (Hindi), hun (Hungarian), ice (Icelandic), ind (Indonesian), ita...
- Page 249 Configuring Transport Stream Information Applying Inband Settings Click Apply Inband Setting to apply the uplink parameters for transcoding, such as bit rate, GOP and resolution, to the local transcoder settings for the selected program entry. This is only supported with an uplink that uses uplink transcoding controls for the user address of the selected program entry.
-
Page 250: Configuring System Settings
Chapter 5 Web GUI Setup and Monitoring Configuring System Settings Viewing the System Identification From the user interface of the D9858, choose System Settings > Identification. The Identification page is displayed. The Identification page displays the parameters associated with the D9858 system, such as serial number, model number, and user addresses. -
Page 251: Viewing Hardware Features And Base License Information
D9858 Advanced Receiver Transcoder. For example, it indicates whether the transcoder is equipped with an SDI output and the number of transcoding paths. The Feature License Summary area displays a list of software licenses for the D9858 Advanced Receiver Transcoder and whether each of the software licenses are enabled or disabled. -
Page 252: Setting Up Ip Information
Chapter 5 Web GUI Setup and Monitoring Setting up IP Information From the user interface of the D9858, choose System Settings > System > IP Settings. The IP Settings page is displayed. Note: The D9858 transcoder is a single data port unit. The Redundancy Control and Redundancy Status areas are not supported. - Page 253 Configuring System Settings Mask Subnet Mask 255.0.0.0 255.255.0.0 255.255.255.0 From the PHY Mode drop-down list, choose the speed and duplex type of the interface. Choose Auto for PHY to negotiate speed and duplex with other devices on the network, or select 10 HD (half-duplex), 10 FD (full-duplex), 100 HD, 100 FD, or 1000 FD to lock into a fixed mode.
- Page 254 (first time only). The following is an example: Add the current address as and exception and you can access the D9858 web GUI. Note: The HTTPS is displayed in the IP address to denote that it is a secure access.
- Page 255 Configuring System Settings Syslog-ng - Balabit for Linux (http://www.balabit.com/network- security/syslog-ng/opensource- logging-system) Syslog Watcher - SnmpSoft for Windows (http://www.snmpsoft.com/downloads.html) The following is an example of a syslog: Viewing the Link Status The Link Status table displays the port information, such as the status, speed, duplex, and crossover.
-
Page 256: Setting Up Ip Routing Information
Chapter 5 Web GUI Setup and Monitoring Setting up IP Routing Information From the user interface of the D9858, choose System Settings > IP Settings > IP Routing. The IP Routing page is displayed. From the RIP drop-down list, choose Enable to enable the Routing Information Protocol (RIP). - Page 257 Configuring System Settings d In the Gateway Address field, enter the IP address on the Network, used to expose the transcoder to a WAN. The following table shows the most commonly used Subnet mask values to enter for a chosen IP address mask, which will depend on the size of your network.
-
Page 258: Configuring The Mpe Settings
Chapter 5 Web GUI Setup and Monitoring Configuring the MPE Settings From the user interface of the D9858, choose System Settings > IP Settings > MPE. The MPE page is displayed. From the MPE Data Filter Mode drop-down list, choose whether the MPE data is forwarded to the network (Forward None, Forward All, or Forward Filtered). - Page 259 Configuring System Settings Click Apply. To Add a Static Multicast Filtering Click Add Row in the Static Multicast Filtering table. Type the IP Address that sets the destination for multicast MPE data, in the range from 224.0.0.0 to 239.0.0.0. Note: If MPE Data Filter Mode is set to Forward All or Forward Filtered, all the unicast MPE data will be forwarded, regardless of the Static Multicast Filtering table.
-
Page 260: Setting Up Snmp Information And Trap Destinations
Chapter 5 Web GUI Setup and Monitoring Setting up SNMP Information and Trap Destinations From the user interface of the D9858, choose System Settings > IP Settings > SNMP. The SNMP page is displayed. In the Read Only Community String and the Read Write Community String fields, enter public (default) or custom string. - Page 261 Configuring System Settings Adding a Trap Destination Click Add in the Trap Destination Configuration area. Type the Trap Destination IP Address that sets the destination for SNMP trap messages for system events (for example, alarms). Type the Community String for the trap destination (IP Address entered above). Enter public or custom string.
-
Page 262: Configuring Time/Clock Settings
Chapter 5 Web GUI Setup and Monitoring Configuring Time/Clock Settings From the user interface of the D9858, choose System Settings > Time/Clock. The Time/Clock page is displayed. From the Date Format drop-down list, choose the date format of the unit. The following formats are supported: YYYY_MM_DD, DD_MM_YYYY, MM_DD_YYYY. -
Page 263: Viewing The Alarm/Warning Status
Configuring System Settings Viewing the Alarm/Warning Status From the user interface of the D9858, choose System Settings > Status. The Status page is displayed. The Status page displays all the active event messages for the D9858 system. The Fault Summary area displays the Type of message (alarm or warning) and the number of alarms and warnings that have an active status ( Number Active). - Page 264 Chapter 5 Web GUI Setup and Monitoring Status Description Text Content of the message. Set Since Date and time of the alarm or warning. Click Clear Alarms/Warnings to clear all the messages in the Alarm/Warning Status table.
-
Page 265: Setting Up Alarms And Warnings
Configuring System Settings Setting up Alarms and Warnings To Set Up Alarms From the user interface of the D9858, choose System Settings > Setup. The Alarm Setup page is displayed. Check the Enable Alarm/Warning Front Panel Reminder check box and the highest priority alarm flashes on the LCD display for a two-second interval every 10 seconds. - Page 266 Chapter 5 Web GUI Setup and Monitoring The Alarm Setup area displays a list of the alarm/fault messages. For more information on alarm messages, refer to D9858 Transcoder Alarm Messages (on page 272). From the Enable/Disable drop-down list, choose Yes and the alarm message will be reported.
- Page 267 Configuring System Settings The Warning Setup area displays a list of the warning messages. For more information on warning messages, refer to D9858 Transcoder Alarm Messages (on page 272). Set Enable/Disable to Yes and the warning message will be reported. Set to No and the warning is disabled and the Relay and Trap settings are ignored.
-
Page 268: Viewing Alarm/Warning History
Chapter 5 Web GUI Setup and Monitoring Viewing Alarm/Warning History From the user interface of the D9858, choose System Settings > History. The Alarm History page is displayed. Note: The Alarm History page can also be accessed by click Support > Alarm History. -
Page 269: Viewing Version Information
Configuring System Settings Viewing Version Information From the user interface of the D9858, choose System Settings > Versions. The Versions page is displayed. The Current Versions area displays the currently running loaded application version and the current limit for the Field Programmable Gate Array (FPGA) version number. - Page 270 Receiver in the Service Actions page (Support > Service Actions) to manually reboot the D9858 transcoder and complete the download. This is to facilitate the typical case in which the user intends to flash the FPGA file (no auto reboot)
- Page 271 Verifying Software and FPGA Integrity Hash Digest You can generate the hash digest to verify the integrity of the software and FPGA versions running on the D9858 transcoder. The current and official Cisco D9858 transcoder hash values are published in the D9858 release note. For more information, see Cisco D9858 Advanced Receiver Transcoder Release Note.
-
Page 272: Viewing Transcoder Version Information
Enter. The hash digest for the D9858 is hash listed. The following is an example: Verify the hash digest values with the values listed in the appropriate D9858 release note. If the values do not match, contact Cisco customer support. Viewing Transcoder Version Information From the user interface of the D9858, choose System Settings >... - Page 273 The HW Board Versions table displays the revisions, option bits, and serial numbers of the main board (TMB). The Transcode - Software Versions table lists all the software packages used for the D9858 transcoder. For more information on the software versions, contact Cisco customer support.
-
Page 274: Setting Up Import/Export File Information
Chapter 5 Web GUI Setup and Monitoring Setting up Import/Export File Information From the user interface of the D9858, choose System Settings > Import/Export File. The Import/Export File page is displayed. In the Device Settings File Transfer area, you can export and/or import device settings and transport network information. -
Page 275: Setting Up Import/Export Ftp Information
Percentage of backup function completed. Setting up Import/Export FTP Information From the user interface of the D9858, choose System Settings > Import/Export FTP. The Import/Export FTP page is displayed. The Configure Offline FTP Settings File Transfer area has backup and restore controls. - Page 276 Chapter 5 Web GUI Setup and Monitoring In the FTP Server IP Address field, enter the IP address of the FTP server used to restore the backup/restore file. In the FTP User Name and FTP Password fields, enter the user name and password to access the FTP server.
-
Page 277: Managing D9858 Web Gui Accounts
(for example, User and Guest) are only allowed to modify their own passwords. To Change the User Login Passwords From the user interface of the D9858, choose System Settings > Account Management. The Account Management page is displayed. To configure the password complexity for all users: Note: This feature is only available to a user with Admin privileges only. - Page 278 It cannot contain username or reversed username. It cannot contain any of the following strings: cisco, sciatl, ocsic, Itaics, atlsci, icslta, or any string achieved by full or partial capitalization of letters. No letter is repeated more than three times in a row.
- Page 279 Configuring System Settings To Add a User Account Note: This feature is available to a user with Admin privileges only. From the Account Management page, click the Manage User Logins link. The Login Accounts page is displayed. Click Add Account Login to create a new login account. Note: You can create a maximum of 10 user accounts.
- Page 280 Note: The New Password and Confirm New Password should be identical. In the Administrator Password field, enter your Administrator password used to log on to the D9858 web GUI. From the Account Type drop-down list, choose User, Admin, or Guest. The...
- Page 281 Configuring System Settings Click Delete Account Login. The Delete Login Account dialog box is displayed. In the Administrator Password field, enter the administrator password to confirm the deletion. Click OK. The selected user account is deleted.
-
Page 282: Configuring Lock Level Settings
Chapter 5 Web GUI Setup and Monitoring Configuring Lock Level Settings From the user interface of the D9858, choose System Settings > Lock Level Settings. The Lock Level Settings page is displayed. Click Change Lock Level and the Lock Level Setting dialog box is displayed. - Page 283 Important: Proceed with caution when changing the password as this operation cannot be undone. If the password is lost or is unavailable, contact Cisco customer support. In the Lock Level Settings page, click Change Lock Level Password. The Change Lock Level Password window is displayed.
-
Page 284: Configuring Front Panel Settings
Chapter 5 Web GUI Setup and Monitoring Configuring Front Panel Settings From the user interface of the D9858, choose System Settings > Front Panel. The Front Panel page is displayed. Check the Enable Automatic Front Panel Keyboard Lock check box to enable the front panel keypad lock state. -
Page 285: Viewing Support Information
Viewing Support Information Viewing Support Information Viewing Contact Information From the user interface of the D9858, choose Support > Contact Information. The Contact Information page is displayed. The Contact Information page displays all the Cisco customer support information. -
Page 286: Viewing Diagnostic Logs
Chapter 5 Web GUI Setup and Monitoring Viewing Diagnostic Logs From the user interface of the D9858, choose Support > Diagnostic Logs. The Diagnostic Logs page is displayed. The Diagnostic Logs page displays all the system log messages with their dates and times. -
Page 287: Viewing The Usage Counters
Viewing Support Information Viewing the Usage Counters From the user interface of the D9858, choose Support > Usage Counters. The Usage Counters page is displayed. The following table describes the Usage Counter Information: Device Status Information Description Production Date & Time Displays the date and time when the receiver was manufactured. -
Page 288: Viewing Operating Fan Speeds And Board Temperatures
The Average column displays the average operating temperature. The values are displayed in Degrees Celsius. The FAN1 to FAN7 columns display the current speed of the seven fans in the D9858 transcoder. -
Page 289: Viewing Alarm/Warning History
Viewing Support Information Viewing Alarm/Warning History From the user interface of the D9858, choose System Settings > History. The Alarm History page is displayed. Note: The Alarm History page can also be accessed by click Support > Alarm History. The Alarm and Warning History page displays all the past system event messages and their set and cleared dates and times. -
Page 290: Loading A Software Version And License
Chapter 5 Web GUI Setup and Monitoring Loading a Software Version and License From the user interface of the D9858, choose Support > Service Actions. The Service Actions page is displayed. The Collect Debug Support Data Export is used by Cisco customer support only. - Page 291 FPGA file (no auto reboot) followed by an APP download (auto reboot). Note: If you are downloading an older version of the software application, we recommend that you clear the browser cache prior to logging back in to the D9858 web GUI.
-
Page 293: Chapter 6 Service And Maintenance
Service and Maintenance Overview This chapter gives information to assist you in upgrading firmware to the Cisco D9858 Advanced Receiver Transcoder. It also describes how the status of the D9858 transcoder is communicated via front panel LEDs. In This Chapter ... -
Page 294: D9858 Transcoder Alarm Messages
For more information, see About the Front Panel (on page 34). The status of the D9858 transcoder and its immediate surroundings is reported to the front panel in the form of messages and alarms. You can enable or disable messages in the Alarm/Warning settings. - Page 295 (one of ERASE, hardware WRITE, failed. BLANK_CHECK or READ_WRITE) failed on the Primary (5514) FLASH offset %d. Remedy: Contact Cisco Services. Sec Flash Fail Contact Customer Cause: FLASH The FLASH Major Service (%s fail at driver operation %s device (one of ERASE,...
- Page 296 Fail (one of ERASE, hardware WRITE, failed. BLANK_CHECK or READ_WRITE) failed on the Transcoder 2 (Sat2) FLASH offset %d. Remedy: Contact Cisco Services. Settings Lost Stored Cause: Corrupted The settings Major configuration database record database incomplete. was found while detects...
- Page 297 Status from the Timeout software fault. transcoder Remedy: Clear all during the alarms, reset the boot process. unit, and notify Cisco Services if the problem persists. Transcoder Transcode Not Cause: Possible Unable to load Major 1500 Started: FPGA hardware or...
- Page 298 Remedy: Clear all not match the alarms, reset the hardware unit, and notify version. Cisco Services if the problem persists. Transcoder Transcode Not Cause: Possible Unable to load Major 1500 Started: Decoder hardware or...
- Page 299 Status Detected received from software fault. Transcode on Remedy: Clear all boot. alarms, reset the unit, and notify Cisco Services if the problem persists. Transcoder Lost Contact With Cause: Transcoder Messages Major 1500 resetting. Possible were not Status...
- Page 300 Cause: There is a TEB in error Major 2000 transcoder board state. error. Remedy: Clear all alarms, reset the unit, and notify Cisco Services if the problem persists. TEB State TEB Application Cause: There is a Application Major 2000 transcoder board version...
- Page 301 Alarm Message Message Cause/Remedy Description Severity Type PE n: ISE Not Channel is blacked Cause: The channel Program is Minor 3000 is unauthorized for unauthorized 4000 Auth the current because at a 5000 minimum, it 6000 program. needs to 7000 Remedy: Contact match one 8000...
- Page 302 PE to have an security 4000 Auth issue. element is not 5000 Remedy: Clear 6000 present. alarms, reset unit, 7000 and notify Cisco 8000 Services if problem 9000 persists. 10000 10009-10032 PE n: ISE Not Channel Cause: Uplink LEC tables are Minor...
- Page 303 Alarm Message Message Cause/Remedy Description Severity Type PE n: Loss of Clear Fault reset – – Minor 11000 12000 Input 13000 14000 15000 16000 17000 18000 18009-18032 Digital Program PID Collision Cause: Uplink Two source Minor 19000 settings may have service PIDs Mapping changed since...
- Page 304 Status version mismatch software issue. running on Remedy: Reselect transcoder desired application, clear alarms, reset the unit, notify Cisco Services if problem persists. Transcoding Transcoding Cause: Possible Transcoder Minor 19500 Halted: Transcoder hardware or software in Status...
- Page 305 FPGA change internal system requires error. reboot. Remedy: If it is an internal system error fault, clear alarms, reset the unit, notify Cisco Services if the problem persists. Shutdown User requested Cause: User request Runnable Major 20000 requires reboot or...
- Page 306 Remedy: If it is an internal system error fault, clear alarms, reset the unit, notify Cisco Services if the problem persists. Shutdown PRODUCTION - Cause: User request Reboot after Major 20000 requires reboot or...
- Page 307 Type Shutdown osal_SetDataForAll Cause: Possible Application Major 20000 initialization Event Tasks software issue. error. Remedy: Clear alarms, reset unit, notify Cisco Services if problem persists. Shutdown aw_LoadFaultList Cause: Possible Application Major 20000 initialization Event software issue. error. Remedy: Clear alarms, reset unit,...
- Page 308 Type Shutdown dprm startup Cause: Possible Application Major 20000 initialization Event software issue. error. Remedy: Clear alarms, reset unit, notify Cisco Services if problem persists. Shutdown dprm clear startup Cause: Possible Application Major 20000 initialization Event software issue. error. Remedy: Clear...
- Page 309 Memory allocation Cause: Possible Application Major 20000 error on DB table initialization Event software issue. construction error. Remedy: Clear alarms, reset unit, notify Cisco Services if problem persists. Shutdown DB_Table_Cl::addT Cause: Possible Application Major 20000 initialization Event able() failed software issue.
- Page 310 Memory Error: Cause: Possible Application Major 20000 initialization Event AAA, Phase X software issue. error. Remedy: Clear alarms, reset unit, notify Cisco Services if problem persists. Shutdown Time Control object Cause: Possible Application Major 20000 initialization Event creation failed software issue.
- Page 311 Cause: Possible Application Major 20000 to allocate scratch initialization Event software issue. buffer error. Remedy: Clear alarms, reset unit, notify Cisco Services if problem persists. Shutdown HTTP - http_init4() Cause: Possible Application Major 20000 FAILED to allocate initialization Event software issue.
- Page 312 VBI DB allocation Cause: Possible Application Major 20000 initialization Event failed software issue. error. Remedy: Clear alarms, reset unit, notify Cisco Services if problem persists. Shutdown VBI Status DB Cause: Possible Application Major 20000 initialization Event creation failed software issue.
- Page 313 SDRAM on Major 21000 SMI bus not SMI SDRAM Issue. working. Remedy: Clear alarms, reset the unit, and notify Cisco Services if the problem persists. SMI Setup SMI SDRAM Cause: Hardware SDRAM on Major 21000 SMI bus not exhaust test failed Issue.
- Page 314 DDR RAM on Major 22000 LMI bus not exhaust test failed issue. working. Remedy: Clear alarms, reset the unit, and notify Cisco Services if the problem persists. LMI setup Clear LMI Video SDRAM – DDR RAM on Major 22000 exhaust test passed LMI bus OK.
- Page 315 Non-volatile Major 23000 storage system progress operation. operation in Remedy: Clear progress. alarms, reset the unit, and notify Cisco Services if the problem persists. Param Storage DB Populate in Cause: Standard Non-volatile Major 23000 storage system progress operation. operation in Remedy: Clear progress.
- Page 316 Cause: Hardware Non-volatile Major 23000 storage system failed issue. failed during Remedy: Clear operation. alarms, reset the unit, and notify Cisco Services if the problem persists. Param Storage Clear DB flushing – Successful Major 23000 completed NVS update. Param Storage...
- Page 317 Corruption, issue. and loss of erasing sector Remedy: sector data Clear alarms, reset the unit, and notify Cisco Services if the problem persists. Flash Storage Clear RECORD: init done – – Major 24000 LNB PS LNBPS: No Load...
- Page 318 Chapter 6 Service and Maintenance Alarm Message Message Cause/Remedy Description Severity Type LNB PS Clear LNBPS: Disabled – – Minor 25000 LNB PS Clear LNBPS: Off – – Minor 25000 Flash Sector Check setting. Cause: A sector on FLASH Minor 25500 Counted <number>...
- Page 319 PTI lockup Cause: Possible Programmabl Minor 27000 e transport Processing software issue. input module Remedy: Clear stopped alarms, reset unit, processing and notify Cisco any data Services if problem packet. persists. Transport Clear PTI running – – Minor 27000 Processing...
- Page 320 Internal Major 27500 communicatio Comms Failure failure issue. n failure. Remedy: Clear alarms, reset the unit, and notify Cisco Services if problem persists. DL:NVS Flash APP5514 Flash Cause: Possible Failed to read Major 27600 hardware or or write flash Failure Write Failed software issue.
- Page 321 Fan RPM Alarm Cause: Hardware Fan RPM out Major 29000 of normal issue. operating Remedy: Unit range. should be returned to Cisco Services as soon as possible. Clear Fans Operational – – Major 29000 FPGA Temperature over Cause: Room FPGA...
- Page 322 Chapter 6 Service and Maintenance Alarm Message Message Cause/Remedy Description Severity Type TEB ENC1 Temperature over Cause: Room TEB encoder 1 Major 32000 temperature is too temperature is Temper. Alarm Alarm threshold high, or air flow is above the safe operating blocked.
- Page 323 Alarm Message Message Cause/Remedy Description Severity Type ASI Out Status ASI Overflow. Cause: Uplink Current Minor 34000 Output Muted. settings may have transport rate changed since exceeds Reduce content. setup of the unit. configured Variable Bit rate for ASI Rate/Statmuxed output.
- Page 324 KB not accessible Cause: Hardware KB is not Major 36000 detected by issue Boot code. Remedy: Clear alarms, reset unit, and notify Cisco Services if the problem persists. Boot Host LCD not connected Cause: Hardware LCD is not Major 36000 detected by issue Boot code.
- Page 325 Boot SW Major 37000 cannot be read issue. from memory Remedy: Clear correctly. alarms, reset the unit, and notify Cisco Services if the problem persists. Boot Secondary FPGA Invalid Cause: Hardware FPGA Image Major 37000 cannot be read issue. from memory Remedy: Clear correctly.
- Page 326 No Response Cause: Hardware Secondary Major 38000 processor not Processor Start issue. responding. Remedy: Clear alarms, reset the unit, and notify Cisco Services if the problem persists. Decoder Synchronization Cause: Hardware Communicati Major 38000 on with Processor Start Failure issue.
- Page 327 39000 failure or the LOW (CRC error) issue. FPGA binary Remedy: Clear identity does alarms, reset the not match the unit, notify Cisco FPGA Services if the registers. problem persists. FPGA status FPGA Done failed Cause: Hardware FPGA setup Major...
- Page 328 Chapter 6 Service and Maintenance Alarm Message Message Cause/Remedy Description Severity Type PE <n>: CA No PowerVU Cause: The current CA System Minor 93000-93031 channel assigned to present in the System Error support this Program Entry currently is scrambled using selected an unsupported channel...
-
Page 329: Warnings
Warnings Warning Message Message Cause/Remedy Description Type Transcoding Transcoding Cause: Possible software The transcoder has 39500 Error: Decoder lost connection with Condition issue. timeout the decoder. Remedy: Clear alarms, reset the unit, and notify Cisco Services if the problem persists. - Page 330 The transcoder 39500 encoder encountered Condition Error: Encoder issue. an error. Remedy: Clear alarms, reset the unit, and notify Cisco Services if the problem persists. Transcoding Transcoding Cause: Possible software The transcoder has 39500 Error: Encoder lost connection with Condition issue.
- Page 331 – – 40000 Overflow Overflow Cleared Transport Error Continuity Count Cause: Possible uplink Transport packet 42000 continuity count Error or signal issue. jumped. Possible Remedy: Clear packet loss. warnings, reset the unit, and notify Cisco Services if the problem persists.
- Page 332 Remedy: Clear the decode engines are warnings, reset the unit, having difficulty and notify Cisco handling the data sent Services if the problem to them. persists. Transport Error Transport Error...
- Page 333 Warning Message Message Cause/Remedy Description Type Temperature Temperature Cause: Room Temperature is above 44000 over Warning temperature too high, or normal operating Warning threshold air flow is blocked. range. Remedy: Check openings on front and rear panels for blockage. Lower the room temperature or improve air flow to the device.
- Page 334 Chapter 6 Service and Maintenance Warning Message Message Cause/Remedy Description Type TEB ENC1 Temperature Cause: Room TEB encoder 1 47000 Temper. over Warning temperature is too high, temperature is above the safe operating Warning threshold or air flow is blocked. range.
- Page 335 Warning Message Message Cause/Remedy Description Type TDT timeout # TDT timed out Cause: Uplink is not Time Date Table was 50000 sending or is sending never received. intermittently. Remedy: Clear warning. If the problem persists, determine if uplink is sending the current SI information table.
- Page 336 Chapter 6 Service and Maintenance Warning Message Message Cause/Remedy Description Type SDT timeout # Clear SDT fault cleared – – 51000 52000 53000 54000 55000 56000 57000 58000 PMT timeout # PMT # timed out Cause: Uplink is not Program Mapping 59000 sending or is sending Table was never...
- Page 337 Warning Message Message Cause/Remedy Description Type PAT timeout # PAT # timed out Cause: Uplink is not Program Association 67000 sending or is sending Table was never 68000 69000 intermittently. received. 70000 Remedy: Clear warning. 71000 If the problem persists, 72000 determine if uplink is 73000...
- Page 338 Chapter 6 Service and Maintenance Warning Message Message Cause/Remedy Description Type NIT timeout # NIT is lost Cause: Uplink is not No longer receiving 75000 sending or is sending Network Information intermittently. Table. Remedy: Clear warning. If the problem persists, determine if uplink is sending the current SI information table.
- Page 339 Warning Message Message Cause/Remedy Description Type DRT timeout # DRT # is lost Cause: Uplink is not No longer receiving 77000 sending or is sending Disaster Recovery intermittently. Table. Remedy: Clear warning. If the problem persists, determine if uplink is sending the current SI information table.
- Page 340 Version Supported=AAA, currently operating software. software. You may Running=BBB Remedy: Select alternate encounter operational FPGA, software difficulties versions, reset unit, notify Cisco Services if problem persists. FPGA Code Clear FPGA code ver – – 80000 Version...
- Page 341 83000 sharing MAC address devices. on same IP segment, or possible HW issue. Remedy: Check cabling, check MAC addresses, clear warnings, reset the unit, and notify Cisco Services if the problem persists. Ethernet Port Clear Connection OK – – 81000 82000 <n>...
- Page 342 Backup ran out of 89000 memory or other Reason issue. internal error. Remedy: Clear warnings, reset the unit, notify Cisco Services if problem persists. Restore Failure FTP Failed Cause: FTP settings or FTP failed to connect 89100 the server may not be...
- Page 343 Verify that the file structure has not been corrupted. If the problem persists, notify Cisco Services. Restore Failure Bad Content Cause: Import file may Item in import file is 89100 be corrupted, or from a...
- Page 344 Non-matching Cause: Non-matching D9859 application is 94000 HW Platform. application was loaded running on the Platform APP: <D9859 | through CDT download D9854/D9858/D9824 D9854/58/24>, or FLASH platform or vice versa. HW: <TMB2 | programming. HDR/TMB/HDR Remedy: Replace the 2> non-matching application and reboot the unit.
- Page 345 Warning Message Message Cause/Remedy Description Type D/R No Search Clear Search path exists – The error is cleared 99310 before disaster Path recovery search path is generated. D/R Malformed Malformed DRT Cause: The Disaster The Disaster Recovery 99320 Recovery Table received Table received from from the uplink is uplink is invalid.
- Page 346 Remedy: Export the Loading a Software diagnostics file Version and License (Support > Service (on page 268). Action) and contact Cisco Services. D/R Invalid Clear warning cleared – The error is cleared 99340 before re-validating Tuning the tuning.
- Page 347 Warning Message Message Cause/Remedy Description Type D/R Value Out Tuning Cause: One or more The Disaster Recovery 99360 parameter out of tuning parameter values Table received from of Range range for Backup in one or more of the the uplink is invalid. (list of affected Backup Transport is DR Backup...
- Page 348 Chapter 6 Service and Maintenance Warning Message Message Cause/Remedy Description Type D/R LO Freq LO frequency Cause: The selected LO The Disaster Recovery 99380 mismatches Frequency from RF Table received from Mismatch tuning for Input settings is in the uplink is invalid. Backup (list of conflict with the affected DR...
-
Page 349: Power Supply Replacement
Power Supply Replacement Power Supply Replacement There are no user-serviceable parts in the D9858 transcoder power supply. If the power supply requires replacement, contact your service provider or Cisco for information on how to return the unit for repair. -
Page 351: Chapter 7 Customer Information
Chapter 7 Customer Information If You Have Questions If you have technical questions, call Cisco Services for assistance. Follow the menu options to speak with a service engineer. Access your company's extranet site to view or order additional technical publications. For accessing instructions, contact the representative who handles your account. -
Page 353: Appendix A Technical Specifications
Appx auto letter Appendi x A Technical Specifications Introduction This appendix contains the technical specifica tions for the Cisco D9858 Advanced Receiver Transcoder. Note: The technical specifications are subject to change without prior notice. In This Appendix L-Band Input and Process ing ............332 ... -
Page 354: L-Band Input And Processing
Appendix A Technical Specifications L-Band Input and Processing General Parameter Specification System MPEG-2/DVB Compatible DVB-S EN 300 421, EN 300 468 Demodulation DVB-S QPSK, DVB-S2 QPSK and 8PSK Number of RF Inputs 4 (only one active at a time) LNB LO Stability DVB-S and DVB-S2 Symbol Rate Stability... -
Page 355: Lnb Power And Control
L-Band Input and Processing LNB Power and Control Parameter Specification Voltage 13 V Vertical/circular right, (RF1to RF3, RF4 does not 18 V Horizontal/circular left have an LNB supply) Current 350 mA maximum LNB Alarms: No load - 6 mA Overload - 360 mA minimum DVB-S/DVB-S2 DVB-S/DVB-S2 Satellite Receiver Parameter... - Page 356 Linear Channel and IF (BW = Symbol Rate) Loop configuration C/N = Eb/No + 10 log (2 x FEC X 188/204) The D9858 transcoder displays the C/N Ratio. DVB-S2 Error Rate Performance Es/No (C/N) Ratio Mode Simulated Es/No (dB) for...
- Page 357 L-Band Input and Processing Mode Simulated Es/No (dB) for Typical Performance (dB) in FEC Frame length = 64,800 Linear Channel and IF Loop configuration QPSK 4/5 4.68 QPSK 5/6 5.18 QPSK 8/9 6.20 QPSK 9/10 6.42 8PSK 3/5 5.50 8PSK 2/3 6.62 8PSK 3/4 7.91...
-
Page 358: Video Inputs/Outputs And Processing
Appendix A Technical Specifications Video Inputs/Outputs and Processing General Parameter Specification System MPEG-2/DVB Compatible EN 300 421, EN 300 468 Video Inputs Item Specification Transcoder Channel Inputs HD Video Input Number of Channels Compression Format MPEG-4 AVC V Resolutions 1080, 720 Horizontal Video Resolutions 1080i: 1920, 1440 720p: 1280, 960... - Page 359 Video Inputs/Outputs and Processing Item Specification Bit Rate 10 to 25 Mb/s Analog SD Video Output Item Test Signal Specification CVBS1 Specification CVBS2 Number of One SD source One SD source program Channels program Video MPEG-2 4:2:0 MPEG-2 4:2:0 Decompression Output 75 Ω...
- Page 360 Appendix A Technical Specifications Item Test Signal Specification CVBS1 Specification CVBS2 Differential NTC-7 comp < 3° < 3° Phase Luminance < 5% < 5% Non-linearity Line Time NTC-7 comp ≤ 1% ≤ 1% Distortion Weighted Signal 50% Grey Field ≤ -70 dB rms ≤...
-
Page 361: Audio Inputs/Outputs
Video Inputs/Outputs and Processing Item Test Signal Specification CVBS1 Specification CVBS2 Luminance VITS17 < 5% < 5% Non-linearity Weighted Signal 50% Grey Field ≤ -70 dB rms ≤ -70 dB rms Video-to-Noise Weighted Signal Luminanace ≤ -55 dB rms ≤ -55 dB rms Video-to-Noise Ramp Return Loss... -
Page 362: Vbi Data Input/Output
Appendix A Technical Specifications VBI Data Input/Output Item Specification Transmission Format EIA-708 and EIA-608... -
Page 363: Transport Stream Outputs
Transport Stream Outputs Transport Stream Outputs ASI Output Item Specification Number of outputs 3 (mirrored) Type of connector 75 ohms BNC Output impedance 75 ohms according to EN 50083-9 Data amplitude 800 mV peak-peak ± 10% according to EN 50083- Return loss >... - Page 364 Appendix A Technical Specifications Item Specification Type of connector RJ-45, 10/100/1000BASE-T Output modes IPv4 datagrams IP Addressing Multicast, Unicast TS Input up to 5 PIDs Bit Rate up to 10 Mbps (for 1500 byte packets)
-
Page 365: Control, Management And Data Interfaces
Control, Management and Data Interfaces Control, Management and Data Interfaces Ethernet Management Interface Item Specification Number of connectors Type of connector Eight-pin RJ-45 Ethernet type 10/100/1000BASE-T Required setup IP address, default gateway and subnet mask Ethernet Data Interface Item Specification Number of connectors Type of connector Eight-pin RJ-45... -
Page 366: Contact Closure Interface
Appendix A Technical Specifications Item Specification Type of connector Terminal block Max. voltage ≤ 30 V AC, ≤ 30 V DC Max. current ≤ 1 A Contact Closure Interface Item Specification Connector type 9-pin sub-D female Minimum duration of event 250 ms, 1 frame period, for example, for 1080i/25 guaranteed to be detected Hz, 40 ms for DPI applications... -
Page 367: Power And General Specifications
Power and General Specifications Power and General Specifications General Item Specification 2 lines of 40 characters, backlit LCD. Keypad Arrow keys, 0 to 9, SELECT, MENU, INFO, ADV, MAP, APPLY and NAV keys. LEDs Green LED for Signal status. Red LED for Alarm indication. -
Page 368: Mechanical
Appendix A Technical Specifications Mechanical Item Specification Height 1 U (4.37 cm) (1.72”) Width 44.07 cm (17.35”) Depth 35.0 cm (13.78“) Weight 4.5 kg (10 lb.) Environment Item Specification Storage General The product is within the original packaging. Humidity 5 – 95% non-condensing Temperature -20 –... -
Page 369: Appendix B Default Settings And Lock Levels
Appendi x B Default Settings and Lock Levels Introduction This appendix lists the factory default settings and the lock levels for the Cisco D9858 Advanced Receiver Transcoder. In This Appendix Factory Default Settings and Lock Levels ........348 DPM Default Settings for Different Output Modes .......361... -
Page 370: Factory Default Settings And Lock Levels
Default Settings and Lock Levels Factory Default Settings and Lock Levels The D9858 Advanced Receiver Transcoder is factory configured with default settings unless you have requested a custom factory configuration. The following table lists the lock levels available for protecting your transcoder and... -
Page 371: Asi Input
Factory Default Settings and Lock Levels Parameter Default Lock Level Date Format YYY_MM_DD Time Format 24 Hr GMT Off +05.30 Reboot ASI Input Parameter Default Lock Level ASI Active Tune Mode Basic CA Ctl Select UserCfg RF Input Parameter Default Lock Level RFx Active RF1 is Act, RF2 to RF4 is No... -
Page 372: Tune Mode
Appendix B Default Settings and Lock Levels Parameter Default Lock Level Roll-off InputIQ Auto NetID LNB Power 22kHz Tune Mode Parameter Default Lock Level Service List Mode Rigorous Frequency Tuning Use BAT in Service List Use NIT in Service List Use SDT in Service List Use PAT in Service List Disaster Recovery... - Page 373 Factory Default Settings and Lock Levels Transport Parameter Default Lock Level Active Input NetId Freq (GHz) SymRate Auto Modulation DVB-S Rolloff 0.35 Note: A factory reset does not change the IP settings. Parameter Default Lock Level Port ID V4/V6 IPv4 IP Address 192.131.244.6 Mask...
-
Page 374: Trap Destinations
Appendix B Default Settings and Lock Levels Trap Destinations Parameter Default Lock Level Trap IP Address 0.0.0.0 Trap Community String public Protocols Parameter Default Lock Level Telnet Disable Disable HTTP Enable SNMP Disable Fwd All Syslog Disable Syslog Server 0.0.0.0 Port Video Parameter... -
Page 375: Audio
Factory Default Settings and Lock Levels Audio Parameter Default Lock Level Stereo/Mono Stereo AC3 Compression RF Mode Left (dB) Right (dB) Select Language By PMT Order Language List PMT Source AUD1 for Audio 1 and AUD2 for Audio 2 Entry Captions Parameter Default... -
Page 376: Decode
Appendix B Default Settings and Lock Levels Parameter Default Lock Level PMT Order First Entry Imitext Position Standard ForeGnd Auto BackGnd Auto Decode Parameter Default Lock Level Decoder Enabled Note: By default, all the decode services are enabled. Cueing Parameter Default Lock Level Cueing Mode... -
Page 377: Ts Out - Asi
Factory Default Settings and Lock Levels TS Out - ASI Parameter Default Lock Level Name Rate Control User User Rate 68.5 Mbps Output Mode No Output Descramble Mode Descrambled Insert Null Packet Auto Map Auto Map Aux TS Out - MOIP Parameter Default Lock Level... -
Page 378: Dpm - Asi
UDPPort 49152 SrcPort Send SAP None SAP Address 224.2.127.25 SAP Port 9875 SAP ID User String SAP User Str Cisco Default SAP1 DPM - ASI Parameter Default Lock Level Drop StType OutCh 8191 OType UNKN Map Mode SVC ID & PID... -
Page 379: Transcode Menu
Factory Default Settings and Lock Levels Parameter Default Lock Level Pass TSDT Pass Pass NITO Pass Pass SDTO Pass Pass Pass Pass Pass Pass Pass Pass Pass Pass Pass Pass Transcode Menu Parameter Default Lock Level Video Mode HD Output HD HRes Full SD HRes... -
Page 380: Inband
Appendix B Default Settings and Lock Levels Parameter Default Lock Level SD Aspect Ratio 16:9 SD AR Conv None CC Pkt1 CEA 708 CC Pkt2 None LOI Action Black Output Inband Parameter Default Lock Level Apply Inband Options Parameter Default Lock Level Output Fixed Output... -
Page 381: Alarm/Warning
Factory Default Settings and Lock Levels Parameter Default Lock Level DATA Alarm/Warning Parameter Default Lock Level FP Alarm Reminder Enable Alarm Vid Cutoff Disable Noise Cutoff Parameter Default Lock Level Trnsprt (DVB-S/DVB-S2 Marg) Cutoff Trnsprt (DVB-S/DVB-S2 Marg) Restore Audio (DVB-S/DVB-S2 Marg) Cutoff Audio (DVB-S/DVB-S2 Marg) Restore Muting Control Enable... -
Page 382: Import/Export (Web Gui Only)
Appendix B Default Settings and Lock Levels Import/Export (Web GUI only) Parameter Default Lock Level Settings File Name file name FTP Server IP Address 192.168.0.100 FTP Port Number FTP User Name user FTP Password USER... -
Page 383: Dpm Default Settings For Different Output Modes
DPM Default Settings for Different Output Modes DPM Default Settings for Different Output Modes The DPM parameters are preset to default settings for each DPM Output Mode. The default settings for particular Output modes have been preset to optimize the output when either PID mapping or transcoding is required. - Page 384 Appendix B Default Settings and Lock Levels Output No Output Passthrough Service MAP Svc Full DPM Transcoding Mode Chans Only Passthrough Chans Only Control If Descramble Actual Value Regen Descramble Descramble Mode is set to Descramble Displayed Mode is set Mode is set Descrambled, Mode is set...
- Page 385 DPM Default Settings for Different Output Modes Output No Output Passthrough Service MAP Svc Full DPM Transcoding Mode Chans Only Passthrough Chans Only Control PwRC PwRC PwRC Actual Value Drop Descramble Displayed Mode is set Descrambled, it is set to PwRC;...
-
Page 387: Appendix C Compliance
Appx auto letter Appendi x C Compliance Introduction This appendix contains the compliance information for the Cisco D9858 Advanced Receiver Transcoder. In This Appendix Applicable Standa rds and Notices ..........366 Declaration of Conform ity ...............368... -
Page 388: Applicable Standards And Notices
Compliance Applicable Standards and Notices Safety The D9858 Advanced Receiver Transcoder has been approved for safety by the Standards Council of Canada and the OHSA (NRTL) Accredited Testing Laboratory to the following standards: CAN/CSA 60065-03 + Am1 +Am2 - Audio, Video and Similar Electronic Apparatus - Safety Requirements. -
Page 389: Fcc Notices
Applicable Standards and Notices FCC Notices This equipment has been tested and found to comply with the limits for a Class B digital device pursuant to Part 15 of the FCC rules. These limits are designed to provide reasonable protection against harmful interference when operated in a residential installation. -
Page 390: Declaration Of Conformity
Appendix C Compliance Declaration of Conformity... -
Page 391: Index
Connecting an External Alarm System • 27 Analog SD Video Output, CVBS1 and CVBS2 for monitoring • 339 Connecting the AC Power to the D9858 Applicable Standards and Notices • 366 T ranscoder • 22 Connecting the ASI Input • 25 Applying Inband Settings •... - Page 392 MOIP • 94 Ethernet Management Interface • 343 MOIP Streams • 97, 355 Mounting the D9858 T ranscoder to a Rack • 21 MPE Output • 5, 341 Factory Default Settings and Lock Levels • 348 MPEGoIP Output • 341 Features •...
- Page 393 Index Program Status • 51 Alarm/Warning • 120 Protocol Control Settings • 231 DR • 123 Protocols • 74, 352 IP • 69 PSI - Channels • 133 Noise Cutoffs • 121 PSI - Frequency Plan • 133 Shortcuts • 139 PSI - T ables •...
- Page 394 Index Video Inputs/Outputs and Processing • 336 Video Outputs • 336 Viewing Contact Information • 263 Viewing Stream Details • 211 Viewing Support Information • 263 Viewing the ASI Output Status • 194 Viewing the ASI Output T ransport Status • 202 Viewing the Disaster Recovery Status •...
- Page 396 Fax: 408 527-0883 This document includes various trademarks of Cisco Systems, Inc. Please see the Notices section of this document for a list of the Cisco Systems, Inc. trademarks used in this document. Product and service availability are subject to change without notice.