Toshiba e-STUDIO2008A Service Manual
Multifunctional digital systems
Hide thumbs
Also See for e-STUDIO2008A:
- Printing manual (174 pages) ,
- Software installation manual (164 pages) ,
- Copying manual (132 pages)

Related Manuals for Toshiba e-STUDIO2008A


Summary of Contents for Toshiba e-STUDIO2008A
- Page 1 SERVICE MANUAL MULTIFUNCTIONAL DIGITAL SYSTEMS e-STUDIO2008A/2508A/3008A/ 3508A/4508A/5008A Model: DP-2008A/2508A/3008A/3508A/4508A/5008A Publish Date: December 2015 File No. SME15001000 R150521Q3200-TTEC VerB_2015-10...
- Page 2 Molykote is a registered trademark of Dow Corning Corporation. • FLOIL is a registered trademark of Kanto Kasei Ltd. CORPORATION. • TopAccess is a trademark of Toshiba Tec Corporation. • iCLASS is a trademark of HID Corporation. • MIFARE is a trademark of Royal Philips Electronics.
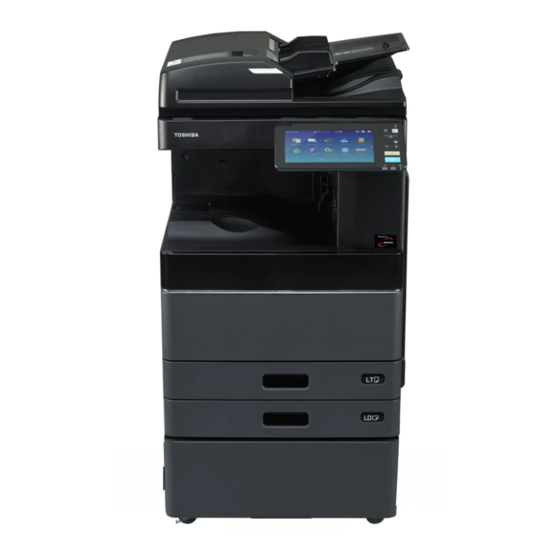
- Page 3 GENERAL PRECAUTIONS REGARDING THE SERVICE FOR THIS EQUIPMENT The installation and service shall be done by a qualified service technician. 1. Transportation/Installation When transporting/installing the equipment, employ two persons and be sure to hold the positions as shown in the figure. The equipment is quite heavy, and weighs approximately 61 kg (134.51 lb.), therefore pay full attention when handling it.
- Page 4 Be sure to handle/install them properly. If these parts are short-circuited and their functions become ineffective, they may result in fatal accidents such as explosion or burnout. Do not allow a short-circuit and do not use the parts not recommended by Toshiba TEC Corporation.
- Page 5 5. Cautionary Labels During servicing, be sure to check the rating plate and cautionary labels such as “Unplug the power cable during service”, “CAUTION. HOT”, “CAUTION. HIGH VOLTAGE”, “CAUTION. LASER BEAM”, etc. to see if there is any dirt on their surface and if they are properly stuck to the equipment.
- Page 6 Precautions for Transporting Equipment Once Unpacked 1.1 General Description It is recommended to follow the procedure below when you transport equipment that has already been unpacked but has not been packed again. Note that the following procedure cannot guarantee the operation of the transported equipment.
- Page 8 ALLGEMEINE SICHERHEITSMASSNAHMEN IN BEZUG AUF DIE WARTUNG FÜR DIESES GERÄT Die Installation und die Wartung sind von einem qualifizierten Service- Techniker durchzuführen. 1. Transport/Installation Zum Transportieren/Installieren des Gerätes werden 2 Personen benötigt. Nur an den in der Abbildung gezeigten Stellen tragen. Das Gerät ist sehr schwer und wiegt etwa 62.5 kg;...
- Page 9 2. Allgemeine Sicherheitsmassnahmen in bezug auf die Wartung Während der Wartung das Gerät ausschalten und das Netzkabel herausziehen (ausser Wartung, die bei einem eingeschalteten Gerät, durchgeführt werden muss). Das Netzkabel herausziehen und den Bereich um die Steckerpole und die Steckdose die Umgebung in der Nähe von den Steckerzacken und der Steckdose wenigstens einmal im Jahr reinigen.
- Page 10 Schäden, wie einer Explosion oder einer Explosion oder einem Abbrand, führen. Kurzschlüsse sind zu vermeiden, und es sind ausschließlich Teile zu verwenden, die von der Toshiba TEC Corporation empfohlen sind. 5. Warnetiketten Im Rahmen der Wartung unbedingt das Leistungsschild und die Etiketten mit Warnhinweisen überprüfen [z.
- Page 11 6. Entsorgung des Geräts, der Verbrauchs- und Verpackungsmaterialien, alter Akkus und IC- RAMs In Bezug auf die Entsorgung und Wiederverwertung des Geräts, der Verbrauchs- und Verpackungsmaterialien, alter Akkus und IC-RAMs, einschließlich Lithiumakkus, sind die einschlägigen nationalen oder regionalen Vorschriften zu befolgen. Caution: Dispose of used batteries and IC-RAMs including lithium batteries according to this manual.
- Page 12 • Laseremissionseinheit Diese Einheit besteht aus der Laserdiode, dem Fokussierungsobjektiv, der Blende und dem Zylinderobjektiv. Laserdiode Diese Laserdiode zeichnet sich durch eine geringe Regeldifferenz, eine kleine Laservariation und einen niedrigen Schwellenstrom aus. Die Blende der Laseremissionseinheit ist unter dem Fokussierobjektiv angeordnet, um die Form der Laserstrahlen in der primären und sekundären Scanrichtung festzulegen.
- Page 13 General Descriptions ..................3-39 3.10.2 Composition ..................... 3-40 3.10.3 Functions ......................3-41 3.10.4 Description of Operation .................. 3-43 3.11 DRIVE SYSTEM ......................3-48 3.11.1 General Description ..................3-48 3.11.2 Functions ......................3-49 © 2015 TOSHIBA TEC CORPORATION All rights reserved e-STUDIO2008A/2508A/3008A/3508A/4508A/5008A CONTENTS...
- Page 14 4.2.3 USB harness/signal harness ................4-11 4.2.4 KEY board/button .................... 4-13 4.2.5 DSP board ....................... 4-16 Scanner Unit ........................4-18 4.3.1 Original glass ....................4-18 4.3.2 Lens cover ....................... 4-18 e-STUDIO2008A/2508A/3008A/3508A/4508A/5008A © 2015 TOSHIBA TEC CORPORATION All rights reserved CONTENTS...
- Page 15 Paper feed drive gear ..................4-82 Driving section......................... 4-85 4.6.1 Main motor (M8) <35ppm/45ppm/50ppm> ............4-85 4.6.2 Main motor (M8) <20ppm/25ppm/30ppm> ............4-85 Drum Related Section ..................... 4-87 4.7.1 Process unit ..................... 4-87 © 2015 TOSHIBA TEC CORPORATION All rights reserved e-STUDIO2008A/2508A/3008A/3508A/4508A/5008A CONTENTS...
- Page 16 Exit motor (M10) .................... 4-142 4.11.6 Reverse motor (M13) <35ppm/45ppm/50ppm>..........4-144 4.11.7 Reverse gate solenoid (SOL1) <35ppm/45ppm/50ppm> ......4-145 4.11.8 Upper exit roller <35ppm/45ppm/50ppm> ............. 4-146 4.11.9 Reverse roller <35ppm/45ppm/50ppm> ............4-148 e-STUDIO2008A/2508A/3008A/3508A/4508A/5008A © 2015 TOSHIBA TEC CORPORATION All rights reserved CONTENTS...
- Page 17 [12 FAX LIST PRINT MODE]................5-35 5.11.3 [13 FAX FUNCTION MODE] ................5-36 5.11.4 [19 RAM EDIT MODE] ..................5-36 5.12 [01 Control panel check mode] ..................5-37 5.12.1 Screen transition....................5-37 © 2015 TOSHIBA TEC CORPORATION All rights reserved e-STUDIO2008A/2508A/3008A/3508A/4508A/5008A CONTENTS...
- Page 18 Image Quality Adjustment (Scanning Function).............. 6-33 6.6.1 Gamma balance adjustment................6-33 6.6.2 Density adjustment ..................6-34 6.6.3 Judgment threshold for ACS................6-34 6.6.4 Sharpness adjustment ..................6-35 6.6.5 Background adjustment ................... 6-35 e-STUDIO2008A/2508A/3008A/3508A/4508A/5008A © 2015 TOSHIBA TEC CORPORATION All rights reserved CONTENTS...
- Page 19 General Descriptions for PM Procedure ................7-4 PM Support Mode (6S) ..................... 7-5 7.4.1 General description.................... 7-5 7.4.2 Operational flow and operational screen ............7-5 7.4.3 Work flow of parts replacement ............... 7-10 © 2015 TOSHIBA TEC CORPORATION All rights reserved e-STUDIO2008A/2508A/3008A/3508A/4508A/5008A CONTENTS...
- Page 20 Maintenance error.................... 8-54 8.2.8 Network error ....................8-59 8.2.9 Notification ....................... 8-63 8.2.10 Error history ..................... 8-67 Diagnosis and Prescription for Each Error Code ............8-69 8.3.1 Check item....................... 8-69 e-STUDIO2008A/2508A/3008A/3508A/4508A/5008A © 2015 TOSHIBA TEC CORPORATION All rights reserved CONTENTS...
- Page 21 “Authentication Failed” is displayed ............... 8-344 8.5.3 Hard disk full error “H04” is displayed............8-344 8.5.4 Error code “M00” is displayed while updating firmware ......... 8-344 8.5.5 "COVER OPEN" continues to be displayed........... 8-345 © 2015 TOSHIBA TEC CORPORATION All rights reserved e-STUDIO2008A/2508A/3008A/3508A/4508A/5008A CONTENTS...
- Page 22 11.6 Confirmation of the updated data.................. 11-27 12. BACKUP FUNCTION....................12-1 12.1 Data Cloning ........................12-1 12.1.1 General description..................12-1 12.1.2 Precautions...................... 12-1 12.1.3 Backup files ..................... 12-2 12.1.4 Cloning procedure ................... 12-2 e-STUDIO2008A/2508A/3008A/3508A/4508A/5008A © 2015 TOSHIBA TEC CORPORATION All rights reserved CONTENTS...
- Page 23 14.1 AC Wire Harness ......................14-1 14.2 DC Wire Harness (20ppm/25ppm/30ppm)..............14-2 14.3 Electric Parts Layout (20ppm/25ppm/30ppm)..............14-3 14.4 DC Wire Harness (35ppm/45ppm/50ppm)..............14-4 14.5 Electric Parts Layout (35ppm/45ppm/50ppm)..............14-5 © 2015 TOSHIBA TEC CORPORATION All rights reserved e-STUDIO2008A/2508A/3008A/3508A/4508A/5008A CONTENTS...
- Page 24 © 2015 TOSHIBA TEC CORPORATION All rights reserved CONTENTS...
- Page 25 • An optional fax is provided as a board instead of a unit for current models. The same board is used for either Line 1 or Line 2. © 2015 TOSHIBA TEC CORPORATION All rights reserved e-STUDIO2008A/2508A/3008A/3508A/4508A/5008A FEATURES 1 - 1...
- Page 26 © 2015 TOSHIBA TEC CORPORATION All rights reserved FEATURES 1 - 2...
- Page 27 A3, A4, A4-R, A5-R, B4, B5, B5-R, FOLIO, 8K, 16K, 16K-R, (optional) LD, LG, LT, LT-R, ST-R, COMPUTER, 13"LG, 8.5" x 8.5", Envelope (DL, COM10, Monarch, CHO-3, YOU-4) © 2015 TOSHIBA TEC CORPORATION All rights reserved e-STUDIO2008A/2508A/3008A/3508A/4508A/5008A SPECIFICATIONS/ACCESSORIES/OPTIONS/SUPPLIES 2 - 1...
- Page 28 20ppm/25ppm/30ppm: Approx. 14 sec. <Stand-alone, temperature: 20 C> 35ppm/45ppm/50ppm: Approx. 16 sec. <Stand-alone, temperature: 20 C> *Varies depending on the settings, use conditions, and quality maintenance behavior such as toner refill. e-STUDIO2008A/2508A/3008A/3508A/4508A/5008A © 2015 TOSHIBA TEC CORPORATION All rights reserved SPECIFICATIONS/ACCESSORIES/OPTIONS/SUPPLIES 2 - 2...
- Page 29 35ppm/45ppm/50ppm: Approx. 61 kg (134.48 lb.) Dimensions of the equipment W 585 x D 597 x H 787 (mm) * When the tilt angle of the control panel is 90 degrees. © 2015 TOSHIBA TEC CORPORATION All rights reserved e-STUDIO2008A/2508A/3008A/3508A/4508A/5008A SPECIFICATIONS/ACCESSORIES/OPTIONS/SUPPLIES 2 - 3...
- Page 30 Bypass tray: within ± 2.0 sheets • Others: within ± 1.0 sheet * "Wait" may be displayed or the print speed may decrease depending on the usage environment or print settings. e-STUDIO2008A/2508A/3008A/3508A/4508A/5008A © 2015 TOSHIBA TEC CORPORATION All rights reserved SPECIFICATIONS/ACCESSORIES/OPTIONS/SUPPLIES 2 - 4...
- Page 31 A4, LT, B5, A5-R, 35.3 35.3 25.4 35.3 35.3 ST-R, 8.5", SQ A4-R, B5-R, LT-R 25.4 B4, LG, FOLIO, 29.5 29.5 25.4 29.5 COMPUTER A3, LD 25.4 25.4 25.4 25.4 © 2015 TOSHIBA TEC CORPORATION All rights reserved e-STUDIO2008A/2508A/3008A/3508A/4508A/5008A SPECIFICATIONS/ACCESSORIES/OPTIONS/SUPPLIES 2 - 5...
- Page 32 A4, LT, B5, A5-R, 25.3 25.3 25.3 25.3 ST-R, 8.5", SQ A4-R, B5-R, LT-R 17.7 17.7 17.7 B4, LG, FOLIO, 15.7 15.7 15.7 COMPUTER A3, LD e-STUDIO2008A/2508A/3008A/3508A/4508A/5008A © 2015 TOSHIBA TEC CORPORATION All rights reserved SPECIFICATIONS/ACCESSORIES/OPTIONS/SUPPLIES 2 - 6...
- Page 33 Paper supply Drawer Size not Paper size (A4/LT only) Size specified specified A4, LT, B5, A5-R, ST-R, 8.5", SQ A4-R, B5-R, LT-R B4, LG, FOLIO, COMPUTER A3, LD © 2015 TOSHIBA TEC CORPORATION All rights reserved e-STUDIO2008A/2508A/3008A/3508A/4508A/5008A SPECIFICATIONS/ACCESSORIES/OPTIONS/SUPPLIES 2 - 7...
- Page 34 Paper supply Drawer Size not Paper size (A4/LT only) Size specified specified A4, LT, B5, A5-R, ST-R, 8.5", SQ A4-R, B5-R, LT-R B4, LG, FOLIO, COMPUTER A3, LD e-STUDIO2008A/2508A/3008A/3508A/4508A/5008A © 2015 TOSHIBA TEC CORPORATION All rights reserved SPECIFICATIONS/ACCESSORIES/OPTIONS/SUPPLIES 2 - 8...
- Page 35 Paper supply Drawer Size not Paper size (A4/LT only) Size specified specified A4, LT, B5, A5-R, ST-R, 8.5", SQ A4-R, B5-R, LT-R B4, LG, FOLIO, COMPUTER A3, LD © 2015 TOSHIBA TEC CORPORATION All rights reserved e-STUDIO2008A/2508A/3008A/3508A/4508A/5008A SPECIFICATIONS/ACCESSORIES/OPTIONS/SUPPLIES 2 - 9...
- Page 36 1. Total length of wrinkles: Less than 100 mm (50 mm or shorter length per 1 wrinkle) 2. 3 or less wrinkles 25ppm/30ppm/35ppm/45ppm/50ppm Paper supply 2nd drawer Paper size DL, COM10, Monarch, CHO-3, YOU-4h e-STUDIO2008A/2508A/3008A/3508A/4508A/5008A © 2015 TOSHIBA TEC CORPORATION All rights reserved SPECIFICATIONS/ACCESSORIES/OPTIONS/SUPPLIES 2 - 10...
- Page 37 * Setting: when in the Text/Photo mode with Automatic density and APS/AMS set to OFF, or when in the sort mode with paper fed from the 1st drawer. * The finisher, saddle stitch finisher, and hole punch unit not installed. © 2015 TOSHIBA TEC CORPORATION All rights reserved e-STUDIO2008A/2508A/3008A/3508A/4508A/5008A SPECIFICATIONS/ACCESSORIES/OPTIONS/SUPPLIES...
- Page 38 Black, Gray scale, Color and ACS (Auto color Selection) File formats JPEG, Multi/Single page TIFF, Multi/Single page PDF, Slim PDF, Multi/Single page XPS * When scanning single-sided A4/LT landscape originals using RADF/DSDF e-STUDIO2008A/2508A/3008A/3508A/4508A/5008A © 2015 TOSHIBA TEC CORPORATION All rights reserved SPECIFICATIONS/ACCESSORIES/OPTIONS/SUPPLIES 2 - 12...
- Page 39 Message size Max. 100MB limitation Message Page by page division [ 2 ] Internet FAX receiving Format of receive attachment TIFF-FX (Profile S, F, J) © 2015 TOSHIBA TEC CORPORATION All rights reserved e-STUDIO2008A/2508A/3008A/3508A/4508A/5008A SPECIFICATIONS/ACCESSORIES/OPTIONS/SUPPLIES 2 - 13...
- Page 40 Send to FTP Single TIFF, Multi-TIFF, Single PDF, Multi PDF Send to E- Single TIFF, Multi-TIFF, Single PDF, Multi PDF mail Send to I-Fax TIFF-S Send to PSTN-FAX e-STUDIO2008A/2508A/3008A/3508A/4508A/5008A © 2015 TOSHIBA TEC CORPORATION All rights reserved SPECIFICATIONS/ACCESSORIES/OPTIONS/SUPPLIES 2 - 14...
- Page 41 Saudi Arabia, Asia CND: China CNS: China KRD: Korea ARD: Argentina JPD: Japan Notes: Check that the above accessories are correctly co-packed at the time of unpacking. © 2015 TOSHIBA TEC CORPORATION All rights reserved e-STUDIO2008A/2508A/3008A/3508A/4508A/5008A SPECIFICATIONS/ACCESSORIES/OPTIONS/SUPPLIES 2 - 15...
- Page 42 System List Fig. 2-1 e-STUDIO2008A/2508A/3008A/3508A/4508A/5008A © 2015 TOSHIBA TEC CORPORATION All rights reserved SPECIFICATIONS/ACCESSORIES/OPTIONS/SUPPLIES 2 - 16...
- Page 43 Fig. 2-2 © 2015 TOSHIBA TEC CORPORATION All rights reserved e-STUDIO2008A/2508A/3008A/3508A/4508A/5008A SPECIFICATIONS/ACCESSORIES/OPTIONS/SUPPLIES 2 - 17...
- Page 44 The finisher (MJ-1042/C) is necessary for installation of the hole punch unit (MJ-6011E/N/F/S/ E-C). • The finisher (MJ-1109/C or MJ-1110/C) is necessary for installation of the hole punch unit (MJ-6105/E/N/F/S/E-C). e-STUDIO2008A/2508A/3008A/3508A/4508A/5008A © 2015 TOSHIBA TEC CORPORATION All rights reserved SPECIFICATIONS/ACCESSORIES/OPTIONS/SUPPLIES 2 - 18...
- Page 45 Unicode Font Enabler GS-1080 OCR Enabler (1 licence) GS-1085 OCR Enabler (5 licences) GS-1090 Multi Station Print Enabler (1 licence) GS-1095 Multi Station Print Enabler (5 licences) © 2015 TOSHIBA TEC CORPORATION All rights reserved e-STUDIO2008A/2508A/3008A/3508A/4508A/5008A SPECIFICATIONS/ACCESSORIES/OPTIONS/SUPPLIES 2 - 19...
- Page 46 Toner cartridge PS-ZT3008U(1) (for North America, Central and South America) PS-ZT3008E(1) (for Europe) PS-ZT3008C(1) / PS-ZT3008C(8) / PS-ZT3008CM(1) / PS-ZT3008CM(8) (for China) PS-ZT3008P(1) (for Asia) PS-ZT5070T(1) (for Taiwan) e-STUDIO2008A/2508A/3008A/3508A/4508A/5008A © 2015 TOSHIBA TEC CORPORATION All rights reserved SPECIFICATIONS/ACCESSORIES/OPTIONS/SUPPLIES 2 - 20...
- Page 47 OUTLINE OF THE MACHINE Sectional View 20ppm/25ppm/30ppm Fig. 3-1 © 2015 TOSHIBA TEC CORPORATION All rights reserved e-STUDIO2008A/2508A/3008A/3508A/4508A/5008A OUTLINE OF THE MACHINE 3 - 1...
- Page 48 A14/A15 20ppm/25ppm/30ppm Fig. 3-2 e-STUDIO2008A/2508A/3008A/3508A/4508A/5008A © 2015 TOSHIBA TEC CORPORATION All rights reserved OUTLINE OF THE MACHINE 3 - 2...
- Page 49 Paper size detection board Toner cartridge Bypass feed clutch Main power switch 1st transport sensor ADU interlock switch Registration sensor Switching regulator cooling fan Registration roller (rubber) © 2015 TOSHIBA TEC CORPORATION All rights reserved e-STUDIO2008A/2508A/3008A/3508A/4508A/5008A OUTLINE OF THE MACHINE 3 - 3...
- Page 50 Electric Parts Layout 1. Scanner unit, control panel THMO4 Fig. 3-3 e-STUDIO2008A/2508A/3008A/3508A/4508A/5008A © 2015 TOSHIBA TEC CORPORATION All rights reserved OUTLINE OF THE MACHINE 3 - 4...
- Page 51 2. Power supply, developer unit THMO3 HVPS THMS4 LVPS Fig. 3-4 © 2015 TOSHIBA TEC CORPORATION All rights reserved e-STUDIO2008A/2508A/3008A/3508A/4508A/5008A OUTLINE OF THE MACHINE 3 - 5...
- Page 52 3. Laser unit, fuser unit, toner cartridge LAMP1, LAMP2, LAMP3 THMS2 THMS3 THMO1 THMO2 CTIF THMS1 CTRG Fig. 3-5 e-STUDIO2008A/2508A/3008A/3508A/4508A/5008A © 2015 TOSHIBA TEC CORPORATION All rights reserved OUTLINE OF THE MACHINE 3 - 6...
- Page 53 4. Drive unit 20ppm/25ppm/30ppm Fig. 3-6 © 2015 TOSHIBA TEC CORPORATION All rights reserved e-STUDIO2008A/2508A/3008A/3508A/4508A/5008A OUTLINE OF THE MACHINE 3 - 7...
- Page 54 5. Automatic duplexing unit, transfer unit, exit unit 20ppm/25ppm/30ppm CLT1 Fig. 3-7 e-STUDIO2008A/2508A/3008A/3508A/4508A/5008A © 2015 TOSHIBA TEC CORPORATION All rights reserved OUTLINE OF THE MACHINE 3 - 8...
- Page 55 35ppm/45ppm/50ppm SOL1 CLT1 Fig. 3-8 © 2015 TOSHIBA TEC CORPORATION All rights reserved e-STUDIO2008A/2508A/3008A/3508A/4508A/5008A OUTLINE OF THE MACHINE 3 - 9...
- Page 56 6. Bypass feed unit CLT2 SW10 Fig. 3-9 e-STUDIO2008A/2508A/3008A/3508A/4508A/5008A © 2015 TOSHIBA TEC CORPORATION All rights reserved OUTLINE OF THE MACHINE 3 - 10...
- Page 57 7. Drawer unit CLT5 CLT6 CLT3 CLT4 SW11 SW12 SW8 Fig. 3-10 © 2015 TOSHIBA TEC CORPORATION All rights reserved e-STUDIO2008A/2508A/3008A/3508A/4508A/5008A OUTLINE OF THE MACHINE 3 - 11...
- Page 58 Fig. 3-5 34-2 Exit sensor the exit section ADU-TR1-SNR Detecting the transporting paper in Fig. 3-7 35-15 ADU exit sensor automatic duplexing unit Fig. 3-8 e-STUDIO2008A/2508A/3008A/3508A/4508A/5008A © 2015 TOSHIBA TEC CORPORATION All rights reserved OUTLINE OF THE MACHINE 3 - 12...
- Page 59 ADU interlock switch the switching regulator (voltagegenerating circuit interlocked with these covers) according to the opening/closing status of the automatic duplexing unit (Cover open: Shut off) © 2015 TOSHIBA TEC CORPORATION All rights reserved e-STUDIO2008A/2508A/3008A/3508A/4508A/5008A OUTLINE OF THE MACHINE 3 - 13...
- Page 60 Solenoids Symbol Name Function Remarks SOL1 REV-SOL Changing the paper transport route at 34-28 Fig. 3-8 Reverse gate solenoid the exit section 35ppm/45ppm/50ppm only e-STUDIO2008A/2508A/3008A/3508A/4508A/5008A © 2015 TOSHIBA TEC CORPORATION All rights reserved OUTLINE OF THE MACHINE 3 - 14...
- Page 61 31-20 Fig. 3-5 Side heater lamp fuser roller LAMP3 LAMP-TRIPLE Sub heating of the fuser roller 31-21 Fig. 3-5 Sub heater lamp 35ppm/45ppm/50ppm only © 2015 TOSHIBA TEC CORPORATION All rights reserved e-STUDIO2008A/2508A/3008A/3508A/4508A/5008A OUTLINE OF THE MACHINE 3 - 15...
- Page 62 Fig. 3-6 Hard disk data LVPS PS-ACC Generating DC voltage and supplying it 10-7 Fig. 3-4 Switching regulator to each section of the equipment e-STUDIO2008A/2508A/3008A/3508A/4508A/5008A © 2015 TOSHIBA TEC CORPORATION All rights reserved OUTLINE OF THE MACHINE 3 - 16...
- Page 63 Transfer assist bias: Improves transfer efficiency. © 2015 TOSHIBA TEC CORPORATION All rights reserved e-STUDIO2008A/2508A/3008A/3508A/4508A/5008A OUTLINE OF THE MACHINE 3 - 17...
- Page 64 5. Transfer • Transfer method Transfer roller output • Transfer output Adjustable output (Constant current) • Transfer assist +250V bias e-STUDIO2008A/2508A/3008A/3508A/4508A/5008A © 2015 TOSHIBA TEC CORPORATION All rights reserved OUTLINE OF THE MACHINE 3 - 18...
- Page 65 Heater lamp (600W x 2) (600W x 2 + 300W x (600W x 2) (600W x 2 + 300W x Turned ON/OFF by thermistor © 2015 TOSHIBA TEC CORPORATION All rights reserved e-STUDIO2008A/2508A/3008A/3508A/4508A/5008A OUTLINE OF THE MACHINE 3 - 19...
- Page 66 When no button is pressed for a certain period of time, - Set number “1” and reproduction ratio “100%” are displayed. Equipment returns to the normal ready state. e-STUDIO2008A/2508A/3008A/3508A/4508A/5008A © 2015 TOSHIBA TEC CORPORATION All rights reserved OUTLINE OF THE MACHINE 3 - 20...
- Page 67 Polygonal motor, main motor and exit motor OFF Drum, fuser unit and developer unit stop Fans return to the ready rotation “READY” is displayed and the equipment enters the ready mode © 2015 TOSHIBA TEC CORPORATION All rights reserved e-STUDIO2008A/2508A/3008A/3508A/4508A/5008A OUTLINE OF THE MACHINE 3 - 21...
- Page 68 Equipment returns to the status before the interruption “Ready to resume job 1” is displayed 4. Press the [START] button The copying operation before the interruption is resumed. e-STUDIO2008A/2508A/3008A/3508A/4508A/5008A © 2015 TOSHIBA TEC CORPORATION All rights reserved OUTLINE OF THE MACHINE 3 - 22...
- Page 69 [START] button disabled [When drawer is installed] Drawer detected Tray going up (drawer empty sensor OFF) “Add paper” displayed [START] button disabled © 2015 TOSHIBA TEC CORPORATION All rights reserved e-STUDIO2008A/2508A/3008A/3508A/4508A/5008A OUTLINE OF THE MACHINE 3 - 23...
- Page 70 (B) Pick-up failure in bypass ( • During bypass feeding Bypass feed clutch ON 1st transport sensor is not turned ON in a fixed period of time e-STUDIO2008A/2508A/3008A/3508A/4508A/5008A © 2015 TOSHIBA TEC CORPORATION All rights reserved OUTLINE OF THE MACHINE 3 - 24...
- Page 71 Paper jam (E010) The copying operation is stopped Paper jam (E010) Fig. 3-12 • Exit sensor detects jamming of the tailing edge of paper © 2015 TOSHIBA TEC CORPORATION All rights reserved e-STUDIO2008A/2508A/3008A/3508A/4508A/5008A OUTLINE OF THE MACHINE 3 - 25...
- Page 72 Any of all sensors on paper transport path detects paper (ON) Paper jam (E030) • Front cover is opened during copying Paper jam (E410) e-STUDIO2008A/2508A/3008A/3508A/4508A/5008A © 2015 TOSHIBA TEC CORPORATION All rights reserved OUTLINE OF THE MACHINE 3 - 26...
- Page 73 Check the error code displayed on the control panel when “Call for service” appears, and handle the abnormality in reference to the error code table. P. 8-7 "8.2 Error Code List" © 2015 TOSHIBA TEC CORPORATION All rights reserved e-STUDIO2008A/2508A/3008A/3508A/4508A/5008A OUTLINE OF THE MACHINE...
- Page 74 ON/OFF lamp (green) has stopped blinking and the touch panel screen and the lamp (green) have gone off. Then turn the power OFF with the main power switch. e-STUDIO2008A/2508A/3008A/3508A/4508A/5008A © 2015 TOSHIBA TEC CORPORATION All rights reserved OUTLINE OF THE MACHINE 3 - 28...
- Page 75 Fig. 3-14 © 2015 TOSHIBA TEC CORPORATION All rights reserved e-STUDIO2008A/2508A/3008A/3508A/4508A/5008A OUTLINE OF THE MACHINE...
- Page 76 [6] Original glass [7] Drive pulley [8] CCD board [9] Lens [10] Automatic original detection sensor [11] Carriage home position sensor [12] Platen sensor e-STUDIO2008A/2508A/3008A/3508A/4508A/5008A © 2015 TOSHIBA TEC CORPORATION All rights reserved OUTLINE OF THE MACHINE 3 - 30...
- Page 77 Scan motor (M1) • 2-phase stepping motor • Driving the carriage-1 and carriage- Other Carriage home position sensor (S3) Platen sensor-1 (S20) Platen sensor-2 (S21) © 2015 TOSHIBA TEC CORPORATION All rights reserved e-STUDIO2008A/2508A/3008A/3508A/4508A/5008A OUTLINE OF THE MACHINE 3 - 31...
- Page 78 This is a plate to efficiently direct the light from the exposure lamp (EXP) to the surface of the original on the glass. Mirror-1 This mirror directs the light reflected from the original to the mirror-2 described later. e-STUDIO2008A/2508A/3008A/3508A/4508A/5008A © 2015 TOSHIBA TEC CORPORATION All rights reserved OUTLINE OF THE MACHINE 3 - 32...
- Page 79 The size of an original placed on the glass is instantly detected using the automatic original detection sensors (S1, S2) fixed on the base frame without moving the carriage-1. © 2015 TOSHIBA TEC CORPORATION All rights reserved e-STUDIO2008A/2508A/3008A/3508A/4508A/5008A OUTLINE OF THE MACHINE...
- Page 80 The Carriage speed of the original placed on the original glass in the color mode is the same as that in the black mode. e-STUDIO2008A/2508A/3008A/3508A/4508A/5008A © 2015 TOSHIBA TEC CORPORATION All rights reserved OUTLINE OF THE MACHINE 3 - 34...
- Page 81 As for the LT series, two automatic original detection sensors detect a size in the secondary scanning direction due to their original size. © 2015 TOSHIBA TEC CORPORATION All rights reserved e-STUDIO2008A/2508A/3008A/3508A/4508A/5008A OUTLINE OF THE MACHINE...
- Page 82 A4-R Size 6 Size 7 Size 8 Fig. 3-21 Sensor detection points [LT Series] Size 1 ST-R Size 2 LT-R Size 3 Fig. 3-22 e-STUDIO2008A/2508A/3008A/3508A/4508A/5008A © 2015 TOSHIBA TEC CORPORATION All rights reserved OUTLINE OF THE MACHINE 3 - 36...
- Page 83 The unit must not be disassembled in the field as they are very sensitive to dust and finely adjusted at the factory. Fig. 3-23 [1] Polygonal motor [2] Slit glass © 2015 TOSHIBA TEC CORPORATION All rights reserved e-STUDIO2008A/2508A/3008A/3508A/4508A/5008A OUTLINE OF THE MACHINE 3 - 37...
- Page 84 “CAUTION. HOT”, “CAUTION. HIGH VOLTAGE”, “CAUTION. LASER BEAM”, etc. to see if there is any dirt on their surface and if they are properly stuck to the equipment. e-STUDIO2008A/2508A/3008A/3508A/4508A/5008A © 2015 TOSHIBA TEC CORPORATION All rights reserved OUTLINE OF THE MACHINE 3 - 38...
- Page 85 2nd drawer paper width detection switch 1st drawer paper stock sensor (S10) 2nd drawer paper length detection switch 1st drawer pickup roller 2nd drawer detection switch © 2015 TOSHIBA TEC CORPORATION All rights reserved e-STUDIO2008A/2508A/3008A/3508A/4508A/5008A OUTLINE OF THE MACHINE 3 - 39...
- Page 86 Registration roller (metal) 1st/2nd transport sensor S16/S9 Transport roller Registration roller clutch CLT1 Hi-speed clutch CLT5 Low-speed clutch CLT6 Feed cover opening/closing switch SW10 e-STUDIO2008A/2508A/3008A/3508A/4508A/5008A © 2015 TOSHIBA TEC CORPORATION All rights reserved OUTLINE OF THE MACHINE 3 - 40...
- Page 87 12.1st transport sensor (S16) This sensor detects whether paper from each paper source is being transported or not. © 2015 TOSHIBA TEC CORPORATION All rights reserved e-STUDIO2008A/2508A/3008A/3508A/4508A/5008A OUTLINE OF THE MACHINE...
- Page 88 (M8) is being rotated, the drive from this clutch feeds and transports paper on the bypass tray to the inside of this equipment. e-STUDIO2008A/2508A/3008A/3508A/4508A/5008A © 2015 TOSHIBA TEC CORPORATION All rights reserved OUTLINE OF THE MACHINE 3 - 42...
- Page 89 1st/2nd drawer feed roller drive motor ( M2 ) ( CLT3/CLT4 ) Bypass feed roller Bypass feed clutch ( CLT2 ) Feed clutch Feed roller (H/L) (CLT5/CLT6) © 2015 TOSHIBA TEC CORPORATION All rights reserved e-STUDIO2008A/2508A/3008A/3508A/4508A/5008A OUTLINE OF THE MACHINE 3 - 43...
- Page 90 Paper is picked up by the movement of the feed clutch. When the feed clutch is turned ON, the pickup roller and feed roller rotate, and the paper is picked up from the drawer. The paper is separated by the separation roller. e-STUDIO2008A/2508A/3008A/3508A/4508A/5008A © 2015 TOSHIBA TEC CORPORATION All rights reserved OUTLINE OF THE MACHINE 3 - 44...
- Page 91 High speed transportation is also performed when the paper is transported from the PFP to the registration position (When the PFP is connected). © 2015 TOSHIBA TEC CORPORATION All rights reserved e-STUDIO2008A/2508A/3008A/3508A/4508A/5008A OUTLINE OF THE MACHINE...
- Page 92 Fig. 3-29 [1] Bypass feed roller [2] Bypass separation roller [3] Spring e-STUDIO2008A/2508A/3008A/3508A/4508A/5008A © 2015 TOSHIBA TEC CORPORATION All rights reserved OUTLINE OF THE MACHINE 3 - 46...
- Page 93 By using the drawer paper size detection sensors 1 and 2, the level where the envelope drawer is installed is detected. Since the size of the paper in the envelope drawer is not detected automatically, it is necessary to set it manually. © 2015 TOSHIBA TEC CORPORATION All rights reserved e-STUDIO2008A/2508A/3008A/3508A/4508A/5008A OUTLINE OF THE MACHINE...
- Page 94 (Transport roller) 1st drawer tray-up motor (M11) Low-speed clutch (CLT6) (2nd drawer) 2nd drawer feed clutch (CLT4) 2nd drawer tray-up motor (M12) Fig. 3-30 e-STUDIO2008A/2508A/3008A/3508A/4508A/5008A © 2015 TOSHIBA TEC CORPORATION All rights reserved OUTLINE OF THE MACHINE 3 - 48...
- Page 95 Drives the Bridge Kit, Job Separator and Offset Tray (all optional) by transmitting the rotation of the main motor through the gears and the timing belt to their gears. © 2015 TOSHIBA TEC CORPORATION All rights reserved e-STUDIO2008A/2508A/3008A/3508A/4508A/5008A OUTLINE OF THE MACHINE...
- Page 96 Transfer roller unit Transfer roller PM parts Separation needle Other Drum thermistor THMS4 High-voltage transformer HVPS TRU fan Process unit fan Ozone filter PM parts e-STUDIO2008A/2508A/3008A/3508A/4508A/5008A © 2015 TOSHIBA TEC CORPORATION All rights reserved OUTLINE OF THE MACHINE 3 - 50...
- Page 97 This blade is pressed against the drum surface and scrapes off the residual toner from the drum surface. Recovery blade This blade catches the toner scraped off by the cleaning blade. © 2015 TOSHIBA TEC CORPORATION All rights reserved e-STUDIO2008A/2508A/3008A/3508A/4508A/5008A OUTLINE OF THE MACHINE 3 - 51...
- Page 98 The exhaust fan also helps the paper separation by absorbing the paper to post-transfer guide. e-STUDIO2008A/2508A/3008A/3508A/4508A/5008A © 2015 TOSHIBA TEC CORPORATION All rights reserved OUTLINE OF THE MACHINE 3 - 52...
- Page 99 EPU memory board Recovered toner supply mechanism (Toner recycling auger) Toner cartridge Toner cartridge PC board CTRG Toner cartridge interface PC board CTIF Toner motor © 2015 TOSHIBA TEC CORPORATION All rights reserved e-STUDIO2008A/2508A/3008A/3508A/4508A/5008A OUTLINE OF THE MACHINE 3 - 53...
- Page 100 The drive of the toner recycling auger is transmitted by the mixer-3. e-STUDIO2008A/2508A/3008A/3508A/4508A/5008A © 2015 TOSHIBA TEC CORPORATION All rights reserved OUTLINE OF THE MACHINE 3 - 54...
- Page 101 For high speed Position of bracket hole Bottom (seen from the back side) 20ppm/25ppm/30ppm 35ppm/45ppm/50ppm Discharge LED Needle electrode Toner recovery roller Gear, Belt Fig. 3-34 © 2015 TOSHIBA TEC CORPORATION All rights reserved e-STUDIO2008A/2508A/3008A/3508A/4508A/5008A OUTLINE OF THE MACHINE 3 - 55...
- Page 102 They are further mixed and transported to the developer sleeve by the mixer-1. Drum cleaner Mixer-1 Toner recovery auger Mixer-2 Mixer-3 Toner cartridge Fresh toner Recovered toner Toner recycling auger Fig. 3-35 e-STUDIO2008A/2508A/3008A/3508A/4508A/5008A © 2015 TOSHIBA TEC CORPORATION All rights reserved OUTLINE OF THE MACHINE 3 - 56...
- Page 103 [6] Heat roller edge thermistor [7] Heat roller center thermistor [8] Heat roller side thermistor [9] Pressure roller [10] Exit sensor [11] Heat roller separation finger © 2015 TOSHIBA TEC CORPORATION All rights reserved e-STUDIO2008A/2508A/3008A/3508A/4508A/5008A OUTLINE OF THE MACHINE 3 - 57...
- Page 104 Heat roller side thermistor THM2 Heat roller edge thermistor THM3 Heat roller center thermostat THMO1 Heat roller front thermostat THMO2 Fuser roller Pressure roller Separation finger e-STUDIO2008A/2508A/3008A/3508A/4508A/5008A © 2015 TOSHIBA TEC CORPORATION All rights reserved OUTLINE OF THE MACHINE 3 - 58...
- Page 105 The exit sensor detects if the leading edge of the paper or the paper has passed through the fuser unit. This sensor is also used for the detection of a paper jam in the fuser unit and paper exit section. © 2015 TOSHIBA TEC CORPORATION All rights reserved e-STUDIO2008A/2508A/3008A/3508A/4508A/5008A...
- Page 106 The thermistors control the temperature of fuser roller and detect temperature abnormalities. If the temperature becomes excessively high, the thermostat is opened to stop the power supply to the heater lamps. e-STUDIO2008A/2508A/3008A/3508A/4508A/5008A © 2015 TOSHIBA TEC CORPORATION All rights reserved OUTLINE OF THE MACHINE 3 - 60...
- Page 107 Temperature control circuit AC line DC line Relay OFF signal are only installed for e-STUDIO356/456/506 / 357/457/507. Relay OFF circuit LGC board Fig. 3-37 © 2015 TOSHIBA TEC CORPORATION All rights reserved e-STUDIO2008A/2508A/3008A/3508A/4508A/5008A OUTLINE OF THE MACHINE 3 - 61...
- Page 108 Fig. 3-38 [1] Exit roller [2] Reverse sensor [3] Reverse gate solenoid [4] Reverse roller [5] ADU entrance sensor [6] Exit sensor [7] Reverse gate e-STUDIO2008A/2508A/3008A/3508A/4508A/5008A © 2015 TOSHIBA TEC CORPORATION All rights reserved OUTLINE OF THE MACHINE 3 - 62...
- Page 109 6. Reverse gate solenoid (SOL1) (only installed for 35ppm/45ppm/50ppm) This reverse gate solenoid drives the reverse gate and switches the paper transport path (exit section of reverse section). © 2015 TOSHIBA TEC CORPORATION All rights reserved e-STUDIO2008A/2508A/3008A/3508A/4508A/5008A OUTLINE OF THE MACHINE...
- Page 110 The figure shown below is the layout of the driving gears of the reverse roller. Reverse motor Reverse roller Upper transport roller Forward Reverse Fig. 3-40 e-STUDIO2008A/2508A/3008A/3508A/4508A/5008A © 2015 TOSHIBA TEC CORPORATION All rights reserved OUTLINE OF THE MACHINE 3 - 64...
- Page 111 [ 20ppm/25ppm/30ppm ] [ 35ppm/45ppm/50ppm ] Fig. 3-41 © 2015 TOSHIBA TEC CORPORATION All rights reserved e-STUDIO2008A/2508A/3008A/3508A/4508A/5008A OUTLINE OF THE MACHINE 3 - 65...
- Page 112 Composition ADU motor M5: Stepping motor ADU entrance sensor ADU exit sensor Reverse sensor ADU driving PC board Upper transport roller Lower transport roller e-STUDIO2008A/2508A/3008A/3508A/4508A/5008A © 2015 TOSHIBA TEC CORPORATION All rights reserved OUTLINE OF THE MACHINE 3 - 66...
- Page 113 For the 20/25/30 ppm models, the duplex printing operation varies depending on the size of the paper, single-paper circulation and alternateness circulation. © 2015 TOSHIBA TEC CORPORATION All rights reserved e-STUDIO2008A/2508A/3008A/3508A/4508A/5008A OUTLINE OF THE MACHINE 3 - 67...
- Page 114 When the ADU motor (M5) rotates, the upper transport roller and lower transport roller are rotated driven by the gears and belt. Fig. 3-42 [1] ADU motor [2] Gear [3] Timing belt [4] Upper transport roller [5] Timing belt e-STUDIO2008A/2508A/3008A/3508A/4508A/5008A © 2015 TOSHIBA TEC CORPORATION All rights reserved OUTLINE OF THE MACHINE 3 - 68...
- Page 115 ON after installing the equipment. The damp heater (including the FUS board) is an option in NAD/MJD model, and is installed as standard device in other models. © 2015 TOSHIBA TEC CORPORATION All rights reserved e-STUDIO2008A/2508A/3008A/3508A/4508A/5008A...
- Page 116 Enabler is installed, or when the IPsec Enabler is installed and its function is set to be enabled When the dial-in function is set to be enabled e-STUDIO2008A/2508A/3008A/3508A/4508A/5008A © 2015 TOSHIBA TEC CORPORATION All rights reserved OUTLINE OF THE MACHINE 3 - 70...
- Page 117 Only DC voltage and +5VS are output from the power supply unit. The [ON/OFF] button is monitored and the LED of the main power switch is lit. © 2015 TOSHIBA TEC CORPORATION All rights reserved e-STUDIO2008A/2508A/3008A/3508A/4508A/5008A OUTLINE OF THE MACHINE...
- Page 118 HVT (via LGC board) CFD board (via LGC board) +24VD2 ADU board (via LGC board) +24VD3 CN513 +24VD4 SYS board CN514 +24VD5 PFC board Finisher e-STUDIO2008A/2508A/3008A/3508A/4508A/5008A © 2015 TOSHIBA TEC CORPORATION All rights reserved OUTLINE OF THE MACHINE 3 - 72...
- Page 119 Exposure lamp (Lamp inverter board / LED board) Key copy counter / Coin controller Bridge unit / Job separator / Offset tray PFP/LCF +24VD3 RADF F203:4A (Time-lag) +24VD4 Finisher F204:5A (Time-lag) © 2015 TOSHIBA TEC CORPORATION All rights reserved e-STUDIO2008A/2508A/3008A/3508A/4508A/5008A OUTLINE OF THE MACHINE 3 - 73...
- Page 120 © 2015 TOSHIBA TEC CORPORATION All rights reserved OUTLINE OF THE MACHINE 3 - 74...
- Page 121 4.1.2 Left cover Open the front cover and pull out the 1st drawer. Remove 6 screws and take off the left cover [1]. Fig. 4-2 © 2015 TOSHIBA TEC CORPORATION All rights reserved e-STUDIO2008A/2508A/3008A/3508A/4508A/5008A DISASSEMBLY AND REPLACEMENT 4 - 1...
- Page 122 [1] by sliding it to the left. Fig. 4-4 Notes: When installing, insert the latch [2] into the hole in the frame. Fig. 4-5 e-STUDIO2008A/2508A/3008A/3508A/4508A/5008A © 2015 TOSHIBA TEC CORPORATION All rights reserved DISASSEMBLY AND REPLACEMENT 4 - 2...
- Page 123 [1] by lifting it up. Fig. 4-7 4.1.7 Connecting port cover Open the side cover. Remove 1 screw and take off the connecting port cover [1]. Fig. 4-8 © 2015 TOSHIBA TEC CORPORATION All rights reserved e-STUDIO2008A/2508A/3008A/3508A/4508A/5008A DISASSEMBLY AND REPLACEMENT 4 - 3...
- Page 124 [1] by lifting it up. Fig. 4-10 4.1.10 Right rear cover Open the side cover. Remove 3 screws and take off the right rear cover [1]. Fig. 4-11 e-STUDIO2008A/2508A/3008A/3508A/4508A/5008A © 2015 TOSHIBA TEC CORPORATION All rights reserved DISASSEMBLY AND REPLACEMENT 4 - 4...
- Page 125 Control panel lower cover Make the control panel [1] level. Fig. 4-13 Remove 2 screws and take off the control panel lower cover [2]. Fig. 4-14 © 2015 TOSHIBA TEC CORPORATION All rights reserved e-STUDIO2008A/2508A/3008A/3508A/4508A/5008A DISASSEMBLY AND REPLACEMENT 4 - 5...
- Page 126 Remove 2 screws and take off the rear top cover [1]. Fig. 4-16 4.1.15 Rear cover Remove 6 screws and take off the rear cover [1] by lifting it up. Fig. 4-17 e-STUDIO2008A/2508A/3008A/3508A/4508A/5008A © 2015 TOSHIBA TEC CORPORATION All rights reserved DISASSEMBLY AND REPLACEMENT 4 - 6...
- Page 127 Remove 5 screws and take off the inner cover [1]. Fig. 4-19 Disconnect 2 connectors and remove 2 screws [2]. Remove the front cover interlock switch [3]. Fig. 4-20 © 2015 TOSHIBA TEC CORPORATION All rights reserved e-STUDIO2008A/2508A/3008A/3508A/4508A/5008A DISASSEMBLY AND REPLACEMENT 4 - 7...
- Page 128 [1]. Fig. 4-21 Release 2 harnesses [2] located under the scanner unit from 3 clamps. Fig. 4-22 Lower the control panel unit [3]. Fig. 4-23 e-STUDIO2008A/2508A/3008A/3508A/4508A/5008A © 2015 TOSHIBA TEC CORPORATION All rights reserved DISASSEMBLY AND REPLACEMENT 4 - 8...
- Page 129 Remove 2 screws. Take off the control panel unit [3] by sliding it. Fig. 4-24 Notes: When installing, pass the harness [2] through the harness clamp of the frame. Fig. 4-25 © 2015 TOSHIBA TEC CORPORATION All rights reserved e-STUDIO2008A/2508A/3008A/3508A/4508A/5008A DISASSEMBLY AND REPLACEMENT 4 - 9...
- Page 130 4.2.2 Hinge cover Remove 4 screws. Fig. 4-26 Raise 2 hinges and remove the hinge cover [1]. Fig. 4-27 Fig. 4-28 e-STUDIO2008A/2508A/3008A/3508A/4508A/5008A © 2015 TOSHIBA TEC CORPORATION All rights reserved DISASSEMBLY AND REPLACEMENT 4 - 10...
- Page 131 Lower 1 bracket and remove the USB harness/signal harness [1] from 2 hooks. Fig. 4-29 Fig. 4-30 Remove 6 screws and take off the cover [2]. Fig. 4-31 © 2015 TOSHIBA TEC CORPORATION All rights reserved e-STUDIO2008A/2508A/3008A/3508A/4508A/5008A DISASSEMBLY AND REPLACEMENT 4 - 11...
- Page 132 USB harness/signal harness [1]. Fig. 4-32 Fig. 4-33 Notes: When disconnecting the connector [4], release the lock [5] and disconnect it. Fig. 4-34 e-STUDIO2008A/2508A/3008A/3508A/4508A/5008A © 2015 TOSHIBA TEC CORPORATION All rights reserved DISASSEMBLY AND REPLACEMENT 4 - 12...
- Page 133 Lower 1 hinge, and then remove the USB harness/signal harness [1] from 2 hooks. Fig. 4-35 Fig. 4-36 Remove 6 screws and take off the cover [2]. Fig. 4-37 © 2015 TOSHIBA TEC CORPORATION All rights reserved e-STUDIO2008A/2508A/3008A/3508A/4508A/5008A DISASSEMBLY AND REPLACEMENT 4 - 13...
- Page 134 KEY board [4]. Fig. 4-38 Notes: When removing the flat cable [3], release the lock by raising the latch and remove it. Fig. 4-39 e-STUDIO2008A/2508A/3008A/3508A/4508A/5008A © 2015 TOSHIBA TEC CORPORATION All rights reserved DISASSEMBLY AND REPLACEMENT 4 - 14...
- Page 135 Remove 6 buttons [5]. Fig. 4-40 Fig. 4-41 © 2015 TOSHIBA TEC CORPORATION All rights reserved e-STUDIO2008A/2508A/3008A/3508A/4508A/5008A DISASSEMBLY AND REPLACEMENT 4 - 15...
- Page 136 [5], and then remove the DSP board [6]. Fig. 4-43 Notes: • When removing the flat cable [3], release 4 latches and remove it. Fig. 4-44 e-STUDIO2008A/2508A/3008A/3508A/4508A/5008A © 2015 TOSHIBA TEC CORPORATION All rights reserved DISASSEMBLY AND REPLACEMENT 4 - 16...
- Page 137 Fig. 4-45 • When removing the flat cable [5], release the lock by raising the latch [8] and pull out the flat cable. Fig. 4-46 © 2015 TOSHIBA TEC CORPORATION All rights reserved e-STUDIO2008A/2508A/3008A/3508A/4508A/5008A DISASSEMBLY AND REPLACEMENT 4 - 17...
- Page 138 P. 4-18 "4.3.1 Original glass" Remove 1 screw and take off the lens cover [1] by sliding it toward the left side. Fig. 4-48 e-STUDIO2008A/2508A/3008A/3508A/4508A/5008A © 2015 TOSHIBA TEC CORPORATION All rights reserved DISASSEMBLY AND REPLACEMENT 4 - 18...
- Page 139 Remove 1 screw and take off the automatic original detection sensor with the bracket [1]. Fig. 4-50 Release the lock by tilting the flap and remove 1 flat cable [2]. Fig. 4-51 © 2015 TOSHIBA TEC CORPORATION All rights reserved e-STUDIO2008A/2508A/3008A/3508A/4508A/5008A DISASSEMBLY AND REPLACEMENT 4 - 19...
- Page 140 • Do not apply pressure to or damage the edge of the flat cable [2]. Fig. 4-53 e-STUDIO2008A/2508A/3008A/3508A/4508A/5008A © 2015 TOSHIBA TEC CORPORATION All rights reserved DISASSEMBLY AND REPLACEMENT 4 - 20...
- Page 141 CCD lens unit. When installing the CCD lens unit, the same number of lines needs to be visible. Fig. 4-55 © 2015 TOSHIBA TEC CORPORATION All rights reserved e-STUDIO2008A/2508A/3008A/3508A/4508A/5008A DISASSEMBLY AND REPLACEMENT 4 - 21...
- Page 142 Remove the rear top cover. P. 4-6 "4.1.14 Rear top cover" Disconnect 1 connector [1]. Release 3 latches and remove the carriage home position sensor [2]. Fig. 4-58 e-STUDIO2008A/2508A/3008A/3508A/4508A/5008A © 2015 TOSHIBA TEC CORPORATION All rights reserved DISASSEMBLY AND REPLACEMENT 4 - 22...
- Page 143 Fig. 4-59 • To move the carriage, manually rotate the drive pulley [3]. Fig. 4-60 Remove 1 screw [2]. Fig. 4-61 © 2015 TOSHIBA TEC CORPORATION All rights reserved e-STUDIO2008A/2508A/3008A/3508A/4508A/5008A DISASSEMBLY AND REPLACEMENT 4 - 23...
- Page 144 Take off the rear top cover. P. 4-6 "4.1.14 Rear top cover" Remove the rear cover. P. 4-6 "4.1.15 Rear cover" Disconnect 1 connector. Fig. 4-63 e-STUDIO2008A/2508A/3008A/3508A/4508A/5008A © 2015 TOSHIBA TEC CORPORATION All rights reserved DISASSEMBLY AND REPLACEMENT 4 - 24...
- Page 145 P. 6-51 "6.9.3 Belt tension adjustment of the Scan motor" Fig. 4-64 Remove 2 screws and take off the scan motor [2]. Fig. 4-65 © 2015 TOSHIBA TEC CORPORATION All rights reserved e-STUDIO2008A/2508A/3008A/3508A/4508A/5008A DISASSEMBLY AND REPLACEMENT 4 - 25...
- Page 146 Fig. 4-67 Disconnect 2 connectors and take off the platen sensor assembly [1]. Notes: When installing, be careful not to connect each different connector. Fig. 4-68 e-STUDIO2008A/2508A/3008A/3508A/4508A/5008A © 2015 TOSHIBA TEC CORPORATION All rights reserved DISASSEMBLY AND REPLACEMENT 4 - 26...
- Page 147 Make sure that the screws on carriage-1 can be seen from the frame holes [2]. Fig. 4-70 Notes: To move the carriage, manually rotate the drive pulley [3]. Fig. 4-71 © 2015 TOSHIBA TEC CORPORATION All rights reserved e-STUDIO2008A/2508A/3008A/3508A/4508A/5008A DISASSEMBLY AND REPLACEMENT 4 - 27...
- Page 148 Slide the front of the carriage-1 [1] toward the direction of the arrow shown in the figure, while trying not to touch the mirror [6]. Then remove the carriage-1 [1]. Fig. 4-74 e-STUDIO2008A/2508A/3008A/3508A/4508A/5008A © 2015 TOSHIBA TEC CORPORATION All rights reserved DISASSEMBLY AND REPLACEMENT 4 - 28...
- Page 149 Move carriage-2 to the center. Attach the wire holder jig [2] to the wire pulley [1] to prevent the wire from coming loose. Fig. 4-77 © 2015 TOSHIBA TEC CORPORATION All rights reserved e-STUDIO2008A/2508A/3008A/3508A/4508A/5008A DISASSEMBLY AND REPLACEMENT 4 - 29...
- Page 150 Rotate carriage-2 [6] while trying not to touch the mirror. Then remove carriage-2 [6]. Notes: Replace mirror-2 and -3 together with carriage-2 [6]. Do not remove mirror-2 and - Fig. 4-80 e-STUDIO2008A/2508A/3008A/3508A/4508A/5008A © 2015 TOSHIBA TEC CORPORATION All rights reserved DISASSEMBLY AND REPLACEMENT 4 - 30...
- Page 151 Fig. 4-81 springs. Make sure the tension applied to the wire is normal. Fig. 4-82 © 2015 TOSHIBA TEC CORPORATION All rights reserved e-STUDIO2008A/2508A/3008A/3508A/4508A/5008A DISASSEMBLY AND REPLACEMENT 4 - 31...
- Page 152 [9] and be passed under the jig arm [10]. 3. When installing the wire holder jig, be careful of the orientation. Fig. 4-85 e-STUDIO2008A/2508A/3008A/3508A/4508A/5008A © 2015 TOSHIBA TEC CORPORATION All rights reserved DISASSEMBLY AND REPLACEMENT 4 - 32...
- Page 153 Remove the original glass. P. 4-18 "4.3.1 Original glass" Remove 1 connector [1]. Fig. 4-86 Remove the scanner damp heater [2]. Fig. 4-87 © 2015 TOSHIBA TEC CORPORATION All rights reserved e-STUDIO2008A/2508A/3008A/3508A/4508A/5008A DISASSEMBLY AND REPLACEMENT 4 - 33...
- Page 154 Fig. 4-88 Remove 1 screw and take off the duct [1]. Fig. 4-89 Remove the sponge [3] from the laser optical unit [2]. Fig. 4-90 e-STUDIO2008A/2508A/3008A/3508A/4508A/5008A © 2015 TOSHIBA TEC CORPORATION All rights reserved DISASSEMBLY AND REPLACEMENT 4 - 34...
- Page 155 Remove the flat cable [6] from the laser optical unit. Fig. 4-92 Remove 1 screw and take off the laser optical unit [2]. Fig. 4-93 © 2015 TOSHIBA TEC CORPORATION All rights reserved e-STUDIO2008A/2508A/3008A/3508A/4508A/5008A DISASSEMBLY AND REPLACEMENT 4 - 35...
- Page 156 5. Hold the laser optical unit vertically. Do not press the top of the unit where the polygonal motor is installed with your Fig. 4-94 hands or other things. e-STUDIO2008A/2508A/3008A/3508A/4508A/5008A © 2015 TOSHIBA TEC CORPORATION All rights reserved DISASSEMBLY AND REPLACEMENT 4 - 36...
- Page 157 [3]. Fig. 4-96 Remove 1 screw from back side of the bypass tray. Take off the paper size detection board cover [4]. Fig. 4-97 © 2015 TOSHIBA TEC CORPORATION All rights reserved e-STUDIO2008A/2508A/3008A/3508A/4508A/5008A DISASSEMBLY AND REPLACEMENT 4 - 37...
- Page 158 Move the projection portion [7] on the front side and the rear side of the bypass unit [6] to the wider part of the groove of the hinge stoppers [8]. Fig. 4-100 e-STUDIO2008A/2508A/3008A/3508A/4508A/5008A © 2015 TOSHIBA TEC CORPORATION All rights reserved DISASSEMBLY AND REPLACEMENT 4 - 38...
- Page 159 [6]. Fig. 4-102 4.5.2 Bypass feed roller Open the bypass tray [1]. Tip the paper holder release lever [2] to release the pressure. Fig. 4-103 © 2015 TOSHIBA TEC CORPORATION All rights reserved e-STUDIO2008A/2508A/3008A/3508A/4508A/5008A DISASSEMBLY AND REPLACEMENT 4 - 39...
- Page 160 [3]. Fig. 4-104 Press the collar [5] toward the rear side to release the lock. Fig. 4-105 Remove the bypass feed roller [3]. Fig. 4-106 e-STUDIO2008A/2508A/3008A/3508A/4508A/5008A © 2015 TOSHIBA TEC CORPORATION All rights reserved DISASSEMBLY AND REPLACEMENT 4 - 40...
- Page 161 Fig. 4-107 Notes: When installing the bypass feed roller [3], fit the convex portion on the roller with the concave portion on the equipment. Fig. 4-108 © 2015 TOSHIBA TEC CORPORATION All rights reserved e-STUDIO2008A/2508A/3008A/3508A/4508A/5008A DISASSEMBLY AND REPLACEMENT 4 - 41...
- Page 162 • Be careful not to drop the parts inside the equipment. Fig. 4-109 Fig. 4-110 Fig. 4-111 e-STUDIO2008A/2508A/3008A/3508A/4508A/5008A © 2015 TOSHIBA TEC CORPORATION All rights reserved DISASSEMBLY AND REPLACEMENT 4 - 42...
- Page 163 [2]. Fig. 4-113 Remove 1 screw from back side of the bypass tray. Take off the paper size detection board cover [3]. Fig. 4-114 © 2015 TOSHIBA TEC CORPORATION All rights reserved e-STUDIO2008A/2508A/3008A/3508A/4508A/5008A DISASSEMBLY AND REPLACEMENT 4 - 43...
- Page 164 Bypass paper sensor (S8) Remove the bypass feed clutch. P. 4-151 "4.12.2 Bypass feed clutch (CLT2)" Remove 2 screws from the automatic duplexing unit [1]. Fig. 4-117 e-STUDIO2008A/2508A/3008A/3508A/4508A/5008A © 2015 TOSHIBA TEC CORPORATION All rights reserved DISASSEMBLY AND REPLACEMENT 4 - 44...
- Page 165 Remove 2 screws and take off the paper guide (middle) [3]. Fig. 4-119 Remove the stopper [5] from the bypass feed roller [4]. Fig. 4-120 © 2015 TOSHIBA TEC CORPORATION All rights reserved e-STUDIO2008A/2508A/3008A/3508A/4508A/5008A DISASSEMBLY AND REPLACEMENT 4 - 45...
- Page 166 [8]. Remove the collar [9]. Fig. 4-122 Release the harness [10] from the harness guide. Fig. 4-123 e-STUDIO2008A/2508A/3008A/3508A/4508A/5008A © 2015 TOSHIBA TEC CORPORATION All rights reserved DISASSEMBLY AND REPLACEMENT 4 - 46...
- Page 167 ADU opening/closing switch (SW5) Open the side cover. Release 2 hooks. Fig. 4-125 Pull out the ADU opening/closing switch [1], and disconnect 1 connector. Fig. 4-126 © 2015 TOSHIBA TEC CORPORATION All rights reserved e-STUDIO2008A/2508A/3008A/3508A/4508A/5008A DISASSEMBLY AND REPLACEMENT 4 - 47...
- Page 168 P. 4-6 "4.1.15 Rear cover" Disconnect 1 connector [1]. Fig. 4-127 Open the feed cover [2]. Fig. 4-128 Remove 4 screws and take off the stay [3]. Fig. 4-129 e-STUDIO2008A/2508A/3008A/3508A/4508A/5008A © 2015 TOSHIBA TEC CORPORATION All rights reserved DISASSEMBLY AND REPLACEMENT 4 - 48...
- Page 169 [4] toward the front side, and then pull the transport guide [4] out toward you. Fig. 4-131 Remove 1 screw from the paper guide [6]. Fig. 4-132 © 2015 TOSHIBA TEC CORPORATION All rights reserved e-STUDIO2008A/2508A/3008A/3508A/4508A/5008A DISASSEMBLY AND REPLACEMENT 4 - 49...
- Page 170 When installing connectors, connect the black wire harness to the 1st transport sensor [8], and the blue wire harness to the registration sensor [9]. Fig. 4-135 e-STUDIO2008A/2508A/3008A/3508A/4508A/5008A © 2015 TOSHIBA TEC CORPORATION All rights reserved DISASSEMBLY AND REPLACEMENT 4 - 50...
- Page 171 Remove the registration roller [1]. Fig. 4-137 Remove 1 stopper [4], 1 E-ring [5], 1 pin [6] and 1 gear [7] from the registration roller [1]. Fig. 4-138 © 2015 TOSHIBA TEC CORPORATION All rights reserved e-STUDIO2008A/2508A/3008A/3508A/4508A/5008A DISASSEMBLY AND REPLACEMENT 4 - 51...
- Page 172 Remove 1 screw while holding the shaft of the registration roller [3], and then remove the bracket [4]. Fig. 4-140 Remove the registration roller [5]. Fig. 4-141 e-STUDIO2008A/2508A/3008A/3508A/4508A/5008A © 2015 TOSHIBA TEC CORPORATION All rights reserved DISASSEMBLY AND REPLACEMENT 4 - 52...
- Page 173 [8] and 1 pin [9] from the registration roller [5]. Fig. 4-142 4.5.10 Feed cover Open the feed cover [1]. Fig. 4-143 Disconnect 1 connector [2] and remove the stopper [3]. Fig. 4-144 © 2015 TOSHIBA TEC CORPORATION All rights reserved e-STUDIO2008A/2508A/3008A/3508A/4508A/5008A DISASSEMBLY AND REPLACEMENT 4 - 53...
- Page 174 P. 4-149 "4.12.1 Automatic duplexing unit (ADU)" Open the feed cover [1]. Fig. 4-146 Remove 4 screws and take off the stay [2]. Fig. 4-147 e-STUDIO2008A/2508A/3008A/3508A/4508A/5008A © 2015 TOSHIBA TEC CORPORATION All rights reserved DISASSEMBLY AND REPLACEMENT 4 - 54...
- Page 175 [3] to the front side, and then remove it by pulling it toward you. Fig. 4-149 Remove the clip from the transport roller [5]. Fig. 4-150 © 2015 TOSHIBA TEC CORPORATION All rights reserved e-STUDIO2008A/2508A/3008A/3508A/4508A/5008A DISASSEMBLY AND REPLACEMENT 4 - 55...
- Page 176 Remove the feed cover. P. 4-53 "4.5.10 Feed cover" Remove 4 screws. Release 3 latches [1], and take off the cover [2]. Fig. 4-153 e-STUDIO2008A/2508A/3008A/3508A/4508A/5008A © 2015 TOSHIBA TEC CORPORATION All rights reserved DISASSEMBLY AND REPLACEMENT 4 - 56...
- Page 177 Remove 4 screws. Release 3 latches [1], and take off the cover [2]. Fig. 4-155 Disconnect 1 connector [3]. Remove 2 screws and take off the cover [4]. Fig. 4-156 © 2015 TOSHIBA TEC CORPORATION All rights reserved e-STUDIO2008A/2508A/3008A/3508A/4508A/5008A DISASSEMBLY AND REPLACEMENT 4 - 57...
- Page 178 1st drawer paper feed unit [2] toward you to remove it. Notes: When installing, align the arrow of the 1st drawer paper feed unit with the guide before inserting. Fig. 4-158 e-STUDIO2008A/2508A/3008A/3508A/4508A/5008A © 2015 TOSHIBA TEC CORPORATION All rights reserved DISASSEMBLY AND REPLACEMENT 4 - 58...
- Page 179 Release two latches and remove the 1st drawer separation roller guide [1]. Fig. 4-160 Remove the E-ring and take off the shaft [2]. Fig. 4-161 © 2015 TOSHIBA TEC CORPORATION All rights reserved e-STUDIO2008A/2508A/3008A/3508A/4508A/5008A DISASSEMBLY AND REPLACEMENT 4 - 59...
- Page 180 [4] shown in the figure, and apply half a rice-sized grain of white grease (Molykote HP-300) to the 2 places [5] shown in the figure. Fig. 4-163 e-STUDIO2008A/2508A/3008A/3508A/4508A/5008A © 2015 TOSHIBA TEC CORPORATION All rights reserved DISASSEMBLY AND REPLACEMENT 4 - 60...
- Page 181 Remove the 2nd drawer paper feed unit. P. 4-61 "4.5.16 2nd drawer paper feed unit" Remove 2 screws from the 2nd drawer separation roller guide [1]. Fig. 4-165 © 2015 TOSHIBA TEC CORPORATION All rights reserved e-STUDIO2008A/2508A/3008A/3508A/4508A/5008A DISASSEMBLY AND REPLACEMENT 4 - 61...
- Page 182 [1]. Fig. 4-166 Remove the E-ring and take off the shaft [2]. Fig. 4-167 Remove the shaft cover [3]. Fig. 4-168 e-STUDIO2008A/2508A/3008A/3508A/4508A/5008A © 2015 TOSHIBA TEC CORPORATION All rights reserved DISASSEMBLY AND REPLACEMENT 4 - 62...
- Page 183 Slide the guide [1] to the front side. Fig. 4-170 Release 3 latches, and remove the separation roller [2], feed roller [3], and pick- up roller [4]. Fig. 4-171 © 2015 TOSHIBA TEC CORPORATION All rights reserved e-STUDIO2008A/2508A/3008A/3508A/4508A/5008A DISASSEMBLY AND REPLACEMENT 4 - 63...
- Page 184 Separation roller Fig. 4-172 Feed roller Fig. 4-173 Pick-up roller Fig. 4-174 e-STUDIO2008A/2508A/3008A/3508A/4508A/5008A © 2015 TOSHIBA TEC CORPORATION All rights reserved DISASSEMBLY AND REPLACEMENT 4 - 64...
- Page 185 Fig. 4-175 Release the roller latch, and remove the separation roller [2], feed roller [3], and pick- up roller [4]. Fig. 4-176 Separation roller Fig. 4-177 © 2015 TOSHIBA TEC CORPORATION All rights reserved e-STUDIO2008A/2508A/3008A/3508A/4508A/5008A DISASSEMBLY AND REPLACEMENT 4 - 65...
- Page 186 Remove the upper tray-up motor unit. P. 4-68 "4.5.22 Upper tray-up motor unit" Disconnect 1 connector [1] from the rear side, and then release 2 latches. Fig. 4-180 e-STUDIO2008A/2508A/3008A/3508A/4508A/5008A © 2015 TOSHIBA TEC CORPORATION All rights reserved DISASSEMBLY AND REPLACEMENT 4 - 66...
- Page 187 Disconnect 1 connector [1] from the rear side, and then release 2 latches. Fig. 4-182 Remove the 2nd drawer detection switch [2] from the front side. Fig. 4-183 © 2015 TOSHIBA TEC CORPORATION All rights reserved e-STUDIO2008A/2508A/3008A/3508A/4508A/5008A DISASSEMBLY AND REPLACEMENT 4 - 67...
- Page 188 Remove the rear cover. P. 4-6 "4.1.15 Rear cover" Disconnect 1 connector [1], and then release the harness from the harness guide. Fig. 4-186 e-STUDIO2008A/2508A/3008A/3508A/4508A/5008A © 2015 TOSHIBA TEC CORPORATION All rights reserved DISASSEMBLY AND REPLACEMENT 4 - 68...
- Page 189 P. 4-68 "4.5.22 Upper tray-up motor unit" Release 4 latches and remove the cover [1]. Fig. 4-188 Take off the upper tray-up motor [2]. Fig. 4-189 © 2015 TOSHIBA TEC CORPORATION All rights reserved e-STUDIO2008A/2508A/3008A/3508A/4508A/5008A DISASSEMBLY AND REPLACEMENT 4 - 69...
- Page 190 Remove the upper tray-up motor unit. P. 4-68 "4.5.22 Upper tray-up motor unit" Release 4 latches, and then remove the cover [1]. Fig. 4-192 e-STUDIO2008A/2508A/3008A/3508A/4508A/5008A © 2015 TOSHIBA TEC CORPORATION All rights reserved DISASSEMBLY AND REPLACEMENT 4 - 70...
- Page 191 Release 4 latches, and then remove the cover [1]. Fig. 4-194 Release 3 latches, and then remove the 2nd drawer paper stock sensor [2]. Fig. 4-195 © 2015 TOSHIBA TEC CORPORATION All rights reserved e-STUDIO2008A/2508A/3008A/3508A/4508A/5008A DISASSEMBLY AND REPLACEMENT 4 - 71...
- Page 192 Feed out the sensor holder [1] to the rear side, and then remove it. Fig. 4-197 Notes: When installing, fix it using the sensor holder projection [2] and latch [3]. Fig. 4-198 e-STUDIO2008A/2508A/3008A/3508A/4508A/5008A © 2015 TOSHIBA TEC CORPORATION All rights reserved DISASSEMBLY AND REPLACEMENT 4 - 72...
- Page 193 P. 4-68 "4.5.22 Upper tray-up motor unit" Release 1 latch. Fig. 4-200 Feed out the sensor holder [1] to the rear side and then remove it. Fig. 4-201 © 2015 TOSHIBA TEC CORPORATION All rights reserved e-STUDIO2008A/2508A/3008A/3508A/4508A/5008A DISASSEMBLY AND REPLACEMENT 4 - 73...
- Page 194 [2]. Notes: When installing, connect the yellow harness connector to the left side. Release the latch, and remove the switch holder [3]. Fig. 4-204 e-STUDIO2008A/2508A/3008A/3508A/4508A/5008A © 2015 TOSHIBA TEC CORPORATION All rights reserved DISASSEMBLY AND REPLACEMENT 4 - 74...
- Page 195 Fig. 4-206 Release the latch, and remove the 2nd drawer paper width detection switch [4] and 2nd drawer paper length detection switch [5]. Fig. 4-207 © 2015 TOSHIBA TEC CORPORATION All rights reserved e-STUDIO2008A/2508A/3008A/3508A/4508A/5008A DISASSEMBLY AND REPLACEMENT 4 - 75...
- Page 196 Fig. 4-208 Remove 3 clips. Fig. 4-209 Remove 3 bushings and 2 screws [2], and then take off the clutch cover [3]. Fig. 4-210 e-STUDIO2008A/2508A/3008A/3508A/4508A/5008A © 2015 TOSHIBA TEC CORPORATION All rights reserved DISASSEMBLY AND REPLACEMENT 4 - 76...
- Page 197 Remove the high speed transport clutch [4]. Notes: When installing the clutch, attach a rotation Fig. 4-211 stopper. Fig. 4-212 © 2015 TOSHIBA TEC CORPORATION All rights reserved e-STUDIO2008A/2508A/3008A/3508A/4508A/5008A DISASSEMBLY AND REPLACEMENT 4 - 77...
- Page 198 1st drawer feed clutch (CLT3) Remove the clutch cover. P. 4-76 "4.5.32 High speed transport clutch (CLT5)" Remove the 1st drawer feed clutch [1]. Fig. 4-215 e-STUDIO2008A/2508A/3008A/3508A/4508A/5008A © 2015 TOSHIBA TEC CORPORATION All rights reserved DISASSEMBLY AND REPLACEMENT 4 - 78...
- Page 199 P. 4-76 "4.5.32 High speed transport clutch (CLT5)" Remove the 2nd drawer feed clutch [1]. Fig. 4-217 Notes: When installing the clutch, attach a rotation stopper. Fig. 4-218 © 2015 TOSHIBA TEC CORPORATION All rights reserved e-STUDIO2008A/2508A/3008A/3508A/4508A/5008A DISASSEMBLY AND REPLACEMENT 4 - 79...
- Page 200 [2]. Fig. 4-220 Notes: When installing the registration roller clutch, attach a rotation stopper to the clutch cover. Fig. 4-221 e-STUDIO2008A/2508A/3008A/3508A/4508A/5008A © 2015 TOSHIBA TEC CORPORATION All rights reserved DISASSEMBLY AND REPLACEMENT 4 - 80...
- Page 201 Remove 1 harness clamp [1] and disconnect 1 connector [2]. Release the harness from the harness guide. Fig. 4-223 Remove the spring [3]. Fig. 4-224 © 2015 TOSHIBA TEC CORPORATION All rights reserved e-STUDIO2008A/2508A/3008A/3508A/4508A/5008A DISASSEMBLY AND REPLACEMENT 4 - 81...
- Page 202 Remove the paper feed drive unit. P. 4-81 "4.5.38 Paper feed drive unit" Remove 3 clips and take off 3 bushings [1]. Fig. 4-226 e-STUDIO2008A/2508A/3008A/3508A/4508A/5008A © 2015 TOSHIBA TEC CORPORATION All rights reserved DISASSEMBLY AND REPLACEMENT 4 - 82...
- Page 203 2nd drawer paper feed clutch [4], and high speed transport clutch [5]. Fig. 4-228 Notes: When installing the clutch, attach a rotation stopper. Fig. 4-229 © 2015 TOSHIBA TEC CORPORATION All rights reserved e-STUDIO2008A/2508A/3008A/3508A/4508A/5008A DISASSEMBLY AND REPLACEMENT 4 - 83...
- Page 204 2 rice-sized grains of white grease (Molykote EM-30L) to the shaft [7]. Fig. 4-231 Remove the paper feed drive gear. Fig. 4-232 e-STUDIO2008A/2508A/3008A/3508A/4508A/5008A © 2015 TOSHIBA TEC CORPORATION All rights reserved DISASSEMBLY AND REPLACEMENT 4 - 84...
- Page 205 Remove 2 screws and take off the main motor [1]. Fig. 4-234 4.6.2 Main motor (M8) <20ppm/25ppm/30ppm> Remove the flywheel. P. 4-80 "4.5.36 Flywheel" Disconnect 2 connectors. Fig. 4-235 © 2015 TOSHIBA TEC CORPORATION All rights reserved e-STUDIO2008A/2508A/3008A/3508A/4508A/5008A DISASSEMBLY AND REPLACEMENT 4 - 85...
- Page 206 Remove 2 screws and take off the main motor [1]. Fig. 4-236 e-STUDIO2008A/2508A/3008A/3508A/4508A/5008A © 2015 TOSHIBA TEC CORPORATION All rights reserved DISASSEMBLY AND REPLACEMENT 4 - 86...
- Page 207 [2] by pulling it toward you. Fig. 4-237 Loosen 2 screws and remove the process unit [3] by pulling it toward you. Fig. 4-238 © 2015 TOSHIBA TEC CORPORATION All rights reserved e-STUDIO2008A/2508A/3008A/3508A/4508A/5008A DISASSEMBLY AND REPLACEMENT 4 - 87...
- Page 208 ( P. 4-87 "4.7.1 Process unit") Remove the harness cover [1] by sliding it downward. Fig. 4-239 Disconnect 1 connector. Fig. 4-240 Disconnect 2 connectors. Fig. 4-241 e-STUDIO2008A/2508A/3008A/3508A/4508A/5008A © 2015 TOSHIBA TEC CORPORATION All rights reserved DISASSEMBLY AND REPLACEMENT 4 - 88...
- Page 209 1. Be careful not to touch or scratch the drum surface at this time. Fig. 4-243 2. Do not deform the guide film [5] of developer unit by touching this. Fig. 4-244 © 2015 TOSHIBA TEC CORPORATION All rights reserved e-STUDIO2008A/2508A/3008A/3508A/4508A/5008A DISASSEMBLY AND REPLACEMENT 4 - 89...
- Page 210 The number of the discharge LEDs for 20ppm/25ppm/30ppm 20ppm/25ppm/30ppm differs from that for 35ppm/45ppm/50ppm, therefore do not install the LEDs in a wrong model. 35ppm/45ppm/50ppm Fig. 4-247 e-STUDIO2008A/2508A/3008A/3508A/4508A/5008A © 2015 TOSHIBA TEC CORPORATION All rights reserved DISASSEMBLY AND REPLACEMENT 4 - 90...
- Page 211 Push the lever [1] and pull out the main charger [2]. Notes: Be careful not to touch or scratch the drum surface at this time. Fig. 4-248 © 2015 TOSHIBA TEC CORPORATION All rights reserved e-STUDIO2008A/2508A/3008A/3508A/4508A/5008A DISASSEMBLY AND REPLACEMENT 4 - 91...
- Page 212 Release the main charger cleaner [1] from the hooks [2]. Then rotate the main charger cleaner [1] at 90 degrees to take it off. Fig. 4-250 e-STUDIO2008A/2508A/3008A/3508A/4508A/5008A © 2015 TOSHIBA TEC CORPORATION All rights reserved DISASSEMBLY AND REPLACEMENT 4 - 92...
- Page 213 Remove the terminal cover [2] at rear side. Fig. 4-251 Remove the terminal [3] and spring [4]. Then take off the needle electrode [5]. Fig. 4-252 © 2015 TOSHIBA TEC CORPORATION All rights reserved e-STUDIO2008A/2508A/3008A/3508A/4508A/5008A DISASSEMBLY AND REPLACEMENT 4 - 93...
- Page 214 ( P. 4-91 "4.7.4 Main charger") Rotate the lever [2] while pushing the latch [1]. Remove the lever [2] by pulling it toward you. Fig. 4-254 e-STUDIO2008A/2508A/3008A/3508A/4508A/5008A © 2015 TOSHIBA TEC CORPORATION All rights reserved DISASSEMBLY AND REPLACEMENT 4 - 94...
- Page 215 Remove 2 screws and take off the drum cleaning blade [1]. Notes: Be careful not to touch or scratch the edge of the drum cleaning blade [1]. Fig. 4-256 © 2015 TOSHIBA TEC CORPORATION All rights reserved e-STUDIO2008A/2508A/3008A/3508A/4508A/5008A DISASSEMBLY AND REPLACEMENT 4 - 95...
- Page 216 [3]. Notes: When the drum separation fingers have been replaced, check if the pressure movement is normal by moving them with your hands. Fig. 4-258 e-STUDIO2008A/2508A/3008A/3508A/4508A/5008A © 2015 TOSHIBA TEC CORPORATION All rights reserved DISASSEMBLY AND REPLACEMENT 4 - 96...
- Page 217 [3]. Fig. 4-260 3. When rotating the toner recovery auger [2], rotate it only in the same direction as that for transporting toner. Fig. 4-261 © 2015 TOSHIBA TEC CORPORATION All rights reserved e-STUDIO2008A/2508A/3008A/3508A/4508A/5008A DISASSEMBLY AND REPLACEMENT 4 - 97...
- Page 218 P. 4-80 "4.5.36 Flywheel" Disconnect 1 connector [1] and remove 1 screw, and then take off the toner motor [2] with the bracket. Fig. 4-264 e-STUDIO2008A/2508A/3008A/3508A/4508A/5008A © 2015 TOSHIBA TEC CORPORATION All rights reserved DISASSEMBLY AND REPLACEMENT 4 - 98...
- Page 219 P. 4-2 "4.1.3 Receiving tray" Disconnect 1 connector on the duct [1]. Fig. 4-266 Remove 1 screw and take off the duct [1]. Fig. 4-267 © 2015 TOSHIBA TEC CORPORATION All rights reserved e-STUDIO2008A/2508A/3008A/3508A/4508A/5008A DISASSEMBLY AND REPLACEMENT 4 - 99...
- Page 220 Disconnect 1 connector [1] from the SYS board. Lift 2 latches and remove the SYS/HDD cooling fan [2] by sliding it toward you. Fig. 4-270 e-STUDIO2008A/2508A/3008A/3508A/4508A/5008A © 2015 TOSHIBA TEC CORPORATION All rights reserved DISASSEMBLY AND REPLACEMENT 4 - 100...
- Page 221 Remove the left cover. P. 4-1 "4.1.2 Left cover" Disconnect 4 connectors and remove the main power switch [1]. Fig. 4-273 © 2015 TOSHIBA TEC CORPORATION All rights reserved e-STUDIO2008A/2508A/3008A/3508A/4508A/5008A DISASSEMBLY AND REPLACEMENT 4 - 101...
- Page 222 ( P. 4-87 "4.7.1 Process unit") Remove the harness cover [1] by sliding it downward. Fig. 4-274 Disconnect 1 connector. Fig. 4-275 Disconnect 2 connectors. Fig. 4-276 e-STUDIO2008A/2508A/3008A/3508A/4508A/5008A © 2015 TOSHIBA TEC CORPORATION All rights reserved DISASSEMBLY AND REPLACEMENT 4 - 102...
- Page 223 1. Be careful not to touch or scratch the drum surface at this time. Fig. 4-278 2. Do not deform the guide film [6] of developer unit by touching this. Fig. 4-279 © 2015 TOSHIBA TEC CORPORATION All rights reserved e-STUDIO2008A/2508A/3008A/3508A/4508A/5008A DISASSEMBLY AND REPLACEMENT 4 - 103...
- Page 224 2. When cleaning the developer unit, never attempt to use solvent. Fig. 4-282 e-STUDIO2008A/2508A/3008A/3508A/4508A/5008A © 2015 TOSHIBA TEC CORPORATION All rights reserved DISASSEMBLY AND REPLACEMENT 4 - 104...
- Page 225 Place the developer unit upside down. Disconnect 2 connectors. Fig. 4-284 Remove 1 screw. Then take off the EPU memory board. EPU memory board Fig. 4-285 © 2015 TOSHIBA TEC CORPORATION All rights reserved e-STUDIO2008A/2508A/3008A/3508A/4508A/5008A DISASSEMBLY AND REPLACEMENT 4 - 105...
- Page 226 Remove the developer material. Drum thermistor ( P. 4-104 "4.8.2 Removing developer material") Disconnect 1 connector, remove 1 screw and take off the drum thermistor. Connector Fig. 4-288 e-STUDIO2008A/2508A/3008A/3508A/4508A/5008A © 2015 TOSHIBA TEC CORPORATION All rights reserved DISASSEMBLY AND REPLACEMENT 4 - 106...
- Page 227 Gear Recovered toner drive unit Fig. 4-290 Remove 2 plate springs fixing the doctor Plate spring sleeve on its both ends. Plate spring Fig. 4-291 © 2015 TOSHIBA TEC CORPORATION All rights reserved e-STUDIO2008A/2508A/3008A/3508A/4508A/5008A DISASSEMBLY AND REPLACEMENT 4 - 107...
- Page 228 Remove 2 screws and take off the bracket. Bracket Fig. 4-294 Remove 1 E-ring and take off the guide roller on the front side. E-ring Guide roller Fig. 4-295 e-STUDIO2008A/2508A/3008A/3508A/4508A/5008A © 2015 TOSHIBA TEC CORPORATION All rights reserved DISASSEMBLY AND REPLACEMENT 4 - 108...
- Page 229 (12) Remove 1 screw and take off the bracket. Bearing Bracket Fig. 4-298 (13) Take off 3 gears and 1 timing belt. Timing belt Gear Fig. 4-299 © 2015 TOSHIBA TEC CORPORATION All rights reserved e-STUDIO2008A/2508A/3008A/3508A/4508A/5008A DISASSEMBLY AND REPLACEMENT 4 - 109...
- Page 230 (16) Remove the seal on the front side. Remove 1 Seal E-ring and 1 bushing. E-ring Bushing Fig. 4-301 (17) Take off the developer sleeve. Developer sleeve Fig. 4-302 e-STUDIO2008A/2508A/3008A/3508A/4508A/5008A © 2015 TOSHIBA TEC CORPORATION All rights reserved DISASSEMBLY AND REPLACEMENT 4 - 110...
- Page 231 Remove 2 bushings and 2 oil seals from the holder. Oil seal (Replacement of Oil Seal: P. 4-113 "4.8.9 Replacement of oil seal") Bushing Fig. 4-305 © 2015 TOSHIBA TEC CORPORATION All rights reserved e-STUDIO2008A/2508A/3008A/3508A/4508A/5008A DISASSEMBLY AND REPLACEMENT 4 - 111...
- Page 232 Remove the bushing and oil seal. (Replacement of Oil Seal: P. 4-113 "4.8.9 Replacement of oil seal") Oil seal Bushing Fig. 4-308 Take off the mixer-1. Mixer-1 Fig. 4-309 e-STUDIO2008A/2508A/3008A/3508A/4508A/5008A © 2015 TOSHIBA TEC CORPORATION All rights reserved DISASSEMBLY AND REPLACEMENT 4 - 112...
- Page 233 Apply the grease (Alvania No.2; amount of 2 rice grains) on entire surface of the oil seal evenly. Grease Notes: Wipe off the excessive grease. Oil seal Fig. 4-311 © 2015 TOSHIBA TEC CORPORATION All rights reserved e-STUDIO2008A/2508A/3008A/3508A/4508A/5008A DISASSEMBLY AND REPLACEMENT 4 - 113...
- Page 234 P. 4-149 "4.12.1 Automatic duplexing unit (ADU)" Remove 4 screws and take off the bracket [1]. Fig. 4-312 Disconnect 1 connector and remove the transfer unit [2]. Fig. 4-313 e-STUDIO2008A/2508A/3008A/3508A/4508A/5008A © 2015 TOSHIBA TEC CORPORATION All rights reserved DISASSEMBLY AND REPLACEMENT 4 - 114...
- Page 235 TRU fan [3]. Fig. 4-315 Notes: When installing, pass the harness [4] through the harness guide as shown in the right figure. Fig. 4-316 © 2015 TOSHIBA TEC CORPORATION All rights reserved e-STUDIO2008A/2508A/3008A/3508A/4508A/5008A DISASSEMBLY AND REPLACEMENT 4 - 115...
- Page 236 4.9.4 Transfer roller Remove the transfer roller unit. P. 4-116 "4.9.3 Transfer roller unit" Release 4 latches on the transfer roller unit. Fig. 4-318 e-STUDIO2008A/2508A/3008A/3508A/4508A/5008A © 2015 TOSHIBA TEC CORPORATION All rights reserved DISASSEMBLY AND REPLACEMENT 4 - 116...
- Page 237 Remove 2 collars [2], 1 gear [3] and 2 stoppers [4] from the transfer roller [1]. Notes: When installing the bushing and gear, be careful of the orientation. Fig. 4-320 © 2015 TOSHIBA TEC CORPORATION All rights reserved e-STUDIO2008A/2508A/3008A/3508A/4508A/5008A DISASSEMBLY AND REPLACEMENT 4 - 117...
- Page 238 [1]. Fig. 4-321 Notes: When installing, insert the cover [1] into the lower side of the power supply plate [2]. Fig. 4-322 e-STUDIO2008A/2508A/3008A/3508A/4508A/5008A © 2015 TOSHIBA TEC CORPORATION All rights reserved DISASSEMBLY AND REPLACEMENT 4 - 118...
- Page 239 Remove the separation needle [3] while trying not to deform it. Fig. 4-323 4.9.6 Ozone filter Open the side cover. Open the transfer unit [1]. Fig. 4-324 © 2015 TOSHIBA TEC CORPORATION All rights reserved e-STUDIO2008A/2508A/3008A/3508A/4508A/5008A DISASSEMBLY AND REPLACEMENT 4 - 119...
- Page 240 Remove the cover [2] by sliding it toward you. Fig. 4-325 Remove the ozone filter [3]. Fig. 4-326 e-STUDIO2008A/2508A/3008A/3508A/4508A/5008A © 2015 TOSHIBA TEC CORPORATION All rights reserved DISASSEMBLY AND REPLACEMENT 4 - 120...
- Page 241 The fuser unit is extremely hot. When removing the fuser unit, hold the handles of the unit to avoid a direct touch on the unit. Fig. 4-327 © 2015 TOSHIBA TEC CORPORATION All rights reserved e-STUDIO2008A/2508A/3008A/3508A/4508A/5008A DISASSEMBLY AND REPLACEMENT 4 - 121...
- Page 242 • "H" is marked on the fuser unit for 35ppm/ 45ppm/50ppm for identification. "L" is marked on the fuser unit for 20ppm/ 25ppm/30ppm. Fig. 4-330 e-STUDIO2008A/2508A/3008A/3508A/4508A/5008A © 2015 TOSHIBA TEC CORPORATION All rights reserved DISASSEMBLY AND REPLACEMENT 4 - 122...
- Page 243 Fuser roller cover Remove the fuser unit. P. 4-121 "4.10.1 Fuser unit" Remove 2 screws, and take off the fuser roller cover [1]. Fig. 4-333 © 2015 TOSHIBA TEC CORPORATION All rights reserved e-STUDIO2008A/2508A/3008A/3508A/4508A/5008A DISASSEMBLY AND REPLACEMENT 4 - 123...
- Page 244 Remove the rear side cover. P. 4-123 "4.10.3 Rear side cover" Remove 2 screws and take off the pressure roller cover [1]. Fig. 4-336 e-STUDIO2008A/2508A/3008A/3508A/4508A/5008A © 2015 TOSHIBA TEC CORPORATION All rights reserved DISASSEMBLY AND REPLACEMENT 4 - 124...
- Page 245 2. Slide the separation finger toward the front side and turn it as twist. 3. Remove the separation finger from the groove. Fig. 4-339 © 2015 TOSHIBA TEC CORPORATION All rights reserved e-STUDIO2008A/2508A/3008A/3508A/4508A/5008A DISASSEMBLY AND REPLACEMENT 4 - 125...
- Page 246 [2]. Fig. 4-340 Release 1 latch and take off the sensor cover [3]. Fig. 4-341 Remove the actuator [4] and spring [5]. Fig. 4-342 e-STUDIO2008A/2508A/3008A/3508A/4508A/5008A © 2015 TOSHIBA TEC CORPORATION All rights reserved DISASSEMBLY AND REPLACEMENT 4 - 126...
- Page 247 Remove 2 screws and take off the leaf spring [1]. Fig. 4-344 Remove 2 screws and take off the fuser center thermostat [2] and fuser front thermostat [3]. Fig. 4-345 © 2015 TOSHIBA TEC CORPORATION All rights reserved e-STUDIO2008A/2508A/3008A/3508A/4508A/5008A DISASSEMBLY AND REPLACEMENT 4 - 127...
- Page 248 Remove 2 screws and take off the lamp holder [1] on the rear side. Fig. 4-346 Disconnect 3 connectors. Fig. 4-347 Release 2 latches and remove the connector bracket [2]. Fig. 4-348 e-STUDIO2008A/2508A/3008A/3508A/4508A/5008A © 2015 TOSHIBA TEC CORPORATION All rights reserved DISASSEMBLY AND REPLACEMENT 4 - 128...
- Page 249 Fig. 4-349 Remove 1 screw. Fig. 4-350 Release the harness from the harness guide, and then remove the harness cover [4]. Fig. 4-351 © 2015 TOSHIBA TEC CORPORATION All rights reserved e-STUDIO2008A/2508A/3008A/3508A/4508A/5008A DISASSEMBLY AND REPLACEMENT 4 - 129...
- Page 250 Fig. 4-352 (11) Remove 3 screws and take off the brackets from the center thermistor [5], side thermistor [6] and edge thermistor [7]. Fig. 4-353 e-STUDIO2008A/2508A/3008A/3508A/4508A/5008A © 2015 TOSHIBA TEC CORPORATION All rights reserved DISASSEMBLY AND REPLACEMENT 4 - 130...
- Page 251 Remove the fuser roller cover. P. 4-123 "4.10.4 Fuser roller cover" Remove 2 screws [1] and release the harness [2] from the harness guide. Fig. 4-356 © 2015 TOSHIBA TEC CORPORATION All rights reserved e-STUDIO2008A/2508A/3008A/3508A/4508A/5008A DISASSEMBLY AND REPLACEMENT 4 - 131...
- Page 252 [5] on the front side. Fig. 4-357 Disconnect 3 connectors. Fig. 4-358 Release 2 latches and remove the connector bracket [6]. Fig. 4-359 e-STUDIO2008A/2508A/3008A/3508A/4508A/5008A © 2015 TOSHIBA TEC CORPORATION All rights reserved DISASSEMBLY AND REPLACEMENT 4 - 132...
- Page 253 Remove the heater lamp [8] by pulling it out toward the rear side. Notes: Do not touch the heater lamp with your bare hands. Fig. 4-361 © 2015 TOSHIBA TEC CORPORATION All rights reserved e-STUDIO2008A/2508A/3008A/3508A/4508A/5008A DISASSEMBLY AND REPLACEMENT 4 - 133...
- Page 254 P. 4-123 "4.10.3 Rear side cover" Remove 2 screws and take off the pressure roller cover [1]. Fig. 4-362 Remove 2 springs [2]. Fig. 4-363 e-STUDIO2008A/2508A/3008A/3508A/4508A/5008A © 2015 TOSHIBA TEC CORPORATION All rights reserved DISASSEMBLY AND REPLACEMENT 4 - 134...
- Page 255 P. 4-131 "4.10.10 Center heater lamp (LAMP1)/side heater lamp (LAMP2)" Remove 2 E-rings, and then take off the 2 pressure roller release levers [1]. Fig. 4-365 © 2015 TOSHIBA TEC CORPORATION All rights reserved e-STUDIO2008A/2508A/3008A/3508A/4508A/5008A DISASSEMBLY AND REPLACEMENT 4 - 135...
- Page 256 [2] and collar [3]. Fig. 4-366 Remove the C-ring from the rear side, and then remove the collar [4]. Fig. 4-367 e-STUDIO2008A/2508A/3008A/3508A/4508A/5008A © 2015 TOSHIBA TEC CORPORATION All rights reserved DISASSEMBLY AND REPLACEMENT 4 - 136...
- Page 257 [6] by pulling it out toward the front side. Notes: • Be sure not to damage the fuser roller. • When installing/removing the C-ring, not to deform it by overextended. Fig. 4-368 © 2015 TOSHIBA TEC CORPORATION All rights reserved e-STUDIO2008A/2508A/3008A/3508A/4508A/5008A DISASSEMBLY AND REPLACEMENT 4 - 137...
- Page 258 The screw on the front side is a shoulder screw. When installing, exercise care not to confuse it with other kinds of screws. Fig. 4-371 e-STUDIO2008A/2508A/3008A/3508A/4508A/5008A © 2015 TOSHIBA TEC CORPORATION All rights reserved DISASSEMBLY AND REPLACEMENT 4 - 138...
- Page 259 Remove the reverse unit. P. 4-138 "4.11.1 Reverse unit <35ppm/ 45ppm/50ppm>" Remove 3 screws and take off the paper exit unit [1]. Fig. 4-373 © 2015 TOSHIBA TEC CORPORATION All rights reserved e-STUDIO2008A/2508A/3008A/3508A/4508A/5008A DISASSEMBLY AND REPLACEMENT 4 - 139...
- Page 260 P. 4-139 "4.11.2 Paper exit unit <35ppm/ 45ppm/50ppm>" Remove 1 E-ring [1], 1 gear [2], and 1 bushing [3]. Fig. 4-375 Remove 1 E-ring [4] and 1 bushing [5]. Fig. 4-376 e-STUDIO2008A/2508A/3008A/3508A/4508A/5008A © 2015 TOSHIBA TEC CORPORATION All rights reserved DISASSEMBLY AND REPLACEMENT 4 - 140...
- Page 261 When replacing the the idling roller or idling roller shaft, apply 0.5 x 2 rice-sized grain of white grease (Molykote EM-30L) to each oil groove [9] and [10]. [10] Fig. 4-379 © 2015 TOSHIBA TEC CORPORATION All rights reserved e-STUDIO2008A/2508A/3008A/3508A/4508A/5008A DISASSEMBLY AND REPLACEMENT 4 - 141...
- Page 262 Remove 1 screw and take off the exit motor assembly [1]. Fig. 4-380 Disconnect 1 connector from the exit motor assembly [1]. Fig. 4-381 Remove the belt [2]. Fig. 4-382 e-STUDIO2008A/2508A/3008A/3508A/4508A/5008A © 2015 TOSHIBA TEC CORPORATION All rights reserved DISASSEMBLY AND REPLACEMENT 4 - 142...
- Page 263 Remove 2 screws, and then take off the exit motor [4] by letting the gear [3] out of the large hole in the bracket. Fig. 4-383 Fig. 4-384 © 2015 TOSHIBA TEC CORPORATION All rights reserved e-STUDIO2008A/2508A/3008A/3508A/4508A/5008A DISASSEMBLY AND REPLACEMENT 4 - 143...
- Page 264 When installing, exercise care not to forget to attach the timing belt [3]. Fig. 4-386 Disconnect the 1 connector [4], remove 2 screws, and take off the reverse motor [5]. Fig. 4-387 e-STUDIO2008A/2508A/3008A/3508A/4508A/5008A © 2015 TOSHIBA TEC CORPORATION All rights reserved DISASSEMBLY AND REPLACEMENT 4 - 144...
- Page 265 Remove 2 screws and take off the cover [1]. Fig. 4-388 Remove the harness from the harness guide. Remove the 1 spring [2]. Fig. 4-389 © 2015 TOSHIBA TEC CORPORATION All rights reserved e-STUDIO2008A/2508A/3008A/3508A/4508A/5008A DISASSEMBLY AND REPLACEMENT 4 - 145...
- Page 266 Upper exit roller <35ppm/45ppm/50ppm> Remove the reverse motor unit. P. 4-144 "4.11.6 Reverse motor (M13) <35ppm/45ppm/50ppm>" Remove 2 screws and take off the cover [1]. Fig. 4-392 e-STUDIO2008A/2508A/3008A/3508A/4508A/5008A © 2015 TOSHIBA TEC CORPORATION All rights reserved DISASSEMBLY AND REPLACEMENT 4 - 146...
- Page 267 Remove the 1 gear [3], 1 clip [4], 1 bushing (metal) [5], and 1 bushing (resin) [6], then take off the upper exit roller [7]. Fig. 4-394 Fig. 4-395 © 2015 TOSHIBA TEC CORPORATION All rights reserved e-STUDIO2008A/2508A/3008A/3508A/4508A/5008A DISASSEMBLY AND REPLACEMENT 4 - 147...
- Page 268 Remove the 1 gear [1], 1 clip [2], 1 bushing (metal) [3], and 1 bushing (resin) [5], then take off the reverse roller [4]. Fig. 4-397 Fig. 4-398 e-STUDIO2008A/2508A/3008A/3508A/4508A/5008A © 2015 TOSHIBA TEC CORPORATION All rights reserved DISASSEMBLY AND REPLACEMENT 4 - 148...
- Page 269 Fig. 4-400 Raise the rear hinge [4]. Notes: When installing, turn the rear hinge [4] downward. Fig. 4-401 © 2015 TOSHIBA TEC CORPORATION All rights reserved e-STUDIO2008A/2508A/3008A/3508A/4508A/5008A DISASSEMBLY AND REPLACEMENT 4 - 149...
- Page 270 [5], and then remove it by sliding it toward the rear side. Fig. 4-403 Notes: When installing, fit the boss [7] of automatic duplexing unit to the front hinge [6]. Fig. 4-404 e-STUDIO2008A/2508A/3008A/3508A/4508A/5008A © 2015 TOSHIBA TEC CORPORATION All rights reserved DISASSEMBLY AND REPLACEMENT 4 - 150...
- Page 271 Fig. 4-405 Remove 1 screw and take off the clutch cover [2]. Fig. 4-406 Remove 1 bushing [3] and 1 leaf spring [4]. Fig. 4-407 © 2015 TOSHIBA TEC CORPORATION All rights reserved e-STUDIO2008A/2508A/3008A/3508A/4508A/5008A DISASSEMBLY AND REPLACEMENT 4 - 151...
- Page 272 P. 4-116 "4.9.3 Transfer roller unit" Remove the bypass feed clutch. P. 4-151 "4.12.2 Bypass feed clutch (CLT2)" Remove 1 ground cable fixing screw. Fig. 4-410 e-STUDIO2008A/2508A/3008A/3508A/4508A/5008A © 2015 TOSHIBA TEC CORPORATION All rights reserved DISASSEMBLY AND REPLACEMENT 4 - 152...
- Page 273 Remove 2 screws and take off the cover [1]. Fig. 4-411 Remove 6 screws and take off the ADU guide assembly [2]. Fig. 4-412 © 2015 TOSHIBA TEC CORPORATION All rights reserved e-STUDIO2008A/2508A/3008A/3508A/4508A/5008A DISASSEMBLY AND REPLACEMENT 4 - 153...
- Page 274 P. 4-157 "4.12.6 ADU middle cover <20ppm/25ppm/30ppm>" Remove 1 ground cable fixing screw. Fig. 4-413 Remove 4 screws and take off the ADU guide assembly [1]. Fig. 4-414 e-STUDIO2008A/2508A/3008A/3508A/4508A/5008A © 2015 TOSHIBA TEC CORPORATION All rights reserved DISASSEMBLY AND REPLACEMENT 4 - 154...
- Page 275 P. 4-152 "4.12.3 ADU guide assembly <35ppm/45ppm/50ppm>" Remove 4 screws and take off the ADU upper cover [1]. Fig. 4-415 Disconnect 2 connectors. Fig. 4-416 © 2015 TOSHIBA TEC CORPORATION All rights reserved e-STUDIO2008A/2508A/3008A/3508A/4508A/5008A DISASSEMBLY AND REPLACEMENT 4 - 155...
- Page 276 Release the harness [2] from the harness guide. Fig. 4-417 Remove 3 screws. Fig. 4-418 e-STUDIO2008A/2508A/3008A/3508A/4508A/5008A © 2015 TOSHIBA TEC CORPORATION All rights reserved DISASSEMBLY AND REPLACEMENT 4 - 156...
- Page 277 Remove the automatic duplexing unit (ADU). P. 4-149 "4.12.1 Automatic duplexing unit (ADU)" Remove 4 screws, and take off the ADU middle cover [1]. Fig. 4-420 © 2015 TOSHIBA TEC CORPORATION All rights reserved e-STUDIO2008A/2508A/3008A/3508A/4508A/5008A DISASSEMBLY AND REPLACEMENT 4 - 157...
- Page 278 [1]. Fig. 4-421 Remove 1 ground cable fixing screw. Fig. 4-422 Disconnect 3 connectors and remove the ADU control PC board [2]. Fig. 4-423 e-STUDIO2008A/2508A/3008A/3508A/4508A/5008A © 2015 TOSHIBA TEC CORPORATION All rights reserved DISASSEMBLY AND REPLACEMENT 4 - 158...
- Page 279 Remove the ADU guide assembly. P. 4-152 "4.12.3 ADU guide assembly <35ppm/45ppm/50ppm>" Remove 2 springs and take off the side cover release lever [1]. Fig. 4-426 © 2015 TOSHIBA TEC CORPORATION All rights reserved e-STUDIO2008A/2508A/3008A/3508A/4508A/5008A DISASSEMBLY AND REPLACEMENT 4 - 159...
- Page 280 Disconnect 1 connector and take off the ADU motor assembly [3]. Fig. 4-428 Remove 2 screws and take off the ADU motor [4]. Fig. 4-429 e-STUDIO2008A/2508A/3008A/3508A/4508A/5008A © 2015 TOSHIBA TEC CORPORATION All rights reserved DISASSEMBLY AND REPLACEMENT 4 - 160...
- Page 281 Fig. 4-430 Disconnect 1 connector and remove the ADU motor assembly [2]. Fig. 4-431 Remove 2 screws, and take off the ADU motor [3]. Fig. 4-432 © 2015 TOSHIBA TEC CORPORATION All rights reserved e-STUDIO2008A/2508A/3008A/3508A/4508A/5008A DISASSEMBLY AND REPLACEMENT 4 - 161...
- Page 282 P. 4-154 "4.12.4 ADU guide assembly <20ppm/25ppm/30ppm>" Bend the rib [2] of the ADU guide assembly [1] to remove the collar [3]. Fig. 4-435 e-STUDIO2008A/2508A/3008A/3508A/4508A/5008A © 2015 TOSHIBA TEC CORPORATION All rights reserved DISASSEMBLY AND REPLACEMENT 4 - 162...
- Page 283 Bend the rib [6] and remove the collar [7]. Fig. 4-437 Remove the collar [8], and then take off the transfer roller (lower) [9]. Fig. 4-438 © 2015 TOSHIBA TEC CORPORATION All rights reserved e-STUDIO2008A/2508A/3008A/3508A/4508A/5008A DISASSEMBLY AND REPLACEMENT 4 - 163...
- Page 284 Remove the ADU middle cover. P. 4-155 "4.12.5 ADU middle cover <35ppm/45ppm/50ppm>" Release the latch and take off the reverse sensor [1]. Fig. 4-441 e-STUDIO2008A/2508A/3008A/3508A/4508A/5008A © 2015 TOSHIBA TEC CORPORATION All rights reserved DISASSEMBLY AND REPLACEMENT 4 - 164...
- Page 285 Fig. 4-443 4.12.16 ADU interlock switch (SW3) <20ppm/25ppm/30ppm> Open the side cover. Remove 2 screws and take off the ADU interlock switch cover [1]. Fig. 4-444 © 2015 TOSHIBA TEC CORPORATION All rights reserved e-STUDIO2008A/2508A/3008A/3508A/4508A/5008A DISASSEMBLY AND REPLACEMENT 4 - 165...
- Page 286 Remove the ADU guide assembly. P. 4-152 "4.12.3 ADU guide assembly <35ppm/45ppm/50ppm>" Disconnect 1 connector and remove the fuser section cooling fan [1]. Fig. 4-446 e-STUDIO2008A/2508A/3008A/3508A/4508A/5008A © 2015 TOSHIBA TEC CORPORATION All rights reserved DISASSEMBLY AND REPLACEMENT 4 - 166...
- Page 287 Turn the main power switch of the equipment off. Disconnect the power cable. Take off the connector cover. Fig. 4-447 Disconnect 1 connector. Fig. 4-448 Install the connector cover. Fig. 4-449 © 2015 TOSHIBA TEC CORPORATION All rights reserved e-STUDIO2008A/2508A/3008A/3508A/4508A/5008A DISASSEMBLY AND REPLACEMENT 4 - 167...
- Page 288 Fig. 4-451 Remove 6 screws and take off the rear cover. Fig. 4-452 (10) Remove 2 screws and take off the SYS board cover. Fig. 4-453 e-STUDIO2008A/2508A/3008A/3508A/4508A/5008A © 2015 TOSHIBA TEC CORPORATION All rights reserved DISASSEMBLY AND REPLACEMENT 4 - 168...
- Page 289 (12) Remove 2 screws and take off the DSDF board. Fig. 4-455 (13) Install the SYS board cover with 2 screws. Fig. 4-456 (14) Install the rear cover with 6 screws. Fig. 4-457 © 2015 TOSHIBA TEC CORPORATION All rights reserved e-STUDIO2008A/2508A/3008A/3508A/4508A/5008A DISASSEMBLY AND REPLACEMENT 4 - 169...
- Page 290 (16) Install the cover with 1 screw. Fig. 4-459 (17) Remove 4 screws and take off 2 brackets. Fig. 4-460 (18) Remove 2 screws and 1 washer. Fig. 4-461 e-STUDIO2008A/2508A/3008A/3508A/4508A/5008A © 2015 TOSHIBA TEC CORPORATION All rights reserved DISASSEMBLY AND REPLACEMENT 4 - 170...
- Page 291 Press the [Power] button on the control panel to shut it down. Turn the main power switch of the equipment off. Disconnect the power cable. Take off the connector cover. Fig. 4-464 © 2015 TOSHIBA TEC CORPORATION All rights reserved e-STUDIO2008A/2508A/3008A/3508A/4508A/5008A DISASSEMBLY AND REPLACEMENT 4 - 171...
- Page 292 Disconnect 1 connector. Fig. 4-465 Install the connector cover. Fig. 4-466 Remove 2 screws and take off 1 bracket. Fig. 4-467 e-STUDIO2008A/2508A/3008A/3508A/4508A/5008A © 2015 TOSHIBA TEC CORPORATION All rights reserved DISASSEMBLY AND REPLACEMENT 4 - 172...
- Page 293 Remove the cover. Fig. 4-468 Remove 2 screws and 1 washer. Fig. 4-469 (10) Open the the reversing automatic document feeder. Remove 2 screws. Fig. 4-470 © 2015 TOSHIBA TEC CORPORATION All rights reserved e-STUDIO2008A/2508A/3008A/3508A/4508A/5008A DISASSEMBLY AND REPLACEMENT 4 - 173...
- Page 294 Disconnect the power cable. Remove 1 screw and take off the cover. Fig. 4-472 Remove 1 screw and take off the ground cable. Disconnect 1 connector. Fig. 4-473 e-STUDIO2008A/2508A/3008A/3508A/4508A/5008A © 2015 TOSHIBA TEC CORPORATION All rights reserved DISASSEMBLY AND REPLACEMENT 4 - 174...
- Page 295 Remove 3 screws and take off 2 fixing brackets on the rear side. Fig. 4-474 Install the cover with 1 screw. Fig. 4-475 Pull out the drawer. Fig. 4-476 © 2015 TOSHIBA TEC CORPORATION All rights reserved e-STUDIO2008A/2508A/3008A/3508A/4508A/5008A DISASSEMBLY AND REPLACEMENT 4 - 175...
- Page 296 Fig. 4-477 (10) Install the drawer. Fig. 4-478 (11) Lift the equipment up and remove the paper feed pedestal. Fig. 4-479 e-STUDIO2008A/2508A/3008A/3508A/4508A/5008A © 2015 TOSHIBA TEC CORPORATION All rights reserved DISASSEMBLY AND REPLACEMENT 4 - 176...
- Page 297 [1] Damp heater harness (JPD) [2] Signal harness Fig. 4-481 Remove 3 screws and take off 2 fixing brackets on the rear side. Fig. 4-482 © 2015 TOSHIBA TEC CORPORATION All rights reserved e-STUDIO2008A/2508A/3008A/3508A/4508A/5008A DISASSEMBLY AND REPLACEMENT 4 - 177...
- Page 298 Install the cover with 1 screw. Fig. 4-483 Pull out the drawer. Fig. 4-484 Pull out the large capacity feeder drawer. Fig. 4-485 e-STUDIO2008A/2508A/3008A/3508A/4508A/5008A © 2015 TOSHIBA TEC CORPORATION All rights reserved DISASSEMBLY AND REPLACEMENT 4 - 178...
- Page 299 (10) Install the right drawer. Fig. 4-486 (11) Remove 4 screws and take off 2 fixing brackets on the front side. Fig. 4-487 (12) Install the drawer. Fig. 4-488 © 2015 TOSHIBA TEC CORPORATION All rights reserved e-STUDIO2008A/2508A/3008A/3508A/4508A/5008A DISASSEMBLY AND REPLACEMENT 4 - 179...
- Page 300 Remove the connecting port cover. Disconnect 1 connector. Fig. 4-490 Remove 1 screw and take off the front cover of the bridge kit. Fig. 4-491 e-STUDIO2008A/2508A/3008A/3508A/4508A/5008A © 2015 TOSHIBA TEC CORPORATION All rights reserved DISASSEMBLY AND REPLACEMENT 4 - 180...
- Page 301 Fig. 4-493 Lift the bridge kit up to pull out the hook, and pull the bridge kit toward the front side to remove it. Fig. 4-494 © 2015 TOSHIBA TEC CORPORATION All rights reserved e-STUDIO2008A/2508A/3008A/3508A/4508A/5008A DISASSEMBLY AND REPLACEMENT 4 - 181...
- Page 302 Turn the main power switch of the equipment off. Disconnect the power cable. Remove the connector cover. Fig. 4-495 Disconnect 1 connector. Fig. 4-496 Install the connector cover. Fig. 4-497 e-STUDIO2008A/2508A/3008A/3508A/4508A/5008A © 2015 TOSHIBA TEC CORPORATION All rights reserved DISASSEMBLY AND REPLACEMENT 4 - 182...
- Page 303 Fig. 4-498 Press the button to release the lock. Pull out the finisher. Fig. 4-499 Remove 1 screw and take off 1 bracket. Fig. 4-500 © 2015 TOSHIBA TEC CORPORATION All rights reserved e-STUDIO2008A/2508A/3008A/3508A/4508A/5008A DISASSEMBLY AND REPLACEMENT 4 - 183...
- Page 304 (10) Install the finisher inside the equipment. Fig. 4-501 (11) Remove 3 screws and take off the cover. Fig. 4-502 (12) Remove 1 screw. Fig. 4-503 e-STUDIO2008A/2508A/3008A/3508A/4508A/5008A © 2015 TOSHIBA TEC CORPORATION All rights reserved DISASSEMBLY AND REPLACEMENT 4 - 184...
- Page 305 Turn the main power switch of the equipment off. Disconnect the power cable. Remove the connector cover. Fig. 4-505 Disconnect 1 connector. Fig. 4-506 © 2015 TOSHIBA TEC CORPORATION All rights reserved e-STUDIO2008A/2508A/3008A/3508A/4508A/5008A DISASSEMBLY AND REPLACEMENT 4 - 185...
- Page 306 Install the connector cover. Fig. 4-507 Open the finisher cover and remove 1 fixing screw. Pull out the lever. Fig. 4-508 Remove the finisher. Fig. 4-509 e-STUDIO2008A/2508A/3008A/3508A/4508A/5008A © 2015 TOSHIBA TEC CORPORATION All rights reserved DISASSEMBLY AND REPLACEMENT 4 - 186...
- Page 307 Turn the main power switch of the machine off. Disconnect the power cable. Remove the connector cover. Fig. 4-510 Disconnect 1 connector. Fig. 4-511 Install the connector cover. Fig. 4-512 © 2015 TOSHIBA TEC CORPORATION All rights reserved e-STUDIO2008A/2508A/3008A/3508A/4508A/5008A DISASSEMBLY AND REPLACEMENT 4 - 187...
- Page 308 Press the [Power] button on the control panel to shut it down. Turn the main power switch of the equipment off. Disconnect the power cable. Remove the connector cover. Fig. 4-515 e-STUDIO2008A/2508A/3008A/3508A/4508A/5008A © 2015 TOSHIBA TEC CORPORATION All rights reserved DISASSEMBLY AND REPLACEMENT 4 - 188...
- Page 309 Disconnect 1 connector. Fig. 4-516 Install the connector cover. Fig. 4-517 Take off the cover of the hole punch unit lower side. Fig. 4-518 © 2015 TOSHIBA TEC CORPORATION All rights reserved e-STUDIO2008A/2508A/3008A/3508A/4508A/5008A DISASSEMBLY AND REPLACEMENT 4 - 189...
- Page 310 Be careful not to fell the finisher when moving only the finisher unit. Fig. 4-520 (10) Remove 2 screws and take off the connector cover. Fig. 4-521 e-STUDIO2008A/2508A/3008A/3508A/4508A/5008A © 2015 TOSHIBA TEC CORPORATION All rights reserved DISASSEMBLY AND REPLACEMENT 4 - 190...
- Page 311 (11) Release the harness from 9 harness clamps. Fig. 4-522 (12) Disconnect 1 connector. Fig. 4-523 (13) Take off the cover of the hole punch unit lower side. Fig. 4-524 © 2015 TOSHIBA TEC CORPORATION All rights reserved e-STUDIO2008A/2508A/3008A/3508A/4508A/5008A DISASSEMBLY AND REPLACEMENT 4 - 191...
- Page 312 Turn the main power switch of the equipment off. Disconnect the power cable. Remove the connector cover. Fig. 4-526 Disconnect the connector. Fig. 4-527 e-STUDIO2008A/2508A/3008A/3508A/4508A/5008A © 2015 TOSHIBA TEC CORPORATION All rights reserved DISASSEMBLY AND REPLACEMENT 4 - 192...
- Page 313 Take off the cover of the hole punch unit lower side. Fig. 4-529 Open the finisher cover and remove 1 fixing screw. Pull out the lever. Fig. 4-530 © 2015 TOSHIBA TEC CORPORATION All rights reserved e-STUDIO2008A/2508A/3008A/3508A/4508A/5008A DISASSEMBLY AND REPLACEMENT 4 - 193...
- Page 314 Fig. 4-531 (10) Remove 1 screw and take off the connector cover. Fig. 4-532 (11) Disconnect 1 connector. Fig. 4-533 e-STUDIO2008A/2508A/3008A/3508A/4508A/5008A © 2015 TOSHIBA TEC CORPORATION All rights reserved DISASSEMBLY AND REPLACEMENT 4 - 194...
- Page 315 (13) Take off the cover of the hole punch unit lower side. Fig. 4-535 (14) Remove 2 screws. Lift up the hole punch unit and take it off. Fig. 4-536 © 2015 TOSHIBA TEC CORPORATION All rights reserved e-STUDIO2008A/2508A/3008A/3508A/4508A/5008A DISASSEMBLY AND REPLACEMENT 4 - 195...
- Page 316 Remove the tray. Fig. 4-537 Open the side cover. Remove 1 screw and take off the connecting port cover. Fig. 4-538 Disconnect 2 connectors. Fig. 4-539 e-STUDIO2008A/2508A/3008A/3508A/4508A/5008A © 2015 TOSHIBA TEC CORPORATION All rights reserved DISASSEMBLY AND REPLACEMENT 4 - 196...
- Page 317 Press the [Power] button on the control panel to shut it down. Turn the main power switch of the equipment off. Disconnect the power cable. Remove the tray. Fig. 4-542 © 2015 TOSHIBA TEC CORPORATION All rights reserved e-STUDIO2008A/2508A/3008A/3508A/4508A/5008A DISASSEMBLY AND REPLACEMENT 4 - 197...
- Page 318 Open the side cover. Remove 1 screw and take off the connecting port cover. Fig. 4-543 Disconnect 1 connector. Fig. 4-544 Remove 2 screws and take off the job separator. Fig. 4-545 e-STUDIO2008A/2508A/3008A/3508A/4508A/5008A © 2015 TOSHIBA TEC CORPORATION All rights reserved DISASSEMBLY AND REPLACEMENT 4 - 198...
- Page 319 Recovers the equipment from particular errors such as F800 or F900. * Only the modes which are available for this equipment are displayed on each menu. © 2015 TOSHIBA TEC CORPORATION All rights reserved e-STUDIO2008A/2508A/3008A/3508A/4508A/5008A SELF-DIAGNOSTIC MODE 5 - 1...
- Page 320 HS menu: Select the icon of the mode. *2 Press [CLASSIC] displayed at the upper right of the menu. *3 This is not used generally. The following mode can be started directly. e-STUDIO2008A/2508A/3008A/3508A/4508A/5008A © 2015 TOSHIBA TEC CORPORATION All rights reserved SELF-DIAGNOSTIC MODE 5 - 2...
- Page 321 [D] Changing/setting of the service password The [SETTINGS] screen is displayed by press [SETTINGS] on [FS Menu]. Press [Service Password] to change or reset the password. © 2015 TOSHIBA TEC CORPORATION All rights reserved e-STUDIO2008A/2508A/3008A/3508A/4508A/5008A SELF-DIAGNOSTIC MODE 5 - 3...
- Page 322 [FS-05-1234-56] or [Performs FS-05-1234-56] is taken for explanation purposes. Start FS Menu by pressing the [ON/OFF] button while pushing the [FUNCTION CLEAR] and [START] buttons simultaneously. Fig.5-3 Select [05 ADJUSTMENT MODE] and press [NEXT]. e-STUDIO2008A/2508A/3008A/3508A/4508A/5008A © 2015 TOSHIBA TEC CORPORATION All rights reserved SELF-DIAGNOSTIC MODE 5 - 4...
- Page 323 [FAX]: In case of [FS-11], [FS-12] or [FS-13] is given in the explanations, select [FAX] in the [FS Menu] and then press [NEXT] to choose each mode. © 2015 TOSHIBA TEC CORPORATION All rights reserved e-STUDIO2008A/2508A/3008A/3508A/4508A/5008A SELF-DIAGNOSTIC MODE 5 - 5...
- Page 324 [D] When a particular setting condition is applied: The setting value is given at the end of the description by dividing with ":" (colons). Example: [FS-08-8911:3]: "3" is set for FS-08-8911. e-STUDIO2008A/2508A/3008A/3508A/4508A/5008A © 2015 TOSHIBA TEC CORPORATION All rights reserved SELF-DIAGNOSTIC MODE 5 - 6...
- Page 325 Enter the user name and password if necessary. * Press [USER FUNCTIONS]. Press the [Tool] icon on the upper left of the screen for at least 3 seconds. Fig.5-6 © 2015 TOSHIBA TEC CORPORATION All rights reserved e-STUDIO2008A/2508A/3008A/3508A/4508A/5008A SELF-DIAGNOSTIC MODE 5 - 7...
- Page 326 In case both the service password and the administrator password have been forgotten, they can be reset by means of the HA mode. • Note that the user data are deleted at that time. e-STUDIO2008A/2508A/3008A/3508A/4508A/5008A © 2015 TOSHIBA TEC CORPORATION All rights reserved SELF-DIAGNOSTIC MODE 5 - 8...
- Page 327 Fig.5-7 Refer to the "Self-diagnostic code list" (separate document) for the items to be checked and the condition of the equipment when [A] through [H] are highlighted. © 2015 TOSHIBA TEC CORPORATION All rights reserved e-STUDIO2008A/2508A/3008A/3508A/4508A/5008A SELF-DIAGNOSTIC MODE 5 - 9...
- Page 328 * Return to the standby screen for code input by pressing [Clear]. Refer to the "Self-diagnostic code list" (separate document) for the codes available in the test mode 03. e-STUDIO2008A/2508A/3008A/3508A/4508A/5008A © 2015 TOSHIBA TEC CORPORATION All rights reserved SELF-DIAGNOSTIC MODE 5 - 10...
- Page 329 During test printing, the [CLEAR] button is disabled when “Wait adding toner” is displayed. Refer to the "Self-diagnostic code list" (separate document) for the codes available in the [04 TEST PRINT MODE]. © 2015 TOSHIBA TEC CORPORATION All rights reserved e-STUDIO2008A/2508A/3008A/3508A/4508A/5008A SELF-DIAGNOSTIC MODE...
- Page 330 (Exit) *[FUNCTION CLEAR] [Test copy] in RAM (Key in a value) [CLEAR] (Corrects value) [START] [CLEAR] (Corrects value) * Press [FUNCTION CLAER] to enter minus (-). e-STUDIO2008A/2508A/3008A/3508A/4508A/5008A © 2015 TOSHIBA TEC CORPORATION All rights reserved SELF-DIAGNOSTIC MODE 5 - 12...
- Page 331 In that case, turn the power ON normally and leave the equipment for approx. 3 minutes, and then restart the adjustment mode. Refer to the "Self-diagnostic code list" (separate document) for the codes available in the [05 ADJUSTMENT MODE]. © 2015 TOSHIBA TEC CORPORATION All rights reserved e-STUDIO2008A/2508A/3008A/3508A/4508A/5008A SELF-DIAGNOSTIC MODE 5 - 13...
- Page 332 [Print] in the [CLASSIC] Mode standby screen in the [05 ADJUSTMENT MODE]. Refer to the "Self-diagnostic code list" (separate document) for the codes and the patterns of the test print. e-STUDIO2008A/2508A/3008A/3508A/4508A/5008A © 2015 TOSHIBA TEC CORPORATION All rights reserved SELF-DIAGNOSTIC MODE 5 - 14...
- Page 333 * Press [FUNCTION CLAER] to enter minus (-). Procedure 5 [CANCEL] [POWER] [Digital key] [FS] [Digital key] [OK] [08] [START] OFF/ON (Code) (Exit) Sets or (Stores value in RAM) changes value © 2015 TOSHIBA TEC CORPORATION All rights reserved e-STUDIO2008A/2508A/3008A/3508A/4508A/5008A SELF-DIAGNOSTIC MODE 5 - 15...
- Page 334 Adjustment value (Exit) cannot be changed [CLEAR] (Corrects value) Refer to the "Self-diagnostic code list" (separate document) for the codes available in the [08 SETTING MODE]. e-STUDIO2008A/2508A/3008A/3508A/4508A/5008A © 2015 TOSHIBA TEC CORPORATION All rights reserved SELF-DIAGNOSTIC MODE 5 - 16...
- Page 335 108: Firmware update log (Maximum 200 items) 110: Power-ON/OFF log (Maximum 100 items) 111: Version list 114: Total counter list 121: (05) adjustment value difference 122: (08) setting value difference © 2015 TOSHIBA TEC CORPORATION All rights reserved e-STUDIO2008A/2508A/3008A/3508A/4508A/5008A SELF-DIAGNOSTIC MODE 5 - 17...
- Page 336 211:VERSION_LIST_serial_date and time(YYYYMMDDHHMMSS).csv 212:ENG_FW_LOG_serial_date and time(YYYYMMDDHHMMSS).csv 214:TOTAL_COUNTER_LIST_serial_date and time(YYYYMMDDHHMMSS).csv 221:05DIFFERENCE_CODE_LIST_serial_date and time(YYYYMMDDHHMMSS).csv 222:08DIFFERENCE_CODE_LIST_serial_date and time(YYYYMMDDHHMMSS).csv 223:JOB_LOG_serial_date and time(YYYYMMDDHHMMSS) (encrypted file)/MESSAGE_LOG_ serial_date and time(YYYYMMDDHHMMSS) (encrypted file) 224:FAX_FUNCTION_LIST_Serial No._Date(YYYYMMDDHHMMSS).csv e-STUDIO2008A/2508A/3008A/3508A/4508A/5008A © 2015 TOSHIBA TEC CORPORATION All rights reserved SELF-DIAGNOSTIC MODE 5 - 18...
- Page 337 (08) setting value difference Job log/Message log Output all CSV files 300 * *: (05) adjustment value difference and (08) setting value difference are not output. © 2015 TOSHIBA TEC CORPORATION All rights reserved e-STUDIO2008A/2508A/3008A/3508A/4508A/5008A SELF-DIAGNOSTIC MODE 5 - 19...
- Page 338 CODE DATA CODE DATA 2000 3860 4830 5920 Fig.5-8 The selected adjustment codes and the current adjustment value for each code are output in a list. e-STUDIO2008A/2508A/3008A/3508A/4508A/5008A © 2015 TOSHIBA TEC CORPORATION All rights reserved SELF-DIAGNOSTIC MODE 5 - 20...
- Page 339 CODE DATA CODE DATA 2010 2880 3040 3070 Fig.5-9 The selected setting codes and the current setting value for each code are output in a list. © 2015 TOSHIBA TEC CORPORATION All rights reserved e-STUDIO2008A/2508A/3008A/3508A/4508A/5008A SELF-DIAGNOSTIC MODE 5 - 21...
- Page 340 PM units. Use this list for confirming the PM units to be replaced at each PM. See the following page for PM: P. 7-1 "7. PREVENTIVE MAINTENANCE (PM)" e-STUDIO2008A/2508A/3008A/3508A/4508A/5008A © 2015 TOSHIBA TEC CORPORATION All rights reserved SELF-DIAGNOSTIC MODE 5 - 22...
- Page 341 Fig.5-11 Pixel counter data (toner cartridge reference) are output in a list. See the following page for the pixel counter: P. 5-55 "5.18 Pixel counter" © 2015 TOSHIBA TEC CORPORATION All rights reserved e-STUDIO2008A/2508A/3008A/3508A/4508A/5008A SELF-DIAGNOSTIC MODE 5 - 23...
- Page 342 Fig.5-12 Pixel counter data (service call reference) are output in a list. See the following page for the pixel counter: P. 5-55 "5.18 Pixel counter" e-STUDIO2008A/2508A/3008A/3508A/4508A/5008A © 2015 TOSHIBA TEC CORPORATION All rights reserved SELF-DIAGNOSTIC MODE 5 - 24...
- Page 343 000 000 0000_0000_0000_0_0000000000 Fig.5-13 The error history is output. See the following page for the parameters for each error: P. 8-40 "8.2.4 Printer function error" © 2015 TOSHIBA TEC CORPORATION All rights reserved e-STUDIO2008A/2508A/3008A/3508A/4508A/5008A SELF-DIAGNOSTIC MODE 5 - 25...
- Page 344 Printer counter data (full color) when firmware was updated LIST List print counter data when firmware was updated Fax print counter data when firmware was updated STATUS Result of update e-STUDIO2008A/2508A/3008A/3508A/4508A/5008A © 2015 TOSHIBA TEC CORPORATION All rights reserved SELF-DIAGNOSTIC MODE 5 - 26...
- Page 345 Whether the power was turned ON or OFF, or if it was turned ON or OFF with a remote reset function TOTAL Total counter data when the power was turned OFF and then back ON © 2015 TOSHIBA TEC CORPORATION All rights reserved e-STUDIO2008A/2508A/3008A/3508A/4508A/5008A SELF-DIAGNOSTIC MODE 5 - 27...
- Page 346 Some of the characters in the fonts that are used to print the version list are not supported. As a result, the language names under LANGUAGE VERSION may not be printed correctly when printing the version list. e-STUDIO2008A/2508A/3008A/3508A/4508A/5008A © 2015 TOSHIBA TEC CORPORATION All rights reserved SELF-DIAGNOSTIC MODE 5 - 28...
- Page 347 4624 4624 4624 4624 4624 4624 4624 4624 4624 4624 4624 4624 4624 4624 4624 4624 4624 4624 Fig.5-17 The log of engine firmware is output. © 2015 TOSHIBA TEC CORPORATION All rights reserved e-STUDIO2008A/2508A/3008A/3508A/4508A/5008A SELF-DIAGNOSTIC MODE 5 - 29...
- Page 348 FULL COLOR BLACK TOTAL xxxxxx xxxxxx xxxxxx SMALL xxxxxx xxxxxx xxxxxx LARGE xxxxxx xxxxxx xxxxxx TOTAL CALIBRATION COUNTER Fig.5-18 The list of total counter is output. e-STUDIO2008A/2508A/3008A/3508A/4508A/5008A © 2015 TOSHIBA TEC CORPORATION All rights reserved SELF-DIAGNOSTIC MODE 5 - 30...
- Page 349 When 30-221 (222) is performed, the equipment returns to the ready state of the 30 LIST PRINT MODE and the error message "The file cannot be saved." appears on the panel. © 2015 TOSHIBA TEC CORPORATION All rights reserved e-STUDIO2008A/2508A/3008A/3508A/4508A/5008A...
- Page 350 Select [FAX] in the FS Menu and press [NEXT]. Select [11 FAX CLEAR MODE] and press [NEXT]. Fig.5-20 [SET UP FAX] and [CUSTOM INITIALZE] are displayed. e-STUDIO2008A/2508A/3008A/3508A/4508A/5008A © 2015 TOSHIBA TEC CORPORATION All rights reserved SELF-DIAGNOSTIC MODE 5 - 32...
- Page 351 [A] FAX Set-up The destination of the fax can be set. Press [SETUP FAX]. Select the destination and press [OK]. Fig.5-21 © 2015 TOSHIBA TEC CORPORATION All rights reserved e-STUDIO2008A/2508A/3008A/3508A/4508A/5008A SELF-DIAGNOSTIC MODE 5 - 33...
- Page 352 [CLEAR DATA]: Initializes the image data area (HDD, SRAM) so that there are no data stored. [SYSTEM SETUP]: Initializes the system setting area (NVRAM) so that its value is reset to the default setting. e-STUDIO2008A/2508A/3008A/3508A/4508A/5008A © 2015 TOSHIBA TEC CORPORATION All rights reserved SELF-DIAGNOSTIC MODE 5 - 34...
- Page 353 ERROR COUNT LIST (SCAN) • Function List for Maintenance • Memory dump list (system) • Memory dump list (FAX/LINE1) • Memory dump list (FAX/LINE2) • SUPPLY ORDER LIST © 2015 TOSHIBA TEC CORPORATION All rights reserved e-STUDIO2008A/2508A/3008A/3508A/4508A/5008A SELF-DIAGNOSTIC MODE 5 - 35...
- Page 354 Refer to the "Self-diagnostic code list" (separate document) for the codes available in the [13 FAX FUNCTION MODE]. 5.11.4 [19 RAM EDIT MODE] This is a mode for the special adjustments and settings. (This is not used generally.) e-STUDIO2008A/2508A/3008A/3508A/4508A/5008A © 2015 TOSHIBA TEC CORPORATION All rights reserved SELF-DIAGNOSTIC MODE 5 - 36...
- Page 355 [ON/OFF] button for a few seconds in the screen after the confirmation in [01 Control panel check mode] is completed. © 2015 TOSHIBA TEC CORPORATION All rights reserved e-STUDIO2008A/2508A/3008A/3508A/4508A/5008A SELF-DIAGNOSTIC MODE...
- Page 356 The [START] LED is turned OFF. The text is displayed only while the key is being pressed. Each LED is turned OFF only while the key is being pressed. e-STUDIO2008A/2508A/3008A/3508A/4508A/5008A © 2015 TOSHIBA TEC CORPORATION All rights reserved SELF-DIAGNOSTIC MODE 5 - 38...
- Page 357 Install a USB storage device and press the [START] button. When a USB storage device is connected properly, [USB Connection Success] is displayed. If not, [USB Connection Failed] is displayed. © 2015 TOSHIBA TEC CORPORATION All rights reserved e-STUDIO2008A/2508A/3008A/3508A/4508A/5008A SELF-DIAGNOSTIC MODE...
- Page 358 Clearing service tech password 5.13.2 Operation procedure Perform [HS-73] by pressing the [73 Assist mode] icon. The following screen is displayed. Fig.5-25 Press the icon to operate. e-STUDIO2008A/2508A/3008A/3508A/4508A/5008A © 2015 TOSHIBA TEC CORPORATION All rights reserved SELF-DIAGNOSTIC MODE 5 - 40...
- Page 359 SRAM will be deleted with this function. • When this operation has been done, do not perform HDD partition creation (Format HDD) before the normal start-up. © 2015 TOSHIBA TEC CORPORATION All rights reserved e-STUDIO2008A/2508A/3008A/3508A/4508A/5008A SELF-DIAGNOSTIC MODE 5 - 41...
- Page 360 It overwrites all the used areas on the HDD with the selected data, and makes it unusable. After selecting this function, specify the level below to be overwritten. This setting is the overwriting method complying with DoD 5220.22-M. e-STUDIO2008A/2508A/3008A/3508A/4508A/5008A © 2015 TOSHIBA TEC CORPORATION All rights reserved SELF-DIAGNOSTIC MODE 5 - 42...
- Page 361 Therefore, its password is copied to the SRAM board so that both passwords become the same with this function. The setting is enabled when the equipment is started up in the normal mode after performing this function. © 2015 TOSHIBA TEC CORPORATION All rights reserved e-STUDIO2008A/2508A/3008A/3508A/4508A/5008A SELF-DIAGNOSTIC MODE...
- Page 362 When a normal HDD is mounted HDD Assist Mode (4C) Current HDD Type : SATA HDD System Firmware Version: XXXXXX Select Menu Revert Factory Initial Remove Status HDD Cancel Fig.5-29 e-STUDIO2008A/2508A/3008A/3508A/4508A/5008A © 2015 TOSHIBA TEC CORPORATION All rights reserved SELF-DIAGNOSTIC MODE 5 - 44...
- Page 363 When the operation is finished, the result appears on the menu. Notes: If the equipment is started in the normal mode with this condition, an HDD mounting error occurs. © 2015 TOSHIBA TEC CORPORATION All rights reserved e-STUDIO2008A/2508A/3008A/3508A/4508A/5008A SELF-DIAGNOSTIC MODE...
- Page 364 Press [OK] to carry out the operation. When the operation is finished, the result appears on the menu. Notes: After this operation, the equipment becomes reusable without reinstalling the firmware. e-STUDIO2008A/2508A/3008A/3508A/4508A/5008A © 2015 TOSHIBA TEC CORPORATION All rights reserved SELF-DIAGNOSTIC MODE 5 - 46...
- Page 365 After the processing is completed, a beep sounds 4 times and either "Completed" or • "Failed" appears on the screen. Remarks: When the mode is started, "1. Check F/S" is selected by default. © 2015 TOSHIBA TEC CORPORATION All rights reserved e-STUDIO2008A/2508A/3008A/3508A/4508A/5008A SELF-DIAGNOSTIC MODE 5 - 47...
- Page 366 File System(F/S) Recovery Mode -> Recovery F/S Please Select Partition 0: Main menu 1. ALL 2. / 3. /work 4. /registration 5. /backup 6. /imagedata 7. /storage 8. /encryption Fig.5-34 e-STUDIO2008A/2508A/3008A/3508A/4508A/5008A © 2015 TOSHIBA TEC CORPORATION All rights reserved SELF-DIAGNOSTIC MODE 5 - 48...
- Page 367 If [1. Except /] is selected, log database is also initialized. Back up the data before initializing if necessary. • If [1.Except/] is selected, do not perform SRAM data formatting (Clear SRAM) before the normal start-up. © 2015 TOSHIBA TEC CORPORATION All rights reserved e-STUDIO2008A/2508A/3008A/3508A/4508A/5008A SELF-DIAGNOSTIC MODE 5 - 49...
- Page 368 Indicates the value of the specified HDD condition as compared to the manufacturer's optimum value. Worst: Worst Ever Normalized Attribute Value Indicates the worst value of NAV permitted by the manufacturer. e-STUDIO2008A/2508A/3008A/3508A/4508A/5008A © 2015 TOSHIBA TEC CORPORATION All rights reserved SELF-DIAGNOSTIC MODE 5 - 50...
- Page 369 HDD, the use of this mode is not necessary. In case the performance level of the equipment is lowered (e.g.: the response of the control panel becomes extremely slow), make use of this mode. This phenomenon may be resolved. © 2015 TOSHIBA TEC CORPORATION All rights reserved e-STUDIO2008A/2508A/3008A/3508A/4508A/5008A SELF-DIAGNOSTIC MODE...
- Page 370 Items 1 and 2 can be canceled while 0 and 3 cannot. • When "3" is keyed in and the [START] button is pressed, the operation starts. e-STUDIO2008A/2508A/3008A/3508A/4508A/5008A © 2015 TOSHIBA TEC CORPORATION All rights reserved SELF-DIAGNOSTIC MODE 5 - 52...
- Page 371 2037 or when the actual end of the year 2037 has come. After selecting this, start the equipment in the normal mode to reset the date and time. © 2015 TOSHIBA TEC CORPORATION All rights reserved e-STUDIO2008A/2508A/3008A/3508A/4508A/5008A SELF-DIAGNOSTIC MODE...
- Page 372 The administrator password and the service password can be reset. * Once the password is reset, user data will be deleted. <Operation procedure> Password [HA] [OK] [OK] [OK] [POWER] OFF input e-STUDIO2008A/2508A/3008A/3508A/4508A/5008A © 2015 TOSHIBA TEC CORPORATION All rights reserved SELF-DIAGNOSTIC MODE 5 - 54...
- Page 373 In addition to the above, there are other factors that may influence toner consumption. These include variations between individual products, life of consumable, bias voltages, Drum surface potential, etc. © 2015 TOSHIBA TEC CORPORATION All rights reserved e-STUDIO2008A/2508A/3008A/3508A/4508A/5008A SELF-DIAGNOSTIC MODE...
- Page 374 Clearing of the counter of the toner cartridge reference is performed in the FS-08-6503. e-STUDIO2008A/2508A/3008A/3508A/4508A/5008A © 2015 TOSHIBA TEC CORPORATION All rights reserved SELF-DIAGNOSTIC MODE 5 - 56...
- Page 375 The average value of all pixel count data after each reference data is cleared is calculated and displayed. Latest pixel count (%) The value is displayed for printing just before the pixel counter is confirmed. © 2015 TOSHIBA TEC CORPORATION All rights reserved e-STUDIO2008A/2508A/3008A/3508A/4508A/5008A SELF-DIAGNOSTIC MODE 5 - 57...
- Page 376 FS-08-6502: All information related to the service technician reference pixel count is cleared. FS-08-6503: All information related to the toner cartridge reference pixel count is cleared. e-STUDIO2008A/2508A/3008A/3508A/4508A/5008A © 2015 TOSHIBA TEC CORPORATION All rights reserved SELF-DIAGNOSTIC MODE 5 - 58...
- Page 377 The following screen is displayed when the buttons, [COUNTER] and [PIXEL COUNTER] are pressed in this order after “Displayed” is selected with the code above and the power is, as usual, turned ON. (The displayed buttons are depending on the FS-08-6505.) © 2015 TOSHIBA TEC CORPORATION All rights reserved e-STUDIO2008A/2508A/3008A/3508A/4508A/5008A SELF-DIAGNOSTIC MODE...
- Page 378 When [TONER CARTRIDGE] is pressed, the following screen appears. Fig.5-43 Information screen of toner cartridge reference When [SERVICE] is pressed, the following screen appears. Fig.5-44 Information screen of service technician reference (full color) e-STUDIO2008A/2508A/3008A/3508A/4508A/5008A © 2015 TOSHIBA TEC CORPORATION All rights reserved SELF-DIAGNOSTIC MODE 5 - 60...
- Page 379 COLOR TOTAL 20xx-xx-xx Print Count[LT/A4] 20xx-xx-xx Average Pixel Count[%] 2.70 1.74 2.51 20xx-xx-xx Latest Pixel Count[%] 6.15 0.39 0.39 Fig.5-46 Data list of service technician reference © 2015 TOSHIBA TEC CORPORATION All rights reserved e-STUDIO2008A/2508A/3008A/3508A/4508A/5008A SELF-DIAGNOSTIC MODE 5 - 61...
- Page 380 The date (08-6502 was performed) is stored. Toner cartridge reference cleared date The toner cartridge reference cleared date is displayed. The date (08-6503 was performed) is stored. e-STUDIO2008A/2508A/3008A/3508A/4508A/5008A © 2015 TOSHIBA TEC CORPORATION All rights reserved SELF-DIAGNOSTIC MODE 5 - 62...
- Page 381 No other automatic execution script has to be located in the root folder of a USB storage device. [ 2 ] Example <Policy> <Data> <Category-05/> <Category-08> <Code> <MainCode>3807</MainCode> <Value>1</Value> </Code> <Code> <MainCode>9240</MainCode> <Value>2</Value> </Code> <Code> <MainCode>9264</MainCode> <SubCode>1</SubCode> © 2015 TOSHIBA TEC CORPORATION All rights reserved e-STUDIO2008A/2508A/3008A/3508A/4508A/5008A SELF-DIAGNOSTIC MODE 5 - 63...
- Page 382 If writing of the setting value has failed, the processing will stop at that moment. Only the codes whose writing has succeeded will be described in a result file. e-STUDIO2008A/2508A/3008A/3508A/4508A/5008A © 2015 TOSHIBA TEC CORPORATION All rights reserved SELF-DIAGNOSTIC MODE 5 - 64...
- Page 383 5. Setting for all codes included in the setting file are completed, the BASIC screen of the 08 mode appears. 6. Remove the USB storage device. © 2015 TOSHIBA TEC CORPORATION All rights reserved e-STUDIO2008A/2508A/3008A/3508A/4508A/5008A SELF-DIAGNOSTIC MODE 5 - 65...
- Page 384 © 2015 TOSHIBA TEC CORPORATION All rights reserved SELF-DIAGNOSTIC MODE 5 - 66...
- Page 385 Code in 05 Adjustment Mode 6.4.1 Automatic gamma adjustment 7165 ( Chapter 6.3, 6.4, 6.5, 6.6, 6.7 ) Adjust the image quality if necessary. Fig.6-1 © 2015 TOSHIBA TEC CORPORATION All rights reserved e-STUDIO2008A/2508A/3008A/3508A/4508A/5008A SETTING / ADJUSTMENT 6 - 1...
- Page 386 Check if the value B is within the range of 234 to 246 (the output voltage range of the auto-toner sensor is 2.34 V to 2.46 V). e-STUDIO2008A/2508A/3008A/3508A/4508A/5008A © 2015 TOSHIBA TEC CORPORATION All rights reserved SETTING / ADJUSTMENT 6 - 2...
- Page 387 The drum, developer unit, etc. are stopped and the following is displayed. 100% [OK] TEST MODE Fig.6-5 Turn the power OFF. Install the toner cartridge. © 2015 TOSHIBA TEC CORPORATION All rights reserved e-STUDIO2008A/2508A/3008A/3508A/4508A/5008A SETTING / ADJUSTMENT 6 - 3...
- Page 388 (d) Reproduction ratio of secondary scanning 3032 direction (e) Image location of secondary scanning 3031 direction (f) Top margin 4050 (g) Right margin 4052 (h) Bottom margin 4053 e-STUDIO2008A/2508A/3008A/3508A/4508A/5008A © 2015 TOSHIBA TEC CORPORATION All rights reserved SETTING / ADJUSTMENT 6 - 4...
- Page 389 If the test copy does not satisfy the specified values, 100% return to step 1 and repeat the adjustment COPYING procedure. Power OFF/ON : Exit the Adjustment Mode. Fig.6-6 © 2015 TOSHIBA TEC CORPORATION All rights reserved e-STUDIO2008A/2508A/3008A/3508A/4508A/5008A SETTING / ADJUSTMENT 6 - 5...
- Page 390 If this scraping noise is annoying, try to decrease the value. Fig.6-7 Perform the same procedure for all paper sources. e-STUDIO2008A/2508A/3008A/3508A/4508A/5008A © 2015 TOSHIBA TEC CORPORATION All rights reserved SETTING / ADJUSTMENT 6 - 6...
- Page 391 * As a tentative countermeasure, the service life of the feed roller can be extended by increasing the aligning amount. © 2015 TOSHIBA TEC CORPORATION All rights reserved e-STUDIO2008A/2508A/3008A/3508A/4508A/5008A SETTING / ADJUSTMENT...
- Page 392 P. 6-11 "[D] Secondary scanning data laser writing start position" 52 ± 0.5mm P. 6-12 "[E] Primary scanning data laser writing start position at duplexing" 52 ± 0.5mm e-STUDIO2008A/2508A/3008A/3508A/4508A/5008A © 2015 TOSHIBA TEC CORPORATION All rights reserved SETTING / ADJUSTMENT 6 - 8...
- Page 393 Press [OK] (Stored in memory). Notes: Make sure the first line of the grid pattern is printed out since the line is occasionally vanished. © 2015 TOSHIBA TEC CORPORATION All rights reserved e-STUDIO2008A/2508A/3008A/3508A/4508A/5008A SETTING / ADJUSTMENT 6 - 9...
- Page 394 Press [1] [TEST PRINT] (A grid pattern is printed out.) * The larger the adjustment value is, the longer the distance C becomes (approx. 0.25 mm/ step). e-STUDIO2008A/2508A/3008A/3508A/4508A/5008A © 2015 TOSHIBA TEC CORPORATION All rights reserved SETTING / ADJUSTMENT 6 - 10...
- Page 395 Press [1] ([3] for duplexing) [TEST PRINT] (A grid pattern is printed out.) * The larger the adjustment value is, the shorter the distance D becomes (approx. 0.1 mm/ step). © 2015 TOSHIBA TEC CORPORATION All rights reserved e-STUDIO2008A/2508A/3008A/3508A/4508A/5008A SETTING / ADJUSTMENT...
- Page 396 Press [3] [TEST PRINT] (A grid pattern is printed out.) * The larger the adjustment value is, the longer the distance E becomes (approx. 0.0423 mm/ step). e-STUDIO2008A/2508A/3008A/3508A/4508A/5008A © 2015 TOSHIBA TEC CORPORATION All rights reserved SETTING / ADJUSTMENT 6 - 12...
- Page 397 4063 (LCF, A4/LT), 4061 (Bypass feed, A4/LT), 4062 (Duplexing, A3/LD) 52±0.5 mm (0.1 mm/step 52±0.5 mm (0.0423 mm/step) FS-05-4019-0 (Lower drawer, A3/ LD), 4019-1 (Lower drawer, A4/ LT)) © 2015 TOSHIBA TEC CORPORATION All rights reserved e-STUDIO2008A/2508A/3008A/3508A/4508A/5008A SETTING / ADJUSTMENT 6 - 13...
- Page 398 In case of A: Tighten the mirror-3 adjustment screw (Rear) [1] (CW). In case of B: Loosen the mirror-3 adjustment screw (Rear) [1] (CCW). Fig.6-10 e-STUDIO2008A/2508A/3008A/3508A/4508A/5008A © 2015 TOSHIBA TEC CORPORATION All rights reserved SETTING / ADJUSTMENT 6 - 14...
- Page 399 Loosen the mirror-1 adjustment screw (Rear) [1] (CCW). Fig.6-11 Apply the screw locking agents to the adjustment screws. (2 areas) • Recommended screw lock agent Manufacturer: Three Bond Product name: 1401E © 2015 TOSHIBA TEC CORPORATION All rights reserved e-STUDIO2008A/2508A/3008A/3508A/4508A/5008A SETTING / ADJUSTMENT 6 - 15...
- Page 400 * The larger the adjustment value is, the higher the reproduction ratio and the longer the distance A become.(approx. 0.1 mm/step) Copied image of the ruler Feeding direction Fig.6-12 e-STUDIO2008A/2508A/3008A/3508A/4508A/5008A © 2015 TOSHIBA TEC CORPORATION All rights reserved SETTING / ADJUSTMENT 6 - 16...
- Page 401 * The smaller the adjustment value is, the more the image is shifted to the left and the distance B becomes narrower. (approx. 0.0423 mm/step) Copied image of the ruler Feeding direction Fig.6-13 © 2015 TOSHIBA TEC CORPORATION All rights reserved e-STUDIO2008A/2508A/3008A/3508A/4508A/5008A SETTING / ADJUSTMENT 6 - 17...
- Page 402 (“100% A” is displayed.) * The smaller the adjustment value is, the lower the reproduction ratio becomes. (approx. 0.018%/step) Copied image of the ruler Feeding direction Fig.6-14 e-STUDIO2008A/2508A/3008A/3508A/4508A/5008A © 2015 TOSHIBA TEC CORPORATION All rights reserved SETTING / ADJUSTMENT 6 - 18...
- Page 403 * The larger the adjustment value is, the more the image is shifted to the trailing edge. (approx. 0.08 mm/step) Copied image of the ruler Feeding direction Fig.6-15 © 2015 TOSHIBA TEC CORPORATION All rights reserved e-STUDIO2008A/2508A/3008A/3508A/4508A/5008A SETTING / ADJUSTMENT 6 - 19...
- Page 404 (“100% A” is displayed.) * The larger the adjustment value is, the wider the blank area becomes (approx. 0.04 mm/ step). Feeding direction Fig.6-16 e-STUDIO2008A/2508A/3008A/3508A/4508A/5008A © 2015 TOSHIBA TEC CORPORATION All rights reserved SETTING / ADJUSTMENT 6 - 20...
- Page 405 (“100% A” is displayed.) * The larger the adjustment value is, the wider the blank area at the right side becomes (approx. 0.04 mm/step). Feeding direction Fig.6-17 © 2015 TOSHIBA TEC CORPORATION All rights reserved e-STUDIO2008A/2508A/3008A/3508A/4508A/5008A SETTING / ADJUSTMENT 6 - 21...
- Page 406 (“100% A” is displayed.) * The larger the adjustment value is, the wider the blank area at the trailing edge becomes (approx. 0.04 mm/step). Feeding direction Fig.6-18 e-STUDIO2008A/2508A/3008A/3508A/4508A/5008A © 2015 TOSHIBA TEC CORPORATION All rights reserved SETTING / ADJUSTMENT 6 - 22...
- Page 407 Then, check if the patch chart on the original glass is placed in the wrong direction or if it is placed inclined on the original glass, and then repeat step (3) and afterward. © 2015 TOSHIBA TEC CORPORATION All rights reserved e-STUDIO2008A/2508A/3008A/3508A/4508A/5008A SETTING / ADJUSTMENT...
- Page 408 Press the [TEST COPY] button and then the [START] button. Then perform test copying. If the desired image density has not been attained, repeat step (1) to (5). e-STUDIO2008A/2508A/3008A/3508A/4508A/5008A © 2015 TOSHIBA TEC CORPORATION All rights reserved SETTING / ADJUSTMENT 6 - 24...
- Page 409 Make a test copy and compare the image obtained with the current settings; if necessary, make adjustment using the following procedure. <Procedure> Procedure is same as that of P. 6-24 "6.4.2 Density adjustment". © 2015 TOSHIBA TEC CORPORATION All rights reserved e-STUDIO2008A/2508A/3008A/3508A/4508A/5008A SETTING / ADJUSTMENT 6 - 25...
- Page 410 <Procedure> Procedure is same as that of P. 6-24 "6.4.2 Density adjustment". e-STUDIO2008A/2508A/3008A/3508A/4508A/5008A © 2015 TOSHIBA TEC CORPORATION All rights reserved SETTING / ADJUSTMENT 6 - 26...
- Page 411 Press the [TEST COPY] button and then the [START] button. Then perform test copying. If the desired image density has not been attained, repeat step (2) to (7). © 2015 TOSHIBA TEC CORPORATION All rights reserved e-STUDIO2008A/2508A/3008A/3508A/4508A/5008A SETTING / ADJUSTMENT...
- Page 412 Press the [TEST COPY] button and then select an original mode. Then press the [START] button to perform test copying. If the desired image density has not been attained, repeat step (2) to (7). e-STUDIO2008A/2508A/3008A/3508A/4508A/5008A © 2015 TOSHIBA TEC CORPORATION All rights reserved SETTING / ADJUSTMENT 6 - 28...
- Page 413 Acceptable values: 0 to 255 (Default: 128) <Procedure> The procedure is the same as that of P. 6-24 "6.4.2 Density adjustment". © 2015 TOSHIBA TEC CORPORATION All rights reserved e-STUDIO2008A/2508A/3008A/3508A/4508A/5008A SETTING / ADJUSTMENT 6 - 29...
- Page 414 Turn the power OFF and then back ON to perform printing job. If the desired text density has not been attained, repeat step (2) to (5). e-STUDIO2008A/2508A/3008A/3508A/4508A/5008A © 2015 TOSHIBA TEC CORPORATION All rights reserved SETTING / ADJUSTMENT 6 - 30...
- Page 415 For resetting the value, repeat step (2) to (5). Turn the power OFF and then back ON to perform printing job. If the desired image density has not been attained, repeat step (2) to (7). © 2015 TOSHIBA TEC CORPORATION All rights reserved e-STUDIO2008A/2508A/3008A/3508A/4508A/5008A SETTING / ADJUSTMENT...
- Page 416 For resetting the value, repeat step (2) to (5). Turn the power OFF and then back ON. Then perform printing. If the image density has not been attained, repeat step (2) to (7). e-STUDIO2008A/2508A/3008A/3508A/4508A/5008A © 2015 TOSHIBA TEC CORPORATION All rights reserved SETTING / ADJUSTMENT 6 - 32...
- Page 417 For resetting the value, repeat step (2) to (5). Turn the power OFF and then back ON. Then perform scanning. If the desired image has not been attained, repeat step (2) to (7). © 2015 TOSHIBA TEC CORPORATION All rights reserved e-STUDIO2008A/2508A/3008A/3508A/4508A/5008A SETTING / ADJUSTMENT...
- Page 418 Acceptable values: 0 to 255 (Default: 70) <Procedure>: The procedure is the same as that of P. 6-34 "6.6.2 Density adjustment". e-STUDIO2008A/2508A/3008A/3508A/4508A/5008A © 2015 TOSHIBA TEC CORPORATION All rights reserved SETTING / ADJUSTMENT 6 - 34...
- Page 419 Acceptable values: 0 to 255 (Default: 128) 7441 Custom mode 7439 Grayscale <Procedure> The procedure is the same as that of P. 6-34 "6.6.2 Density adjustment". © 2015 TOSHIBA TEC CORPORATION All rights reserved e-STUDIO2008A/2508A/3008A/3508A/4508A/5008A SETTING / ADJUSTMENT 6 - 35...
- Page 420 Acceptable values: 0 to 255 (Default: 128) 8326 Photo 8373 User custom <Procedure> The procedure is the same as that of P. 6-34 "6.6.2 Density adjustment". e-STUDIO2008A/2508A/3008A/3508A/4508A/5008A © 2015 TOSHIBA TEC CORPORATION All rights reserved SETTING / ADJUSTMENT 6 - 36...
- Page 421 Let the equipment restart. Acquire the SlimPDF file and check it. If the desired image quality has not been attained, repeat step (1) to (5). © 2015 TOSHIBA TEC CORPORATION All rights reserved e-STUDIO2008A/2508A/3008A/3508A/4508A/5008A SETTING / ADJUSTMENT 6 - 37...
- Page 422 Acceptable values: 0 to 255 (Default: 128) 8304-2 Low quality <Procedure> Procedure is same as that of P. 6-34 "6.6.2 Density adjustment". e-STUDIO2008A/2508A/3008A/3508A/4508A/5008A © 2015 TOSHIBA TEC CORPORATION All rights reserved SETTING / ADJUSTMENT 6 - 38...
- Page 423 If too small a value is set, the text may not be printed clearly. <Procedure> Procedure is same as that of P. 6-24 "6.4.2 Density adjustment". © 2015 TOSHIBA TEC CORPORATION All rights reserved e-STUDIO2008A/2508A/3008A/3508A/4508A/5008A SETTING / ADJUSTMENT 6 - 39...
- Page 424 To set it again, repeat step (2) to (4). Turn the power OFF. <Confirmation> If possible, perform a Fax transmission and check the adjusted density with the image on the recipient's side. e-STUDIO2008A/2508A/3008A/3508A/4508A/5008A © 2015 TOSHIBA TEC CORPORATION All rights reserved SETTING / ADJUSTMENT 6 - 40...
- Page 425 For resetting the value, repeat step (2) to (5). Turn the power OFF. <Confirmation> Check the beam level conversion setting with the actual fax data received, if possible. © 2015 TOSHIBA TEC CORPORATION All rights reserved e-STUDIO2008A/2508A/3008A/3508A/4508A/5008A SETTING / ADJUSTMENT 6 - 41...
- Page 426 Connection the transfer Connection for developer bias main charger bias, transfer cleaning separation adjustment" adjustment" bias (positive) and charger transfer cleaning bias adjustment" (negative) adjustment" e-STUDIO2008A/2508A/3008A/3508A/4508A/5008A © 2015 TOSHIBA TEC CORPORATION All rights reserved SETTING / ADJUSTMENT 6 - 42...
- Page 427 Open the automatic duplexing unit. Open the front cover and take off the toner cartridge. Loosen 2 screws and pull out the process unit. Process unit Fig.6-20 © 2015 TOSHIBA TEC CORPORATION All rights reserved e-STUDIO2008A/2508A/3008A/3508A/4508A/5008A SETTING / ADJUSTMENT 6 - 43...
- Page 428 Green cable Fig.6-22 Install the door switch jig. Take off the transfer roller unit. Close the automatic duplexing unit. Door switch jig Fig.6-23 e-STUDIO2008A/2508A/3008A/3508A/4508A/5008A © 2015 TOSHIBA TEC CORPORATION All rights reserved SETTING / ADJUSTMENT 6 - 44...
- Page 429 ( + ) terminal: Connect with the red cable (thick ) Front cover switch ( - ) terminal: Connect with the black cable (thin) Fig.6-25 © 2015 TOSHIBA TEC CORPORATION All rights reserved e-STUDIO2008A/2508A/3008A/3508A/4508A/5008A SETTING / ADJUSTMENT 6 - 45...
- Page 430 [E] Connection for separation charger adjustment ( - ) terminal: Connect with the Front cover opening/closing switch black cable (thin) ( + ) terminal: Connect with the gray cable Fig.6-27 e-STUDIO2008A/2508A/3008A/3508A/4508A/5008A © 2015 TOSHIBA TEC CORPORATION All rights reserved SETTING / ADJUSTMENT 6 - 46...
- Page 431 [OK] : Adjusted value “YYY” is stored in memory. 100% TEST MODE Return to 1 to enter the other adjustment code. [POWER] : OFF/ON Fig.6-28 © 2015 TOSHIBA TEC CORPORATION All rights reserved e-STUDIO2008A/2508A/3008A/3508A/4508A/5008A SETTING / ADJUSTMENT 6 - 47...
- Page 432 Poor transfer occurs although the transfer roller unit, transfer roller and power supply spring are properly installed and no abnormality exists on the appearance of the transfer roller. • Thick paper has been frequently used. e-STUDIO2008A/2508A/3008A/3508A/4508A/5008A © 2015 TOSHIBA TEC CORPORATION All rights reserved SETTING / ADJUSTMENT 6 - 48...
- Page 433 • Decrease the separation output value when poor transfer occurs. Remember that the separation performance becomes low if the separation output value is decreased too much. © 2015 TOSHIBA TEC CORPORATION All rights reserved e-STUDIO2008A/2508A/3008A/3508A/4508A/5008A SETTING / ADJUSTMENT 6 - 49...
- Page 434 [2]. Notes: Confirm that they are aligned properly through the windows [3] and [4] of the exit side frame [2]. Fig.6-30 e-STUDIO2008A/2508A/3008A/3508A/4508A/5008A © 2015 TOSHIBA TEC CORPORATION All rights reserved SETTING / ADJUSTMENT 6 - 50...
- Page 435 The scan motor [6] is pulled by the belt tension jig [1]. When it is stopped, tighten the screws in order of [4] and [5]. Remove the belt tension jig[1]. Fig.6-31 Fig.6-32 © 2015 TOSHIBA TEC CORPORATION All rights reserved e-STUDIO2008A/2508A/3008A/3508A/4508A/5008A SETTING / ADJUSTMENT 6 - 51...
- Page 436 Center Center [Front] [Front] Fig.6-34 Fig.6-33 Bypass feeding Loosen the screw. Move the entire guide to the front or rear side. Tighten the screw. Fig.6-35 e-STUDIO2008A/2508A/3008A/3508A/4508A/5008A © 2015 TOSHIBA TEC CORPORATION All rights reserved SETTING / ADJUSTMENT 6 - 52...
- Page 437 Drawer tray Stopper Fig.6-37 Move 1 screw to a position for the adjustment screw. (If it is already moved, skip this step.) Fig.6-38 © 2015 TOSHIBA TEC CORPORATION All rights reserved e-STUDIO2008A/2508A/3008A/3508A/4508A/5008A SETTING / ADJUSTMENT 6 - 53...
- Page 438 Install the drawer tray, drawer and stopper. * Adjustable range: 3 mm to the front side, 4 mm to the rear side (Unit: 1 mm) Fig.6-40 e-STUDIO2008A/2508A/3008A/3508A/4508A/5008A © 2015 TOSHIBA TEC CORPORATION All rights reserved SETTING / ADJUSTMENT 6 - 54...
- Page 439 Adjust the screws with the doctor blade to push the doctor sleeve jig lightly. Toner scattering prevention sheet Fig.6-43 © 2015 TOSHIBA TEC CORPORATION All rights reserved e-STUDIO2008A/2508A/3008A/3508A/4508A/5008A SETTING / ADJUSTMENT 6 - 55...
- Page 440 Developer sleeve Fig.6-44 Confirm that the side seals are attached on the toner scattering prevention sheet. Side seal Toner scattering prevention sheet Fig.6-45 e-STUDIO2008A/2508A/3008A/3508A/4508A/5008A © 2015 TOSHIBA TEC CORPORATION All rights reserved SETTING / ADJUSTMENT 6 - 56...
- Page 441 Side seal Rubber seal Developer unit upper cover Fig.6-47 © 2015 TOSHIBA TEC CORPORATION All rights reserved e-STUDIO2008A/2508A/3008A/3508A/4508A/5008A SETTING / ADJUSTMENT 6 - 57...
- Page 442 RADF). Fig.6-48 Remove the platen sheet. Fig.6-49 Close the RADF and check if the positioning pins fit the holes on the RADF. Fig.6-50 e-STUDIO2008A/2508A/3008A/3508A/4508A/5008A © 2015 TOSHIBA TEC CORPORATION All rights reserved SETTING / ADJUSTMENT 6 - 58...
- Page 443 Remove the right-hand hinge screw at the MR-3028 rear side. Fig.6-51 Loosen the left-hand hinge screw at the rear side. Fig.6-52 Loosen the hinge screws at the front side. Fig.6-53 © 2015 TOSHIBA TEC CORPORATION All rights reserved e-STUDIO2008A/2508A/3008A/3508A/4508A/5008A SETTING / ADJUSTMENT 6 - 59...
- Page 444 Tighten the left-hand hinge screw at the rear side. Fig.6-55 Loosen the hole position adjustment screws on the right hand side. (MR-3021/3022) Fig.6-56 Match the screw hole positions. MR-3028 Fig.6-57 e-STUDIO2008A/2508A/3008A/3508A/4508A/5008A © 2015 TOSHIBA TEC CORPORATION All rights reserved SETTING / ADJUSTMENT 6 - 60...
- Page 445 Close the RADF gently and open it to check if the platen sheet is attached properly. Fig.6-60 © 2015 TOSHIBA TEC CORPORATION All rights reserved e-STUDIO2008A/2508A/3008A/3508A/4508A/5008A SETTING / ADJUSTMENT 6 - 61...
- Page 446 “B” from the left hand side of the equipment. If the value is not within the tolerance, perform the adjustment according to the following procedure. [Tolerance of the gap] Rear side: 0 - 0.5 mm Front side: 0 mm Fig.6-61 e-STUDIO2008A/2508A/3008A/3508A/4508A/5008A © 2015 TOSHIBA TEC CORPORATION All rights reserved SETTING / ADJUSTMENT 6 - 62...
- Page 447 Adjust the gap on the rear side by means of the screw on the hinge on the feed side of the RADF. Turn it clockwise ...... Lowered Turn it counterclockwise ... Heightened MR-3028 Fig.6-63 © 2015 TOSHIBA TEC CORPORATION All rights reserved e-STUDIO2008A/2508A/3008A/3508A/4508A/5008A SETTING / ADJUSTMENT 6 - 63...
- Page 448 Place the chart provided as an original with its face down on the original tray of the RADF, select [2 Sided 2 Sided] and press the [START] button. Superimpose the chart on the copy and check the inclination of the copy image. e-STUDIO2008A/2508A/3008A/3508A/4508A/5008A © 2015 TOSHIBA TEC CORPORATION All rights reserved SETTING / ADJUSTMENT 6 - 64...
- Page 449 “+”, and if “D”, shift it to “-”. Fig.6-66 Fig.6-67 Shift the aligning plate in the direction of “+”. Shift the aligning plate in the direction of “-”. © 2015 TOSHIBA TEC CORPORATION All rights reserved e-STUDIO2008A/2508A/3008A/3508A/4508A/5008A SETTING / ADJUSTMENT 6 - 65...
- Page 450 “-”, and if “D”, shift it to “+”. Fig.6-69 Fig.6-70 Shift the aligning plate in the direction of “-”. Shift the aligning plate in the direction of “+”. e-STUDIO2008A/2508A/3008A/3508A/4508A/5008A © 2015 TOSHIBA TEC CORPORATION All rights reserved SETTING / ADJUSTMENT 6 - 66...
- Page 451 Superimpose the chart on the copy and check the leading edge E of the chart and F of the copy. Fig.6-71 Chart (Original) Fig.6-72 Copy © 2015 TOSHIBA TEC CORPORATION All rights reserved e-STUDIO2008A/2508A/3008A/3508A/4508A/5008A SETTING / ADJUSTMENT 6 - 67...
- Page 452 If the leading edge (F) margin of the copy image is smaller than the (E) margin of the chart, enter a value larger than the current one. Notes: Changing one value shifts the copy image by 0.2 mm. Press the [OK] button. e-STUDIO2008A/2508A/3008A/3508A/4508A/5008A © 2015 TOSHIBA TEC CORPORATION All rights reserved SETTING / ADJUSTMENT 6 - 68...
- Page 453 If the center line of the copy image is shifted to the rear side of the equipment, enter a value smaller than the current one. Notes: Changing one value shifts the copy image by 0.042 mm. Fig.6-74 Press the [OK] button. © 2015 TOSHIBA TEC CORPORATION All rights reserved e-STUDIO2008A/2508A/3008A/3508A/4508A/5008A SETTING / ADJUSTMENT 6 - 69...
- Page 454 When the value increases by "1", the reproduction ratio of the secondary scanning direction when using the RADF increases by approx. 0.1%. Press the [OK] button. e-STUDIO2008A/2508A/3008A/3508A/4508A/5008A © 2015 TOSHIBA TEC CORPORATION All rights reserved SETTING / ADJUSTMENT 6 - 70...
- Page 455 The distance between the stapling position and the edge of the paper becomes longer Decreasing the value The distance between the stapling position and the edge of the paper becomes shorter. © 2015 TOSHIBA TEC CORPORATION All rights reserved e-STUDIO2008A/2508A/3008A/3508A/4508A/5008A SETTING / ADJUSTMENT 6 - 71...
- Page 456 The punching position moves farther to the front side from the center position. Decreasing the value The punching position moves farther to the rear side from the center position. e-STUDIO2008A/2508A/3008A/3508A/4508A/5008A © 2015 TOSHIBA TEC CORPORATION All rights reserved SETTING / ADJUSTMENT 6 - 72...
- Page 457 Decreasing the value The distance between the punch hole and the trailing edge of the paper becomes longer. © 2015 TOSHIBA TEC CORPORATION All rights reserved e-STUDIO2008A/2508A/3008A/3508A/4508A/5008A SETTING / ADJUSTMENT 6 - 73...
- Page 458 The alignment plate moves to the A4 or LT size position and stops. (It stops at the position of -5 steps from the center value of the adjustment range.) e-STUDIO2008A/2508A/3008A/3508A/4508A/5008A © 2015 TOSHIBA TEC CORPORATION All rights reserved SETTING / ADJUSTMENT 6 - 74...
- Page 459 Adjustment Value Turn OFF the power of the equipment. Turn OFF all bits of the SW1 on the Finisher control board. Install the board access cover. © 2015 TOSHIBA TEC CORPORATION All rights reserved e-STUDIO2008A/2508A/3008A/3508A/4508A/5008A SETTING / ADJUSTMENT 6 - 75...
- Page 460 The alignment plate moves to the rear or front side stapling position and stops. (It stops at the position of -20 steps from the center value of the adjustment range.) e-STUDIO2008A/2508A/3008A/3508A/4508A/5008A © 2015 TOSHIBA TEC CORPORATION All rights reserved SETTING / ADJUSTMENT 6 - 76...
- Page 461 Adjustment value Turn OFF the power of the equipment. Turn OFF all bits of the SW1 on the Finisher control board. Install the board access cover. © 2015 TOSHIBA TEC CORPORATION All rights reserved e-STUDIO2008A/2508A/3008A/3508A/4508A/5008A SETTING / ADJUSTMENT 6 - 77...
- Page 462 Be sure to press [Button1] and [Button2] the correct number of times. Press [Button1] and [Button2] simultaneously to cancel the operation. LED3 LED2 LED1 Button1 Button2 Fig.6-84 e-STUDIO2008A/2508A/3008A/3508A/4508A/5008A © 2015 TOSHIBA TEC CORPORATION All rights reserved SETTING / ADJUSTMENT 6 - 78...
- Page 463 In this case, turn the power OFF and make the settings again from step (4). Turn OFF the power of the equipment. Turn OFF all bits of the SW1 on the Finisher control board. Install the board access cover. © 2015 TOSHIBA TEC CORPORATION All rights reserved e-STUDIO2008A/2508A/3008A/3508A/4508A/5008A SETTING / ADJUSTMENT 6 - 79...
- Page 464 Set the SW1 on the Finisher control board as shown in the figures below. Fig.6-85 Turn ON the power of the equipment while [FUNCTION CLEAR] button and [START] button are pressed simultaneously. e-STUDIO2008A/2508A/3008A/3508A/4508A/5008A © 2015 TOSHIBA TEC CORPORATION All rights reserved SETTING / ADJUSTMENT 6 - 80...
- Page 465 Therefore press [Button1] 11 times and the press [Button2] once. Then press [Button1] 4 times and then press [Button2] once. This selects plain paper. Press [Button1] and [Button2] simultaneously. © 2015 TOSHIBA TEC CORPORATION All rights reserved e-STUDIO2008A/2508A/3008A/3508A/4508A/5008A SETTING / ADJUSTMENT...
- Page 466 Setting code No. 1 Setting code No. 2 Others A4-R A5-R A6-R B5-R FOLIO LT-R ST-R COMP 13”LG 8.5”SG 16K-R A3 wide Press [Button1] and [Button2] simultaneously. e-STUDIO2008A/2508A/3008A/3508A/4508A/5008A © 2015 TOSHIBA TEC CORPORATION All rights reserved SETTING / ADJUSTMENT 6 - 82...
- Page 467 Plain paper Thick paper 1 Thick paper 2 Thick paper 3 Other A4-R A5-R A6-R B5-R FOLIO LT-R ST-R COMP 13”LG 8.5”SG 16K-R A3 wide © 2015 TOSHIBA TEC CORPORATION All rights reserved e-STUDIO2008A/2508A/3008A/3508A/4508A/5008A SETTING / ADJUSTMENT 6 - 83...
- Page 468 *Example of operation To change the number of LED blinking times from 2 to 3, press [Button1] three times. Press [Button2] once. Press [Button1] and [Button2] simultaneously. e-STUDIO2008A/2508A/3008A/3508A/4508A/5008A © 2015 TOSHIBA TEC CORPORATION All rights reserved SETTING / ADJUSTMENT 6 - 84...
- Page 469 (11) Turn OFF all bits of SW1 on the Finisher control board as shown below. ON SW1 ON SW1 Fig.6-88 (12) Install the board access cover with 1 screw. © 2015 TOSHIBA TEC CORPORATION All rights reserved e-STUDIO2008A/2508A/3008A/3508A/4508A/5008A SETTING / ADJUSTMENT 6 - 85...
- Page 470 Turn OFF all bits of SW1 on the Finisher control board as shown below. ON SW1 ON SW1 Fig.6-90 Install the board access cover with 1 screw. e-STUDIO2008A/2508A/3008A/3508A/4508A/5008A © 2015 TOSHIBA TEC CORPORATION All rights reserved SETTING / ADJUSTMENT 6 - 86...
- Page 471 The alignment plate moves to the A4 or LT size position and stops. (It stops at the position of -5 steps from the center value of the adjustment range.) © 2015 TOSHIBA TEC CORPORATION All rights reserved e-STUDIO2008A/2508A/3008A/3508A/4508A/5008A SETTING / ADJUSTMENT...
- Page 472 Confirm the gap between paper and the alignment plate [2] by moving the adjustment sheet [1] forward and backward to reduce affect by backlash of the gear of the side alignment plate. e-STUDIO2008A/2508A/3008A/3508A/4508A/5008A © 2015 TOSHIBA TEC CORPORATION All rights reserved SETTING / ADJUSTMENT 6 - 88...
- Page 473 Turn OFF the power of the equipment. Turn OFF all bits of the SW1 on the Finisher control board. (10) Install the board access cover. © 2015 TOSHIBA TEC CORPORATION All rights reserved e-STUDIO2008A/2508A/3008A/3508A/4508A/5008A SETTING / ADJUSTMENT 6 - 89...
- Page 474 The alignment plate moves to the rear or front side stapling position and stops. (It stops at the position of -20 steps from the center value of the adjustment range.) e-STUDIO2008A/2508A/3008A/3508A/4508A/5008A © 2015 TOSHIBA TEC CORPORATION All rights reserved SETTING / ADJUSTMENT 6 - 90...
- Page 475 Adjustment value Turn OFF the power of the equipment. Turn OFF all bits of the SW1 on the Finisher control board. Install the board access cover. © 2015 TOSHIBA TEC CORPORATION All rights reserved e-STUDIO2008A/2508A/3008A/3508A/4508A/5008A SETTING / ADJUSTMENT 6 - 91...
- Page 476 When the staples are bent Staple Staple Do not include the width of the staples -0.5mm - +0.5mm -0.5mm - +0.5mm Folding line Folding line Fig.6-97 e-STUDIO2008A/2508A/3008A/3508A/4508A/5008A © 2015 TOSHIBA TEC CORPORATION All rights reserved SETTING / ADJUSTMENT 6 - 92...
- Page 477 Folding position position of the stapling hooks) of the stacker upward. Stapling position P. 6-94 "[ 1 ] Saddle stapling position adjustment" Stacker hook Fig.6-101 © 2015 TOSHIBA TEC CORPORATION All rights reserved e-STUDIO2008A/2508A/3008A/3508A/4508A/5008A SETTING / ADJUSTMENT 6 - 93...
- Page 478 Press [Button 1] on the touch panel 10 times and then press [Button 2] once. Then press [Button 1] once again, and [Button 2] once again. (Adjustment of LD and A3 paper starts.) LED3 LED2 LED1 Button1 Button2 Fig.6-103 e-STUDIO2008A/2508A/3008A/3508A/4508A/5008A © 2015 TOSHIBA TEC CORPORATION All rights reserved SETTING / ADJUSTMENT 6 - 94...
- Page 479 (10) Turn OFF the power of the equipment. (11) Turn OFF all bits of the SW1 on the Finisher control board. (12) Install the board access cover. © 2015 TOSHIBA TEC CORPORATION All rights reserved e-STUDIO2008A/2508A/3008A/3508A/4508A/5008A SETTING / ADJUSTMENT 6 - 95...
- Page 480 Press [Button 1] on the touch panel 10 times and then press [Button 2] once. Then press [Button 1] again 2 times, and [Button 2] once again. (Adjustment of LD and A3 paper starts.) LED3 LED2 LED1 Button1 Button2 Fig.6-105 e-STUDIO2008A/2508A/3008A/3508A/4508A/5008A © 2015 TOSHIBA TEC CORPORATION All rights reserved SETTING / ADJUSTMENT 6 - 96...
- Page 481 (10) Turn OFF the power of the equipment. (11) Turn OFF all bits of the SW1 on the Finisher control board. (12) Install the board access cover. © 2015 TOSHIBA TEC CORPORATION All rights reserved e-STUDIO2008A/2508A/3008A/3508A/4508A/5008A SETTING / ADJUSTMENT 6 - 97...
- Page 482 Open the cover, pull out the saddle stitch section, and then loosen the 2 screws. Fig.6-106 Rotate the adjustment screw slightly. Fig.6-107 Tighten the 2 screws, return the saddle stitch section, and then close the cover. Fig.6-108 e-STUDIO2008A/2508A/3008A/3508A/4508A/5008A © 2015 TOSHIBA TEC CORPORATION All rights reserved SETTING / ADJUSTMENT 6 - 98...
- Page 483 Refer to the table below for the destination settings. DIP switch Destination Number of punch holes MJ-6007E (Europe/Japan/China) 2 holes MJ-6007N (North America) 2/3 holes MJ-6007F (France) 4 holes MJ-6007S (Sweden) 4 holes © 2015 TOSHIBA TEC CORPORATION All rights reserved e-STUDIO2008A/2508A/3008A/3508A/4508A/5008A SETTING / ADJUSTMENT 6 - 99...
- Page 484 © 2015 TOSHIBA TEC CORPORATION All rights reserved SETTING / ADJUSTMENT 6 - 100...
- Page 485 FS-08-5562: Setting value of PM counter [parts other than the PM parts of the process unit] FS-08-5563: Setting value of PM time counter [parts other than the PM parts of the process unit] © 2015 TOSHIBA TEC CORPORATION All rights reserved e-STUDIO2008A/2508A/3008A/3508A/4508A/5008A...
- Page 486 If the value of FS-08-9891 (Warning message on the touch panel when PM time has come) is set to “0: No warning notification”, the PM display is not performed regardless of the settings above. (Default value is “1: Display warning notification”) e-STUDIO2008A/2508A/3008A/3508A/4508A/5008A © 2015 TOSHIBA TEC CORPORATION All rights reserved PREVENTIVE MAINTENANCE (PM) 7 - 2...
- Page 487 FS-08-6195: Current value of PM time counter [process unit (K)] FS-08-5568: Current value of PM counter [developer material (K)] FS-08-5569: Current value of PM time counter [developer material (K)] © 2015 TOSHIBA TEC CORPORATION All rights reserved e-STUDIO2008A/2508A/3008A/3508A/4508A/5008A PREVENTIVE MAINTENANCE (PM)
- Page 488 Plug in the equipment after the maintenance has been finished. Then turn ON the power and make some copies to confirm that the equipment is working properly. e-STUDIO2008A/2508A/3008A/3508A/4508A/5008A © 2015 TOSHIBA TEC CORPORATION All rights reserved PREVENTIVE MAINTENANCE (PM) 7 - 4...
- Page 489 * The screen goes back to the main screen when the counter clear is executed or the [CANCEL] button is pressed after moving from the main screen, while it goes back to the sub screen after moving from the sub screen. © 2015 TOSHIBA TEC CORPORATION All rights reserved e-STUDIO2008A/2508A/3008A/3508A/4508A/5008A PREVENTIVE MAINTENANCE (PM)
- Page 490 , including all sub unit (parts) counters belonging to that unit When the unit is not selected, all counters are cleared. Displaying of the main unit name e-STUDIO2008A/2508A/3008A/3508A/4508A/5008A © 2015 TOSHIBA TEC CORPORATION All rights reserved PREVENTIVE MAINTENANCE (PM) 7 - 6...
- Page 491 PM standard number. Displaying of the sub unit (parts) name Moving to the clear screen to clear the selected unit (parts) counters Back to the main screen © 2015 TOSHIBA TEC CORPORATION All rights reserved e-STUDIO2008A/2508A/3008A/3508A/4508A/5008A PREVENTIVE MAINTENANCE (PM) 7 - 7...
- Page 492 Present driving counts” are cleared and “Previous replacement date” is updated. When the [CANCEL] button is pressed, the counter is not cleared and the display returns to the main or sub screen. e-STUDIO2008A/2508A/3008A/3508A/4508A/5008A © 2015 TOSHIBA TEC CORPORATION All rights reserved PREVENTIVE MAINTENANCE (PM) 7 - 8...
- Page 493 Separation roller [SEP ROLLER (3rd CST.)] PFP lower drawer [4th CST.] Pickup roller [PICK UP ROLLER (4th CST.)] Feed roller [FEED ROLLER (4th CST.)] Separation roller [SEP ROLLER (4th CST.)] © 2015 TOSHIBA TEC CORPORATION All rights reserved e-STUDIO2008A/2508A/3008A/3508A/4508A/5008A PREVENTIVE MAINTENANCE (PM) 7 - 9...
- Page 494 Check the drive counts of all parts at PM support mode. Does it exceed the specified drive count? Replace the part. Check the part and equipment according to the “TROUBLESHOOTING”. e-STUDIO2008A/2508A/3008A/3508A/4508A/5008A © 2015 TOSHIBA TEC CORPORATION All rights reserved PREVENTIVE MAINTENANCE (PM) 7 - 10...
- Page 495 A4/LT size papers need to be loaded in the cassette for automatic gamma adjustment. Before performing the EPU replacement mode, load the A4/LT size papers into the cassette, then set the cassette paper size. © 2015 TOSHIBA TEC CORPORATION All rights reserved e-STUDIO2008A/2508A/3008A/3508A/4508A/5008A PREVENTIVE MAINTENANCE (PM)
- Page 496 Press and hold the [POWER] button until the power is Step 5 Power off Press the [ON/OFF] button turned OFF. for a few seconds. Fig. 7-6 e-STUDIO2008A/2508A/3008A/3508A/4508A/5008A © 2015 TOSHIBA TEC CORPORATION All rights reserved PREVENTIVE MAINTENANCE (PM) 7 - 12...
- Page 497 If the 21 EPU Replacement Mode does not function, check that the value of FS-08-4556 (Detection setting of new or old EPU) is set to “1: Enabled”. If this value is set to “0: Disabled”, the EPU replacement mode does not function. © 2015 TOSHIBA TEC CORPORATION All rights reserved e-STUDIO2008A/2508A/3008A/3508A/4508A/5008A PREVENTIVE MAINTENANCE (PM)
- Page 498 The display of [0xff00(NEW)] indicates a new IC chip while [0x00ff(OLD)] indicates a used one. A hexadecimal value ending with “-” indicates that invalid data have been entered. In this case, rewriting with a jig is required. e-STUDIO2008A/2508A/3008A/3508A/4508A/5008A © 2015 TOSHIBA TEC CORPORATION All rights reserved PREVENTIVE MAINTENANCE (PM) 7 - 14...
- Page 499 When the fuse is not blown out, though the fuser unit is new, a C4C0 error occurs. In this case, replace the fuse and turn the power OFF and then back ON, or remove the fuse and clear the counters in the PM support mode. © 2015 TOSHIBA TEC CORPORATION All rights reserved e-STUDIO2008A/2508A/3008A/3508A/4508A/5008A PREVENTIVE MAINTENANCE (PM)
- Page 500 150,000 sheets 50ppm every 150,000 sheets • Values under “Replacement” indicate the replacement cycle for the e-STUDIO2008A/2508A/ 3008A/3508A/4508A/5008A. • The replacement cycle of the parts in the feeding section equals to the number of sheets fed from each paper source.
- Page 501 Make sure that there is no fingerprints or oil staining on part of the original glass on where the original scale is mounted since the shading correction plate is located below the scale to be scanned. © 2015 TOSHIBA TEC CORPORATION All rights reserved e-STUDIO2008A/2508A/3008A/3508A/4508A/5008A PREVENTIVE MAINTENANCE (PM)
- Page 502 7.7.2 Laser optical unit Fig. 7-8 Replacement Operation Parts list Items to check Cleaning Lubrication (x 1,000 sheets) check <P-I> Slit glass e-STUDIO2008A/2508A/3008A/3508A/4508A/5008A © 2015 TOSHIBA TEC CORPORATION All rights reserved PREVENTIVE MAINTENANCE (PM) 7 - 18...
- Page 503 AV, W2 20-4 80/80/80/80/80/80 Bypass tray Paper guide Drive gear (tooth face and shaft) Plastic bushing bearing Bypass drive gear (shaft) Bypass GCB bushing 20-8 bearing © 2015 TOSHIBA TEC CORPORATION All rights reserved e-STUDIO2008A/2508A/3008A/3508A/4508A/5008A PREVENTIVE MAINTENANCE (PM) 7 - 19...
- Page 504 Apply 2 rice-sized grains of white grease (Molykote EM-30L) to the 2 contact points of the registration roller (rubber) and the pusher. Registration roller Grease Pusher Fig. 7-12 e-STUDIO2008A/2508A/3008A/3508A/4508A/5008A © 2015 TOSHIBA TEC CORPORATION All rights reserved PREVENTIVE MAINTENANCE (PM) 7 - 20...
- Page 505 Molykote to the gear which is located near the clutch. The quantity of Molykote should be smaller than that to be applied to the other parts. © 2015 TOSHIBA TEC CORPORATION All rights reserved e-STUDIO2008A/2508A/3008A/3508A/4508A/5008A PREVENTIVE MAINTENANCE (PM)
- Page 506 Transfer roller 26-5 80/100/120/125/ 150/150 Separation needle 26-11 Transfer guide Separation cover 26-12 Transfer roller guide roller 26-8 Main charger case Needle electrode 25-6 80/100/120/125/ 150/150 e-STUDIO2008A/2508A/3008A/3508A/4508A/5008A © 2015 TOSHIBA TEC CORPORATION All rights reserved PREVENTIVE MAINTENANCE (PM) 7 - 22...
- Page 507 If there is paper dust in the whole transfer unit including the transfer guide, wipe them with a dry cloth. If the transfer guide is removed, clean the wall inside the unit. © 2015 TOSHIBA TEC CORPORATION All rights reserved e-STUDIO2008A/2508A/3008A/3508A/4508A/5008A...
- Page 508 80/100/120/125/ 150/150 Front shield 28-32 Guide roller 29-17 Side shield 28-30 28-31 Developer unit lower stay Oil seal (6 pcs.) 28-1 480/600/720/750/ 29-8 900/900 29-12 e-STUDIO2008A/2508A/3008A/3508A/4508A/5008A © 2015 TOSHIBA TEC CORPORATION All rights reserved PREVENTIVE MAINTENANCE (PM) 7 - 24...
- Page 509 Apply an even coat of grease to the inside of the oil seal. • Amount: About two small drops Wipe off any grease the exudes from the Inside Grease inside. Oil seal Fig. 7-16 © 2015 TOSHIBA TEC CORPORATION All rights reserved e-STUDIO2008A/2508A/3008A/3508A/4508A/5008A PREVENTIVE MAINTENANCE (PM) 7 - 25...
- Page 510 Fuser unit entrance guide 32-11 Thermistor (3 pcs.) 31-12 31-13 Drive gear (tooth face 31-11 and shaft) Fuser roller gear 31-18 Exit sensor actuator 32-25 e-STUDIO2008A/2508A/3008A/3508A/4508A/5008A © 2015 TOSHIBA TEC CORPORATION All rights reserved PREVENTIVE MAINTENANCE (PM) 7 - 26...
- Page 511 Be sure to perform the fuser thermistor correction when it is removed or replaced. * h. Exit sensor actuator If toner has adhered, wipe it off with alcohol. © 2015 TOSHIBA TEC CORPORATION All rights reserved e-STUDIO2008A/2508A/3008A/3508A/4508A/5008A PREVENTIVE MAINTENANCE (PM)
- Page 512 Items to check Cleaning Lubrication (x 1,000 sheets) check <P-I> Exit/reverse guide Exit roller 33-3 Transport roller 34-8 Reverse roller 34-15 Drive gear 33-19 Conductive bushing 33-6 e-STUDIO2008A/2508A/3008A/3508A/4508A/5008A © 2015 TOSHIBA TEC CORPORATION All rights reserved PREVENTIVE MAINTENANCE (PM) 7 - 28...
- Page 513 Replacement Operation Parts list Items to check Cleaning Lubrication (x 1,000 sheets) check <P-I> Transport roller 35-2 (upper and lower) 35-3 Drive gear 35-17 35-18 © 2015 TOSHIBA TEC CORPORATION All rights reserved e-STUDIO2008A/2508A/3008A/3508A/4508A/5008A PREVENTIVE MAINTENANCE (PM) 7 - 29...
- Page 514 Make sure that the grease does not adhere to the roller surface. Wipe it off with alcohol if adhered. Apply grease on the inner surface Fig. 7-21 Apply white grease Fig. 7-22 e-STUDIO2008A/2508A/3008A/3508A/4508A/5008A © 2015 TOSHIBA TEC CORPORATION All rights reserved PREVENTIVE MAINTENANCE (PM) 7 - 30...
- Page 515 Parts list Items to check Cleaning Lubrication (x 1,000 sheets) check <P-I> Pickup roller 160/160/160/160/ 160/160 Feed roller 160/160/160/160/ 160/160 Separation roller 160/160/160/160/ 160/160 Drive gear © 2015 TOSHIBA TEC CORPORATION All rights reserved e-STUDIO2008A/2508A/3008A/3508A/4508A/5008A PREVENTIVE MAINTENANCE (PM) 7 - 31...
- Page 516 JSP paper jam sensor * a. Idling roller Apply one-rice-grain-amount of white grease (Molykote EM-30L) to each part A in the figure below. Fig. 7-25 e-STUDIO2008A/2508A/3008A/3508A/4508A/5008A © 2015 TOSHIBA TEC CORPORATION All rights reserved PREVENTIVE MAINTENANCE (PM) 7 - 32...
- Page 517 (x 1,000 sheets) check <P-I> Pickup roller Separation roller Feed roller Registration roller Reading start roller Reading guide Exit roller DSDF-CCD original glass Shading plate © 2015 TOSHIBA TEC CORPORATION All rights reserved e-STUDIO2008A/2508A/3008A/3508A/4508A/5008A PREVENTIVE MAINTENANCE (PM) 7 - 33...
- Page 518 As needed Applying EM-50L drive unit grease Wipe with a dry cloth or alco- Paper detection sensor Minimum maintenance interval set Cleaning for the equipment e-STUDIO2008A/2508A/3008A/3508A/4508A/5008A © 2015 TOSHIBA TEC CORPORATION All rights reserved PREVENTIVE MAINTENANCE (PM) 7 - 34...
- Page 519 Paper holder cam Buffer tray shaft Stapler carrier shaft Rack & pinion gear (Aligning plate) Movable tray drive gear Buffer tray guide Finishing tray shaft Grate-shaped guide © 2015 TOSHIBA TEC CORPORATION All rights reserved e-STUDIO2008A/2508A/3008A/3508A/4508A/5008A PREVENTIVE MAINTENANCE (PM) 7 - 35...
- Page 520 Fig. 7-28 *i. Buffer tray shaft Apply an adequate amount of white grease (Molykote EM-30L) to the entire buffer tray shaft. Buffer tray shaft Fig. 7-29 e-STUDIO2008A/2508A/3008A/3508A/4508A/5008A © 2015 TOSHIBA TEC CORPORATION All rights reserved PREVENTIVE MAINTENANCE (PM) 7 - 36...
- Page 521 *l. Movable tray drive gear Apply an adequate amount of white grease (Molykote EM-30L) to the gear teeth of the gear-A and gear-B. Gear B Gear A Fig. 7-31 © 2015 TOSHIBA TEC CORPORATION All rights reserved e-STUDIO2008A/2508A/3008A/3508A/4508A/5008A PREVENTIVE MAINTENANCE (PM) 7 - 37...
- Page 522 Apply an adequate amount of white grease (Molykote EM-30L) to the gear teeth of the rack and pinion gears which drive the aligning plate, and the entire finishing tray shaft. Finishing tray shaft Rack gear Pinion gear Fig. 7-33 e-STUDIO2008A/2508A/3008A/3508A/4508A/5008A © 2015 TOSHIBA TEC CORPORATION All rights reserved PREVENTIVE MAINTENANCE (PM) 7 - 38...
- Page 523 *Do not apply coating material (Molykote PD-910) to the rubber section of the grate-shaped tray. *When coating material adheres to the skin, rinse it well with water. [ 1 ] Fig. 7-34 © 2015 TOSHIBA TEC CORPORATION All rights reserved e-STUDIO2008A/2508A/3008A/3508A/4508A/5008A PREVENTIVE MAINTENANCE (PM) 7 - 39...
- Page 524 Transport sensor (S2) Stack transport roller-1 Stack transport roller-2 Buffer roller Exit roller Entrance roller Transport roller Paddle 1,000 Paper pusher cam Buffer tray shaft e-STUDIO2008A/2508A/3008A/3508A/4508A/5008A © 2015 TOSHIBA TEC CORPORATION All rights reserved PREVENTIVE MAINTENANCE (PM) 7 - 40...
- Page 525 *k Buffer tray shaft Apply an adequate amount of white grease (Molykote EM-30L) to the entire buffer tray shaft [1]. [ 1 ] Fig. 7-37 © 2015 TOSHIBA TEC CORPORATION All rights reserved e-STUDIO2008A/2508A/3008A/3508A/4508A/5008A PREVENTIVE MAINTENANCE (PM) 7 - 41...
- Page 526 Apply an adequate amount of white grease (Molykote EM-30L) to the gear teeth of the rack gear [1] which drive the aligning plate, and the entire finishing tray shaft [2]. [ 2 ] [ 1 ] Fig. 7-39 e-STUDIO2008A/2508A/3008A/3508A/4508A/5008A © 2015 TOSHIBA TEC CORPORATION All rights reserved PREVENTIVE MAINTENANCE (PM) 7 - 42...
- Page 527 *p Additional folding unit carrier shaft Apply an adequate amount of white grease (Molykote EM-30L) to the entire Additional folding unit carrier shaft [1]. [ 1 ] Fig. 7-41 © 2015 TOSHIBA TEC CORPORATION All rights reserved e-STUDIO2008A/2508A/3008A/3508A/4508A/5008A PREVENTIVE MAINTENANCE (PM) 7 - 43...
- Page 528 *Do not apply coating material (Molykote PD-910) to the rubber section of the grate-shaped tray. *When coating material adheres to the skin, rinse it well with water. [ 1 ] Fig. 7-42 e-STUDIO2008A/2508A/3008A/3508A/4508A/5008A © 2015 TOSHIBA TEC CORPORATION All rights reserved PREVENTIVE MAINTENANCE (PM) 7 - 44...
- Page 529 *3: Page-Item (P-I) is described in the column of the Parts list. *4: This unit may require replacement once or more over the period of machine warranty because of deterioration or damage. Replace them as needed. © 2015 TOSHIBA TEC CORPORATION All rights reserved e-STUDIO2008A/2508A/3008A/3508A/4508A/5008A PREVENTIVE MAINTENANCE (PM)
- Page 530 Transfer roller should be stored in a place where the ambient temperature is between 10°C to 35°C (no condensation). Be sure to avoid places where transfer roller may be subjected to high humidity, chemicals and/or their fumes. e-STUDIO2008A/2508A/3008A/3508A/4508A/5008A © 2015 TOSHIBA TEC CORPORATION All rights reserved PREVENTIVE MAINTENANCE (PM) 7 - 46...
- Page 531 6. Collecting used photoconductive drums Regarding the recovery and disposal of used photoconductive drums, we recommend following the relevant local regulations or rules. © 2015 TOSHIBA TEC CORPORATION All rights reserved e-STUDIO2008A/2508A/3008A/3508A/4508A/5008A PREVENTIVE MAINTENANCE (PM) 7 - 47...
- Page 532 Be careful not to rub the fuser roller and pressure roller surface with your nails or hard objects because it can be easily damaged. Do not use silicone oil on the fuser roller and pressure roller. e-STUDIO2008A/2508A/3008A/3508A/4508A/5008A © 2015 TOSHIBA TEC CORPORATION All rights reserved PREVENTIVE MAINTENANCE (PM) 7 - 48...
- Page 533 If bits of thread or similar adhere to the surface, remove them with gloves or a pair of tweezers. Be careful that the roller surface is not damaged by the points of the tweezers. © 2015 TOSHIBA TEC CORPORATION All rights reserved e-STUDIO2008A/2508A/3008A/3508A/4508A/5008A...
- Page 534 Pick up roller Feed roller Separation roller * 1. For Equipment drawer / PFP drawer / Drawer Module * 2. For RADF * 3. For LCF e-STUDIO2008A/2508A/3008A/3508A/4508A/5008A © 2015 TOSHIBA TEC CORPORATION All rights reserved PREVENTIVE MAINTENANCE (PM) 7 - 50...
- Page 535 STUDIO207L/257/307/357/457/507 Service Parts List”. No.1-13, 15-18: Refer to “e-STUDIO206L/256/306/356/456/506 Service Parts List” or e- STUDIO207L/257/307/357/457/507. No.14: Refer to “MJ-1101 Service Parts List” or “MJ-1107 Service Parts List”. © 2015 TOSHIBA TEC CORPORATION All rights reserved e-STUDIO2008A/2508A/3008A/3508A/4508A/5008A PREVENTIVE MAINTENANCE (PM) 7 - 51...
- Page 536 Fig. 7-43 e-STUDIO2008A/2508A/3008A/3508A/4508A/5008A © 2015 TOSHIBA TEC CORPORATION All rights reserved PREVENTIVE MAINTENANCE (PM) 7 - 52...
- Page 537 100cc Oiler 101-11 White grease (Molykote HP-300) Bottle 101-12B Alvania No.2 100g Tube 101-13 White grease (Molykote EM-30L) 100g Tube 101-14 Floil (GE-334C) Bottle 101-15 © 2015 TOSHIBA TEC CORPORATION All rights reserved e-STUDIO2008A/2508A/3008A/3508A/4508A/5008A PREVENTIVE MAINTENANCE (PM) 7 - 53...
- Page 538 Parts list Items to check Cleaning Lubrication (x 1,000 sheets) check <P-I> Drum drive unit Development drive unit Paper feeding drive unit Fuser unit drive gear e-STUDIO2008A/2508A/3008A/3508A/4508A/5008A © 2015 TOSHIBA TEC CORPORATION All rights reserved PREVENTIVE MAINTENANCE (PM) 7 - 54...
- Page 539 Even in the cases other than the above, fully observe safety precautions. If any PC board or HDD shall be replaced, refer to P. 9-1 "9. REPLACEMENT OF PC BOARDS/HDD". © 2015 TOSHIBA TEC CORPORATION All rights reserved e-STUDIO2008A/2508A/3008A/3508A/4508A/5008A ERROR CODE AND TROUBLESHOOTING...
- Page 540 If a problem continues even after performing all troubleshooting and technical tips, report the problem to the appropriate Toshiba service center along with the following information. This information will help the service center understand your problem and take quick action to find the solution.
- Page 541 No problem occurred when an attempt to collect the debug log was made; however the customer did turn the main power switch OFF when the problem occurred, so the log can be collected. © 2015 TOSHIBA TEC CORPORATION All rights reserved e-STUDIO2008A/2508A/3008A/3508A/4508A/5008A...
- Page 542 (XXXX= Serial number of the equipment, YYYY= year, MM= month, DD= day, HH= hour, mm= minute, SS= second) After the debug logs have been collected, be sure to send them to the service center together with a report. e-STUDIO2008A/2508A/3008A/3508A/4508A/5008A © 2015 TOSHIBA TEC CORPORATION All rights reserved ERROR CODE AND TROUBLESHOOTING 8 - 4...
- Page 543 A traceability label on which a management No. at the manufacturing has been printed is attached to some units. If a problem occurs in a unit, report it to the appropriate Toshiba service center along with the traceability label information to help them to understand it.
- Page 544 [ 3 ] Label attachment position Fig.8-1 e-STUDIO2008A/2508A/3008A/3508A/4508A/5008A © 2015 TOSHIBA TEC CORPORATION All rights reserved ERROR CODE AND TROUBLESHOOTING 8 - 6...
- Page 545 LCF misfeeding (Paper not reaching the LCF feed P. 8-91 sensor): The paper fed from the LCF does not reach the LCF feed sensor. © 2015 TOSHIBA TEC CORPORATION All rights reserved e-STUDIO2008A/2508A/3008A/3508A/4508A/5008A ERROR CODE AND TROUBLESHOOTING 8 - 7...
- Page 546 LCF transport jam (Paper not reaching the 2nd P. 8-74 transport sensor): The paper does not reach the 2nd transport sensor after it has passed the LCF feed sensor. e-STUDIO2008A/2508A/3008A/3508A/4508A/5008A © 2015 TOSHIBA TEC CORPORATION All rights reserved ERROR CODE AND TROUBLESHOOTING 8 - 8...
- Page 547 Stop jam at the reverse sensor: The trailing edge of P. 8-78 the paper does not pass the reverse sensor after its leading edge has reached this sensor. © 2015 TOSHIBA TEC CORPORATION All rights reserved e-STUDIO2008A/2508A/3008A/3508A/4508A/5008A ERROR CODE AND TROUBLESHOOTING 8 - 9...
- Page 548 Stop jam at the job separator transport sensor: The P. 8-113 trailing edge of the paper does not pass the job separator transport sensor. e-STUDIO2008A/2508A/3008A/3508A/4508A/5008A © 2015 TOSHIBA TEC CORPORATION All rights reserved ERROR CODE AND TROUBLESHOOTING 8 - 10...
- Page 549 (2) Paper cannot be detected in the gripper arm exit sensor after the paper stack has exited from the finishing tray. [MJ-1033] © 2015 TOSHIBA TEC CORPORATION All rights reserved e-STUDIO2008A/2508A/3008A/3508A/4508A/5008A ERROR CODE AND TROUBLESHOOTING 8 - 11...
- Page 550 Paper transport remaining jam in the Finisher: Paper is detected in any of the path sensors when the power is turned ON or the cover is closed. [MJ-1033] P. 8-127 e-STUDIO2008A/2508A/3008A/3508A/4508A/5008A © 2015 TOSHIBA TEC CORPORATION All rights reserved ERROR CODE AND TROUBLESHOOTING 8 - 12...
- Page 551 Print end command time-out jam: The printing has P. 8-104 not finished normally because of the communication error between the SYS board and LGC board at the end of printing. © 2015 TOSHIBA TEC CORPORATION All rights reserved e-STUDIO2008A/2508A/3008A/3508A/4508A/5008A ERROR CODE AND TROUBLESHOOTING 8 - 13...
- Page 552 P. 8-141 home position. [MJ-1101/1107/MJ-1106/1108] ED16 Buffer tray home position error: The buffer tray is P. 8-142 not at the home position. [MJ-1101/1107/MJ-1106/ 1108] e-STUDIO2008A/2508A/3008A/3508A/4508A/5008A © 2015 TOSHIBA TEC CORPORATION All rights reserved ERROR CODE AND TROUBLESHOOTING 8 - 14...
- Page 553 EF20 Saddle stacker jam: Transported paper cannot be P. 8-148 detected in the stacker. [MJ-1106/1108] © 2015 TOSHIBA TEC CORPORATION All rights reserved e-STUDIO2008A/2508A/3008A/3508A/4508A/5008A ERROR CODE AND TROUBLESHOOTING 8 - 15...
- Page 554 EPU board memory old parts detection error: The EPU P. 8-167 board cannot detect the new process unit when the equipment is started in the EPU replacement mode ([7] + [START]). e-STUDIO2008A/2508A/3008A/3508A/4508A/5008A © 2015 TOSHIBA TEC CORPORATION All rights reserved ERROR CODE AND TROUBLESHOOTING 8 - 16...
- Page 555 C8E0 Optional ADF communication abnormality: The system has to be P. 8-177 communication stopped because the control abnormality occurred related service call © 2015 TOSHIBA TEC CORPORATION All rights reserved e-STUDIO2008A/2508A/3008A/3508A/4508A/5008A ERROR CODE AND TROUBLESHOOTING 8 - 17...
- Page 556 Stapler unit sliding home position detection error: The P. 8-194 detection of the home position of the stapler unit sliding ends abnormally. [MJ-1032/MJ-1033] P. 8-195 e-STUDIO2008A/2508A/3008A/3508A/4508A/5008A © 2015 TOSHIBA TEC CORPORATION All rights reserved ERROR CODE AND TROUBLESHOOTING 8 - 18...
- Page 557 The folding motor is not rotating or the folding roller is not moving normally. [MJ-1106/1108] CBF0 Stacker motor (M9) abnormality: P. 8-202 The stacker motor is not rotating. [MJ-1033] © 2015 TOSHIBA TEC CORPORATION All rights reserved e-STUDIO2008A/2508A/3008A/3508A/4508A/5008A ERROR CODE AND TROUBLESHOOTING 8 - 19...
- Page 558 Rear alignment plate home position detection error: The detection of the home position ends abnormally because the rear alignment plate has not worked properly. [MJ-1032/MJ-1033] e-STUDIO2008A/2508A/3008A/3508A/4508A/5008A © 2015 TOSHIBA TEC CORPORATION All rights reserved ERROR CODE AND TROUBLESHOOTING 8 - 20...
- Page 559 Partition mount error: The HDD cannot be connected P. 8-227 (mounted) caused by damage to the “/encryption” partition. F102 HDD start error: HDD cannot become ‘Ready’ state. P. 8-228 © 2015 TOSHIBA TEC CORPORATION All rights reserved e-STUDIO2008A/2508A/3008A/3508A/4508A/5008A ERROR CODE AND TROUBLESHOOTING 8 - 21...
- Page 560 Data Overwrite option (GP-1070) disabled P. 8-241 F350 Circuit related SLG board abnormality P. 8-180 service call F400 SYS board cooling fan abnormality P. 8-180 e-STUDIO2008A/2508A/3008A/3508A/4508A/5008A © 2015 TOSHIBA TEC CORPORATION All rights reserved ERROR CODE AND TROUBLESHOOTING 8 - 22...
- Page 561 Engine speed error: The speed information of the LGC P. 8-245 board is damaged. F901_1 Engine speed error: The speed information of the LGC P. 8-245 board is damaged. © 2015 TOSHIBA TEC CORPORATION All rights reserved e-STUDIO2008A/2508A/3008A/3508A/4508A/5008A ERROR CODE AND TROUBLESHOOTING 8 - 23...
- Page 562 1C71 Internet fax SMTP related error authentication error 1C72 Internet fax POP before SMTP related error error 1CC0 Internet fax Job canceling related error e-STUDIO2008A/2508A/3008A/3508A/4508A/5008A © 2015 TOSHIBA TEC CORPORATION All rights reserved ERROR CODE AND TROUBLESHOOTING 8 - 24...
- Page 563 Error code display media Error Troubles Classification Message Contents code hooting Panl JL ML Noti Cf Pjl 1CC1 Internet fax Power failure related error © 2015 TOSHIBA TEC CORPORATION All rights reserved e-STUDIO2008A/2508A/3008A/3508A/4508A/5008A ERROR CODE AND TROUBLESHOOTING 8 - 25...
- Page 564 Insufficient system Terminal/ error storage Destination address error (RFC: 552) 2553 RFC related Mailbox name not Destination mail error allowed address error (RFC: 553) e-STUDIO2008A/2508A/3008A/3508A/4508A/5008A © 2015 TOSHIBA TEC CORPORATION All rights reserved ERROR CODE AND TROUBLESHOOTING 8 - 26...
- Page 565 2AD3 Remote Restore operation Archived e-Filing scanning of e-Filing data is data restoring related error done © 2015 TOSHIBA TEC CORPORATION All rights reserved e-STUDIO2008A/2508A/3008A/3508A/4508A/5008A ERROR CODE AND TROUBLESHOOTING 8 - 27...
- Page 566 Panl JL ML Noti Cf Pjl 2AD4 Remote e-Filing data was e-Filing data scanning downloaded by downloading (Scan related error scan utility Utility) e-STUDIO2008A/2508A/3008A/3508A/4508A/5008A © 2015 TOSHIBA TEC CORPORATION All rights reserved ERROR CODE AND TROUBLESHOOTING 8 - 28...
- Page 567 Box e-Filing box is related error Storage is initialized. initialized. 2BE0 e-Filing box Failed to get Machine related error machine parameter reading parameter error © 2015 TOSHIBA TEC CORPORATION All rights reserved e-STUDIO2008A/2508A/3008A/3508A/4508A/5008A ERROR CODE AND TROUBLESHOOTING 8 - 29...
- Page 568 2BF2 e-Filing box Maximum number Exceeding the related error of folder range is maximum number reached of folders e-STUDIO2008A/2508A/3008A/3508A/4508A/5008A © 2015 TOSHIBA TEC CORPORATION All rights reserved ERROR CODE AND TROUBLESHOOTING 8 - 30...
- Page 569 2C45 E-mail related Failed in making Meta data creation error meta data error (Scan to Email) © 2015 TOSHIBA TEC CORPORATION All rights reserved e-STUDIO2008A/2508A/3008A/3508A/4508A/5008A ERROR CODE AND TROUBLESHOOTING 8 - 31...
- Page 570 POP before SMTP error Authentication error Failed 2CC0 E-mail related Job canceled Job canceling error 2CC1 E-mail related Power failure Power failure error occurred e-STUDIO2008A/2508A/3008A/3508A/4508A/5008A © 2015 TOSHIBA TEC CORPORATION All rights reserved ERROR CODE AND TROUBLESHOOTING 8 - 32...
- Page 571 Encryption error related error Failed to create file 2D44 File sharing Creating the image Encryption PDF related error file was not enforced mode permitted error © 2015 TOSHIBA TEC CORPORATION All rights reserved e-STUDIO2008A/2508A/3008A/3508A/4508A/5008A ERROR CODE AND TROUBLESHOOTING 8 - 33...
- Page 572 2DA3 File sharing Scanned Manual deletion of related error documents in scanned shared folder documents has deleted upon been completed user’s request properly. e-STUDIO2008A/2508A/3008A/3508A/4508A/5008A © 2015 TOSHIBA TEC CORPORATION All rights reserved ERROR CODE AND TROUBLESHOOTING 8 - 34...
- Page 573 USB USB folder storage 2E31 File sharing Failed to store File creation failure related error document(s) in in USB storage USB folder © 2015 TOSHIBA TEC CORPORATION All rights reserved e-STUDIO2008A/2508A/3008A/3508A/4508A/5008A ERROR CODE AND TROUBLESHOOTING 8 - 35...
- Page 574 2EC0 File sharing Job canceled Job canceling related error 2EC1 File sharing Power Failure Job Power failure in related error Aborted USB storage e-STUDIO2008A/2508A/3008A/3508A/4508A/5008A © 2015 TOSHIBA TEC CORPORATION All rights reserved ERROR CODE AND TROUBLESHOOTING 8 - 36...
- Page 575 3C20 E-mail Tiff Compression TIFF compression reception Error has been error related error detected in the received mail. © 2015 TOSHIBA TEC CORPORATION All rights reserved e-STUDIO2008A/2508A/3008A/3508A/4508A/5008A ERROR CODE AND TROUBLESHOOTING 8 - 37...
- Page 576 3E40 E-mail POP3 Login Error POP3 login reception occurred in the method error related error received mail. e-STUDIO2008A/2508A/3008A/3508A/4508A/5008A © 2015 TOSHIBA TEC CORPORATION All rights reserved ERROR CODE AND TROUBLESHOOTING 8 - 38...
- Page 577 File I/O Error has File I/O error reception been occurred related error in this mail. The mail could not be received until File I/ O is recovered. © 2015 TOSHIBA TEC CORPORATION All rights reserved e-STUDIO2008A/2508A/3008A/3508A/4508A/5008A ERROR CODE AND TROUBLESHOOTING 8 - 39...
- Page 578 Serverless Location Free Print function. (A specific error for the Serverless Location Free Print function) e-STUDIO2008A/2508A/3008A/3508A/4508A/5008A © 2015 TOSHIBA TEC CORPORATION All rights reserved ERROR CODE AND TROUBLESHOOTING 8 - 40...
- Page 579 Printing data storing limitation error: Printing with its data being stored to the HDD temporarily (Proof print, Private print, Scheduled print, etc.) has been performed. © 2015 TOSHIBA TEC CORPORATION All rights reserved e-STUDIO2008A/2508A/3008A/3508A/4508A/5008A ERROR CODE AND TROUBLESHOOTING 8 - 41...
- Page 580 4313 Printer error No privilege for e- Filing storage: No privilege to store e- Filing data is given. (e-Filing storage permission) e-STUDIO2008A/2508A/3008A/3508A/4508A/5008A © 2015 TOSHIBA TEC CORPORATION All rights reserved ERROR CODE AND TROUBLESHOOTING 8 - 42...
- Page 581 A new font cannot be registered because the number of fonts registered in this equipment has already reached the limit. © 2015 TOSHIBA TEC CORPORATION All rights reserved e-STUDIO2008A/2508A/3008A/3508A/4508A/5008A ERROR CODE AND TROUBLESHOOTING 8 - 43...
- Page 582 4F10 Printer error Printing has not been performed successfully due to other abnormalities. e-STUDIO2008A/2508A/3008A/3508A/4508A/5008A © 2015 TOSHIBA TEC CORPORATION All rights reserved ERROR CODE AND TROUBLESHOOTING 8 - 44...
- Page 583 5019 Communication TOSHIBA Global Connection error: error remote monitoring Settings for the system error initial URL and proxy are incorrect. © 2015 TOSHIBA TEC CORPORATION All rights reserved e-STUDIO2008A/2508A/3008A/3508A/4508A/5008A ERROR CODE AND TROUBLESHOOTING 8 - 45...
- Page 584 Toner-C empty error 5400 Communication Succeeded in MFP MFP registration error registration success 5410 Communication TOSHIBA Global MFP registration error remote monitoring error system error e-STUDIO2008A/2508A/3008A/3508A/4508A/5008A © 2015 TOSHIBA TEC CORPORATION All rights reserved ERROR CODE AND TROUBLESHOOTING 8 - 46...
- Page 585 Communication Security error on A network fax job error Address Book. has failed because the specified address is not registered in the address book. © 2015 TOSHIBA TEC CORPORATION All rights reserved e-STUDIO2008A/2508A/3008A/3508A/4508A/5008A ERROR CODE AND TROUBLESHOOTING 8 - 47...
- Page 586 6014 MFP access Detected the Inaccessible error authentication authentication server that can not server detection be connected e-STUDIO2008A/2508A/3008A/3508A/4508A/5008A © 2015 TOSHIBA TEC CORPORATION All rights reserved ERROR CODE AND TROUBLESHOOTING 8 - 48...
- Page 587 Base Access Base Access Control (LDAP) Control server 6053 MFP access Failed print Print job error authentication(Net authentication work Initializing) failure due to NIC initialization © 2015 TOSHIBA TEC CORPORATION All rights reserved e-STUDIO2008A/2508A/3008A/3508A/4508A/5008A ERROR CODE AND TROUBLESHOOTING 8 - 49...
- Page 588 6100 MFP access User account is User account error locked locking out 6101 MFP access Box is locked e-Filing box locking error e-STUDIO2008A/2508A/3008A/3508A/4508A/5008A © 2015 TOSHIBA TEC CORPORATION All rights reserved ERROR CODE AND TROUBLESHOOTING 8 - 50...
- Page 589 Log near full (90% database nearly Used) full (90%) 6173 MFP access FAX_Transmission Fax transmission error Log near full (80% database nearly Used) full (80%) © 2015 TOSHIBA TEC CORPORATION All rights reserved e-STUDIO2008A/2508A/3008A/3508A/4508A/5008A ERROR CODE AND TROUBLESHOOTING 8 - 51...
- Page 590 (80% database nearly Used) full (80%) 61C4 MFP access Application Log Application log error near full (70% database nearly Used) full (70%) e-STUDIO2008A/2508A/3008A/3508A/4508A/5008A © 2015 TOSHIBA TEC CORPORATION All rights reserved ERROR CODE AND TROUBLESHOOTING 8 - 52...
- Page 591 6282 MFP access Failed to add Certification error certificate addition failure 6283 MFP access Cryptographic key Encryption key error generated generation © 2015 TOSHIBA TEC CORPORATION All rights reserved e-STUDIO2008A/2508A/3008A/3508A/4508A/5008A ERROR CODE AND TROUBLESHOOTING 8 - 53...
- Page 592 Log DB corruption by damage on it 71A4 Maintenance Failed in Cryptographic key error consistency consistency confirmation of confirmation failure cryptographic key e-STUDIO2008A/2508A/3008A/3508A/4508A/5008A © 2015 TOSHIBA TEC CORPORATION All rights reserved ERROR CODE AND TROUBLESHOOTING 8 - 54...
- Page 593 Image log saving error Image Log to the failure to an external server external server 7202 Maintenance Image Log was Image log deletion error deleted © 2015 TOSHIBA TEC CORPORATION All rights reserved e-STUDIO2008A/2508A/3008A/3508A/4508A/5008A ERROR CODE AND TROUBLESHOOTING 8 - 55...
- Page 594 7238 Maintenance Failed to import Some project error some Project Code import failure 7272 Maintenance Successfully Fax firmware1 error updated FAX installation FIRMWARE1 success e-STUDIO2008A/2508A/3008A/3508A/4508A/5008A © 2015 TOSHIBA TEC CORPORATION All rights reserved ERROR CODE AND TROUBLESHOOTING 8 - 56...
- Page 595 The expiration date The validated date error of the license of the of the license for application an application will approaches. nearly have expired. © 2015 TOSHIBA TEC CORPORATION All rights reserved e-STUDIO2008A/2508A/3008A/3508A/4508A/5008A ERROR CODE AND TROUBLESHOOTING 8 - 57...
- Page 596 Panl JL ML Noti Cf Pjl 7331 Maintenance The time limit of The validity date of error the application the license for an license expired. application has expired. e-STUDIO2008A/2508A/3008A/3508A/4508A/5008A © 2015 TOSHIBA TEC CORPORATION All rights reserved ERROR CODE AND TROUBLESHOOTING 8 - 58...
- Page 597 Network error Invalid Signature Ipsec error for invalid signature for certification 803A Network error No IKEv2 proposal Ipsec error for chosen wrong selection of proposal © 2015 TOSHIBA TEC CORPORATION All rights reserved e-STUDIO2008A/2508A/3008A/3508A/4508A/5008A ERROR CODE AND TROUBLESHOOTING 8 - 59...
- Page 598 Ipsec error for data invalid of id manual 8061 Network error Secure Update to Update error for Primary IPv4 secure primary DDNS failed. DDNS e-STUDIO2008A/2508A/3008A/3508A/4508A/5008A © 2015 TOSHIBA TEC CORPORATION All rights reserved ERROR CODE AND TROUBLESHOOTING 8 - 60...
- Page 599 8126 Network error Domain - User Domain: Locked account is locked user account and cannot be (cannot be used for used for logon logon) © 2015 TOSHIBA TEC CORPORATION All rights reserved e-STUDIO2008A/2508A/3008A/3508A/4508A/5008A ERROR CODE AND TROUBLESHOOTING 8 - 61...
- Page 600 Ticket has failed authentication failure 812B Network error Active Directory Active directory Domain - The domain: Invalid Domain specified realm name could not be found e-STUDIO2008A/2508A/3008A/3508A/4508A/5008A © 2015 TOSHIBA TEC CORPORATION All rights reserved ERROR CODE AND TROUBLESHOOTING 8 - 62...
- Page 601 Open - Please Close Cover D20F Information Punch Unit Front Front cover of the Cover Open - punch unit Please Close Cover. © 2015 TOSHIBA TEC CORPORATION All rights reserved e-STUDIO2008A/2508A/3008A/3508A/4508A/5008A ERROR CODE AND TROUBLESHOOTING 8 - 63...
- Page 602 Empty - Please Refill. D344 Information Yellow Toner Cartridge-Y empty Empty - Please Refill. D351 Information Developer material-K replacing period D352 Information Developer material-C replacing period e-STUDIO2008A/2508A/3008A/3508A/4508A/5008A © 2015 TOSHIBA TEC CORPORATION All rights reserved ERROR CODE AND TROUBLESHOOTING 8 - 64...
- Page 603 D711 Information Add/Remove Drawer 2 Drawer 2 installation/removal D712 Information Add/Remove Drawer 3 Drawer 3 installation/removal D713 Information Add/Remove Drawer 4 Drawer 4 installation/removal © 2015 TOSHIBA TEC CORPORATION All rights reserved e-STUDIO2008A/2508A/3008A/3508A/4508A/5008A ERROR CODE AND TROUBLESHOOTING 8 - 65...
- Page 604 D804 Information The machine was rebooted D805 Information DA01 Information Fax board line 1 malfunction DA02 Information Fax board line 2 malfunction e-STUDIO2008A/2508A/3008A/3508A/4508A/5008A © 2015 TOSHIBA TEC CORPORATION All rights reserved ERROR CODE AND TROUBLESHOOTING 8 - 66...
- Page 605 0: Unused 1: Masking 2: Trimming 3: Mirror image 4: Positive/negative reverse 5: Unused Edge erase/Dual-page 0: Unused 1: Edge erase 2: Dual-page 3: Edge erase & Dual-page © 2015 TOSHIBA TEC CORPORATION All rights reserved e-STUDIO2008A/2508A/3008A/3508A/4508A/5008A ERROR CODE AND TROUBLESHOOTING 8 - 67...
- Page 606 H: Special paper 2/ reverse I: Envelope J: Tab paper Z: Unused RADF size mixed 0: Unused 1: Size mixed 2: Single-size document Workflow ID: 10-digit ID e-STUDIO2008A/2508A/3008A/3508A/4508A/5008A © 2015 TOSHIBA TEC CORPORATION All rights reserved ERROR CODE AND TROUBLESHOOTING 8 - 68...
- Page 607 Check that there is no abnormality in the driving section. • Check that there is no abnormality in the roller. Board check • Check if the board is short circuited or open circuited. © 2015 TOSHIBA TEC CORPORATION All rights reserved e-STUDIO2008A/2508A/3008A/3508A/4508A/5008A ERROR CODE AND TROUBLESHOOTING 8 - 69...
- Page 608 Check the registration roller. Replace it if it is worn out. Parts to be replaced Remark Exit sensor LGC board Registration roller clutch Registration roller e-STUDIO2008A/2508A/3008A/3508A/4508A/5008A © 2015 TOSHIBA TEC CORPORATION All rights reserved ERROR CODE AND TROUBLESHOOTING 8 - 70...
- Page 609 Check the transport roller. Replace it if it is worn out. Parts to be replaced Remark Registration roller LGC board High-speed/low-speed transport clutches Feed roller © 2015 TOSHIBA TEC CORPORATION All rights reserved e-STUDIO2008A/2508A/3008A/3508A/4508A/5008A ERROR CODE AND TROUBLESHOOTING 8 - 71...
- Page 610 Check the registration roller. Replace it if it is worn out. Parts to be replaced Remark Registration sensor. LGC board Bypass feed clutch ADU clutch Registration roller e-STUDIO2008A/2508A/3008A/3508A/4508A/5008A © 2015 TOSHIBA TEC CORPORATION All rights reserved ERROR CODE AND TROUBLESHOOTING 8 - 72...
- Page 611 Check the transport roller. Replace it if it is worn out. Parts to be replaced Remark 1st transport sensor LGC board Feed roller Separation roller Pickup roller Transfer roller © 2015 TOSHIBA TEC CORPORATION All rights reserved e-STUDIO2008A/2508A/3008A/3508A/4508A/5008A ERROR CODE AND TROUBLESHOOTING 8 - 73...
- Page 612 Check the transport roller. Replace it if it is worn out. Parts to be replaced Remark 2nd transport sensor. LGC board PFP transport clutch PFP board Feed roller Separation roller Pickup roller e-STUDIO2008A/2508A/3008A/3508A/4508A/5008A © 2015 TOSHIBA TEC CORPORATION All rights reserved ERROR CODE AND TROUBLESHOOTING 8 - 74...
- Page 613 MOT2 board and LGC board are short circuited or open circuited. (e-STUDIO356/456/506 / 357/457/507) • Replace the ADU entrance sensor. • Replace the LGC board. © 2015 TOSHIBA TEC CORPORATION All rights reserved e-STUDIO2008A/2508A/3008A/3508A/4508A/5008A ERROR CODE AND TROUBLESHOOTING 8 - 75...
- Page 614 Parts to be replaced Remark ADU entrance sensor LGC board Exit motor ADU exit sensor Exit board LGC board Rollers in the ADU Exit roller e-STUDIO2008A/2508A/3008A/3508A/4508A/5008A © 2015 TOSHIBA TEC CORPORATION All rights reserved ERROR CODE AND TROUBLESHOOTING 8 - 76...
- Page 615 Parts to be replaced Remark ADU exit sensor LGC board ADU exit sensor MOT board MOT2 board Rollers in the ADU © 2015 TOSHIBA TEC CORPORATION All rights reserved e-STUDIO2008A/2508A/3008A/3508A/4508A/5008A ERROR CODE AND TROUBLESHOOTING 8 - 77...
- Page 616 Replace the MOT2 board. • Replace the LGC board. Parts to be replaced Remark Reverse sensor LGC board Exit roller Reverse motor MOT2 board e-STUDIO2008A/2508A/3008A/3508A/4508A/5008A © 2015 TOSHIBA TEC CORPORATION All rights reserved ERROR CODE AND TROUBLESHOOTING 8 - 78...
- Page 617 3. Check if the conductor patterns on the LGC board are short circuited or open circuited. Parts to be replaced Remark Registration sensor LGC board Rollers on the transport path © 2015 TOSHIBA TEC CORPORATION All rights reserved e-STUDIO2008A/2508A/3008A/3508A/4508A/5008A ERROR CODE AND TROUBLESHOOTING 8 - 79...
- Page 618 4. Replace the registration sensor. 5. Replace the LGC board. Parts to be replaced Remark 1st transport sensor LGC board Registration sensor Rollers on the transport path e-STUDIO2008A/2508A/3008A/3508A/4508A/5008A © 2015 TOSHIBA TEC CORPORATION All rights reserved ERROR CODE AND TROUBLESHOOTING 8 - 80...
- Page 619 4. Replace the 2nd transport sensor. 5. Replace the LGC board. Parts to be replaced Remark LGC board 2nd transport sensor Rollers on the transport path © 2015 TOSHIBA TEC CORPORATION All rights reserved e-STUDIO2008A/2508A/3008A/3508A/4508A/5008A ERROR CODE AND TROUBLESHOOTING 8 - 81...
- Page 620 Measure dure Step Open the PFP side cover. Remove the paper. Is there any paper in front of the PFP upper drawer feed sensor? e-STUDIO2008A/2508A/3008A/3508A/4508A/5008A © 2015 TOSHIBA TEC CORPORATION All rights reserved ERROR CODE AND TROUBLESHOOTING 8 - 82...
- Page 621 Parts to be replaced Remark PFP upper drawer feed sensor PFP board LGC board PFP transport clutch Feed roller Separation roller Pickup roller PFP transport roller © 2015 TOSHIBA TEC CORPORATION All rights reserved e-STUDIO2008A/2508A/3008A/3508A/4508A/5008A ERROR CODE AND TROUBLESHOOTING 8 - 83...
- Page 622 Check the rollers in the ADU. Replace them if they are worn out. Parts to be replaced Remark ADU clutch LGC board Rollers in the ADU e-STUDIO2008A/2508A/3008A/3508A/4508A/5008A © 2015 TOSHIBA TEC CORPORATION All rights reserved ERROR CODE AND TROUBLESHOOTING 8 - 84...
- Page 623 Replace them if they are worn out. Parts to be replaced Remark 1st transport sensor LGC board Bypass feed clutch Bypass paper sensor Bypass feed roller Separation pad © 2015 TOSHIBA TEC CORPORATION All rights reserved e-STUDIO2008A/2508A/3008A/3508A/4508A/5008A ERROR CODE AND TROUBLESHOOTING 8 - 85...
- Page 624 Replace them if they are worn out. Parts to be replaced Remark 1st transport sensor. LGC board Upper drawer feed clutch Upper drawer feed roller Separation roller Pickup roller e-STUDIO2008A/2508A/3008A/3508A/4508A/5008A © 2015 TOSHIBA TEC CORPORATION All rights reserved ERROR CODE AND TROUBLESHOOTING 8 - 86...
- Page 625 Parts to be replaced Remark 2nd transport sensor LGC board Lower drawer feed clutch Lower drawer feed roller Separation roller Pickup roller © 2015 TOSHIBA TEC CORPORATION All rights reserved e-STUDIO2008A/2508A/3008A/3508A/4508A/5008A ERROR CODE AND TROUBLESHOOTING 8 - 87...
- Page 626 Parts to be replaced Remark PFP upper drawer feed sensor PFP board LGC board PFP upper drawer feed clutch PFP upper drawer feed roller Separation roller e-STUDIO2008A/2508A/3008A/3508A/4508A/5008A © 2015 TOSHIBA TEC CORPORATION All rights reserved ERROR CODE AND TROUBLESHOOTING 8 - 88...
- Page 627 Separation roller Replace them if they are worn out. Pickup roller Parts to be replaced Remark PFP lower drawer feed sensor. PFP board © 2015 TOSHIBA TEC CORPORATION All rights reserved e-STUDIO2008A/2508A/3008A/3508A/4508A/5008A ERROR CODE AND TROUBLESHOOTING 8 - 89...
- Page 628 Parts to be replaced Remark LGC board PFP lower drawer feed clutch PFP lower drawer feed roller, Separation roller Pickup roller e-STUDIO2008A/2508A/3008A/3508A/4508A/5008A © 2015 TOSHIBA TEC CORPORATION All rights reserved ERROR CODE AND TROUBLESHOOTING 8 - 90...
- Page 629 Replace them if they are worn out. Parts to be replaced Remark LCF feed sensor LCF board LGC board LCF feed clutch LCF feed roller Separation roller Pickup roller © 2015 TOSHIBA TEC CORPORATION All rights reserved e-STUDIO2008A/2508A/3008A/3508A/4508A/5008A ERROR CODE AND TROUBLESHOOTING 8 - 91...
- Page 630 • Replace the LGC board. LGC board • Replace the LGC board. Parts to be replaced Remark Front cover opening/closing switch LGC board e-STUDIO2008A/2508A/3008A/3508A/4508A/5008A © 2015 TOSHIBA TEC CORPORATION All rights reserved ERROR CODE AND TROUBLESHOOTING 8 - 92...
- Page 631 • Replace the PFP board. • Replace the LGC board. Parts to be replaced Remark PFP side cover opening/closing switch PFP board LGC board © 2015 TOSHIBA TEC CORPORATION All rights reserved e-STUDIO2008A/2508A/3008A/3508A/4508A/5008A ERROR CODE AND TROUBLESHOOTING 8 - 93...
- Page 632 Replace the ADU opening/closing switch. • Replace the LGC board. Replacing board • Replace the LGC board. Parts to be replaced Remark ADU opening/closing switch LGC board e-STUDIO2008A/2508A/3008A/3508A/4508A/5008A © 2015 TOSHIBA TEC CORPORATION All rights reserved ERROR CODE AND TROUBLESHOOTING 8 - 94...
- Page 633 • Replace the LGC board. Replacing board • Replace the LGC board. Parts to be replaced Remark Feed cover opening/closing detection sensor LGC board © 2015 TOSHIBA TEC CORPORATION All rights reserved e-STUDIO2008A/2508A/3008A/3508A/4508A/5008A ERROR CODE AND TROUBLESHOOTING 8 - 95...
- Page 634 • Replace the LCF board. • Replace the LGC board. Parts to be replaced Remark LCF side cover opening/closing switch LCF board LGC board e-STUDIO2008A/2508A/3008A/3508A/4508A/5008A © 2015 TOSHIBA TEC CORPORATION All rights reserved ERROR CODE AND TROUBLESHOOTING 8 - 96...
- Page 635 • Replace the LGC board. Replacing board • Replace the LGC board. Parts to be replaced Remark The bridge unit opening/closing switch LGC board © 2015 TOSHIBA TEC CORPORATION All rights reserved e-STUDIO2008A/2508A/3008A/3508A/4508A/5008A ERROR CODE AND TROUBLESHOOTING 8 - 97...
- Page 636 Replacing board • Replace the JSP board. • Replace the LGC board. Parts to be replaced Remark JSP cover switch JSP board LGC board e-STUDIO2008A/2508A/3008A/3508A/4508A/5008A © 2015 TOSHIBA TEC CORPORATION All rights reserved ERROR CODE AND TROUBLESHOOTING 8 - 98...
- Page 637 Replacing board • Replace the OCT board. • Replace the LGC board. Parts to be replaced Remark OCT cover switch OCT board. LGC board © 2015 TOSHIBA TEC CORPORATION All rights reserved e-STUDIO2008A/2508A/3008A/3508A/4508A/5008A ERROR CODE AND TROUBLESHOOTING 8 - 99...
- Page 638 Bridge unit transport sensor-1 03-[FAX]ON/[4]/[G] 03-[FAX]ON/[3]/[G] Bridge unit transport sensor-2 03-[FAX]ON/[4]/[F] 03-[FAX]ON/[3]/[G] JSP cover JSP feed sensor 03-[FAX]ON/[3]/G] OCT cover OCT feed sensor 03-[FAX]ON/[3]/[G] e-STUDIO2008A/2508A/3008A/3508A/4508A/5008A © 2015 TOSHIBA TEC CORPORATION All rights reserved ERROR CODE AND TROUBLESHOOTING 8 - 100...
- Page 639 Replace the LGC board. LGC board • Replace the LGC board. Parts to be replaced Remark Sensor Refer to the following table LGC board © 2015 TOSHIBA TEC CORPORATION All rights reserved e-STUDIO2008A/2508A/3008A/3508A/4508A/5008A ERROR CODE AND TROUBLESHOOTING 8 - 101...
- Page 640 If the jam is occurring in the ADU, LCF or PFP, check the board in each unit. Parts to be replaced Remark Sensor in the jamming area Refer to the table below. LGC board e-STUDIO2008A/2508A/3008A/3508A/4508A/5008A © 2015 TOSHIBA TEC CORPORATION All rights reserved ERROR CODE AND TROUBLESHOOTING 8 - 102...
- Page 641 Lower paper exit sensor 03-[ALL]OFF/[4]/[C] 03-[COPY]ON/[5]/[G] Reverse section Reverse path Reverse section paper 03-[COPY]ON/[8]/[F] cover transport detection sensor Finisher Finisher door Sensors in the finisher © 2015 TOSHIBA TEC CORPORATION All rights reserved e-STUDIO2008A/2508A/3008A/3508A/4508A/5008A ERROR CODE AND TROUBLESHOOTING 8 - 103...
- Page 642 Replacing the PC board • Replace the SYS board. • Replace the LGC board. Parts to be replaced Remark SYS board LGC board e-STUDIO2008A/2508A/3008A/3508A/4508A/5008A © 2015 TOSHIBA TEC CORPORATION All rights reserved ERROR CODE AND TROUBLESHOOTING 8 - 104...
- Page 643 Sensor check (Perform the input check: 03-[FAX] ON[7]/[B]) • Lever check • Connector check (CN75) • Harness check Parts to be replaced Remark Empty sensor © 2015 TOSHIBA TEC CORPORATION All rights reserved e-STUDIO2008A/2508A/3008A/3508A/4508A/5008A ERROR CODE AND TROUBLESHOOTING 8 - 105...
- Page 644 Connector check (CN75) • Harness check Parts to be replaced Remark Original exit/reverse sensor RADF board Read roller Replace it if it is worn out. e-STUDIO2008A/2508A/3008A/3508A/4508A/5008A © 2015 TOSHIBA TEC CORPORATION All rights reserved ERROR CODE AND TROUBLESHOOTING 8 - 106...
- Page 645 Connector check (CN75) • Harness check Parts to be replaced Remark Read sensor RADF board Read roller Replace it if it is worn out. © 2015 TOSHIBA TEC CORPORATION All rights reserved e-STUDIO2008A/2508A/3008A/3508A/4508A/5008A ERROR CODE AND TROUBLESHOOTING 8 - 107...
- Page 646 Connector check (CN74) • Harness check Parts to be replaced Remark Exit sensor RADF board Exit roller Replace it if it is worn out. e-STUDIO2008A/2508A/3008A/3508A/4508A/5008A © 2015 TOSHIBA TEC CORPORATION All rights reserved ERROR CODE AND TROUBLESHOOTING 8 - 108...
- Page 647 Connector check (CN75) • Harness check Parts to be replaced Remark RADF opening/closing sensor Is the RADF opening/closing sensor adjusted within the specified range? RADF board © 2015 TOSHIBA TEC CORPORATION All rights reserved e-STUDIO2008A/2508A/3008A/3508A/4508A/5008A ERROR CODE AND TROUBLESHOOTING 8 - 109...
- Page 648 (Perform the input check: 03-[FAX] ON[7]/[C]) • Connector check (CN75) • Harness check Parts to be replaced Remark RADF jam access cover sensor RADF board e-STUDIO2008A/2508A/3008A/3508A/4508A/5008A © 2015 TOSHIBA TEC CORPORATION All rights reserved ERROR CODE AND TROUBLESHOOTING 8 - 110...
- Page 649 Check the drive system of the equipment and 03-113/163) bridge unit. Parts to be replaced Remark Bridge unit transport sensor-1 LGC board Bridge unit gate solenoid © 2015 TOSHIBA TEC CORPORATION All rights reserved e-STUDIO2008A/2508A/3008A/3508A/4508A/5008A ERROR CODE AND TROUBLESHOOTING 8 - 111...
- Page 650 (Perform the output check: Check the drive system of the equipment and 03-113/163) bridge unit. Parts to be replaced Remark Bridge unit transport sensor-2 LGC board e-STUDIO2008A/2508A/3008A/3508A/4508A/5008A © 2015 TOSHIBA TEC CORPORATION All rights reserved ERROR CODE AND TROUBLESHOOTING 8 - 112...
- Page 651 Replacing board • Replace the JSP board. • Replace the LGC board. Parts to be replaced Remark JSP feed sensor JSP board LGC board © 2015 TOSHIBA TEC CORPORATION All rights reserved e-STUDIO2008A/2508A/3008A/3508A/4508A/5008A ERROR CODE AND TROUBLESHOOTING 8 - 113...
- Page 652 PC board • Replace the OCT board. • Replace the LGC board. Parts to be replaced Remark OCT feed sensor OCT board LGC board e-STUDIO2008A/2508A/3008A/3508A/4508A/5008A © 2015 TOSHIBA TEC CORPORATION All rights reserved ERROR CODE AND TROUBLESHOOTING 8 - 114...
- Page 653 5V5% when shielded. If the voltage does not fall within the range mentioned, replace the sensor. © 2015 TOSHIBA TEC CORPORATION All rights reserved e-STUDIO2008A/2508A/3008A/3508A/4508A/5008A ERROR CODE AND TROUBLESHOOTING 8 - 115...
- Page 654 Hole punch control PC board (HP) If the error still occurs after replacing the motor, sensors and abnormality connectors, exchange the hole punch control PC board (HP). e-STUDIO2008A/2508A/3008A/3508A/4508A/5008A © 2015 TOSHIBA TEC CORPORATION All rights reserved ERROR CODE AND TROUBLESHOOTING 8 - 116...
- Page 655 (SOL5) and the interface PC board (CN6), If there is any abnormality, correct it. • Board check • Connector check (CN5, CN6, CN7) • Harness check © 2015 TOSHIBA TEC CORPORATION All rights reserved e-STUDIO2008A/2508A/3008A/3508A/4508A/5008A ERROR CODE AND TROUBLESHOOTING 8 - 117...
- Page 656 • Board check (FIN) • Connector check (CN26) • Harness check Parts to be replaced Remark Entrance sensor (S1) Finisher control PC board (FIN) e-STUDIO2008A/2508A/3008A/3508A/4508A/5008A © 2015 TOSHIBA TEC CORPORATION All rights reserved ERROR CODE AND TROUBLESHOOTING 8 - 118...
- Page 657 [EA22] Paper size error jam (punch paper edge sensor) Classification Error content Finisher jam Paper size error jam (outlet sensor) (Finisher section) Paper size error jam (punch paper edge sensor) © 2015 TOSHIBA TEC CORPORATION All rights reserved e-STUDIO2008A/2508A/3008A/3508A/4508A/5008A ERROR CODE AND TROUBLESHOOTING 8 - 119...
- Page 658 [EA28] Paper transport stop jam (paper holder plate operation delay) [EA29] Paper transport stop jam (stack transport delay) Classification Error content Paper jam in finisher section Paper transport stop jam e-STUDIO2008A/2508A/3008A/3508A/4508A/5008A © 2015 TOSHIBA TEC CORPORATION All rights reserved ERROR CODE AND TROUBLESHOOTING 8 - 120...
- Page 659 Entrance sensor (S1) Transport sensor (S2) Processing tray sensor (S12) Assist arm motor (M10) buffer tray guide motor (M2) Finisher control PC board (FIN) © 2015 TOSHIBA TEC CORPORATION All rights reserved e-STUDIO2008A/2508A/3008A/3508A/4508A/5008A ERROR CODE AND TROUBLESHOOTING 8 - 121...
- Page 660 Finisher control PC board If the error still occurs after replacing the sensor and the connector, (FIN) abnormality exchange the finisher control PC board (FIN). e-STUDIO2008A/2508A/3008A/3508A/4508A/5008A © 2015 TOSHIBA TEC CORPORATION All rights reserved ERROR CODE AND TROUBLESHOOTING 8 - 122...
- Page 661 Finisher control PC board If the error still occurs after replacing the sensor and the connector, (FIN) abnormality replace the finisher control PC board (FIN). © 2015 TOSHIBA TEC CORPORATION All rights reserved e-STUDIO2008A/2508A/3008A/3508A/4508A/5008A ERROR CODE AND TROUBLESHOOTING 8 - 123...
- Page 662 (FIN). Then check that the measured voltage is 1V or lower when not shielded and within the range of 3.3V±5% when shielded. If the voltage does not fall within the range mentioned, replace the sensor. e-STUDIO2008A/2508A/3008A/3508A/4508A/5008A © 2015 TOSHIBA TEC CORPORATION All rights reserved ERROR CODE AND TROUBLESHOOTING 8 - 124...
- Page 663 PC board (FIN). [EA2E, EA31] Transport jam in Finisher Classification Error content Paper jam in finisher section Paper transport remaining jam in the Finisher © 2015 TOSHIBA TEC CORPORATION All rights reserved e-STUDIO2008A/2508A/3008A/3508A/4508A/5008A ERROR CODE AND TROUBLESHOOTING 8 - 125...
- Page 664 Check if there is any paper in the finisher or on the transport path of the equipment and remove it if there is. Transport sensor (S2) • Sensor check • Connector check • Harness check e-STUDIO2008A/2508A/3008A/3508A/4508A/5008A © 2015 TOSHIBA TEC CORPORATION All rights reserved ERROR CODE AND TROUBLESHOOTING 8 - 126...
- Page 665 Finisher Check if there is any paper in the finisher or on the transport path of the equipment and remove it if there is. © 2015 TOSHIBA TEC CORPORATION All rights reserved e-STUDIO2008A/2508A/3008A/3508A/4508A/5008A ERROR CODE AND TROUBLESHOOTING 8 - 127...
- Page 666 If the error still occurs after replacing the sensor and the connector, abnormality exchange the finisher control PC board (FIN). [EA40] Cover open error Classification Error content Paper jam in finisher section Cover open error e-STUDIO2008A/2508A/3008A/3508A/4508A/5008A © 2015 TOSHIBA TEC CORPORATION All rights reserved ERROR CODE AND TROUBLESHOOTING 8 - 128...
- Page 667 If the error still occurs after replacing the switches, sensor and connector, (FIN) abnormality exchange the finisher control PC board (FIN). [EA50] Stapling jam Classification Error content Paper jam in finisher section Stapling jam © 2015 TOSHIBA TEC CORPORATION All rights reserved e-STUDIO2008A/2508A/3008A/3508A/4508A/5008A ERROR CODE AND TROUBLESHOOTING 8 - 129...
- Page 668 Check if the connector CN7 on the finisher controller PC board is disconnected from the entrance sensor (S1) and the harnesses are disconnected or open circuited. Correct if any. e-STUDIO2008A/2508A/3008A/3508A/4508A/5008A © 2015 TOSHIBA TEC CORPORATION All rights reserved ERROR CODE AND TROUBLESHOOTING 8 - 130...
- Page 669 Correct if any. Parts to be replaced Remark Stack belt exit home position sensor Stack transport motor Finisher controller PC board © 2015 TOSHIBA TEC CORPORATION All rights reserved e-STUDIO2008A/2508A/3008A/3508A/4508A/5008A ERROR CODE AND TROUBLESHOOTING 8 - 131...
- Page 670 • Check if the cover opening switches noted above are working properly. Parts to be replaced Remark Sensor Saddle stitcher controller PC board e-STUDIO2008A/2508A/3008A/3508A/4508A/5008A © 2015 TOSHIBA TEC CORPORATION All rights reserved ERROR CODE AND TROUBLESHOOTING 8 - 132...
- Page 671 Check if there is any paper in the finisher, saddle stitcher or the on the transport path of the equipment. Remove it if there is. • Use paper accepted in the specifications. © 2015 TOSHIBA TEC CORPORATION All rights reserved e-STUDIO2008A/2508A/3008A/3508A/4508A/5008A ERROR CODE AND TROUBLESHOOTING 8 - 133...
- Page 672 Transport path-3 (S28) Ejecting roller (S29) Entrance motor (M1) Transport path switching solenoid (SOL9) Interface PC board (I/F) Saddle stitcher controller board Finisher controller board e-STUDIO2008A/2508A/3008A/3508A/4508A/5008A © 2015 TOSHIBA TEC CORPORATION All rights reserved ERROR CODE AND TROUBLESHOOTING 8 - 134...
- Page 673 Connector check(CN8) • Board check Saddle stitcher controller board • Connector check • Board check Finisher controller board • Connector check • Board check © 2015 TOSHIBA TEC CORPORATION All rights reserved e-STUDIO2008A/2508A/3008A/3508A/4508A/5008A ERROR CODE AND TROUBLESHOOTING 8 - 135...
- Page 674 Check if the harness connecting the I/F connector of the finisher side and finisher controller PC board is open circuited. Parts to be replaced Remark Finisher controller PC board e-STUDIO2008A/2508A/3008A/3508A/4508A/5008A © 2015 TOSHIBA TEC CORPORATION All rights reserved ERROR CODE AND TROUBLESHOOTING 8 - 136...
- Page 675 [ED10] Skew adjustment motor (M1) home position detection abnormality MJ-1101 (when MJ-6103 is installed), MJ-1107 (when MJ-6104 is installed) Classification Error content Skew adjustment motor (M1) home position detection abnormality Finisher jam © 2015 TOSHIBA TEC CORPORATION All rights reserved e-STUDIO2008A/2508A/3008A/3508A/4508A/5008A ERROR CODE AND TROUBLESHOOTING 8 - 137...
- Page 676 (CLT1), or the harnesses are open circuited. Correct if any. Parts to be replaced Remark Shutter clutch Shutter opening/closing sensor Finisher controller PC board e-STUDIO2008A/2508A/3008A/3508A/4508A/5008A © 2015 TOSHIBA TEC CORPORATION All rights reserved ERROR CODE AND TROUBLESHOOTING 8 - 138...
- Page 677 Finisher controller PC board circuited. Correct if any. Parts to be replaced Remark Front alignment motor Front alignment plate home position sensor Finisher controller PC board © 2015 TOSHIBA TEC CORPORATION All rights reserved e-STUDIO2008A/2508A/3008A/3508A/4508A/5008A ERROR CODE AND TROUBLESHOOTING 8 - 139...
- Page 678 Check if the connector (CN18) on the finisher controller PC board is disconnected from the rear alignment plate home position sensor (S8) and the harnesses are open circuited. Correct if so. e-STUDIO2008A/2508A/3008A/3508A/4508A/5008A © 2015 TOSHIBA TEC CORPORATION All rights reserved ERROR CODE AND TROUBLESHOOTING 8 - 140...
- Page 679 (M6) and the harnesses are open circuited. Correct if so. Parts to be replaced Remark Rear alignment motor Finisher controller PC board © 2015 TOSHIBA TEC CORPORATION All rights reserved e-STUDIO2008A/2508A/3008A/3508A/4508A/5008A ERROR CODE AND TROUBLESHOOTING 8 - 141...
- Page 680 (M10) and the harnesses are open circuited. Correct if so. Parts to be replaced Remark Buffer tray home position sensor Finisher controller PC board e-STUDIO2008A/2508A/3008A/3508A/4508A/5008A © 2015 TOSHIBA TEC CORPORATION All rights reserved ERROR CODE AND TROUBLESHOOTING 8 - 142...
- Page 681 • Harness check Saddle controller board • Connector check (CN3) • Board check Replace parts Remarks Front saddle stapler drive unit Saddle controller board © 2015 TOSHIBA TEC CORPORATION All rights reserved e-STUDIO2008A/2508A/3008A/3508A/4508A/5008A ERROR CODE AND TROUBLESHOOTING 8 - 143...
- Page 682 Is there any paper remaining in the paper transport path of the equipment or the saddle stitch section of the Finisher? Exit sensor (S31) • Sensor check • Connector check • Harness check e-STUDIO2008A/2508A/3008A/3508A/4508A/5008A © 2015 TOSHIBA TEC CORPORATION All rights reserved ERROR CODE AND TROUBLESHOOTING 8 - 144...
- Page 683 Saddle controller board • Connector check (CN5) • Board check Replace parts Remarks Side alignment home position sensor (S36) Side alignment motor (M15) Saddle controller board © 2015 TOSHIBA TEC CORPORATION All rights reserved e-STUDIO2008A/2508A/3008A/3508A/4508A/5008A ERROR CODE AND TROUBLESHOOTING 8 - 145...
- Page 684 Saddle controller board • Connector check (CN15) • Board check Replace parts Remarks Folding blade home position sensor (S35) Folding blade clutch (CLT3) Saddle controller board e-STUDIO2008A/2508A/3008A/3508A/4508A/5008A © 2015 TOSHIBA TEC CORPORATION All rights reserved ERROR CODE AND TROUBLESHOOTING 8 - 146...
- Page 685 Connector check • Harness check Saddle controller board • Connector check (CN19) • Board check Replace parts Remarks Exit transport sensor (S41) Saddle controller board © 2015 TOSHIBA TEC CORPORATION All rights reserved e-STUDIO2008A/2508A/3008A/3508A/4508A/5008A ERROR CODE AND TROUBLESHOOTING 8 - 147...
- Page 686 • Harness check Saddle controller board • Connector check (CN19) • Board check Replace parts Remarks Stacker paper detection sensor (S30) Saddle controller board e-STUDIO2008A/2508A/3008A/3508A/4508A/5008A © 2015 TOSHIBA TEC CORPORATION All rights reserved ERROR CODE AND TROUBLESHOOTING 8 - 148...
- Page 687 2. Check if the voltage supplied to the CPU input terminal IC22-98 is always “L”? 3. Replace the LGC board. Parts to be replaced Remark Main motor LGC board © 2015 TOSHIBA TEC CORPORATION All rights reserved e-STUDIO2008A/2508A/3008A/3508A/4508A/5008A ERROR CODE AND TROUBLESHOOTING 8 - 149...
- Page 688 “L” level. 3. Replace the PFP board. 4. Replace the LGC board. Parts to be replaced Remark PFP motor PFP board LGC board e-STUDIO2008A/2508A/3008A/3508A/4508A/5008A © 2015 TOSHIBA TEC CORPORATION All rights reserved ERROR CODE AND TROUBLESHOOTING 8 - 150...
- Page 689 1. Check if the conductor pattern on the LGC board is short circuited or open circuited. 2. Replace the LGC board. Parts to be replaced Remark LGC board Tray-up motor Tray-up sensor © 2015 TOSHIBA TEC CORPORATION All rights reserved e-STUDIO2008A/2508A/3008A/3508A/4508A/5008A ERROR CODE AND TROUBLESHOOTING 8 - 151...
- Page 690 2. Replace the LGC board. Parts to be replaced Remark PFP board LGC board Tray-up motor Tray-up sensor e-STUDIO2008A/2508A/3008A/3508A/4508A/5008A © 2015 TOSHIBA TEC CORPORATION All rights reserved ERROR CODE AND TROUBLESHOOTING 8 - 152...
- Page 691 2. Replace the LGC board. Parts to be replaced Remark LCF board LGC board LCF tray-up motor LCF tray-up sensor © 2015 TOSHIBA TEC CORPORATION All rights reserved e-STUDIO2008A/2508A/3008A/3508A/4508A/5008A ERROR CODE AND TROUBLESHOOTING 8 - 153...
- Page 692 2. Replace the LGC board. Parts to be replaced Remark LCF board LGC board LCF end fence motor End fence home/stop position sensors e-STUDIO2008A/2508A/3008A/3508A/4508A/5008A © 2015 TOSHIBA TEC CORPORATION All rights reserved ERROR CODE AND TROUBLESHOOTING 8 - 154...
- Page 693 6. Replace the LCF transport motor. 7. Replace the LCF board. 8. Replace the LGC board. Parts to be replaced Remark LCF transport motor LCF board LGC board © 2015 TOSHIBA TEC CORPORATION All rights reserved e-STUDIO2008A/2508A/3008A/3508A/4508A/5008A ERROR CODE AND TROUBLESHOOTING 8 - 155...
- Page 694 2. Check if the exposure lamp is scratched or damaged. Supply harness 1. Check if wiring of the supply harness (CN127) is abnormal. 2. Check if the harness is scratched or open circuited. e-STUDIO2008A/2508A/3008A/3508A/4508A/5008A © 2015 TOSHIBA TEC CORPORATION All rights reserved ERROR CODE AND TROUBLESHOOTING 8 - 156...
- Page 695 SYS board or in the appearance of the SYS board. 3. Check if 10V is output from the power supply for the CCD. 4. Replace the SYS board. © 2015 TOSHIBA TEC CORPORATION All rights reserved e-STUDIO2008A/2508A/3008A/3508A/4508A/5008A ERROR CODE AND TROUBLESHOOTING...
- Page 696 1. Check if there is any abnormality in the appearance of the reflector, such as deformation. 2. Replace the carriage-1. Parts to be replaced Remark LED lamp unit SYS board e-STUDIO2008A/2508A/3008A/3508A/4508A/5008A © 2015 TOSHIBA TEC CORPORATION All rights reserved ERROR CODE AND TROUBLESHOOTING 8 - 158...
- Page 697 1. Check if the harness of the carriage home position sensor is sensor connected properly. 2. Check if the harness is caught or open circuited. © 2015 TOSHIBA TEC CORPORATION All rights reserved e-STUDIO2008A/2508A/3008A/3508A/4508A/5008A ERROR CODE AND TROUBLESHOOTING 8 - 159...
- Page 698 SRAM"). Parts to be replaced Remark Carriage home position sensor Carriage home position sensor harness SLG board Scan motor Scan motor harness e-STUDIO2008A/2508A/3008A/3508A/4508A/5008A © 2015 TOSHIBA TEC CORPORATION All rights reserved ERROR CODE AND TROUBLESHOOTING 8 - 160...
- Page 699 SRAM"). Parts to be replaced Remark Carriage home position sensor Carriage home position sensor harness SYS board Scan motor Scan motor harness © 2015 TOSHIBA TEC CORPORATION All rights reserved e-STUDIO2008A/2508A/3008A/3508A/4508A/5008A ERROR CODE AND TROUBLESHOOTING 8 - 161...
- Page 700 [C280] Carriage home position sensor not coming ON within the specified time (e-STUDIO207L/ 257/307/357/457/507) Classification Error content Scanning system related service Abnormal carriage movement / Abnormal carriage home call position sensor behavior e-STUDIO2008A/2508A/3008A/3508A/4508A/5008A © 2015 TOSHIBA TEC CORPORATION All rights reserved ERROR CODE AND TROUBLESHOOTING 8 - 162...
- Page 701 1. Check if the carriage locking is released. Parts to be replaced Remark Carriage home position sensor SYS board Scan motor Harness © 2015 TOSHIBA TEC CORPORATION All rights reserved e-STUDIO2008A/2508A/3008A/3508A/4508A/5008A ERROR CODE AND TROUBLESHOOTING 8 - 163...
- Page 702 SLG board. 4. Check if the fuse on the LVPS is open circuited. Parts to be replaced Remark SLG board Fuse Supply harness LVPS e-STUDIO2008A/2508A/3008A/3508A/4508A/5008A © 2015 TOSHIBA TEC CORPORATION All rights reserved ERROR CODE AND TROUBLESHOOTING 8 - 164...
- Page 703 4. Check if the fuse on the switching power supply (LVPS) is open circuited. 5. Replace the fuse. 6. Replace the supply harness. Parts to be replaced Remark SYS board Fuse LVPS Harness © 2015 TOSHIBA TEC CORPORATION All rights reserved e-STUDIO2008A/2508A/3008A/3508A/4508A/5008A ERROR CODE AND TROUBLESHOOTING 8 - 165...
- Page 704 4. Check if the harness connected to the connector J451 on the EPU board has any abnormality. Parts to be replaced Remark EPU memory board LGC board e-STUDIO2008A/2508A/3008A/3508A/4508A/5008A © 2015 TOSHIBA TEC CORPORATION All rights reserved ERROR CODE AND TROUBLESHOOTING 8 - 166...
- Page 705 4. Is the connector CN310 on the LGC board, or the connector of the drum thermistor disconnected? Replacement part Remark Drum thermistor EPU memory board LGC board © 2015 TOSHIBA TEC CORPORATION All rights reserved e-STUDIO2008A/2508A/3008A/3508A/4508A/5008A ERROR CODE AND TROUBLESHOOTING 8 - 167...
- Page 706 6. Check if the transfer roller or the separation needle is removed. 7. Check if there is any foreign matter attached on the transfer roller or the separation needle. e-STUDIO2008A/2508A/3008A/3508A/4508A/5008A © 2015 TOSHIBA TEC CORPORATION All rights reserved ERROR CODE AND TROUBLESHOOTING 8 - 168...
- Page 707 Fuser unit related service call Thermistor or heater is abnormal at power ON Check item Measure 1. Check the fuse Check if the fuse (F203) is open circuited. © 2015 TOSHIBA TEC CORPORATION All rights reserved e-STUDIO2008A/2508A/3008A/3508A/4508A/5008A ERROR CODE AND TROUBLESHOOTING 8 - 169...
- Page 708 3. Check if the center, side and edge thermistors are not deformed or dirty. 4. Check if the harnesses of the center, side and edge thermistors are open circuited. e-STUDIO2008A/2508A/3008A/3508A/4508A/5008A © 2015 TOSHIBA TEC CORPORATION All rights reserved ERROR CODE AND TROUBLESHOOTING 8 - 170...
- Page 709 “9” The temperature detected by the edge thermistor is 240°C or higher: “9” only during printing. Parts to be replaced Remark Switching regulator © 2015 TOSHIBA TEC CORPORATION All rights reserved e-STUDIO2008A/2508A/3008A/3508A/4508A/5008A ERROR CODE AND TROUBLESHOOTING 8 - 171...
- Page 710 [C447] The fusing temperature is 40 degrees C or lower Classification Error content Fuser unit related service call The fusing temperature is 40 degrees C or lower. e-STUDIO2008A/2508A/3008A/3508A/4508A/5008A © 2015 TOSHIBA TEC CORPORATION All rights reserved ERROR CODE AND TROUBLESHOOTING 8 - 172...
- Page 711 2. Check if the conductor pattern on the LGC board is open or short circuited. 3. Replace the LGC board. 4. Check the power supply Replace the switching regulator. © 2015 TOSHIBA TEC CORPORATION All rights reserved e-STUDIO2008A/2508A/3008A/3508A/4508A/5008A ERROR CODE AND TROUBLESHOOTING 8 - 173...
- Page 712 Fuser unit related service call The temperature between the center and edge thermistors differs by more than 100 degrees C when reaching the Ready temperature. e-STUDIO2008A/2508A/3008A/3508A/4508A/5008A © 2015 TOSHIBA TEC CORPORATION All rights reserved ERROR CODE AND TROUBLESHOOTING 8 - 174...
- Page 713 1. Are the connectors disconnected? 2. Are the harnesses short circuited or open circuited? 3. Replace the board. Parts to be replaced Remark Fuser unit. PC board © 2015 TOSHIBA TEC CORPORATION All rights reserved e-STUDIO2008A/2508A/3008A/3508A/4508A/5008A ERROR CODE AND TROUBLESHOOTING 8 - 175...
- Page 714 CNV board Check if the conductor pattern on the CNV board is short circuited or open circuited. Parts to be replaced Remark LGC board e-STUDIO2008A/2508A/3008A/3508A/4508A/5008A © 2015 TOSHIBA TEC CORPORATION All rights reserved ERROR CODE AND TROUBLESHOOTING 8 - 176...
- Page 715 RADF communication protocol abnormality service call Check item Measure Turn the power OFF and then back ON to check if the equipment operates normally. © 2015 TOSHIBA TEC CORPORATION All rights reserved e-STUDIO2008A/2508A/3008A/3508A/4508A/5008A ERROR CODE AND TROUBLESHOOTING 8 - 177...
- Page 716 PC board (HP). If the error still control PC board (HP) occurs, replace the finisher control PC board (FIN). e-STUDIO2008A/2508A/3008A/3508A/4508A/5008A © 2015 TOSHIBA TEC CORPORATION All rights reserved ERROR CODE AND TROUBLESHOOTING 8 - 178...
- Page 717 9. Perform “Data transfer of characteristic value of scanner” (05-3203). 10.Turn the power OFF and then back ON. If the error is not recovered, replace the SRAM on the SYS board. © 2015 TOSHIBA TEC CORPORATION All rights reserved e-STUDIO2008A/2508A/3008A/3508A/4508A/5008A ERROR CODE AND TROUBLESHOOTING 8 - 179...
- Page 718 SYS board Check the connector (*1) and relay connector. *1: CN112: e-STUDIO206L/256/306/356/456/506 CN105: e-STUDIO207L/257/307/357/457/507 Replacement part Remark SYS board SYS/HDD cooling fan e-STUDIO2008A/2508A/3008A/3508A/4508A/5008A © 2015 TOSHIBA TEC CORPORATION All rights reserved ERROR CODE AND TROUBLESHOOTING 8 - 180...
- Page 719 Check the version of the system ROM and the scanner ROM on the SYS board. Board check Check if the SYS board is damaged or abnormal. Parts to be replaced Remark SYS board. SLG board. © 2015 TOSHIBA TEC CORPORATION All rights reserved e-STUDIO2008A/2508A/3008A/3508A/4508A/5008A ERROR CODE AND TROUBLESHOOTING 8 - 181...
- Page 720 2. Replace the laser optical unit optical unit? Classification Error content Laser optical unit related service call Parts to be replaced Remark LGC board Laser optical unit e-STUDIO2008A/2508A/3008A/3508A/4508A/5008A © 2015 TOSHIBA TEC CORPORATION All rights reserved ERROR CODE AND TROUBLESHOOTING 8 - 182...
- Page 721 Check the connectors and harnesses between the entrance motor (M1) and the finisher control PC board (CN7). Replacement part Measure Entrance motor (M1) Finisher controller PC board © 2015 TOSHIBA TEC CORPORATION All rights reserved e-STUDIO2008A/2508A/3008A/3508A/4508A/5008A ERROR CODE AND TROUBLESHOOTING 8 - 183...
- Page 722 Finisher related service call Buffer roller drive motor abnormality: The buffer roller drive motor is not rotating or the buffer roller is not moving normally. e-STUDIO2008A/2508A/3008A/3508A/4508A/5008A © 2015 TOSHIBA TEC CORPORATION All rights reserved ERROR CODE AND TROUBLESHOOTING 8 - 184...
- Page 723 Error item Finisher related service call Check item Measures Paper pusher cam • Is there any mechanical problem when the paper pusher cam is rotated? © 2015 TOSHIBA TEC CORPORATION All rights reserved e-STUDIO2008A/2508A/3008A/3508A/4508A/5008A ERROR CODE AND TROUBLESHOOTING 8 - 185...
- Page 724 Parts to be replaced Remark Movable tray shift motor (M7) Movable tray position A, B, and C sensors (S13, S14, and S15) Finisher controller PC board e-STUDIO2008A/2508A/3008A/3508A/4508A/5008A © 2015 TOSHIBA TEC CORPORATION All rights reserved ERROR CODE AND TROUBLESHOOTING 8 - 186...
- Page 725 Finisher control PC board (FIN) If the error still occurs after replacing the solenoid, sensors and abnormality connector, exchange the finisher control PC board (FIN). © 2015 TOSHIBA TEC CORPORATION All rights reserved e-STUDIO2008A/2508A/3008A/3508A/4508A/5008A ERROR CODE AND TROUBLESHOOTING 8 - 187...
- Page 726 (S16) and the finisher control PC board (CN13). Replacement part Measure Movable tray paper-full detection sensor (S16) Finisher controller PC board e-STUDIO2008A/2508A/3008A/3508A/4508A/5008A © 2015 TOSHIBA TEC CORPORATION All rights reserved ERROR CODE AND TROUBLESHOOTING 8 - 188...
- Page 727 Finisher related service call Front alignment motor abnormality: The front alignment motor is not rotating or the front alignment plate is not moving normally. © 2015 TOSHIBA TEC CORPORATION All rights reserved e-STUDIO2008A/2508A/3008A/3508A/4508A/5008A ERROR CODE AND TROUBLESHOOTING 8 - 189...
- Page 728 Finisher control PC board (FIN) If the error still occurs after replacing the motor, sensor and abnormality connectors, exchange the finisher control PC board (FIN). e-STUDIO2008A/2508A/3008A/3508A/4508A/5008A © 2015 TOSHIBA TEC CORPORATION All rights reserved ERROR CODE AND TROUBLESHOOTING 8 - 190...
- Page 729 Check the connectors and harnesses between the stapler and finisher controller PC board (CN19). • Check the harnesses in the stapler. Parts to be replaced Remark Stapler Finisher controller PC board © 2015 TOSHIBA TEC CORPORATION All rights reserved e-STUDIO2008A/2508A/3008A/3508A/4508A/5008A ERROR CODE AND TROUBLESHOOTING 8 - 191...
- Page 730 OFF to one point where this sensor is turned e-STUDIO2008A/2508A/3008A/3508A/4508A/5008A © 2015 TOSHIBA TEC CORPORATION All rights reserved ERROR CODE AND TROUBLESHOOTING 8 - 192...
- Page 731 Check the connectors and harnesses between the stapler unit shift motor (M4) and the finisher control PC board (CN5). Replacement part Measure Stapler unit home position sensor (S10) Finisher controller PC board © 2015 TOSHIBA TEC CORPORATION All rights reserved e-STUDIO2008A/2508A/3008A/3508A/4508A/5008A ERROR CODE AND TROUBLESHOOTING 8 - 193...
- Page 732 Finisher control PC board (FIN) If the error still occurs after replacing the staple unit, sensors and abnormality connectors, exchange the finisher control PC board (FIN). e-STUDIO2008A/2508A/3008A/3508A/4508A/5008A © 2015 TOSHIBA TEC CORPORATION All rights reserved ERROR CODE AND TROUBLESHOOTING 8 - 194...
- Page 733 Check the connectors and harnesses between the stapler unit shift motor (M4) and the finisher control PC board (CN5). Replacement part Measure Stapler unit shift motor (M4) Finisher controller PC board © 2015 TOSHIBA TEC CORPORATION All rights reserved e-STUDIO2008A/2508A/3008A/3508A/4508A/5008A ERROR CODE AND TROUBLESHOOTING 8 - 195...
- Page 734 Finisher control PC board (FIN) Replace the finisher control PC board (FIN) as the cause is a abnormality fault in the IC of the backup RAM. e-STUDIO2008A/2508A/3008A/3508A/4508A/5008A © 2015 TOSHIBA TEC CORPORATION All rights reserved ERROR CODE AND TROUBLESHOOTING 8 - 196...
- Page 735 Check item Measures Saddle control PC board • Update the firmware version of the saddle control PC board (SDL). • Connector check • Board check © 2015 TOSHIBA TEC CORPORATION All rights reserved e-STUDIO2008A/2508A/3008A/3508A/4508A/5008A ERROR CODE AND TROUBLESHOOTING 8 - 197...
- Page 736 Finisher control PC board (FIN) If the error still occurs after replacing the motor, sensors and abnormality connectors, exchange the finisher control PC board (FIN). e-STUDIO2008A/2508A/3008A/3508A/4508A/5008A © 2015 TOSHIBA TEC CORPORATION All rights reserved ERROR CODE AND TROUBLESHOOTING 8 - 198...
- Page 737 Harness check Saddle control PC board (SDL) • Connector check (CN18) • Board check Replace parts Remarks Additional folding motor Saddle control PC board © 2015 TOSHIBA TEC CORPORATION All rights reserved e-STUDIO2008A/2508A/3008A/3508A/4508A/5008A ERROR CODE AND TROUBLESHOOTING 8 - 199...
- Page 738 Saddle control PC board (SDL) • Connector check (CN6) • Board check Replace parts Remarks Front saddle stapler clinch unit Saddle control PC board e-STUDIO2008A/2508A/3008A/3508A/4508A/5008A © 2015 TOSHIBA TEC CORPORATION All rights reserved ERROR CODE AND TROUBLESHOOTING 8 - 200...
- Page 739 Saddle stitch alignment motor (M8) Check if the electrical continuity of the coil is normal. If abnormality electricity is not conducted, replace the motor. © 2015 TOSHIBA TEC CORPORATION All rights reserved e-STUDIO2008A/2508A/3008A/3508A/4508A/5008A ERROR CODE AND TROUBLESHOOTING 8 - 201...
- Page 740 (FIN). Then check that the measured voltage is 1V or lower when not abnormality shielded and within the range of 3.3V5% when shielded. If the voltage does not fall within the range mentioned, replace the sensor. e-STUDIO2008A/2508A/3008A/3508A/4508A/5008A © 2015 TOSHIBA TEC CORPORATION All rights reserved ERROR CODE AND TROUBLESHOOTING 8 - 202...
- Page 741 [CC20] Saddle communication error MJ-1106/1108 Classification Contents Finisher related service call Saddle communication error Check Item Measure Interface PC board (I/F) • Connector check • Harness check © 2015 TOSHIBA TEC CORPORATION All rights reserved e-STUDIO2008A/2508A/3008A/3508A/4508A/5008A ERROR CODE AND TROUBLESHOOTING 8 - 203...
- Page 742 Finisher control PC board (FIN) If the error still occurs after replacing the motor, sensor and abnormality connectors, exchange the finisher control PC board (FIN). e-STUDIO2008A/2508A/3008A/3508A/4508A/5008A © 2015 TOSHIBA TEC CORPORATION All rights reserved ERROR CODE AND TROUBLESHOOTING 8 - 204...
- Page 743 Stack transport motor (M5) Check the connectors and harnesses between the stack transport motor (M5) and the finisher control PC board (CN10). © 2015 TOSHIBA TEC CORPORATION All rights reserved e-STUDIO2008A/2508A/3008A/3508A/4508A/5008A ERROR CODE AND TROUBLESHOOTING 8 - 205...
- Page 744 (M7) and the harnesses are open circuited. Correct if so. Parts to be replaced Remark Transport motor Finisher control PC board e-STUDIO2008A/2508A/3008A/3508A/4508A/5008A © 2015 TOSHIBA TEC CORPORATION All rights reserved ERROR CODE AND TROUBLESHOOTING 8 - 206...
- Page 745 Check the connectors and harnesses between the hole punch control PC board (HP) and sideways adjustment motor (M2). Sideways deviation home position • Sensor check sensor (S3) • Harness check © 2015 TOSHIBA TEC CORPORATION All rights reserved e-STUDIO2008A/2508A/3008A/3508A/4508A/5008A ERROR CODE AND TROUBLESHOOTING 8 - 207...
- Page 746 5V5% when shielded. If the voltage does not fall within the range mentioned, replace the sensor. e-STUDIO2008A/2508A/3008A/3508A/4508A/5008A © 2015 TOSHIBA TEC CORPORATION All rights reserved ERROR CODE AND TROUBLESHOOTING 8 - 208...
- Page 747 Hole punch control PC board (HP) If the error still occurs after replacing the sensors and the abnormality connectors, exchange the hole punch control PC board (HP). © 2015 TOSHIBA TEC CORPORATION All rights reserved e-STUDIO2008A/2508A/3008A/3508A/4508A/5008A ERROR CODE AND TROUBLESHOOTING 8 - 209...
- Page 748 1V or lower when shielded. If the voltage does not fall within the range mentioned, replace a couple of PC boards on either the light-receiving side or the light-emitting side. e-STUDIO2008A/2508A/3008A/3508A/4508A/5008A © 2015 TOSHIBA TEC CORPORATION All rights reserved ERROR CODE AND TROUBLESHOOTING 8 - 210...
- Page 749 Check if the electrical continuity between the connector terminals is normal. If electricity is not conducted, replace the connector. (Hole punch control PC board (HP): CN2, CN5, CN6) © 2015 TOSHIBA TEC CORPORATION All rights reserved e-STUDIO2008A/2508A/3008A/3508A/4508A/5008A ERROR CODE AND TROUBLESHOOTING...
- Page 750 Check Item Measure Transport path If there is any paper remaining on the transport path, remove the paper. e-STUDIO2008A/2508A/3008A/3508A/4508A/5008A © 2015 TOSHIBA TEC CORPORATION All rights reserved ERROR CODE AND TROUBLESHOOTING 8 - 212...
- Page 751 Hole punch controller PC board is detected when the power is turned on. Check Item Measure Hole punch control PC board (HP) Board check Replacement part Measure Hole punch control PC board (HP) © 2015 TOSHIBA TEC CORPORATION All rights reserved e-STUDIO2008A/2508A/3008A/3508A/4508A/5008A ERROR CODE AND TROUBLESHOOTING 8 - 213...
- Page 752 shielded and within the range of 3.3V 5% when shielded. If the voltage does not fall within the range mentioned, replace the sensor. e-STUDIO2008A/2508A/3008A/3508A/4508A/5008A © 2015 TOSHIBA TEC CORPORATION All rights reserved ERROR CODE AND TROUBLESHOOTING 8 - 214...
- Page 753 shielded and within the range of 3.3V 5% when shielded. If the voltage does not fall within the range mentioned, replace the sensor. © 2015 TOSHIBA TEC CORPORATION All rights reserved e-STUDIO2008A/2508A/3008A/3508A/4508A/5008A ERROR CODE AND TROUBLESHOOTING 8 - 215...
- Page 754 Check the connectors and harnesses between the paddle motor (M8) and the finisher control PC board (CN6). Replacement part Measure Paddle motor Finisher control PC board e-STUDIO2008A/2508A/3008A/3508A/4508A/5008A © 2015 TOSHIBA TEC CORPORATION All rights reserved ERROR CODE AND TROUBLESHOOTING 8 - 216...
- Page 755 Board check Hole punch control PC board Board check Replacement part Measure Converter PC board Finisher control PC board Hole punch control PC board © 2015 TOSHIBA TEC CORPORATION All rights reserved e-STUDIO2008A/2508A/3008A/3508A/4508A/5008A ERROR CODE AND TROUBLESHOOTING 8 - 217...
- Page 756 4. Check if any conductor pattern on the MOT2 board and LGC board is short circuited or open circuited. Replacement part Remark Offset gate motor. MOT2 board LGC board e-STUDIO2008A/2508A/3008A/3508A/4508A/5008A © 2015 TOSHIBA TEC CORPORATION All rights reserved ERROR CODE AND TROUBLESHOOTING 8 - 218...
- Page 757 <The error occurs except when the SYS board is replaced> Replace the SRAM board (for the SYS board). P. 9-25 "9.2.8 Precautions and procedure when replacing the SRAM" (all steps) © 2015 TOSHIBA TEC CORPORATION All rights reserved e-STUDIO2008A/2508A/3008A/3508A/4508A/5008A ERROR CODE AND TROUBLESHOOTING 8 - 219...
- Page 758 Precautions and procedures when replacing the SYS board". [C] Restore ADI key (only when ADI-HDD is installed) [D] Restore encryption key [E] Restore license * AccessFailed, KeyNull or KeyBroken e-STUDIO2008A/2508A/3008A/3508A/4508A/5008A © 2015 TOSHIBA TEC CORPORATION All rights reserved ERROR CODE AND TROUBLESHOOTING 8 - 220...
- Page 759 5. If the error persists even after step 4, replace the SATA harness. 6. If the error persists even after step 5, replace the SYS board. Replacement part Remark SYS board SATA harness © 2015 TOSHIBA TEC CORPORATION All rights reserved e-STUDIO2008A/2508A/3008A/3508A/4508A/5008A ERROR CODE AND TROUBLESHOOTING 8 - 221...
- Page 760 7. If the error persists even after step 6, replace the SATA harness. 8. If the error persists even after step 7, replace the SYS board. Replacement part Remark SYS board SATA harness e-STUDIO2008A/2508A/3008A/3508A/4508A/5008A © 2015 TOSHIBA TEC CORPORATION All rights reserved ERROR CODE AND TROUBLESHOOTING 8 - 222...
- Page 761 7. If the error persists even after step 6, replace the SATA harness. 8. If the error persists even after step 7, replace the SYS board. Replacement part Remark SYS board SATA harness © 2015 TOSHIBA TEC CORPORATION All rights reserved e-STUDIO2008A/2508A/3008A/3508A/4508A/5008A ERROR CODE AND TROUBLESHOOTING 8 - 223...
- Page 762 7. If the error persists even after step 6, replace the SATA harness. 8. If the error persists even after step 7, replace the SYS board. Replacement part Remark SYS board SATA harness e-STUDIO2008A/2508A/3008A/3508A/4508A/5008A © 2015 TOSHIBA TEC CORPORATION All rights reserved ERROR CODE AND TROUBLESHOOTING 8 - 224...
- Page 763 7. If the error persists even after step 6, replace the SATA harness. 8. If the error persists even after step 7, replace the SYS board. Replacement part Remark SYS board SATA harness © 2015 TOSHIBA TEC CORPORATION All rights reserved e-STUDIO2008A/2508A/3008A/3508A/4508A/5008A ERROR CODE AND TROUBLESHOOTING 8 - 225...
- Page 764 7. If the error persists even after step 6, replace the SATA harness. 8. If the error persists even after step 7, replace the SYS board. Replacement part Remark SYS board SATA harness e-STUDIO2008A/2508A/3008A/3508A/4508A/5008A © 2015 TOSHIBA TEC CORPORATION All rights reserved ERROR CODE AND TROUBLESHOOTING 8 - 226...
- Page 765 7. If the error persists even after step 6, replace the SATA harness. 8. If the error persists even after step 7, replace the SYS board. Replacement part Remark SYS board SATA harness © 2015 TOSHIBA TEC CORPORATION All rights reserved e-STUDIO2008A/2508A/3008A/3508A/4508A/5008A ERROR CODE AND TROUBLESHOOTING 8 - 227...
- Page 766 2b. In case of “ADI-HDD” Check each item in the Measures field for the HDD below. If the error still occurs, reinstall the master data (HD Data). e-STUDIO2008A/2508A/3008A/3508A/4508A/5008A © 2015 TOSHIBA TEC CORPORATION All rights reserved ERROR CODE AND TROUBLESHOOTING 8 - 228...
- Page 767 [F106_2] ADI-HDD error: ADI encryption key download operation error Classification Error item ADI-HDD error: Downloading of or consistency check for ADI- Other service call HDD encryption key fails. © 2015 TOSHIBA TEC CORPORATION All rights reserved e-STUDIO2008A/2508A/3008A/3508A/4508A/5008A ERROR CODE AND TROUBLESHOOTING 8 - 229...
- Page 768 Reinstall the master data (HD Data). If the error persists even after above step , replace the HDD. If the equipment operation disabled after above step, replace the HDD. e-STUDIO2008A/2508A/3008A/3508A/4508A/5008A © 2015 TOSHIBA TEC CORPORATION All rights reserved ERROR CODE AND TROUBLESHOOTING 8 - 230...
- Page 769 Template If the error persists even after above step , replace the HDD. If the equipment operation disabled after above step, replace the HDD. © 2015 TOSHIBA TEC CORPORATION All rights reserved e-STUDIO2008A/2508A/3008A/3508A/4508A/5008A ERROR CODE AND TROUBLESHOOTING 8 - 231...
- Page 770 Reboot the equipment. If it cannot be recovered, reinstall the software in the following procedure. Install the OS data. P. 11-5 "11.2.2 Update procedure" e-STUDIO2008A/2508A/3008A/3508A/4508A/5008A © 2015 TOSHIBA TEC CORPORATION All rights reserved ERROR CODE AND TROUBLESHOOTING 8 - 232...
- Page 771 Recover the encryption key on the SRAM board. P. 9-25 "9.2.8 Precautions and procedure when replacing KeyBroken the SRAM" (for the SYS board, [H]Backup encryption key) © 2015 TOSHIBA TEC CORPORATION All rights reserved e-STUDIO2008A/2508A/3008A/3508A/4508A/5008A ERROR CODE AND TROUBLESHOOTING 8 - 233...
- Page 772 [E] Restore license AccessFailed Replace the SRAM board. (for the SYS board). P. 9-25 "9.2.8 Precautions and procedure when replacing the SRAM" (all steps) e-STUDIO2008A/2508A/3008A/3508A/4508A/5008A © 2015 TOSHIBA TEC CORPORATION All rights reserved ERROR CODE AND TROUBLESHOOTING 8 - 234...
- Page 773 Recover the ADI key on the SYS board. P. 9-19 "9.2.4 Precautions and procedures when replacing KeyBroken the SYS board" ([C]Restore ADI key) © 2015 TOSHIBA TEC CORPORATION All rights reserved e-STUDIO2008A/2508A/3008A/3508A/4508A/5008A ERROR CODE AND TROUBLESHOOTING 8 - 235...
- Page 774 Recover the encryption key on the SRAM board. (Transfer the license from SYS-FROM to SYS-SRAM.) P. 9-25 "9.2.8 Precautions and procedure when replacing the SRAM"([G]Backup ADI key) * AccessFailed or KeyMismatch e-STUDIO2008A/2508A/3008A/3508A/4508A/5008A © 2015 TOSHIBA TEC CORPORATION All rights reserved ERROR CODE AND TROUBLESHOOTING 8 - 236...
- Page 775 KeyNull/ Recover the encryption key on the SRAM board. P. 9-25 "9.2.8 Precautions and procedure when replacing KeyBroken the SRAM" ([G]Backup ADI key) © 2015 TOSHIBA TEC CORPORATION All rights reserved e-STUDIO2008A/2508A/3008A/3508A/4508A/5008A ERROR CODE AND TROUBLESHOOTING 8 - 237...
- Page 776 If you back up the data in advance, they will be recovered by restoring them after rebuilding the database. e-STUDIO2008A/2508A/3008A/3508A/4508A/5008A © 2015 TOSHIBA TEC CORPORATION All rights reserved ERROR CODE AND TROUBLESHOOTING 8 - 238...
- Page 777 If you back up the data in advance, they will be recovered by restoring them after rebuilding the database. © 2015 TOSHIBA TEC CORPORATION All rights reserved e-STUDIO2008A/2508A/3008A/3508A/4508A/5008A ERROR CODE AND TROUBLESHOOTING 8 - 239...
- Page 778 Other service call ASIC formatting fails or memory acquiring fails when software is formatted Check Item Measure SYS board • Connector check • Board check e-STUDIO2008A/2508A/3008A/3508A/4508A/5008A © 2015 TOSHIBA TEC CORPORATION All rights reserved ERROR CODE AND TROUBLESHOOTING 8 - 240...
- Page 779 3. If it still persists after step 2, perform [3] + [C] + [Start] -> 3, and then reinstall the HDD software. Note: User data will be deleted when [3] + [C] + [Start] -> 3 is performed. © 2015 TOSHIBA TEC CORPORATION All rights reserved e-STUDIO2008A/2508A/3008A/3508A/4508A/5008A ERROR CODE AND TROUBLESHOOTING 8 - 241...
- Page 780 1. Perform [3] + [C] + [POWER] -> [1] -> [START] for “Clear Error Flag in Software Installation”. 2. Reinstall the firmware in error displayed on the F600 error screen. e-STUDIO2008A/2508A/3008A/3508A/4508A/5008A © 2015 TOSHIBA TEC CORPORATION All rights reserved ERROR CODE AND TROUBLESHOOTING 8 - 242...
- Page 781 3. Press the [START] button on the confirmation screen displayed. (The date is set to January 1st, 2011.) 4. Request the administrator to set the date and time. © 2015 TOSHIBA TEC CORPORATION All rights reserved e-STUDIO2008A/2508A/3008A/3508A/4508A/5008A ERROR CODE AND TROUBLESHOOTING...
- Page 782 Key in [2] to select “2. Key FROM to SRAM”, and then press the [START] button. After the operation is completed, shut down the equipment by pressing the [ON/OFF] button. e-STUDIO2008A/2508A/3008A/3508A/4508A/5008A © 2015 TOSHIBA TEC CORPORATION All rights reserved ERROR CODE AND TROUBLESHOOTING 8 - 244...
- Page 783 The F901_1 may occur especially when the equipment is not started up with the 08 mode according to the procedures when replacing the LGC board. Replacement part Remark Harness LGC board © 2015 TOSHIBA TEC CORPORATION All rights reserved e-STUDIO2008A/2508A/3008A/3508A/4508A/5008A ERROR CODE AND TROUBLESHOOTING 8 - 245...
- Page 784 When a template is used, form the template again. • If the error still occurs, turn the power OFF and then back ON, and perform the job again. e-STUDIO2008A/2508A/3008A/3508A/4508A/5008A © 2015 TOSHIBA TEC CORPORATION All rights reserved ERROR CODE AND TROUBLESHOOTING 8 - 246...
- Page 785 Turn the power OFF and then back ON. Perform the job in error again. • Replace the main memory and perform the job again. Replace parts Remarks Main memory © 2015 TOSHIBA TEC CORPORATION All rights reserved e-STUDIO2008A/2508A/3008A/3508A/4508A/5008A ERROR CODE AND TROUBLESHOOTING 8 - 247...
- Page 786 • Reset the SMTP address and perform the job. • Turn the power OFF and then back ON. Perform the job in error again. e-STUDIO2008A/2508A/3008A/3508A/4508A/5008A © 2015 TOSHIBA TEC CORPORATION All rights reserved ERROR CODE AND TROUBLESHOOTING 8 - 248...
- Page 787 Turn the power OFF and then back ON. Perform the job in error again. • If the error still occurs, replace the SYS board. Replace parts Remarks SYS board © 2015 TOSHIBA TEC CORPORATION All rights reserved e-STUDIO2008A/2508A/3008A/3508A/4508A/5008A ERROR CODE AND TROUBLESHOOTING 8 - 249...
- Page 788 Error item Internet FAX related error Internet FAX transmission failure when processing FAX job received Check item Measures Setting • Reset the “Received Fax Forward” e-STUDIO2008A/2508A/3008A/3508A/4508A/5008A © 2015 TOSHIBA TEC CORPORATION All rights reserved ERROR CODE AND TROUBLESHOOTING 8 - 250...
- Page 789 Measures Setting • Check if the power cable is connected properly and it is inserted securely. • Check if the power voltage is unstable. © 2015 TOSHIBA TEC CORPORATION All rights reserved e-STUDIO2008A/2508A/3008A/3508A/4508A/5008A ERROR CODE AND TROUBLESHOOTING 8 - 251...
- Page 790 • If the error still occurs, turn the power OFF and then back ON. Perform the job in error again. e-STUDIO2008A/2508A/3008A/3508A/4508A/5008A © 2015 TOSHIBA TEC CORPORATION All rights reserved ERROR CODE AND TROUBLESHOOTING 8 - 252...
- Page 791 Error item RFC related error Check item Measures Setting • Check if there is an illegal character in the mail box in the mail server. © 2015 TOSHIBA TEC CORPORATION All rights reserved e-STUDIO2008A/2508A/3008A/3508A/4508A/5008A ERROR CODE AND TROUBLESHOOTING 8 - 253...
- Page 792 • Check if the specified document exists. (If no, this error would not occur.) Delete the specified document. Perform the job in error again. e-STUDIO2008A/2508A/3008A/3508A/4508A/5008A © 2015 TOSHIBA TEC CORPORATION All rights reserved ERROR CODE AND TROUBLESHOOTING 8 - 254...
- Page 793 A Paper size not supported in the Electronic Filing function is being selected. Check item Measures Setting • The specified paper size, color mode or resolution cannot be used. Check the setting. © 2015 TOSHIBA TEC CORPORATION All rights reserved e-STUDIO2008A/2508A/3008A/3508A/4508A/5008A ERROR CODE AND TROUBLESHOOTING 8 - 255...
- Page 794 Error item Electronic Filing related error Check item Measures Setting • Backup the folders in the box or folder to PC or delete them. e-STUDIO2008A/2508A/3008A/3508A/4508A/5008A © 2015 TOSHIBA TEC CORPORATION All rights reserved ERROR CODE AND TROUBLESHOOTING 8 - 256...
- Page 795 Windows is a name registered as a user. • When MFP panel or EWB Scan is used Check if the login user name is a name registered as a user. © 2015 TOSHIBA TEC CORPORATION All rights reserved e-STUDIO2008A/2508A/3008A/3508A/4508A/5008A ERROR CODE AND TROUBLESHOOTING 8 - 257...
- Page 796 A user without e-Filing data access privilege tried to use Scan utility. Check item Measures Setting Check if correct privilege is given to the user. e-STUDIO2008A/2508A/3008A/3508A/4508A/5008A © 2015 TOSHIBA TEC CORPORATION All rights reserved ERROR CODE AND TROUBLESHOOTING 8 - 258...
- Page 797 Check item Measures Setting • Reset and extend the “Maximum send to E-mail/iFAX size” or reduce the number of pages and perform the job again. © 2015 TOSHIBA TEC CORPORATION All rights reserved e-STUDIO2008A/2508A/3008A/3508A/4508A/5008A ERROR CODE AND TROUBLESHOOTING 8 - 259...
- Page 798 Error item E-mail related error Check item Measures Setting • Turn the power OFF and then back ON. Perform the job in error again. e-STUDIO2008A/2508A/3008A/3508A/4508A/5008A © 2015 TOSHIBA TEC CORPORATION All rights reserved ERROR CODE AND TROUBLESHOOTING 8 - 260...
- Page 799 Check item Measures Setting • Reset the Terminal IP address. • Turn the power OFF and then back ON. Perform the job in error again. © 2015 TOSHIBA TEC CORPORATION All rights reserved e-STUDIO2008A/2508A/3008A/3508A/4508A/5008A ERROR CODE AND TROUBLESHOOTING 8 - 261...
- Page 800 Setting • Check if there is an illegal character in the device name. • Delete the illegal character and reset the appropriate device name. e-STUDIO2008A/2508A/3008A/3508A/4508A/5008A © 2015 TOSHIBA TEC CORPORATION All rights reserved ERROR CODE AND TROUBLESHOOTING 8 - 262...
- Page 801 [2C80] E-mail transmission failure when processing E-mail job received Classification Error item E-mail related error Check item Measures Setting • Reset the “Received InternetFax Forward”. © 2015 TOSHIBA TEC CORPORATION All rights reserved e-STUDIO2008A/2508A/3008A/3508A/4508A/5008A ERROR CODE AND TROUBLESHOOTING 8 - 263...
- Page 802 Measures Setting • Check if the power cable is connected properly and it is inserted securely. • Check if the power voltage is unstable. e-STUDIO2008A/2508A/3008A/3508A/4508A/5008A © 2015 TOSHIBA TEC CORPORATION All rights reserved ERROR CODE AND TROUBLESHOOTING 8 - 264...
- Page 803 When a template is used, form the template again. • If the error still occurs, turn the power OFF and then back ON, and perform the job again. © 2015 TOSHIBA TEC CORPORATION All rights reserved e-STUDIO2008A/2508A/3008A/3508A/4508A/5008A ERROR CODE AND TROUBLESHOOTING 8 - 265...
- Page 804 Replace the main memory and perform the job again. • If the error still occurs, check that there is no job, and initialize the shared folder with [5] + [C] + [START]. e-STUDIO2008A/2508A/3008A/3508A/4508A/5008A © 2015 TOSHIBA TEC CORPORATION All rights reserved ERROR CODE AND TROUBLESHOOTING 8 - 266...
- Page 805 • Check the network path. • If the path is correct, turn the power OFF and then back ON, and perform the job again. © 2015 TOSHIBA TEC CORPORATION All rights reserved e-STUDIO2008A/2508A/3008A/3508A/4508A/5008A ERROR CODE AND TROUBLESHOOTING 8 - 267...
- Page 806 Error item File sharing related error File sharing service not available Check item Measures Setting • Check if the setting of SMB is valid. e-STUDIO2008A/2508A/3008A/3508A/4508A/5008A © 2015 TOSHIBA TEC CORPORATION All rights reserved ERROR CODE AND TROUBLESHOOTING 8 - 268...
- Page 807 File sharing related error Job status is invalid. Check item Measures Setting Turn the power OFF and then back ON. Perform the job in error again. © 2015 TOSHIBA TEC CORPORATION All rights reserved e-STUDIO2008A/2508A/3008A/3508A/4508A/5008A ERROR CODE AND TROUBLESHOOTING 8 - 269...
- Page 808 Turn the power OFF and then back ON. Perform the job in error again. If the error still occurs, check that there is no job, and format the HDD with [5] + [C] + [START]. e-STUDIO2008A/2508A/3008A/3508A/4508A/5008A © 2015 TOSHIBA TEC CORPORATION All rights reserved ERROR CODE AND TROUBLESHOOTING 8 - 270...
- Page 809 Check the template settings. Perform the job in error again. If the error still occurs, turn the power OFF and then back ON, and then perform the job in error again. © 2015 TOSHIBA TEC CORPORATION All rights reserved e-STUDIO2008A/2508A/3008A/3508A/4508A/5008A ERROR CODE AND TROUBLESHOOTING...
- Page 810 Power failure occurred. Check item Measures Setting Check if the power cable is connected properly and inserted securely. Check if the power voltage is unstable. e-STUDIO2008A/2508A/3008A/3508A/4508A/5008A © 2015 TOSHIBA TEC CORPORATION All rights reserved ERROR CODE AND TROUBLESHOOTING 8 - 272...
- Page 811 The format of the partial mail is not corresponding to this equipment. • Request the sender to remake and retransmit the partial mail in RFC2046 format. © 2015 TOSHIBA TEC CORPORATION All rights reserved e-STUDIO2008A/2508A/3008A/3508A/4508A/5008A ERROR CODE AND TROUBLESHOOTING 8 - 273...
- Page 812 • The format of the attached file is not supported by this equipment (TIFF-FX). • Request the sender to retransmit the file in TIFF-FX. e-STUDIO2008A/2508A/3008A/3508A/4508A/5008A © 2015 TOSHIBA TEC CORPORATION All rights reserved ERROR CODE AND TROUBLESHOOTING 8 - 274...
- Page 813 (Acceptable: A4, B4, A3, B5, LT, LG, LD or ST) • Request the sender to retransmit the file in the acceptable paper size. © 2015 TOSHIBA TEC CORPORATION All rights reserved e-STUDIO2008A/2508A/3008A/3508A/4508A/5008A ERROR CODE AND TROUBLESHOOTING 8 - 275...
- Page 814 Correct if any of the setting is incorrect. • When the content of the setting is correct, confirm the sender if the destination is correct. e-STUDIO2008A/2508A/3008A/3508A/4508A/5008A © 2015 TOSHIBA TEC CORPORATION All rights reserved ERROR CODE AND TROUBLESHOOTING 8 - 276...
- Page 815 E-mail reception related error POP3 login error Check item Measures Setting • Check if the POP3 server login name and password set for this equipment are correct. © 2015 TOSHIBA TEC CORPORATION All rights reserved e-STUDIO2008A/2508A/3008A/3508A/4508A/5008A ERROR CODE AND TROUBLESHOOTING 8 - 277...
- Page 816 These errors occur when the mail data is not transferred properly to the HDD. • Request the sender to retransmit the mail. • Replace the HDD if the error still occurs after retransmission. e-STUDIO2008A/2508A/3008A/3508A/4508A/5008A © 2015 TOSHIBA TEC CORPORATION All rights reserved ERROR CODE AND TROUBLESHOOTING 8 - 278...
- Page 817 Error item TopAccess related error Printing data storing limitation error Check item Measures Setting • Select “Normal Print”, and then perform the printing again. © 2015 TOSHIBA TEC CORPORATION All rights reserved e-STUDIO2008A/2508A/3008A/3508A/4508A/5008A ERROR CODE AND TROUBLESHOOTING 8 - 279...
- Page 818 Classification Error item TopAccess related error Not being authorized to perform JOB Check item Measures Setting • Confirm the administrator for the JOB authorization. e-STUDIO2008A/2508A/3008A/3508A/4508A/5008A © 2015 TOSHIBA TEC CORPORATION All rights reserved ERROR CODE AND TROUBLESHOOTING 8 - 280...
- Page 819 The number of the assigned pages set by the user management has reached 0. Assign the number of the pages again or perform initialization. © 2015 TOSHIBA TEC CORPORATION All rights reserved e-STUDIO2008A/2508A/3008A/3508A/4508A/5008A ERROR CODE AND TROUBLESHOOTING 8 - 281...
- Page 820 Scanner kit is not installed firmly, but the Printer kit is installed. Check item Measures Setting • Check that the Scanner kit is installed firmly. e-STUDIO2008A/2508A/3008A/3508A/4508A/5008A © 2015 TOSHIBA TEC CORPORATION All rights reserved ERROR CODE AND TROUBLESHOOTING 8 - 282...
- Page 821 No privilege for Fax / Internet FAX transmission Check item Measures Setting • Check the privilege given, or request the administrator to add the necessary privilege. © 2015 TOSHIBA TEC CORPORATION All rights reserved e-STUDIO2008A/2508A/3008A/3508A/4508A/5008A ERROR CODE AND TROUBLESHOOTING 8 - 283...
- Page 822 TopAccess related error Font deletion failure Check item Measures Setting • Check if the font to be deleted is registered (or pre- registered) in this equipment. e-STUDIO2008A/2508A/3008A/3508A/4508A/5008A © 2015 TOSHIBA TEC CORPORATION All rights reserved ERROR CODE AND TROUBLESHOOTING 8 - 284...
- Page 823 3. Initialize HDD. Refer to step 3 and later in [E]Replace / Format HDDin P. 9-14 "9.2.3 Precautions and procedures when replacing the HDD/SSD". © 2015 TOSHIBA TEC CORPORATION All rights reserved e-STUDIO2008A/2508A/3008A/3508A/4508A/5008A ERROR CODE AND TROUBLESHOOTING 8 - 285...
- Page 824 There is no SSL certificate or the certificate is not in a correct application file format. Check item Measures Setting Install the correct SSL certificate. e-STUDIO2008A/2508A/3008A/3508A/4508A/5008A © 2015 TOSHIBA TEC CORPORATION All rights reserved ERROR CODE AND TROUBLESHOOTING 8 - 286...
- Page 825 Communication error with external Settings for initial URL and proxy are incorrect. application Check item Measures Setting Perform the correct settings for initial URL and proxy. © 2015 TOSHIBA TEC CORPORATION All rights reserved e-STUDIO2008A/2508A/3008A/3508A/4508A/5008A ERROR CODE AND TROUBLESHOOTING 8 - 287...
- Page 826 Toner cartridge detection error. Check item Measures Setting • Check if the toner cartridge is installed properly. • Check if the toner cartridge detection sensor operates properly. e-STUDIO2008A/2508A/3008A/3508A/4508A/5008A © 2015 TOSHIBA TEC CORPORATION All rights reserved ERROR CODE AND TROUBLESHOOTING 8 - 288...
- Page 827 Measures Setting of a cloud server Retry the registration. Contact the administrator of the cloud server. [5411] MFP registration lock error / TOSHIBA Global remote monitoring system error Classification Error item MFP registration error Data to be sent to a cloud server from the equipment has been damaged or incorrect authentication data have been sent.
- Page 828 [5416] Setting files / system software update error / TOSHIBA Global remote monitoring system error Classification Error item Update failure of system software / The system software and the setting files of the equipment setting files of the equipment cannot be updated because there is an ongoing job.
- Page 829 Data import failed because the specified file (Address Book, department or user information) is incorrect or damaged. Check if the file is incorrect or damaged, and then reattempt the import. © 2015 TOSHIBA TEC CORPORATION All rights reserved e-STUDIO2008A/2508A/3008A/3508A/4508A/5008A ERROR CODE AND TROUBLESHOOTING 8 - 291...
- Page 830 Error item MFP access error The card cannot be used because it has expired. Check item Measures Setting Use a card with a valid expiration. e-STUDIO2008A/2508A/3008A/3508A/4508A/5008A © 2015 TOSHIBA TEC CORPORATION All rights reserved ERROR CODE AND TROUBLESHOOTING 8 - 292...
- Page 831 Error item MFP access error User account is locked Check item Measures Setting Log into TopAccess as an administrator, and release the locked user account. © 2015 TOSHIBA TEC CORPORATION All rights reserved e-STUDIO2008A/2508A/3008A/3508A/4508A/5008A ERROR CODE AND TROUBLESHOOTING 8 - 293...
- Page 832 TopAccess as an administrator, and check that the SNTP setting is correct. [6150] Print log DB full Classification Error item MFP access error Print log DB full e-STUDIO2008A/2508A/3008A/3508A/4508A/5008A © 2015 TOSHIBA TEC CORPORATION All rights reserved ERROR CODE AND TROUBLESHOOTING 8 - 294...
- Page 833 Error item MFP access error Scan log DB near-full (95%) Check item Measures Setting Perform Clear Log with TopAccess Logs>Export Logs>Scan Job Log Export. © 2015 TOSHIBA TEC CORPORATION All rights reserved e-STUDIO2008A/2508A/3008A/3508A/4508A/5008A ERROR CODE AND TROUBLESHOOTING 8 - 295...
- Page 834 Perform Clear Log with TopAccess Logs>Export Logs>Fax Transmission Journal Export. [6173] FAX transmission log DB near-full (80%) Classification Error item MFP access error FAX transmission log DB near-full (80%) e-STUDIO2008A/2508A/3008A/3508A/4508A/5008A © 2015 TOSHIBA TEC CORPORATION All rights reserved ERROR CODE AND TROUBLESHOOTING 8 - 296...
- Page 835 Error item MFP access error FAX reception log DB near-full (70%) Check item Measures Setting Perform Clear Log with TopAccess Logs>Export Logs>Fax Reception Journal Export. © 2015 TOSHIBA TEC CORPORATION All rights reserved e-STUDIO2008A/2508A/3008A/3508A/4508A/5008A ERROR CODE AND TROUBLESHOOTING 8 - 297...
- Page 836 Classification Error item MFP access error Message log DB near-full (70%) Check item Measures Setting Perform Clear Log with TopAccess Logs>Export Logs>Message Log Export. e-STUDIO2008A/2508A/3008A/3508A/4508A/5008A © 2015 TOSHIBA TEC CORPORATION All rights reserved ERROR CODE AND TROUBLESHOOTING 8 - 298...
- Page 837 Check item Measures Setting Language Pack file may have a problem or may be corrupted. Check the package file and then reattempt the installation. © 2015 TOSHIBA TEC CORPORATION All rights reserved e-STUDIO2008A/2508A/3008A/3508A/4508A/5008A ERROR CODE AND TROUBLESHOOTING 8 - 299...
- Page 838 [7125] Unsuccessful Import of MailBox Data Classification Error item Maintenance error The import of Mailbox data failed. Check item Measures Setting Check if you are importing a valid file. e-STUDIO2008A/2508A/3008A/3508A/4508A/5008A © 2015 TOSHIBA TEC CORPORATION All rights reserved ERROR CODE AND TROUBLESHOOTING 8 - 300...
- Page 839 Classification Error item Maintenance error The import of Print Data Converter failed. Check item Measures Setting Check if you are importing a valid file. © 2015 TOSHIBA TEC CORPORATION All rights reserved e-STUDIO2008A/2508A/3008A/3508A/4508A/5008A ERROR CODE AND TROUBLESHOOTING 8 - 301...
- Page 840 Failed to import the certificate Check item Measures Setting Certificate may have a problem or be corrupted. Check the certificate and perform the job again. e-STUDIO2008A/2508A/3008A/3508A/4508A/5008A © 2015 TOSHIBA TEC CORPORATION All rights reserved ERROR CODE AND TROUBLESHOOTING 8 - 302...
- Page 841 The export of a Meta Scan format file failed. Check item Measures Setting Check if there is enough capacity in the HDD and then retry the export. © 2015 TOSHIBA TEC CORPORATION All rights reserved e-STUDIO2008A/2508A/3008A/3508A/4508A/5008A ERROR CODE AND TROUBLESHOOTING 8 - 303...
- Page 842 The export of Print Data Converter failed. Check item Measures Setting Check if there is enough capacity in the HDD and then retry the export. e-STUDIO2008A/2508A/3008A/3508A/4508A/5008A © 2015 TOSHIBA TEC CORPORATION All rights reserved ERROR CODE AND TROUBLESHOOTING 8 - 304...
- Page 843 Failed to add CA certificate Check item Measures Setting CA certificate may have a problem or be corrupted. Check the CA certificate and perform the job again. © 2015 TOSHIBA TEC CORPORATION All rights reserved e-STUDIO2008A/2508A/3008A/3508A/4508A/5008A ERROR CODE AND TROUBLESHOOTING 8 - 305...
- Page 844 Setting Check SCEP server and the SCEP setting (automatic) on the TopAccess screen in the following procedure: TopAccess Administration Security Certificate Management e-STUDIO2008A/2508A/3008A/3508A/4508A/5008A © 2015 TOSHIBA TEC CORPORATION All rights reserved ERROR CODE AND TROUBLESHOOTING 8 - 306...
- Page 845 The creation of a clone file failed. Check item Measures Setting Check if there is enough capacity in the HDD and the USB media and then retry the creation. © 2015 TOSHIBA TEC CORPORATION All rights reserved e-STUDIO2008A/2508A/3008A/3508A/4508A/5008A ERROR CODE AND TROUBLESHOOTING 8 - 307...
- Page 846 Classification Error item Maintenance error The encryption of a clone file failed. Check item Measures Setting Restart the equipment and then retry the encryption. e-STUDIO2008A/2508A/3008A/3508A/4508A/5008A © 2015 TOSHIBA TEC CORPORATION All rights reserved ERROR CODE AND TROUBLESHOOTING 8 - 308...
- Page 847 [8023] Can not contact Authentication Server/Switch Classification Error item Network error Failed in connection to authentication server and switch. Check item Measures Setting Check connectivity to switch or server. © 2015 TOSHIBA TEC CORPORATION All rights reserved e-STUDIO2008A/2508A/3008A/3508A/4508A/5008A ERROR CODE AND TROUBLESHOOTING 8 - 309...
- Page 848 [8035] IKEv1 certificate not supported Classification Error item Network error Ipsec error if certificate not supported Check item Measures Setting Check the User certificate type. e-STUDIO2008A/2508A/3008A/3508A/4508A/5008A © 2015 TOSHIBA TEC CORPORATION All rights reserved ERROR CODE AND TROUBLESHOOTING 8 - 310...
- Page 849 Ipsec error if proposal chosen is wrong Check item Measures Setting Check the IKEv2/IPsec proposal parameters (encryption/ authentication algorithms, DH group, authentication methods) in MFP and peer machine. © 2015 TOSHIBA TEC CORPORATION All rights reserved e-STUDIO2008A/2508A/3008A/3508A/4508A/5008A ERROR CODE AND TROUBLESHOOTING 8 - 311...
- Page 850 Ipsec error for ikev2 if crypto operation failed Check item Measures Setting If Certificates are being used, re-upload the corresponding certificates using Security Services. Restart IPsec Service on MFP. e-STUDIO2008A/2508A/3008A/3508A/4508A/5008A © 2015 TOSHIBA TEC CORPORATION All rights reserved ERROR CODE AND TROUBLESHOOTING 8 - 312...
- Page 851 Error item Network error Ipsec error for peer ip mismatch Check item Measures Setting Remote Traffic selector mismatch. Check the destination address/port in IPsec filter. © 2015 TOSHIBA TEC CORPORATION All rights reserved e-STUDIO2008A/2508A/3008A/3508A/4508A/5008A ERROR CODE AND TROUBLESHOOTING 8 - 313...
- Page 852 Ipsec error id manual key is not valid Check item Measures Setting Check the Inbound and Outbound (ESP Encryption/ Authentication and AH Authentication) keys in MFP and Remote PC. e-STUDIO2008A/2508A/3008A/3508A/4508A/5008A © 2015 TOSHIBA TEC CORPORATION All rights reserved ERROR CODE AND TROUBLESHOOTING 8 - 314...
- Page 853 MFP not able to contact the Access point with the specified SSID Check item Measures Setting Verify the access point name setting and mechanism used for association same as Access Point setting. © 2015 TOSHIBA TEC CORPORATION All rights reserved e-STUDIO2008A/2508A/3008A/3508A/4508A/5008A ERROR CODE AND TROUBLESHOOTING 8 - 315...
- Page 854 Setting Check if the user name and the password for this equipment are correct. Specify upper- and lower-case characters correctly when you enter them. e-STUDIO2008A/2508A/3008A/3508A/4508A/5008A © 2015 TOSHIBA TEC CORPORATION All rights reserved ERROR CODE AND TROUBLESHOOTING 8 - 316...
- Page 855 The logon hour is invalid and not available for login for domain authentication. Check item Measures Setting Check the logon hour setting for the user account noted in the Active Directory Users and Computers window. © 2015 TOSHIBA TEC CORPORATION All rights reserved e-STUDIO2008A/2508A/3008A/3508A/4508A/5008A ERROR CODE AND TROUBLESHOOTING 8 - 317...
- Page 856 Check if the realm name of this equipment for the Active Directory server is correct. If the error still occurs, ask your Windows Server administrator. e-STUDIO2008A/2508A/3008A/3508A/4508A/5008A © 2015 TOSHIBA TEC CORPORATION All rights reserved ERROR CODE AND TROUBLESHOOTING 8 - 318...
- Page 857 Is there a blotch on the image? Perform troubleshooting for blotched image. Is the image transferred normally? Perform troubleshooting for abnormal transfer. © 2015 TOSHIBA TEC CORPORATION All rights reserved e-STUDIO2008A/2508A/3008A/3508A/4508A/5008A ERROR CODE AND TROUBLESHOOTING 8 - 319...
- Page 858 Check the pressure of the drum cleaning blade. Toner dusting Is toner heaped on the seal of the Remove the toner and clean the developer unit? developer unit. e-STUDIO2008A/2508A/3008A/3508A/4508A/5008A © 2015 TOSHIBA TEC CORPORATION All rights reserved ERROR CODE AND TROUBLESHOOTING 8 - 320...
- Page 859 Check the image processing Check the encircled areas A and B in parameters. the image, and change the sharpness intensity in the sharpness adjustment mode. © 2015 TOSHIBA TEC CORPORATION All rights reserved e-STUDIO2008A/2508A/3008A/3508A/4508A/5008A ERROR CODE AND TROUBLESHOOTING 8 - 321...
- Page 860 Only e-STUDIO356/456/506 / e- STUDIO357/457/507) Using the recommended paper? Use the recommended paper. Developer material Using the specified developer material? Use the specified developer material and toner. e-STUDIO2008A/2508A/3008A/3508A/4508A/5008A © 2015 TOSHIBA TEC CORPORATION All rights reserved ERROR CODE AND TROUBLESHOOTING 8 - 322...
- Page 861 Defective area Step Check items Prescription Scanner Are the original glass (especially the Clean them. position of shading correction plate), mirror and lens dirty? © 2015 TOSHIBA TEC CORPORATION All rights reserved e-STUDIO2008A/2508A/3008A/3508A/4508A/5008A ERROR CODE AND TROUBLESHOOTING 8 - 323...
- Page 862 Is the exhaust fan operating Check the connection of connector. properly? Replace the ozone exhaust fan. Is the ozone filter stained or Replace the ozone filter. damaged? e-STUDIO2008A/2508A/3008A/3508A/4508A/5008A © 2015 TOSHIBA TEC CORPORATION All rights reserved ERROR CODE AND TROUBLESHOOTING 8 - 324...
- Page 863 08-2028, 2049, 2050, 2051,2141, 2142, 2143, 2192, 2194, 2195) (08-5328, 5329, 5330, 5331, 5332: e- STUDIO356/456/506 / e- STUDIO357/457/507) Using the recommended paper? Use the recommended paper. © 2015 TOSHIBA TEC CORPORATION All rights reserved e-STUDIO2008A/2508A/3008A/3508A/4508A/5008A ERROR CODE AND TROUBLESHOOTING 8 - 325...
- Page 864 Are the connectors securely Connect the connectors securely. boards and harnesses connected? Replace the harness. Check if the harnesses connecting the boards are open circuited. e-STUDIO2008A/2508A/3008A/3508A/4508A/5008A © 2015 TOSHIBA TEC CORPORATION All rights reserved ERROR CODE AND TROUBLESHOOTING 8 - 326...
- Page 865 Are the connectors securely Connect the connectors securely. boards and harnesses connected? Replace the harness. Check if the harnesses connecting the boards are open circuited. © 2015 TOSHIBA TEC CORPORATION All rights reserved e-STUDIO2008A/2508A/3008A/3508A/4508A/5008A ERROR CODE AND TROUBLESHOOTING 8 - 327...
- Page 866 Is there a foreign matter on the light Remove the foreign matter. path? Are the original glass (especially the Clean them. position of shading correction plate) mirror and lens dirty? e-STUDIO2008A/2508A/3008A/3508A/4508A/5008A © 2015 TOSHIBA TEC CORPORATION All rights reserved ERROR CODE AND TROUBLESHOOTING 8 - 328...
- Page 867 Pull the doctor blade in the direction of the arrow. • Rotate the gear. • Remove the foreign matter that has come out on the developer sleeve. Doctor blade Developer sleeve Gear Fig.8-12 © 2015 TOSHIBA TEC CORPORATION All rights reserved e-STUDIO2008A/2508A/3008A/3508A/4508A/5008A ERROR CODE AND TROUBLESHOOTING 8 - 329...
- Page 868 Feed system Is the aligning amount proper? Adjust the aligning amount. e-STUDIO2008A/2508A/3008A/3508A/4508A/5008A © 2015 TOSHIBA TEC CORPORATION All rights reserved ERROR CODE AND TROUBLESHOOTING 8 - 330...
- Page 869 Pre-registration guide Is the pre-registration guide properly Correct it. installed? Scanner Is the carriage-1 slanted? Adjust the carriage-1. © 2015 TOSHIBA TEC CORPORATION All rights reserved e-STUDIO2008A/2508A/3008A/3508A/4508A/5008A ERROR CODE AND TROUBLESHOOTING 8 - 331...
- Page 870 Replace the drum. surface? Laser optical unit Is there a foreign matter or stain on Remove the foreign matter or the the slit glass? stain. e-STUDIO2008A/2508A/3008A/3508A/4508A/5008A © 2015 TOSHIBA TEC CORPORATION All rights reserved ERROR CODE AND TROUBLESHOOTING 8 - 332...
- Page 871 Scanner Is there a foreign matter on the Remove the foreign matter. carriage rail? © 2015 TOSHIBA TEC CORPORATION All rights reserved e-STUDIO2008A/2508A/3008A/3508A/4508A/5008A ERROR CODE AND TROUBLESHOOTING 8 - 333...
- Page 872 Is there any foreign matter on the Remove the foreign matter or replace transfer roller? Is there any the transfer roller. abnormality on its appearance? e-STUDIO2008A/2508A/3008A/3508A/4508A/5008A © 2015 TOSHIBA TEC CORPORATION All rights reserved ERROR CODE AND TROUBLESHOOTING 8 - 334...
- Page 873 Adjust the rotation speed of the roller. High-voltage transformer Is the high-voltage transformer Adjust the output, or replace the (Transfer roller unit) output defective? transformer. © 2015 TOSHIBA TEC CORPORATION All rights reserved e-STUDIO2008A/2508A/3008A/3508A/4508A/5008A ERROR CODE AND TROUBLESHOOTING 8 - 335...
- Page 874 Close the original cover or RADF. opened? Are the original glass (especially the Clean them. position of shading correction plate), mirror and lens dirty? e-STUDIO2008A/2508A/3008A/3508A/4508A/5008A © 2015 TOSHIBA TEC CORPORATION All rights reserved ERROR CODE AND TROUBLESHOOTING 8 - 336...
- Page 875 Replace the high-voltage harness. Is the harness open circuited? Discharge LED Are the connectors of discharge LED Reconnect the harness securely. harness securely connected? © 2015 TOSHIBA TEC CORPORATION All rights reserved e-STUDIO2008A/2508A/3008A/3508A/4508A/5008A ERROR CODE AND TROUBLESHOOTING 8 - 337...
- Page 876 Is the feed clutch working properly? Check the circuit or feed clutch, and replace them if necessary. Pre-registration guide Is the pre-registration guide installed Install the guide properly. properly? e-STUDIO2008A/2508A/3008A/3508A/4508A/5008A © 2015 TOSHIBA TEC CORPORATION All rights reserved ERROR CODE AND TROUBLESHOOTING 8 - 338...
- Page 877 Is there any problem with the drive Check the drive system of the drum. system of the drum? Clean or replace the gears if they have stains or scratches. © 2015 TOSHIBA TEC CORPORATION All rights reserved e-STUDIO2008A/2508A/3008A/3508A/4508A/5008A ERROR CODE AND TROUBLESHOOTING 8 - 339...
- Page 878 Is the setting temperature of the fuser Check the setting and correct it. roller normal? 08-2009, 2010, 2101, 2120, 2140 (08-5285: e-STUDIO356/456/506 / e- STUDIO357/457/507) e-STUDIO2008A/2508A/3008A/3508A/4508A/5008A © 2015 TOSHIBA TEC CORPORATION All rights reserved ERROR CODE AND TROUBLESHOOTING 8 - 340...
- Page 879 Exposure lamp Is the exposure lamp tilted? Adjust the position of the exposure lamp. Is the exposure lamp discolored or Replace the exposure lamp. degraded? © 2015 TOSHIBA TEC CORPORATION All rights reserved e-STUDIO2008A/2508A/3008A/3508A/4508A/5008A ERROR CODE AND TROUBLESHOOTING 8 - 341...
- Page 880 (Transfer roller unit) transformer normal? transformer if necessary. Separation Is the output from the separation Adjust the output, from the charger too high? separation charger. e-STUDIO2008A/2508A/3008A/3508A/4508A/5008A © 2015 TOSHIBA TEC CORPORATION All rights reserved ERROR CODE AND TROUBLESHOOTING 8 - 342...
- Page 881 Step Check items Prescription Scanner Amount of surrounding void Perform 05-7489 to adjust the amount of the surrounding void (network scanning) during network scanning. © 2015 TOSHIBA TEC CORPORATION All rights reserved e-STUDIO2008A/2508A/3008A/3508A/4508A/5008A ERROR CODE AND TROUBLESHOOTING 8 - 343...
- Page 882 • Connector check (CN415) • Harness check LGC board • Connector check (CN301, CN312) • Harness check Replacement part Remark Switching regulator LGC board e-STUDIO2008A/2508A/3008A/3508A/4508A/5008A © 2015 TOSHIBA TEC CORPORATION All rights reserved ERROR CODE AND TROUBLESHOOTING 8 - 344...
- Page 883 LGC board Replace the LGC board. Switching regulator Replace the switching regulator. Replacement part Remark LGC board Switching regulator © 2015 TOSHIBA TEC CORPORATION All rights reserved e-STUDIO2008A/2508A/3008A/3508A/4508A/5008A ERROR CODE AND TROUBLESHOOTING 8 - 345...
- Page 884 © 2015 TOSHIBA TEC CORPORATION All rights reserved ERROR CODE AND TROUBLESHOOTING 8 - 346...
- Page 885 Remove 1 screw [1] from the harness guide of SYS board. Release the lock by tilting the flap [2] and remove the flat cable [3]. Fig. 9-2 © 2015 TOSHIBA TEC CORPORATION All rights reserved e-STUDIO2008A/2508A/3008A/3508A/4508A/5008A REPLACEMENT OF PC BOARDS/HDD 9 - 1...
- Page 886 Do not apply pressure to or damage the edge of the flat cable [3]. Fig. 9-4 Disconnect 10 connectors from the SYS board. Remove 2 flat cables [4]. Fig. 9-5 e-STUDIO2008A/2508A/3008A/3508A/4508A/5008A © 2015 TOSHIBA TEC CORPORATION All rights reserved REPLACEMENT OF PC BOARDS/HDD 9 - 2...
- Page 887 CN112: White USB harness (The harness of the control panel) CN113: Black USB harness (The harness of the USB Hub board) Fig. 9-8 © 2015 TOSHIBA TEC CORPORATION All rights reserved e-STUDIO2008A/2508A/3008A/3508A/4508A/5008A REPLACEMENT OF PC BOARDS/HDD 9 - 3...
- Page 888 P. 9-1 "9.1.1 SYS Board cover" Remove 4 screws and disconnect 2 connectors [1], and then take off the HDD unit [2]. Fig. 9-10 Loosen 4 screws. Fig. 9-11 e-STUDIO2008A/2508A/3008A/3508A/4508A/5008A © 2015 TOSHIBA TEC CORPORATION All rights reserved REPLACEMENT OF PC BOARDS/HDD 9 - 4...
- Page 889 [2] connected to the LGC board [1]. Fig. 9-13 Release the lock by pushing the actuators [3] and remove 2 flat cables [4]. Fig. 9-14 © 2015 TOSHIBA TEC CORPORATION All rights reserved e-STUDIO2008A/2508A/3008A/3508A/4508A/5008A REPLACEMENT OF PC BOARDS/HDD 9 - 5...
- Page 890 • 20ppm: White • 25ppm: Pink • 30ppm: Blue • 35ppm: Yellow • 45ppm: Green Fig. 9-17 • 50ppm: Red e-STUDIO2008A/2508A/3008A/3508A/4508A/5008A © 2015 TOSHIBA TEC CORPORATION All rights reserved REPLACEMENT OF PC BOARDS/HDD 9 - 6...
- Page 891 Disconnect 11 connectors. Slide the switching regulator [2] toward you and take it off. Fig. 9-19 Remove 10 screws and take off the switching regulator [2]. Fig. 9-20 © 2015 TOSHIBA TEC CORPORATION All rights reserved e-STUDIO2008A/2508A/3008A/3508A/4508A/5008A REPLACEMENT OF PC BOARDS/HDD 9 - 7...
- Page 892 Release 3 hooks and turn over the high- voltage transformer [1]. Fig. 9-22 Disconnect 1 connector and remove the high-voltage transformer [1]. Fig. 9-23 e-STUDIO2008A/2508A/3008A/3508A/4508A/5008A © 2015 TOSHIBA TEC CORPORATION All rights reserved REPLACEMENT OF PC BOARDS/HDD 9 - 8...
- Page 893 Remove the HDD unit. P. 9-4 "9.1.3 Hard disk (HDD)" Release 2 latches and remove the main memory [2] from the SYS board [1]. Fig. 9-25 © 2015 TOSHIBA TEC CORPORATION All rights reserved e-STUDIO2008A/2508A/3008A/3508A/4508A/5008A REPLACEMENT OF PC BOARDS/HDD 9 - 9...
- Page 894 EEPROM. • When installing the EEPROM, pay attention to the orientation. Install the EEPROM with its concave portion left. Fig. 9-26 e-STUDIO2008A/2508A/3008A/3508A/4508A/5008A © 2015 TOSHIBA TEC CORPORATION All rights reserved REPLACEMENT OF PC BOARDS/HDD 9 - 10...
- Page 895 P. 9-25 "9.2.8 Precautions and procedure when replacing the SRAM" • To replace the EEPROM, see the following procedures. P. 9-33 "9.2.9 Procedures when replacing EEPROM" © 2015 TOSHIBA TEC CORPORATION All rights reserved e-STUDIO2008A/2508A/3008A/3508A/4508A/5008A REPLACEMENT OF PC BOARDS/HDD 9 - 11...
- Page 896 High possibility of physical failure (A HDD/SSD connector, HDD/SSD displayed as harness or SYS board may be one of the causes.) replacement is “-------”. recommended. e-STUDIO2008A/2508A/3008A/3508A/4508A/5008A © 2015 TOSHIBA TEC CORPORATION All rights reserved REPLACEMENT OF PC BOARDS/HDD 9 - 12...
- Page 897 “Over-range” appears when the digits of the numbers obtained from HDD/SSD exceed the acceptable limit for being displayed on the touch panel. This is not shown as a failure. © 2015 TOSHIBA TEC CORPORATION All rights reserved e-STUDIO2008A/2508A/3008A/3508A/4508A/5008A REPLACEMENT OF PC BOARDS/HDD...
- Page 898 [F] Reset user's setting item and restore data/information [G] Reset "FUNCTION LIST FOR MAINTENANCE" [H] Reset "FUNCTION" list [I] Adjust image quality Setting completed Fig. 9-28 e-STUDIO2008A/2508A/3008A/3508A/4508A/5008A © 2015 TOSHIBA TEC CORPORATION All rights reserved REPLACEMENT OF PC BOARDS/HDD 9 - 14...
- Page 899 Explain the procedure to the user (machine administrator) and ask him/her to enter his/her password. Press the [LIST/REPORT] - [LIST]. Press the [FUNCTION]. The “FUNCTION” list is printed out. © 2015 TOSHIBA TEC CORPORATION All rights reserved e-STUDIO2008A/2508A/3008A/3508A/4508A/5008A REPLACEMENT OF PC BOARDS/HDD 9 - 15...
- Page 900 Confirm the version displayed on the LCD, and then press the [OK] button. (11) Initialization of NIC information (08-9083). (12) Turn the power OFF. e-STUDIO2008A/2508A/3008A/3508A/4508A/5008A © 2015 TOSHIBA TEC CORPORATION All rights reserved REPLACEMENT OF PC BOARDS/HDD 9 - 16...
- Page 901 Compare the lists which were printed before and after the formatting to check the setting items having the different setting values. Set the value which was set before the formatting. Turn the power OFF. © 2015 TOSHIBA TEC CORPORATION All rights reserved e-STUDIO2008A/2508A/3008A/3508A/4508A/5008A REPLACEMENT OF PC BOARDS/HDD...
- Page 902 Press the [INITIAL SETUP] to set each item. Adjust image quality Perform [FS-05-7165] to carry out "Automatic gamma adjustment <PPC>". P. 6-23 "6.4.1 Automatic gamma adjustment" Turn the power OFF. e-STUDIO2008A/2508A/3008A/3508A/4508A/5008A © 2015 TOSHIBA TEC CORPORATION All rights reserved REPLACEMENT OF PC BOARDS/HDD 9 - 18...
- Page 903 Select the license to be returned, and then press the [REMOVE]. Install the one-time dongle, which you used for uploading the selected license, in the equipment, and then press the [OK]. © 2015 TOSHIBA TEC CORPORATION All rights reserved e-STUDIO2008A/2508A/3008A/3508A/4508A/5008A REPLACEMENT OF PC BOARDS/HDD...
- Page 904 Press the [ADIKey], and then press the [Execute]. Wait until the restoring of the encryption key is completed. "Success" is displayed. Turn the power OFF. e-STUDIO2008A/2508A/3008A/3508A/4508A/5008A © 2015 TOSHIBA TEC CORPORATION All rights reserved REPLACEMENT OF PC BOARDS/HDD 9 - 20...
- Page 905 P. 11-2 "11.2 Firmware Updating with USB Device" [G] Data transfer of characteristic value of scanner Performs FS-05-3203 (Data transfer of characteristic value of scanner). Turn the power OFF. © 2015 TOSHIBA TEC CORPORATION All rights reserved e-STUDIO2008A/2508A/3008A/3508A/4508A/5008A REPLACEMENT OF PC BOARDS/HDD 9 - 21...
- Page 906 If the security mode is changed from High Security to Low Security in the step "[A] Return License", set the value of FS-08-8911 to "3" (High Security). e-STUDIO2008A/2508A/3008A/3508A/4508A/5008A © 2015 TOSHIBA TEC CORPORATION All rights reserved REPLACEMENT OF PC BOARDS/HDD 9 - 22...
- Page 907 P. 9-5 "9.1.4 LGC board" Install the removed LGC board’s EEPROM into the new LGC board’s IC29. Attach a battery to the new LGC board. © 2015 TOSHIBA TEC CORPORATION All rights reserved e-STUDIO2008A/2508A/3008A/3508A/4508A/5008A REPLACEMENT OF PC BOARDS/HDD 9 - 23...
- Page 908 Perform [FS-05-3209] to carry out "Data transfer of characteristic value of scanner / SYS board SLG board". Turn the power OFF. Perform [FS-08-9902] to check the version of the scanner ROM. Turn the power OFF. e-STUDIO2008A/2508A/3008A/3508A/4508A/5008A © 2015 TOSHIBA TEC CORPORATION All rights reserved REPLACEMENT OF PC BOARDS/HDD 9 - 24...
- Page 909 A procedure for replacing the SRAM is shown below. When disposing of the SRAM, perform the items in P. 9-37 "9.3.4 Precautions when disposing of the SRAM". © 2015 TOSHIBA TEC CORPORATION All rights reserved e-STUDIO2008A/2508A/3008A/3508A/4508A/5008A REPLACEMENT OF PC BOARDS/HDD...
- Page 910 Setting completed Fig. 9-31 Notes: "[G], [H] and [I] Backup ADI key" is required only for the equipment in which the ADI-HDD has been installed. e-STUDIO2008A/2508A/3008A/3508A/4508A/5008A © 2015 TOSHIBA TEC CORPORATION All rights reserved REPLACEMENT OF PC BOARDS/HDD 9 - 26...
- Page 911 If there are any other licenses to be returned, repeat from step (2). If there is no more licenses to be returned, press the [CLOSE], and then turn the power OFF. © 2015 TOSHIBA TEC CORPORATION All rights reserved e-STUDIO2008A/2508A/3008A/3508A/4508A/5008A...
- Page 912 When the restoration is completed successfully, do not perform "[F] Clear SRAM update error flags" or later procedures. End this procedure here and finish replacing the SRAM. (10) Reinstall the GD-1370 Fax Board if used. e-STUDIO2008A/2508A/3008A/3508A/4508A/5008A © 2015 TOSHIBA TEC CORPORATION All rights reserved REPLACEMENT OF PC BOARDS/HDD 9 - 28...
- Page 913 (5) Restart the equipment after the backup is completed. If you want to perform the backup of the license, do not restart the equipment but perform from (3) in "[I] Backup license". Turn the power OFF. © 2015 TOSHIBA TEC CORPORATION All rights reserved e-STUDIO2008A/2508A/3008A/3508A/4508A/5008A REPLACEMENT OF PC BOARDS/HDD...
- Page 914 Key in the serial number on the label attached to the rear cover of the equipment, and then press the [OK]. Turn the power off. e-STUDIO2008A/2508A/3008A/3508A/4508A/5008A © 2015 TOSHIBA TEC CORPORATION All rights reserved REPLACEMENT OF PC BOARDS/HDD 9 - 30...
- Page 915 Performs FS-05-3203 (Data transfer of characteristic value of scanner). Performs FS-05-7165 (Automatic gamma adjustment” <PPC>). P. 6-23 "6.4.1 Automatic gamma adjustment" Turn the power OFF. © 2015 TOSHIBA TEC CORPORATION All rights reserved e-STUDIO2008A/2508A/3008A/3508A/4508A/5008A REPLACEMENT OF PC BOARDS/HDD 9 - 31...
- Page 916 [O] Set date and time Set the date and time according to these buttons. [USER FUNCTIONS] [ADMIN] [GENERAL] [CLOCK] [DATE/TIME] e-STUDIO2008A/2508A/3008A/3508A/4508A/5008A © 2015 TOSHIBA TEC CORPORATION All rights reserved REPLACEMENT OF PC BOARDS/HDD 9 - 32...
- Page 917 Confirm that the main power switch is turned OFF. Replace the EEPROM. Perform [FS-08-4581] to copy the data in SRAM to EEPROM. Turn the power OFF. © 2015 TOSHIBA TEC CORPORATION All rights reserved e-STUDIO2008A/2508A/3008A/3508A/4508A/5008A REPLACEMENT OF PC BOARDS/HDD 9 - 33...
- Page 918 * It is recommended to keep this list for future reinstallation such as the replacement of the SYS board. Keep pressing the [ON/OFF] button until you hear a sound to shut down the equipment. e-STUDIO2008A/2508A/3008A/3508A/4508A/5008A © 2015 TOSHIBA TEC CORPORATION All rights reserved REPLACEMENT OF PC BOARDS/HDD 9 - 34...
- Page 919 The Remove screen is displayed. Then press the [YES]. If this screen is not displayed, check that the one-time dongle is installed in the equipment properly. © 2015 TOSHIBA TEC CORPORATION All rights reserved e-STUDIO2008A/2508A/3008A/3508A/4508A/5008A REPLACEMENT OF PC BOARDS/HDD 9 - 35...
- Page 920 If there are any other licenses to be installed, repeat from step (9). If there are no other licenses to be installed, press the [CLOSE], and then turn the power OFF. e-STUDIO2008A/2508A/3008A/3508A/4508A/5008A © 2015 TOSHIBA TEC CORPORATION All rights reserved REPLACEMENT OF PC BOARDS/HDD 9 - 36...
- Page 921 When disposing of the SRAM, perform HS-73 Erase SRAM Securely (SRAM securely erasing) for security reasons. Notes: If these codes are performed, the equipment cannot be started up. © 2015 TOSHIBA TEC CORPORATION All rights reserved e-STUDIO2008A/2508A/3008A/3508A/4508A/5008A REPLACEMENT OF PC BOARDS/HDD 9 - 37...
- Page 922 © 2015 TOSHIBA TEC CORPORATION All rights reserved REPLACEMENT OF PC BOARDS/HDD 9 - 38...
- Page 923 3. If Order Failure Occurs If some problems occur and the order cannot be placed after registering an order as a job, refer to the standard countermeasure for the FAX/E-mail transmission failure. © 2015 TOSHIBA TEC CORPORATION All rights reserved e-STUDIO2008A/2508A/3008A/3508A/4508A/5008A REMOTE SERVICE...
- Page 924 *2 Even when “FAX” is selected, the order is not placed without entering the FAX number. *3 Even when “MAIL” is selected, the order is not placed without entering the E-mail address. e-STUDIO2008A/2508A/3008A/3508A/4508A/5008A © 2015 TOSHIBA TEC CORPORATION All rights reserved REMOTE SERVICE 10 - 2...
- Page 925 1. Enter the Service Mode. P. 5-7 "5.3 Service UI" 2. Select “FAX LIST PRINT MODE” and then press [NEXT]. 3. Select “SUPPLY ORDER LIST” and then press [PRINT]. © 2015 TOSHIBA TEC CORPORATION All rights reserved e-STUDIO2008A/2508A/3008A/3508A/4508A/5008A REMOTE SERVICE 10 - 3...
- Page 926 Press the [PASSWORD] button and the screen is switched to a full keyboard. Then key in the Administrator Password and press the [OK] button. * Confirm the password to the administrator. Fig.10-1 e-STUDIO2008A/2508A/3008A/3508A/4508A/5008A © 2015 TOSHIBA TEC CORPORATION All rights reserved REMOTE SERVICE 10 - 4...
- Page 927 Press the [SERVICE] button in the ADMIN screen. Fig.10-2 The SERVICE screen is displayed. Fig.10-3 Press the [SUPPLY ORDER SETUP] button. © 2015 TOSHIBA TEC CORPORATION All rights reserved e-STUDIO2008A/2508A/3008A/3508A/4508A/5008A REMOTE SERVICE 10 - 5...
- Page 928 Press the [ORDER INFORMATION] button. Fig.10-4 (10) The ORDER INFORMATION screen is displayed. Fig.10-5 e-STUDIO2008A/2508A/3008A/3508A/4508A/5008A © 2015 TOSHIBA TEC CORPORATION All rights reserved REMOTE SERVICE 10 - 6...
- Page 929 (14) Press the buttons of the screen of SUPPLIER to set the required item. [NAME] --- Input the name of supplier. [ADDRESS] --- Input the address of supplier. (15) Press the [OK] button. © 2015 TOSHIBA TEC CORPORATION All rights reserved e-STUDIO2008A/2508A/3008A/3508A/4508A/5008A REMOTE SERVICE 10 - 7...
- Page 930 (16) The SERVICE screen is displayed. Fig.10-7 (17) Press the [SERVICE INFORMATION] button. (18) The CUSTOMER/SERVICE TECHNICIAN screen is displayed. Fig.10-8 e-STUDIO2008A/2508A/3008A/3508A/4508A/5008A © 2015 TOSHIBA TEC CORPORATION All rights reserved REMOTE SERVICE 10 - 8...
- Page 931 (20) Press the [OK] button to register and complete the order information setting. (21) The SERVICE screen is returned. Fig.10-9 (22) Press the [SUPPLY ORDER SETUP] button. © 2015 TOSHIBA TEC CORPORATION All rights reserved e-STUDIO2008A/2508A/3008A/3508A/4508A/5008A REMOTE SERVICE 10 - 9...
- Page 932 (23) Press the [TONER ORDERING] button. Fig.10-10 (24) The TONER ORDERING screen is displayed. Fig.10-11 (25) Select the part to be ordered. (Press the [TONER] button.) e-STUDIO2008A/2508A/3008A/3508A/4508A/5008A © 2015 TOSHIBA TEC CORPORATION All rights reserved REMOTE SERVICE 10 - 10...
- Page 933 (29) Press the [USER FUNCTION] button to be switched from the ADMIN screen on touch panel and returned to the BASIC screen, so that the setting of Auto Supply Order is finished. © 2015 TOSHIBA TEC CORPORATION All rights reserved e-STUDIO2008A/2508A/3008A/3508A/4508A/5008A...
-
Page 934: Table Of Contents
9763 Maximum 192 letters [E-MAIL] Remarks 9766 Maximum 128 letters [DESCRIPTION] TONER 9776 Maximum 20 digits [PART NUMBER] TONER 9778 1-99 [CONDITION] TONER 9777 1-99 [QUANTITY] e-STUDIO2008A/2508A/3008A/3508A/4508A/5008A © 2015 TOSHIBA TEC CORPORATION All rights reserved REMOTE SERVICE 10 - 12... - Page 935 BLACK REMAINING QUANTITY (%) : 0000062 Fig.10-13 DESCRIPTION AREA: Remarks DEVICE DESCRIPTION: Model name SERIAL NUMBER: Serial number DEVICE FAX NUMBER: Fax number DEVICE E-MAIL ADDRESS: E-mail address © 2015 TOSHIBA TEC CORPORATION All rights reserved e-STUDIO2008A/2508A/3008A/3508A/4508A/5008A REMOTE SERVICE 10 - 13...
- Page 936 *2. “FullColor:0” and “TwinColor:0” do not change. The value for “Black:” is the counter value. *3. “TwinColor:0” does not change. The values for “FullColor:” and “Black:” are the counter values. e-STUDIO2008A/2508A/3008A/3508A/4508A/5008A © 2015 TOSHIBA TEC CORPORATION All rights reserved REMOTE SERVICE 10 - 14...
- Page 937 SERVICE TECHNICIAN E-MAIL: Service technician E-mail address SUPPLIER NAME: Supplier name SUPPLIER ADDRESS: Supplier address PART NUMBER: Order part number QUANTITY: Order quantity TONER CARTRIDGE: Toner cartridge © 2015 TOSHIBA TEC CORPORATION All rights reserved e-STUDIO2008A/2508A/3008A/3508A/4508A/5008A REMOTE SERVICE 10 - 15...
- Page 938 DEVICE E-MAIL ADDRESS: E-mail address PRINT COUNTER: Print count SCAN COUNTER: Scan count TOTAL: Total BLACK: Black FULL COLOR: Full color TONER INFORMATION Black remaining quantity e-STUDIO2008A/2508A/3008A/3508A/4508A/5008A © 2015 TOSHIBA TEC CORPORATION All rights reserved REMOTE SERVICE 10 - 16...
- Page 939 PM driving count has reached to its setting value. • Toner near-empty notification If this function is effective, it notifies each counter information and toner cartridge information when toner near-empty occurs. © 2015 TOSHIBA TEC CORPORATION All rights reserved e-STUDIO2008A/2508A/3008A/3508A/4508A/5008A REMOTE SERVICE 10 - 17...
- Page 940 Press the [USER FUNCTIONS] button and select the [ADMIN] tab. Then enter the password and press the [OK] button. • Confirm the password to the administrator. Fig.10-16 e-STUDIO2008A/2508A/3008A/3508A/4508A/5008A © 2015 TOSHIBA TEC CORPORATION All rights reserved REMOTE SERVICE 10 - 18...
- Page 941 Press the [SERVICE] button. Fig.10-17 Press the [SERVICE NOTIFICATION] button. Fig.10-18 © 2015 TOSHIBA TEC CORPORATION All rights reserved e-STUDIO2008A/2508A/3008A/3508A/4508A/5008A REMOTE SERVICE 10 - 19...
- Page 942 When pressing the [E-MAIL] button, the screen is switched to a full keyboard. Then enter the E-mail addresses and press the [OK] button. (Maximum 3 addresses can be set.) Fig.10-20 e-STUDIO2008A/2508A/3008A/3508A/4508A/5008A © 2015 TOSHIBA TEC CORPORATION All rights reserved REMOTE SERVICE 10 - 20...
- Page 943 • Press the [FAX NUMBER] button, key in the FAX number and then press the [OK] button. Fig.10-21 © 2015 TOSHIBA TEC CORPORATION All rights reserved e-STUDIO2008A/2508A/3008A/3508A/4508A/5008A REMOTE SERVICE 10 - 21...
- Page 944 Pressing the [DATE] button sets up to 2 dates on which you wand to send data. * This is not affected by the specified day of the week. e-STUDIO2008A/2508A/3008A/3508A/4508A/5008A © 2015 TOSHIBA TEC CORPORATION All rights reserved REMOTE SERVICE 10 - 22...
- Page 945 Fig.10-23 Key in the date (acceptable values: 0-31) in “Notify Date 1” or “Notify Date 2” and press the [OK] button. © 2015 TOSHIBA TEC CORPORATION All rights reserved e-STUDIO2008A/2508A/3008A/3508A/4508A/5008A REMOTE SERVICE 10 - 23...
- Page 946 Total counter transmission interval setting 9606 00:00-23:59 (Hour/Hour/Minute/Minute) Service Call Transmit setting 9605 0: OFF (Invalid) 1: ON (Valid) PM Counter Transmit setting 9797 0: OFF (Invalid) 1: ON (Valid) e-STUDIO2008A/2508A/3008A/3508A/4508A/5008A © 2015 TOSHIBA TEC CORPORATION All rights reserved REMOTE SERVICE 10 - 24...
-
Page 947: Supplier
Net Scan 00000000 00000000 Black ------------------------------------------ Copy Scan 00000000 00000000 FAX Scan 00000000 00000000 Net Scan 00000000 00000000 <FAX Counter> Transmit 00000000 00000000 Receive 00000000 00000000 Fig.10-25 © 2015 TOSHIBA TEC CORPORATION All rights reserved e-STUDIO2008A/2508A/3008A/3508A/4508A/5008A REMOTE SERVICE 10 - 25... - Page 948 PM count present value / PM driving count present value [Other parts] History of error *1 The latest 20 errors are displayed. Toner remaining quantity (Black) e-STUDIO2008A/2508A/3008A/3508A/4508A/5008A © 2015 TOSHIBA TEC CORPORATION All rights reserved REMOTE SERVICE 10 - 26...
-
Page 949: Supplier E-Mail
: 0987654321 SERVICE TECHNICIAN E-MAIL : svc@toshibatec.co.jp SUPPLIER NAME : SUPPLIER_NAME SUPPLIER ADDRESS : SUPPLIER_ADDRESS SUPPLIER FAX NUMBER : 5544332211 SUPPLIER E-MAIL : s upplier_emailaddress@ccccc.xxx Fig.10-27 © 2015 TOSHIBA TEC CORPORATION All rights reserved e-STUDIO2008A/2508A/3008A/3508A/4508A/5008A REMOTE SERVICE 10 - 27... - Page 950 Number of output pages in the Printer Function (BLACK) Number of output pages at the List Print Mode (BLACK) Number of output pages in the FAX Function (BLACK) e-STUDIO2008A/2508A/3008A/3508A/4508A/5008A © 2015 TOSHIBA TEC CORPORATION All rights reserved REMOTE SERVICE 10 - 28...
- Page 951 PM driving count setting value (Other parts) PM driving count present value (Other parts) History of error *2 The latest 20 errors are displayed. Toner remaining quantity (Black) © 2015 TOSHIBA TEC CORPORATION All rights reserved e-STUDIO2008A/2508A/3008A/3508A/4508A/5008A REMOTE SERVICE 10 - 29...
-
Page 952: Customer [E-Mail]
Net Scan 00000000 00000000 Black ------------------------------------------ Copy Scan 00000000 00000000 FAX Scan 00000000 00000000 Net Scan 00000000 00000000 <FAX Counter> Transmit 00000000 00000000 Receive 00000000 00000000 Fig.10-29 e-STUDIO2008A/2508A/3008A/3508A/4508A/5008A © 2015 TOSHIBA TEC CORPORATION All rights reserved REMOTE SERVICE 10 - 30... -
Page 953: Supplier
Number of scanning pages in the FAX Function (BLACK) Number of scanning pages in the Network Scanning Function (BLACK) Number of transmitted pages in the FAX Function (BLACK) © 2015 TOSHIBA TEC CORPORATION All rights reserved e-STUDIO2008A/2508A/3008A/3508A/4508A/5008A REMOTE SERVICE 10 - 31... - Page 954 Current value for total printed sheets of developer Current value for developer driving time Current value for drum driving time *1. The latest 20 errors are displayed. Toner remaining quantity (Black) e-STUDIO2008A/2508A/3008A/3508A/4508A/5008A © 2015 TOSHIBA TEC CORPORATION All rights reserved REMOTE SERVICE 10 - 32...
-
Page 955: Service Technician Number
: 0987654321 SERVICE TECHNICIAN E-MAIL : svc@toshibatec.co.jp SUPPLIER NAME : SUPPLIER_NAME SUPPLIER ADDRESS : SUPPLIER_ADDRESS SUPPLIER FAX NUMBER : 5544332211 SUPPLIER E-MAIL : s upplier_emailaddress@ccccc.xxx Fig.10-31 © 2015 TOSHIBA TEC CORPORATION All rights reserved e-STUDIO2008A/2508A/3008A/3508A/4508A/5008A REMOTE SERVICE 10 - 33... - Page 956 (*2) 08/04/12 22:23 F110 00000000 08/04/13 16:44 F110 00000000 08/03/15 22:23 F110 00000000 08/04/13 16:44 F110 00000000 08/02/25 11:12 F110 00000000 08/04/13 16:44 F110 00000000 Fig.10-32 e-STUDIO2008A/2508A/3008A/3508A/4508A/5008A © 2015 TOSHIBA TEC CORPORATION All rights reserved REMOTE SERVICE 10 - 34...
- Page 957 PM count present value [EPU (K)] PM driving count setting value [EPU (K)] PM driving count present value [EPU (K)] PM count setting value [Developer material (K)] © 2015 TOSHIBA TEC CORPORATION All rights reserved e-STUDIO2008A/2508A/3008A/3508A/4508A/5008A REMOTE SERVICE 10 - 35...
- Page 958 Current value for total printed sheets of developer Current value for developer driving time Current value for drum driving time *2 The latest 20 errors are displayed. e-STUDIO2008A/2508A/3008A/3508A/4508A/5008A © 2015 TOSHIBA TEC CORPORATION All rights reserved REMOTE SERVICE 10 - 36...
-
Page 959: Service Technician [Name]
Machine model name Serial number Function: Fixed at “Printer” Severity: Fixed at “Error” Error code Error message: The content of error is displayed. Supplier information Customer information © 2015 TOSHIBA TEC CORPORATION All rights reserved e-STUDIO2008A/2508A/3008A/3508A/4508A/5008A REMOTE SERVICE 10 - 37... -
Page 960: Service Technician
Service technician information History of error *1 The latest 20 errors are displayed. Toner remaining quantity (Black) e-STUDIO2008A/2508A/3008A/3508A/4508A/5008A © 2015 TOSHIBA TEC CORPORATION All rights reserved REMOTE SERVICE 10 - 38... - Page 961 [ON/OFF] button is pressed while simultaneously holding down the [4] and [9] buttons, "Can't fetch Ver." may be displayed on the control panel for some firmwares. A normal power on must be performed. © 2015 TOSHIBA TEC CORPORATION All rights reserved e-STUDIO2008A/2508A/3008A/3508A/4508A/5008A FIRMWARE UPDATING...
- Page 962 SADDLE FIRMWARE firmware (MJ- board * xxx is version. 1110) Hole punch unit Punch control PC PUN6105T.xxx PUNCH FIRMWARE firmware (MJ- board * xxx is version. 6105) e-STUDIO2008A/2508A/3008A/3508A/4508A/5008A © 2015 TOSHIBA TEC CORPORATION All rights reserved FIRMWARE UPDATING 11 - 2...
- Page 963 Model specific folder name 2008A_5008A USB device 2008A_5008A T410SF0Wxxxx.tar TH410MWW.xx TH410SLGWW.xxx T410HD0Wxxxx.tar H616DFWW.xxx H617DFWW.xxx TH410FWW.xx FIN1042T.xxx FIN1109T.xxx FIN1110T.xxx PUN6105T.xxx T410NIC0Wxxxx.tar Signature_N_2008A.sig Fig.11-1 © 2015 TOSHIBA TEC CORPORATION All rights reserved e-STUDIO2008A/2508A/3008A/3508A/4508A/5008A FIRMWARE UPDATING 11 - 3...
- Page 964 However, if the model specific folder for the same model as that of the data file stored in the root directory already exists, this will have priority. e-STUDIO2008A/2508A/3008A/3508A/4508A/5008A © 2015 TOSHIBA TEC CORPORATION All rights reserved FIRMWARE UPDATING 11 - 4...
- Page 965 Store the data file for updating in the model specific folder. Press the [ON/OFF] button to shut down the equipment. Connect the USB device [1] to the USB port [2] on the right upper cover. Fig.11-2 © 2015 TOSHIBA TEC CORPORATION All rights reserved e-STUDIO2008A/2508A/3008A/3508A/4508A/5008A FIRMWARE UPDATING 11 - 5...
- Page 966 The screen for selecting items to be updated is displayed after approx. 3 minutes. On this screen, the current firmware version of this equipment and the firmware version of data to be updated are displayed. Fig.11-4 e-STUDIO2008A/2508A/3008A/3508A/4508A/5008A © 2015 TOSHIBA TEC CORPORATION All rights reserved FIRMWARE UPDATING 11 - 6...
- Page 967 Data files are not stored in the USB device. Patch and Normal package in one folder When both the system and patch of USB Storage update packages are in the USB device © 2015 TOSHIBA TEC CORPORATION All rights reserved e-STUDIO2008A/2508A/3008A/3508A/4508A/5008A FIRMWARE UPDATING 11 - 7...
- Page 968 FAX FIRMWARE Completed FINISHER FIRMWARE update in progress FINISHER FIRMWARE Completed SADDLE FIRMWARE update in progress SADDLE FIRMWARE Completed PUNCH FIRMWARE update in progress PUNCH FIRMWARE Completed e-STUDIO2008A/2508A/3008A/3508A/4508A/5008A © 2015 TOSHIBA TEC CORPORATION All rights reserved FIRMWARE UPDATING 11 - 8...
- Page 969 “Update successfully completed Restart the MFP” is displayed at the bottom of the LCD screen after the updating is completed properly. Fig.11-5 © 2015 TOSHIBA TEC CORPORATION All rights reserved e-STUDIO2008A/2508A/3008A/3508A/4508A/5008A FIRMWARE UPDATING 11 - 9...
- Page 970 File creation error File decompression error (Out of free disk space on the HDD at file extraction) Partition mount error Hard disk full error Other errors e-STUDIO2008A/2508A/3008A/3508A/4508A/5008A © 2015 TOSHIBA TEC CORPORATION All rights reserved FIRMWARE UPDATING 11 - 10...
- Page 971 (When the download is written) Reception status code abnormality Reception status code abnormality (When the download is finished) (When the download is finished) Other error Other error © 2015 TOSHIBA TEC CORPORATION All rights reserved e-STUDIO2008A/2508A/3008A/3508A/4508A/5008A FIRMWARE UPDATING 11 - 11...
- Page 972 Communication timeout (When the download is requested) (When the download is requested) Time out Communication timeout (When the download is written) (When the download is written) e-STUDIO2008A/2508A/3008A/3508A/4508A/5008A © 2015 TOSHIBA TEC CORPORATION All rights reserved FIRMWARE UPDATING 11 - 12...
- Page 973 After the updating is completed, check each data version in the 08 Setting Mode to confirm that the data were overwritten properly. P. 11-27 "11.6 Confirmation of the updated data" © 2015 TOSHIBA TEC CORPORATION All rights reserved e-STUDIO2008A/2508A/3008A/3508A/4508A/5008A FIRMWARE UPDATING...
- Page 974 USB devices which comply with the following standards regulated by USB-IF (USB Implementers Forum) Class number: 8 (=08h) (Mass-storage class) Sub-class number: 6 (=06h) (SCSI transfer command set) Protocol number: 80 (=50h) (Bulk-Only) e-STUDIO2008A/2508A/3008A/3508A/4508A/5008A © 2015 TOSHIBA TEC CORPORATION All rights reserved FIRMWARE UPDATING 11 - 14...
- Page 975 USB device. However, if the model specific folder for the same model as that of the data file stored in the root directory already exists, this will have priority. © 2015 TOSHIBA TEC CORPORATION All rights reserved e-STUDIO2008A/2508A/3008A/3508A/4508A/5008A FIRMWARE UPDATING...
- Page 976 Data in the USB device are checked and the checking status is displayed on the screen. Enter the password, and then press the [OK] button. (If the password is not set for Service, press the [OK] button without entering anything.) e-STUDIO2008A/2508A/3008A/3508A/4508A/5008A © 2015 TOSHIBA TEC CORPORATION All rights reserved FIRMWARE UPDATING 11 - 16...
- Page 977 The screen for selecting items to be updated is displayed after approx. 3 minutes. On this screen, the current firmware version of this equipment and the firmware version of data to be updated are displayed. Fig.11-9 © 2015 TOSHIBA TEC CORPORATION All rights reserved e-STUDIO2008A/2508A/3008A/3508A/4508A/5008A FIRMWARE UPDATING 11 - 17...
-
Page 978: Remarks [Description]
The follow screen shows the display when selecting "1. SYSTEM FIRMWARE (OS Data)" in the update selection menu. "Update in progress" is displayed on the right side of the selected item, and then "Verifying Signature..." appears. e-STUDIO2008A/2508A/3008A/3508A/4508A/5008A © 2015 TOSHIBA TEC CORPORATION All rights reserved FIRMWARE UPDATING 11 - 18... - Page 979 Fig.11-10 © 2015 TOSHIBA TEC CORPORATION All rights reserved e-STUDIO2008A/2508A/3008A/3508A/4508A/5008A FIRMWARE UPDATING 11 - 19...
- Page 980 “Patch Update Successful Restart the MFP” is displayed at the bottom of the LCD screen after the updating is completed properly. Fig.11-11 e-STUDIO2008A/2508A/3008A/3508A/4508A/5008A © 2015 TOSHIBA TEC CORPORATION All rights reserved FIRMWARE UPDATING 11 - 20...
- Page 981 After the updating is completed, check each data version in the 08 Setting Mode to confirm that the data were overwritten properly. P. 11-27 "11.6 Confirmation of the updated data" © 2015 TOSHIBA TEC CORPORATION All rights reserved e-STUDIO2008A/2508A/3008A/3508A/4508A/5008A FIRMWARE UPDATING...
- Page 982 * When SYSTEM FIRMWARE updating is finished, "Completed" appears on the screen. (10) Shut down the equipment. Turn the power OFF and unplug the power cable. e-STUDIO2008A/2508A/3008A/3508A/4508A/5008A © 2015 TOSHIBA TEC CORPORATION All rights reserved FIRMWARE UPDATING 11 - 22...
- Page 983 * When the recovery succeeds, the indication in the FROM row will change to "OK". P. 5-41 "5.13.3 Functions" Shut down the equipment and then reboot it. Confirm that it starts normally. © 2015 TOSHIBA TEC CORPORATION All rights reserved e-STUDIO2008A/2508A/3008A/3508A/4508A/5008A FIRMWARE UPDATING...
- Page 984 " 11.5 Confirmation of the updated data " Replace SYS board. Is system firmware version correct? Update USB. " 11.2 Firmware Updating with a USB Storage Device" Update completed e-STUDIO2008A/2508A/3008A/3508A/4508A/5008A © 2015 TOSHIBA TEC CORPORATION All rights reserved FIRMWARE UPDATING 11 - 24...
- Page 985 " Update succeeded? Is system software version correct ? Replace SYS board. Update USB. " 11.2 Firmware Updating with a USB Storage Device” Update completed © 2015 TOSHIBA TEC CORPORATION All rights reserved e-STUDIO2008A/2508A/3008A/3508A/4508A/5008A FIRMWARE UPDATING 11 - 25...
- Page 986 USB update " 11.2 Firmware Updating with " 11.6 Confirmation of the updated data " a USB Storage Device” Is ROM version correct ? Update completed e-STUDIO2008A/2508A/3008A/3508A/4508A/5008A © 2015 TOSHIBA TEC CORPORATION All rights reserved FIRMWARE UPDATING 11 - 26...
- Page 987 Updating RADF firmware 08-9903 RADF firmware version Updating Finisher firmware 08-9904 Finisher firmware version Saddle stitcher firmware 08-9944 Punch firmware version Updating FAX firmware 08-9905 FAX firmware version © 2015 TOSHIBA TEC CORPORATION All rights reserved e-STUDIO2008A/2508A/3008A/3508A/4508A/5008A FIRMWARE UPDATING 11 - 27...
- Page 988 © 2015 TOSHIBA TEC CORPORATION All rights reserved FIRMWARE UPDATING 11 - 28...
- Page 989 Restore data to equipment which has the same options as when the data are backed up. • Delete the backed up data in the USB device after the data cloning. © 2015 TOSHIBA TEC CORPORATION All rights reserved e-STUDIO2008A/2508A/3008A/3508A/4508A/5008A BACKUP FUNCTION...
- Page 990 Enter a password (max. 15 characters) set for the backup data. "Backup Successfully done Restore the MFP" is displayed on the LCD screen when the backup has been properly completed. (10) Shut down the equipment. e-STUDIO2008A/2508A/3008A/3508A/4508A/5008A © 2015 TOSHIBA TEC CORPORATION All rights reserved BACKUP FUNCTION 12 - 2...
- Page 991 2. Press the [ADIKey] and then [Execute]. 3. Wait until the restoring of the encryption key is completed. "Success" is displayed. 4. Then turn the power OFF. © 2015 TOSHIBA TEC CORPORATION All rights reserved e-STUDIO2008A/2508A/3008A/3508A/4508A/5008A BACKUP FUNCTION 12 - 3...
- Page 992 Backup file has not existed in the USB device. Invalid password An incorrect password has been entered. Decryption Failed Decoding of the backup file has been failed. e-STUDIO2008A/2508A/3008A/3508A/4508A/5008A © 2015 TOSHIBA TEC CORPORATION All rights reserved BACKUP FUNCTION 12 - 4...
- Page 993 An incorrect MFP Serial No. has been entered. MFP Serial Number Not Set Acquisition of the MFP Serial No. has been failed. Backup File Corrupted A backup file has been damaged. © 2015 TOSHIBA TEC CORPORATION All rights reserved e-STUDIO2008A/2508A/3008A/3508A/4508A/5008A BACKUP FUNCTION 12 - 5...
- Page 994 Since the energy saver mode cannot be set using the control panel, set it in TopAccess. However, the setting of “Sleep/Auto Shut Off” cannot be changed in TopAccess and “Disable” is displayed. e-STUDIO2008A/2508A/3008A/3508A/4508A/5008A © 2015 TOSHIBA TEC CORPORATION All rights reserved BACKUP FUNCTION 12 - 6...
- Page 995 [E] Reset user's setting item and restore data/information [F] Reset "FUNCTION LIST FOR MAINTENANCE" [G] Reset "FUNCTION" list [H] Check actuation of data encryption function setting Setting completed Fig.12-4 © 2015 TOSHIBA TEC CORPORATION All rights reserved e-STUDIO2008A/2508A/3008A/3508A/4508A/5008A BACKUP FUNCTION 12 - 7...
- Page 996 [B] Print out “FUNCTION LIST FOR MAINTENANCE” Select "FAX LIST PRINT MODE" and then press [NEXT]. Select "Function list for Maintenance" and then press [PRINT]. e-STUDIO2008A/2508A/3008A/3508A/4508A/5008A © 2015 TOSHIBA TEC CORPORATION All rights reserved BACKUP FUNCTION 12 - 8...
- Page 997 • When wireless LAN is used, perform the setting again on the LCD panel. (only when security with a certificate is used) CA certificate User certificate © 2015 TOSHIBA TEC CORPORATION All rights reserved e-STUDIO2008A/2508A/3008A/3508A/4508A/5008A BACKUP FUNCTION 12 - 9...
- Page 998 Press the [COUNTER] button on the control panel. If a key-shaped icon is displayed at the top right of the screen, the data encryption function is in operation. Fig.12-5 e-STUDIO2008A/2508A/3008A/3508A/4508A/5008A © 2015 TOSHIBA TEC CORPORATION All rights reserved BACKUP FUNCTION 12 - 10...
- Page 999 Set the data encryption function disabled following the procedure shown in P. 12-11 "12.2.4 Procedure for disabling data encryption function". Then perform the code HS-73->Erase HDD Securely (HDD securely erasing) to completely erase the data in the HDD. © 2015 TOSHIBA TEC CORPORATION All rights reserved e-STUDIO2008A/2508A/3008A/3508A/4508A/5008A BACKUP FUNCTION...
- Page 1000 ROM (SYS V4.0) are displayed on the top right of the counter menu, this means the mode is operating normally. Reset the user data backed up in advance. e-STUDIO2008A/2508A/3008A/3508A/4508A/5008A © 2015 TOSHIBA TEC CORPORATION All rights reserved BACKUP FUNCTION 12 - 12...
- Page 1001 High Security Mode. Be sure to back up user data before having it do so. • After the equipment enters the High Security Mode, ask the administrator for the equipment to select [FULL] and perform the Integrity check manually. © 2015 TOSHIBA TEC CORPORATION All rights reserved e-STUDIO2008A/2508A/3008A/3508A/4508A/5008A BACKUP FUNCTION 12 - 13...