D-Link DGE-560SX User Manual
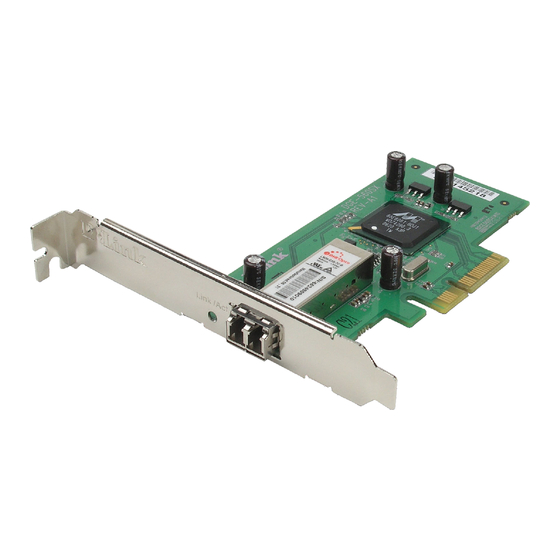
Gigabit fiber (lc) pci express server adapter
Hide thumbs
Also See for DGE-560SX:
- User manual (18 pages) ,
- Quick installation manual (4 pages) ,
- Quick start manual (4 pages)

Related Manuals for D-Link DGE-560SX


Summary of Contents for D-Link DGE-560SX
- Page 1 ® D-Link NetXtreme DGE-560SX User Guide Gigabit Fiber (LC) PCI Express Server Adapter...
-
Page 2: Table Of Contents
D-Link DGE-560SX User Guide Index Chapter 1: Introduction ....................5 1.1 Functionality and Features: ................5 1.1.1 Features ....................5 1.1.2 Supported Operating Environments ............. 6 1.2 Teaming ......................7 1.2.1 Overview ....................7 1.2.2 Load Balancing and Fault Tolerance ............7 1.3 Virtual LANs .................... - Page 3 D-Link DGE-560SX User Guide 3.5.3 Installing TG3 Driver Software ............39 3.5.4 Network Installations ................41 3.5.5 Patching PCI Files (Optional) ............... 41 3.5.6 Unloading/Removing the TG3 Driver ..........41 3.5.7 Driver Messages .................. 42 3.5.8 Teaming with Channel Bonding ............43 3.6 NetWare Driver Software ................
- Page 4 D-Link DGE-560SX User Guide 6.2 System Requirements .................. 127 6.3 Running D-Link NetXtreme User Diagnostics ..........128 6.4 Diagnostic Test Descriptions ................ 131 6.5 Diagnostic Test Messages ................136 Chapter 7: Troubleshooting ..................139 7.1 Hardware Diagnostics .................. 140 7.1.1 BACS Diagnostic Tests Failures ............140 7.1.2 BACS Network Test Failures...............
-
Page 5: Chapter 1: Introduction
VLANs. See Configuring Teaming for instructions on configuring teaming and creating VLANs on Windows and NetWare operating systems. 1.1.1 Features The following is a list of the D-Link NetXtreme Gigabit Ethernet adapter features for all supported operating systems: ... -
Page 6: Supported Operating Environments
BACS is used on Windows operating systems to configure teaming and to add VLANs. See Using Broadcom Advanced Control Suite for detailed information and instructions. 1.1.2 Supported Operating Environments The D-Link NetXtreme Gigabit Ethernet adapter has software support for the following operating systems:... -
Page 7: Teaming
D-Link DGE-560SX User Guide ® ® Microsoft Windows (32-bit and 64-bit extended) ® Linux (32-bit and 64-bit extended) ® MS-DOS ® NetWare 1.2 Teaming 1.2.1 Overview Adapter teaming allows you to group network adapters together to function as a team. The benefits of teaming include allowing membership to VLANs, providing load balancing between adapters, and offering fault tolerance. - Page 8 D-Link DGE-560SX User Guide Each team can consist of up to eight adapters, with one adapter used as a standby for Smart Load Balancing and Failover (SLB) or SLB (Auto-Fallback Disabled) team types. If traffic is not identified on any of the adapter team member connections due to failure of the adapter, cable, or switch, the load will be distributed to the remaining team members with an active connection.
- Page 9 D-Link DGE-560SX User Guide minimizes the downtime due to spanning tree loop determination when failing over. LiveLink mitigates such issues. IPX balances only on the transmit side of the team; other protocols are limited to the primary adapter. If a team member is linked at 1000 Mbit/s and another team member is linked at 100 Mbit/s, most of the traffic is handled by the 1000 Mbit/s team member.
- Page 10 D-Link DGE-560SX User Guide The SLB (Auto-Fallback Disable) type of team is identical to the Smart Load Balancing and Failover type of team, with the following exception—when the standby member is active, if a primary member comes back on line, the team continues using the standby member, rather than switching back to the primary member.
- Page 11 D-Link DGE-560SX User Guide 2003 Windows Server 2008 NetWare 5.1/6.5 Red Hat Linux 3 and 4 Legend: Y = yes N = no N/S = not supported Drivers for third-party network adapters must be NetWare Event Service Layer (NESL) compliant for NetWare to be fault-tolerant and load-balanced in a multivendor team.
-
Page 12: Virtual Lans
D-Link DGE-560SX User Guide member. Later, if that team member begins to detect a response from a probe target, this indicates that the link has been restored, and the teaming software automatically resumes passing traffic through that team member. LiveLink works only with TCP/IP. - Page 13 D-Link DGE-560SX User Guide Figure 1: Example of Servers Supporting Multiple VLANs with Tagging Figure 1 shows an example network that uses VLANs. In this example network, the physical LAN consists of a switch, two servers, and five clients. The LAN is logically organized into three different VLANs, each representing a different IP subnet.
-
Page 14: Adding Vlans To Teams
D-Link DGE-560SX User Guide and #2 belong to VLAN #2 only, and are logically in the same IP subnet as the Main Server and PC #5. The switch port connected to this segment has tagging turned off. PC #3 A member of VLAN #1, PC #3 can communicate only with the Main Server and PC #5. - Page 15 Windows Server 2003, and Windows Server 2008 SNMP service. The extensible-agent allows the SNMP manager software to actively monitor the configurations of the D-Link NetXtreme adapter. It is intended to supplement the information already provided by the standard SNMP Management Network Interface information.
- Page 16 D-Link DGE-560SX User Guide The extensible-agent provides in-depth information about a D-Link NetXtreme adapter such MAC address Bound IP address IP subnet mask Physical link status Adapter state Line speed Duplex mode ...
-
Page 17: Chapter 2: Installing The Hardware
D-Link DGE-560SX User Guide Chapter 2: Installing the Hardware 2.1 System Requirements Before you install the D-Link NetXtreme Gigabit Ethernet adapter, verify that your system meets the requirements listed for your operating system: 2.1.1 Hardware Requirements Pentium-based system that meets operating system requirements ... -
Page 18: Safety Precautions
D-Link DGE-560SX User Guide testing has been done on some of these machines. The Makefile may have to be modified to include architecture-specific compile switches, and some minor changes in the source files may also be required. On these machines, patching the driver into the kernel is recommended. -
Page 19: Installing The Adapter
Never attempt to install any damaged adapter. 2.4 Installing the Adapter The following instructions apply to installing the D-Link NetXtreme Gigabit Ethernet adapter (add-in NIC) in most servers. Refer to the manuals that were supplied with your server for details about performing these tasks on your particular server. -
Page 20: Chapter 3: Installing The Driver Software
D-Link DGE-560SX User Guide Chapter 3: Installing the Driver Software 3.1 Creating a Driver Disk Create driver disks using the Broadcom MakeDisk utility (Setup.exe file). This utility runs under Windows and allows you to create disks with the following drivers: ... -
Page 21: Overview
D-Link DGE-560SX User Guide 3.2.1 Overview D-Link NetXtreme Gigabit Ethernet adapters support Preboot Execution Environment (PXE), Remote Program Load (RPL), and Bootstrap Protocol (BootP). Multi-Boot Agent (MBA) is a software module that allows your networked system to boot with the images provided by remote systems across the network. -
Page 22: Setting Up Mba In A Client Environment
D-Link DGE-560SX User Guide 3.2.2 Setting Up MBA in a Client Environment Use the following procedure for add-in NICs. For LOMs, refer to your computer's system guide. Setting up MBA in a client environment involves the following steps: 1. Enabling the MBA driver. - Page 23 NOTE: You can use the MBA Configuration Menu to configure the MBA driver one adapter at a time as described below, or you can use the D-Link NetXtreme User Diagnostics MS-DOS based application to simultaneously configure the MBA driver for multiple adapters.
-
Page 24: Setting Up The Bios
D-Link DGE-560SX User Guide NOTE: The message prompting you to press CTRL+S is displayed once for each D-Link NetXtreme Gigabit Ethernet adapter you have in your system. The messages are displayed in the same order as the assigned adapter device number. -
Page 25: Setting Up Mba In A Server Environment
The current version of Windows Server 2003 does not include the latest released network driver for the D-Link NetXtreme Gigabit Ethernet adapter. You can create a driver disk for the adapter using files obtained from the support website. To perform remote installations with PXE, include a network driver for the NetXtreme Gigabit Ethernet adapter as a part of the client installation image on the server. -
Page 26: Ndis2 Driver Software
D-Link DGE-560SX User Guide To boot in DOS mode and connect to a network for the DOS environment, download the Intel PXE PDK from the Intel website. This PXE PDK comes with a TFTP/ProxyDHCP/Boot server. The PXE PDK can be downloaded from Intel at http://downloadcenter.intel.com/default.aspx. -
Page 27: Modifying The Startup Disk
D-Link DGE-560SX User Guide To create a startup disk 1. Create a folder called NCADMIN in the root of the C drive. 2. Copy the NCADMIN.CN_, NCADMIN.EX_, and NCADMIN.HL_ files from the I386 folder on the Windows NT Server 4.0 CD-ROM. - Page 28 D-Link DGE-560SX User Guide DefaultGateway=0 SubNetMask=255 0 0 0 IPAddress=192 168 0 1 DisableDHCP=0 DriverName=TCPIP$ BINDINGS=MS$NE2CLONE LANABASE=0 Example: Protocol.ini file for IPX [network.setup] version=0x3110 netcard=ms$ne2clone,1,MS$NE2CLONE,1 transport=ms$ndishlp,MS$NDISHLP transport=ms$nwlink,MS$NWLINK lana0=ms$ne2clone,1,ms$nwlink lana1=ms$ne2clone,1,ms$ndishlp [MS$NE2CLONE] DriverName=B57$ [protman] DriverName=PROTMAN$ PRIORITY=MS$NDISHLP [MS$NDISHLP] DriverName=ndishlp$ BINDINGS=ms$ne2clone [ms$nwlink] DriverName=nwlink$ FRAME=Ethernet_802.2...
- Page 29 D-Link DGE-560SX User Guide lana1=ms$ne2clone,1,ms$netbeui [MS$NE2CLONE] DriverName=B57$ [protman] DriverName=PROTMAN$ PRIORITY=MS$NDISHLP [MS$NDISHLP] DriverName=ndishlp$ BINDINGS=MS$NE2CLONE [MS$NETBEUI] DriverName=netbeui$ SESSIONS=10 NCBS=12 BINDINGS=MS$NE2CLONE LANABASE=0 2. Edit A:\Net\System.ini. a. Change netcard= to netcard=b57.dos. b. Check for references to C:\NET and change C:\NET to A:\NET if necessary.
- Page 30 D-Link DGE-560SX User Guide [network drivers] netcard=B57.dos transport=ndishlp.sys,*netbeui devdir=A:\NET LoadRMDrivers=yes 3. Copy B57.dos to A:\Net. 4. Create the appropriate Autoexec.bat file in drive A for the chosen protocol as shown below. For TCP/IP path=a:\net a:\net\net initialize a:\net\netbind.com a:\net\umb.com a:\net\tcptsr.exe a:\net\tinyrfc.exe a:\net\nmtsr.exe...
-
Page 31: Installing The Dos Ndis2 Driver Software On The Hard Disk
D-Link DGE-560SX User Guide device=a:\net\ifshlp.sys lastdrive=z 3.3.3 Installing the DOS NDIS2 Driver Software on the Hard Disk To install the DOS NDIS2 Driver Software on the hard disk 1. Verify that the system has Microsoft LAN Manager 2.2 installed, with a protocol such as NetBEUI configured. -
Page 32: Configuring The Ndis2 Driver Software
The NDIS2 driver software can be configured by adding specific optional keywords to the Protocol.ini file. If multiple (or multiport) D-Link NetXtreme Gigabit Ethernet adapters are installed in a system, the NDIS2 driver software loads by default on the adapter/port that has a good link. - Page 33 D-Link DGE-560SX User Guide [B57] DRIVERNAME = B57$ BUSNUM = 3 DEVNUM = 10 [B57_2] DRIVERNAME = B572$ BUSNUM 3 DEVNUM 11 [B57_3] DRIVERNAME = B573$ BUSNUM 3 DEVNUM 12 [B57_4] DRIVERNAME = B574$ BUSNUM 3 DEVNUM 13 The LineSpeed keyword is used to force the speed of the network connection. The LineSpeed keyword requires a decimal number and of either 10, 100, or 1000.
-
Page 34: Using Keywords For The B57.Dos Drivers
D-Link DGE-560SX User Guide BUSNUM = 3 DEVNUM = 10 PORTNUM = 0 LINESPEED = 100 DUPLEX = FULL NODEADDRESS = "001020304050" 3.3.5 Using Keywords for the B57.dos Drivers The Protocol.ini file contains certain keywords that are used by the B57.dos drivers. These keywords are listed below: BusNum. -
Page 35: Odi Driver Software
3. If necessary, reconfigure the driver software after installation. Preinstallation Requirements Verify that the D-Link NetXtreme Gigabit Ethernet adapter driver software has been installed on your system. If it has not, install it (see Installing the Driver Software). Otherwise, you cannot use a D-Link NetXtreme Gigabit Ethernet adapter in the MS-DOS environment. - Page 36 D-Link DGE-560SX User Guide Environment 1. Copy the ODI driver file (B57.com) to the root directory of the hard disk (the B57.com file is on the installation CD). 2. Copy the Lsl.com, Ipxodi.com, and Vlm.com files to the same directory (these files are provided by Novell).
-
Page 37: Configuring Parameters For The B57.Com Driver (In The Net.cfg File)
Do not use them unless you are familiar with PCI device configuration. These two keywords are needed if multiple D-Link NetXtreme Gigabit Ethernet adapters are installed in a system, and each adapter must be loaded in a specific order. -
Page 38: Linux Driver Software
D-Link DGE-560SX User Guide The FUNNUM keyword is used to determine which function/port the driver is to load on when using a multifunction (multiport) adapter. Function number values are limited to 0 and 1, for the first and second ports of the adapter. -
Page 39: Installing Tg3 Driver Software
D-Link DGE-560SX User Guide Source RPM (tg3-version.src.rpm) Supplemental (tg3_sup-version.tar.gz) Compressed tar (tg3-version.tar.gz) Identical source files to build the driver are included in both RPM and TAR source packages. The tar file contains additional utilities such as patches and driver disk images for network installation. -
Page 40: Building The Driver From The Source Tar File
D-Link DGE-560SX User Guide 2.4.x kernels: /lib/modules/kernel_version/kernel/drivers/net/tg3.o 2.4.x kernels with the tg3 driver patched in: /lib/modules/kernel_version/kernel/drivers/addon/tg3/tg3.o 2.6.x kernels: /lib/modules/kernel_version/kernel/drivers/net/tg3.ko 4. Load the driver. modprobe tg3 To configure the network protocol and address, refer to the Linux version-specific documentation. Building the Driver from the Source TAR File 1. -
Page 41: Network Installations
D-Link DGE-560SX User Guide 3.5.4 Network Installations For network installations through NFS, FTP, or HTTP (using a network boot disk or PXE), a driver disk that contains the tg3 driver may be needed. The driver disk images for the most recent Red Hat versions are included. -
Page 42: Driver Messages
D-Link DGE-560SX User Guide Installation To unload the driver, use ifconfig to bring down all ethX interfaces opened by the driver, and then type the following: rmmod tg3 If the driver was installed using rpm, do the following to remove it: version rpm -e tg3-<... -
Page 43: Teaming With Channel Bonding
Make sure that your system meets the hardware and operating system software requirements described in Installing the Hardware. To enable the D-Link NetXtreme adapter to function correctly, you must install the latest Novell NetWare support pack files. The NetWare support pack or patch file(s) needed for the... - Page 44 D-Link DGE-560SX User Guide pack rch&families=2639&version=8130&date_range=&keywords=&s ort_by=&x=25&y=8 NetWare Latest The latest support pack can be found at: support http://download.novell.com/index.jsp?product_id=&search=Sea pack rch&families=2639&version=7486&date_range=&keywords=&s ort_by=&x=17&y=7 NetWare Latest The latest support pack can be found at: support http://download.novell.com/index.jsp?product_id=&search=Sea pack rch&families=2639&version=12127&date_range=&keywords=& sort_by=&x=32&y=4 NOTES: NetWare 5.1/6.0/6.5. If you are installing NetWare 5.1/6.0/6.5 for the first time on a system, the driver is installed during the operating system installation process.
- Page 45 D-Link DGE-560SX User Guide 6. If you inserted the archive disk, press ENTER. If you have the installation CD mounted as a NetWare volume, press F3 and type Volume Name: NetWare\Driver as the source path, where Volume Name is the name of the NetWare volume for the installation CD, and NetWare\Driver is the directory containing the specific files on the installation CD needed for this installation.
- Page 46 D-Link DGE-560SX User Guide set maximum packet receive buffers = 36000 set minimum packet receive buffers = 12000 Installing NetWare Server 6.5 Driver Software NOTE: The following instructions are for installing the NetWare Server 6.5 driver software. For instructions on installing NetWare Server 5.1 or 6.0 driver software, see Installing NetWare Server 5.1/6.0 Driver Software.
- Page 47 D-Link DGE-560SX User Guide When an adapter configuration is saved, the NetWare installation program adds load and bind statements to the Autoexec.ncf file. By accessing this file, you can view and modify properties or add properties for each network adapter.
- Page 48 D-Link DGE-560SX User Guide AUTO 10FD 10HD 100FD 100HD The default setting is AUTO. Note that 1000 Mbit/s speed is auto-detected and cannot be forced. Forced 1000 Mbit/s speed is not needed for copper links. Auto-negotiation is the proper supported configuration under the IEEE specification.
- Page 49 D-Link DGE-560SX User Guide Max = 5000000 (5 seconds) Units are in microseconds. The default value is 200. TxPacketsPer= Enables allowing an interrupt to occur after a specific amount of packets is transmitted. Min = 0 (disabled) Max = 100 The default value is 20.
- Page 50 D-Link DGE-560SX User Guide OFF (default) RxFlow= This keyword allows enabling/disabling of receive flow control. OFF (default) PDriver= Enables the driver to operate in persistent driver mode. Use only if the adapter is placed in a hot-plug slot and only if you must swap with an adapter that is exactly the same.
- Page 51 D-Link DGE-560SX User Guide SLOT=n Jumbo= Enables jumbo frame support. When enabled, jumbo packets of up to 9000 bytes are supported. Jumbo=1536–9100 The default setting is no jumbo packets. Notes: Jumbo frames are supported only on NetWare 6.0 and later. Also, the first frame loaded must be ETHERNET_II.
- Page 52 D-Link DGE-560SX User Guide Disables the interrupt driven mode. When set to Poll=1, the driver does not use interrupts, but is polled by the NetWare operating system. This is a common feature supported in NetWare. The poll mode may increase driver performance in some environments.
- Page 53 D-Link DGE-560SX User Guide SET Daylight Savings Time Offset = 1:00:00 SET Start Of Daylight Savings Time = (MARCH SUNDAY LAST 2:00:00 AM) SET End Of Daylight Savings Time = (OCTOBER SUNDAY LAST 2:00:00 AM) SET Time Zone = TPST8TPDT # Note: The Time zone information mentioned above # should always precede the SERVER name.
-
Page 54: Broadcom Advanced Server Program Driver Software (Netware)
D-Link DGE-560SX User Guide # LOAD B57 SLOT=2 FRAME=Ethernet_802.2 NAME=B57_1_E82 # BIND IPX B57_1_E82 NET=FAFD3D25 # LOAD B57 SLOT=2 FRAME=Ethernet_802.3 NAME=B57_1_E83 # BIND IPX B57_1_E83 NET=5A2D8D6D # LOAD B57 SLOT=2 FRAME=Ethernet_SNAP NAME=B57_1_ESP # BIND IPX B57_1_ESP NET=477A35BD # LOAD B57 SLOT=2 FRAME=Ethernet_II NAME=B57_1_EII # BIND IPX B57_1_EII NET=C3C8F2E4 # BIND IP B57_1_EII ADDR=172.16.1.1 MASK=ff.ff.ff.0... - Page 55 D-Link DGE-560SX User Guide Balance Modes and Limitations Smart Load-balance (SLB) is a protocol-specific scheme and the level of support for IP, IPX, and other protocols are listed below. Table 1: Balance Modes and Limitations Protocol Load Balancing Support Fault Tolerance Support...
- Page 56 D-Link DGE-560SX User Guide aggregation. This mode is also protocol-independent and all traffic should be load-balanced and fault-tolerant. NESL Compliance For optimum fault tolerance and recovery operations, the BASP.LAN driver relies on the adapter drivers to generate NetWare Event Service Layer (NESL) events during link changes and other failure events.
- Page 57 D-Link DGE-560SX User Guide LOAD BASP.LAN FRAME=ETHERNET_II NAME=BASP_1_EII VSLOT=1 2. Load the network drivers for the adapters that are to be on the team. The frame types loaded should be the same for all adapters on the team and the same as those loaded for BASP.LAN in step 1.
- Page 58 D-Link DGE-560SX User Guide NOTE: If there are multiple frame types loaded on the virtual and the physical adapters, it is necessary to bind only one frame type on the virtual adapter to the same frame type on the physical adapter. The other frame types are automatically bound.
-
Page 59: Configuring Teaming
D-Link DGE-560SX User Guide NOTE: The recommended sequence is to load BASP.LAN before the network drivers as outlined above. This allows BASP.LAN to determine the initial link state of the bound adapters without delay. Unloading BASP To unload Broadcom Advanced Server Program, unload the adapter driver and the BASP drivers. -
Page 60: Loading Frame Types
D-Link DGE-560SX User Guide Use MODE=SLB for a Smart Load-Balancing type of team, MODE=TRUNK for a Generic Trunking type of team, or MODE=802.3AD for an 802.3ad type of team. The default selection is SLB. Example: LOAD BASP.LAN FRAME=ETHERNET_II NAME=BASP_1_EII VSLOT=1 MODE=TRUNK NOTES: ... -
Page 61: Hot Standby
D-Link DGE-560SX User Guide adapters. For example, ETHERNET_802.2 can be loaded in BASP VSLOT 1 if ETHERNET_802.2 is loaded for the B57 driver in SLOT 1 and 2 in the example below. Similarly, a virtual adapter can only be bound to a physical adapter if the physical adapter has all the frame types loaded in the virtual adapter. - Page 62 D-Link DGE-560SX User Guide 1. Load the BASP.LAN driver with the all necessary frame types and specify the VLAN ID for each frame type. You can specify a maximum of 64 VLAN IDs and each VLAN ID can be loaded up to four times with four different frame types.
- Page 63 D-Link DGE-560SX User Guide virtual adapter to the same frame type on the physical adapter. The other VLANs are automatically bound. 4. Bind protocols to BASP.LAN. Example: BIND IP BASP_1_V2_EII ADDR=x.x.x.x MASK=x.x.x.x This example creates a team with two adapters using VLAN ID 2. Outbound packets are tagged with VLAN ID 2, and only similarly-tagged packets can be received by the adapters on the team.
-
Page 64: Additional Command Line Keywords
D-Link DGE-560SX User Guide Jumbo Frames Jumbo Frames are supported in all load balancing types of teams. The maximum frame size is automatically set to the smallest maximum frame size of all adapters in the team. Use appropriate keywords to enable Jumbo Frames when loading the adapter drivers. - Page 65 D-Link DGE-560SX User Guide Example: LOAD BASP.LAN FRAME=ETHERNET_II NAME=BASP_1_EII VSLOT=1 NOSCREEN GVRP Enables GVRP (GARP VLAN Registration Protocol) for the VLAN that is loaded. An untagged IEEE 802.2 frame type must be loaded in the virtual adapter and all bound physical adapters for GVRP to take effect.
- Page 66 D-Link DGE-560SX User Guide # Bind BASP.LAN to the NIC adapters in the team for each protocol. BASP BIND BASP_1_V2_EII B57_1_EII BASP BIND BASP_1_V2_EII B57_2_EII #Bind protocols to BASP.LAN. BIND IP BASP_1_V2_EII ADDR=192.168.2.200 MASK=255.255.255.0 Example: # Team of 2 NIC adapters with frame type Ethernet_II and three VLANs, number 2,3,4 #Load BASP.LAN with the frame types and VLAN ID(s) specified.
- Page 67 D-Link DGE-560SX User Guide BIND IP BASP_1_V2_EII ADDR=192.168.2.200 MASK=255.255.255.0 BIND IP BASP_1_V3_EII ADDR=192.168.3.200 MASK=255.255.255.0 BIND IP BASP_1_V4_EII ADDR=192.168.4.200 MASK=255.255.255.0 mount all NOTE: If you modify any adapter parameters, you must reboot the system before the changes takes effect. If you make changes and do not reboot, you may experience configuration problems.
- Page 68 D-Link DGE-560SX User Guide LOAD ODINEB.NLM LOAD BASP.LAN FRAME=ETHERNET_II NAME=BASP_1_V100_EII VSLOT=1 VLAN=100 LOAD BASP.LAN FRAME=ETHERNET_II NAME=BASP_1_V200_EII VSLOT=1 VLAN=200 LOAD BASP.LAN FRAME=ETHERNET_II NAME=BASP_1_V300_EII VSLOT=1 VLAN=300 LOAD B57.LAN FRAME=ETHERNET_II NAME=B57_1_EII SLOT=1 LOAD B57.LAN FRAME=ETHERNET_II NAME=B57_2_EII SLOT=2 BASP BIND BASP_1_V100_EII B57_1_EII BASP BIND BASP_1_V100_EII B57_2_EII BIND IP BASP_1_V100_EII ADDR=172.16.210.1 MASK=255.255.0.0...
- Page 69 D-Link DGE-560SX User Guide BASP BIND BASP_1_EII B57_2_EII BIND IP BASP_1_EII ADDR=172.16.210.1 MASK=255.255.0.0 NOTES: In this example, VLAN 100 is advertised to the switch using GVRP. The untagged 802.2 frame must be loaded to allow sending and receiving GVRP frames. Switch ports must be configured with GVRP enabled.
- Page 70 D-Link DGE-560SX User Guide 12. Press INSERT. BASP1 BASP2 BASP3 13. Type the name for the protocol, such as for TEAM 1, for TEAM 2, BASP4 for TEAM 3, or for TEAM 4. 14. Press ESC to return to the Internetworking Configuration console.
-
Page 71: Snmp Agent
D-Link DGE-560SX User Guide 3.6.3 SNMP Agent This SNMP agent is designed to support the configuration information pertaining to the Broadcom BASP driver for NetWare. Installation When the BASP.LDI driver is installed using nwconfig or nwinstall, the driver automatically copies the BASP.LAN, bmapi.nlm, and bsnmp.nlm files to the system. - Page 72 NOTE: If your adapter was installed at the factory, the driver software has been installed for you. When Windows first starts after a hardware device (such as a D-Link NetXtreme Gigabit Ethernet adapter) has been installed, or after the existing device driver has been removed, the operating system automatically detects the hardware and prompts you to install the driver software for that device.
- Page 73 D-Link DGE-560SX User Guide Using Silent Installation NOTES: All commands are case sensitive. User must "Run as Administrator" for Vista when using "msiexec" for "silent" install/uninstall(s). For more detailed instructions and information about unattended installs, refer to the Silent.txt file in the DrvInst folder.
-
Page 74: Updating The Driver Software
2. In Control Panel, click System to view System Properties. 3. Click the Hardware tab, and then click Device Manager. 4. Right-click the name of the D-Link NetXtreme 5718 Gigabit Ethernet Controller and click Update Driver. 5. Follow the on-screen instructions provided by the Hardware Update Wizard. -
Page 75: Setting Power Management Options
D-Link DGE-560SX User Guide To view or change the properties of the D-Link NetXtreme 5718 Gigabit Ethernet Controller 1. Right-click the Control Suite icon in the taskbar notification area, and then click Launch BACS. 2. Click the Advanced tab. 3. See Setting Adapter Properties for a detailed description of the available properties as well as for instructions for viewing and changing the value of a particular property. -
Page 76: Removing The Device Drivers
3.7.5 Removing the Device Drivers 1. Open Add or Remove Programs in Control Panel. 2. Click D-Link NetXtreme Ethernet Controller, and then click Remove. 3. Click Yes to remove the drivers and management applications. 4. Restart your system. NOTE: You can also remove the device drivers by running the InstallShield... -
Page 77: Chapter 4: Installing Management Applications
D-Link DGE-560SX User Guide Chapter 4: Installing Management Applications 4.1 Installing Broadcom Advanced Control Suite and Related Management Applications The Broadcom Advanced Control Suite (BACS) software and related management applications can be installed from the installation CD or by using the silent install option. -
Page 78: Using Silent Installation
D-Link DGE-560SX User Guide 5. Select the features you want installed. If you receive a warning regarding .NET Framework 2.0, then press OK to continue installing BACS and manually install .NET Framework 2.0 when installation completes, or Cancel to quit. -
Page 79: Modifying Management Applications
D-Link DGE-560SX User Guide NOTES: The hexidecimal number above may differ from your current installer. Check the Key name corresponding with the Broadcom Advanced Control Suite (BACS) application in HKLM\Software\Microsoft\Windows\CurrentVersion\Uninstall for the correct hexidecimal number. After performing a silent uninstall, it is necessary to reboot the system before reinstalling this installer. -
Page 80: Repairing Management Applications
D-Link DGE-560SX User Guide 4. Click Modify to change program features. 5. Click Next to continue. 6. Click on an icon to change how a feature is installed. 7. Click Next. 8. Click Install. 9. Click Finish to close the wizard. -
Page 81: Chapter 5: Using Broadcom Advanced Control Suite 4
D-Link DGE-560SX User Guide Chapter 5: Using Broadcom Advanced Control Suite 4 5.1 Broadcom Advanced Control Suite Overview Broadcom Advanced Control Suite (BACS) is an integrated utility that provides useful information about each network adapter that is installed in your system. BACS also enables you to perform detailed tests, diagnostics, and analyses on each adapter, as well as to view and modify property values and view traffic statistics for each adapter. -
Page 82: Bacs Interface
D-Link DGE-560SX User Guide 5.3.1 BACS Interface The BACS interface is comprised of the following regions: Explorer View pane Context View selector Context View pane Menu bar Description pane By default, the Explorer View pane is docked and pinned on the left side of the main window, the Context View pane on the right, the Context View selector below the menu bar, and the Description pane below the Context View pane. - Page 83 D-Link DGE-560SX User Guide The Explorer View pane lists the objects that can be viewed, analyzed, tested, or configured by BACS. When an item is selected in the Explorer View pane, the tabs showing the information and options that are available for the item appear in the Context View pane.
-
Page 84: Menu Bar
D-Link DGE-560SX User Guide iSCSI Target view FCoE Target view Context View Pane The Context View pane displays all the parameters that you can view for the object selected in the Explorer View pane. The parameters are grouped by tabs and categories, depending on the parameter type. -
Page 85: Configuring Preferences
D-Link DGE-560SX User Guide Teams Create Teams: creates new teams with either the Teaming Wizard or in Advanced mode Manage Teams: manages existing teams with either the Teaming Wizard or in Advanced mode Description Pane The Description pane provides information, configuration instructions, and options for the selected parameter in the Context View pane. -
Page 86: Managing The Host
D-Link DGE-560SX User Guide You can add one or more Windows or Linux hosts to manage from BACS. To add a local host 1. From the Action menu, click Add Host. 2. For both Windows and Linux hosts, do not change the default settings. The User name and Password are not required while connecting to the local host. - Page 87 D-Link DGE-560SX User Guide Select the host in the Explorer View pane, and then select the Information tab to view host-level information. Information Tab: Host Information Host Name Displays the name of the host. OS Version Info Displays the operating system, including the version.
-
Page 88: Managing The Network Adapter
D-Link DGE-560SX User Guide Configuration Tab: System Management Chimney Offload State Enable or disable chimney offload at the host level, rather than at the device level, and then click Apply. 5.3.5 Managing the Network Adapter The installed network adapters appear one level below the host in the hierarchical tree in the Explorer View pane. - Page 89 D-Link DGE-560SX User Guide Select the network adapter in the Explorer View pane, and then select the Information tab to view adapter-level information. NOTES: Information about Broadcom network adapters may be more comprehensive than information about network adapters made by others.
- Page 90 The link speed of the adapter, in megabits per second. Offload Capabilities The offload capabilities supported by the adapter. This information is only available for D-Link NetXtreme adapters. LSO. Large Send Offload (LSO) prevents an upper level protocol such as TCP from breaking a large data packet into a series of smaller packets with headers appended to them.
- Page 91 D-Link DGE-560SX User Guide Driver Status The status of the adapter driver. Loaded. Normal operating mode. The adapter driver has been loaded by Windows and is functioning. Not Loaded. The driver associated with the adapter has not been loaded by Windows.
- Page 92 D-Link DGE-560SX User Guide Viewing Resource Information The Resources section of the Information tab displays information about connections and other essential functions for the selected network adapter. To view Resources for any installed network adapter, click the name of the adapter listed in the Explorer View pane, then click the Information tab.
- Page 93 D-Link DGE-560SX User Guide Bus Width (bit) The number of bits that the bus can transfer at a single time to and from the adapter. This item is not available for PCI Express type adapters. Bus No Indicates the number of the bus where the adapter is installed.
- Page 94 The chip version of the Broadcom adapter (this information is not available for adapters made by others). Firmware Version The firmware version of the Broadcom adapter (this information is not available for adapters made by others). This information is only available for D-Link NetXtreme adapters. Vendor ID The vendor ID. Device ID The adapter ID.
-
Page 95: Testing The Network
D-Link DGE-560SX User Guide The subsystem ID. Testing the Network The Network Test option on the Diagnostics tab lets you verify IP network connectivity. This test verifies if the driver is installed correctly and tests connectivity to a gateway or other specified IP address on the same subnet. -
Page 96: Running Diagnostic Tests
D-Link DGE-560SX User Guide Running Diagnostic Tests The Diagnostic Tests option on the Diagnostics tab lets you check the state of the physical components on a Broadcom network adapter. You can trigger the tests manually, or choose to have BACS 4 continuously perform them. If the test are performed continuously, then the number of passes and fails in the Result field for each test increments every time the tests are performed. - Page 97 6. In the error message window that warns of the network connection being temporarily interrupted, click Yes. The results are displayed in the Result field for each test. NOTES: DGE-560SX supports fiber interface and so the information of MII Registers, LoopBack MAC, and LoopBack PHY are not available. The list of available properti...
- Page 98 D-Link DGE-560SX User Guide registers to perform network functions such as sending and receiving information. A test failure indicates that the adapter may not be working properly. MII Registers This test verifies the read and write capabilities of the registers of the physical layer (PHY).
- Page 99 D-Link DGE-560SX User Guide Test LED This test causes all of the port LEDs to blink 5 times for the purpose of identifying the adapter. Setting Adapter Properties Advanced on the Configurations tab allow you to view and change the values of the available properties of the selected adapter.
- Page 100 D-Link DGE-560SX User Guide 802.1p QOS Enables quality of service, which is an Institute of Electrical and Electronics Engineering (IEEE) specification that treats different types of network traffic diversely to ensure required levels or reliability and latency according to the type of traffic. This property is disabled by default.
- Page 101 D-Link DGE-560SX User Guide Rx PAUSE. PAUSE frame receipt is enabled. Rx/Tx PAUSE. PAUSE frame receipt and transmission are enabled. Tx PAUSE. PAUSE frame transmission is enabled. IPv4 Checksum Offload Normally, the checksum function is computed by the protocol stack. When you select one of the Checksum Offload property values (other than None), the checksum can be computed by the network adapter.
- Page 102 D-Link DGE-560SX User Guide Note: Jumbo Frames and Large Send Offload (LSO) are mutually-exclusive properties. Normally, the TCP segmentation is done by the protocol stack. When you enable the Large Send Offload (LSO) property, the TCP segmentation can be done by the network adapter.
- Page 103 D-Link DGE-560SX User Guide TCP/UDP Checksum Offload (IPv4) Allows configuring checksum offload for the IPv4 protocol. Disable. Disables checksum offload. Rx Enabled. Enables receive TCP/IP/UDP checksum offload. Tx Enabled. Enables transmit TCP/IP/UDP checksum offload. TX & Rx Enabled (default). Enables transmit and receive TCP/IP/UDP checksum offload.
-
Page 104: Configuring Teaming
D-Link DGE-560SX User Guide Also unlike BASP, the NDIS 6.0 driver only provides VLAN tagging of the outbound packet, but does not provide filtering of incoming packets based on VLAN ID membership. This is the default behavior of all miniport drivers. While the lack of filtering packets based on... - Page 105 D-Link DGE-560SX User Guide NOTES: For further information regarding teaming protocols, see "Teaming" in your Broadcom network adapter user guide. If you do not enable LiveLink™ when configuring teams, disabling Spanning Tree Protocol (STP) at the switch is recommended. This minimizes the downtime due to spanning tree loop determination when failing over.
- Page 106 D-Link DGE-560SX User Guide Link Aggregation (802.3ad) In this type of team, you can dynamically configure the network adapters that have been selected to participate in a given team. If the link partner is not correctly configured for IEEE 802.3ad link configuration, errors are detected and noted. All adapters in the team are configured to receive packets for the same MAC address.
-
Page 107: Using The Broadcom Teaming Wizard
D-Link DGE-560SX User Guide In Auto-Fallback Disable mode, if a load balance member returns on line, the team continues using the standby member rather than switching back to using the load balance member. Consequently, the adapter that was initially designated a load balance member remains in an inactive state and becomes the new standby member. - Page 108 D-Link DGE-560SX User Guide 3. Type the team name and then click Next. If you want to review or change any of your settings, click Back. Click Cancel to discard your settings and exit the wizard. Note: The team name cannot exceed 39 characters, cannot begin with spaces, and cannot contain any of the following characters: &...
- Page 109 D-Link DGE-560SX User Guide 5. From the Available Adapters list, click the adapter you want to add to the team and then click Add. Remove team members from the Team Members list by clicking the adapter and then clicking Remove. Click Next.
- Page 110 D-Link DGE-560SX User Guide 6. If you want to designate one of the adapters as a standby member (optional), select Use the following member as a standby member, then choose the standby member from the list of adapters. 7. The Auto-Fallback Disable mode feature allows the team to continue using the standby member rather than switching back to the primary member if the primary member comes back online.
- Page 111 D-Link DGE-560SX User Guide 8. If you want to configure LiveLink, select Yes, otherwise select No, then click Next. 9. Select the probe interval (the number of seconds between each retransmission of a link packet to the probe target) and the maximum number of probe retries (the number of consecutively missed responses from a probe target before a failover is triggered).
- Page 112 D-Link DGE-560SX User Guide 12. Select a listed team member, click Edit Member IP Address, and then type the member IP address in the IP Address box. Repeat for all listed team members and then click OK. Click Next. Note: All of the member IP addresses must be in the same subnet as the subnet of the probe targets.
- Page 113 D-Link DGE-560SX User Guide 15. To tag the VLAN, select Tagged and then click Next. Otherwise, click Untagged, click Next, and continue with the wizard to add additional VLANs (see Step 17. of this procedure). 16. Type the VLAN tag value and then click Next. The value must be between 1 and 4094.
- Page 114 D-Link DGE-560SX User Guide 17. Select Yes to add or manage another VLAN and then click Next. Repeat until you do not want to add or manage any additional VLANs. Note: You can define up to 64 VLANs per team (63 VLANs that are tagged and 1 VLAN that is not tagged).
- Page 115 D-Link DGE-560SX User Guide To apply and commit the changes to the team, select Commit changes to system and Exit the wizard. To apply your changes but continue using the wizard, select Save changes and continue to manage more teams. Click Finish.
-
Page 116: Using Expert Mode
D-Link DGE-560SX User Guide 19. Click the team name in the Team Management pane to view the team's properties in the Information tab, transfer and receive data in the Statistics tab. 5.4.2 Using Expert Mode... -
Page 117: Creating A Team
D-Link DGE-560SX User Guide Use Expert Mode to create a team, modify a team, add a VLAN, and configure LiveLink for a Smart Load Balance and Failover and SLB (Auto-Fallback Disable) team. To create a team using the wizard, see Using the Broadcom Teaming Wizard. - Page 118 D-Link DGE-560SX User Guide Note: The Create Team tab appears only if there are teamable adapters available. 4. Click the Team Name field to enter a team name. 5. Click the Team Type field to select a team type. 6. Assign any available adapter or adapters to the team by selecting the adapter from the Load Balance Members list.
- Page 119 D-Link DGE-560SX User Guide Note: Adding a network adapter to a team where its driver is disabled may negatively affect the offloading capabilities of the team. This may have an impact on the team's performance. Therefore, it is recommended that only driver-enabled network adapters be added as members to a team.
-
Page 120: Modifying A Team
D-Link DGE-560SX User Guide Not all network adapters made by others are supported or fully certified for teaming. 13. Configure the team IP address. a. From Control Panel, double-click Network Connections. b. Right-click the name of the team to be configured, and then click Properties. - Page 121 D-Link DGE-560SX User Guide 4. Make the desired changes, and then click Update. The changes have not yet been applied; click the Preview tab to view the updated team structure before applying the changes. 5. Click Apply/Exit to apply the updates and exit the Manage Teams window.
- Page 122 D-Link DGE-560SX User Guide To configure a team with a VLAN 1. From the Teams menu, select Add VLAN. 2. The Welcome screen appears. 3. Click Expert Mode. 4. On the Create Team tab of the Manage Teams window, click Manage VLAN(s).
-
Page 123: Deleting A Vlan
D-Link DGE-560SX User Guide 1. Select one of the listed VLANs. 2. Click the Information tab to view the properties of the VLAN adapter. 3. Click the Statistics tab to view the statistics for the VLAN adapter. 4. Click the Diagnostics tab to run a network test on the VLAN adapter. - Page 124 D-Link DGE-560SX User Guide To ensure network connectivity to the probe target, ping the probe target from the team. You can specify up to four probe targets. The IP address assigned to either a probe target or team member cannot have a zero as the first or last octet.
- Page 125 D-Link DGE-560SX User Guide 10. Click Apply/Exit. Saving and Restoring a Configuration To save a configuration 1. From the File menu, select Team Save As. 2. Type the path and file name of the new configuration file, and then click Save (a .bcg extension is added).
- Page 126 D-Link DGE-560SX User Guide Click Refresh to get the most recent values for each statistic. Click Reset to change all values to zero. Tx. Packet This is the number of packets transmitted. Tx. Packet Discarded This is the number of packets discarded.
-
Page 127: Chapter 6: User Diagnostics
Chapter 6: User Diagnostics 6.1 Introduction D-Link NetXtreme User Diagnostics is an MS-DOS based application that runs a series of diagnostic tests (see Table 1: "MS-DOS Command Prompt Mode Command Options") on the D-Link NetXtreme Gigabit Ethernet adapters in your system. D-Link NetXtreme User Diagnostics also allows you to update device firmware and to view and change settings for available adapter properties. -
Page 128: Running D-Link Netxtreme User Diagnostics
Table 1: MS-DOS Command Prompt Mode Command Options Command Options Description b57udiag Performs all of the tests on all of the D-Link NetXtreme Gigabit Ethernet adapters in your system. b57udiag -c <num> Specifies the adapter to test, or the adapter on which to update the firmware or to view or change the settings for available properties. - Page 129 D-Link DGE-560SX User Guide Examples: b57udiag -firm ee5751c3.40a b57udiag -firm ee5721c3.40a b57udiag -firmall <file> Updates the EEPROM of all of the adapters based on the <file name> image match. b57udiag -ver Displays the version of the software/eeprom.bin file. b57udiag -pxe <file>...
- Page 130 D-Link DGE-560SX User Guide upgfrm Updates the PXE or Boot Code from a file Displays the file directory in NVRAM. Example: Entry Type SRAM Addr EEP Offset Length Execute Version Boot Code 08003000 00000200 000011B0 CPUA(2) 5721-v6.17 00010000 000013Bo 0000C854 NO 7.0.1...
-
Page 131: Diagnostic Test Descriptions
= Silent mode (adapters are not displayed) version Displays the version of the adapter software help Displays this list of commands reset Resets the D-Link NetXtreme Gigabit Ethernet chip reset c = Simulate a cold reset reset w = Wait for firmware signature reset t... - Page 132 D-Link DGE-560SX User Guide Register read-only bit and the read/write bits. The test writes 0s and 1s to the test bits to ensure the read-only bits are not changed, and that read/write bits are changed. This test attempts to read the register configuration file (Ctrlreg.txt) for the register definitions.
- Page 133 D-Link DGE-560SX User Guide SRAM, writes complement test data to the next address, and reads back both to ensure the data is correct. After the test, the program reads back data one more time to ensure that the data is still correct. The test data used is 0x00000000, 0xFFFFFFFF, 0xAA55AA55, and 0x55AA55AA.
- Page 134 D-Link DGE-560SX User Guide AA55AA55 Fills the entire host DMA buffer with data 0xAA55AA55. 55AA55AA Fills the entire host DMA buffer with data 0x55AA55AA. CPU GPR This test tests the CPU General Purpose registers and performs in the same way as the Scratch Pad Test (B1) over 3 different voltages (1.1V, 1.2V, and 1.3V).
- Page 135 D-Link DGE-560SX User Guide 0x08 0xFFFF 0x0000 0x09 0x0000 0xFF00 0x0A 0x7C00 0x0000 0x10 0x0000 0xFFBF 0x11 0x7C00 0x0000 0x19 0x7C00 0x0000 0x1E 0x0000 0xFFFF 0x1F 0x0000 0xFFFF The VPD test first saves the contents of the vital product data (VPD) memory before performing the test.
-
Page 136: Diagnostic Test Messages
D-Link DGE-560SX User Guide This test is an internal loopback data transmit/receive test. It Loopback initializes the medium access control (MAC) into an internal loopback mode and transmits 100 packets. The data should be routed back to the receive channel and received by the receive routine, which verifies the integrity of data. - Page 137 D-Link DGE-560SX User Guide /* 13 */ "TX DMA failed", /* 14 */ "Rx DMA failed", /* 15 */ "Data error, got 0x%08X at 0x%08X, expected 0x%08X", /* 16 */ "Second read error, got 0x%08X at 0x%08X, expected 0x%08X", /* 17 */ "Failed writing EEPROM at 0x%04X",...
- Page 138 D-Link DGE-560SX User Guide /* 42 */ "DMA buffer %04X is large, size must be less than %04X", /* 43 */ "File size %d is too big, max is %d", /* 44 */ "Invalid %s", /* 45 */ "Failed writing 0x%x to 0x%x", /* 46 */ "",...
-
Page 139: Chapter 7: Troubleshooting
D-Link DGE-560SX User Guide /* 70 */ "Adjacent memory has been corrupted while testing block 0x%08x-0x%08x\nGot 0x%08x @ address 0x%08x. Expected 0x%08x", /* 71 */ "The function is not Supported in this chip", /* 72 */ "Packets received with CRC error", /* 73 */ "MII error bits set: %04x",... -
Page 140: Hardware Diagnostics
D-Link DGE-560SX User Guide 7.1 Hardware Diagnostics Loopback diagnostic tests are available for testing the adapter hardware. These tests provide access to the adapter internal/external diagnostics, where packet information is transmitted across the physical link (for instructions and information on running tests in an MS-DOS environment, see User Diagnostics. -
Page 141: Troubleshooting Checklist
CAUTION! Before you open the case of your system, review Safety Precautions. The following checklist provides recommended actions to take to resolve problems installing the D-Link NetXtreme Gigabit Ethernet adapter or running it in your system. Inspect all cables and connections. Verify that the cable connections at the network adapter and the switch are attached properly. -
Page 142: Checking For Network Link And Activity
D-Link DGE-560SX User Guide 7.3 Checking for Network Link and Activity See Testing Network Connectivity or Viewing Adapter Information to check the state of the network link and activity as indicated by the port LEDs. 7.4 Checking if Current Drivers are Loaded... -
Page 143: Testing Network Connectivity
D-Link DGE-560SX User Guide lsmod | grep tg3 If the driver is loaded, a line similar to the one below is displayed, where size is the size of the driver in bytes, and n is the number of adapters configured. -
Page 144: Software Problems And Solutions
D-Link DGE-560SX User Guide To verify that the Ethernet interface is up and running, run ifconfig to check the status of the Ethernet interface. It is possible to use netstat -i to check the statistics on the Ethernet interface. Go to Linux Driver Software for information on ifconfig and netstat. -
Page 145: Riprep Utility Problem
D-Link DGE-560SX User Guide Modify that line to read: %BRCM% = Broadcom.NTx86.5.1, NTamd64. (The change replaces the comma and the space after "Broadcom" with a period. d. Save the file. 4. On the RIS server, copy the b57win32.inf and b57xp32.sys files from the RIS folder to the RemoteInstall\Setup\Language\Images\Dir_name\i386 folder. - Page 146 D-Link DGE-560SX User Guide 2. Place the Broadcom driver files in the i386 subfolder under the original image folder. Example: i:\RemoteInstall\Setup\English\Images\(Original Image)\i386 3. Place the Broadcom driver files for the network adapter in the RIPREP Image folder. Example: i:\RemoteInstall\Setup\English\Images\(RIPREP Image) 4.
-
Page 147: Linux And Asfipmon
D-Link DGE-560SX User Guide 5. Restart the Remote Installation service. This can be performed from a command line with the following commands: net stop binlsvc net start binlsvc 7.6.3 Linux and ASFIPMon Problem: I brought down the interface and now I cannot bring it back up. When I try, the following message appears, `SIOCSIFFLAGS: Resource temporarily unavailable.'... -
Page 148: Miscellaneous
Solution: .NET Framework 2.0 is required for BACS to operate. Install .NET Framework 2.0. Problem: When the bus on the system is operating in PCI mode, the D-Link NetXtreme Gigabit Ethernet adapter performs at PCI mode if it is added after the system has booted. - Page 149 D-Link DGE-560SX User Guide...