Table of Contents
Advertisement
Advertisement
Table of Contents

Related Manuals for Draytek VigorSwitch P2261


Summary of Contents for Draytek VigorSwitch P2261
- Page 2 VigorSwitch P2261 PoE 24+2 Giga Port L2 Managed Switch User’s Guide Version: 1.0 Date: 24/09/2012 Copyright 2012 All rights reserved. VigorSwitch P2261 User’s Guide...
-
Page 3: Copyright Information
Web registration is preferred. You can register your Vigor device via Be a Registered http://www.draytek.com. Owner Due to the continuous evolution of DrayTek technology, all devices will be regularly Firmware & Tools upgraded. Please consult the DrayTek web site for more information on newest Updates firmware, tools and documents. -
Page 4: Regulatory Information
This device complies with Part 15 of the FCC Rules. Operation is subject to the following two conditions: (1) This device may not cause harmful interference, and (2) This device may accept any interference received, including interference that may cause undesired operation. VigorSwitch P2261 User’s Guide... -
Page 5: Table Of Contents
2.2.26 System Log – General Setup ..................54 2.2.27 System Log – Log......................55 2.2.28 System Log – Detailed Log ..................56 2.2.29 SMTP General Setup....................57 2.2.30 sFlow Agent - Collector....................58 2.2.31 sFlow Agent - Sampler ....................59 2.3 Configuration......................... 61 VigorSwitch P2261 User’s Guide... - Page 6 2.3.55 GVRP – General Setup ....................140 2.3.56 QoS – Port Classification.................... 141 2.3.57 QoS – Port Policing ....................143 2.3.58 QoS – Port Scheduler....................144 2.3.59 QoS – Port Shaping....................145 2.3.60 QoS – Tag Remarking ....................146 VigorSwitch P2261 User’s Guide...
- Page 7 2.5.8 Export/Import – Export Config ..................219 2.5.9 Export/Import – Import Config ..................220 2.5.10 Diagnostics – Ping ...................... 221 2.5.11 Diagnostics – Ping6 ....................222 2.5.12 Diagnostics – VeriPHY ....................223 Chapter 3: Trouble Shooting..................225 3.1 Resolving No Link Condition....................225 VigorSwitch P2261 User’s Guide...
- Page 8 3.2 Q & A ........................... 225 viii VigorSwitch P2261 User’s Guide...
-
Page 9: Chapter 1: Introduction
Division Multiplexing (WDM) technology that transports bi-directional full duplex signal over a single fiber simultaneously. For upgrading firmware, please refer to the Section 2.5.2 for more details. The switch will not stop operating while upgrading firmware and after that, the configuration keeps unchanged. VigorSwitch P2261 User’s Guide... - Page 10 IGMP messages. However, when acting as the proxy, the system performs the host portion of the IGMP task on the upstream interface as follows: When queried, sends group membership reports to the group. VigorSwitch P2261 User’s Guide...
-
Page 11: Features
When the last of its hosts in a particular multicast group leaves the group, sends an unsolicited leave group membership report to the all-routers group (244.0.0.2). The VigorSwitch P2261, a standalone off-the-shelf switch, provides the comprehensive features listed below for users to perform system network administration and efficiently and securely serve your network. -
Page 12: Packing List
1000Mbps SFP Fiber transceiver is used for high-speed connection expansion; the following are optional SFP types compatible for the switch: 1000Mbps LC, MM, SFP Fiber transceiver 1000Mbps LC, SM 10km, SFP Fiber transceiver 1000Mbps LC, SM 30km, SFP Fiber transceiver VigorSwitch P2261 User’s Guide... -
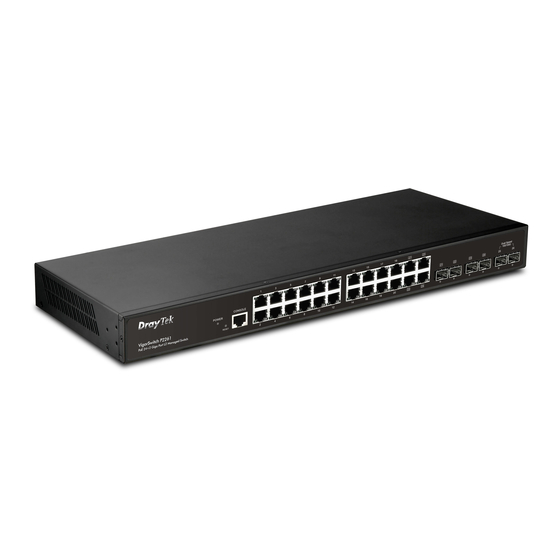
Page 13: Led Indicators And Connectors
Blinks when any traffic is present. Lit Green when the connection with remote device is 1000M. SFP Port 25-26 Green/ Lit Amber when the connection with remote device LINK/ACT Amber is 100M. Blinks when any traffic is present. VigorSwitch P2261 User’s Guide... -
Page 14: Hardware Installation
2. Repeat the above steps, as needed, for each RJ-45 port to be connected to a Gigabit 10/100/1000 TP device. 3. Now, you can start having the switch in operation. VigorSwitch P2261 User’s Guide... -
Page 15: Installing Optional Sfp Fiber Transceivers To The Switch
2. Screw the mounting accessory to the front side of the switch. 3. Place the Chassis into the 19-inch wiring closet rail and locate it at the proper position. Then, fix the Chassis by screwing it. VigorSwitch P2261 User’s Guide... -
Page 16: Cabling Requirements
Theoretically, the switch partitions the collision domain for each port in switch cascading that you may up-link the switches unlimitedly. In practice, the network extension (cascading levels & overall diameter) must follow the constraint of the IEEE VigorSwitch P2261 User’s Guide... - Page 17 Here VLAN area is defined by what VLAN you are using. The switch supports both port-based VLAN and tag-based VLAN. They are different in practical deployment, especially in physical location. The following diagram shows how it works and what the difference they are. VigorSwitch P2261 User’s Guide...
- Page 18 VLAN2 members could not access VLAN1 and VLAN3 members, but they could access VLAN4 members. VLAN3 members could not access VLAN1, VLAN2 and VLAN4. VLAN4 members could not access VLAN1 and VLAN3 members, but they could access VLAN2 members. VigorSwitch P2261 User’s Guide...
- Page 19 Case 4: The same VLAN members can be at different switches with the same VID VigorSwitch P2261 User’s Guide...
-
Page 20: Configuring The Management Agent Of Switch
Managing VigorSwitch P2261 through Ethernet Port Before you communicate with the switch, you have to finish the configuration of the IP address or to know the IP address of the switch. Then, follow the procedures listed below. Set up a physical path between the configured the switch and a PC by a qualified UTP Cat. -
Page 21: Ip Address Assignment
IP address range between 192.0.0.0 and 223.255.255.255. Each class C network has a 24-bit network prefix followed 8-bit host address. There are 2,097,152 (2^21)/24 networks able to be defined with a maximum of 254 (2^8 –2) hosts per network. VigorSwitch P2261 User’s Guide... - Page 22 They are the addresses with all zero’s and all one’s host number. For example, an IP address 128.1.2.128, what IP address reserved will be looked like? All 0s mean the network itself, and all 1s mean IP broadcast. VigorSwitch P2261 User’s Guide...
- Page 23 For assigning an IP address to the switch, you just have to check what the IP address of the network will be connected with the switch. Use the same network address and append your host address to it. VigorSwitch P2261 User’s Guide...
- Page 24 To connect to a server, the client needs to know the IP of the server. However, user generally uses the name to connect to the server. Thus, the switch DNS client program (such as a browser) will ask the DNS to resolve the IP address of the named server. VigorSwitch P2261 User’s Guide...
-
Page 25: Typical Applications
The switch is suitable for the following applications. Central Site/Remote site application is used in carrier or ISP It is a system wide basic reference connection diagram. This diagram demonstrates how the switch connects with other network devices and hosts. VigorSwitch P2261 User’s Guide... - Page 26 Peer-to-peer application is used in two remote offices Office Network Connection VigorSwitch P2261 User’s Guide...
-
Page 27: Chapter 2: Operation Of Web-Based Management
Note: When you login the switch WEB/CLI to manager, you must type the Username and password first. Note: The default IP of the switch 192.168.1.226. Note: When you login P2261 switch Web UI management, you can use both IPv4 and IPv6 login for management. VigorSwitch P2261 User’s Guide... -
Page 28: Web Management Home Overview
MAC address, serial number, how many ports good and so on. This is helpful while malfunctioning. In the following figure, left section is the whole function tree with web user interface and we will travel it through this chapter. VigorSwitch P2261 User’s Guide... -
Page 29: The Information Of
Open the function folder, a sub-menu will be shown. The functions of each folder are described in its corresponded section respectively. When clicking it, the function is performed. The following list is the full function tree for web user interface. VigorSwitch P2261 User’s Guide... -
Page 30: System
The version of Hardware and Mechanical. The figure version: before the hyphen is the version of electronic hardware; the one after the hyphen is the version of mechanical. Serial Code: The serial number is assigned by the manufacturer. VigorSwitch P2261 User’s Guide... -
Page 31: System Information - Device Name
The textual identification of the contact person for this managed node, together with information on how to contact this person. The allowed string length is 0 to 255, and the allowed content is the ASCII characters from 32 to 126. VigorSwitch P2261 User’s Guide... -
Page 32: System Information - Cpu Load
Microsoft Internet Explorer will need to have a plug-in installed to support SVG. Note: CPU Load is using SVG (Scalable Vector Graphics) to display the chart and this feature is only available on MS IE 9.0 & above or Firefox v4.0 & above. VigorSwitch P2261 User’s Guide... -
Page 33: Ntp & Time Configuration
For example, if you set the day light saving to be 1 hour. When the time passes over the starting time, the system time will be increased one hour after one minute at the time since it passed over. VigorSwitch P2261 User’s Guide... -
Page 34: Account - Users
In this function, only administrator can create, modify or delete the username and password. Administrator can modify other guest identities’ password without confirming the password but it is necessary to modify the administrator-equivalent identity. Guest-equivalent identity can modify his password only. Please note that you must confirm VigorSwitch P2261 User’s Guide... - Page 35 15. Generally, the privilege level 15 can be used for an administrator account, privilege level 10 for a standard user account and privilege level 5 for a guest account. Add new user Create a new user account. VigorSwitch P2261 User’s Guide...
-
Page 36: Account - Privilege Level
Account, Aggregation,Diagnostics,EEE,GARP,GVRP,IP, IPMC Snooping LACP LLDP LLDP MED MAC Table MRP MVR MVRP Maintenance Mirroring POE Ports Private VLANs QoS SMTP SNMP Security Spanning Tree System Trap Event VCL VLANs Voice VLAN Privilege Levels form 1 to 15 . VigorSwitch P2261 User’s Guide... -
Page 37: Ip Configuration - Ipv4
You may also need to establish a default gateway between the switch and management stations that exist on another network segment. VigorSwitch P2261 User’s Guide... -
Page 38: Ip Configuration - Ipv6
When DNS proxy is enabled, DUT will relay DNS requests to the current configured DNS server on DUT, and reply as a DNS resolver to the client device on the network. After finished the above settings, click Apply to save the configuration. – – VigorSwitch P2261 User’s Guide... - Page 39 128-bit records represented as eight fields of up to four hexadecimal digits with a colon separating each field (:). For example, 'fe80::215:c5ff:fe03:4dc7'. The symbol '::' is a special syntax that can be used as a VigorSwitch P2261 User’s Guide...
-
Page 40: Port - General Setup
Speed Current - Provides the current link speed of the port. Type - Set the speed and duplex of the port. In speed, if the VigorSwitch P2261 User’s Guide... - Page 41 The Usage column shows the current percentage of the power consumption per port. The Configured column allows for changing the power savings mode parameters per port. Disabled: All power savings mechanisms disabled. ActiPHY: Link down power savings enabled. PerfectReach: Link up power savings enabled. VigorSwitch P2261 User’s Guide...
-
Page 42: Port - Traffic Overview
UI screen. Refresh The simple counts will be refreshed manually when user use mouse to click on “Refresh” button. Clear The simple counts will be reset to zero when user use mouse to click on “Clear” button. VigorSwitch P2261 User’s Guide... -
Page 43: Port - Detailed Statistics
A count of the MAC Control frames received or transmitted on this port that have an opcode indicating a PAUSE operation. Receive and Transmit Size Counters The number of received and transmitted (good and bad) packets split into categories VigorSwitch P2261 User’s Guide... -
Page 44: Port - Qos Statistics
The section describes that switch could display the QoS detailed Queuing counters for a specific switch port. for the different queues for all switch ports. The ports belong to the currently selected stack unit, as reflected by the page header. Function name: VigorSwitch P2261 User’s Guide... - Page 45 UI screen. Refresh The simple counts will be refreshed manually when user use mouse to click on “Refresh” button. Clear The simple counts will be reset to zero when user use mouse to click on “Clear” button. VigorSwitch P2261 User’s Guide...
-
Page 46: Port - Sfp Information
Vendor Serial Number Show the serial number assigned by the manufacturer. Date Code Show the date this SFP module was made. Temperature Show the current temperature of SFP module. Show the working DC voltage of SFP module. VigorSwitch P2261 User’s Guide... -
Page 47: Port - Eee
The section allows the user to inspect and configure the current EEE port settings. Parameter description: Port The switch port number of the logical EEE port. EEE Enabled Controls whether EEE is enabled for this switch port. VigorSwitch P2261 User’s Guide... -
Page 48: Loop Protection - General Setup
(and the port action shuts down the port). Valid values are 0 to 604800 seconds (7 days). A value of zero will keep a port disabled (until next device restart). VigorSwitch P2261 User’s Guide... -
Page 49: Loop Protection - Status
Display the port number. The number is 1 – 26. Action Display the currently configured port action. Transmit Display the currently configured port transmit mode. Loops Display the number of loops detected on this port. Status Display the current loop protection status of the port. VigorSwitch P2261 User’s Guide... -
Page 50: Trap Event Severity
Parameter description: Group Name The name identifies the severity group. Severity Level Scroll to select a severity level on each group. The following level types are supported: <0> Emergency: System is unusable. VigorSwitch P2261 User’s Guide... -
Page 51: Snmp - System
Community Name, Trap Host IP Address, Trap and all MIB counters will be ignored. Function name: System Function description: This function is used to enable SNMP settings. Parameter Description: SNMP State The term SNMP here The term SNMP here is used for the activation or de-activation of SNMP. VigorSwitch P2261 User’s Guide... -
Page 52: Snmp - General Setup
Indicate the community write access string to permit access to SNMP agent. The allowed string length is 0 to 255, and the allowed content is the ASCII characters from 33 to 126. The field is applicable only when SNMP version is VigorSwitch P2261 User’s Guide... -
Page 53: Snmp - Communities
Display a string identifying the user name that this entry should belong to. Source IP Display the SNMP access source IP address. Source Mask Display the source address mask. Add new community Click it to add a new community. VigorSwitch P2261 User’s Guide... -
Page 54: Snmp - Users
Click it to delete the selected user setting. User Name A string identifying the user name that this entry should belong to. The allowed string length is 1 to 32, and the allowed content is ASCII characters from 33 to 126. VigorSwitch P2261 User’s Guide... - Page 55 8 to 32, and the allowed content is ASCII characters from 33 to 126. Add new user Click it to add a new user. After finished the above settings, click Apply to save the configuration. The settings will take effect. VigorSwitch P2261 User’s Guide...
-
Page 56: Snmp - Groups
The allowed string length is 1 to 32, and the allowed content is ASCII characters from 33 to 126. Add new group Click it to add a new user. After finished the above settings, click Apply to save the configuration. The settings will take effect. VigorSwitch P2261 User’s Guide... -
Page 57: Snmp - Views
The OID defining the root of the subtree to add to the named view. The allowed OID length is 1 to 128. The allowed string content is digital number or asterisk (*). Add new group Click it to add a new user. VigorSwitch P2261 User’s Guide... -
Page 58: Snmp - Access
ASCII characters from 33 to 126. Security Model Indicates the security model that this entry should belong to. Possible security models are: any: Any security model accepted(v1|v2c|usm). v1: Reserved for SNMPv1. v2c: Reserved for SNMPv2c. usm: User-based Security Model (USM). VigorSwitch P2261 User’s Guide... - Page 59 1 to 32, and the allowed content is ASCII characters from 33 to 126. Add new access Click it to add a new profile. After finished the above settings, click Apply to save the configuration. The settings will take effect. VigorSwitch P2261 User’s Guide...
-
Page 60: Snmp - Trap
Security Level Display the level for security. Authentication Protocol Display the protocol configured for authentication. Privacy Protocol Display the protocol configured for privacy. Click the number link to access into the configuration page for each trap host. VigorSwitch P2261 User’s Guide... - Page 61 You can set DES encryption for User Name. Privacy Password The length of ' Privacy Password ' is restricted to 8 – 32. After finished the above settings, click Apply to save the configuration. The settings will take effect. VigorSwitch P2261 User’s Guide...
-
Page 62: System Log - General Setup
Syslog Level Indicates what kind of message will send to syslog server. Possible modes are: Emerg: Send Emerg Alert: Send Emerg, Alert Crit: Send Emerg, Alert, Crit Error: Send Emerg, Alert, Crit, Error Warning: Send warnings VigorSwitch P2261 User’s Guide... -
Page 63: System Log - Log
Refresh The simple counts will be refreshed manually when user use mouse to click on “Refresh” button. Clear The simple counts will be reset to zero when user use mouse to click on “Clear” button. VigorSwitch P2261 User’s Guide... -
Page 64: System Log - Detailed Log
Parameters description: ID (>= 1) of the system log entry. Message The detailed message of the system log entry. Refresh The simple counts will be refreshed manually when user use mouse to click on “Refresh” button. VigorSwitch P2261 User’s Guide... -
Page 65: Smtp General Setup
To set the mail return-path as sender mail address. Email Address 1-6 Email address that would like to receive the alarm message. After finished the above settings, click Apply to save the configuration. The settings will take effect. VigorSwitch P2261 User’s Guide... -
Page 66: Sflow Agent - Collector
Collector. The value of the port number has to be typed into the text box. The value accepted is within the range of 1-65535. But an appropriate port number not used by other protocols need to VigorSwitch P2261 User’s Guide... -
Page 67: Sflow Agent - Sampler
The attributes associated with the flow sampling are: sampler type, sampling rate. Sampler Type - Configured sampler type on the port and could be any of the types: None, Rx, Tx or All. You can VigorSwitch P2261 User’s Guide... - Page 68 If sampling rate is configured as 'N',1/N frames is sampled. The sampling rate ranges from 0 to 4095. Default value is "0" meaning sampling is disabled on the port. If receiver time_out is 0sec, this sFlow configuration is disabled operationally. VigorSwitch P2261 User’s Guide...
-
Page 69: Configuration
“logic trunked port”. Using Static Trunk on both end of a link is strongly recommended. Please also note that low speed links will stay in “not ready” state when using static trunk to aggregate with high speed links. VigorSwitch P2261 User’s Guide... - Page 70 Only full duplex ports can join an aggregation and ports must be in the same speed in each group. After finished the above settings, click Apply to save the configuration. The settings will take effect. VigorSwitch P2261 User’s Guide...
-
Page 71: Aggregation - Lacp - General Setup
LACP packets each second while Passive will wait for a LACP packet from a partner (speak if spoken to). After finished the above settings, click Apply to save the configuration. The settings will take effect. VigorSwitch P2261 User’s Guide... -
Page 72: Aggregation - Lacp - System Status
The simple counts will be refreshed automatically on the UI screen. Refresh The simple counts will be refreshed manually when user use mouse to click on “Refresh” button. After finished the above settings, click Apply to save the configuration. The settings will take effect. VigorSwitch P2261 User’s Guide... -
Page 73: Aggregation -Lacp - Port Status & Statistics
Shows how many LACP frames have been sent from each port. Discarded Shows how many unknown or illegal LACP frames have been discarded at each port. Auto refresh The simple counts will be refreshed automatically on the UI screen. VigorSwitch P2261 User’s Guide... -
Page 74: Spanning Tree - Bridge Settings
Spanning Tree – Bridge Settings Function description: The function is used to configure the Spanning Tree Bridge and STP System settings. It allows you to configure STP System settings are used by all STP Bridge instance in the Switch Stack. VigorSwitch P2261 User’s Guide... - Page 75 Control whether a port explicitly configured as Edge will Filtering transmit and receive BPDUs. Edge Port BPDU Guard Control whether a port explicitly configured as Edge will disable itself upon reception of a BPDU. The port will enter VigorSwitch P2261 User’s Guide...
-
Page 76: Spanning Tree - Msti Mapping
Parameters description: Configuration Identification Configuration Name The name identifying the VLAN to MSTI mapping. Bridges must share the name and revision (see below), as well as the VLAN-to-MSTI mapping configuration in order to share VigorSwitch P2261 User’s Guide... -
Page 77: Spanning Tree - Msti Priorities
The function is used to inspect the current STP MSTI bridge instance priority configurations, and possibly change them as well. Parameters description: MSTI The bridge instance. The CIST is the default instance, which is always active. Priority Controls the bridge priority. Lower numeric values have VigorSwitch P2261 User’s Guide... -
Page 78: Spanning Tree - Cist Ports
1 to 200000000. Priority Controls the port priority. This can be used to control priority of ports having identical port cost. (See above). Admin Edge Controls whether the operEdge flag should start as set or VigorSwitch P2261 User’s Guide... - Page 79 Transition to the forwarding state is faster for point-to-point LANs than for shared media. After finished the above settings, click Apply to save the configuration. The settings will take effect. VigorSwitch P2261 User’s Guide...
-
Page 80: Spanning Tree - Msti Ports
The function is used to inspect the current STP MSTI port configurations, and possibly change them as well. Use the drop down list to choose one of the MSTI ports and click Get to open the following page: Parameters description: VigorSwitch P2261 User’s Guide... -
Page 81: Spanning Tree - Bridge Status
Parameters description: MSTI The Bridge Instance. This is also a link to the STP Detailed Bridge Status. Bridge ID The Bridge ID of this Bridge instance. Root ID The Bridge ID of the currently elected root bridge. VigorSwitch P2261 User’s Guide... -
Page 82: Spanning Tree - Port Status
The port state can be one of the following values: Blocking, Learning, Forwarding. Uptime The time since the bridge port was last initialized. Auto refresh The simple counts will be refreshed automatically on the UI screen. VigorSwitch P2261 User’s Guide... -
Page 83: Spanning Tree - Port Statistics
The number of illegal Spanning Tree BPDU's received (and discarded) on the port. Auto refresh The simple counts will be refreshed automatically on the UI screen. Refresh The simple counts will be refreshed manually when user VigorSwitch P2261 User’s Guide... -
Page 84: Igmp Snooping - General Setup
The function is used to set the basic IGMP snooping on the switch, which connects to a router closer to the root of the tree. This interface is the upstream interface. The router on the upstream interface should be running IGMP. Parameters description: Global Configuration Snooping Enabled Enable the Global IGMP Snooping. VigorSwitch P2261 User’s Guide... - Page 85 Enable the fast leave on the port. Throttling Enable to limit the number of multicast groups to which a switch port can belong. After finished the above settings, click Apply to save the configuration. The settings will take effect. VigorSwitch P2261 User’s Guide...
-
Page 86: Igmp Snooping - Vlan General Setup
Query Interval. The Query Interval variable denotes the interval between General Queries sent by the Querier. The allowed range is 1 to 255 seconds; default query interval is 125 seconds. Query Response Interval. The Maximum Response Delay VigorSwitch P2261 User’s Guide... -
Page 87: Igmp Snooping - Port Group Filtering
It allows the user to control the distribution of multicast services, such as IP/TV, based on some type of subscription or service plan. VigorSwitch P2261 User’s Guide... - Page 88 VigorSwitch P2261 User’s Guide...
-
Page 89: Igmp Snooping - Status
The number of Transmitted Queries. Queries Received The number of Received Queries. V1 Reports Received The number of Received V1 Reports. V2 Reports Received The number of Received V2 Reports. V3 Reports Received The number of Received V3 Reports. VigorSwitch P2261 User’s Guide... -
Page 90: Igmp Snooping - Groups Information
When the end is reached the text "No more entries" is shown in the displayed table. Parameters description: VLAN ID VLAN ID of the group. Groups Group address of the group displayed. Port Members Ports under this group. VigorSwitch P2261 User’s Guide... -
Page 91: Igmp Snooping- Ipv4 Ssm Information
The will use the last entry of the currently displayed table as a basis for the next lookup. When the end is reached the text "No more entries" is shown in the displayed table. Use the button to start over. VigorSwitch P2261 User’s Guide... - Page 92 (Note that this is a function of the application software, not of MLD.) When MLD snooping is enabled on a VLAN, the switch acts to minimize unnecessary multicast traffic. If the switch receives multicast traffic destined for a given multicast VigorSwitch P2261 User’s Guide...
-
Page 93: Mld Snooping - General Setup
SSM-aware hosts and routers run the SSM service model for the groups in the address (Using IPv6 Address) range. Proxy Enabled Enable MLD Proxy. This feature can be used to avoid forwarding unnecessary join and leave messages to the router side. VigorSwitch P2261 User’s Guide... -
Page 94: Mld Snooping - Vlan General Setup
The will use the last entry of the currently displayed entry as a basis for the next lookup. When the end is reached the text "No more entries" is shown in the displayed table. Use the button to start over. VigorSwitch P2261 User’s Guide... - Page 95 31744 seconds; default unsolicited report interval is 1 second. Refresh The simple counts will be refreshed manually when user use mouse to click on “Refresh” button. After finished the above settings, click Apply to save the configuration. The settings will take effect. VigorSwitch P2261 User’s Guide...
-
Page 96: Mld Snooping - Port Group Filtering
Parameters description: Delete Click to delete the entry. Port The logical port for the settings. Filtering Groups The IP Multicast Group that will be filtered. Add new Filtering Group Click to add a new filtering group. VigorSwitch P2261 User’s Guide... -
Page 97: Mld Snooping - Status
Refresh The simple counts will be refreshed manually when user use mouse to click on “Refresh” button. Clear The simple counts will be reset to zero when user use mouse to click on “Clear” button. VigorSwitch P2261 User’s Guide... -
Page 98: Mld Snooping - Groups Information
Port Members Ports under this group. Auto refresh The simple counts will be refreshed automatically on the UI screen. Refresh The simple counts will be refreshed manually when user use mouse to click on “Refresh” button. VigorSwitch P2261 User’s Guide... -
Page 99: Mld Snooping- Ipv6 Ssm Information
Indicates the Type. It can be either Allow or Deny. Auto refresh The simple counts will be refreshed automatically on the UI screen. Refresh The simple counts will be refreshed manually when user use mouse to click on “Refresh” button. VigorSwitch P2261 User’s Guide... -
Page 100: Mvr - General Setup
Enable MVR on the port. Type Specify the MVR port type on the port. Immediate Leave Enable the fast leave on the port. After finished the above settings, click Apply to save the configuration. The settings will take effect. VigorSwitch P2261 User’s Guide... -
Page 101: Mvr - Group Information
Port Members Ports under this group. Auto refresh The simple counts will be refreshed automatically on the UI screen. Refresh The simple counts will be refreshed manually when user use mouse to click on “Refresh” button. VigorSwitch P2261 User’s Guide... -
Page 102: Mvr - Statistics
Refresh The simple counts will be refreshed manually when user use mouse to click on “Refresh” button. Clear The simple counts will be reset to zero when user use mouse to click on “Clear” button. VigorSwitch P2261 User’s Guide... -
Page 103: Lldp - Lldp General Setup
Tx Delay cannot be larger than 1/4 of the Tx Interval value. Valid values are restricted to 1 - 8192 seconds. Tx Reinit When a port is disabled, LLDP is disabled or the switch is VigorSwitch P2261 User’s Guide... - Page 104 Port Descr Optional TLV: When checked the "port description" is included in LLDP information transmitted. Sys Name Optional TLV: When checked the "system name" is included in LLDP information transmitted. VigorSwitch P2261 User’s Guide...
-
Page 105: Lldp - Lldp Neighbours
System Name is the name advertised by the neighbour unit. Port Description Port Description is the port description advertised by the neighbour unit. System Capabilities System Capabilities describes the neighbour unit's capabilities. The possible capabilities are: 1. Other VigorSwitch P2261 User’s Guide... -
Page 106: Lldp - Lldp-Med General Setup
(manufacturer, software and hardware versions, serial or asset number). Function name: LLDP – LLDP-MED General Setup Function description: The function is used to configure the LLDP-MED. This function applies to VoIP devices which support LLDP-MED. VigorSwitch P2261 User’s Guide... - Page 107 The recommended value is 4 times, given that 4 LLDP frames with a 1 second interval will be transmitted, when an LLDP frame with new information is received. VigorSwitch P2261 User’s Guide...
- Page 108 IETF Geopriv Civic Address based Location Configuration Information (Civic Address LCI). Country code The two-letter ISO 3166 country code in capital ASCII letters - Example: DK, DE or US. State National subdivisions (state, canton, region, province, VigorSwitch P2261 User’s Guide...
- Page 109 VLAN configuration, along with the associated Layer 2 and Layer 3 attributes, which apply for a set of specific protocol applications on that port. Improper network policy configurations are a very significant issue in VoIP VigorSwitch P2261 User’s Guide...
- Page 110 This application type should not be advertised if all the same network policies apply as those advertised in the Voice application policy. VigorSwitch P2261 User’s Guide...
- Page 111 VLAN ID VLAN identifier (VID) for the port as defined in IEEE 802.1Q-2003. L2 Priority L2 Priority is the Layer 2 priority to be used for the specified application type. L2 Priority may specify one of VigorSwitch P2261 User’s Guide...
- Page 112 The set of policies that shall apply to a given port. The set of policies is selected by check marking the checkboxes that corresponds to the policies. After finished the above settings, click Apply to save the configuration. The settings will take effect. VigorSwitch P2261 User’s Guide...
-
Page 113: Lldp - Lldp-Med Neighbours
TIA-1057 and can relay IEEE 802 frames via any method. LLDP-MED Endpoint Devices, as defined in TIA-1057, are LLDP-MED Endpoint located at the IEEE 802 LAN network edge, and participate Device Definition in IP communication service using the LLDP-MED VigorSwitch P2261 User’s Guide... - Page 114 IP Phones, PC-based softphones, or other communication appliances that directly support the end user. Discovery services defined in this class include provision of location identifier (including ECS / E911 information), embedded L2 switch support, inventory management. VigorSwitch P2261 User’s Guide...
- Page 115 Policy indicates that an Endpoint Device wants to explicitly Policy advertise that the policy is required by the device. Can be either Defined or Unknown Unknown: The network policy for the specified application VigorSwitch P2261 User’s Guide...
- Page 116 IETF RFC 2474. Contain one of 64 code point values (0 through 63). Auto refresh The simple counts will be refreshed automatically on the UI screen. Refresh The simple counts will be refreshed manually when user use mouse to click on “Refresh” button. VigorSwitch P2261 User’s Guide...
-
Page 117: Lldp - Eee
Echo Tx Tw The link partner's Echo Tx Tw value. The respective echo values shall be defined as the local link partner reflection (echo) of the remote link partners respective values. When a local link partner receives its VigorSwitch P2261 User’s Guide... - Page 118 (based on EEE information exchanged via LLDP). Auto refresh The simple counts will be refreshed automatically on the UI screen. Refresh The simple counts will be refreshed manually when user use mouse to click on “Refresh” button. VigorSwitch P2261 User’s Guide...
-
Page 119: Lldp - Port Statistics
The number of LLDP frames received on the port. Rx Errors The number of received LLDP frames containing some kind of error. Frames Discarded If an LLDP frame is received on a port, and the switch's VigorSwitch P2261 User’s Guide... -
Page 120: Poe - General Setup
This page allows the user to inspect and configure the current PoE port settings and show all PoE Supply W. VigorSwitch P2261 User’s Guide... -
Page 121: Poe -Status
NOTE: If you want to set the Port support IEEE802.3at then you can set the Maximum allowed value is 30W. Detection Allows you to choose power supply mode (Legacy and 4-Point). Reset Rest the PoE status. – – Function name: PoE –Status VigorSwitch P2261 User’s Guide... -
Page 122: Poe -Power Delay
The simple counts will be refreshed automatically on the UI screen. Refresh The simple counts will be refreshed manually when user use mouse to click on “Refresh” button. – – Function name: PoE –Power Delay Function description: VigorSwitch P2261 User’s Guide... -
Page 123: Poe - Auto Checking
Delay Time (0-300 sec) Set the delay time for power mode. – – Function name: PoE – Auto Checking Parameters description: Ping Check Check the device with PING command. Ping IP Address Type the IP address of the device. VigorSwitch P2261 User’s Guide... -
Page 124: Poe -Schedule
Switching of frames is based upon the DMAC address contained in the frame. The switch builds up a table that maps MAC addresses to switch ports for knowing which ports the frames should go to (based upon the DMAC address in the frame). This table contains both VigorSwitch P2261 User’s Guide... - Page 125 SMAC is received. If the learning mode for a given port is greyed out and another module is in control of the mode, it cannot be changed by the user. An example of such a module is the VigorSwitch P2261 User’s Guide...
-
Page 126: Filtering Data Base - Dynamic Mac Table
Filtering Data Base – Dynamic MAC Table Function description: Entries in the MAC Table are shown on this page. The MAC Table contains up to 8192 entries, and is sorted first by VLAN ID, then by MAC address. Parameters description: VigorSwitch P2261 User’s Guide... -
Page 127: Vlan - Vlan Membership
VLAN through a multi-VLAN route. Function name: VLAN – VLAN Membership Function description: The function is used for adding and deleting VLANs as well as adding and deleting port members of each VLAN. Parameters description: VigorSwitch P2261 User’s Guide... -
Page 128: Vlan - Ports
Filtering Rule 1 is “forward only packets with VID matching this port’s configured VID”. The Ingress Filtering Rule 2 is “drop untagged frame”. You can also select the Role of each port as Access, Trunk, or Hybrid. VigorSwitch P2261 User’s Guide... - Page 129 Hybrid: If the tag of tagged frame is as the same as PVID, the tag of the frame will be removed. The frame become an untagged frame and transmitted. Any other tagged frame whose tag value is different from PVID is transmitted directly. VigorSwitch P2261 User’s Guide...
- Page 130 1 through 4095. The default value is 1. Note: The port must be a member of the same VLAN as the Port VLAN ID. After finished the above settings, click Apply to save the configuration. The settings will take effect. VigorSwitch P2261 User’s Guide...
-
Page 131: Vlan - Switch Status
Supplicant, Authenticator, and an Authentication Server. GVRP: GARP VLAN Registration Protocol (GVRP) allows dynamic registration and deregistration of VLANs on ports on a VLAN bridged network. MVR: MVR is used to eliminate the need to duplicate VigorSwitch P2261 User’s Guide... -
Page 132: Vlan - Port Status
Static NAS MVRP MVP Voice VLAN MSTP GVRP Combined. Parameters description: VLAN USER VLAN User module uses services of the VLAN management functionality to configure VLAN memberships and VLAN port configurations such as PVID and UVID. Currently we support the following VLAN user types: VigorSwitch P2261 User’s Guide... - Page 133 Shows whether the port accepts all frames or only tagged Frame Type frames. This parameter affects VLAN ingress processing. If the port only accepts tagged frames, untagged frames received on that port are discarded. Shows egress filtering frame status whether tagged or Tx Tag untagged. VigorSwitch P2261 User’s Guide...
-
Page 134: Vlan - Private Vlans - Private Vlan Membership
Function description: The Private VLAN membership configurations for the switch can be monitored and modified here. Private VLANs can be added or deleted here. Port members of each Private VLAN can be added or removed here. VigorSwitch P2261 User’s Guide... - Page 135 The Private VLAN is enabled when you click "Apply". The button can be used to undo the addition of new Private VLANs. After finished the above settings, click Apply to save the configuration. The settings will take effect. VigorSwitch P2261 User’s Guide...
-
Page 136: Vlan - Private Vlans - Port Isolation
When checked, port isolation is enabled on that port. When unchecked, port isolation is disabled on that port. By default, port isolation is disabled on all ports. After finished the above settings, click Apply to save the configuration. The settings will take effect. VigorSwitch P2261 User’s Guide... -
Page 137: Vlan - Mac-Based Vlan - General Setup
This page shows only static entries. Parameters description: Delete To delete a MAC-based VLAN entry, check this box and press Apply. MAC Address Indicates the MAC address. VLAN ID Indicates the VLAN ID. VigorSwitch P2261 User’s Guide... - Page 138 The button can be used to undo the addition of new MAC-based VLANs. Refresh The simple counts will be refreshed manually when user use mouse to click on “Refresh” button. After finished the above settings, click Apply to save the configuration. The settings will take effect. VigorSwitch P2261 User’s Guide...
-
Page 139: Vlan - Mac-Based Vlan - Status
The simple counts will be refreshed automatically on the UI screen. Refresh The simple counts will be refreshed manually when user use mouse to click on “Refresh” button. After finished the above settings, click Apply to save the configuration. The settings will take effect. VigorSwitch P2261 User’s Guide... -
Page 140: Vlan - Protocol-Based Vlan - Protocol Group
Parameters description: Delete Check this box to delete the entry. Frame Type Frame Type can have one of the following values: Ethernet SNAP Note: On changing the Frame type field, valid value of the VigorSwitch P2261 User’s Guide... - Page 141 The button can be used to undo the addition of new entry. Refresh The simple counts will be refreshed manually when user use mouse to click on “Refresh” button. After finished the above settings, click Apply to save the configuration. The settings will take effect. VigorSwitch P2261 User’s Guide...
-
Page 142: Vlan - Protocol-Based Vlan - Group To Vlan
Legal values for a VLAN ID are 1 through 4095. The button can be used to undo the addition of new entry. Auto refresh The simple counts will be refreshed automatically on the UI screen. VigorSwitch P2261 User’s Guide... -
Page 143: Voice Vlan - General Setup
VID, MVR VID, PVID etc. The allowed range is 1 to 4095. Aging Time Indicates the Voice VLAN secure learning aging time. The allowed range is 10 to 10000000 seconds. It is used when VigorSwitch P2261 User’s Guide... - Page 144 Possible discovery protocols are: OUI: Detect telephony device by OUI address. LLDP: Detect telephony device by LLDP. Both: Both OUI and LLDP. After finished the above settings, click Apply to save the configuration. The settings will take effect. VigorSwitch P2261 User’s Guide...
-
Page 145: Voice Vlan - Qui
VLAN Identifiers, with each other. In doing so, the attributes are propagated to devices in the bridged LAN, and these devices form a reachability tree that is a subset of an active topology. GARP defines the architecture, rules VigorSwitch P2261 User’s Guide... -
Page 146: Garp - General Setup
This configuration is used to configure the Applicant state machine behavior for GARP on a particular port locally. Applicant state machine behavior for GARP on a particular port locally. normal-participate: In this mode the Applicant state VigorSwitch P2261 User’s Guide... -
Page 147: Garp - Statistics
Failed Count Explain Failed count here... Auto refresh The simple counts will be refreshed automatically on the UI screen. Refresh The simple counts will be refreshed manually when user use mouse to click on “Refresh” button. VigorSwitch P2261 User’s Guide... -
Page 148: Gvrp - General Setup
Default value of Global MVRP Mode is Disable. Port Configuration Port The Port column shows the list of ports for which you can configure per port GVRP settings. VigorSwitch P2261 User’s Guide... -
Page 149: Qos - Port Classification
CPU even when all the QoS class queues are congested. Function name: QoS – Port Classification Function description: The function is to configure the basic QoS Ingress Classification settings for all switch ports. VigorSwitch P2261 User’s Guide... - Page 150 Click on the mode in order to configure the mode and/or mapping. DSCP Based Click to Enable DSCP Based QoS Ingress Port Classification. After finished the above settings, click Apply to save the configuration. The settings will take effect. VigorSwitch P2261 User’s Guide...
-
Page 151: Qos - Port Policing
Select the unit of rate including kbps, Mbps, fps and kfps. The default is kbps. Flow Control Check it to enable or disable flow control on port. After finished the above settings, click Apply to save the configuration. The settings will take effect. VigorSwitch P2261 User’s Guide... -
Page 152: Qos - Port Scheduler
The logical port for the settings contained in the same row. Click on the port number in order to configure the schedulers. Mode Shows the scheduling mode for this port. Weight (Q0 – Qn) Shows the weight for this queue and port. VigorSwitch P2261 User’s Guide... -
Page 153: Qos - Port Shaping
Click on the port number in order to configure the shapers. Shapers (Q0- Qn) Shows "disabled" or actual queue shaper rate - e.g. "800 Mbps". Port Shows "disabled" or actual port shaper rate - e.g. "800 Mbps". VigorSwitch P2261 User’s Guide... -
Page 154: Qos - Tag Remarking
Click on the port number in order to configure tag remarking. Mode Shows the tag remarking mode for this port. Classified: Use classified PCP/DEI values. Default: Use default PCP/DEI values. Mapped: Use mapped versions of QoS class and DP level. VigorSwitch P2261 User’s Guide... -
Page 155: Qos - Dscp
DSCP is 0. Selected: Classify only selected DSCP for which classification is enabled as specified in DSCP Translation window for the specific DSCP. All: Classify all DSCP. Egress Port Egress Rewriting can be one of the following: VigorSwitch P2261 User’s Guide... -
Page 156: Qos - Dscp-Based Qos
Click to check if the DSCP value is trusted. QoS Class QoS Class value can be any of (0-7). Drop Precedence Level (0-3). After finished the above settings, click Apply to save the configuration. The settings will take effect. VigorSwitch P2261 User’s Guide... -
Page 157: Qos - Dscp Translation
2. Remap DP1 - Select the DSCP value from select menu to which you want to remap. DSCP value ranges form 0 to 63. After finished the above settings, click Apply to save the configuration. The settings will take effect. VigorSwitch P2261 User’s Guide... -
Page 158: Qos - Dscp Classification
QoS Classes. DSCP Select DSCP value (0-63) from DSCP menu to map DSCP to corresponding QoS Class and DPL value. After finished the above settings, click Apply to save the configuration. The settings will take effect. VigorSwitch P2261 User’s Guide... -
Page 159: Qos - Qos Control List
Possible values are: Any: All types of Destination MAC addresses are allowed. Unicast: Only Unicast MAC addresses are allowed. Multicast: Only Multicast MAC addresses are allowed. Broadcast: Only Broadcast MAC addresses are allowed. The default value is 'Any'. VigorSwitch P2261 User’s Guide... - Page 160 1-4094 or 'Any'; user can enter either a specific value or a range of VIDs. PCP - Priority Code Point: Valid value PCP are specific(0, 1, 2, 3, 4, 5, 6, 7) or range(0-1, 2-3, 4-5, 6-7, 0-3, 4-7) or VigorSwitch P2261 User’s Guide...
- Page 161 0-63 including BE, CS1-CS7, EF or AF11-AF43. Sport Source TCP/UDP port: (0-65535) or 'Any', specific or port range applicable for IP protocol UDP/TCP. Dport Destination TCP/UDP port:(0-65535) or 'Any', specific or port range applicable for IP VigorSwitch P2261 User’s Guide...
- Page 162 : Deletes the QCE. : The lowest plus sign adds a new entry at the bottom of the QCE listings. After finished the above settings, click Apply to save the configuration. The settings will take effect. VigorSwitch P2261 User’s Guide...
-
Page 163: Qos - Qos Status
Class: Classified QoS Class; if a frame matches the QCE it will be put in the queue. DPL: Drop Precedence Level; if a frame matches the QCE then DP level will set to value displayed under DPL column. VigorSwitch P2261 User’s Guide... -
Page 164: Qos - Storm Control
Address table. The configuration indicates the permitted packet rate for unicast, multicast or broadcast traffic across the switch Parameters description: Frame Type The settings in a particular row apply to the frame type listed here: Unicast, Multicast or Broadcast. VigorSwitch P2261 User’s Guide... -
Page 165: Single Ip - General Setup
Parameters description: Mode The parameter lets you disable the SIP function or set the device become a Master role or Slave role. Possible modes are: Disable: Disable operation of Single IP Management. VigorSwitch P2261 User’s Guide... -
Page 166: Single Ip - Information
Display the Ethernet MAC address of the Slave Switch. The parameter lets you to know what device’s MAC address and join to this SIP group. Auto refresh Check this box to enable an automatic refresh of the page at regular intervals. VigorSwitch P2261 User’s Guide... -
Page 167: Easy Port
Role The port role is based on the type of devices to be connected to the switch ports. To scroll to select what kind device you want to connect and implement with the Easy Port setting. VigorSwitch P2261 User’s Guide... - Page 168 If you connect the IP Phone, you need to assign the Voice VLAN ID. The value of the port number has to be typed into the text box. After finished the above settings, click Apply to save the configuration. The settings will take effect. VigorSwitch P2261 User’s Guide...
-
Page 169: Mirroring
Note: For a given port, a frame is only transmitted once. It is therefore not possible to mirror Tx frames on the mirror port. Because of this, mode for the selected mirror port is limited to Disabled or Rx only. VigorSwitch P2261 User’s Guide... -
Page 170: Upnp
In the implementation, the switch sends SSDP messages periodically at the interval one-half of the advertising duration minus 30 seconds. Valid values are in the range VigorSwitch P2261 User’s Guide... -
Page 171: Security
The logical port for the settings contained in the same row. Policy ID Select the policy to apply to this port. The allowed values are 1 through 8. The default value is 1. Action Select whether forwarding is permitted ("Permit") or denied VigorSwitch P2261 User’s Guide... - Page 172 “Refresh” button. Clear The simple counts will be reset to zero when user use mouse to click on “Clear” button. After finished the above settings, click Apply to save the configuration. The settings will take effect. VigorSwitch P2261 User’s Guide...
-
Page 173: Acl - Rate Limiters
300, ..., 1000000 in kbps. Unit Specify the rate unit. The allowed values are: pps: Packets per second. kbps: Kbits per second. After finished the above settings, click Apply to save the configuration. The settings will take effect. VigorSwitch P2261 User’s Guide... -
Page 174: Acl - Access Control List
EType: The ACE will match Ethernet Type frames. Note that an Ethernet Type based ACE will not get matched by IP and ARP frames. ARP: The ACE will match ARP/RARP frames. IPv4: The ACE will match all IPv4 frames. VigorSwitch P2261 User’s Guide... - Page 175 The simple counts will be refreshed manually when user use mouse to click on “Refresh” button. Clear The simple counts will be reset to zero when user use mouse to click on “Clear” button. Remove All Clean up all ACL configurations on the table. VigorSwitch P2261 User’s Guide...
- Page 176 IPv4: The ACE will match all IPv4 frames. IPv4/ICMP: The ACE will match IPv4 frames with ICMP protocol. IPv4/UDP: The ACE will match IPv4 frames with UDP protocol. IPv4/TCP: The ACE will match IPv4 frames with TCP protocol. VigorSwitch P2261 User’s Guide...
- Page 177 Any: Any value is allowed ("don't-care"). Enabled: Tagged frame only. Disabled: Untagged frame only. The default value is "Any". Specify the VLAN ID filter for this ACE. VLAN ID Filter Any: No VLAN ID filter is specified. (VLAN ID filter VigorSwitch P2261 User’s Guide...
-
Page 178: Acl - Acl Status
Indicates the frame type of the ACE. Possible values are: Any: The ACE will match any frame type. EType: The ACE will match Ethernet Type frames. Note that an Ethernet Type based ACE will not get matched by IP VigorSwitch P2261 User’s Guide... - Page 179 ACE is not applied to the hardware due to hardware limitations. Auto refresh The simple counts will be refreshed automatically on the UI screen. Refresh The simple counts will be refreshed manually when user use mouse to click on “Refresh” button. VigorSwitch P2261 User’s Guide...
-
Page 180: Ip Source Guard - General Setup
0, it means only allow the IP packets forwarding that are matched in static entries on the specific port. After finished the above settings, click Apply to save the configuration. The settings will take effect. VigorSwitch P2261 User’s Guide... -
Page 181: Ip Source Guard - Static Table
Click to add a new entry to the Static IP Source Guard table. Specify the Port, VLAN ID, IP address, and IP Mask for the new entry. Click Apply After finished the above settings, click Apply to save the configuration. The settings will take effect. VigorSwitch P2261 User’s Guide... -
Page 182: Ip Source Guard - Dynamic Table
User IP address of the entry. MAC Address Source MAC address. Auto refresh The simple counts will be refreshed automatically on the UI screen. Refresh The simple counts will be refreshed manually when user use mouse to click on “Refresh” button. VigorSwitch P2261 User’s Guide... -
Page 183: Arp Inspection - General Setup
Global Mode and Port Mode on a given port are enabled, ARP Inspection is enabled on this given port. After finished the above settings, click Apply to save the configuration. The settings will take effect. VigorSwitch P2261 User’s Guide... -
Page 184: Arp Inspection - Static Table
Click to add a new entry to the Static ARP Inspection table. Specify the Port, VLAN ID, MAC address, and IP address for the new entry. Click Apply. After finished the above settings, click Apply to save the configuration. The settings will take effect. VigorSwitch P2261 User’s Guide... -
Page 185: Arp Inspection - Dynamic Table
User IP address of the entry. Auto refresh The simple counts will be refreshed automatically on the UI screen. Refresh The simple counts will be refreshed manually when user use mouse to click on “Refresh” button. VigorSwitch P2261 User’s Guide... -
Page 186: Dhcp Snooping - General Setup
Trusted: Configures the port as trusted source of the DHCP messages. Untrusted: Configures the port as untrusted source of the DHCP messages. After finished the above settings, click Apply to save the configuration. The settings will take effect. VigorSwitch P2261 User’s Guide... -
Page 187: Dhcp Snooping - Statistics
Rx and Tx Lease Query The number of lease query (option 53 with value 10) packets received and transmitted. Rx and Tx Lease The number of lease unassigned (option 53 with value 11) Unassigned packets received and transmitted. VigorSwitch P2261 User’s Guide... -
Page 188: Dhcp Relay - General Setup
Relay Information Mode Indicates the DHCP relay information mode option operation. Possible modes are: Enabled: Enable DHCP relay information mode operation. VigorSwitch P2261 User’s Guide... - Page 189 Drop: Drop the package when a DHCP message that already contains relay information is received. After finished the above settings, click Apply to save the configuration. The settings will take effect. VigorSwitch P2261 User’s Guide...
-
Page 190: Dhcp Relay - Statistics
The number of packets whose Remote ID option did not match known Remote ID. Client Statistics Transmit to Client The number of relayed packets from server to client. Transmit Error The number of packets that resulted in error while being sent to servers. VigorSwitch P2261 User’s Guide... -
Page 191: Nas - General Setup
Indicates if NAS is globally enabled or disabled on the switchstack. If it is disabled, all ports are allowed forwarding of frames. Reauthentication Enabled If checked, successfully authenticated supplicants/clients are reauthenticated after the interval specified by the VigorSwitch P2261 User’s Guide... - Page 192 • Single 802.1X • Multi 802.1X • MAC-Based Auth. If a client is denied access - either because the RADIUS server denies the client access or because the RADIUS server request times out (according to the timeout specified VigorSwitch P2261 User’s Guide...
- Page 193 This is the value that a port's Port VLAN ID is set to if a port is moved into the Guest VLAN. It is only changeable if the Guest VLAN option is globally enabled. Valid values are in the range [1; 4095]. VigorSwitch P2261 User’s Guide...
- Page 194 The switch simply encapsulates the EAP part of the frame into the relevant type (EAPOL or RADIUS) and forwards it. When authentication is complete, the RADIUS server sends VigorSwitch P2261 User’s Guide...
- Page 195 Multi 802.1X is really not an IEEE standard, but features many of the same characteristics as does port-based 802.1X. Multi 802.1X is - like Single 802.1X - not an IEEE standard, but a variant that features many of the same VigorSwitch P2261 User’s Guide...
- Page 196 MAC addresses can be spoofed by malicious users - equipment whose MAC address is a valid RADIUS user can be used by anyone. Also, only the MD5-Challenge method is supported. The maximum number of clients that can be VigorSwitch P2261 User’s Guide...
- Page 197 RADIUS-assigned). This option is only available for single-client modes, i.e. • Port-based 802.1X • Single 802.1X For trouble-shooting VLAN assignments, use the "Monitor → VLANs→ VLAN Membership and VLAN Port" pages. VigorSwitch P2261 User’s Guide...
- Page 198 State is changed), and if not, the port will be placed in the Guest VLAN. Otherwise it will not move to the Guest VLAN, but continue transmitting EAPOL Request Identity frames at the rate given by EAPOL Timeout. Once in the Guest VLAN, the port is considered VigorSwitch P2261 User’s Guide...
- Page 199 The clients will transfer to the unauthorized state while the reauthentication is in progress. After finished the above settings, click Apply to save the configuration. The settings will take effect. VigorSwitch P2261 User’s Guide...
-
Page 200: Nas - Switch Status
Port VLAN ID is not overridden by NAS. If the VLAN ID is assigned by the RADIUS server, "(RADIUS-assigned)" is appended to the VLAN ID. Read more about RADIUS-assigned VLANs here. If the port is moved to the Guest VLAN, "(Guest)" is VigorSwitch P2261 User’s Guide... - Page 201 The simple counts will be refreshed automatically on the UI screen. Refresh The simple counts will be refreshed manually when user use mouse to click on “Refresh” button. After finished the above settings, click Apply to save the configuration. The settings will take effect. VigorSwitch P2261 User’s Guide...
-
Page 202: Nas - Port Status
The current state of the port. Refer to NAS Port State for a description of the individual states. Auto refresh The simple counts will be refreshed automatically on the UI screen. Refresh The simple counts will be refreshed manually when user use mouse to click on “Refresh” button. VigorSwitch P2261 User’s Guide... -
Page 203: Aaa - General Setup
This will stop the switch from continually trying to contact a server that it has already determined as dead. Setting the Dead Time to a value greater than 0 (zero) will VigorSwitch P2261 User’s Guide... - Page 204 0 (zero), the default port (1813) is used on the RADIUS Accounting Server. Secret The secret - up to 29 characters long - shared between the RADIUS Accounting Server and the switch stack. VigorSwitch P2261 User’s Guide...
- Page 205 Secret The secret - up to 29 characters long - shared between the TACACS+ Authentication Server and the switch stack. After finished the above settings, click Apply to save the configuration. The settings will take effect. VigorSwitch P2261 User’s Guide...
-
Page 206: Aaa - Radius Overview
Auto refresh The simple counts will be refreshed automatically on the UI screen. Refresh The simple counts will be refreshed manually when user use mouse to click on “Refresh” button. VigorSwitch P2261 User’s Guide... -
Page 207: Aaa - Radius Details
The number of RADIUS Access-Response packets Bad Authenticators containing invalid authenticators or Message Authenticator attributes received from the server. The number of RADIUS packets that were received Unknown Types VigorSwitch P2261 User’s Guide... - Page 208 Access-Reply/Access-Challenge and the Access-Request that matched it from the RADIUS authentication server. The granularity of this measurement is 100 ms. A value of 0 ms indicates that there hasn't been round-trip communication with the server yet. VigorSwitch P2261 User’s Guide...
-
Page 209: Port Security - Limit Control
The Aging Period can be set to a number between 10 and 10,000,000 seconds. To understand why aging may be desired, consider the following scenario: Suppose an end-host is connected to a VigorSwitch P2261 User’s Guide... - Page 210 2) Disable and re-enable Limit Control on the port or the stackswitch, 3) Click the Reopen button. Trap & Shutdown: If Limit + 1 MAC addresses is seen on the port, both the "Trap" and the "Shutdown" actions VigorSwitch P2261 User’s Guide...
-
Page 211: Port Security - Switch Status
If only one chooses to block it, it will be blocked until that user module decides otherwise. The status page is divided into two sections - one with a legend of user modules and one with the actual port status. VigorSwitch P2261 User’s Guide... - Page 212 No MAC addresses can be learned on the port until it is administratively re-opened on the Limit Control configuration Web-page. MAC Count (Current, The two columns indicate the number of currently learned VigorSwitch P2261 User’s Guide...
-
Page 213: Port Security - Port Status
MAC address to forward. If only one chooses to block it, it will be blocked until that user module decides otherwise. Parameters description: MAC Address & VLAN The MAC address and VLAN ID that is seen on this port. If VigorSwitch P2261 User’s Guide... - Page 214 MAC address indefinitely, a dash (-) will be shown. Auto refresh The simple counts will be refreshed automatically on the UI screen. Refresh The simple counts will be refreshed manually when user use mouse to click on “Refresh” button. VigorSwitch P2261 User’s Guide...
-
Page 215: Access Management - General Setup
TELNET/SSH Indicates that the host can access the switch from TELNET/SSH interface if the host IP address matches the IP address range provided in the entry. Add new entry Create a new entry. VigorSwitch P2261 User’s Guide... -
Page 216: Access Management - Statistics
Number of discarded packets from the interface when access management mode is enabled. Auto refresh The simple counts will be refreshed automatically on the UI screen. Refresh The simple counts will be refreshed manually when user use mouse to click on “Refresh” button. VigorSwitch P2261 User’s Guide... -
Page 217: Ssh
Parameters description: Mode Indicates the SSH mode operation. Possible modes are: Enabled: Enable SSH mode operation. Disabled: Disable SSH mode operation. After finished the above settings, click Apply to save the configuration. The settings will take effect. VigorSwitch P2261 User’s Guide... -
Page 218: Https
Automatically redirect web browser to HTTPS when HTTPS mode is enabled. Possible modes are: Enabled: Enable HTTPS redirect mode operation. Disabled: Disable HTTPS redirect mode operation. After finished the above settings, click Apply to save the configuration. The settings will take effect. VigorSwitch P2261 User’s Guide... -
Page 219: Auth Method
This is only possible if the Authentication Method is set to a value other than 'none' or 'local'. After finished the above settings, click Apply to save the configuration. The settings will take effect. VigorSwitch P2261 User’s Guide... -
Page 220: Maintenance
Restart Device Function description: The function is used to restart switch for any maintenance needs. Any configuration files or scripts that you saved in the switch should still be available afterwards. Click Yes to restart the device. VigorSwitch P2261 User’s Guide... -
Page 221: Firmware - Firmware Upgrade
Warning: While the firmware is being updated, web access appears to be defunct. The front LED flashes Green/Off with a frequency of 10 Hz while the firmware update is in progress. Do not restart or power off the device at this time or the switch may fail to function afterwards. VigorSwitch P2261 User’s Guide... -
Page 222: Firmware - Firmware Selection
The firmware version and date information may be empty for older firmware releases. This does not constitute an error. VigorSwitch P2261 User’s Guide... -
Page 223: Save/Restore - Factory Defaults
Defaults, Save Start, Save Users, Restore Users for any maintenance needs. Any configuration files or scripts will recover to factory default values. Click Yes to reset the Switch configuration to Factory Defaults. Only the IP configuration is retained. VigorSwitch P2261 User’s Guide... -
Page 224: Save/Restore - Save Start
The function is used to save the Switch Start configuration. Click Save to perform the work. You can save/view or load the switch configuration. The configuration file is in XML format with a hierarchy of tags. VigorSwitch P2261 User’s Guide... -
Page 225: Save/Restore - Save User
The function is used to save users information. Any current configuration files will be saved as XML format. Click Save to perform the work. You can save/view or load the switch configuration. The configuration file is in XML format with a hierarchy of tags. VigorSwitch P2261 User’s Guide... -
Page 226: Save/Restore - Restore User
The function is used to restore user information back to the switch. Any current configuration files will be restored via XML format. Click Save to perform the work. You can save/view or load the switch configuration. The configuration file is in XML format with a hierarchy of tags. VigorSwitch P2261 User’s Guide... -
Page 227: Export/Import - Export Config
The function is used to export the Switch configuration. Any current configuration files will be exported as XML format. Click Save configuration to perform the work. You can save/view or load the switch configuration. The configuration file is in XML format with a hierarchy of tags. VigorSwitch P2261 User’s Guide... -
Page 228: Export/Import - Import Config
XML format. Click Browser… to select firmware in you device and click Upload. You can save/view or load the switch configuration. The configuration file is in XML format with a hierarchy of tags. VigorSwitch P2261 User’s Guide... -
Page 229: Diagnostics - Ping
PING6 server::10.10.132.20 64 bytes from::10.10.132.20: icmp_seq=0, time=0ms 64 bytes from::10.10.132.20: icmp_seq=1, time=0ms 64 bytes from::10.10.132.20: icmp_seq=2, time=0ms 64 bytes from::10.10.132.20: icmp_seq=3, time=0ms 64 bytes from::10.10.132.20: icmp_seq=4, time=0ms Sent 5 packets, received 5 OK, 0 bad VigorSwitch P2261 User’s Guide... -
Page 230: Diagnostics - Ping6
64 bytes from 10.10.132.20: icmp_seq=0, time=0ms 64 bytes from 10.10.132.20: icmp_seq=1, time=0ms 64 bytes from 10.10.132.20: icmp_seq=2, time=0ms 64 bytes from 10.10.132.20: icmp_seq=3, time=0ms 64 bytes from 10.10.132.20: icmp_seq=4, time=0ms Sent 5 packets, received 5 OK, 0 bad VigorSwitch P2261 User’s Guide... -
Page 231: Diagnostics - Veriphy
The port where you are requesting VeriPHY Cable Diagnostics. Cable Status Port: Port number. Pair: The status of the cable pair. Length: The length (in meters) of the cable pair. After finished the above settings, click Start to perform the Ping job. VigorSwitch P2261 User’s Guide... - Page 232 This page is left blank. VigorSwitch P2261 User’s Guide...
-
Page 233: Chapter 3: Trouble Shooting
The COM port default parameters are [Baud Rate: 115200, Data Bits: 8, Parity Bits: None, Stop Bit: A, Flow Control: None]. Please check the COM port property in the terminal program. And if the parameters are changed, please set the COM configuration to the new setting. VigorSwitch P2261 User’s Guide... - Page 234 Linux/Unix to configure the Managed Switch. Please refer to the user guide of that terminal program. But the COM port parameters (baud rate/ data bits/ parity bits/ flow control) must be the same as the setting of the console port of the Managed Switch. VigorSwitch P2261 User’s Guide...