Table of Contents
Advertisement
Advertisement
Table of Contents

Related Manuals for Blomberg KWD2330X


Summary of Contents for Blomberg KWD2330X
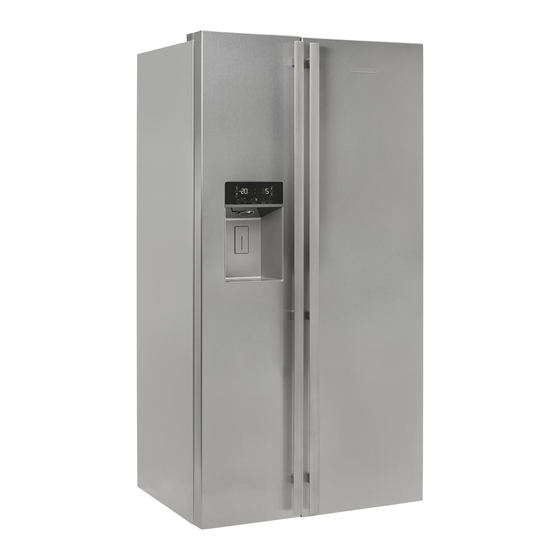
- Page 1 Refrigerator KWD2330X Operating instructions...
- Page 2 Please read this manual first! Dear Customer, We hope that your product, which has been produced in modern plants and checked under the most meticulous quality control procedures, will provide you with effective service. For this, we recommend you to carefully read the entire manual of your product before using it and keep it at hand for future references.
-
Page 3: Table Of Contents
1 Your refrigerator 5 Operating the product 5.1. Indicator panel ... . . 18 2 Warnings 5.2. NeoFrost Cooling System ..20 5.3. Freezing fresh food ..20 3 Installation 5.4. -
Page 4: Your Refrigerator
Your refrigerator Congratulations on your choice of a BLOMBERG quality Appliance which has been designed to give you service for many years. 1- Freezer compartment 9- Odour filter 2- Fridge compartment 10- Chiller compartment 3- Fan 11- Crisper compartment 4- Butter-cheese compartments... -
Page 5: Warnings
• Do not dispose of the your appliance it is very appliance on a fire. important to carefully read At BLOMBERG, the these instructions. care and protection of • On delivery, check to make our environment is an sure that the product is ongoing commitment. - Page 6 BLOMBERG from knowledge if they have Authorised Service Agent. Refrigerator / User Manual 5 / 34 EN...
- Page 7 Important instructions for safety and environment Warning! This Appliance Must Important! Fitting A Different Be Earthed Plug As the colours of the If the fitted moulded plug is wires in the mains lead not suitable for your socket, this appliance then the plug should be cut correspond with...
- Page 8 Important instructions for safety and environment With alternative plugs and ensure they are a 13 A fuse must be closed properly after each fitted either in the plug opening. or adaptor or in the Defrost frozen food in the main fuse box. If in fridge, so that frozen food doubt contact a qualified acts as an ice pack to...
- Page 9 Important instructions for safety and environment Compliance with RoHS Directive: The product you have purchased complies with EU RoHS Directive (2011/65/ EU). It does not contain harmful prohibited materials specified in the Directive. Package information Packaging materials of the product are manufactured from recyclable materials in accordance with our National...
-
Page 10: Installation
Installation 3.1. Appropriate Always have the repair procedures carried out by the Authorised Service Agent. installation location Manufacturer shall not be held liable for WARNING: If the door of the damages that may arise from procedures room where the product will be carried out by unauthorised persons. -
Page 11: Electrical Connection
Installation • The specified voltage must be equal to your mains voltage. • Do not make connections via extension cables or multi-plugs. WARNING: Damaged power cable must be replaced by the Authorised Service Agents. WARNING: If the product has a failure, it should not be operated unless it is repaired by the Authorised Service Agent! There is... -
Page 12: Door Open Warning
Installation 3.8. Connecting the water 3.6. Door open warning hose to the refrigerator (This feature is optional) 1. Slip the union (b) onto the water hose (a). An audio warning signal will be given 2. Push the water hose downwards firmly when the door of your product is left open to slip it onto the water inlet valve (c). -
Page 13: Connecting Of The Water Hose To The Cold Water Mains Line
Installation 3.9. Connecting of the water hose to the cold water mains line (This feature is optional) If you will use the refrigerator by connecting it to the cold water mains line, you must install a standard 1/2" valve connector to the cold water installation of your home. -
Page 14: Water Filter
Installation 3.10. Water filter (This feature is optional) Your refrigerator may be equipped with an external or internal filter depending on its model. To fit the water filter, follow the instructions below referring to the figures supplied: 3.11. Mounting the external filter onto the wall 1. -
Page 15: Activating Water Filter Change Warning
Installation If the password is entered correctly, buzzer 3.12. Activating water will sound shortly and Filter Change Warning filter change warning indicator will turn on. (For products connected to the mains water line Automatic filter usage time calculation is not and equipped with filter) enabled ex factory. -
Page 16: Transportation Of The Product
Installation 3.14. Transportation • The first 10 glasses of water should of the product not be consumed. • You must wait approximately 12 hours 1. Unplug the product before transporting to obtain ice from the ice dispenser for the first time. If there is not enough 2. -
Page 17: Preparation
Preparation 4.1. Things to be done 4.3. Recommendations on for energy saving the fridge compartment Connecting the product to electric • Do not allow the food to touch energy saving systems is risky the temperature sensor in fridge as it may restrict operation of the compartment. - Page 18 Preparation • Run the refrigerator without putting any food for 6 hours and do not open its door unless absolutely necessary. You will hear a noise when the compressor starts up. The liquids and gases sealed within the refrigeration system may also give rise to noise, even if the compressor is not running and this is quite normal.
-
Page 19: Operating The Product
Operating the product 5.1. Indicator panel Indicator panels may vary according to the product model. *opsiyonel 1. Freezer compartment temperature setting 2. Economy mode 3. Error status 4. Cooler compartment temperature setting 5. Rapid cooling 6. Vacation function 7. Keypad lock / filter replacing alert cancellation 8. - Page 20 Operating the product temperature set for each compartment. Pressing the button ( ) number (1) Press the vacation function button again will enable the freezer compartment to cancel this function. ( temperature to be set at -18,-19,-20,-21 ,-22,-23,-24,-18... 7. Keypad lock / Keypad lock / filter replacing alert cancellation 2.
-
Page 21: Neofrost Cooling System
Operating the product 5.2. NeoFrost Cooling System • Pack the food in an airtight manner to prevent them from drying even if they Thanks to the two separate cooling are going to be stored for a short time. systems, cooling speed is much faster •... -
Page 22: Recommendations For Preserving The Frozen Food
Operating the product You can keep the freshness of food 5.4. Recommendations for for many months (at -18°C or lower preserving the frozen food temperatures in the deep freeze). • Frozen food that you have purchased should be stored in accordance Divide the food into portions according to your family's daily or with the frozen food manufacturer's... -
Page 23: Chiller Compartment
Operating the product 5.7. Chiller compartment 5.11. Odour filter *optional *optional The chiller compartment maintains a Odour filter prevents unpleasant odour lower temperature then the rest of the build-up in your refrigerator. fridge, ideal for storing fresh meat fish Odour filter can be located in the fridge and deli items. -
Page 24: Using The Dispenser
Operating the product 5.12. Using the dispenser As the level of the water in your glass/ container rises, slightly lessen the pres- *optional sure on the lever to prevent the overspill. The water and ice dispenser will provide If you slightly press the lever, the water will chilled water and ice either direct from drip;... -
Page 25: Filling The Water Dispenser's Tank
Operating the product 5.13. Filling the water dispenser’s tank Water tank filling reservoir is located inside the door rack. Open the reservoir cover and pour in clean drinking water. And then, close the lid. Do not fill the water reservoir with any other liquid except for water such as fruit juices, carbonated beverages or alcoholic drinks... -
Page 26: Drip Tray
Operating the product 5.14. Filling the water • Grab the water tank from both sides dispenser’s tank and remove it with an angle of 45°. • Clean the water tank by removing its lid. Water tank filling reservoir is located inside the door rack. -
Page 27: Icematic And Ice Storage Container
Operating the product 5.16. Icematic and ice 5.17. Ice-maker storage container (Optional) *optional Ice maker is located on the upper section of the freezer cover. Using the Icematic’ Hold the handles on the sides of the ice Fill the Icematic with water and place it stock reservoir and move up to remove. - Page 28 Operating the product Any sound you hear when the ice drops into Do not let the children hang on the ice the reservoir is a part of normal operation. dispenser or the ice maker since it may cause an injury When the ice dispenser does not work properly To prevent dropping the ice stock reservoir If you do not remove ice cubes for a long...
-
Page 29: Maintenance And Cleaning
Maintenance and cleaning • Keeping the refrigerator clean is Cleaning your fridge at regular intervals important. Food residuals, stains, etc. will extend the service life of the product. can cause odour. Therefore, clean the WARNING: refrigerator with bi-carbonate dissolved Unplug the product in water every few months. -
Page 30: Cleaning Of Glass Water Tank
Maintenance and cleaning 6.3 Cleaning of Glass Water Tank Remove the water filling reservoir inside the door rack. Remove the door rack by holding from both sides. Remove the glass water tank cover by pressing both sides. Remove the hose connecting cover. Do not let children hang on the glass water tank since it may cause injury. -
Page 31: Troubleshooting
Troubleshooting Check this list before contacting the service. Doing so will save you time and money. This list includes frequent complaints that are not related to faulty workmanship or materials. Certain features mentioned herein may not apply to your product. The refrigerator is not working. - Page 32 Troubleshooting • The new product may be larger than the previous one. Larger products will run for longer periods. • The room temperature may be high. >>> The product will normally run for long periods in higher room temperature. • The product may have been recently plugged in or a new food item is placed inside.
- Page 33 Troubleshooting • The ground is not level or durable. >>> If the product is shaking when moved slowly, adjust the stands to balance the product. Also make sure the ground is sufficiently durable to bear the product. • Any items placed on the product may cause noise. >>> Remove any items placed on the product.
-
Page 34: How To Obtain Service
How To Obtain Service Please keep your purchase receipt or other proof of purchase in a safe place; you will need to have it should the product require attention under guarantee. You should also complete the details below; it will help us assist you when re- questing service. -
Page 35: Guarantee Details
• The cost of functional replacement parts, but excluding consumable items. • The labour costs of a BLOMBERG approved repairer to carry out the repair. What is not covered? • Transit, delivery or accidental damage or misuse and abuse. - Page 36 Blomberg, 1 Greenhill Crescent, Watford, Hertfordshire, WD18 Tel: 0845 6048340 Fax: 0845 6004922 email: service@blomberguk.com www.blomberg.uk. 57 5765 0000/AB...