Table of Contents
Advertisement
Advertisement
Table of Contents

Related Manuals for Standard Horizon HX210


Summary of Contents for Standard Horizon HX210
- Page 1 HX210 Floating Transceiver Owner’s Manual HX210...
-
Page 2: Table Of Contents
1. GENERAL INFORMATION ........1 CONFIG ............. 31 1.1 INTRODUCTION ..........1 KEY BEEP ............ 31 BATTERY SAVE ........... 32 2. SAFETY PRECAUTIONS ........2 STROBE LED..........32 3. ABOUT THIS RADIO ........... 4 KEY SETUP ..........33 3.1 ABOUT THE VHF MARINE BAND ....4 BACKLIT LEVEL .......... -
Page 3: General Information
LCD display, Battery Life display on the LCD, and a transmit Time-Out Timer (TOT). The HX210 transmitter provides a full 6 Watts of transmit power which is also to selectable to 1 Watt to assist the user in ensuring maximum battery life. -
Page 4: Safety Precautions
An injury, electric shock, or failure may result. damage, ignition, or failure may result. Please Never touch the antenna during transmission. contact the dealer from which you purchased this This may result in injury, electric shock and equip- product. ment failure. HX210 Page 2... - Page 5 Injury to the child, or damage to the transceiver fix tape or insulating covering to its terminals. may result. Do not use any products other than the speci- fied options and accessories. Failure or miss operation may result. HX210 Page 3...
-
Page 6: About This Radio
VHF Marine Band on land could be fined up to $10,000 for the first offense. 3.2 ABOUT WATER PROTECTION ※ The HX210 is only submersible when the MIC/SP cap is installed in the MIC/SP jack. ※ IPX7 Specification for submersibility: 3 ft. (1 m) for 30 minutes. -
Page 7: Calling Another Vessel ( Channel 16 Or 9 )
When all communication with the other vessel is completed, end the last transmission by stating your Call Sign and the word “out”. Note that it is not necessary to state your Call Sign with each transmission, only at the begin- HX210 Page 5... -
Page 8: Bridge Channels 13 And 67
Simplex (ship to ship) or duplex (marine operator) mode is automatically activated, de- pending on the channel and whether the USA, International or Canadian operating band is selected. HX210 Page 6... -
Page 9: Automated Radio Check Service
Sea Tow Fort Lauderdale - Ch. 27 Sea Tow Charlotte Harbor - Ch. 24 Sea Tow Tampa Bay - Ch. 27 Sea Tow Horseshoe Beach - Ch. 27 Sea Tow Carrabelle/St. Marks - Ch. 27 Sea Tow Pensacola/Orange Beach (Ala.) - Ch. 27 HX210 Page 7... -
Page 10: Accessories
“B” suffix is for use with 120 VAC (Type-A plug), “C” suffix is for use with 230 VAC (Type-C plug), and “U” suffixis for use with 230 VAC (Type-BF plug). Note: Before operating the HX210 for the first time, it is recommended that the battery be charged. Please see section “5.2.2 BATTERY CHARGING”... -
Page 11: Getting Started
5. GETTING STARTED 5.1 RADIO CARE After using the HX210 in salt water environment is recommended to clean the radio with fresh by rinsing the radio under a sink faucet or by dunking the radio in a bucket of fresh water. After washing, use a soft cloth and thorough- ly dry all parts of the radio. -
Page 12: Battery Charging
Use only a STANDARD HORIZON approved charger. The use of any other charger may cause permanent damage to the battery. Follow charging instructions provided with the chargers. -
Page 13: Belt Clip Installation / Removal
NOTE The SAD-23B is only designed for the charging of the HX210’s buil- tin battery, and is not suitable for other purposes. The SAD-23B may contribute noise to TV and radio reception in the immediate vicinity, so it is not recommended for use adjacent to such devices. -
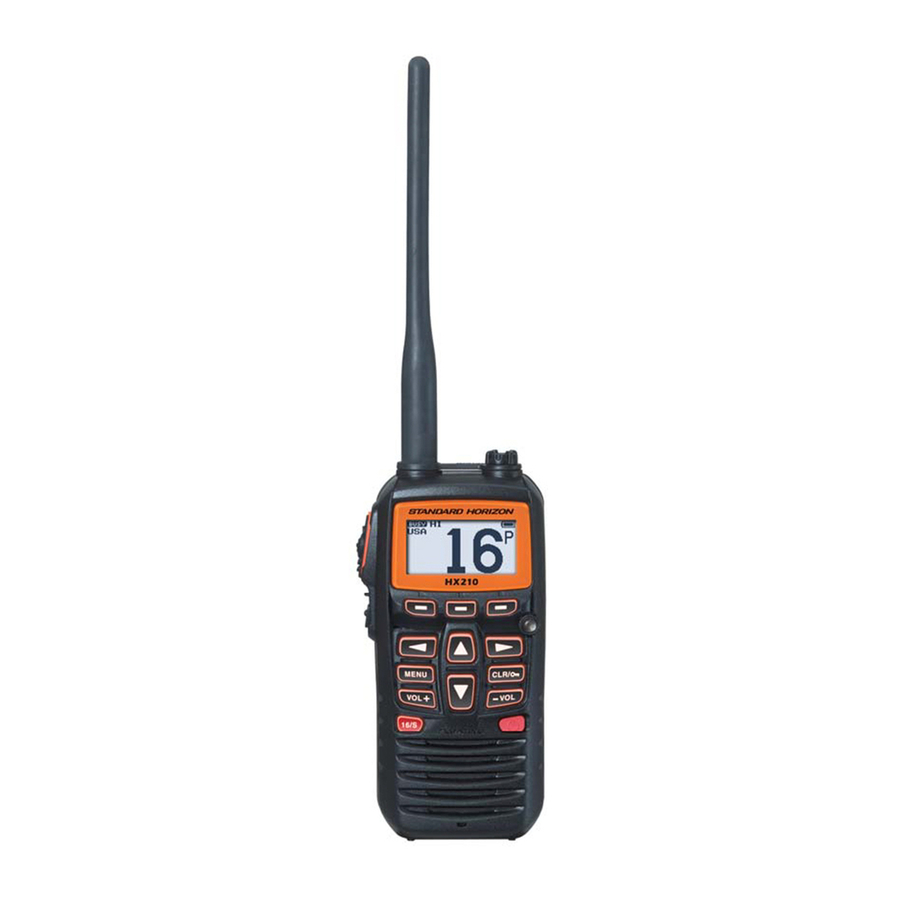
Page 14: Controls And Indicators
“7. BASIC OPERATION”. Refer to the below illustration for the locations of the following controls, switches, and con- nections. HX210 ANT Jack ( Top Panel ) The supplied CAT460 flexible antenna is attached here. - Page 15 16/S Key Pressing this key immediately recalls channel 16 from any channel loca- tion. Press and hold it to recall the sub channel. POWER Key Press and hold this key to turn the radio “ON” or “OFF”. HX210 Page 13...
-
Page 16: Lcd Indicators
Water Enabled Light When the HX210 comes in contact with water, the light will blink white to assist finding the radio in low light conditions. This feature operates when the radio is ON or OFF. - Page 17 The operating channel is shown on the LCD in both the transmit and the receive modes. VOL Indicator This indicator shows the receive audio volume level. SQL Indicator This indicator shows the squelch setting level. ①② ⑤ ⑥ ⑦ ⑧ ③ ⑨ ④ ⑩ ⑪ ⑫ HX210 Page 15...
-
Page 18: Basic Operation
4. Position the microphone about 1/2 to 1 inch (1.2 ~ 2.5 cm) away from your mouth. Speak slowly and clearly into the microphone. 5. When the transmission is finished, release the PTT switch. HX210 Page 16... -
Page 19: Transmit Power
7.4.1 TRANSMIT POWER The TX output power of the HX210 is set to high level (6 W*) in factory de- fault, and the “HI” indicator is displayed on the top part of the screen. To change the TX output power: 1. -
Page 20: Keypad Locking
7.6 KEYPAD LOCKING In order to prevent accidental channel change, the HX210’s keypad may be locked. Hold down the [CLR/ ] key to lock the keypad (except the PTT, [VOL-], [VOL+] and [CLR/ ] keys) so that they are not accidentally changed. “KEY LOCK”... -
Page 21: Noaa Weather Alert Testing
Wednesday sometime between 11 AM and 1 PM local time. You may use this opportunity to test your transceiver periodically to confirm that the Weather Alert feature is working, or for training crew members on how to configure the transceiver to receive the NOAA Weather Alerts. HX210 Page 19... -
Page 22: Preset Channels: Instant Access
3. Press the [P-SET] soft key, then press the [▲]/[▼] key to select the desired preset channel. 4. To return to the previous operation channel, press one of the soft keys, then press the [P-SET] soft key. The “P-SET” icon will disappear from the display. HX210 Page 20... -
Page 23: Deleting A Preset Channel
[P-SET] soft key until the “P-SET” icon and channel number are blinking. 5. Press the [DEL] soft key to delete the channel from the preset channel memory. 6. To exit from deleting the preset channels, press the [BACK] soft key. HX210 Page 21... -
Page 24: Scanning
7.9 SCANNING The HX210 provides two types of scanning, “Memory Scan” or “Priority Scan”. “Memory Scan” scans the channels that were programmed into Scan Memory and also channels stored in the Preset Channel. “Priority Scan” is similar to the “Memory Scan” scan, however it scans the priority channel (channel 16) and dual watches to channels programmed in memory scan and preset channel memory. -
Page 25: Scanning Operation
5. Press the [SCAN] soft key. “PRI SCAN” appears on the display. Scan- ning will proceed between the memorized channels and preset channel and the priority channel. The priority channel will be scanned after each programmed channel. 6. To stop scanning, press the [16/S] or [CLR/ ] key. HX210 Page 23... -
Page 26: Multi Watch (To Priority Channel)
The HX210 watches the activity of the current channel and the priority channel. TRIPLE (Triple Watch): The HX210 watches the activity of the priority channel, the sub channel, and the current channel. 6. Press the [ENTER] soft key to store the selected setting. -
Page 27: Starting The Triple Watch
2. 6. While a signal is received on the channel selected in step 2, the HX210 will periodically dual watch to the priority channel. 7. To stop dual watch, press the [CLR/ ] key. -
Page 28: Frequency Sweep Operation For The Fm Radio Mode
FM Broadcast Receive mode. Memory Frequency Recall 1. Press the [NEXT] soft key to recall the Last displayed FM broadcast memory. 2. Then press the [NEXT] soft key repeatedly to step sequentially through the FM broadcast memories. HX210 Page 26... -
Page 29: Soft Keys
4. Select “KEY TIMER” with the [▲]/[▼] key, then press the [SELECT] soft key. 5. Press the [▲]/[▼] key to select the desired time, and press the [ENTER] soft key. 6. Press the [CLR/ ] key to return to radio operation. HX210 Page 27... -
Page 30: Menu ("Setup")
8. MENU (“SETUP”) The HX210’s Menu Mode allows enables a number of the HX210 operating parameters to be custom-configured. Use the following procedure to activate and set The Menu Mode parameters: 1. Press and hold the [MENU/SET] key. 2. Press the [▲]/[▼] key to select the desired menu item, then press the [SELECT] soft key. -
Page 31: Scan Resume
SCAN RESUME This selection is used to select the time the HX210 waits after a transmission ends before the radio starts to scan channels again. The default setting is 2 seconds. 1. Press and hold the [MENU/SET] key. 2. Press the [▲]/[▼] key to select “CHANNEL SETUP”, then press the [SE- LECT] soft key. -
Page 32: Fm Setup
10 and 11. 13. After the twelve letters or spaces have been entered, press the [SELECT] soft key, then press the [ENTER] soft key to save and exit to radio opera- tion. HX210 Page 30... -
Page 33: Edit
This selection is used to select the beep tone volume level when a key is pressed. 1. Press and hold the [MENU/SET] key. 2. Press the [▲]/[▼] key to select “CONFIG”, then press the [SELECT] soft key. 3. Select “KEY BEEP” with the [▲]/[▼] key, then press the [SELECT] soft key. HX210 Page 31... -
Page 34: Battery Save
You can select one from “CON- TINIOUS”, “SOS”, “BLINK 1”, “BLINK 2”, or “BLINK 3”. 6. Press the [ENTER] soft key to store the se- lected setting. 7. Press the [CLR/ ] key to return to radio operation. HX210 Page 32... -
Page 35: Key Setup
4. Press the [▲]/[▼] key to select the desired setting, from “1” to “5”, or “OFF”. 5. Press the [ENTER] soft key to store the se- lected level. 6. Press the [CLR/ ] key to return to radio operation. HX210 Page 33... -
Page 36: Backlit Timer
The contrast level can be set from “0” to “30” (“16” is default). 5. Press the [ENTER] soft key to store the se- lected level. 6. Press the [CLR/ ] key to return to radio operation. HX210 Page 34... -
Page 37: Reset
“ALL” (all settings except the MMSI will be initialized). 5. Press the [SELECT] soft key. 6. Press the [▲]/[▼] key to select “OK?”, then press the [ENTER] soft key. ABOUT... Displays the version of the software currently operating on the transceiver. HX210 Page 35... -
Page 38: Maintenance
8. MAINTENANCE 8.1 GENERAL The inherent quality of the solid-state components in STANDARD HORIZON radios will provide many years of continuous use. Take the following precau- tions to prevent damage to the radio. Never press the PTT switch unless an antenna or suitable dummy load is ... -
Page 39: Vhf Marine Channel Assignments
5. Channels normally used by recreational boaters are those that include the term “non-commercial” in the Channel Use column of the chart. Some of these are shared with other users and some are used only in certain geographic regions. HX210 Page 37... - Page 40 Head of Passes near Baton Rouge. Additionally it is not available for use in the Mississippi River-Gulf Outlet, the Mississippi River-Gulf Outlet Ca- nal, and the Inner Harbor Navigational Canal, except to aid the transition from these areas. HX210 Page 38...
- Page 41 17. The duplex pair for channel 20 (157.000/161.600 MHz) may be used for ship to coast station communications. 18. Available for assignment to coast stations, the use of which is in accord with an agreed program, for the broadcast of information to ship stations concerning the environment. HX210 Page 39...
- Page 42 157.050 161.650 Port operation, ship movement 157.050 Canadian Coast Guard - - - 161.650 CMB Service U.S. Government Only 1021 157.050 157.100 161.700 Port operation, ship movement Canadian Coast Guard Liaison and 157.100 Maritime Safety Information Broadcasts announced on channel 16 HX210 Page 40...
- Page 43 River. Inter-ship only. Canada: Commercial fishing, S&R 156.425 Non-commercial (Recreational) US: Non-commercial (Recreational), Canada: Commercial fishing only, 156.475 International: Inter-ship, Port operations and Ship movement 156.525 Digital selective calling (voice communica- - - - tions not allowed) HX210 Page 41...
- Page 44 1087 157.375 Public Correspondence (Marine Operator) Port operation, ship movement 157.425 Commercial, Inter-ship Only NOTE: Simplex channels, 3A, 21A, 23A, 61A, 64A, 81A, 82A and 83A CANNOT be lawfully used by the general public in U.S.A. waters. HX210 Page 42...
-
Page 45: Warranty
STANDARD HORIZON (a division of YAESU USA.). Include proof of purchase indicating model. serial number, and date of purchase. STANDARD HORIZON will return the Product to the purchaser freight prepaid. Products purchased prior to January 1, 1991 will bear the STANDARD HORIZON warranty terms in effect prior to that date. - Page 46 This warranty only extends to Products sold within the 50 States of the Unit- ed States of America and the District of Columbia. STANDARD HORIZON will pay all labor to repair the product and replace- ment parts charges incurred in providing the warranty service except where purchaser abuse or other qualifying exceptions exist.
- Page 47 STANDARD HORIZON Web site. Product Support Inquiries If you have any questions or comments regarding the use of the HX210, you can visit the STANDARD HORIZON Web site to send an E-mail or contact the Product Support team at (800) 767-2450 ext 6300 M-F 8:00- 5:00PST.
-
Page 48: Specifications
12 kHz / 25 kHz (–6 dB / –60 dB) AF Output (Internal SP): 600 mW @16 for 10 % THD (@7.4 V) 11.4 FM BROADCAST RECEIVER Frequency Range: 65 MHz - 108 MHz Frequency Step: 100 kHz Sensitivity: 1.0 µV for 12 dB SINAD HX210 Page 46... -
Page 49: Fcc And Canada Radio License Information
12. FCC AND CANADA RADIO LICENSE INFORMATION Standard Horizon radios comply with the Federal Communication Commis- sion (FCC) and Industry-Canada requirements that regulate the Maritime Radio Service. MARITIME STATION LICENSE An FCC ship station license is no longer required for any vessel traveling in U.S. -
Page 50: Rf Exposure Safety Statement
NOTICE Unauthorized changes or modifications to this equipment may void compliance with FCC Rules. Any change or modification must be approved in writing by STANDARD HORIZON, a division of YAESU USA. THIS DEVICE COMPLIES WITH PART 15 OF THE FCC RULES. OPERATION IS SUB-... - Page 51 NOTE: THE GRANTEE IS NOT RESPONSIBLE FOR ANY CHANGES OR MODIFICA- TIONS NOT EXPRESSLY APPROVED BY THE PARTY RESPONSIBLE FOR COMPLI- ANCE. SUCH MODIFICATIONS COULD VOID THE USER’S AUTHORITY TO OPERATE THE EQUIPMENT. NOTE: This equipment has been tested and found to comply with the limits for a Class B digital device, pursuant to part 15 of the FCC Rules.
- Page 52 Copyright 2017 YAESU MUSEN CO., LTD. All rights reserved. No portion of this manual may be reproduced without the permission of YAESU MUSEN CO., LTD. 1707D-AC Printed in China YAESU U.S.A. 6125 Phyllis Drive, Cypress, California 90630 www.standardhorizon.com...
Need help?
Do you have a question about the HX210 and is the answer not in the manual?
Questions and answers