Huawei B2368 User Manual
Hide thumbs
Also See for B2368:
- Quick start manual ,
- User manual (176 pages) ,
- Quick start manual (2 pages)

Related Manuals for Huawei B2368


Summary of Contents for Huawei B2368
- Page 1 LTE CPE B2368 V100R001C00 User Guide Issue Date 2019-01-31 HUAWEI TECHNOLOGIES CO., LTD.
- Page 2 Notice The purchased products, services and features are stipulated by the contract made between Huawei and the customer. All or part of the products, services and features described in this document may not be within the purchase scope or the usage scope. Unless otherwise specified in the contract, all statements, information, and recommendations in this document are provided "AS IS"...
-
Page 3: About This Document
Changes between document issues are cumulative. The latest document issue contains all the changes made in earlier issues. Issue Date Description 2019-01-31 Updated descriptions in 15.2 The SIP Service Provider Screen. 2018-03-31 30 Personal Data Description. 2018-03-22 This issue is the first release. Issue 03 (2019-01-31) Copyright © Huawei Technologies Co., Ltd. -
Page 4: Table Of Contents
3.2 The Connection Status Screen............................19 3.3 The System Info Screen..............................20 4 Broadband............................. 28 4.1 Overview..................................28 4.2 Broadband Screen.................................28 4.2.1 Edit Broadband Connection............................29 4.3 SIM Screen................................... 31 4.3.1 SIM Locked Screen..............................32 Issue 03 (2019-01-31) Copyright © Huawei Technologies Co., Ltd. - Page 5 8.1 Overview..................................69 8.1.1 What You Need To Know............................69 8.2 The Port Forwarding Screen............................70 8.2.1 The Port Forwarding Screen............................70 8.2.2 The Port Forwarding Edit Screen..........................72 8.3 The DMZ Screen................................73 Issue 03 (2019-01-31) Copyright © Huawei Technologies Co., Ltd.
- Page 6 13.3 The Monitor Screen..............................98 13.4 A Layer 3 L2TP VPN Configuration Example......................99 13.5 A Layer 2 L2TP VPN Configuration Example......................100 14 GRE VPN...........................102 14.1 Overview.................................. 102 14.2 The Setup Screen..............................102 Issue 03 (2019-01-31) Copyright © Huawei Technologies Co., Ltd.
- Page 7 19.2 The User Account Screen............................145 20 Remote MGMT........................147 20.1 Overview.................................. 147 20.1.1 What You Need to Know............................147 20.2 The Remote MGMT Screen............................. 147 20.3 The TR069 Screen..............................148 21 System............................150 Issue 03 (2019-01-31) Copyright © Huawei Technologies Co., Ltd.
- Page 8 29.2 Power, Hardware Connections, and LEDs....................... 178 29.3 LTE Device Access and Login..........................178 29.4 Internet Access................................. 180 29.5 Wireless Internet Access............................180 29.6 Phone Calls and VoIP............................... 181 29.7 UPnP..................................182 30 Personal Data Description..................... 183 Issue 03 (2019-01-31) Copyright © Huawei Technologies Co., Ltd.
-
Page 9: Introduction
Your LTE Device provides Internet access by connecting to an LTE network wirelessly. Your LTE Device supports the following LTE frequency bands although the band it actually uses depends on your LTE service provider. B2368-22 and B2368-66 support LTE bands B38/B40/B41/B42/B43/B1/B3/B7/B8/B20. B2368-57 supports LTE bands B40/B41/B42/B4/B7/B28. Figure 1-1, computers can connect to the LTE Device's ETHERNET ports (or wirelessly). -
Page 10: Wireless Connection
GHz wireless LAN on or off. You can also use it to activate WPS in order to quickly set up a wireless network with strong security. Turn the Wireless LAN On or Off Step 1 Make sure the PWR/SYS LED is on (not blinking). Issue 03 (2019-01-31) Copyright © Huawei Technologies Co., Ltd. -
Page 11: Ways To Manage The Lte Device
Keep in mind that backing up a configuration file will not back up passwords used to set up your VoIP account. Write down any information your ISP provides you. 1.5 Hardware Issue 03 (2019-01-31) Copyright © Huawei Technologies Co., Ltd. -
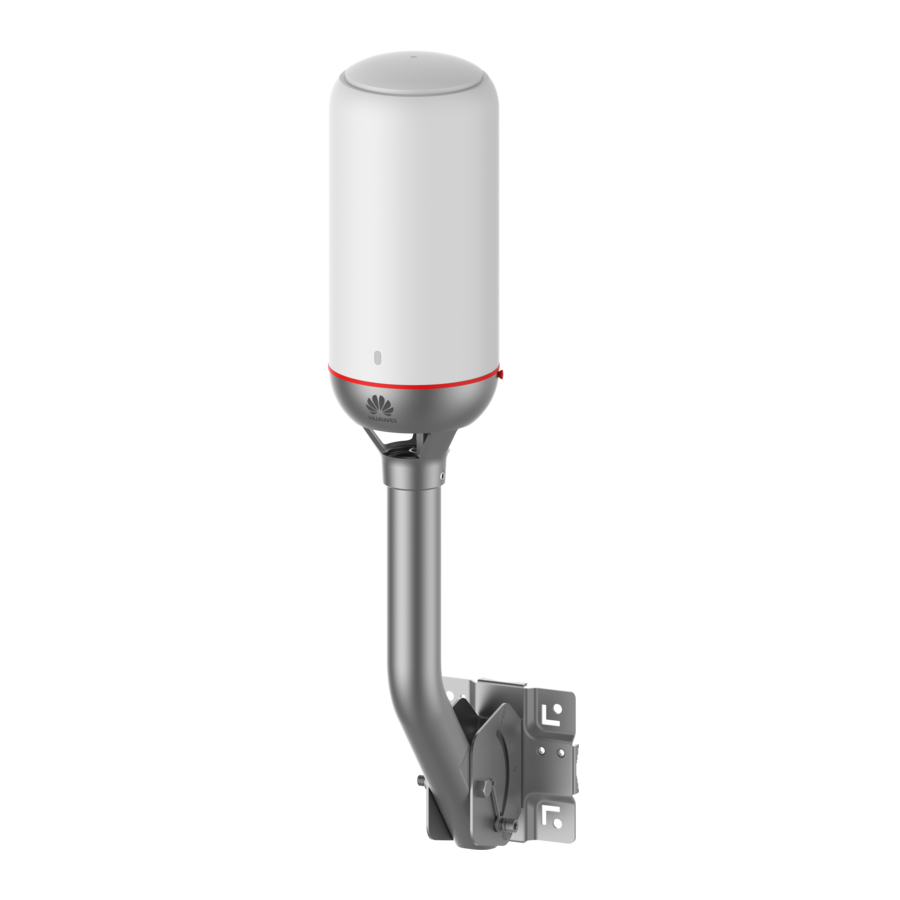
Page 12: Odu
Strong LTE signal: SINR ≥ 10 dB Blue Steady ON Medium LTE signal: 10 dB > SINR ≥ 4 dB Orange Steady ON Weak LTE signal: SINR < 4 dB Blinking No LTE signal, searching, or disconnected. Issue 03 (2019-01-31) Copyright © Huawei Technologies Co., Ltd. -
Page 13: Idu
LTE CPE B2368 User Guide 1 Introduction 1.5.2 IDU The following graphic displays the Labels of the LEDs. Figure 1-5 IDU Front Panel Issue 03 (2019-01-31) Copyright © Huawei Technologies Co., Ltd. - Page 14 Yellow A SIP account is registered for the phone port and there is a voice message in the corresponding SIP account. Issue 03 (2019-01-31) Copyright © Huawei Technologies Co., Ltd.
-
Page 15: The Reset Button
(not blinking) and press the RESET BUTTON for over 10 seconds. If you forget your password or cannot access the web configurator, you can use the RESET BUTTON at the back of the device to reload the factory-default configuration file. This Issue 03 (2019-01-31) Copyright © Huawei Technologies Co., Ltd. - Page 16 LTE CPE B2368 User Guide 1 Introduction means that you will lose all configurations that you had previously and the web access password will be reset to the default. Issue 03 (2019-01-31) Copyright © Huawei Technologies Co., Ltd.
-
Page 17: Introducing The Web Configurator
2.1.1 Basic Setting Information Do the following before you start to use the LTE Device. Step 1 Click Start > Control Panel > Network and Sharing Center. Step 2 Click your Internet connection. Issue 03 (2019-01-31) Copyright © Huawei Technologies Co., Ltd. - Page 18 User Guide 2 Introducing the Web Configurator Figure 2-1 Network and Sharing Center Step 3 Click Properties. Figure 2-2 Connection Status Step 4 Select Internet Protocol Version 4 (TCP/IPv4) and click Properties. Issue 03 (2019-01-31) Copyright © Huawei Technologies Co., Ltd.
- Page 19 Step 5 Select Obtain an IP address automatically and Obtain DNS server address automatically and click OK and then Close and Close. Figure 2-4 Internet Protocol Version 4 (TCP/IPv4) Properties ----End Issue 03 (2019-01-31) Copyright © Huawei Technologies Co., Ltd.
-
Page 20: Accessing The Web Configurator
For user access, type "user" as the default username and "LTE@Endusr" as the default password. Click Login. If you have changed the password, enter your password and click Login. Figure 2-5 Password Screen (B2368-22) Figure 2-6 Password Screen (B2368-57) Issue 03 (2019-01-31) - Page 21 2 Introducing the Web Configurator Figure 2-7 Password Screen (B2368-66) The following screen displays if you enter the password wrong three times. Figure 2-8 Login Blocked Screen (B2368-22) Figure 2-9 Login Blocked Screen (B2368-57) Issue 03 (2019-01-31) Copyright © Huawei Technologies Co., Ltd.
- Page 22 LTE CPE B2368 User Guide 2 Introducing the Web Configurator Figure 2-10 Login Blocked Screen (B2368-66) NOTE For security reasons, the LTE Device automatically logs you out if you do not use the web configurator for five minutes (default). If this happens, log in again.
- Page 23 LTE CPE B2368 User Guide 2 Introducing the Web Configurator Figure 2-12 Connection Status (B2368-22) Figure 2-13 Connection Status (B2368-57) Figure 2-14 Connection Status (B2368-66) Issue 03 (2019-01-31) Copyright © Huawei Technologies Co., Ltd.
-
Page 24: The Web Configurator Layout
Click Connection Status > System Info to show the following screen. (See 3.3 The System Info Screen for more information.) Figure 2-15 Web Configurator Layout (B2368-22) Figure 2-16 Web Configurator Layout (B2368-57) Issue 03 (2019-01-31) Copyright © Huawei Technologies Co., Ltd. -
Page 25: Title Bar
LTE CPE B2368 User Guide 2 Introducing the Web Configurator Figure 2-17 Web Configurator Layout (B2368-66) As illustrated above, the main screen is divided into these parts: title bar main window navigation panel 2.2.1 Title Bar The title bar provides links to the privacy policy and open source software notice. Click the Logout icon in the upper right corner to log out of the web configurator. -
Page 26: Navigation Panel
LTE CPE B2368 User Guide 2 Introducing the Web Configurator 2.2.4 Navigation Panel Use the menu items on the navigation panel to open screens to configure LTE Device features. Issue 03 (2019-01-31) Copyright © Huawei Technologies Co., Ltd. -
Page 27: Connection Status And System Info
If you prefer to view the status in a list, click List View in the Viewing mode selection box. You can configure how often you want the LTE Device to update this screen in Refresh Interval. Issue 03 (2019-01-31) Copyright © Huawei Technologies Co., Ltd. -
Page 28: The System Info Screen
Figure 3-3 Connection Status: List View > Info In List View, you can also view the client's information. 3.3 The System Info Screen Click Connection Status > System Info to open this screen. Issue 03 (2019-01-31) Copyright © Huawei Technologies Co., Ltd. - Page 29 LTE CPE B2368 User Guide 3 Connection Status and System Info Figure 3-4 System Info Screen (B2368-22) Issue 03 (2019-01-31) Copyright © Huawei Technologies Co., Ltd.
- Page 30 LTE CPE B2368 User Guide 3 Connection Status and System Info Figure 3-5 System Info Screen (B2368-57) Issue 03 (2019-01-31) Copyright © Huawei Technologies Co., Ltd.
- Page 31 LTE CPE B2368 User Guide 3 Connection Status and System Info Figure 3-6 System Info Screen (B2368-66) Each field is described in the following table. Table 3-1 System Info Screen Label Description Refresh Interval Select how often you want the LTE Device to update this screen from the drop-down list box.
- Page 32 On displays when the WLAN radio is enabled. Off displays when the WLAN radio is turned off. SSID (1~4) Information SSID This is the descriptive name used to identify the LTE Device in the wireless LAN. Issue 03 (2019-01-31) Copyright © Huawei Technologies Co., Ltd.
- Page 33 Device has with the base station which is also known as eNodeB or eNB. SINR This displays the SINR strength of the LTE connection that the LTE Device has with the base station which is also known as eNodeB or eNB. Issue 03 (2019-01-31) Copyright © Huawei Technologies Co., Ltd.
- Page 34 LTE Device is running at full load, and the throughput is not going to improve anymore. If you want some applications to have more throughput, you should turn off other applications. Issue 03 (2019-01-31) Copyright © Huawei Technologies Co., Ltd.
- Page 35 In-Active when the SIP account is not yet registered. This field displays the account number and service domain of the SIP account. You can change these in VoIP > SIP > SIP Settings. Issue 03 (2019-01-31) Copyright © Huawei Technologies Co., Ltd.
-
Page 36: Broadband
Use this screen to lock a band, frequency or cell tower for the LTE Device's LTE connection. Click Network Setting > Broadband to open the following screen. Figure 4-1 Network Setting > Broadband > Broadband The following table describes the fields in this screen. Issue 03 (2019-01-31) Copyright © Huawei Technologies Co., Ltd. -
Page 37: Edit Broadband Connection
Click the Edit icon to configure the connection. 4.2.1 Edit Broadband Connection Use this screen to configure a WAN connection. Click an LTE connection's Edit icon to display a screen like the one shown next. Issue 03 (2019-01-31) Copyright © Huawei Technologies Co., Ltd. - Page 38 This disables NAT and DHCP server configuration (Network Setting > Home Networking > LAN Setup). The LTE Device will be remotely managed by HTTPS and SNMP. Choosing this option also displays more IP pass through configuration parameters. Issue 03 (2019-01-31) Copyright © Huawei Technologies Co., Ltd.
-
Page 39: Sim Screen
If your LTE Device has the SIM screen, you may use it to specify the PIN for your SIM card. Click Network Setting > Broadband > SIM to open the following screen. Figure 4-3 Network Setting > Broadband > SIM The following table describes the fields in this screen. Issue 03 (2019-01-31) Copyright © Huawei Technologies Co., Ltd. -
Page 40: Sim Locked Screen
You may have to ask the service provider for a PUK code to unlock the SIM card. You will need a new SIM card if you enter the wrong PUK code too many times! Issue 03 (2019-01-31) Copyright © Huawei Technologies Co., Ltd. -
Page 41: Lte Setting Screen
4.4 LTE Setting Screen Use this screen to lock a band, frequency or cell tower for the LTE Device's LTE connection. Click Network Setting > Broadband > LTE Setting to open the following screen. Issue 03 (2019-01-31) Copyright © Huawei Technologies Co., Ltd. - Page 42 Select Enable to set the LTE Device's LTE connection to use a specific band, frequency, or cell tower. Select Disable to let the LTE Device's LTE connection automatically select a band, frequency, or cell tower to use. Issue 03 (2019-01-31) Copyright © Huawei Technologies Co., Ltd.
- Page 43 Identifier) on the right (0-503). Apply Click this to save your changes and to apply them to the LTE Device. Cancel Click this to set every field in this screen to its last-saved value. Issue 03 (2019-01-31) Copyright © Huawei Technologies Co., Ltd.
-
Page 44: Wireless
An "ad-hoc" type of network is one in which there is no access point. Wireless clients connect to one another in order to exchange information. The following figure provides an example of a wireless network. Issue 03 (2019-01-31) Copyright © Huawei Technologies Co., Ltd. - Page 45 AP (access point) to reduce interference. Interference occurs when radio signals from different access points overlap causing interference and degrading performance. Issue 03 (2019-01-31) Copyright © Huawei Technologies Co., Ltd.
-
Page 46: Before You Begin
Click Network Setting > Wireless (or Wireless 5G)to open the General screen. The regular (2.4 GHz) wireless screen is shown here. The 5 GHz wireless screen works the same. Select the Enable Wireless LAN checkbox to show the Wireless configurations. Issue 03 (2019-01-31) Copyright © Huawei Technologies Co., Ltd. - Page 47 LTE CPE B2368 User Guide 5 Wireless Figure 5-2 Network Setting > Wireless > General Issue 03 (2019-01-31) Copyright © Huawei Technologies Co., Ltd.
- Page 48 The following table describes the Labels in this screen. Table 5-1 Network > Wireless > General Label Description Wireless Network Setup Wireless Select the Enable Wireless LAN check box to activate the wireless LAN. Wireless Network Settings Issue 03 (2019-01-31) Copyright © Huawei Technologies Co., Ltd.
- Page 49 WLAN devices. l 802.11a/an allows IEEE 802.11a and IEEE 802.11n compliant WLAN devices. l 802.11an allows only IEEE 802.11n compliant WLAN devices. l 802.11a allows only IEEE 802.11a compliant WLAN devices. Issue 03 (2019-01-31) Copyright © Huawei Technologies Co., Ltd.
- Page 50 If you do not enable any wireless security on your LTE Device, your network is accessible to any wireless networking device that is within range. Figure 5-4 Wireless> General: No Security Issue 03 (2019-01-31) Copyright © Huawei Technologies Co., Ltd.
-
Page 51: More Secure (Wpa(2)-Psk)
Figure 5-5 Figure 1-1 Wireless > General: More Secure: WPA(2)-PSK The following table describes the Labels in this screen. Table 5-3 Wireless > General: WPA(2)-PSK Label Description Security Level Select More Secure to enable WPA(2)-PSK data encryption. Issue 03 (2019-01-31) Copyright © Huawei Technologies Co., Ltd. -
Page 52: The More Ap Screen
Click Network Setting > Wireless (or Wireless 5G) > More AP. The following screen displays. Figure 5-6 Network Settings > Wireless > More AP The following table describes the Labels in this screen. Issue 03 (2019-01-31) Copyright © Huawei Technologies Co., Ltd. -
Page 53: Edit More Ap
Use this screen to edit an SSID profile. Click the Edit icon next to an SSID in the More AP screen. The following screen displays. Figure 5-7 Wireless > More AP: Edit Issue 03 (2019-01-31) Copyright © Huawei Technologies Co., Ltd. - Page 54 Select this to keep the wireless clients in this SSID from communicating Isolation with each other directly through the Router. BSSID This shows the MAC address of the wireless interface on the LTE Device when wireless LAN is enabled. Security Level Issue 03 (2019-01-31) Copyright © Huawei Technologies Co., Ltd.
-
Page 55: The Wps Screen
Click Network Setting > Wireless (or Wireless 5G) > WPS. The following screen displays. Select Enable and click Apply to activate the WPS function. Then you can configure the WPS settings in this screen. Issue 03 (2019-01-31) Copyright © Huawei Technologies Co., Ltd. - Page 56 You can find the PIN either on the outside of the device, or by checking the device's settings. Note: You must also activate WPS on that device within two minutes to have it present its PIN to the LTE Device. Issue 03 (2019-01-31) Copyright © Huawei Technologies Co., Ltd.
-
Page 57: Technical Reference
This type of security is fairly weak, however, because there are ways for unauthorized wireless devices to get the SSID. In addition, unauthorized wireless devices can still see the information that is sent in the wireless network. Issue 03 (2019-01-31) Copyright © Huawei Technologies Co., Ltd. - Page 58 You can choose no encryption, WPA-PSK, or WPA2-PSK. Usually, you should set up the strongest encryption that every device in the wireless network supports. Suppose the wireless network has two devices. Device A only supports WPA-PSK, Issue 03 (2019-01-31) Copyright © Huawei Technologies Co., Ltd.
-
Page 59: Signal Problems
A and B can access the wired network and communicate with each other. When Intra-BSS traffic blocking is enabled, wireless station A and B can still access the wired network but cannot communicate with each other. Issue 03 (2019-01-31) Copyright © Huawei Technologies Co., Ltd. -
Page 60: Mbssid
Depending on the devices you have, you can either press a button (on the device itself, or in its configuration utility) or enter a PIN (a unique Personal Identification Number that allows Issue 03 (2019-01-31) Copyright © Huawei Technologies Co., Ltd. -
Page 61: Push Button Configuration
Step 4 Enter the client's PIN in the AP's configuration interface. Step 5 Start WPS on both devices within two minutes. Step 6 Use the configuration utility to activate WPS, not the push-button on the device itself. Issue 03 (2019-01-31) Copyright © Huawei Technologies Co., Ltd. -
Page 62: How Wps Works
(the device that supplies network and security settings) and the other device acts as the enrollee (the device that receives network and security settings. The registrar creates a secure EAP (Extensible Authentication Protocol) tunnel and sends the Issue 03 (2019-01-31) Copyright © Huawei Technologies Co., Ltd. -
Page 63: Limitations Of Wps
It does not work in Ad-Hoc networks (where there is no AP). When you use WPS, it works between two devices only. You cannot enroll multiple devices simultaneously; you must enroll one after the other. Issue 03 (2019-01-31) Copyright © Huawei Technologies Co., Ltd. - Page 64 Check the MAC addresses of your wireless clients (usually printed on a Label on the bottom of the device). If there is an unknown MAC address you can remove it or reset the AP. Issue 03 (2019-01-31) Copyright © Huawei Technologies Co., Ltd.
-
Page 65: Home Networking
Subnet Mask The subnet mask specifies the network number portion of an IP address. Your LTE Device will compute the subnet mask automatically based on the IP address that you entered. You Issue 03 (2019-01-31) Copyright © Huawei Technologies Co., Ltd. -
Page 66: About Upnp
Local Area Network IP address and subnet mask of your LTE Device and configure the DNS server information that the LTE Device sends to the DHCP client devices on the LAN. Issue 03 (2019-01-31) Copyright © Huawei Technologies Co., Ltd. - Page 67 Figure 6-2 Network Setting > Home Networking > LAN Setup (DHCP Disabled) The following table describes the fields in this screen. Table 6-1 Network Setting > Home Networking > LAN Setup Label Description LAN IP Setup Issue 03 (2019-01-31) Copyright © Huawei Technologies Co., Ltd.
- Page 68 DNS server addresses manually configured. If you do not configure a DNS server, you must know the IP address of a computer in order to access it. DHCP Relay State Issue 03 (2019-01-31) Copyright © Huawei Technologies Co., Ltd.
-
Page 69: The Static Dhcp Screen
Table 6-2 Network Setting > Home Networking > Static DHCP Label Description Add new static Click this to add a new static DHCP entry. lease This is the index number of the entry. Issue 03 (2019-01-31) Copyright © Huawei Technologies Co., Ltd. - Page 70 Enter the MAC address of a computer on your LAN. Address IP Address Enter the IP address that you want to assign to the computer on your LAN with the MAC address that you will also specify. Issue 03 (2019-01-31) Copyright © Huawei Technologies Co., Ltd.
-
Page 71: The Upnp Screen
When you enable UPnP, this screen lists the UPnP-enabled devices and/or software the LTE Device finds on your network. Click Network Setting > Home Networking > UPnP List to display the screen shown next. Issue 03 (2019-01-31) Copyright © Huawei Technologies Co., Ltd. - Page 72 The external (WAN) port that the LTE Device uses for the application. Internal Port The internal (LAN) port that the LTE Device uses for the application. Refresh Click Refresh to save your changes. Issue 03 (2019-01-31) Copyright © Huawei Technologies Co., Ltd.
-
Page 73: Static Route
(R1). You create one static route to connect to services offered by your ISP behind router R2. You create another static route to communicate with a separate network behind a router R3 connected to the LAN. Figure 7-1 Example of Static Routing Topology Issue 03 (2019-01-31) Copyright © Huawei Technologies Co., Ltd. -
Page 74: Configuring Static Route
Click the Edit icon to go to the screen where you can set up a static route on the LTE Device. Click the Delete icon to remove a static route from the LTE Device. Issue 03 (2019-01-31) Copyright © Huawei Technologies Co., Ltd. -
Page 75: Add/Edit Static Route
You can decide if you want to forward packets to a gateway IP address or a specific interface. If you want to select an individual interface, select the check box and choose an interface through which the traffic is sent. Issue 03 (2019-01-31) Copyright © Huawei Technologies Co., Ltd. - Page 76 LTE CPE B2368 User Guide 7 Static Route Label Description Apply Click Apply to save your changes. Back Click Back to exit this screen without saving. Issue 03 (2019-01-31) Copyright © Huawei Technologies Co., Ltd.
-
Page 77: Network Address Translation (Nat)
A port forwarding set is a list of inside (behind NAT on the LAN) servers, for example, web or FTP, that you can make visible to the outside world even though NAT makes your whole inside network appear as a single computer to the outside world. Issue 03 (2019-01-31) Copyright © Huawei Technologies Co., Ltd. -
Page 78: The Port Forwarding Screen
WAN IP address. The NAT network appears as a single host on the Internet. Figure 8-1 Multiple Servers Behind NAT Example 8.2.1 The Port Forwarding Screen Click Network Setting > NAT to open the Port Forwarding screen. Issue 03 (2019-01-31) Copyright © Huawei Technologies Co., Ltd. - Page 79 Click the Edit icon to edit the port forwarding rule. Click the Delete icon to delete an existing port forwarding rule. Note that subsequent address mapping rules move up by one when you take this action. Issue 03 (2019-01-31) Copyright © Huawei Technologies Co., Ltd.
-
Page 80: The Port Forwarding Edit Screen
Port field above and then enter it again in this field. To forward a series of ports, enter the last port number in a series that begins with the port number in the External Start Port field above. Issue 03 (2019-01-31) Copyright © Huawei Technologies Co., Ltd. -
Page 81: The Dmz Screen
Enter the IP address of your network DMZ host, if you have one. 0.0.0.0 Address means this feature is disabled. Apply Click Apply to save your changes. Cancel Click Cancel to restore your previously saved settings. Issue 03 (2019-01-31) Copyright © Huawei Technologies Co., Ltd. -
Page 82: The Sessions Screen
For the LTE environment, the LTE interface may experience heavy overhead when sending SIP re-registration requests due to SIP server NAT session timeout. This default NAT session timeout value (3600 seconds) helps to decrease the chance of this happening. Issue 03 (2019-01-31) Copyright © Huawei Technologies Co., Ltd. -
Page 83: Technical Reference
In the simplest form, NAT changes the source IP address in a packet received from a subscriber (the inside local address) to another (the inside global address) before forwarding the packet to the WAN side. When the response comes back, NAT translates the destination Issue 03 (2019-01-31) Copyright © Huawei Technologies Co., Ltd. -
Page 84: How Nat Works
Internet. The LTE Device keeps track of the original addresses and port numbers so incoming reply packets can have their original values restored. The following figure illustrates this. Figure 8-7 How NAT Works Issue 03 (2019-01-31) Copyright © Huawei Technologies Co., Ltd. -
Page 85: Dynamic Dns
IP address as yourhost.dyndns.org. This feature is useful if you want to be able to use, for example, www.yourhost.dyndns.org and still reach your hostname. If you have a private WAN IP address, then you cannot use Dynamic DNS. 9.2 The Dynamic DNS Screen Issue 03 (2019-01-31) Copyright © Huawei Technologies Co., Ltd. -
Page 86: Firewall
Messaging) session from the LAN to the WAN (1). Return traffic for this session is also allowed (2). However other traffic initiated from the WAN is blocked (3 and 4). Figure 10-1 Default Firewall Action Issue 03 (2019-01-31) Copyright © Huawei Technologies Co., Ltd. -
Page 87: What You Need To Know
10.6 Firewall Technical Referencefor more information on firewall. 10.2 The General Screen Use this screen to enable or disable the LTE Device's firewall. Click Security > Firewall to open the General screen. Issue 03 (2019-01-31) Copyright © Huawei Technologies Co., Ltd. -
Page 88: The Services Screen
Use this screen to view the configured service list. To access this screen, click Security > Firewall > Services. You have to configure at least one service in this screen before configuring the Security > Firewall > Access Control > Add New ACL Rule/Edit screen. Issue 03 (2019-01-31) Copyright © Huawei Technologies Co., Ltd. -
Page 89: The Add New Services Entry Screen
Use this screen to configure a service that you want to use in an ACL rule in the Security > Firewall > Access Control > Add New ACL Rule/Edit screen. To access this screen, click Security > Firewall > Services and then the Add New Service Entry button. Issue 03 (2019-01-31) Copyright © Huawei Technologies Co., Ltd. -
Page 90: The Access Control Screen
Click Back to exit this screen without saving your changes. 10.4 The Access Control Screen Click Security > Firewall > Access Control to display the following screen. This screen displays a list of the configured incoming or outgoing filtering rules. Issue 03 (2019-01-31) Copyright © Huawei Technologies Co., Ltd. - Page 91 Modify Click the Edit icon to edit the rule. Click the Delete icon to delete an existing rule. Note that subsequent rules move up by one when you take this action. Issue 03 (2019-01-31) Copyright © Huawei Technologies Co., Ltd.
-
Page 92: The Add New Acl Rule/Edit Screen
Source IP Enter an IP address or the starting IP address of the source IP range. Address Start Source IP Enter the ending IP address of the source IP range. Address End Issue 03 (2019-01-31) Copyright © Huawei Technologies Co., Ltd. -
Page 93: The Dos Screen
Click Back to exit this screen without saving your changes. 10.5 The DoS Screen Click Security > Firewall > DoS to display the following screen. Use this screen to enable or disable Denial of Service (DoS) protection. Issue 03 (2019-01-31) Copyright © Huawei Technologies Co., Ltd. -
Page 94: Firewall Technical Reference
Step 6 Keep the firewall in a secured (locked) room. ----End Issue 03 (2019-01-31) Copyright © Huawei Technologies Co., Ltd. -
Page 95: Security Considerations
Step 4 Does this rule conflict with any existing rules? ----End Once these questions have been answered, adding rules is simply a matter of entering the information into the correct fields in the web configurator screens. Issue 03 (2019-01-31) Copyright © Huawei Technologies Co., Ltd. -
Page 96: Mac Filter
Use the MAC Filter screen to allow wireless and LAN clients access to the LTE Device. Click Security > MAC Filter to change your LTE Device's MAC filter settings. Select Allow option to display the screen as shown next. Issue 03 (2019-01-31) Copyright © Huawei Technologies Co., Ltd. - Page 97 Deny from accessing the LTE Device. MAC addresses not listed will be permitted to access the LTE Device. Select Disable to not filter traffic by the source MAC address. This is the index number of the MAC address. Issue 03 (2019-01-31) Copyright © Huawei Technologies Co., Ltd.
- Page 98 Enter the MAC addresses in a valid MAC address format, that is, six hexadecimal character pairs, for example, 12:34:56:78:9a:bc. Apply Click Apply to save your changes. Cancel Click Cancel to restore your previously saved settings. Issue 03 (2019-01-31) Copyright © Huawei Technologies Co., Ltd.
-
Page 99: Parental Control
Security > Parental Control to open the following screen. Figure 12-1 Security > Parental Control Figure 12-2 Security > Parental Control (After adding a new PCP) The following table describes the fields in this screen. Issue 03 (2019-01-31) Copyright © Huawei Technologies Co., Ltd. -
Page 100: Add/Edit A Parental Control Rule
Use this screen to configure a restricted access schedule and/ or URL filtering settings to block the users on your network from accessing certain web sites. Issue 03 (2019-01-31) Copyright © Huawei Technologies Co., Ltd. - Page 101 The following table describes the fields in this screen. Table 12-2 Add/Edit Parental Control Rule Label Description General Active Select the checkbox to activate this parental control rule. Parental Control Enter a descriptive name for the rule. Profile Name Issue 03 (2019-01-31) Copyright © Huawei Technologies Co., Ltd.
- Page 102 Select an item in the list and click Delete to remove it. Apply Click this button to save your settings back to the LTE Device. Back Click this button to return to the previous screen without saving any changes. Issue 03 (2019-01-31) Copyright © Huawei Technologies Co., Ltd.
-
Page 103: L2Tp Vpn
Table 13-1 Security > L2TP VPN > Setup Label Description Add New Click this button to create a new L2TP tunnel. Tunnel This shows the index number of an L2TP tunnel. Issue 03 (2019-01-31) Copyright © Huawei Technologies Co., Ltd. -
Page 104: The Add/Edit L2Tp Tunnel Screen
Use this screen to create or modify an L2TP VPN tunnel. Click the Add New Tunnel button or an Edit icon next to a VPN tunnel in the Security > L2TP VPN screen to open the following screen. Issue 03 (2019-01-31) Copyright © Huawei Technologies Co., Ltd. - Page 105 Select Layer3 L2TP to have the LTE Device tunnel OSI layer 3 Layer protocol over a network. Select Layer2 L2TP to have the LTE Device tunnel OSI layer 2 protocol (BCP tunnel) over a network. Issue 03 (2019-01-31) Copyright © Huawei Technologies Co., Ltd.
-
Page 106: The Monitor Screen
This shows the IP address of the remote gateway. L2TP Server This shows the IP address that the LTD Device assigned for the remote user's computer to use within the L2TP VPN tunnel. Issue 03 (2019-01-31) Copyright © Huawei Technologies Co., Ltd. -
Page 107: A Layer 3 L2Tp Vpn Configuration Example
Both CPEs will bring up ppp0 interface and the L2TP server will provide a L2TP IP (192.168.3.2) for CPE A. After setting up the Layer 3 L2TP VPN, you also need to configure Issue 03 (2019-01-31) Copyright © Huawei Technologies Co., Ltd. -
Page 108: A Layer 2 L2Tp Vpn Configuration Example
L2TP BCP Server has a WAN IP (172.16.9.3) and connects to a LAN PC with IP (192.168.1.214). Both of the LAN PC IPs must in the same subnet domain. You can set the Layer 2 L2TP VPN in the L2TP VPN screen. Issue 03 (2019-01-31) Copyright © Huawei Technologies Co., Ltd. - Page 109 PC (br0) through the L2TP BCP tunnel (bcp0). Users can send packets from one LAN PC to another (192.168.1.58 to 192.168.1.214). Configuration: Figure 13-8 Layer 2 L2TP VPN Configuration Example, Add/Edit L2TP Tunnel Issue 03 (2019-01-31) Copyright © Huawei Technologies Co., Ltd.
-
Page 110: Gre Vpn
Use this screen to view and manage GRE VPN tunnels. Click Security > GRE VPN to open the following screen. Figure 14-1 Security > GRE VPN > Setup The following table describes the fields in this screen. Issue 03 (2019-01-31) Copyright © Huawei Technologies Co., Ltd. -
Page 111: The Add/Edit Gre Tunnel Screen
Use this screen to create or modify a GRE VPN tunnel. Click the Add New Tunnel button or an Edit icon next to a VPN tunnel in the Security > GRE VPN screen to open the following screen. Issue 03 (2019-01-31) Copyright © Huawei Technologies Co., Ltd. - Page 112 Enter the IP address or domain name of the remote gateway to which Address the LTE Device's WAN interface tunnels traffic. GRE Local IP Enter a local host's IP address the LTE Device tunnels the traffic sent to the remote gateway. Issue 03 (2019-01-31) Copyright © Huawei Technologies Co., Ltd.
-
Page 113: A Layer 2 Gre Vpn Configuration Example
GRE Layer to Layer2 GER, and set the WAN IP of CPE B (172.23.40.48) as the Server IP Address. Configuration (Security > GRE VPN, and then click Add New Tunnel): Figure 14-4 Layer 2 GRE VPN Configuration Example, Add/Edit GRE Tunnel Issue 03 (2019-01-31) Copyright © Huawei Technologies Co., Ltd. -
Page 114: A Layer 3 Gre Vpn Configuration Example
Internet traffic goes through the GRE tunnel. By default the CPE does not send traffic through the GRE tunnel. For this example's network structure, set the static route to send all of the traffic destined for 192.168.2.0/24 through the tunnel (Gateway IP: 192.168.3.2). Issue 03 (2019-01-31) Copyright © Huawei Technologies Co., Ltd. - Page 115 LTE CPE B2368 User Guide 14 GRE VPN Figure 14-7 Layer 3 GRE VPN Configuration Example, Add Static Route Issue 03 (2019-01-31) Copyright © Huawei Technologies Co., Ltd.
-
Page 116: Voip
VoIP automatically connect to the server, or you can go to the System Info page and press the register button to have VoIP immediately connect to the server. Issue 03 (2019-01-31) Copyright © Huawei Technologies Co., Ltd. -
Page 117: What You Need To Know
- figuring out how to get your call to the right place in a way that you and the other person can talk to one another. Issue 03 (2019-01-31) Copyright © Huawei Technologies Co., Ltd. -
Page 118: Before You Begin
Click more... to see all the fields in the screen. You don't necessarily need to use all these fields to set up your account. Click hide more to see and configure only the fields needed for this feature. Issue 03 (2019-01-31) Copyright © Huawei Technologies Co., Ltd. - Page 119 LTE CPE B2368 User Guide 15 VoIP Figure 15-2 VoIP > SIP > SIP Service Provider Issue 03 (2019-01-31) Copyright © Huawei Technologies Co., Ltd.
- Page 120 LTE CPE B2368 User Guide 15 VoIP Issue 03 (2019-01-31) Copyright © Huawei Technologies Co., Ltd.
- Page 121 REGISTER Server Port Enter the SIP register server's listening port number, if your VoIP service provider gave you one. Otherwise, enter the same port number you entered in the SIP Server Port field. Issue 03 (2019-01-31) Copyright © Huawei Technologies Co., Ltd.
- Page 122 VoIP IOP Flags - Select VoIP inter-operability settings. Please select VoIP IOP Flag options according to information given by your Service Provider. RTP Port Range Issue 03 (2019-01-31) Copyright © Huawei Technologies Co., Ltd.
- Page 123 Enter the IP address or domain name of the SIP outbound proxy server. Server Port Enter the SIP outbound proxy server's listening port, if your VoIP service provider gave you one. Otherwise, keep the default value. QoS Tag Issue 03 (2019-01-31) Copyright © Huawei Technologies Co., Ltd.
- Page 124 "one shot" feature. Caller Display Call This code is used to display the caller ID for outgoing calls. Caller Hidden Call This code is used to hide the caller ID for outgoing calls. Issue 03 (2019-01-31) Copyright © Huawei Technologies Co., Ltd.
- Page 125 Do Not Disturb Disable This code is used to turn the Do Not Disturb feature off. Apply Click Apply to save your changes. Cancel Click Cancel to restore your previously saved settings. Issue 03 (2019-01-31) Copyright © Huawei Technologies Co., Ltd.
-
Page 126: The Sip Account Screen
Click the Edit icon to configure the SIP account. 15.3.1 Edit SIP Account You can configure the SIP account. To access this screen, click Edit icon next to an existing account. Issue 03 (2019-01-31) Copyright © Huawei Technologies Co., Ltd. - Page 127 LTE CPE B2368 15 VoIP User Guide Figure 15-4 SIP Account: Edit Issue 03 (2019-01-31) Copyright © Huawei Technologies Co., Ltd.
- Page 128 Minimum is the quietest, and Maximum is the loudest. Listening Enter the loudness that the LTE Device uses for speech that it receives Volume Control from the peer device. Minimum is the quietest, and Maximum is the loudest. Issue 03 (2019-01-31) Copyright © Huawei Technologies Co., Ltd.
- Page 129 Active Select this if you do not want the phone to ring when someone tries to Anonymous call you with caller ID deactivated. Call Block Flash Detect Interval Configuration Issue 03 (2019-01-31) Copyright © Huawei Technologies Co., Ltd.
-
Page 130: The Phone Region Screen
Figure 15-5 VoIP> Phone > Region Each field is described in the following table. Table 15-4 VoIP > Phone > Region Label Description Region Select the place in which the LTE Device is located. Settings Issue 03 (2019-01-31) Copyright © Huawei Technologies Co., Ltd. -
Page 131: The Call Rule Screen
To access this screen, click VoIP > Call Rule. Figure 15-6 VoIP > Call Rule Each field is described in the following table. Issue 03 (2019-01-31) Copyright © Huawei Technologies Co., Ltd. -
Page 132: Technical Reference
Circuit-switched telephone networks require 64 kilobits per second (Kbps) in each direction to handle a telephone call. VoIP can use advanced voice coding techniques with compression to reduce the required bandwidth. Issue 03 (2019-01-31) Copyright © Huawei Technologies Co., Ltd. -
Page 133: Sip
The LTE Device attempts to register all enabled subscriber ports when it is switched on. When you enable a subscriber port that was previously disabled, the LTE Device attempts to register the port immediately. Issue 03 (2019-01-31) Copyright © Huawei Technologies Co., Ltd. - Page 134 Step 1 The client device (A in the figure) sends a call invitation to the SIP proxy server B. Step 2 The SIP proxy server forwards the call invitation to C. Issue 03 (2019-01-31) Copyright © Huawei Technologies Co., Ltd.
- Page 135 Step 2 The SIP redirect server sends the invitation back to A with C's IP address (or domain name). Step 3 Client device A then sends the call invitation to client device C. Issue 03 (2019-01-31) Copyright © Huawei Technologies Co., Ltd.
- Page 136 Pulse Code Modulation (PCM) measures analog signal amplitudes at regular time intervals and converts them into bits. SIP Call Progression The following figures display the basic steps in the setup and tear down of a SIP call. A calls Issue 03 (2019-01-31) Copyright © Huawei Technologies Co., Ltd.
- Page 137 Enable Message Waiting Indication (MWI) enables your phone to give you a message-waiting (beeping) dial tone when you have a voice message(s). Your VoIP service provider must have a messaging system that sends message waiting status SIP packets as defined in RFC 3842. Issue 03 (2019-01-31) Copyright © Huawei Technologies Co., Ltd.
-
Page 138: Quality Of Service (Qos)
After pressing the flash key, if you do not issue the sub-Command before the default sub- Command time-out (2 seconds) expires or issue an invalid sub-Command, the current operation will be aborted. Issue 03 (2019-01-31) Copyright © Huawei Technologies Co., Ltd. - Page 139 Either press the flash key and press "1", or just hang up the phone and then answer the phone after it rings. Put the first call on hold and answer the second call. Press the flash key and then "2". Issue 03 (2019-01-31) Copyright © Huawei Technologies Co., Ltd.
- Page 140 Put a current call on hold to answer an incoming call. Flash *98# Transfer the call to another phone. USA Call Hold Call hold allows you to put a call (A) on hold by pressing the flash key. Issue 03 (2019-01-31) Copyright © Huawei Technologies Co., Ltd.
- Page 141 Step 7 If you want to separate the activated three-way conference into two individual connections again, press the flash key. This time the party B is on-line and party A is on hold. ----End Issue 03 (2019-01-31) Copyright © Huawei Technologies Co., Ltd.
-
Page 142: Lte Status
LTE CPE B2368 User Guide 16 LTE Status LTE Status 16.1 Overview Use the LTE Status screens to look at LTE related signaling status. Figure 16-1 System Monitor > LTE Status Issue 03 (2019-01-31) Copyright © Huawei Technologies Co., Ltd. -
Page 143: Logs
The following table describes the syslog severity levels. Table 17-1 Syslog Severity Levels CODE SEVERITY Emergency (EMERG): The system is unusable. Alert (ALERT): Action must be taken immediately. Issue 03 (2019-01-31) Copyright © Huawei Technologies Co., Ltd. -
Page 144: The System Log Screen
LTE Device searches through all logs of that severity or higher. See Table 17-1 for more information about severity levels. Refresh Click this to renew the log screen. Clear Logs Click this to delete all the logs. Issue 03 (2019-01-31) Copyright © Huawei Technologies Co., Ltd. -
Page 145: The Phone Log Screen
Select a category of logs to view from the drop-down list box. Select All Logs to view all logs. Level Select the severity level that you want to view. Refresh Click this to renew the log screen. Clear Logs Click this to delete all the logs. Issue 03 (2019-01-31) Copyright © Huawei Technologies Co., Ltd. -
Page 146: The Voip Call History Screen
This field displays the phone number you called or from which this call is made. Interface This field displays the type of the call. Duration This field displays how long the call lasted. Issue 03 (2019-01-31) Copyright © Huawei Technologies Co., Ltd. -
Page 147: Traffic Status
WAN (VoIP) displays when you enable dual APN. Figure 18-1 System Monitor > Traffic Status > WAN The following table describes the fields in this screen. Issue 03 (2019-01-31) Copyright © Huawei Technologies Co., Ltd. -
Page 148: The Lan Status Screen
This indicates the number of received packets dropped on this interface. 18.3 The LAN Status Screen Click System Monitor > Traffic Status > LAN to open the following screen. You can view the LAN traffic statistics in this screen. Issue 03 (2019-01-31) Copyright © Huawei Technologies Co., Ltd. - Page 149 This indicates the number of frames with errors transmitted on this interface. Drop This indicates the number of outgoing packets dropped on this interface. Received (Packet) Data This indicates the number of received packets on this interface. Issue 03 (2019-01-31) Copyright © Huawei Technologies Co., Ltd.
-
Page 150: The Nat Status Screen
This shows the number of NAT sessions used by the client. Session 18.5 The VoIP Status Screen Click System Monitor > VoIP Status to open the following screen. You can view the VoIP status in this screen. Issue 03 (2019-01-31) Copyright © Huawei Technologies Co., Ltd. - Page 151 This field displays the last number the SIP account called. The field is blank if the SIP account has never dialed a number. Number Call Status Account This column displays the SIP account in the LTE Device. Issue 03 (2019-01-31) Copyright © Huawei Technologies Co., Ltd.
- Page 152 This field displays the SIP number that you use to receive calls on this Number phone port. Phone State This field shows whether or the phone connected to the subscriber port is on-hook ONHOOK) or off-hook (OFFHOOK). Issue 03 (2019-01-31) Copyright © Huawei Technologies Co., Ltd.
-
Page 153: User Account
Use the User Account screen to configure system password. Click Maintenance > User Account to open the following screen. Figure 19-1 Maintenance > User Account The following table describes the Labels in this screen. Issue 03 (2019-01-31) Copyright © Huawei Technologies Co., Ltd. - Page 154 After you change the password, use the new password to access the LTE Device. Retype to Type the new password again for confirmation. Confirm Apply Click Apply to save your changes. Cancel Click Cancel to restore your previously saved settings. Issue 03 (2019-01-31) Copyright © Huawei Technologies Co., Ltd.
-
Page 155: Remote Mgmt
Click Maintenance > Remote MGMT to open the following screen. NOTE Only admin users can configure Remote MGMT when they log on. The user users do not have remote administrative authority and cannot configure Remote MGMT. Issue 03 (2019-01-31) Copyright © Huawei Technologies Co., Ltd. -
Page 156: The Tr069 Screen
Please refer to the TR-069 model tree for TR-069 settings and notice items. Click Maintenance > Remote MGMT > TR069 to open the following screen. Use this screen to configure your LTE Device to be managed by an ACS. Issue 03 (2019-01-31) Copyright © Huawei Technologies Co., Ltd. - Page 157 Enter the password for authenticating the ACS when it requests a Request connection to the LTE Device. Password Apply Click Apply to save your changes. Cancel Click Cancel to restore your previously saved settings. Issue 03 (2019-01-31) Copyright © Huawei Technologies Co., Ltd.
-
Page 158: System
In Windows 7, click Start, Computer, Properties. Note the entry in the Full computer name field and enter it as the LTE Device System Name. Click Maintenance > System to open the following screen. Issue 03 (2019-01-31) Copyright © Huawei Technologies Co., Ltd. -
Page 159: The Encryption Key Screen
There are three encryption key update scenarios to consider: 21.3.1 Normal: IDU and ODU Bundle Step 1 Click Maintenance > System > Encryption Key to open the following screen. Issue 03 (2019-01-31) Copyright © Huawei Technologies Co., Ltd. -
Page 160: New Odu With Old Idu
Do the following if you replace the ODU but still have the old IDU. Step 1 Press the IDU reset button over 10 seconds and release, and wait for the device to reboot. Issue 03 (2019-01-31) Copyright © Huawei Technologies Co., Ltd. -
Page 161: New Idu With Old Odu
Defaults, select Reset, and wait for the IDU to reboot. Step 3 After the restart, the Wi-Fi user name and password can be found on the label of the new IDU. ----End Issue 03 (2019-01-31) Copyright © Huawei Technologies Co., Ltd. -
Page 162: Time Setting
Use this screen to configure the LTE Device's time based on your local time zone. Figure 22-1 Maintenance > Time Setting The following table describes the fields in this screen. Table 22-1 Maintenance > Time Setting Label Description Current Date/Time Issue 03 (2019-01-31) Copyright © Huawei Technologies Co., Ltd. - Page 163 March. The time you type in the o'clock field depends on your time zone. In Germany for instance, you would type 2 because Germany's time zone is one hour ahead of GMT or UTC (GMT+1). Issue 03 (2019-01-31) Copyright © Huawei Technologies Co., Ltd.
- Page 164 The time you type in the o'clock field depends on your time zone. In Germany for instance, you would type 2 because Germany's time zone is one hour ahead of GMT or UTC (GMT+1). Apply Click Apply to save your changes. Issue 03 (2019-01-31) Copyright © Huawei Technologies Co., Ltd.
-
Page 165: Log Setting
You can configure which logs and/or immediate alerts the LTE Device records in the Log Setting screen. 23.2 The Log Setting Screen To change your LTE Device's log settings, click Maintenance > Log Setting. The screen appears as shown. Figure 23-1 Maintenance > Log Setting Issue 03 (2019-01-31) Copyright © Huawei Technologies Co., Ltd. - Page 166 Select the severity level of logs that you want to record. If you want to record all logs, select ALL. Apply Click Apply to save your changes. Cancel Click Cancel to restore your previously saved settings. Issue 03 (2019-01-31) Copyright © Huawei Technologies Co., Ltd.
-
Page 167: Software Upgrade
HTTP (Hypertext Transfer Protocol) and may take up to five minutes. After a successful upload, the system will reboot. Do NOT turn off the LTE Device while firmware upload is in progress! Issue 03 (2019-01-31) Copyright © Huawei Technologies Co., Ltd. - Page 168 After you select the file, click Upload to begin the upload process. This process may take up to five minutes. After you see the firmware updating screen, wait a few minutes before logging into the LTE Device again. Figure 24-2 Firmware Upgrading Warning Issue 03 (2019-01-31) Copyright © Huawei Technologies Co., Ltd.
- Page 169 After two minutes, log in again and check your new firmware version in the System Info screen. If the upload was not successful, an error screen will appear. Click OK to go back to the Software Upgrade screen. Issue 03 (2019-01-31) Copyright © Huawei Technologies Co., Ltd.
-
Page 170: Online Upgrade
Do NOT turn off the LTE Device while firmware upload is in progress! In the Periodic Online Upgrade field, select Disable to turn off remote automatic detection and automatic upgrade functions. Issue 03 (2019-01-31) Copyright © Huawei Technologies Co., Ltd. - Page 171 When you choose Check Software and notify or Check Software and autoupgrade; you can choose when to check (Check Time). Use the server URL provided by your service provider for your LTE Device! Issue 03 (2019-01-31) Copyright © Huawei Technologies Co., Ltd.
-
Page 172: Online Upgrade Types
Figure 25-5 Maintenance > Online Upgrade: Module Firmware Only There is new firmware for both the LTE Device and new firmware for the LTE module. In this situation, the LTE Device upgrades the LTE module's firmware first. Issue 03 (2019-01-31) Copyright © Huawei Technologies Co., Ltd. -
Page 173: Online Upgrade Procedures
URL, click Apply and click Check Now. Figure 25-7 Maintenance > Online Upgrade: Enter URL Step 2 A popup window shows if there is new firmware. Figure 25-8 Maintenance > Online Upgrade: New Module Firmware Popup Issue 03 (2019-01-31) Copyright © Huawei Technologies Co., Ltd. - Page 174 No or the X button to close the popup window and skip the firmware upgrade. Figure 25-9 Maintenance > Online Upgrade: Firmware Upgrading Warning Figure 25-10 Maintenance > Online Upgrade: Firmware Upgrading 25% Figure 25-11 Maintenance > Online Upgrade: Firmware Upgrading 50% Issue 03 (2019-01-31) Copyright © Huawei Technologies Co., Ltd.
- Page 175 To upgrade both the LTE Device and LTE module firmware Step 1 Click Maintenance > Online Upgrade. Set Periodic Online Upgrade to Disable. Fill in the firmware server URL and click Check Now. Issue 03 (2019-01-31) Copyright © Huawei Technologies Co., Ltd.
- Page 176 If you don't need to upgrade the firmware, click No or the X button to close the popup window and skip the firmware upgrade. Figure 25-16 Maintenance > Online Upgrade: Firmware Upgrading Warning Issue 03 (2019-01-31) Copyright © Huawei Technologies Co., Ltd.
- Page 177 Step 4 The login page appears again after the upgrade is complete. Log back into the LTE Device and use System Monitor > LTE Status to check if the module firmware version is correct. Issue 03 (2019-01-31) Copyright © Huawei Technologies Co., Ltd.
- Page 178 Step 6 The login screen appears again after the upgrade is complete. Log back into the LTE Device and use System Monitor > LTE Status to check if the firmware version is correct. Issue 03 (2019-01-31) Copyright © Huawei Technologies Co., Ltd.
- Page 179 LTE CPE B2368 User Guide 25 Online Upgrade Figure 25-23 System Monitor > LTE Status: Checking the Firmware Version ----End Issue 03 (2019-01-31) Copyright © Huawei Technologies Co., Ltd.
-
Page 180: Backup/Restore
Step 1 Backup Log allows you to back up (save) the LTE Device's logs to a file on your computer. Once your LTE Device has unusual behavior, it is highly recommended that you back up your Issue 03 (2019-01-31) Copyright © Huawei Technologies Co., Ltd. - Page 181 The LTE Device automatically restarts in this time causing a temporary network disconnect. In some operating systems, you may see the following icon on your desktop. Figure 26-2 Network Temporarily Disconnected Issue 03 (2019-01-31) Copyright © Huawei Technologies Co., Ltd.
- Page 182 You can also press the RESET button on the back panel to reset the factory defaults of your LTE Device. Refer to Section 1.7 on page 6 for more information on the RESET button. Issue 03 (2019-01-31) Copyright © Huawei Technologies Co., Ltd.
-
Page 183: The Reboot Screen
You may need to do this if the LTE Device hangs, for example. Step 1 Click Maintenance> Reboot. Click the Reboot button to have the LTE Device reboot. This does not affect the LTE Device's configuration. Figure 27-1 Reboot ----End Issue 03 (2019-01-31) Copyright © Huawei Technologies Co., Ltd. -
Page 184: Diagnostic
Ping and traceroute help check availability of remote hosts and also help troubleshoot network or Internet connections. Click Maintenance > Diagnostic to open the Ping/TraceRoute screen shown next. Figure 28-1 Maintenance > Diagnostic > Ping/TraceRoute The following table describes the fields in this screen. Issue 03 (2019-01-31) Copyright © Huawei Technologies Co., Ltd. - Page 185 Click Ping and the ping statistics will show in the diagnostic. TraceRoute Click this button to perform the traceroute function. This determines the path a packet takes to the specified host. Issue 03 (2019-01-31) Copyright © Huawei Technologies Co., Ltd.
-
Page 186: Troubleshooting
IP address in your Internet browser. Step 3 If this does not work, you have to reset the device to its factory defaults, see 1.5.3 The RESET Button. ----End I forgot the password. Issue 03 (2019-01-31) Copyright © Huawei Technologies Co., Ltd. - Page 187 Step 3 Turn the LTE Device off and on. Step 4 If this does not work, you have to reset the device to its factory defaults. See 26.2 The Backup/Restore Screen. ----End Issue 03 (2019-01-31) Copyright © Huawei Technologies Co., Ltd.
-
Page 188: Internet Access
----End 29.5 Wireless Internet Access What factors may cause intermittent or unstable wireless connection? How can I solve this problem? Issue 03 (2019-01-31) Copyright © Huawei Technologies Co., Ltd. -
Page 189: Phone Calls And Voip
Step 3 If the VoIP settings are correct, use speed dial to make peer-to-peer calls. If you can make a call using speed dial, there may be something wrong with the SIP server, contact your VoIP service provider. ----End Issue 03 (2019-01-31) Copyright © Huawei Technologies Co., Ltd. -
Page 190: Upnp
I cannot open special applications such as white board, file transfer and video when I use the MSN messenger. Step 1 Wait more than three minutes. Step 2 Restart the applications. ----End Issue 03 (2019-01-31) Copyright © Huawei Technologies Co., Ltd. -
Page 191: Personal Data Description
30 Personal Data Description Personal Data Description LTE CPE B2368 Personal Data Description provides descriptions to the personal data collected by CPE. You must handle the personal data on the CPE according to the laws and regulations of your country, for example, GDPR(General Data Protection Regulation) of European Union.