GE LOGIQ E9 User Manual
Hide thumbs
Also See for LOGIQ E9:
- Service manual (808 pages) ,
- Technical publication (127 pages) ,
- Service manual (754 pages)
Table of Contents
Advertisement
Quick Links
Download this manual
See also:
Service Manual
Advertisement
Table of Contents

Related Manuals for GE LOGIQ E9


Summary of Contents for GE LOGIQ E9
- Page 1 Technical Publications Direction 5454884-100 English Rev. 1 0459 LOGIQ E9 User Guide Version R4 Operating Documentation Copyright 2012 By General Electric Co.
- Page 2 LOGIQ E9 complies with regulatory requirements of the following European Directive 93/42/EEC concerning medical devices. 0459 This manual is a reference for the LOGIQ E9. It applies to Version R4 software for the LOGIQ E9 ultrasound system. GE Healthcare P.O. Box 414, Milwaukee, Wisconsin 53201 U.S.A.
-
Page 3: Revision History
(GE Healthcare electronic Product Data Management). If you need to know the latest revision, contact your distributor, local GE Sales Representative or in the USA call the GE Ultrasound Clinical Answer Center at 1 800 682 5327 or 1 262 524 5698. - Page 4 This page intentionally left blank. – LOGIQ E9 User Guide Direction 5454884-100 English Rev. 1...
-
Page 5: Regulatory Requirements
The location of the CE marking is shown in the Safety chapter of this manual. Authorized EU Representative European registered place of business: GE Medical Systems Information Technologies GmbH (GEMS IT GmbH) Munzinger Strasse 3, D-79111 Freiburg, GERMANY Tel: +49 761 45 43 -0; Fax: +49 761 45 43 -233 –... - Page 6 General Requirements for Safety. • NEMA/AIUM Acoustic Output Display Standard (NEMA UD-3). • Medical Device Good Manufacturing Practice Manual issued by the FDA (Food and Drug Administration, Department of Health, USA). – LOGIQ E9 User Guide Direction 5454884-100 English Rev. 1...
- Page 7 – Breast Measure Assistant – OB Measure Assistant Importer Information • Turkey ITHALATÇI PENTA ELEKTRONIK MEDIKAL SISTEMLER SAN. VE TIC. A.S. HOSDERE CAD. FUAR SOK. 5 / 3 Y. AYRANCI / ANKARA – LOGIQ E9 User Guide Direction 5454884-100 English Rev. 1...
- Page 8 – LOGIQ E9 User Guide Direction 5454884-100 English Rev. 1...
-
Page 9: Table Of Contents
B-Mode Controls- - - - - - - - - - - - - - - - - - - - - - - - - - - - - - - - - - - - - - - - 2-2 – LOGIQ E9 User Guide... - Page 10 Contact Information Contacting GE Healthcare Ultrasound - - - - - - - - - - - - - - - - - - - - - - - 3-42 Manufacturer - - - - - - - - - - - - - - - - - - - - - - - - - - - - - - - - - - - - - - - - - 3-48...
- Page 11 Warning Label Locations - - - - - - - - - - - - - - - - - - - - - - - - - - - - - - - - - 4-43 Index – LOGIQ E9 User Guide Direction 5454884-100 English Rev. 1...
- Page 12 – LOGIQ E9 User Guide Direction 5454884-100 English Rev. 1...
- Page 13 Chapter 1 Getting Started Console Overview, Moving the System, System Start-up, Probes and Beginning an Exam – LOGIQ E9 User Guide Direction 5454884-100 English Rev. 1...
-
Page 14: Console Overview
Disregarding information on safety is considered abnormal use. Not all features or products described in this document may be available or cleared for sale in all markets. Please contact your local GE Healthcare Ultrasound representative to get the latest information. NOTE:... -
Page 15: Indications For Use
Console Overview Indications for Use The LOGIQ E9 is intended for use by a qualified physician for ultrasound evaluation. Frequency of Use Daily (Typically 8 hours) Operator Profile • Qualified and trained physicians or sonographers with at least basic ultrasound knowledge. -
Page 16: Contraindication
Getting Started Contraindication The LOGIQ E9 ultrasound system is not intended for ophthalmic use or any use causing the acoustic beam to pass through the eye. Only qualified physicians or sonographers should perform ultrasound scanning on human subjects for medical diagnostic reasons. -
Page 17: Important Notices
Operation in an enclosed area (wood, plaster or concrete walls, floors and ceilings) helps prevent electromagnetic interference. • Special shielding may be required if the console is to be operated in the vicinity of radio broadcast equipment. – LOGIQ E9 User Guide Direction 5454884-100 English Rev. 1... - Page 18 To avoid leakage current above safety limits as prescribed by CAUTION IEC 60601-1 and to ensure continuity of protective earth. DO NOT connect LOGIQ E9 and mains-operated accessories to a single or multiple socket extension cord or power strip. Figure 1-1. Example Plug and Outlet Configurations...
-
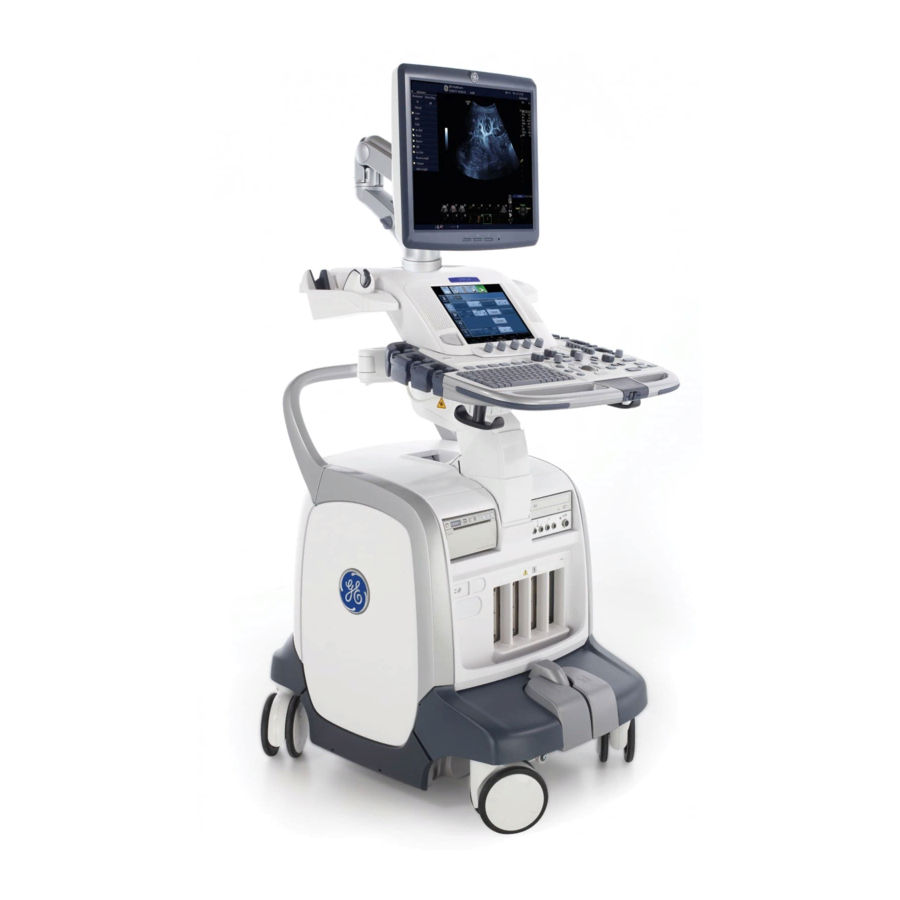
Page 19: Console Graphics
Console Overview Console Graphics The following are illustrations of the console: Figure 1-2. LOGIQ E9 System (right and left side views) 1. LCD 5. Peripherals (Black/White Printer, CD/DVD 2. Gel Holder / Specialty Probe Holder Drive), V Nav option, and Network Activity/ 3. - Page 20 Getting Started Console Graphics (continued) Figure 1-3. LOGIQ E9 System (front and back views) 1. Power On/Off; Operator Panel USB Ports 9. Probe Connectors 2. Brake and Up/Down Controls 10. Brake Pedal 3. Probe Cable Management Hooks (underneath 11. Rear Handle Operator Panel) 12.
- Page 21 ONLY plug in devices to the USB ports located at the rear of CAUTION the system WHILE the LOGIQ E9 is NOT powered up. If you plug in a device while the LOGIQ E9 is powered on, your system may become unusable.
- Page 22 Getting Started Peripheral/Accessory Connector Panel LOGIQ E9 peripherals CAN ONLY BE properly connected using the Peripheral/Accessory Connector Panel located behind the rear door: Color Digital or Report printer, Audio In/Out, DVI Analog Video Output, S-Video, and Ethernet. For compatiblity reasons, use only GE-approved probes, CAUTION peripherals, or accessories.
- Page 23 Console Overview Peripheral/Accessory Connector Panel (continued) Figure 1-4. Peripheral/Accessory Connector Panel Table 1-1: Peripheral/Accessory Connector Panel Descriptions Item Type of connector USB Ports USB 2.0 Ethernet RJ-45 Modular, 8-pin – 1-11 LOGIQ E9 User Guide Direction 5454884-100 English Rev. 1...
- Page 24 Item Type of connector DVI Port Connector DVI Analog Video Output. Note: Use a DVI to VGA Adapter in order to connect an analog monitor. Audio In/Out S-Video S-Video 1-12 – LOGIQ E9 User Guide Direction 5454884-100 English Rev. 1...
- Page 25 6. Mode/Gain/XYZ (3D) Controls 7. TGC 8. Trackball, Trackball Keys, Pointer, Measure, Comment, Body Pattern, Clear, Zoom, 3D/4D, P1 9. L/R, Start/Stop, Freeze 10. Steer/Width/Depth/Reverse 11. Auto 12. P2, P3, P4 – 1-13 LOGIQ E9 User Guide Direction 5454884-100 English Rev. 1...
- Page 26 Press the button to switch between controls, or rotate the dial to adjust the value, or move the control left/right or up/down to adjust the value. 1-14 – LOGIQ E9 User Guide Direction 5454884-100 English Rev. 1...
- Page 27 Monitor Display Figure 1-7. Monitor Display Tour Figure 1-8. Monitor Display Tour 2 NOTE: The date on the monitor may truncate the century when using the YYYY-MM-DD date format. – 1-15 LOGIQ E9 User Guide Direction 5454884-100 English Rev. 1...
- Page 28 (Second) Patient Name/Patient Identification. PC with X=not connected), wireless LAN 3. Power Output Readout indicator (WLAN=connected, WLAN with X=not 4. GE Symbol: Probe Orientation Marker. connected), DVR status, InSite ExC status, 5. Worksheet/Direct Report. InSite ExC controls, system messages display.
- Page 29 Table 1-2: Brightness Settings (Recommended) Room Condition Brightness Dark Room (Factory default) Bright Room NOTE: After readjusting the monitor's Brightness, readjust all preset and peripheral settings. – 1-17 LOGIQ E9 User Guide Direction 5454884-100 English Rev. 1...
-
Page 30: Moving The System
If more than four (4) probes are intended to be used, store the additional probes securely. 7. Store all other probes in their original cases or in soft cloth or foam to prevent damage. 1-18 – LOGIQ E9 User Guide Direction 5454884-100 English Rev. 1... - Page 31 To prevent system damage while not in use AND/OR CAUTION before moving the system, flip down the monitor and lock the monitor arm and operator panel firmly in place. 10. Unlock the wheels. – 1-19 LOGIQ E9 User Guide Direction 5454884-100 English Rev. 1...
-
Page 32: When Moving The System
Be sure the pathway is clear. • Limit movement to a slow careful walk. • Use two or more persons to move the system on inclines or long distances. 1-20 – LOGIQ E9 User Guide Direction 5454884-100 English Rev. 1... -
Page 33: Operator Panel Movement Controls
Operator Panel. Release the Up/Down button when the Top Console is in the desired height. To manually adjust the Operator Panel, manipulate the metal lever located in-between the slots on the rear of the LOGIQ E9. When power is on, the brakes are applied to the Operator CAUTION Panel. - Page 34 Figure 1-11. Park Lock Reset After you press the Park Lock Reset control, you can hear the motor moving, releasing the Operator Panel for you to position as you need. 1-22 – LOGIQ E9 User Guide Direction 5454884-100 English Rev. 1...
-
Page 35: Setting The Front Wheels Lock
When two or more people are releasing the swivel/pivot wheel CAUTION controls with the front and rear pedals, take extra precaution to prevent unexpected movement which could result in possible toe injuries. – 1-23 LOGIQ E9 User Guide Direction 5454884-100 English Rev. 1... -
Page 36: System Start-Up
‘Circuit breaker’ on page 1-27 for more information. Login Personal IDs and associated passwords can be preset on the LOGIQ E9. If the User Auto Logon preset is blank, you are prompted to login. Figure 1-13. Operator Login Window 1. -
Page 37: Power Off
For optimum system operation, we recommend that you restart the system at least once every 24-hour period. If you shut down the system at the end of the day, no other action is needed. – 1-25 LOGIQ E9 User Guide Direction 5454884-100 English Rev. 1... - Page 38 4. Wait approximately one minute. The system On/Off switch should be dark. 5. Turn on the LOGIQ E9 by either turning on the circuit breaker or plugging in the scanner. 6. Turn on the scanner by pressing the system On/Off switch.
-
Page 39: Circuit Breaker
1. Disconnect the Power Cable. 2. Call Service immediately. DO NOT attempt to use the system. Figure 1-14. Circuit Breaker (located at the rear of the system) – 1-27 LOGIQ E9 User Guide Direction 5454884-100 English Rev. 1... -
Page 40: Probes
Only use approved probes. Figure 1-15. 4 DLP Probe Port Connectors DO NOT plug any LOGIQ 9 probes into the LOGIQ E9 system. Use the left-most probe port for the 3CRF, S1-5, S4-10, and 6Tc probes; use the 3 right probe ports for any “___-D” probe. -
Page 41: Connecting The Probe
Figure 1-16 on page 1-28), inspect the probe connector pin. If the pin is bent, do not use the probe until it has been inspected and repaired/replaced by a GE Service Representative. 6. Turn the connector locking handle to the right to secure the probe connector. -
Page 42: Cable Handling
To activate the probe, select the appropriate probe from the probe indicators on the Touch Panel. Figure 1-17. Probe Indicators 1. Probe Indicators The probe's default settings for the mode and selected exam are used automatically. 1-30 – LOGIQ E9 User Guide Direction 5454884-100 English Rev. 1... -
Page 43: Disconnecting The Probe
5. Ensure the cable is free. 6. Be sure that the probe head is clean before placing the probe in its storage box or wall hanging unit. Probe Discussion The LOGIQ E9 supports the following types of probes: • Matrix Array. Matrix Array probes. •... -
Page 44: Convex Probes
Illustration C1-5-D • Abdomen • Coded Contrast • OB/GYN • Tru3D • V Nav • CrossXBeam • Anatomical Color M • Elastography • Elastography Quantification (Not available in USA) 1-32 – LOGIQ E9 User Guide Direction 5454884-100 English Rev. 1... - Page 45 • OB/GYN • Coded Contrast • TV/TR • Tru3D • Urology • V Nav • CrossXBeam • Anatomical Color M • Elastography • Elastography Quantification (Not available in USA) – 1-33 LOGIQ E9 User Guide Direction 5454884-100 English Rev. 1...
-
Page 46: Linear Probes
(Not available in USA) • Biopsy capability L8-18i-D • Intraoperative • Tru3D • Musculoskeletal • V Nav • Neonatal • B Flow/B Flow Color • Pediatric • Peripheral Vascular • Small Parts 1-34 – LOGIQ E9 User Guide Direction 5454884-100 English Rev. 1... -
Page 47: Sector Probes
• Easy 3D • Cardiac • Advanced 3D • OB/GYN • Tru3D • Pediatric • V Nav • Anatomical M-Mode • CW • CAMM • Color M • TVI • TVD – 1-35 LOGIQ E9 User Guide Direction 5454884-100 English Rev. 1... - Page 48 • Cardiac, Pediatric • Coded Harmonics • Easy 3D • Advanced 3D • Anatomical M-Mode • CW • CAMM • Anatomical Color M • Color M • TVI • TVD 1-36 – LOGIQ E9 User Guide Direction 5454884-100 English Rev. 1...
- Page 49 Probes Table 1-10: Sector Probes (Continued) Probe Indications for Use Capabilities and Features Illustration • Cardiac, Adult • Anatomical M-Mode • Transesophageal • CW • CAMM • Color M – 1-37 LOGIQ E9 User Guide Direction 5454884-100 English Rev. 1...
- Page 50 • Peripheral Vascular • Speed of Sound • Compare Assistant • Adult Cephalic • Scan Assistant • Cardiac • CW • Peripheral Vascular • Speed of Sound • Compare Assistant 1-38 – LOGIQ E9 User Guide Direction 5454884-100 English Rev. 1...
- Page 51 • Anatomical M-Mode • Anatomical Color M • CrossXBeam • Biopsy capability RAB4-8-D • Abdomen • Anatomical M-Mode • OB/GYN • Anatomical Color M • Pediatric • CrossXBeam • Biopsy capability – 1-39 LOGIQ E9 User Guide Direction 5454884-100 English Rev. 1...
- Page 52 Beta View is not available while the image is Frozen, during an image Recall, during a Biopsy procedure, or during Volume Navigation. When these controls are selected, the Beta View Touch Panel control is hidden and unavailable. 1-40 – LOGIQ E9 User Guide Direction 5454884-100 English Rev. 1...
-
Page 53: Biopsy Special Concerns
Follow the manufacturer's instructions for the cleaning of biopsy devices and accessories. • Use protective barriers such as gloves and probe sheaths. • After use, follow proper procedures for decontamination, cleaning, and waste disposal. – 1-41 LOGIQ E9 User Guide Direction 5454884-100 English Rev. 1... - Page 54 NEVER reuse the TR5° disposable biopsy guide attachment WARNING and Disposable sterile Ultra-Pro II Needle guide kits. 1-42 – LOGIQ E9 User Guide Direction 5454884-100 English Rev. 1...
-
Page 55: Preparing For A Biopsy
The available biopsy options appear when Biopsy Kit is selected. There are fixed and adjustable angle biopsy kits and plastic/disposable and reusable biopsy guides available with the LOGIQ E9 depending on the probe. Select the desired biopsy kit. NOTE: You can display the biopsy guideline on the CFM image in simultaneous mode. - Page 56 Before scanning, verify the needle can be visualized within the imaging plane. User appropriate needle length to reach target area. 1-44 – LOGIQ E9 User Guide Direction 5454884-100 English Rev. 1...
- Page 57 – 1-45 LOGIQ E9 User Guide Direction 5454884-100 English Rev. 1...
- Page 58 Disposable components are packaged sterile and are single-use only. Do not use if integrity of packing is vilated or if expiration date has passed. 1-46 – LOGIQ E9 User Guide Direction 5454884-100 English Rev. 1...
- Page 59 3. Attach the biopsy bracket to the probe by sliding the bracket over the end of the probe until it clicks or locks in place. 4. Place an adequate amount of coupling gel on the face of the probe. – 1-47 LOGIQ E9 User Guide Direction 5454884-100 English Rev. 1...
- Page 60 Use the rubber bands supplied to hold the sheath in place. Figure 1-21. Applying Sanitary Sheath 6. Snap the fixed or adjustable needle clip onto the biopsy guide bracket. Figure 1-22. Fixed Needle Clip Attachment a. Sheath 1-48 – LOGIQ E9 User Guide Direction 5454884-100 English Rev. 1...
- Page 61 This is because the guide allows variable angles. For in-plane needle guides, steps 8 and 9 are not applicable. Figure 1-24. Example of In-Plane Needle Guide – 1-49 LOGIQ E9 User Guide Direction 5454884-100 English Rev. 1...
- Page 62 9. Place the needle barrel into the needle clip with the desired gauge facing the needle clip and snap into place. Figure 1-26. Needle Barrel Installation Ensure that all guide parts are seated properly prior to CAUTION performing a biopsy. 1-50 – LOGIQ E9 User Guide Direction 5454884-100 English Rev. 1...
- Page 63 Push the knob down (Figure 1-28 b) into the desired slot to secure the angle position of the needle guide attachment. Figure 1-28. Pull up and push down the knob – 1-51 LOGIQ E9 User Guide Direction 5454884-100 English Rev. 1...
- Page 64 Hold the side (a) and tuck down the needle guide side (b) until it clicks or locks in place. Figure 1-30. Probe/Multi-angle Bracket Alignment 2 4. Place an adequate amount of coupling gel on the face of the probe. 1-52 – LOGIQ E9 User Guide Direction 5454884-100 English Rev. 1...
- Page 65 Use the rubber bands supplied to hold the sheath in place. Figure 1-31. Applying Sanitary Sheath 6. Snap the needle guide onto the biopsy guide bracket. Figure 1-32. Snap the needle guide – 1-53 LOGIQ E9 User Guide Direction 5454884-100 English Rev. 1...
- Page 66 Figure 1-34. Needle Barrel 9. Place the needle barrel into the needle clip with the desired gauge facing the needle clip and snap into place. Figure 1-35. Needle Barrel Installation 1-54 – LOGIQ E9 User Guide Direction 5454884-100 English Rev. 1...
- Page 67 1. Hold the other side and push out the needle clip attachment side. See Figure 1-36. Figure 1-36. Remove the biopsy guide Prevent damage to the probe lens with finger nails. CAUTION – 1-55 LOGIQ E9 User Guide Direction 5454884-100 English Rev. 1...
- Page 68 Push the knob portion of a sleeve in the direction of the arrow. b. The needle is released from the assembly. c. Push the probe and the assembly in the direction of the larger arrow to remove the needle. 1-56 – LOGIQ E9 User Guide Direction 5454884-100 English Rev. 1...
- Page 69 Figure 1-38. Attachment Filling Removal a. Probe Head b. Attachment c. Filling Removal Tool 3. Clean, then disinfect the probe. NOTE: Ensure that protective gloves are worn. – 1-57 LOGIQ E9 User Guide Direction 5454884-100 English Rev. 1...
- Page 70 Figure 1-39. Endocavitary Probe with Sheath a. Probe Handle b. Sanitary Sheath c. Probe Body 5. Rub a finger over the tip of the probe to ensure all air bubbles have been removed. 1-58 – LOGIQ E9 User Guide Direction 5454884-100 English Rev. 1...
- Page 71 3. Ensure the guide is properly seated and secure by pushing forward on the needle insertion end of the guide until the attachment node is firmly in place in it’s hole. – 1-59 LOGIQ E9 User Guide Direction 5454884-100 English Rev. 1...
- Page 72 1. Press the needle guide onto the probe shaft and push it forward until the small swelling of the needle guide cacthes in the notch at the probe tip. NOTE: Material: Stainless Steel NOTE: Needle guide sterilization with autoclave possible. 1-60 – LOGIQ E9 User Guide Direction 5454884-100 English Rev. 1...
- Page 73 • Scan in a container filled with water (47° C). • Display the biopsy guidezone on the monitor. • Ensure that the needle echo falls within the guidezone markers. – 1-61 LOGIQ E9 User Guide Direction 5454884-100 English Rev. 1...
- Page 74 4. Place the needle in the guide between the needle barrel and needle clip. Direct it into the area of interest for specimen retrieval. 1-62 – LOGIQ E9 User Guide Direction 5454884-100 English Rev. 1...
- Page 75 When the biopsy needle guide kit is opened, all parts must be CAUTION discarded after the procedure whether they have been used or not. – 1-63 LOGIQ E9 User Guide Direction 5454884-100 English Rev. 1...
-
Page 76: Surgery/Intra-Operative Use
Equipment must be cleaned as appropriate for the procedure prior to use. For surgery/intra-operative procedures, a sterile environment is CAUTION required. Therefore, both the operator and probe needs to be sterile. 1-64 – LOGIQ E9 User Guide Direction 5454884-100 English Rev. 1... - Page 77 5. Depending on the type of procedure, use either sterile water or sterile gel on the sheath cover. NOTE: Follow your institutions guidelines on post surgery/ intra-operative procedures for probe cleaning and disinfection. – 1-65 LOGIQ E9 User Guide Direction 5454884-100 English Rev. 1...
-
Page 78: Beginning An Exam
“ ‘ \ / : ; . , * < > | + = [ ] & 7. Select Register. 8. Select the probe to start scanning (or select Exit, Esc, Scan, or Freeze). 9. Perform the exam. 1-66 – LOGIQ E9 User Guide Direction 5454884-100 English Rev. 1... - Page 79 When you press a Print key during scan (Live Store), the HINTS LOGIQ E9 stores the cine for the specified length of time noted in the Time Span(s) preset, found under Time-Based Store in Utility -> Application -> Print Controls.
-
Page 80: Patient Screen
1. Image Management 2. Function Selection 3. EZBackup/EZMove 4. Dataflow Selection 5. Exit 6. Patient Information 7. Category Selection 8. Exam Information 9. Scan Assistant Program 10. Patient View/Exam View 1-68 – LOGIQ E9 User Guide Direction 5454884-100 English Rev. 1... - Page 81 Exam details include Indications, Comments, Admission Number, Performing Physician’s Telephone Number, Referring Physician’s Telephone Number, Operator Telephone Number, and Exam Description. NOTE: The Exam Description pull-down selection is used as the DICOM identifier. – 1-69 LOGIQ E9 User Guide Direction 5454884-100 English Rev. 1...
- Page 82 Ensure you have selected a dataflow. If No Archive is selected, WARNING no patient data is saved. A Ø appears next to Dataflow if No Archive is selected. Exit Used to exit the Patient Menu. 1-70 – LOGIQ E9 User Guide Direction 5454884-100 English Rev. 1...
- Page 83 All possible information needs to be entered. • Images–Displays the selected exam’s images. • Clear–Clears existing data. • Past Exam (only for OB)–Input past exam data (register the patient before using). – 1-71 LOGIQ E9 User Guide Direction 5454884-100 English Rev. 1...
- Page 84 From and To dates are separated by a “-” (dash) in the Search String. NOTE: Img. Archived means that the exam was backed up to external media by EZBackup or Export. 1-72 – LOGIQ E9 User Guide Direction 5454884-100 English Rev. 1...
- Page 85 To avoid patient identification errors, always verify the CAUTION identification with the patient. Make sure the correct patient identification appears on all screens and hard copy prints. – 1-73 LOGIQ E9 User Guide Direction 5454884-100 English Rev. 1...
- Page 86 Read). Press the right Set key to select the patient. Press the left Set key to bring up the print menu. Select Print and press the right Set key to print the patient list. 1-74 – LOGIQ E9 User Guide Direction 5454884-100 English Rev. 1...
- Page 87 Chapter 2 Performing an Exam Optimizing the Image and Measurement and Analysis – LOGIQ E9 User Guide Direction 5454884-100 English Rev. 1...
-
Page 88: Optimizing The Image
Velocity Scale (live imaging only), baseline shift, dynamic range, and invert (if preset). Upon deactivation, the spectrum is still optimized. Mode Cursor Displays the M/D-Mode cursor on the B-Mode image. – LOGIQ E9 User Guide Direction 5454884-100 English Rev. 1... - Page 89 You can steer the sector angle to get more information without moving the probe while in B-Mode, M-Mode, Doppler Mode, and Color Flow Mode. Tilt is not available on Linear probes. – LOGIQ E9 User Guide Direction 5454884-100 English Rev. 1...
- Page 90 Suppression Suppresses the noise in the image. Speed of Sound Changes the transmitted speed of sound for various tissue types. – LOGIQ E9 User Guide Direction 5454884-100 English Rev. 1...
-
Page 91: Color Flow Mode Controls
Threshold Threshold assigns the gray scale level at which color information stops. Frame Average Averages color frames. Transparency Map Brings out the tissue behind the color map. – LOGIQ E9 User Guide Direction 5454884-100 English Rev. 1... - Page 92 PDI does not map velocity, therefore it is not subject to aliasing. – LOGIQ E9 User Guide Direction 5454884-100 English Rev. 1...
-
Page 93: M-Mode Controls
Curved Anatomical M-Mode (CAMM) displays a distance/time plot from a free-drawn cursor line. CAMM is available in gray scale, color and TVI. M Color Flow Mode See ‘Color Flow Mode Controls’ on page 2-5. – LOGIQ E9 User Guide Direction 5454884-100 English Rev. 1... -
Page 94: Doppler Mode Controls
Traces the average mean and peak velocities in realtime or frozen (Spectral Trace) images. Cycles to Average The average value over a number of cycles (from 1-5). Trace Sensitivity Adjust the trace to follow the waveform for signal strength. – LOGIQ E9 User Guide Direction 5454884-100 English Rev. 1... - Page 95 Activates the menu to select which calculations are automatically calculated. Auto Calcs Activates the calculation automatically which you select in the Modify Auto Calculation when the system is in a state of freeze or live. – LOGIQ E9 User Guide Direction 5454884-100 English Rev. 1...
-
Page 96: 3D Mode
6. To complete the 3D scan, press End (Trackball key). NOTE: You can also press Freeze, but then you need to also press the 3D key to obtain the final render. 2-10 – LOGIQ E9 User Guide Direction 5454884-100 English Rev. 1... -
Page 97: Other Controls
To zoom an image, adjust Zoom. A reference image appears in the lower, left-hand section of the display. To exit zoom, adjust Zoom until the reference zoom image is removed or press B-Mode. – 2-11 LOGIQ E9 User Guide Direction 5454884-100 English Rev. 1... - Page 98 (but not from the worksheet). Use the Trackball to start CINE after pressing Freeze. Activating CINE To activate CINE, 1. Press Freeze. 2. Move the Trackball. 2-12 – LOGIQ E9 User Guide Direction 5454884-100 English Rev. 1...
- Page 99 Clear key. Press Set on the keyboard or Scan on the Touch Panel to exit without erasing the body pattern. – 2-13 LOGIQ E9 User Guide Direction 5454884-100 English Rev. 1...
- Page 100 To create a Fast Key, press the F5 key and follow the on-screen prompts. To start a Fast Key, press the F6 key and follow the on-screen prompts. 2-14 – LOGIQ E9 User Guide Direction 5454884-100 English Rev. 1...
- Page 101 5. Thumbnail Size 3. Next/Previous Image(s); and 6. Number of Images in Exam Clipboard Slide Show if you press and hold down the [Ctrl] key + Next or Previous Arrow.. – 2-15 LOGIQ E9 User Guide Direction 5454884-100 English Rev. 1...
-
Page 102: Measurement And Analysis
The user should consider contraindications for the use of a calculation or chart as described in the scientific literature. The diagnosis, decision for further examination, and medical treatment must be performed by qualified personnel following good clinical practice. 2-16 – LOGIQ E9 User Guide Direction 5454884-100 English Rev. 1... -
Page 103: Location Of Measurement Controls
Cursor, etc) depending on the mode or action. Current functionality is displayed on the lower-right corner of the monitor. 6. Pointer Key. Select to display a pointer on the monitor. – 2-17 LOGIQ E9 User Guide Direction 5454884-100 English Rev. 1... -
Page 104: B-Mode Measurements
• Ellipse Method • Trace Method • Spline Method • Intensity (Echo level) Method NOTE: The following instructions assume that you first scan the patient and then press Freeze. 2-18 – LOGIQ E9 User Guide Direction 5454884-100 English Rev. 1... - Page 105 To rotate through and activate previously fixed calipers, adjust Cursor Select. • To erase all data that has been measured to this point, but not data entered onto worksheets, press Clear. – 2-19 LOGIQ E9 User Guide Direction 5454884-100 English Rev. 1...
- Page 106 To erase the ellipse and the current data measured, press Clear once. The original caliper is displayed to restart the measurement. • To exit the measurement function without completing the measurement, press Clear a second time. 2-20 – LOGIQ E9 User Guide Direction 5454884-100 English Rev. 1...
- Page 107 5. To trace the measurement area, move the Trackball around the anatomy. A dotted line shows the traced area. 6. To complete the measurement, press Set. The system displays the circumference and the area in the Results Window. – 2-21 LOGIQ E9 User Guide Direction 5454884-100 English Rev. 1...
- Page 108 Trackball or adjust the Ellipse control counterclockwise. • To erase the dotted line but not the caliper, press Clear once. • To clear the caliper and the current data measured, press Clear twice. 2-22 – LOGIQ E9 User Guide Direction 5454884-100 English Rev. 1...
- Page 109 Spline trace is not available through the factory default. The system defaults to trace. To enable spline trace, modify the Measure Key Sequence preset found in Utility -> Measure -> Advanced preset menu. – 2-23 LOGIQ E9 User Guide Direction 5454884-100 English Rev. 1...
- Page 110 If there are less than three points, the spline trace is removed. 4. Press Set again. All points are removed from the trace and the trace is shown as yellow. 2-24 – LOGIQ E9 User Guide Direction 5454884-100 English Rev. 1...
- Page 111 NOTE: Echo Level is not available through the factory default. To enable echo level, modify the Measure Key Sequence preset, found in the Utility -> Measure -> Advanced preset. – 2-25 LOGIQ E9 User Guide Direction 5454884-100 English Rev. 1...
-
Page 112: Doppler Mode Measurements
2. To position the caliper at the desired measurement point, move the Trackball. 3. To complete the measurement, press Set. The system displays the velocity measurement in the Results Window. 2-26 – LOGIQ E9 User Guide Direction 5454884-100 English Rev. 1... - Page 113 If the maximum velocity is not the maximum power, the system may not trace accurately. If you want to use maximum velocity, select either Above or Below. – 2-27 LOGIQ E9 User Guide Direction 5454884-100 English Rev. 1...
- Page 114 4. To position the second caliper at the end point, move the Trackball. 5. To complete the measurement, press Set. The system displays the time interval between the two calipers in the Results Window. 2-28 – LOGIQ E9 User Guide Direction 5454884-100 English Rev. 1...
-
Page 115: M-Mode Measurements
4. To position the second caliper at the most posterior point you want to measure, move the Trackball. 5. To complete the measurement, press Set. The system displays the vertical distance between the two points in the Results Window. – 2-29 LOGIQ E9 User Guide Direction 5454884-100 English Rev. 1... - Page 116 4. To position the second caliper at the end point, move the Trackball. 5. To complete the measurement, press Set. The system displays time(s) and slope between the two points in the Results Window. 2-30 – LOGIQ E9 User Guide Direction 5454884-100 English Rev. 1...
-
Page 117: Viewing And Editing Worksheets
The system displays the worksheet for the current study. Figure 2-4. OB B-Mode Worksheet To return to scanning, do one of the following: • Select Worksheet. • Press Esc. • Select the Exit button. – 2-31 LOGIQ E9 User Guide Direction 5454884-100 English Rev. 1... - Page 118 If a worksheet has more data on a second page, to view the next page, adjust the Page Change control. 2-32 – LOGIQ E9 User Guide Direction 5454884-100 English Rev. 1...
- Page 119 To type a comment on a worksheet: 1. Select Examiner’s Comments. The Examiner’s Comments window opens. 2. Type comments about the exam. 3. To close the Examiner’s Comments window, select Examiner’s Comments. – 2-33 LOGIQ E9 User Guide Direction 5454884-100 English Rev. 1...
- Page 120 To easily see which fields you can change or select, move the Trackball. As the cursor moves over a field that you can change or select, the field is highlighted. 2-34 – LOGIQ E9 User Guide Direction 5454884-100 English Rev. 1...
- Page 121 1. When the Worksheet is displayed on the monitor, press the Clear key; the following warning message appears: Figure 2-7. Delete All Warning Message 2. Select OK to delete all. Select Cancel to cancel the deletion. – 2-35 LOGIQ E9 User Guide Direction 5454884-100 English Rev. 1...
-
Page 122: Clinical Measurement Accuracy
(not the full scale range). Where the accuracy is stated as a percent with a fixed value, the expected inaccuracy is the greater of the two. 2-36 – LOGIQ E9 User Guide Direction 5454884-100 English Rev. 1... - Page 123 ±20% or ±2mm All probes Not to 1540m/s) Equal To 1540m/s whichever is greater ±13% Static 3D/4D Volume Accuracy ±5%, not to exceed Time Timeline Display M or Doppler 10ms Mode – 2-37 LOGIQ E9 User Guide Direction 5454884-100 English Rev. 1...
- Page 124 Volume Depth (SVD) direction least half the depth of the image Velocity cm/s Full Range PW and CW Doppler Mode ±1% Doppler Angle degrees From 0-59° ±2% Correction From 60-90° 2-38 – LOGIQ E9 User Guide Direction 5454884-100 English Rev. 1...
-
Page 125: Setting Up The Off-Line Paper Printer
Figure 2-8). Refer to the off-board printer’s manual for details. Peripheral devices that use their own AC power source CANNOT be connected to the LOGIQ E9. DO NOT connect the peripheral device’s power cord into the LOGIQ E9 system. Figure 2-8. Patient Environment Use a USB printer cable that is less than 3 meters in length. - Page 126 Performing an Exam 2-40 – LOGIQ E9 User Guide Direction 5454884-100 English Rev. 1...
- Page 127 Chapter 3 After the Exam is Over Probe Overview, System Presets, DataBackup, Configuring Connectivity, Electronic Documentation, Contact Information, System Data, System Care and Maintenance, and Accessories – LOGIQ E9 User Guide Direction 5454884-100 English Rev. 1...
-
Page 128: Probe Overview
Probe Overview Probe Naming Conventions Table 3-1: Probe Naming Convention Real Time 4D Type Application Frequency Connector Type “R” C=Convex AB=Abdominal “1-5” D=DLP L=Linear IC=Intracavitary M=Matrix NA=Neonatal S=Sector SP=Small Parts – LOGIQ E9 User Guide Direction 5454884-100 English Rev. 1... -
Page 129: Probe Handling And Infection Control
Devices containing latex may cause severe allergic reaction in CAUTION latex sensitive individuals. Refer to FDA's March 29, 1991 Medical Alert on latex products. – LOGIQ E9 User Guide Direction 5454884-100 English Rev. 1... -
Page 130: Endocavitary Probe Handling Precautions
If sterilant comes into contact with the patient, refer the the sterilant’s instruction manual. Endocavitary Probe Point of Contact—Refer to the sterilant’s instruction manual. – LOGIQ E9 User Guide Direction 5454884-100 English Rev. 1... -
Page 131: Probe Cleaning Process
3. Rinse the probe with enough clean potable water to remove all visible soap residue. 4. Air dry or dry with a soft cloth. – LOGIQ E9 User Guide Direction 5454884-100 English Rev. 1... - Page 132 After the Exam is Over Cleaning probes (continued) Figure 3-1. Probe Immersion Levels 1. Fluid Level – LOGIQ E9 User Guide Direction 5454884-100 English Rev. 1...
- Page 133 Since there is a possibility of having negative effects on the probe, observe the specified immersing time by the germicide manufacturer strictly. Do not immerse the probe in liquid chemical germicides more than the time prescribed in the care card. – LOGIQ E9 User Guide Direction 5454884-100 English Rev. 1...
- Page 134 X X X X X X X Gigasept FF neu X X X X X X X X X X Hexanios G+R Hibitane X X X Incidin Foam Korsolex Extra Klenzyme Metricide – LOGIQ E9 User Guide Direction 5454884-100 English Rev. 1...
- Page 135 TD-100 and TD-5 Transeptic Spray X X X X Tristel Generator Solution T-Spray X X X X X X X X X X X X X X X X X X X – LOGIQ E9 User Guide Direction 5454884-100 English Rev. 1...
- Page 136 X X X X X X X X X X X X X Trophon EPR X X X X Wavicide-01 X X X X X X X X X X X X X X X X X X X X 3-10 – LOGIQ E9 User Guide Direction 5454884-100 English Rev. 1...
- Page 137 Thoroughly clean the probe, as described earlier before attempting disinfection. You MUST disconnect the probe from the LOGIQ E9 prior to cleaning/disinfecting the probe. Failure to do so could damage the system.
- Page 138 Avoid temperatures above 60°C. • Inspect the probe prior to use for damage or degeneration to the housing, strain relief, lens and seal. Do not use a damaged or defective probe. 3-12 – LOGIQ E9 User Guide Direction 5454884-100 English Rev. 1...
- Page 139 Only those individuals previously trained on the Trophon EPR CAUTION unit may use the device. Refer to the Trophon EPR user documentation for more information on disinfecting approved probes. – 3-13 LOGIQ E9 User Guide Direction 5454884-100 English Rev. 1...
- Page 140 Do NOT allow the probe surface or lens to touch the CAUTION chamber’s wall during the disinfection process. This could cause permanent damage to the probe. 3-14 – LOGIQ E9 User Guide Direction 5454884-100 English Rev. 1...
- Page 141 5. Remove the probe from the Trophon EPR. 6. Wipe the probe prior to use with an absorbent, single-use, dry, lint-free cloth. 7. Remove and discard the disposable gloves. – 3-15 LOGIQ E9 User Guide Direction 5454884-100 English Rev. 1...
-
Page 142: Coupling Gels
Do not apply gel to the eyes. If there is gel contact to the eye, CAUTION flush eye thoroughly with water. 3-16 – LOGIQ E9 User Guide Direction 5454884-100 English Rev. 1... - Page 143 Ensure you always use sterile ultrasound gel for those procedures that require sterile ultrasound gel. Once a container of sterile ultrasound gel is opened, it is no longer sterile and contamination during subsequent use is possible. – 3-17 LOGIQ E9 User Guide Direction 5454884-100 English Rev. 1...
-
Page 144: System Presets
[Shift] + [“] + [a] to ä • [Shift] + [“] + [e] to ë • [Shift] + [“] + [i] to ï • [Shift] + [“] + [o] to ö 3-18 – LOGIQ E9 User Guide Direction 5454884-100 English Rev. 1... - Page 145 Figure 3-3. Changing the System Language to Russian/Greek 2. Press Regional Options. The “Region and Language” pop-up menu appears. Under “Format:” select “Russian (Russia)”/”Greek (Greece),” press Apply, Press OK. Figure 3-4. Region and Language – 3-19 LOGIQ E9 User Guide Direction 5454884-100 English Rev. 1...
- Page 146 “Default input language” select “Russian (Russia) - Russian”/”Greek (Greece) - Greek.” In the “Installed Services” section ensure that both “English (United States)” and “Russian (Russia)” both appear. Press Apply. Press OK. Figure 3-5. Set Language 3-20 – LOGIQ E9 User Guide Direction 5454884-100 English Rev. 1...
- Page 147 4. Under “Choose a display language:” select [Russian]/ [Greek]. Press Apply. Figure 3-6. Set Language 5. The “Change Display Language” pop-up prompt appears. Press “Cancel.” Press OK. Figure 3-7. Change Display Language – 3-21 LOGIQ E9 User Guide Direction 5454884-100 English Rev. 1...
- Page 148 The “Region and Language Settings” pop-up menu appears. Figure 3-8. Change system locale 7. Under “Current system locale:” select “Russian (Russia)”/ ”Greek (Greece).” Press OK. Figure 3-9. Set Language 3-22 – LOGIQ E9 User Guide Direction 5454884-100 English Rev. 1...
- Page 149 To have the settings take effect, you MUST turn off the system and turn it back on. NOTE: Service password does not work for Greek and Russian language settings. Change the setting to English. – 3-23 LOGIQ E9 User Guide Direction 5454884-100 English Rev. 1...
- Page 150 Keyboard Setup for Russian/Greek Languages (continued) Here is an example of the Russian keyboard: Figure 3-11. Russian Keyboard Here is an example of the Greek keyboard: Figure 3-12. Greek Keyboard 3-24 – LOGIQ E9 User Guide Direction 5454884-100 English Rev. 1...
-
Page 151: Data Backup
It’s also useful to keep your more recent information on the hard drive since it’s easier to recall that way. GE Healthcare IS NOT responsible for lost data if you do not follow suggested back-up procedures. GE Healthcare WILL NOT aid in the recovery of lost data. - Page 152 Daily backup is recommended. External storage media is recommended for image archive. • You need to set up a process for locating images stored to external storage media for easy recall 3-26 – LOGIQ E9 User Guide Direction 5454884-100 English Rev. 1...
- Page 153 If you uncheck this option, the system only backs up exams which have not yet been backed up. NOTE: If you update an exam which is already backed up, the exam is also backed up. – 3-27 LOGIQ E9 User Guide Direction 5454884-100 English Rev. 1...
- Page 154 USB Hard Drive storage media. If the storage capacity of the USB HD is insufficient, you will see the message, “Selected Location does not have enough free space.” 3-28 – LOGIQ E9 User Guide Direction 5454884-100 English Rev. 1...
- Page 155 Ensure that you label the media with not only the volume name indicated on the Insert Media Message, but with the name of the LOGIQ E9 system where this backup/move procedure was done. b. Update the EZBackup/EZMove log with this information the volume information and the location of the media.
- Page 156 USB HDD is not considered a permanent storage device. If you connect the USB HDD to a virus-infected computer, the USB HDD may also be infected with a computer virus. 3-30 – LOGIQ E9 User Guide Direction 5454884-100 English Rev. 1...
- Page 157 However, take care not to import studies over existing studies; duplicate or missing images may result. Delete the existing exam first. – 3-31 LOGIQ E9 User Guide Direction 5454884-100 English Rev. 1...
-
Page 158: Backup Procedure: User-Defined Configurations
7. Select Backup. The system performs the backup. As it proceeds, status information is displayed on the Backup/Restore screen. 8. After the backup is complete, press F3 to eject the CD. 3-32 – LOGIQ E9 User Guide Direction 5454884-100 English Rev. 1... -
Page 159: Restore Procedure: Patient Data
5. In the Restore list, select Patient Archive. 6. In the Media field, select the media. 7. Select Restore. The system performs the restore. As it proceeds, status information is displayed on the Backup/Restore screen. – 3-33 LOGIQ E9 User Guide Direction 5454884-100 English Rev. 1... -
Page 160: Restore Procedure: User-Defined Configurations
Restore section. 6. In the Media field, select the media. 7. Select Restore. The system performs the restore. As it proceeds, status information is displayed on the System/Backup/Restore screen. 3-34 – LOGIQ E9 User Guide Direction 5454884-100 English Rev. 1... -
Page 161: Configuring Connectivity
You use Connectivity functionality to set up the connection and communication protocols for the ultrasound system. The following page gives an overview of each of the Connectivity functions. Each function is described in detail in the following pages. – 3-35 LOGIQ E9 User Guide Direction 5454884-100 English Rev. 1... -
Page 162: Connectivity Functions
The ultrasound system is pre-configured for many services, with default settings selected. You can change these services and settings as needed. You must restart the LOGIQ E9 (shutdown) after making any CAUTION changes to connectivity settings in the Utility menus. This includes any changes on the TCPIP or dataflow setup screens. -
Page 163: Anti-Virus Software Note
LOGIQ E9 Security At GE Healthcare we’re committed to providing technologies to help you excel every day. The LOGIQ E9 Ultrasound system is designed with you, your specialty, and your patients in mind offering extraordinary image quality, easy workflow, and expert tools to help you provide the best patient care. - Page 164 After the Exam is Over LOGIQ E9 Security (continued) We have worked diligently to develop a combination of the safety measures above and the security standards of Windows Embedded Standard 7 to provide a degree of safety against Viruses, Worms, Trojan Horses, etc., especially for a system used in a professional hospital grade networking environment that also typically features its own sufficient safety measures.
-
Page 165: Electronic Documentation
To close the window, click on the ‘X’ in the upper, right-hand corner of the browser window. NOTE: If your PC does not have Adobe Reader, a free download is available on the Adobe website at http://www.adobe.com. – 3-39 LOGIQ E9 User Guide Direction 5454884-100 English Rev. 1... -
Page 166: Accessing Documentation On The Ultrasound Scanner Via The Media
In addition to viewing documentation on the Ultrasound system, the Documentation media can be read on any PC. To exit, press the ‘X’ in the upper, right-hand corner of the documentation window. 3-40 – LOGIQ E9 User Guide Direction 5454884-100 English Rev. 1... -
Page 167: Using Online Help Via F1
Figure 3-14. Opening Help Screen Exiting Online Help To exit Online Help, press the ‘X’ in the upper, right-hand corner of the Online Help window. – 3-41 LOGIQ E9 User Guide Direction 5454884-100 English Rev. 1... -
Page 168: Contact Information
TEL: (1) 800-682-5327 or (1) 262-524-5698 In other locations, contact your local Applications, Sales, or Service Representative. Service Questions For service in the United States, call GE CARES. TEL: (1) 800-437-1171 In other locations, contact your local Service Representative. Information... - Page 169 Miranda 5237 Buenos Aires - 1407 TEL: (1) 639-1619 FAX: (1) 567-2678 BRAZIL GE Healthcare do Brasil Comércio e Serviços para Equipamentos Médico- Hospitalares Ltda Av. Das Nações Unidas, 8501 3º andar parte - Pinheiros São Paulo SP – CEP: 05425-070 C.N.P.J.: 02.029.372/0001-40...
- Page 170 After the Exam is Over Contacting GE Healthcare Ultrasound (continued) ASIA ASIA PACIFIC GE Healthcare Asia Pacific JAPAN 4-7-127, Asahigaoka Hinoshi, Tokyo 191-8503, Japan TEL: +81 42 585 5111 AUSTRALIA Building 4B, 21 South St Rydalmere NSW 2116 Australia TEL: 1300 722 229...
- Page 171 Contact Information Contacting GE Healthcare Ultrasound (continued) EUROPE For all other European countries not listed, please contact your local GE Healthcare distributor or the appropriate support resource listed on www.gehealthcare.com. AUSTRIA General Electric Austria GmbH Filiale GE Healthcare Technologies EURO PLAZA, Gebäude E...
- Page 172 GE Healthcare Unit F4, Centrepoint Business Park Oak Drive, Dublin 22 TEL: (+353) 1 4605500 ITALY GE Medical Systems Italia spa Via Galeno, 36, 20126 Milano TEL: (+39) 02 2600 1111 FAX: (+39) 02 2600 1599 LUXEMBORG See Belgium. NETHERLANDS...
- Page 173 Contact Information EUROPE (continued) NORWAY GE Medical Systems Ultrasound Tåsenveien 71, 0873 Oslo TEL: (+47) 2202 0800 GE Medical Systems Ultrasound Strandpromenaden 45 P.O. Box 141, 3191 Horten TEL: (+47) 33 02 11 16 POLAND GE Medical Systems Polska Sp. z o.o., ul. Woloska 9...
-
Page 174: Manufacturer
U.A.E TEL: (+971) 4 429 6101 or 4 429 6161 FAX: (+971) 4 429 6201 UNITED KINGDOM GE Medical Systems Ultrasound TEL: (+44) 1707 263570 71 Great North Road FAX: (+44) 1707 260065 Hatfield, Hertfordshire, AL9 5EN Manufacturer GE Medical Systems Ultrasound &... -
Page 175: System Data
LCD Monitor (19”) • High-Resolution monitor Non Interlace Scan • LCD translation: 350mm horizontal; 120mm vertical; 90 degree swivel • Fold-down and Lock Mechanism for Transport • Resolution 1280 x 1024 – 3-49 LOGIQ E9 User Guide Direction 5454884-100 English Rev. 1... -
Page 176: System Overview
• 3D Static • Linear Array • 4D Real Time (Option) • Split Crystal • Anatomical M-Mode • Coded Contrast Imaging (Option) [not available in the US] • Elastography (Option) 3-50 – LOGIQ E9 User Guide Direction 5454884-100 English Rev. 1... - Page 177 • Digital Color Printer • External USB Printer connection • DVI-I output available for compatible devices • Console Protective Cover • Footswitch with programmable functionality • Video Scan Converter • S-Video Output – 3-51 LOGIQ E9 User Guide Direction 5454884-100 English Rev. 1...
- Page 178 • Color Flow (CFM Gain; CFM Velocity Range; Acoustic Output; Wall Echo Filter; Packet Size; Frame Rate Control; CFM Spatial Filter; CFM Frame Averaging; CFM Line Resolution; Frequency/Velocity Baseline Shift) 3-52 – LOGIQ E9 User Guide Direction 5454884-100 English Rev. 1...
- Page 179 • PI (Pulsatility Index) • Summary Worksheet • RI (Resistivity Index) • Summary Report Vascular Measurements/Calculations • Carotid, Vertebral, Subclavian Measurements, Auto IMT • Summary Worksheet • Summary Report – 3-53 LOGIQ E9 User Guide Direction 5454884-100 English Rev. 1...
- Page 180 • Single-Angle, disposable with a disposable bracket • Multi-Angle, disposable with a reusable bracket Table 3-11: Inputs and Outputs Signal • DVI-I • Ethernet • Audio Stereo Out • Multiple USB 2.0 ports • S-Video 3-54 – LOGIQ E9 User Guide Direction 5454884-100 English Rev. 1...
-
Page 181: System Care And Maintenance
Equipment / Accessory Expected Service Life LOGIQ E9 system The expected service life for the LOGIQ E9 is at least seven (7) years from the manufacturing date under the provision of regular maintenance by authorized service personnel. LOGIQ E9 Probes... -
Page 182: Inspecting The System
If any defects are observed or malfunctions occur, do not Electrical operate the equipment but inform a qualified service person. Hazard Contact a Service Representative for information. 3-56 – LOGIQ E9 User Guide Direction 5454884-100 English Rev. 1... - Page 183 Mild, Non-Abrasive Soap and Water Ammonia Bleach (10 to 1 Ratio of 5% Home Bleach) Hydrogen Peroxide / Hydrogen Peroxide Wipes Other T--Spray II Sani-Cloth HB Ammonia Diluted Cidex – 3-57 LOGIQ E9 User Guide Direction 5454884-100 English Rev. 1...
-
Page 184: Cleaning The System
NOTE: The cloth should be damp, not dripping wet. 2. Wipe down the top, front, back, and both sides of the Touch Panel. 3. Wipe off excess cleaning agents. 3-58 – LOGIQ E9 User Guide Direction 5454884-100 English Rev. 1... - Page 185 Hydrogen Peroxide / Hydrogen Peroxide Wipes NOTE: DO NOT scratch or press on the panel with any sharp objects, such as pencils or pens, as this may result in damage to the panel. – 3-59 LOGIQ E9 User Guide Direction 5454884-100 English Rev. 1...
- Page 186 After the Exam is Over Operator Controls Cleaning Agents ONLY use the following cleaners on the LOGIQ E9 Operator Panel: • Palmolive Dishwashing Liquid (manufactured by Colgate-Palmolive) • Sani Wipes (Sani-Cloth HB, green cap) Alcohol-free (manufactured by Micorgen Inc.) •...
- Page 187 3. Wipe down operator control panel. 4. Use a cotton swab to clean around keys or controls. Use a toothpick to remove solids from between keys and controls. – 3-61 LOGIQ E9 User Guide Direction 5454884-100 English Rev. 1...
- Page 188 Footswitch To clean the footswitch: 1. Disconnect the footswitch from the LOGIQ E9. 2. Moisten a soft, non-abrasive folded cloth with a mild, general purpose, non-abrasive soap and water solution.
-
Page 189: Other Maintenance
System Care and Maintenance Other Maintenance Manually Moving the Operator Panel Up/Down The LOGIQ E9 is equipped with an automatic Operator Panel up/down, left/right, forward/backward control. But if the system is powered down when you need to lower the Operator Panel, you can use the manual release handle located at the back of the unit to manually move the Operator Panel up/down. - Page 190 Locating The LOGIQ E9 has two air filters which need to be cleaned. The top air filter (A) is located on the back of the LOGIQ E9 below the power cord and the bottom air filter (B) is located underneath the LOGIQ E9.
- Page 191 3. Position your other hand at a corner of the filter and wedge a finger between the filter and the bottom of the LOGIQ E9. 4. Pull down on the filter with the finger that is wedged...
-
Page 192: Assistance
Not all features or products described in this document may be available or cleared for sale in all markets. Contact the distributor, GE affiliate or sales representative for approved peripherals. For HCATs, contact your sales person. For 2million/5million number part numbers, these are service replacement part numbers that may be either new or refurbished. - Page 193 H4000ZG / 5323129 Power Cord - India H4000ZF / 5148381-11 Probe Holder Insert, Small Probes H4911P NOTE: For best results, GE recommends using high quality medical or professional grade CDs or DVDs. – 3-67 LOGIQ E9 User Guide Direction 5454884-100 English Rev. 1...
- Page 194 V Nav Active Tracker (Omni TRAX) Starter Kit H4913AT V Nav Flat Transmitter H4913NF V Nav Shelf Load Description Shelf load for the V Nav wire shelf on the V Nav Stand is 10 lbs. 3-68 – LOGIQ E9 User Guide Direction 5454884-100 English Rev. 1...
- Page 195 Accessory Part Number / HCAT ECG Cables, IEC, AHA Style for Americas H4910EC ECG Cables, IEC Style H4911JC ECG Cables IEC Style - Short H44012LK ECG Cable Kit H45521AL – 3-69 LOGIQ E9 User Guide Direction 5454884-100 English Rev. 1...
- Page 196 H4908SC Multi Angle, Disposable H4908SD H4908ND Sector with a Reusable Bracket S1-5-D H4913SD Multi Angle, Disposable H4908SD H4908ND Sector with a Reusable Bracket S4-10 H4908SN Not Available H4908NN Sector 3-70 – LOGIQ E9 User Guide Direction 5454884-100 English Rev. 1...
- Page 197 Volume RIC5-9-D H48651MS Single Angle, Reusable H46721R H4908NG 4D Convex Volume Intracavitary RNA5-9-D H48651MY Single Angle, H46701AF 4D Convex Disposable with a Volume Reusable Bracket Single Angle, Reusable H468651DG – 3-71 LOGIQ E9 User Guide Direction 5454884-100 English Rev. 1...
- Page 198 Single Angle, Reusable H46721W Starter Kit H46701AD H4830JE Not Available CW Split Crystal Pencil Probe H4830JG Not Available CW Split Crystal Pencil Probe H45551ZD Not Available Trans- esophageal Probe 3-72 – LOGIQ E9 User Guide Direction 5454884-100 English Rev. 1...
- Page 199 H4913WL Elastography H4910E Elastography + QAnalysis H4911EC Auto IMT H4910MT Tissue Velocity Imaging (TVI) H4910TY LOGIQ E9 On-Board Scan Converter H4913SC Quantification Elastography: H4911EN (N/A in the USA) B, Color, and PDI Mode: H4911CN Stress Echo H4911SE Video Scan Converter H4911SC –...
- Page 200 3-DLP Port Relay Board H4913DL *The LOGIQ E9 is designed for compatibility with commercially available Ultrasound contrast agents. Because the availability of these agents is subject to government regulation and approval, product features intended for use with these agents may not be commercially marketed nor made available before the contrast agent is cleared for use.
- Page 201 20 Per Set Sterile Combination Probe and Cord Cover Set 12 Per Set Sterile Ultrasound Probe Sheath Set for Wide (2.5 and 3.5) Aperture 20 Per Set Sector Probes – 3-75 LOGIQ E9 User Guide Direction 5454884-100 English Rev. 1...
- Page 202 After the Exam is Over 3-76 – LOGIQ E9 User Guide Direction 5454884-100 English Rev. 1...
- Page 203 Chapter 4 Safety Describes the safety and regulatory information pertinent for operating this ultrasound system. – LOGIQ E9 User Guide Direction 5454884-100 English Rev. 1...
-
Page 204: Owner Responsibility
It is advisable to maintain a list of authorized operators. Should the system fail to operate correctly, or if the unit does not respond to the commands described in this manual, the operator should contact the nearest field GE Ultrasound Service Office. For information about specific requirements and regulations applicable to the use of electronic medical equipment, consult the local, state and federal agencies. -
Page 205: Notice Against User Modification
Notice against user modification Never modify this product, including system components, software, cables, and so on. User modification may cause safety hazards and degradation in system performance. All modification must be done by a GE qualified person. – LOGIQ E9 User Guide... -
Page 206: Safety Precautions
Indicates precautions or recommendations that should be used in the operation of the ultrasound system, specifically: • Maintaining an optimum system environment • Using this Manual • Notes to emphasize or clarify a point. – LOGIQ E9 User Guide Direction 5454884-100 English Rev. 1... -
Page 207: Hazard Symbols
Fire and Smoke Hazard • Replacing fuses • Patient/user injury or adverse reaction • Outlet guidelines from fire or smoke. • Patient/user injury from explosion and fire. – LOGIQ E9 User Guide Direction 5454884-100 English Rev. 1... - Page 208 The user must be thoroughly familiar with the instructions and potential hazards involving ultrasound examination before attempting to use the device. Training assistance is available from GE Healthcare if needed. Disregarding information on safety is considered abnormal use. The use of the system outside the described conditions or...
-
Page 209: Patient Safety
It is advisable to back up system data prior to any service repairs to the hard drive. It is always possible during system failure and repair to lose patient data. GE will not be held responsible for the loss of this data. - Page 210 The user should be aware of the product specifications and of the system accuracy and stability limitations. These limitations must be considered before making any decision based on quantitative values. If in doubt, the nearest GE Ultrasound Service Office should be consulted. Equipment malfunction or incorrect settings can result in measurement errors or failure to detect details within the image.
- Page 211 A damaged housing, lens or cable can result in patient injury or serious impairment or operation. Do not use with Defibrillator. CAUTION This equipment does not have a defibrillator approved applied part. – LOGIQ E9 User Guide Direction 5454884-100 English Rev. 1...
- Page 212 It is recommended that all users receive proper training in applications before performing them in a clinical setting. Please contact the local GE representative for training assistance. ALARA training is provided in the Medical Ultrasound Safety booklet shipped in the eDOCs kit. The ALARA education...
-
Page 213: Equipment And Personnel Safety
Do not place liquids on or above the console. Spilled liquid may contact live parts and increase the risk of shock. • In North America, a 220-240V installation requires the use of a center-tapped AC power source. – 4-11 LOGIQ E9 User Guide Direction 5454884-100 English Rev. 1... - Page 214 All peripherals and accessories must be securely mounted to the LOGIQ E9. The LOGIQ E9 is not intended to be used as a data storage WARNING device; backup of the Patient and Image Database is your institution’s responsibility. GE is NOT responsible for any lost patient information or for lost images.
- Page 215 Peripheral devices that use their own AC power source CAUTION CANNOT be attached to the LOGIQ E9. DO NOT connect the peripheral device’s power cord into the LOGIQ E9 system. Use a USB printer cable that is less than 3 meters in length.
- Page 216 Sensitive users and patients must avoid contact with these items. Refer to package labeling to determine latex content and FDA’s March 29, 1991 Medical Alert on latex products. 4-14 – LOGIQ E9 User Guide Direction 5454884-100 English Rev. 1...
- Page 217 Before deleting a patient or image from the patient screen, make sure you have saved the data by EZBackup/Backup or Export and verify that the media transfer of data was successful. Do not unpack the LOGIQ E9. This must be performed by CAUTION qualified service personnel only. –...
- Page 218 DO NOT load non-system software on the system computer. CAUTION Material Safe Data Rubber part Material: EPDM Where Used: Probe holder/Gel holder/Keyboard bumper/Front and Rear Foot Pedal/System bumper at the four corners 4-16 – LOGIQ E9 User Guide Direction 5454884-100 English Rev. 1...
- Page 219 Service Representative for information. Related Hazards (Volume Navigation) DO NOT use the Volume Navigation feature on any patient WARNING relying on life-sustaining electronic equipment, such as a pacemaker or defibrillator. – 4-17 LOGIQ E9 User Guide Direction 5454884-100 English Rev. 1...
-
Page 220: Classifications
Type BF Applied Part against electric shock particularly regarding allowable LEAKAGE CURRENTS. Table 4-3: Type CF Equipment Normal Mode Single fault condition Patient leakage current Less than 10 microA Less than 50 microA 4-18 – LOGIQ E9 User Guide Direction 5454884-100 English Rev. 1... -
Page 221: Emc (Electromagnetic Compatibility)
Use of cables not properly shielded and grounded may result in the equipment causing radio frequency interference in violation of the FCC regulations. – 4-19 LOGIQ E9 User Guide Direction 5454884-100 English Rev. 1... - Page 222 Do not use devices which intentionally transmit RF Signals (cellular phones, transceivers, or radio controlled products) other than those supplied by GE (wireless microphone, broadband over power lines, for example) in the vicinity of the equipment as it may cause performance outside the published specifications.
- Page 223 Do not use devices which intentionally transmit RF signals CAUTION (cellular phones, transceivers, or radio controlled products), other than those supplied by GE (wireless microphone, broadband over power lines, for example) unless intended for use with this system, in the vicinity of this equipment as it may cause performance outside the published specifications.
- Page 224 RF shielded examination room may be necessary. 1. Use either power supply cords provided by GE Healthcare or ones designated by GE Healthcare. Products equipped with a power source plug should be plugged into the fixed power socket which has the protective grounding conductor.
- Page 225 3. Operate the system with all covers closed. If a cover is opened for some reason, be sure to shut it before starting/ resuming operation. 4. Operating the system with any cover open may affect EMC performance. – 4-23 LOGIQ E9 User Guide Direction 5454884-100 English Rev. 1...
- Page 226 Ethernet connection, provided the LAN components are IEC/EN 60950 compliant. A Wireless LAN option is available. The LOGIQ E9 may also be used safely while connected to devices other than those recommended above if the devices and their specifications, installation, and interconnection with the system conform to the requirements of IEC/EN 60601-1-1.
- Page 227 IEC60601-1-1. Everyone who connects additional equipment to the signal input part or signal output part of the LOGIQ E9 system configures a medical system, and is therefore responsible to ensure that the system complies with the requirements of the valid version of IEC60601-1-1. If in doubt, consult the technical service department or your local GE Healthcare representative.
- Page 228 IEC/EN 60601-1-1 by the installer. Equipment modifications and possible resulting malfunctions and electromagnetic interference are the responsibility of the owner. 4-26 – LOGIQ E9 User Guide Direction 5454884-100 English Rev. 1...
- Page 229 It may be Fluctuations/Flicker necessary to take mitigation measures, such as re-orienting or Emissions relocating the system or shielding the location. IEC 61000-3-3 – 4-27 LOGIQ E9 User Guide Direction 5454884-100 English Rev. 1...
- Page 230 This system is suitable for use in the following environment. The user must assure that the system is used according to the specified guidance and only in the electromagnetic environment listed. 4-28 – LOGIQ E9 User Guide Direction 5454884-100 English Rev. 1...
- Page 231 If noise generated from other electronic equipment is near the probe’s center frequency, noise may appear on the image. Good power line isolation is required. – 4-29 LOGIQ E9 User Guide Direction 5454884-100 English Rev. 1...
- Page 232 • The ability to display Color Flow-mode image as input for diagnosis. • The display of acoustic power indexes as an aid for safe use of ultrasound diagnostic (MI,TIS,TIB,TIC). 4-30 – LOGIQ E9 User Guide Direction 5454884-100 English Rev. 1...
-
Page 233: Patient Environmental Devices
3. Network/Disk Indicators, USB Ports 8. Signals I/O Port (USB Ports, Ethernet 4. Probe Ports (4) Connector, Audio In/Out, DVI Port Connector, S-Video Connector) Probe Ports with CW Option (5) – 4-31 LOGIQ E9 User Guide Direction 5454884-100 English Rev. 1... - Page 234 If devices are connected without the approval of GE, the warranty will be INVALID. Any device connected to the LOGIQ E9 must conform to one or more of the requirements listed below: 1. IEC standard or equivalent standards appropriate to devices.
-
Page 235: Acoustic Output
Acoustic Output chapter in the Advanced Reference Manual for more information. This display is based on NEMA/AIUM Standards for Real-time Display of Thermal and Mechanic Acoustic Output Indices on Diagnostic Ultrasound Equipment. – 4-33 LOGIQ E9 User Guide Direction 5454884-100 English Rev. 1... - Page 236 Cranial Bone Thermal Index (TIC). Used when bone is near the skin surface as in transcranial examination, it provides an estimate of potential temperature increase in the bone or adjacent soft tissue. 4-34 – LOGIQ E9 User Guide Direction 5454884-100 English Rev. 1...
- Page 237 Controls that can influence MI and TI are detailed under the Bioeffects portion of each control in the Optimizing the Image sections. Always observe the Acoustic Output display for possible effects. – 4-35 LOGIQ E9 User Guide Direction 5454884-100 English Rev. 1...
- Page 238 Acoustic Output Default Levels In order to assure that an exam does not start at a high output level, the LOGIQ E9 initiates scanning at a reduced default output level. This reduced level is preset programmable and depends upon the exam category and probe selected. It takes effect when the system is powered on or New Patient is selected.
-
Page 239: Device Labels
United States only • Rear Panel Prescription Requirement label CE Mark • Rear Panel The CE Mark of Conformity indicates • Probes this equipment conforms with the Council Directive 93/42/EEC. – 4-37 LOGIQ E9 User Guide Direction 5454884-100 English Rev. 1... - Page 240 “General Warning Sign” • Rear Panel • Patient Cardiac and ECG Connectors • Peripheral/Accessory Connector Panel • Probe Connector Panel • Circuit Breaker Panel • Inside of Console • Probes 4-38 – LOGIQ E9 User Guide Direction 5454884-100 English Rev. 1...
- Page 241 IEC60417-5021 Alternating Current symbol is in • Rear Panel accordance with IEC 60878-01-14. • Rating Plate – 4-39 LOGIQ E9 User Guide Direction 5454884-100 English Rev. 1...
- Page 242 • Footswitch approved in UL Laboratories, based on UL and CSA standards, through mutual approval activities. Non-Ionizing Electromagnetic • Rear Panel, on LOGIQ E9 Radiation equipped with Wireless LAN ISO 7010 - P007 • V Nav Transmitter Volume Navigation Pacemaker...
- Page 243 How to lower LCD prior to transport • Rear of the LCD monitor How to lock Operator Panel prior to • Rear of the LCD monitor transport – 4-41 LOGIQ E9 User Guide Direction 5454884-100 English Rev. 1...
- Page 244 • Rear of On-board V Nav DO NOT use the LCD. Failure to do so Stand may cause serious injury or system damage. 4-42 – LOGIQ E9 User Guide Direction 5454884-100 English Rev. 1...
-
Page 245: Warning Label Locations
Device Labels Warning Label Locations Figure 4-2. Rear Panel Label Location – 4-43 LOGIQ E9 User Guide Direction 5454884-100 English Rev. 1... - Page 246 11. Possible shock hazard. Do not remove covers or panels. No user serviceable parts are inside. Refer servicing to qualified service personnel. 4-44 – LOGIQ E9 User Guide Direction 5454884-100 English Rev. 1...
- Page 247 2. Ethernet Connection 5. Audio In/Out 3. Possible shock hazard. Do not 6. S-Video remove covers or panels. No user serviceable parts are inside. Refer servicing to qualified service personnel. – 4-45 LOGIQ E9 User Guide Direction 5454884-100 English Rev. 1...
- Page 248 No equipment is connected to a user serviceable parts are receptacle marked “Hospital inside. Refer servicing to Only” or “Hospital Grade”. (For qualified service personnel. U.S.A., Canada, Japan) 4-46 – LOGIQ E9 User Guide Direction 5454884-100 English Rev. 1...
- Page 249 Device Labels Warning Label Locations (continued) Figure 4-5. Rating Plate–USA/Asia 120V console Figure 4-6. Caution Label on the LCD Monitor Figure 4-7. Footswitch Label – 4-47 LOGIQ E9 User Guide Direction 5454884-100 English Rev. 1...
- Page 250 Safety 4-48 – LOGIQ E9 User Guide Direction 5454884-100 English Rev. 1...
- Page 251 3-42 brake Internet, 3-42 location, 1-23 service questions, 3-42 brightness, video, 1-17 contraindications, 1-4 Control Panel description, 1-13 controls operator, 1-13 probe keys, 1-30 Touch Panel, 1-14 – LOGIQ E9 User Guide Index Direction 5454884-100 English Rev. 1...
- Page 252 4-9, 4-11 Connectivity, 3-35 explosion, 4-12 Probe handling and infection control, 3-3 mechanical, 4-9 probe identifier, locating, 1-16 Image History, description, 1-69 Indications for Use, 1-3 information, requesting, 3-42 – Index LOGIQ E9 User Guide Direction 5454884-100 English Rev. 1...
- Page 253 4-4 precaution levels, defined, 4-4 probes handling precautions, 3-3 service, requesting, 3-42 system electrical configurations, 1-5 power down, 1-25 System cabinet, 3-58 system messages, display location, 1-16 – LOGIQ E9 User Guide Index Direction 5454884-100 English Rev. 1...
- Page 254 – Index LOGIQ E9 User Guide Direction 5454884-100 English Rev. 1...