Table of Contents
Advertisement
Quick Links
Advertisement
Table of Contents

Related Manuals for Honeywell Thor CV41


Summary of Contents for Honeywell Thor CV41
- Page 1 CV41 Vehicle Mounted Computer Windows Embedded Standard - CV41W User Guide...
- Page 2 Disclaimer Honeywell International Inc. (“HII”) reserves the right to make changes in specifications and other infor- mation contained in this document without prior notice, and the reader should in all cases consult HII to determine whether any such changes have been made. The information in this publication does not rep- resent a commitment on the part of HII.
-
Page 3: Table Of Contents
TABLE OF CONTENTS Chapter 1 - Customer Support..................1 Product Service and Repair........................... 1 Technical Assistance............................1 Limited Warranty............................... 1 Chapter 2 - About the Computer.................. 3 About the CV41 Vehicle Mount Computer ....................4 Overview of the Features ......................... 5 About the Power Supply Options ........................ - Page 4 Set the Screen Backlight........................17 Rotate the Screen .............................17 Enable the Defroster..........................18 Change the Volume ............................18 About the CV41 Radio Antennas.......................18 Connect an External Antenna......................18 About the Keypad ............................20 Remap the Power Button........................20 Enter Characters on the Keypad......................21 CV41 Options and Accessories........................21 Chapter 3 - Understand the User Interface and Applications......23 About the User Interface ..........................24 About the Desktop Screen........................24...
- Page 5 Connect to a Bluetooth Scanner ....................43 Connect to a Bluetooth Printer .....................44 About Serial and USB Communications..................45 Connect the Honeywell SR30 or SR61T USB Scanner............45 Connect to a Serially Tethered Scanner ..................46 About Wireless Security ..........................47 Choose Between Microsoft and Wireless Security ..............47 Select Microsoft Security as Your Security Choice ...............48...
- Page 6 Activate or Deactivate a PIN Number..................62 Change the PIN Number .........................62 Configure Network Connections ......................62 AutoLaunch the OneClick Internet Application................63 Connect to WWAN Automatically On Startup ................63 Reconnect to WWAN Automatically ....................63 About Data Roaming ..........................63 Enable or Disable Data Roaming....................63 Enable Roaming Alerts ........................64 View WWAN Network Statistics........................64 View All Current Network Statistics ....................64...
- Page 7 Replace the Fuse .............................77 Clean the Computer ............................78 Appendix A - Specifications and Default Settings..........79 Physical and Environmental Specifications..................79 Physical Dimensions ..........................79 Environmental Specifications ......................79 Power and Electrical Specifications ....................79 Hardware..............................80 Standard Communications ........................80 Wireless LAN...............................81 Bluetooth..............................81 Default Configuration ..........................81 Data Collection Settings........................81 Communications ..........................84 Device Settings............................84...
- Page 8 Appendix D - CV41 Docks ..................105 Standard Dock ............................... 106 Components ............................106 Enhanced Dock for Off-Vehicle Use ..................... 107 Components - Back ..........................107 Components - Top ..........................108 viii CV41 Vehicle Mount Computer (Windows Embedded Standard) User Guide...
-
Page 9: Chapter 1 - Customer Support
CHAPTER CUSTOMER SUPPORT Product Service and Repair Honeywell International Inc. provides service for all of its products through service cen- ters throughout the world. To obtain warranty or non-warranty service, please visit www.honeywellaidc.com/locations to find contact information for your region’s service center. - Page 10 ule; or (iii) damaged as a result of (A) modification or alteration by the purchaser or other party, (B) excessive voltage or current supplied to or drawn from the interface connections, (C) static electricity or electro-static discharge, (D) operation under condi- tions beyond the specified operating parameters, or (E) repair or service of the product by anyone other than HII or its authorized representatives.
-
Page 11: Chapter 2 - About The Computer
CHAPTER ABOUT THE COMPUTER This chapter introduces the CV41 Vehicle Mount Computer with Windows® Embedded Standard operating system. Use this chapter to learn about the basic features and available accessories. CV41 Vehicle Mount Computer (Windows Embedded Standard) User Guide... -
Page 12: About The Cv41 Vehicle Mount Computer
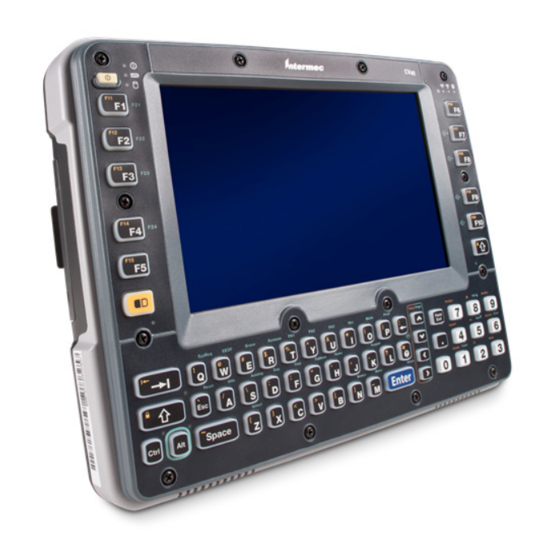
About the CV41 Vehicle Mount Computer The rugged CV41 Vehicle Mount Computer is designed for real-time data collection applications in warehousing, distribution, work-in-process, time and attendance, and stationary applications. The CV41 is highly configurable and runs on the Microsoft® Windows® Embedded Standard (WES) operating system. Additionally, the CV41 sup- ports terminal emulation applications, browser-based applications, and custom appli- cations. -
Page 13: Overview Of The Features
CV41 Back View with Quick Mount Smart Dock Wi-Fi Wi-Fi (aux) WWAN antenna antenna antenna antenna plug plug plug plug Strain relief clamps COM1 COM2 USB connector CANBUS/audio connector CV41 Back View with Quick Mount Smart Dock Fuse Power connector Power button Padlock... - Page 14 • 4 GB solid state disk (SSD) or optional 8 GB SSD. • User-installable SD expansion slot supporting up to 32 GB. • 802.11a/b/g/n and Bluetooth® radios • Optional WWAN radio (available in North America, Europe, and Australia only) • Intel Atom 1.6 GHz processor The CV41 Vehicle Mount Computer has an IEEE 802.11a/b/ g/n radio installed and Wi-Fi®...
-
Page 15: About The Power Supply Options
IEC certified ITE power supply with an output rating of 12 to 48 VDC, minimum 15 W. Contact your Honeywell representative to order one of the power supply options listed. For installation instructions, see the CV41 Vehicle Mounting Kit Reference Guide. -
Page 16: Attach The Cv41 To The Smart Dock
Attach the CV41 to the Smart Dock After you secure the smart dock and connected it to power, you can attach the computer to the smart dock. 1. Press the Power button. The computer turns off. 2. Locate the protruding lip on the rear of the computer. 3. -
Page 17: Remove The Cv41 From The Smart Dock
Remove the CV41 from the Smart Dock You can easily move the computer from one vehicle equipped with the smart dock to another. 1. Press the Power button. The computer turns off. 2. Pull down on the red quick release handle. 3. -
Page 18: About The Cv41 Startup Behavior
Padlock Provision Location Laptop Security Provision Location About the CV41 Startup Behavior Change the startup behavior so that the computer can be turned on and off through the ignition input signal of a vehicle or when power is applied to the smart dock. For more information about the startup behavior, see the following table. -
Page 19: Select A Startup Behavior
CV41 Startup Behavior Descriptions Startup Description Behavior Auto-On The computer is turned on when power is applied: • power switch on the smart dock is on. • the ignition input wire is connected. Select a Startup Behavior By default the computer startup behavior is set to standard. If you intend to startup your computer using ignition control or auto-on, make sure you wire the ignition input wire according to the CV41 Vehicle Mounting Kit Reference Guide. - Page 20 Connection LEDs Connection LED Status Descriptions State Description The computer is connected to WWAN. The computer is not connected to WWAN. The computer is connected to Wi-Fi. The computer is not connected to Wi-Fi. Bluetooth is turned on. Bluetooth is turned off. CV41 Vehicle Mount Computer (Windows Embedded Standard) User Guide...
- Page 21 System LEDs System LED Status Descriptions State Description • The computer is on. Solid green • The computer is on but the display or backlight may be off. • The computer is in suspend mode. Blinking green every 1.5 seconds •...
-
Page 22: About The Internal Ups Battery
System LED Status Descriptions (Continued) State Description Flashing green Read or write activity is occurring. There is no read or write activity. About the Internal UPS Battery The computer contains an internal UPS battery that is automatically charged when you place the computer in a powered smart dock. -
Page 23: About The Backup Battery
The backup battery must only be changed by authorized service personnel. For more information, contact your Honeywell service representative. Insert an SD Card You can use an SD card to increase file storage and install software. The computer sup- ports SD cards up to 32 GB. -
Page 24: About The Touch Screen
Protect the Touch Screen Apply the optional touch screen protective film to help protect the screen from minor damage, scratches, and abrasions. Contact your Honeywell representative to order pro- tective film for your touch screen. 1. Clean the touch screen from fingerprints, lint particles, dust, and smudges. For... -
Page 25: Enable Automatic Screen Brightness
Enable Automatic Screen Brightness If your computer is equipped with an outdoor display, enable automatic brightness con- trol to allow the computer to automatically adjust the screen brightness depending on the current lighting conditions. 1. Tap Start > Control Panel > Screen. The Screen Control screen appears. 2. -
Page 26: Enable The Defroster
Use this section to learn how to connect an external radio antenna to the CV41. You can purchase 802.11, GPS, or WWAN antennas to mount onto a wall, forklift, or other flat surface. For more information on ordering an antenna, contact your Honeywell repre- sentative. - Page 27 Wi-Fi WWAN Wi-Fi (aux) antenna antenna antenna antenna plug plug plug plug 3. Unscrew the antenna clamp on the smart dock and route the antenna wire through the antenna clamp. Antenna clamp 4. Screw the antenna clamp back into the smart dock. CV41 Vehicle Mount Computer (Windows Embedded Standard) User Guide...
-
Page 28: About The Keypad
Because system performance and antenna polarization are site-dependent, a perma- nent mounting location may require some experimentation. In most fixed installations, you should mount the antenna initially in a vertically-polarized position, with the cable from the antenna parallel to the floor and ceiling. For information on purchasing an antenna, contact yourHoneywell sales representative. -
Page 29: Enter Characters On The Keypad
• Press to turn off Caps Lock. CV41 Options and Accessories You can use these accessories (sold and ordered separately) with the CV41. To order accessories, contact your Honeywell sales representative. CV41 Accessories Accessory Description Quick Mount Smart Dock The smart dock provides a mount for the CV41, and supplies conditioned (also referred to as power to the CV41. - Page 30 CV41 Accessories (Continued) Accessory Description RAM Mounting Kit Use this mounting kit to attach the CV41 to a variety of surfaces, including a vehicle or to your desktop. For more information, see the CV41 Vehicle Mounting Kit Reference Guide. USB Y-Cable Use the USB cable to connect USB devices and peripherals to the CV41.
-
Page 31: Chapter 3 - Understand The User Interface And Applications
CHAPTER UNDERSTAND THE USER INTERFACE AND APPLICATIONS Use this chapter to learn about the Windows® Embedded Standard user interface and how to interact with the screen. You can also use this chapter to learn about the applica- tions on your computer, as well as additional applications you can download. CV41 Vehicle Mount Computer (Windows Embedded Standard) User Guide... -
Page 32: About The User Interface
About the User Interface The user interface for the Window Embedded Standard operating system is similar to the Windows XP operating system. The interface is touch-friendly and easy to navigate. About the Desktop Screen When you turn on your computer, the Desktop screen is the first screen that appears, unless Intermec Terminal Emulator (ITE) is configured to automatically launch. -
Page 33: Use Pop-Up Menus
Honeywell provides many useful applications to help you configure, troubleshoot, and connect your computer to other devices and networks. You can also download addi- tional applications from the Honeywell website to help you use all of the features of your computer. -
Page 34: Applications You Can Download For The Computer
You can download several applications from the website that extend the capabilities of your computer. All of the applications explained below are available from the Honeywell website. Some of the applications require the purchase of a license to run. To find the application you want, go to the Technical Support Downloads Portal at hsmftp.honey-... -
Page 35: About Features Demo
SmartSystems™ is an easy-to-use software platform that provides IT Administrators and Integrators a single, integrated portal for hands-free provisioning, deployment, and management of Honeywell devices minimizing the effort spent on software upgrades, equipment monitoring, maintenance and troubleshooting. SmartSystems Foundation provides a consistent way to manage Honeywell devices... - Page 36 CV41 Vehicle Mount Computer (Windows Embedded Standard) User Guide...
-
Page 37: Chapter 4 - Manage The Computer
CHAPTER MANAGE THE COMPUTER Use this chapter to learn how to remotely update, configure, and monitor your Honey- well computers. You will also find information on installing software applications as well as how to upgrade the system software. CV41 Vehicle Mount Computer (Windows Embedded Standard) User Guide... -
Page 38: About Managing The Computer In Your Network
With a Provisioning license, SmartSystems Foundation can automatically push soft- ware, configuration settings, and other files to connected computers. You can download SmartSystems Foundation from the Honeywell website at no charge. To purchase a Provisioning license, contact your Honeywell sales representative. -
Page 39: Install Applications Using Smartsystems Foundation Console
You can use the SmartSystems console to drag-and-drop applications onto your com- puter. The console is part of SmartSystems Foundation. 1. Download your application file from the Honeywell website and unzip it on your desktop PC. 2. Double-click the application file to install it. The application file should appear in the Software Vault. -
Page 40: Update System Software Using Smartsystems Foundation
Before you can update your computer, you need: • SmartSystems Foundation. To download SmartSystems Foundation, go to the Technical Support Downloads Portal at hsmftp.honeywell.com. • the files you want to install. These files are available from the Technical Support Downloads Portal at hsmftp.honeywell.com. - Page 41 4. Run the .exe file from within the bundle. 5. Follow the onscreen instructions to update your computer. CV41 Vehicle Mount Computer (Windows Embedded Standard) User Guide...
- Page 42 CV41 Vehicle Mount Computer (Windows Embedded Standard) User Guide...
-
Page 43: Chapter 5 - Configure The Computer
CHAPTER CONFIGURE THE COMPUTER Use this chapter to learn about the available methods for configuring your computer and how to use Intermec Settings. You can also use this chapter to learn how to config- ure network communications and wireless security. CV41 Vehicle Mount Computer (Windows Embedded Standard) User Guide... -
Page 44: How To Configure The Computer
You can use a third-party device management product that supports the computer and Intermec Settings, such as Soti MobiControl or Wavelink Avalanche. For more information, visit the Device Management page on the Honeywell website. You can also configure the computer with configuration bundles that you create using SmartSystems Foundation. -
Page 45: About The Structure Of Intermec Settings
About the Structure of Intermec Settings Use the following tables to help find the parameters in Intermec Settings that you want to configure. Each table contains the parameters for one of the Intermec Settings Main Menu options. If you see > next to a menu option, there are more screens available in the next level. If you see ... - Page 46 Most parameters are saved when you tap OK. Some settings require you to reboot the computer for the changes to take effect. Data Collection Options Parameters You Can Configure • Overwrite with computer settings Tethered-Configure on connect • Keep scanner settings Enable USB scanner auto- Enable USB scanner auto-detect detect...
- Page 47 Device Settings Options Parameters You Can Configure • Brightness settings Screen • Screen Blanking On Motion settings System Component Versions System component versions (read- only) Application Options Parameters You Can Configure • Administration settings Intermec Browser • Menu options • Toolbar options •...
-
Page 48: Navigate In Intermec Settings
Virtual Wedge Options Parameters You Can Configure Bar Code Scanner Wedge Bar code scanner wedge settings (bar code scanner grid and label encoding) RFID Reader Wedge RFID reader wedge settings Common Lockdown Parameters You Can Configure Service CLDS Server CLDS server settings. License Manager Options Parameters You Can Configure About... -
Page 49: Restore Default Settings
• Tap the menu item in the list. To move back a level in Intermec Settings: • Tap Back or Cancel on the Tile bar. To save a parameter setting: • Tap OK. To exit Intermec Settings: • Tap Menu > Exit or OK. Restore Default Settings You can easily restore a menu to its default settings or all of the Intermec Settings parameters to their default settings if necessary. -
Page 50: Hide Menu Items In Intermec Settings
Hide Menu Items in Intermec Settings You can hide items in the Intermec Settings menus if you do not want them available for other users to access. Hidden items are not saved when you back up your settings in the SmartSystems console. -
Page 51: Configure 802.11A/B/G/N (Wi-Fi) Radio Communications
Your computer is Bluetooth™-enabled out-of-the-box. With Bluetooth, you can connect to other Bluetooth devices, such as scanners or printers. Connect to a Bluetooth Scanner You can connect the computer to a Honeywell Bluetooth scanner, such as the SF51 or SR61. CV41 Vehicle Mount Computer (Windows Embedded Standard) User Guide... -
Page 52: Connect To A Bluetooth Printer
COM port on your computer. For help, see the Bluetooth Resource Kit, which is part of the Intermec Developer Library (IDL), available from the Honeywell website. • select the current wireless printer on your computer. For help, see the next procedure. -
Page 53: About Serial And Usb Communications
Use a serial or USB cable to transmit and receive data from another device through se rial or USB communications. If you are using a USB cable, you must purchase a USB Y- Cable. For more information, contact your Honeywell representative. Connect the Honeywell SR30 or SR61T USB Scanner... -
Page 54: Connect To A Serially Tethered Scanner
Connect to a Serially Tethered Scanner Use this procedure to connect a tethered scanner and enable RS-232 communications. 1. Connect the scanner to the COM1 or COM2 port. 2. From the Intermec Settings main menu, select Tethered Scanner (COM 1 or COM 3. -
Page 55: About Wireless Security
• LEAP • This section explains how to configure wireless security on your computer. Honeywell recommends that you implement WPA2 security using PSK (Personal) or 802.1X (Enterprise) key management as appropriate. You must use either Wireless or Microsoft security to implement your security solution. -
Page 56: Select Microsoft Security As Your Security Choice
• If you are using the computer in a static environment that requires a high level of security, you should use Wireless security, which offers CCX v4.0 compliance, support for LEAP and TTLS, and configuration for up to four profiles. To use Wireless security, you need to select Wireless security as your security choice and select profile. - Page 57 8. Tap the Properties button. 9. Select Validate server certificate. 10. Select a root certificate or load a root certificate of the authentication server on your computer. For help, see Load a Certificate. 11. Tap OK to exit the Properties screen. 12.
- Page 58 Configure Static WEP Security With Microsoft Security Use the following procedure to configure static WEP security with Microsoft security. Honeywell recommends that you use WPA2-PSK instead of WEP if possible. 1. Make sure the communications and radio parameters on your computer are config- ured.
-
Page 59: Select Wireless Security As Your Security Choice
1. Make sure the communications and radio parameters on your computer are config- ured. 2. Tap Start > Network Connections. The Network Connections screen appears. 3. Tap and hold onto the Wireless Network Connection icon until the pop-up screen appears and select Properties. 4. - Page 60 4. (Optional) In the Profile Label text box, enter a meaningful name for your profile. 5. Configure your security settings. For help, see the next sections. 6. Repeat Steps 3 through 5 for each profile you want to define. 7. Set an active profile by choosing it from the Active Profile list. 8.
- Page 61 Configure 802.1x Security With Wireless Security Use the following procedure to configure 802.1x-WEP security with Wireless security. Honeywell recommends that you use WPA2-802.1x instead of 802.1x-WEP if possible. 1. Make sure the communications and radio parameters on your computer are config- ured.
- Page 62 8. Save your settings. Configure Static WEP Security With Wireless Security Use the following procedure to configure static WEP security with Wireless. Honeywell recommends that you use WPA2-PSK instead of WEP if possible. 1. Make sure the communications and radio parameters on your computer are config- ured.
-
Page 63: Load A Certificate
Load a Certificate To use transport layer security (TLS) with WPA or 802.1x security, you need a unique cli- ent certificate on the computer and a trusted root certificate authority (CA) certificate. Certificates are pieces of cryptographic data that guarantee a public key is associated with a private key. - Page 64 CV41 Vehicle Mount Computer (Windows Embedded Standard) User Guide...
-
Page 65: Chapter 6 - Use Wwan And Gps Communications
CHAPTER USE WWAN AND GPS COMMUNICATIONS Some configurations of the CV41 come equipped with a WWAN radio. With WWAN enabled, you can use UMTS or CDMA communications to transmit data through cellu- lar wide-area networks (WANs), and use the Global Positioning System Receiver (GPS).’ CV41 Vehicle Mount Computer (Windows Embedded Standard) User Guide... -
Page 66: About Wwan Communications
Honeywell OneClick Internet Application Main Screen About the Status Buttons and Icons Tappable buttons and icons in the Honeywell OneClick Internet application immedi- ately shows you the status of your WWAN connection. Some buttons or icons may also launch your default web browser, SMS, and email applications. -
Page 67: Activate Umts Communications
OneClick Internet Status Buttons and Icons (Continued) Icons Description Connected to WWAN. Connection failure. Activate UMTS Communications You use a SIM card to activate UMTS communications on your computer. You can pur- chase the SIM card from your network provider. 1. -
Page 68: Activate Cdma Communications
The following table lists the carriers that Honeywell currently supports. If your carrier is not listed in the table, please con- tact Honeywell product support to see if it is now supported. -
Page 69: Test The Gps Receiver
Test the GPS Receiver Use this section to learn how to test the GPS receiver. 1. Make sure WWAN communications is enabled. For more information, see WWAN and GPS Communications. 2. Make sure an external GPS antenna is connected. For more information, see Connect an External Antenna. -
Page 70: About The Oneclick Internet Pin Number
About the OneClick Internet PIN Number If you are using CDMA communications, you must enter a PIN number when the One- click Internet opens. Activate or Deactivate a PIN Number If you do not want to enter a PIN number every time the OneClick Internet Application stops, dieactivate the PIN number. -
Page 71: Autolaunch The Oneclick Internet Application
AutoLaunch the OneClick Internet Application When you enable AutoLaunch, the OneClick Inernet application opens when the com- puter starts up. Enable AutoLaunch to easily access the OneClick Internet application or view your current WWAN settings. 1. Tap Start > All Programs > OneClick Internet > OneClick Internet. The Oneclick Internet application opens. -
Page 72: Enable Roaming Alerts
1. Tap Start > All Programs > OneClick Internet > OneClick Internet. The Oneclick Internet application opens. 2. Tap the Settings button and select the General tab. 3. Select the Allow Roaming checkbox to enable roaming and clear it to disable roaming. -
Page 73: Chapter 7 - Enable Screen Blanking
CHAPTER ENABLE SCREEN BLANKING Enable screen blanking on your computer to turn off the computer screen while your vehicle is in motion. CV41 Vehicle Mount Computer (Windows Embedded Standard) User Guide... -
Page 74: About Screen Blanking
You can install the switch in a variety of ways, but Honeywell recommends you install a switch that closes when the user presses the accelerator pedal on a vehicle. -
Page 75: Install Switch For Screen Blanking
Custom Serial Cable Pinout Specifications Signal Description Not used Not used Not used Not used Not used Not used Request to send output Clear to send input Not used Sample Custom Serial Cable for Switch Pin 8 Pin 7 Install Switch for Screen Blanking This section explains how mount, connect, and enable the switch for screen blanking. -
Page 76: Enable Screen Blanking
Enable Screen Blanking After you have wired and mounted the motion switch sensor, you must enable screen blanking in Intermec settings on the vehicle mount computer. 1. In Intermec Settings, select Device Settings > Screen > Screen Blanking on Motion. 2. -
Page 77: Chapter 8 - Troubleshoot And Maintain The Computer
CHAPTER TROUBLESHOOT AND MAINTAIN THE COMPUTER If you encounter any problems while using the computer, look in this chapter to find a possible solution. You will also find information on routine maintenance. CV41 Vehicle Mount Computer (Windows Embedded Standard) User Guide... -
Page 78: Troubleshoot Your Computer
Note: If you send the computer in for service, it is your responsibility to save the computer data and configuration. Honeywell is responsible only for ensuring that the hardware matches the original configuration when repairing or replacing the computer. Troubleshoot the Wi-Fi Connection Use this troubleshooting table to help solve problems with your 802.11 radio connec-... -
Page 79: Troubleshoot 802.1X Security
Check your wireless security settings. Follow the next procedure to verify available access points and networks, check signal strength, and view other diagnostics. If you need to contact Honeywell Product Support, this information can be helpful in troubleshooting wireless network connection issues. -
Page 80: Troubleshoot Reading Bar Codes
Use this section to troubleshoot problems that may prevent you from being able to read a bar code with an Honeywell scanner. If you cannot find the solution in the following table, refer to your scanner user guide for more information. - Page 81 Problems Reading Bar Codes (Continued) Problem Solution • Aim the scanner beam to cross the entire bar code label The scanner will not read the in one pass. Vary the scanning angle. bar code label. • Check the quality of the bar code label. Scan a bar code label that you know will scan.
-
Page 82: Troubleshoot Operating The Computer
Problems Reading Bar Codes (Continued) Problem Solution You scan a valid bar code label The scanner may have decoded the bar code label in a to enter data for your symbology other than the label’s actual symbology. Try application. The data decoded scanning the bar code label again. -
Page 83: Call Product Support
If you still need help after visiting Knowledge Central, you may need to call Product Support. Before you can call Honeywell Product Support, make sure you have the following infor- mation ready: •... -
Page 84: Find Your Operating System Version
Find Your Operating System Version Use the following procedure to find the OS version of your computer. • Tap Start > Control Panel > About. The OS version is displayed in the Versions tab as the Intermec Content version. View WWAN Settings Use the following procedure to view your current WWAN settings. -
Page 85: Replace The Fuse
3. Press the UPS Battery Disconnect button located below the SIM card slot. 4. Reinstall the SIM card access panel and tighten the screws to a torque to a value of 4-5 in/lbs. Once power external power is reconnected to the CV41, the UPS battery automatically reconnects. -
Page 86: Clean The Computer
4. Replace the fuse. 5. Secure the fuse holder back into the CV41. Clean the Computer To keep the computer in good working order, you may need to clean the touch screen. Clean the touch screen as often as needed for the environment in which you are using the computer. -
Page 87: Appendix A - Specifications And Default Settings
APPENDIX SPECIFICATIONS AND DEFAULT SETTINGS Physical and Environmental Specifications Physical Dimensions CV41 dimensions 21.4 x 26.8 x 4.3 /6.6 cm (8.4 x 10.6 x 1.7/2.6 in) CV41 weight 2.1 kg (5.6 lbs) Smart dock dimensions 15.5 x 18 x 6.4 cm (6.1 x 7.1 x 2.5 in) Smart dock weight 1.2 kg (3.2 lbs) Environmental Specifications... -
Page 88: Hardware
Backup battery (CMOS) Field replaceable, rechargeable lithium-ion battery, 30 minutes of life at -20 °C (-4 °F). Hardware Touch Screen 20 cm (8 in) color WVGA 800 x 480 LED backlit display. Standard display: • 400 NIT indoor display • Ambient light sensor •... -
Page 89: Wireless Lan
Wireless LAN Wireless frequency 2.4 to 2.4895 GHz IEEE 802.11b/802.11g DSSS OFDM (varies by regulatory 5.15 to 5.82 GHz IEEE 802.11a DSSS OFDM domain) RF data rates 802.11a (OFDM) 6, 9, 12, 18, 24, 26, 48, 54 Mbps 802.11b (DSSS) 1, 2, 5.5, 11 Mbps 802.11g (OFDM) 6, 9, 12, 18, 24, 36, 48, 54 Mbps 802.11n (OFDM 20 MHz chs) 13, 26, 39, 52, 78, 104, 117, 130 Mbps... - Page 90 Data Collection Settings Data Collection for Tethered Scanner Default Value Setting Bluetooth-Configure On Connect Overwrite with computer settings Symbology Settings Symbology Default Value AustraliaPost Disable Aztec Disable Disable CanadaPost Disable Codabar Disable Codablock A Disable Codablock F Disable Code 11 Disable Code 39 Enable...
- Page 91 Symbology Option Settings Symbology Option Setting Default Value Preamble None (Disable) Postamble None (Disable) Symbology Identifier Disable Enable Multicode Disable Number of Bar Codes Bar Code Separator <> Complete Multicode UDM0 Incomplete Multicode UDM1 Code Mark Incomplete Transmission Disable Incomplete Transmission Timeout Bar Code 1-8 Symbology Bar Code 1-8 Length Bar Code 1-8 Mask...
-
Page 92: Communications
Communications Use communications settings to configure how the computer communicates with the network. Communications Settings Communications Setting Default Value Device Name CV4- where is the serial number of the device. 802.11 Radio Settings 802.11 Radio Setting Default Value Radio Enabled Security Choice Microsoft Security Wireless Security... -
Page 93: Rfid Settings
Screen Settings Screen Setting Default Value Brightness High Screen Blanking On Motion Disable Screen-On Delay After Motion Stops (sec) RFID Settings Use RFID settings to enable the RFID service. RFID Settings RFID Setting Default Value Enable RFID Service Virtual Wedge Settings Use virtual wedge settings to configure the virtual wedge. -
Page 94: Device Monitor Settings
Lockable Key Settings Lockable Key Setting Default Value Enable Windows Key Disable Enable Task Manager Key Disable Enable Task Switcher Key Disable Enable Windows Security Dialog Key Disable Enable Closing Application Key Disable Enable Minimize Key Disable Enable New Session Key Disable Device Monitor Settings Use the device health control settings to enable health data collection and set refresh... -
Page 95: Core Messaging Services
Core Messaging Services Use the core messaging services to configure the message routers between client and server software applications. Core Messaging Services Settings Core Messaging Services Setting Default Value Associated Server IP Null Broadcast Name INTERMEC Port 62241 Keep Alive Interval 30 seconds Port Pin Assignments Use this section to learn about the ports pin assignments on the CV41, smart dock, and... -
Page 96: Usb Port
USB Port The USB port is located on the back of the smart dock. USB Port Signal Description Common ground USBC_D+ USB client data signal USBC_D- USN client data signal USB_H1_PWR USB host 1 (5 V output power) Common ground Common ground USB_H1_D+ USB host 1 data signal... -
Page 97: Power Supply Connector
CANBUS/Audio Port Signal Description Mic return Microphone return Audio return Optional ground CAN_SHLD CAN_H CAN_H bus line dominant high CAN reserved CAN_V+ Optional CAN external power supply Power Supply Connector Power is supplied from the smart dock to the CV41 through the power connector. The power supply connector also provides a connection point for the vehicle chassis ground to be connected internally to the conductive chassis of the computer. - Page 98 USB host connector D9 male connector USB client connector USB Dongle Cable D9 Male Connector Signal Description Common ground USBC_D+ USB client data signal USBC_D_ USN client data signal USB_H1_PWR USB host 5 V output power Common ground Common ground USB_H1_D+ USB host 1 data signal USB_H1_D-...
- Page 99 USB Dongle Cable Host Connector Signal Description DGND USB power return Shell CGND Chassis ground USB Dongle Client Connector Signal Description V In+ 12 to 48 V nominal DC input + V In+ 12 to 48 V nominal DC input + V In- Input - V In-...
- Page 100 CV41 Vehicle Mount Computer (Windows Embedded Standard) User Guide...
-
Page 101: Appendix B - Keypads And Keystrokes
APPENDIX KEYPADS AND KEYSTROKES Standard Characters Use the following tables to learn how to enter standard and other available characters and functions with the keypad. If there is no sequence of keystrokes for a particular character or function, it is only available through the soft input panel (SIP), which you can access by tapping the keyboard icon on the touch screen. - Page 102 CV41 Alphanumeric Characters (Continued) To Enter Keypad CV41 Function Keys To Enter Keypad ¡ ¢ £ ¥ ¦ § ¨ © ª b ¡ b ¢ b £ b ¥ b ¦ b § b ¨ b © b ª ¡...
- Page 103 CV41 Special Keys (Continued) To Enter Keypad % (percentage) : (colon) ; (semicolon) , (comma) $ (dollar) ! (exclamation) ? (question mark) - (hyphen or minus) . (period) + (plus) ‘ (apostrophe) = (equals) _ (underscore) ^ (caret) > (greater than) <...
- Page 104 CV41 Special Keys (Continued) To Enter Keypad Shift Space Start (Windows) Ctrl Ctrl CV41 Intermec Terminal Emulator Keys To Enter Keypad Attention Autolog Clear Alt 6 Duplicate EEOF Erase Find Field + Field - Fieldmark Help Home Keypad Menu Mode New Line Next Screen Page...
- Page 105 CV41 Intermec Terminal Emulator Keys (Continued) To Enter Keypad Remove Reset Return Roll Down Roll Up Select System Request View Down View Up CV41 Vehicle Mount Computer (Windows Embedded Standard) User Guide...
- Page 106 CV41 Vehicle Mount Computer (Windows Embedded Standard) User Guide...
-
Page 107: Appendix C - Scanngo Wi-Fi Configuration Bar Codes
APPENDIX SCANNGO WI-FI CONFIGURATION BAR CODES You can use the ScanNGo Wi-Fi configuration bar codes to quickly configure the 802.11 radio in your computer. CV41 Vehicle Mount Computer (Windows Embedded Standard) User Guide... -
Page 108: Radio Configuration Bar Codes
Radio Configuration Bar Codes Use an external scanner to read the following ScanNGo bar codes to enable the 802.11 radio and set the defaults for either Wireless security or Microsoft security. After you scan the bar codes, you will still need to use Intermec Settings or another configuration program to set network-specific settings on your computer and to configure the wire- less security. - Page 109 4. Follow any instructions on the device. 1D Imager Radio Configuration Bar Codes When You Want To: Scan This Bar Code • Set all communication settings to defaults (Wi-Fi, WWAN if applicable) • Enable Wi-Fi - set Wireless security to defaults CV41 Vehicle Mount Computer (Windows Embedded Standard) User Guide...
- Page 110 1D Imager Radio Configuration Bar Codes (Continued) When You Want To: Scan This Bar Code • Set all communication settings to defaults (Wi-Fi, WWAN if applicable) • Enable Wi-Fi - set Wireless security to defaults CV41 Vehicle Mount Computer (Windows Embedded Standard) User Guide...
- Page 111 1D Imager Radio Configuration Bar Codes (Continued) When You Want To: Scan This Bar Code • Set all communication settings to defaults (Wi-Fi, WWAN if applicable) • Enable Wi-Fi - set Microsoft security to defaults CV41 Vehicle Mount Computer (Windows Embedded Standard) User Guide...
- Page 112 1D Imager Radio Configuration Bar Codes (Continued) When You Want To: Scan This Bar Code • Set all communication settings to defaults (Wi-Fi, WWAN if applicable) • Enable Wi-Fi - set Microsoft security defaults CV41 Vehicle Mount Computer (Windows Embedded Standard) User Guide...
-
Page 113: Appendix D - Cv41 Docks
APPENDIX CV41 DOCKS This chapter details the different docks available for the CV41: • Standard Dock • Enhanced Dock for Off-Vehicle Use CV41 Vehicle Mount Computer (Windows Embedded Standard) User Guide... -
Page 114: Standard Dock
Direct or DC/DC power supply Connection Serial Ports COM1 and COM2 USB Ports USB port provides host connections via an adapter cable. This port also supports Honeywell external keyboards. Ethernet CANbus CANbus connection via an adapter cable Audio Headset connection via an adapter cable Screen Supported via COM1 and COM2 connectors. -
Page 115: Enhanced Dock For Off-Vehicle Use
COM1 and COM2 USB Ports USB1 port provides host connections via an adapter cable. This port also supports Honeywell external keyboards. USB2 port provides two USB host ports via an adapter cable. Direct USB host connection on top of dock. -
Page 116: Components - Top
Components - Top Only the Enhanced Dock has these connectors on the top. The connectors are located behind water tight plugs. USB Host Ethernet Note: The Ethernet port is not supported on the CV41. CV41 Vehicle Mount Computer (Windows Embedded Standard) User Guide... - Page 117 CV41 Vehicle Mount Computer (Windows Embedded Standard) User Guide...
- Page 118 Honeywell 9680 Old Bailes Road Fort Mill, SC 29707 www.honeywellaidc.com ™ CV41-WIN-UG Rev A 6/18...