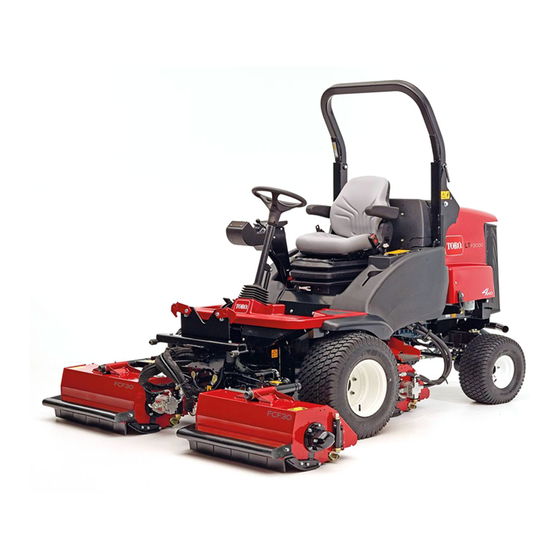
Toro LT-F3000 Operator's Manual
Heavy-duty triple turf flail mower
Hide thumbs
Also See for LT-F3000:
- Operator's manual (60 pages) ,
- Installation instructions manual (20 pages) ,
- Addendum (4 pages)

Related Manuals for Toro LT-F3000


Summary of Contents for Toro LT-F3000
- Page 1 Form No. 3431-829 Rev B LT-F3000 Heavy-Duty Triple Turf Flail Mower Model No. 31659—Serial No. 400000000 and Up *3431-829* Register at www.Toro.com. Original Instructions (EN)
-
Page 2: Table Of Contents
Whenever you need service, genuine Toro parts, or Setup ..............10 additional information, contact an Authorized Service Product Overview ........... 10 Dealer or Toro Customer Service and have the model Controls ............10 and serial numbers of your product ready. Figure 1 Operator’s Seat Controls....... - Page 3 After Operation Safety ........32 Checking the Hydraulic Lines and Identifying the Tie-Down Points ......32 Hoses............54 Hauling the Machine ......... 32 Hydraulic Fluid Specifications......54 Towing the Machine .......... 32 Checking the Hydraulic Fluid Level ....55 Maintenance ............36 Changing the Hydraulic Return Filter ....
-
Page 4: Safety
Safety This machine has been designed in accordance with ISO 4254-12 and ISO 12100. General Safety This product is capable of amputating hands and feet and of throwing objects. • Read and understand the contents of this Operator’s Manual before starting the engine. •... -
Page 5: Safety And Instructional Decals
Safety and Instructional Decals Safety decals and instructions are easily visible to the operator and are located near any area of potential danger. Replace any decal that is damaged or missing. decal120-0625 120-0625 1. Pinch point, hand—keep hands away. decal93-9084 decal120-6604 93-9084 120-6604... - Page 6 decal111-3567 111-3567 1. Pedal operation decal121-3884 121–3884 decal93-6686 93-6686 1. Engine—stop 3. Engine—start 1. Hydraulic oil 2. Engine—preheat 2. Read the Operator's Manual. decal127-0392 decal106-6754 127-0392 106-6754 1. Warning—stay away from hot surfaces. 1. Warning—do not touch the hot surface. 2.
- Page 7 decal106-6755 106-6755 1. Engine coolant under 3. Warning—do not touch the decal134-1827 pressure. hot surface. 134-1827 2. Explosion hazard—read 4. Warning—read the 1. Cutting units—lower/float 4. Beacon the Operator's Manual. Operator's Manual. 5. Hazard warning light 2. Cutting units—raise 3. Horn decal40-13-010 decal119-4988 40-13–010...
- Page 8 decal134-1829 134-1829 1. Read the Operator’s 7. Beacon—7.5 A Manual for information on fuses. 2. Cab—relay 8. Slope sensor—2 A 9. Power seat—10 A 3. Cab—40 A 4. Key switch—2 A 10. Horn—10 A 5. Headlights—7.5 A 11. Power—10 A decal134-4281 6.
- Page 9 decal134-5122 134-5122 1. Warning—shut off the engine and remove the key before releasing or operating safety latches. decal134-5112 134-5112 1. Height of cut decal134-4280 134-4280 Note: This machine complies with the industry standard stability test in the static lateral and longitudinal tests with the maximum recommended slope indicated on the decal.
-
Page 10: Setup
Setup Media and Additional Parts Description Qty. Operator's Manual Read the manuals before operating the machine. Engine owner’s manual CE certificate The certificate indicates CE compliance. Store all documentation in a safe place for future use. Note: Determine the left and right sides of the machine from the normal operating position. Product Overview Controls Control Panel Components... - Page 11 Key Switch Parking-Brake Switch Use the key switch to control the engine and power to WARNING certain electrical components. The parking brake affects the front wheels only, and may not keep the machine from rolling down a slope. The machine could move unintentionally.
-
Page 12: Operator's Seat Controls
Traction Pedals Forward travel: Press the forward traction pedal to drive the machine forward and increase ground speed. Release the pedal to reduce ground speed (Figure Reverse travel: Press the reverse traction pedal to drive the machine backward and increase ground speed. - Page 13 Operator Weight Adjustment Rotate the handle clockwise to increase suspension stiffness and counterclockwise to decrease the stiffness. The dial indicates when the seat suspension is adjusted for the operator’s weight (kg); refer to Figure g327324 Figure 11 1. Handle Backrest Adjustment Pull the handle outward to adjust the seat backrest angle.
-
Page 14: Transport Latches
Fuel Gauge The fuel gauge shows the amount of fuel in the tank (Figure 13). g327359 Figure 15 1. Latch arm (rear cutting-unit 2. Front of the machine arm latch) g295232 Figure 13 Transport Latches Front Cutting Unit Arm Latches Raise the cutting units to the T position and RANSPORT... - Page 15 Using the InfoCenter LCD Display InfoCenter Icon Descriptions SERVICE DUE Indicates when scheduled service The InfoCenter LCD display shows information about should be performed your machine, such as the operating status, various diagnostics, and other information about the machine Hours remaining until service (Figure 16).
- Page 16 Menu Item Description drive the machine back to the shop Hours Lists the total number of hours and contact your authorized Toro that the machine, engine, and distributor (software version U and PTO have been on, as well later). as the number of hours the The power take-off is disabled.
- Page 17 To lock these settings, use the Protected Menu. Settings Note: At the time of delivery, the initial password code is programmed by your authorized Toro distributor. Menu Item Description Units Controls the units used on the Accessing Protected Menus...
- Page 18 Viewing and Changing the Protected Menu Settings In the Protected Menu, scroll down to Protect Settings and perform 1 of the following: • To view and change the settings without entering a PIN code, and use the right button to change the Protect Settings to O •...
-
Page 19: Specifications
Rotor speed 3000 rpm Attachments/Accessories A selection of Toro approved attachments and accessories is available for use with the machine to enhance and expand its capabilities. Contact your Authorized Service Dealer or authorized Toro distributor or go to www.toro.com/en-gb for a list of all approved attachments and accessories. -
Page 20: Before Operation
Performing Daily Operation Maintenance Before Operation Before starting the machine each day, perform the Each Use/Daily procedures listed in Maintenance (page 36). Before Operation Safety Filling the Fuel Tank General Safety • Never allow children or untrained people to Fuel Tank Capacity operate or service the machine. -
Page 21: Checking The Forward/Reverse Traction Pedal Action
• Fuel filter plugging may be expected for a time after converting to biodiesel blends. • Contact your authorized Toro distributor for more information on biodiesel. Adding Fuel Park the machine on a level surface, lower the cutting units, shut off the engine, engage the... -
Page 22: Checking The Interlock Switches
Checking the Interlock Checking the Transmission Neutral Interlock Switch Switches Important: Take extreme care to ensure that the Service Interval: Before each use or daily operator area around the machine is clear before checking presence, cutting-unit drive that the engine does not start when checking the interlock, parking brake interlock, neutral interlock switch. - Page 23 • • Use care when approaching blind corners, shrubs, Be aware that there is no rollover protection when trees, or other objects that may obscure your a folded roll bar is in the down position. vision. • Check the area that you will be mowing and never •...
-
Page 24: Understanding The Operator Presence Controls
Understanding the Adjusting the Roll Bar Operator Presence WARNING Controls To avoid injury or death from rollover, keep the roll bar in the raised locked position and CAUTION use the seat belt. If safety interlock switches are disconnected Ensure that the seat is secured with the seat or damaged the machine could operate latch. - Page 25 Lowering the Roll Bar Raising the Roll Bar Park the machine on a level surface, lower the Remove the hairpins that secure the roll-bar pins cutting units, engage the parking brake, shut off to the pivot brackets of the lower roll-bar frame. the engine, and remove the key.
-
Page 26: Starting The Engine
Starting the Engine Shutting Off the Engine Important: Important: If you are starting the engine for the Allow the engine to idle for 5 minutes first time, the engine has stopped from lack of before shutting it off after a full-load operation. fuel, or you performed fuel system maintenance, This allows the turbocharger to cool down before bleed the fuel system before starting the engine;... -
Page 27: Flail Cutting Unit General Information
Flail Cutting Unit General Ensure that all cutting units are set at the same height of cut by referring to the indicator rings Information (Figure 27). It is important to keep the flail blades sharp and in good condition to ensure good cutting performance, minimum power consumption, and a good quality of cut. -
Page 28: Controlling The Position Of The Individual Cutting Units
Controlling the Position of Cutting Unit Limited-Lift Position the Individual Cutting Units Limiting Cutting Unit Lift When Driving Forward Use the 3 lift-control switches to raise or lower the cutting units independently. Note: The limited lift function for driving forward is enabled by default. -
Page 29: Engaging The Cutting Unit Drive
• When cutting-unit Auto Limited Lift is enabled, in a downward direction. The cutting units run when driving the machine in reverse causes the cutting the cutting units are approximately 150 mm (6 inches) units to automatically raise to the limited-lift above ground level. -
Page 30: Clearing The Cutting Units
Clearing the Cutting Units WARNING Never attempt to rotate the cutting units by hand. Residual pressure in the hydraulic system could cause the cutting unit(s) to rotate suddenly when you release the blockage, which may cause serious injury. • Always wear protective gloves and use a suitable strong wooden instrument. -
Page 31: Operating Tips
Operating Tips Maximizing the Quality of Cut The quality of cut deteriorates when the forward speed is too fast. Always balance the quality of cut with Becoming Familiar with the the required cutting rate, and set the forward speed Machine accordingly. -
Page 32: After Operation
Towing the Machine After Operation Ensure that the towing vehicle can control the After Operation Safety combined weight of both vehicles; refer to Specifications (page 19). General Safety Raising the Cutting Units • Shut off the engine, remove the key, and wait for all movement to stop before you leave the Whenever possible, raise and latch the cutting units operator’s position. - Page 33 g014451 Figure 36 1. Front wheel motor 3. Washer 12 mm 2. Hex plug 4. Bolt 12 x 40 mm Tighten the bolt in the threaded hole in the brake piston until the brake releases g328268 (Figure 36). Figure 34 Repeat steps through for the brake at the...
- Page 34 g328252 g328252 Figure 37 Figure 38 1. Socket head plugs (transmission pump-relief valves) 1. Socket head plugs (transmission pump-relief valves) Lower and latch the platform; refer to Lowering Torque the 2 socket head plugs to 81 N∙m (59.7 the Platform (page 39).
- Page 35 Install the hex plug into the motor end plate WARNING (Figure 40). Operating the machine without the braking system working properly may cause you to lose control of the machine, resulting in serious injury to you and bystanders. Before using the machine, ensure that the braking system operates correctly.
-
Page 36: Maintenance
• To ensure safe, optimal performance of the – Shut off the engine and remove the key. machine, use only genuine Toro replacement – Wait for all movement to stop. parts. Replacement parts made by other manufacturers could be dangerous, and such use •... - Page 37 Maintenance Service Maintenance Procedure Interval • Lubricate the grease every 50-hour fittings. • Service the battery. • Check the blade bolts. • Inspect the blades for damage and excessive wear. • Make sure that each blade bolt is torqued to 45 N∙m (33.2 ft-lb). Every 50 hours •...
-
Page 38: Daily Maintenance Checklist
Daily Maintenance Checklist Duplicate this page for routine use. For the week of: Maintenance Check Item Mon. Tues. Wed. Thurs. Fri. Sat. Sun. Check the engine-oil level. Check the air filter-blockage indicator. Drain water the fuel/water separator. Check for fluid leaks. Check the cooling system. -
Page 39: Pre-Maintenance Procedures
Pre-Maintenance Lowering the Platform Procedures WARNING Operating the machine with the platform Raising the Platform unlatched may cause you to lose control of the machine, resulting in serious injury to you Move the platform-latch handle (Figure and bystanders. toward the front of the machine until the latch hooks clear the locking bar. -
Page 40: Removing The Storage Compartment
Installing the Storage Fully lower the platform and move the platform-latch handle toward the rear of the Compartment machine until the latch hooks fully engage the locking bar (Figure 46). Align the holes on the bottom of the storage compartment with the holes in the chassis brackets. -
Page 41: Locating The Lift Points
Locating the Lift Points Note: Use jack stands to support the machine when you lift it. WARNING Mechanical or hydraulic jacks may fail to support the machine and cause serious injury. Use jack stands when supporting the machine. • Front—under the front arm mount •... -
Page 42: Lubrication
Lubrication Greasing the Bearings, Bushings, and Pivots Service Interval: Before each use or daily—Lubricate the grease-daily fittings. Every 50 hours—Lubricate the grease every 50-hour fittings. Important: Lubricate the bearings, bushings, and pivot points immediately after every washing, regardless of the service interval listed. Grease specification: No. -
Page 43: Engine Maintenance
Engine Maintenance damaged. Check the whole intake system for leaks, damage, or loose hose clamps. Note: Service the primary air filter when the Engine Safety filter-blockage indicator (Figure 51) is red. Changing • Shut off the engine before checking the oil or the air filter frequently increases the chance of dirt adding oil to the crankcase. -
Page 44: Replacing The Safety Filter
Align the dirt ejection port air-filter cover between temperatures) 5 o’clock to 7 o’clock when viewed from the end, Toro Premium Engine Oil is available from your assemble the cover to the canister, and secure authorized Toro distributor in either 15W-40 or 10W-30 the cover. -
Page 45: Servicing The Diesel-Oxidation Catalyst (Doc) And The Soot Filter
Remove the oil filter. soot filter of the DPF. Apply a light coat of clean oil to the oil filter Refer to your authorized Toro distributor for gasket. diesel-oxidation catalyst and the soot filter replacement parts or service. -
Page 46: Extended Engine Maintenance
Extended Engine Fuel System Maintenance Maintenance Service Interval: Every 1,000 hours Refer to the DANGER Engine Service Manual. Under certain conditions, fuel and fuel vapors Every 1,500 hours—Inspect the crankcase breather system. Contact an Authorized Service are highly flammable and explosive. A fire or Dealer. -
Page 47: Priming The Fuel System
Drain the fuel filter canister; refer to Servicing the Water Separator (page 46). Clean the area around the fuel filter and filter head (Figure 58). g292479 Figure 57 1. Vent screw 2. Drain valve (water separator filter) g292477 Figure 58 Tighten the drain valve at the bottom of the filter 1. -
Page 48: Servicing The Engine Fuel Filter
Servicing the Engine Fuel Electrical System Filter Maintenance Service Interval: Every 500 hours—Replace the Important: Before welding on the machine, engine fuel filter. disconnect both cables from the battery, both wire harness plugs from the electronic control Note: Refer to the engine owner's manual included modules, and the terminal connector from the with the machine for additional information. -
Page 49: Checking The Electrical System
1. Fuse block 2. Fuse-block cover Apply Grafo 112X skin-over grease (Toro Part No. 505-47) or petroleum jelly to the terminals. Check for open fuses. Clean the battery compartment. -
Page 50: Drive System Maintenance
Inspecting the Drive System Transmission Control Maintenance Cable and Operating Checking the Tire Air Mechanism Pressure Service Interval: Every 250 hours Service Interval: Before each use or daily Check the condition and security of the cable and operating mechanism at the speed-control pedals and Important: Maintain correct tire pressure in all transmission pump ends. -
Page 51: Checking The Rear Wheel Toe-In
Checking the Rear Wheel Cooling System Toe-In Maintenance Service Interval: Every 1,000 hours—Check the rear wheel toe-in. Cooling System Safety Rotate the steering wheel to position the rear • Swallowing engine coolant can cause poisoning; wheels straight ahead. keep out of reach from children and pets. Loosen the jam nut on each end of the tie rod •... - Page 52 g292487 Figure 65 Clean the screens. g328487 Figure 67 Unlatch and open the hood (Figure 66). 1. Radiator Close and latch the hood. Assemble the screen onto the pivot pins, close the screen and secure it with the latch and ball pin.
-
Page 53: Checking The Coolant Level
Checking the Coolant Level Belt Maintenance Service Interval: Before each use or daily Servicing the Alternator The cooling system is filled with a 50/50 solution of water and permanent ethylene glycol antifreeze. Belt Check the level of coolant in the expansion tank at the beginning of each day before starting the engine. -
Page 54: Hydraulic System Maintenance
Service Interval: Before each use or daily This fluid is compatible with the elastomers used in Toro hydraulic systems and is suitable for a Check the hydraulic lines and hoses for leaks, kinked wide-range of temperature conditions. This fluid is... -
Page 55: Checking The Hydraulic Fluid Level
Checking the Hydraulic Important: Do not overfill the tank with hydraulic fluid. Fluid Level Install the cap onto the tank. Service Interval: Before each use or daily Install the storage compartment; refer to Installing the Storage Compartment (page 40). The reservoir is filled at the factory with high-quality hydraulic fluid. -
Page 56: Changing The Hydraulic Fluid
If the fluid becomes contaminated, contact your authorized Toro distributor to flush the system. Contaminated fluid looks milky or black when compared to clean fluid. g014452 Figure 73 1. -
Page 57: Cutting Units
Cutting Units Blade Safety A worn or damaged blade can break, and a piece could be thrown toward you or bystanders, resulting in serious personal injury or death. • Inspect the blades periodically for excessive wear or damage. • Use care when checking the blades. Wear gloves and use caution when servicing them. -
Page 58: Inspecting The Blades
Inspecting the Blades movement in either direction from the rotor. If there is more than a total of 3 mm (1/8 inch) of Service Interval: Every 50 hours—Inspect the blades free movement, replace the blade. for damage and excessive wear. Check each pair of opposite blades for a weight Every 50 hours—Make sure that each blade difference between them. -
Page 59: Clearing A Blocked Rotor
Clearing a Blocked Rotor Checking the Front Guards Service Interval: Before each use or daily WARNING Inspect the front guards for wear or damage (Figure Residual pressure in the hydraulic system 78). Replace the front guards if they are damaged to could cause injury through sudden movement prevent objects being thrown toward you. -
Page 60: Checking The Rotor
Ensure that the scraper wires are correctly tensioned Note: If you detect the rotor has excessive end for maximum working life. play, contact your authorized Toro distributor. Carefully tighten the scraper wire retaining nuts Note: If the rotor needs to be replaced to remove any slack from the scraper wires. -
Page 61: Chassis
Chassis Cleaning Inspecting the Seat Belt Washing the Machine Service Interval: Before each use or daily Wash the machine as needed using water alone or with a mild detergent. You may use a rag when Inspect the seat belt for wear, cuts, and other washing the machine. -
Page 62: Storage
Clean the battery, terminals, and posts with a wire brush and baking-soda solution. Coat the cable terminals and battery posts with Grafo 112X skin-over grease (Toro Part No. 505-47) or petroleum jelly to prevent corrosion. Slowly charge the battery every 60 days for 24... -
Page 63: Troubleshooting
Troubleshooting Problem Possible Cause Corrective Action There are areas of uncut grass at the 1. You are turning too tightly. 1. Increase the turning radius. overlap between cutting units. 2. The machine slides sideways when 2. Mow up/down the slope. driving the machine across the face of a slope. - Page 64 Problem Possible Cause Corrective Action There is excessive blade wear. 1. The blades are in heavy contact with 1. Raise the height of cut. the ground. 2. The cutting edges of the blades are 2. Sharpen or replace the blades. rounded.
- Page 65 Problem Possible Cause Corrective Action There is excessive noise in the hydraulic 1. A pump is malfunctioning. 1. Identify the noisy pump and service or system. replace it. 2. A motor is malfunctioning. 2. Identify the noisy motor and service or replace it.
- Page 66 Problem Possible Cause Corrective Action The cutting units fail to start up when 1. The seat sensor switch is 1. Check the mechanical and electrical lowered into work. malfunctioning. operation of the switch. 2. The hydraulic-fluid level is low. 2. Fill the hydraulic-fluid reservoir to the correct level.
- Page 67 The Toro Company (“Toro”) respects your privacy. When you purchase our products, we may collect certain personal information about you, either directly from you or through your local Toro company or dealer. Toro uses this information to fulfil contractual obligations - such as to register your warranty, process your warranty claim or to contact you in the event of a product recall - and for legitimate business purposes - such as to gauge customer satisfaction, improve our products or provide you with product information which may be of interest.
- Page 68 Countries Other than the United States or Canada Customers who have purchased Toro products exported from the United States or Canada should contact their Toro Distributor (Dealer) to obtain guarantee policies for your country, province, or state. If for any reason you are dissatisfied with your Distributor's service or have difficulty obtaining guarantee information, contact your Authorized Toro Service Center.