Toro 38700 Service Manual
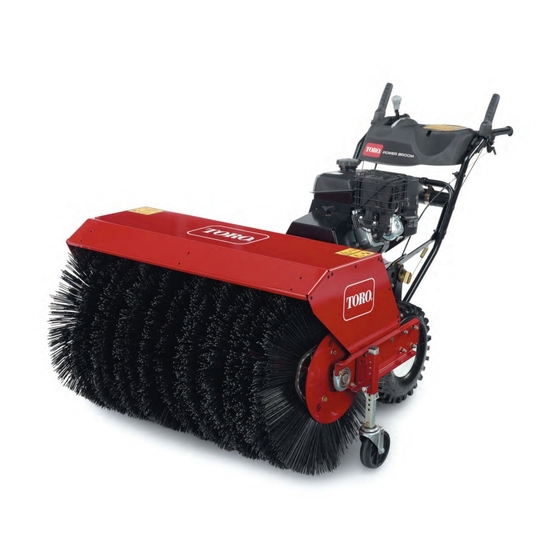
Walk-behind rotary broom
Hide thumbs
Also See for 38700:
- Operator's manual (32 pages) ,
- Operator's manual (32 pages) ,
- Operator's manual (24 pages)
Table of Contents
Advertisement
Quick Links
Advertisement
Table of Contents

Related Manuals for Toro 38700


Summary of Contents for Toro 38700
- Page 1 LCE/Residential Products/ Siteworks Walk-Behind Rotary Broom Service Manual...
- Page 2 Basic shop safety knowledge and mechanical/electrical skills are assumed. The Table of Contents lists the systems and the related topics covered in this manual. The Toro Walk-Behind Rotary Broom, model year 2014, is covered in this manual. The manual may also be specified for use on later model products.
-
Page 3: Table Of Contents
TABLE OF CONTENTS Chapter 1 - Safety Information ......................1-1 Chapter 2 - Specifications & Maintenance ..................2-1 Checking the Sweeping Path ..............................2-3 Adjusting the Broom Height ..............................2-4 Adjusting Broom Side Angle ..............................2-4 Recommended Maintenance Schedule..........................2-5 Checking the Engine Oil Level ............................2-6 Checking the Traction Cable ...............................2-6 Checking for Loose Hardware .............................2-6 Changing the Engine Oil..............................2-7... -
Page 4: Chapter 1 - Safety Information
PER SONAL SAFETY INSTRUCTION – informa tion and operating tips for safe operating practices. read the instruction because it has to do Operator’s manuals are available online through your Toro with your safety. Failure to comply with parts source or: the instruction may result in personal injury or even death. -
Page 5: Safety Information
SAFETY INFORMATION NOTES Walk-Behind Rotary Broom Service Manual... -
Page 6: Chapter 2 - Specifications & Maintenance
SPECIFICATIONS & MAINTENANCE Checking the Sweeping Path ......... 2-3 Adjusting the Broom Height ..........2-4 Adjusting Broom Side Angle ........... 2-4 Recommended Maintenance Schedule......2-5 Checking the Engine Oil Level ........2-6 Checking the Traction Cable .......... 2-6 Checking for Loose Hardware ........2-6 Changing the Engine Oil.......... - Page 7 SPECIFICATIONS & MAINTENANCE NOTES Walk-Behind Rotary Broom Service Manual...
-
Page 8: Checking The Sweeping Path
SPECIFICATIONS & MAINTENANCE Model 38700, 23740 Engine ® Kohler 208cc Command Pro Multi Season Clearing Width 36” (11.0m) Starter Recoil Fuel Capacity 1 Gallon (4.1 L) Engine RPM 3600 ± 100 PRM Broom Speed 200 RPM Direct Drive Speed 6/2 Variable Speed... -
Page 9: Adjusting The Broom Height
SPECIFICATIONS & MAINTENANCE Adjusting the Broom Height Adjusting Broom Side Angle 1. Drive to a flat dusty area and stop the machine. 1. Disengage the broom and stop the engine. 2. Disengage the broom and stop the engine. 2. Wait for all moving parts to stop. 3. -
Page 10: Recommended Maintenance Schedule
SPECIFICATIONS & MAINTENANCE Recommended Maintenance Schedule MAINTENANCE SERVICE INTERVAL MAINTENANCE PROCEDURE Check the traction cable. After the first 2 hours Check the broom cable. After the first 5 hours Check the engine oil. Check the engine oil level. Before each use or daily Check for loose hardware. -
Page 11: Checking The Engine Oil Level
4. If the oil level is low, wipe off the area around the oil fill cap, remove the cap and fill to the Full mark on the dipstick. Toro 4-Cycle Premium Engine Oil is recommended; refer to the Engine Owner’s manual for an acceptable alternative. -
Page 12: Changing The Engine Oil
SPECIFICATIONS & MAINTENANCE Checking the Tire Pressure Changing the Engine Oil SERVICE INTERVAL SERVICE INTERVAL After the first 5 hours. Every 100 hours (more frequently Every 50 hours. in severe conditions). 1. Turn off the engine, wait for all moving parts to stop, and leave engine switch in the Off position. -
Page 13: Lubricating The Broom Angle Lock Pin And Hex Shaft
SPECIFICATIONS & MAINTENANCE Lubricating the Broom Angle IMPORTANT Lock Pin and Hex Shaft Do not get oil on the rubber wheel or the aluminum friction drive plate as the traction drive will slip (Fig. 006). SERVICE INTERVAL Every 100 hours, Yearly. 1. -
Page 14: Checking The Broom Cable
B. Shear Pin A. Broom Clutch Assembly B. Tab C. 1/8” (3.2 mm) 4. If the shear pin is damaged, remove the pin and replace with a Toro recommended pin. Secure the pin with a nut. Walk-Behind Rotary Broom Service Manual... -
Page 15: Checking The Broom Segments
SPECIFICATIONS & MAINTENANCE Adjusting the Traction Cable Checking the Broom Segments 1. Move the machine to a level surface. If the machine does not drive in the forward or reverse speeds or it drives when you release the traction lever, 2. -
Page 16: Adjusting The Broom Drive
SPECIFICATIONS & MAINTENANCE Adjusting the Wheel Clutch Adjusting the Broom Drive Cable If the broom cable is not properly adjusted see “Checking the Broom Cable” (page 2-9), do the following steps: 1. Squeeze the lever fully, then check the gap between the bottom of the handle and the wheel clutch 1. -
Page 17: Troubleshooting
SPECIFICATIONS & MAINTENANCE Troubleshooting IMPORTANT It is essential that all operator safety mechanisms be connected and in proper operating condition prior to use. When a problem occurs, do not overlook the simple causes. For example: starting problems could be caused by an empty fuel tank.The following table lists some of the common causes of trouble. - Page 18 SPECIFICATIONS & MAINTENANCE Problem Possible Cause Corrective Action 1. The broom assembly is loose 1. Tighten the hardware. Replace the or damaged. broom assembly. 2. The engine mounting bolts are loose. There is abnormal vibration. 2. Tighten the engine mounting bolts. 3.
- Page 19 SPECIFICATIONS & MAINTENANCE NOTES 2-14 Walk-Behind Rotary Broom Service Manual...
-
Page 20: Chapter 3 - Controls
CONTROLS Sub System Handle ............3-2 Sub System Control Panel ..........3-3 Shift Lever ..............3-4 Shift Rod Adjustment ............3-4 Auger Control ..............3-4 Auger Cable Adjustment ..........3-5 Traction Control .............. 3-5 Traction Cable Adjustment ..........3-6 Clutch Cable Replacement Removal......3-6 Replacement .............. -
Page 21: Sub System Handle
CONTROLS Sub System Handle Fig. 001 A. Handle - Upper, RH Curved side of clamp must seat against B. Handle - Upper, LH inner round of upper handle tube. C. Handle - Lower Torque to 17 ft - lbs (23 Nm). Torque to 8 ft - lbs (11 Nm). -
Page 22: Sub System Control Panel
CONTROLS CONTROLS Sub System Control Panel Fig. 002 A. Lever - Clutch F. Cable - Traction Adjust broom cable nut to acheive .125” space to pully B. Lever - Auger G. Cable - Auger arm stop. C. Panel, Control H. Cable - Clutch D. -
Page 23: Shift Lever
CONTROLS Shift Lever 2. Pull the shift rod and arm upward as far as they will go. With the shift lever in R2, adjust the trunion to The shift lever on the control panel is connected to the take the slack out and re-secure. friction wheel in the traction drive by a shift rod. -
Page 24: Auger Cable Adjustment
CONTROLS Auger Cable Adjustment Traction Control 1. The auger cable adjustment should be checked after The traction bail is on the left handle and when the first 2 hours of use and annually thereafter. To squeezed engages the wheel drive system. begin, ensure the auger lever is in the full up position. -
Page 25: Traction Cable Adjustment
CONTROLS Traction Cable Adjustment Clutch Cable Replacement Removal 1. The traction lever should be in the full upright position with some slack in the traction cable to 1. To replace the clutch cables, drain the fuel tank begin adjustment. remove broom and stand the machine forward onto the hood. -
Page 26: Replacement
CONTROLS Replacement 4. Reach under the shift plate and compress the small ears on the cable fitting. The cable fitting can then 1. Feed the lower end of the cable through the shift be pushed out of the shift plate. plate and snap the cable into the plate. - Page 27 CONTROLS 4. Pull the cable jacket down gently until the wheel clutch lever is down and the slack is out of the cable. Tighten the cable clamp nut securely. Fig. 018 5. Squeeze the lever fully and check the gap between the bottom of the handle and the wheel clutch lever end.
-
Page 28: Chapter 4 - Belt Replacement
BELT REPLACEMENT Subsystem Engine............4-2 Auger Belt Removal............4-3 Auger Belt Installation.............4-4 Traction Belt Removal ............4-5 Walk-Behind Rotary Broom Service Manual... -
Page 29: Subsystem Engine
BELT REPLACEMENT BELT REPLACEMENT Subsystem Engine Fig. 001 Torque 135-165 in - lbs (15.5 - 18.9 Nm). A. Engine H. Sheave - Half B. Guide - Belt I. Cover - Belt Apply light coat of anti-sieze to engine crankshaft before C. -
Page 30: Auger Belt Removal
BELT REPLACEMENT BELT REPLACEMENT Auger Belt Removal 3. Remove the bolt securing the engine pulley to the crankshaft. If necessary, you can hold the 1. Remove the belt cover. hub between the pulley and engine to keep the crankshaft from turning (A). Remove the pulley sheave and the auger belt from the crankshaft. -
Page 31: Auger Belt Installation
BELT REPLACEMENT Auger Belt Installation 1. Route a new belt around the broom shaft pulley. 2. Place the belt in the groove of the engine pulley. Install the pulley sheave. Make sure that the keyways line up from the sheave to the pulley. If they are not aligned the sheave will break when tightening. -
Page 32: Traction Belt Removal
BELT REPLACEMENT Traction Belt Removal 4. Move the link to the side and let it rest in the saddle provided. Reach down alongside the link and 1. Remove the auger belt as outlined on page 4-3. remove the belt from the lower pulley. Then remove the belt from the crankshaft pulley. -
Page 33: Belt Replacement
BELT REPLACEMENT 6. Install the auger belt and install the pulley sheave. Make sure that the keyways line up from the sheave to the pulley. If they are not aligned the sheave will break when tightening. Fig. 012 7. Install the belt guide. Check for proper clearance between the belt and the belt guide. -
Page 34: Chapter 5 - Traction Drive System
TRACTION DRIVE SYSTEM Sub System Frame ............5-2 Sub System Clutch Drive..........5-3 Sub System Clutch Pack ..........5-4 Walk-Behind Rotary Broom Service Manual... -
Page 35: Sub System Frame
TRACTION DRIVE SYSTEM Sub System Frame Fig. 001 A. Bracket - Idler Impeller K. Cover Lower Shoulder screw shall be torqued to 170 - 250 in - lbs. B. Impeller Clutch Asm L. Bellcrank - Drive (20-30 Nm). Bellcrank must pivot freely. C. -
Page 36: Sub System Clutch Drive
TRACTION DRIVE SYSTEM Sub System Clutch Drive Fig. 002 A. RH Wheel and Tire Asm. I. Shaft - Intermediate Torque screws to 50 - 70 in - lbs (6 - 8 Nm). B. Wheel - Friction J. Collar - Shift, LH Do not deform plastic. -
Page 37: Sub System Clutch Pack
TRACTION DRIVE SYSTEM Sub System Clutch Pack Fig. 003 A. Retainer - Pin, Pawl E. 32T Sprocket Asm Apply a light coat of oil to dowel pin B. Pawl - Clutch F. Support - Pawl before assembly C. Spring - Compression G. - Page 38 TRACTION DRIVE SYSTEM The freewheel steering system is used on the walk-behind 3. Remove the bottom plate. rotary broom. Handle mounted triggers allow clutching the wheels simultaneously or independently, so one or both wheels can “freewheel”. This feature makes turning, reversing, and traction control simple and efficient.
- Page 39 TRACTION DRIVE SYSTEM 5. Remove both bolts that hold the wheel clutch 8. Unbolt the upper end of the shift brace from assembly to the housing. the housing. Fig. 008 Fig. 011 6. Remove the extension springs. Unhook the spring from the lower clutch collar and housing.
- Page 40 TRACTION DRIVE SYSTEM NOTE 12. Slide the axle shaft out through the bearing retainer Install a washer and screw into each end of the shaft to one at a time, holding onto the 44-tooth gear. keep the parts from sliding off. Fig.
- Page 41 TRACTION DRIVE SYSTEM 15. Remove the two screws from the shift rod bracket 17. Remove the hex shaft assembly/friction wheel from and remove the traction control lever and bracket the housing. assembly from the friction wheel. Fig. 023 Fig. 020 18.
- Page 42 TRACTION DRIVE SYSTEM 20. Remove the hairpin cotter connecting the speed 23. Place the unit back onto the broom housing. control linkage to the pivot pulley plate assembly. 24. Remove the retaining ring from both sides of the housing and slide the nylon bushing off the pivot pulley plate shaft.
- Page 43 TRACTION DRIVE SYSTEM 26. Remove the pivot pulley plate assembly from Drive System Assembly the housing. 1. Install the pivot plate assembly into the housing and install the belt. The idler pulley (A) should be pushed away from you to install the pivot plate. Fig.
- Page 44 TRACTION DRIVE SYSTEM 3. Install the speed control linkage (B) through the pivot 6. Install the friction wheel assembly. Lay the shift plate and install the hairpin cotter (A) into the hole of mechanism onto the housing and insert the shift the speed control linkage on the outside of the shaft into the friction wheel assembly in the pivot plate.
- Page 45 TRACTION DRIVE SYSTEM 7. Before mounting the friction wheel assembly, install 9. Before installing the axle with the 44-tooth sprockets, the chains onto the 8-tooth sprockets making sure apply a light coat of anti-seize to the outer 5” (12 cm) the closed end of the master link is going in the of both ends of the axle shaft.
- Page 46 TRACTION DRIVE SYSTEM 11. The 44-tooth gears should have the hub facing 13. With the woodruff key out of the other side of the inward. shaft as well as all other components, install the axle bearing onto the housing and then slide the shaft in through the bearing and housing, through the two washers, and 44-tooth gear into the tube.
- Page 47 TRACTION DRIVE SYSTEM 15. Position the hole for the hairpin cotter between the 18. Install the wheel clutch assembly with the brace two washers. Push the hairpin cotter into place. shift plate facing away and up towards the housing, Repeat for other side. making sure the collars are correctly installed with the “RIGHT”...
- Page 48 TRACTION DRIVE SYSTEM 22. Install the two extension springs from the lower part 20. Attach the shift brace plate to the housing. of the shift collar flange to the housing. Fig. 054 Fig. 056 21. Torque the two intermediate shaft screws to 170 - 300 in - lbs (19.2 - 33.9 Nm).
- Page 49 TRACTION DRIVE SYSTEM 23. Install the Z-bend of the clutch cable from outside to 25. Install the lower cover. inside of the shift collar. Fig. 061 Fig. 058 26. Install the upper and lower covers, with the upper 24. Install the shift rod/traction rod lever onto the cover overlapping the lower cover.
- Page 50 TRACTION DRIVE SYSTEM Wheel Clutch Disassembly 28. The wheels are installed with the V-tread rotation forward. 1. Remove the 11-tooth gear from the 32-tooth gear by sliding it off the shaft. Fig. 064 Fig. 066 29. Bolt the wheel hub to the axle shaft and torque to 115 +/- 15 in - lbs (13 +/- 1.7 Nm).
- Page 51 TRACTION DRIVE SYSTEM 3. Remove the 32-tooth sprocket gear and the thrust 6. Remove the wheel clutch components from the other washer from the shaft. end of the shaft. Fig. 068 Fig. 071 4. Remove the shift collar and flat washer from the shaft.
- Page 52 TRACTION DRIVE SYSTEM Wheel Clutch Assembly 9. Remove the retainer plate off the gear hub. NOTE Apply a light coat of SAE 30W oil to the intermediate shaft before assembly. 1. Set the 32-tooth gear on a flat surface and install the pawls.
- Page 53 TRACTION DRIVE SYSTEM 7. Slide the flat washers next to the guides. 3. Clamp or hold the gear and turn it over to properly install the three pawl supports and Torx screws. Fig. 081 Fig. 079 8. Install the RIGHT and LEFT collar. 4.
- Page 54 TRACTION DRIVE SYSTEM 12. Install the flat washer. 9. Install the compression springs under the pawls. 13. Make sure the 11-tooth gear slides on so it is flush with the end of the shaft. Fig. 084 10. Slide the thrust washer onto the 32-tooth Fig.
- Page 55 TRACTION DRIVE SYSTEM 15. Apply a light coat of anti-seize to the 11-tooth gear. Repeat for the opposite side. Fig. 089 16. Install the assembly into the housing. Fig. 090 After installation, rotate the left and right collars fully to the stop.
- Page 56 BROOM HEAD Subsystem Broom ............6-2 Broom Mounting ............. 6-3 Broom Core ..............6-4 Walk-Behind Rotary Broom Service Manual...
-
Page 57: Subsystem Broom
BROOM HEAD Subsystem Broom Fig. 001 A. Frame D. Shaft Silver grade anti-sieze applied to gearbox B. Arm - Right E. Gearbox - Worm splined shaft interface with driveline. C. Arm - Left F. Hood - Broom Walk-Behind Rotary Broom Service Manual... -
Page 58: Broom Mounting
BROOM HEAD Broom Mounting Fig. 002 A. Frame - Mounting D. Pin - Swing Cable/pin set position - measurement B. Driveline E. Cable - Broom Angle from top thread start to top of jam nut C. Pulley - Impeller is .31” (5/16”) +/- .05” (3/64”). Silver grade anti-sieze applied to driveline interface with gearbox splined shaft. -
Page 59: Broom Core
BROOM HEAD Broom Core Fig. 003 A. Core, Broom B. Segment - Poly C. Plate - End, Retainer Walk-Behind Rotary Broom Service Manual... -
Page 60: Filament Removal
BROOM HEAD Filament Removal 3. Tip machine back on its handles to remove broom assembly. Slide broom spline shaft out of coupler. 1. Drain fuel from fuel tank. 2. Remove pillow block bearing bolts (4) on broom shaft Fig. 005 4. -
Page 61: Replacement Filament Installation
BROOM HEAD Replacement Filament Installation 2. Continue to add replacement sections, alternating locator pins to the next shaft tube as you place 1. Stand broom shaft on one end. Begin adding additional sections (Fig. 009). replacement filaments. Fig. 009 Fig. 007 3. - Page 62 BROOM HEAD 4. Repeat this procedure for the opposite side of the broom shaft. 5. Place the broom assembly on the floor so that the gearbox shaft is closest to the floor. 6. Apply silver grade anti-seize to gear box splined shaft end. Slide the broom back into the machine just far enough to install the drive shaft into the spline coupler.
- Page 63 LCE/Residential Products/ Siteworks ® Walk-Behind Rotary Broom 2014 Power Clear 418/621 Service Manual Service Manual Form Number 492-9342...