Honeywell touchpoint Pro Operating Instructions Manual
Hide thumbs
Also See for touchpoint Pro:
- Operating manual (100 pages) ,
- Technical handbook (200 pages) ,
- Security manual (12 pages)
Table of Contents
Advertisement
Quick Links
Advertisement
Table of Contents

Related Manuals for Honeywell touchpoint Pro


Summary of Contents for Honeywell touchpoint Pro
- Page 1 Operating Instructions Touchpoint Pro...
-
Page 2: Table Of Contents
19” Rack mounted unit Panel Mount Controller Touchpoint Pro Battery Box 3.7.1 Siting considerations 3.7.2 Installation and Assembly 3.7.2.1 Mounting the Touchpoint Pro Battery Box to a wall 3.7.3 Touchpoint Pro Battery Box Assembly Cooling and Ventilation Electrical Installation Power Consumption Power Supply 4.2.1... - Page 3 Field devices 4.3.3 Power Supplies 4.3.4 Bus interfaces 4.3.5 Ethernet 4.3.6 Touchpoint Pro Battery Box Cabling Requirements – Additional info for assembly by system integrators 4.4.1 24 Vdc Power - Controller 4.4.2 Internal network connections Ring Network Distance Restrictions Earthing...
- Page 4 7.12 Access Diagnostic information 7.13 Check the capacity of the SD Card 7.14 Access Help 7.15 System State Relays Maintenance Testing the Touchpoint Pro System 8.1.1 Introduction 8.1.2 Field Inputs Test 8.1.3 Configuration Settings Test 8.1.4 Cause and Effect Test Routine maintenance...
- Page 5 EC declaration of conformity 11.2 Applicable National and International Standards 11.3 National and International Certificates Ordering Information 12.1 TPPR-M Input and Output Configurator (I/O Configurator) 12.2 Touchpoint Pro Control System Part Number Generator 12.3 TPPR-V Controllers and Remote Units 12.4 TPPR-H Enclosures 12.5 TPPR-W PSUs Honeywell Analytics Product Warranty...
- Page 6 MAN0923_Issue 3_04/15 Touchpoint Pro Operating Instructions Contents 14.1 Introduction 14.2 Installation 14.2.1 Installing the Bus Interface Board (Upgrade or OEM Assembly by system integrators) 14.2.2 Cable recommendation 14.2.3 Electrical connections 14.2.4 Configuration Examples 14.2.5 Termination resistor 14.2.6 Multi-drop mode 14.3 Configuration 14.4...
- Page 7 MAN0923_Issue 3_04/15 Touchpoint Pro Operating Instructions Contents 15.2.5 Display Settings 15.2.6 Suppression Settings 15.2.7 Threshold Alarm 1 Settings 15.2.8 Threshold Alarm 2 Settings 15.2.9 Threshold Alarm 3 Settings 15.2.10 Threshold Alarm Hysteresis 15.2.11 Rate Alarm Settings 1 15.2.12 Rate Alarm Settings 2 15.2.13...
-
Page 8: Safety And Information
MAN0923_Issue 3_04/15 Touchpoint Pro Operating Instructions 1. Safety and Information The Equipment referred to in this manual contains components and assemblies that are each certified for use in a variety of differing environments, and it is the site owner’s responsibility to confirm the suitability of the equipment prior to its installation and use. The Equipment assemblies referred to in this manual are collectively certified for use in a flammable gas detection system only. Any other use is not currently certified and is not authorised by the manufacturer. For installation in Canada and the USA, for both ordinary and hazardous locations, all connections, cabling, overcurrent protection and installations must strictly adhere to both the National Electrical Code (NEC) and the Canadian Electrical Code (CEC). - Page 9 Installation must be in accordance with the recognized standards of the appropriate authority in the country concerned. Refer to local, national and company regulations. Do not operate the Touchpoint Pro system or its components outside of their rated operating specification.
- Page 10 3. Do not use sharp objects to operate the touchscreen as this could irreparably damage the User Interface and adversely affect its IP rating. 4. Use only soft, damp cloths or screen wipes to clean the Touchpoint Pro. Do not use solvents or abrasives as they will damage the User Interface.
-
Page 11: How To Use This Manual
Overview An overview of the Touchpoint Pro system and its components Mechanical Installation Instructions for mechanical installation of Touchpoint Pro units, as well as details for system integrator customers of how to assemble a system Electrical Installation Instructions for electrical installation of Touchpoint Pro units, including power supply... -
Page 12: Safety Hazards
1. Safety and Information 1.2 Safety Hazards The following specific hazards are associated with the use of this equipment: Danger – Ignition Hazard The Touchpoint Pro Controller is NOT ATEX/IECEx safe, and it may only be installed in safe areas where there are no flammable atmospheres, and no oxygen concentrations >25% v/v O The Touchpoint Pro range includes a wall mounted enclosure that is certified as ATEX/IECEx Zone 2, Class I Div 2 and Class I (Zone 2) safe, but this enclosure can only be installed as a remote unit. - Page 13 Caution – Risk of Injury and Damage Touchpoint Pro enclosures are heavy and may become unstable when moved. Always wear PPE and ensure that mechanical means and sufficient personnel are available to assist when moving or handling these items. Please contact your Honeywell authorised representative if you need further advice on any of the above.
-
Page 14: Location And Description Of Warning Labels
MAN0923_Issue 3_04/15 Touchpoint Pro Operating Instructions 1. Safety and Information 1.3 Location and Description of Warning Labels 1.3.1 Safety Warning Labels Warning labels are mounted in specified locations on the equipment. This is to indicate conditions under which the user could be subjected to electrical hazards. WARNING WARNING ISOLATE SUPPLIES BEFORE HAZARDOUS LIVE CIRCUIT SERVICING OR MAINTENANCE... -
Page 15: Equipment Rating Labels (Hazardous Locations)
Certified Figure 5 - Example Remote Wall Mount (Zone 2 Div 2) Rating Label Figure 6 - Touchpoint Pro AIM mA Rating Label Note: Similar labels appear on AIM mV, DIM, RCM, ROM Modules and the Backplanes. Note: The CE mark and Notified Body number 0518 shown on labels does not apply to Type ‘n’ approval. -
Page 16: Disposal
Casing – Polyamide PA 6.6 V0 (UL94), green Contents – printed circuit boards 1.4.2 Packaging Touchpoint Pro outer packaging is made from cardboard. Facilities for recycling are widely available. Touchpoint Pro inner packaging (used inside the Wall Mounted Enclosure) is made from Stratocell ®... -
Page 17: Batteries
1.5 Restriction of Hazardous Substances (RoHS) Directive Touchpoint Pro is compliant with the requirements of the RoHS Directive. 1.6 Waste Electrical and Electronic Equipment (WEEE) Directive This symbol indicates that this product and/or parts of the product may not be treated as household or municipal waste. -
Page 18: Information
The reader of this Operating Manual should ensure that it is appropriate in all details for the exact equipment to be installed and/or operated. If in doubt, contact Honeywell Analytics for advice. The following types of notices are used throughout this Operating Manual: WARNINGS Identifies a hazardous or unsafe practice which could result in severe injury or death to personnel. -
Page 19: Overview / Introduction
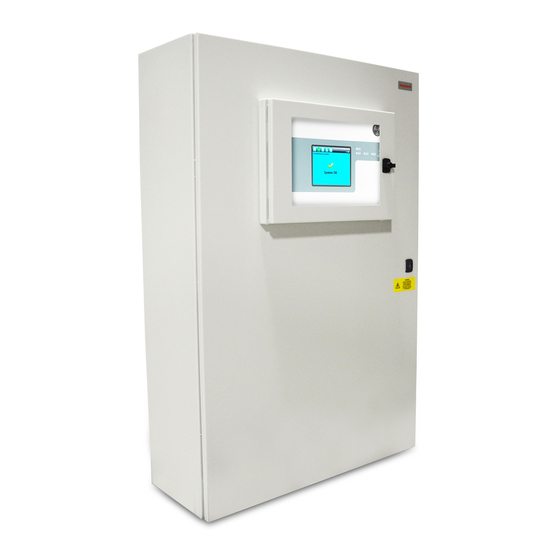
The heart of Touchpoint Pro is the Controller, which includes the User Interface. The User Interface features a full colour liquid crystal display (LCD) with touch screen, and provides engineers with an intuitive solution to system set-up and deployment. -
Page 20: Touchpoint Pro Controller
3 km (cable length) for the complete system. The only connection required between the Controller and Remote units is the network cable. The Remote Touchpoint Pro unit can be housed in any of the standard Touchpoint Pro Enclosures, a 19” rack, or a suitable third party enclosure. -
Page 21: System Topology
Gas Detectors Fig 2.3 Touchpoint Pro Controller The Ring Network is the communication link between all I/O modules in a Touchpoint Pro system and the Control Centre Board. The Ring Network is the only connection required between a Touchpoint Pro Controller (containing the Control Module and User Interface) and Remote Touchpoint Pro units. -
Page 22: Input/Output (I/O) Modules
Fig 2.4 Ring Network 2.6 Input / Output (I/O) modules Various types of I/O modules are available, each containing four channels. A single Touchpoint Pro system can contain up to 64 input channels (16 input modules) and 128 output channels (32 output modules). -
Page 23: Available Modules
• Accept and reset buttons on the front panel of the Touchpoint Pro Controller • Power, Alarm, Fault and Inhibit LEDs on the front panel of the Touchpoint Pro Controller • Buzzer on the Touchpoint Pro Controller Further System Interfaces consist of: •... -
Page 24: Sensor Catalogue
Laptop Configuration (PC Configuration Software) Gateway Touchpoint Pro Configuration and Visualisation Controller (Touchscreen, LEDs, Sounder, Buttons) Removable Memory Visualisation (Web Server) Master Relays Fig 2.5 Touchpoint Pro Interfaces 2.8 Sensor Catalogue For convenient sensor configuration, the Touchpoint Pro Controller is loaded with a sensor catalogue, which contains a complete listing of all Honeywell Analytics’ gas sensors, each with a full default configuration setting. A user can choose to configure input channel settings from the sensor catalogue, resulting in a three step configuration process – select channel ID, program channel tags and select sensor and gas. The rest of the configuration will be loaded automatically. The full configuration can be viewed afterwards, and individual parameters changed if desired. -
Page 25: Power Supply Options
480 W (20 A at 24 Vdc) The power supplies have status outputs which can be connected to dedicated inputs on the Touchpoint Pro Controller to give a signal if there is a failure of an individual power supply unit. -
Page 26: Touchpoint Pro Ups Module With Backup Battery
Operating Instructions 2. Overview / Introduction 2.9.3 Touchpoint Pro UPS Module with Backup Battery The UPS Module can be used in combination with the separate Touchpoint Pro Battery Box to protect against failure of the AC supply, as shown below: Battery... -
Page 27: Mechanical Installation
All signal cables should be protected from stray or induced current, especially if you are re-using existing cables with a new Touchpoint Pro installation. 3.2 Wall Mounted Enclosures There are a range of wall mounted enclosures available for Touchpoint Pro - small, medium and large mild steel versions. - Page 28 Incorrect Figure 3.1 Touchpoint Pro wall mounting brackets orientation Caution: The Touchpoint Pro enclosure is heavy (refer to table of typical weights, single person lift is not recommended). Before lifting the enclosure, consider and implement control measures to reduce the risk of injury. Refer to local safety regulations.
-
Page 29: Small Wall Mounted Enclosure – Mild Steel
R4,5 TYP R7,5 TYP Figure 3.2 Touchpoint Pro Small Wall Mounted Enclosure - Mild Steel 3.2.2 Medium Wall Mounted Enclosure – Mild Steel The dimensions of the medium wall mounted unit (Controller or Remote) are shown below (all dimensions in... -
Page 30: Large Wall Mounted Enclosure – Mild Steel
3. Mechanical Installation 3.2.3 Large Wall Mounted Enclosure - Mild Steel The dimensions of the large wall mounted unit (Controller or Remote) are shown below (all dimensions in mm): Figure 3.4 Touchpoint Pro Large Wall Mounted Enclosure - Mild Steel... -
Page 31: Hazardous Area Enclosure
3. Mechanical Installation 3.3 Hazardous Area Enclosure Caution: The Touchpoint Pro enclosure is heavy (refer to table of typical weights, single person lift is not recommended). Before lifting the enclosure, consider and implement control measures to reduce the risk of injury. Refer to local safety regulations. -
Page 32: Floor Standing Enclosures
3. Mechanical Installation 3.4 Floor Standing Enclosures Caution: The Touchpoint Pro enclosure is heavy (refer to table of typical weights). Before lifting the enclosure, consider and implement control measures to reduce the risk of injury. Refer to local safety regulations. -
Page 33: Floor Standing Cabinet - Front Access
MAN0923_Issue 3_04/15 Touchpoint Pro Operating Instructions 3. Mechanical Installation 3.4.1 Floor Standing Cabinet - Front Access The front access floor standing cabinet is available in options with no ventilation, natural ventilation or forced ventilation. The dimensions are shown below (all dimensions in mm): Front View Right View PLINTH Figure 3.6 Front Access No Ventilation... - Page 34 MAN0923_Issue 3_04/15 Touchpoint Pro Operating Instructions 3. Mechanical Installation Front View Right View PLINTH Figure 3.7 Front Access Natural Ventilation Front View Right View PLINTH Figure 3.8 Front Access Forced Ventilation...
-
Page 35: Floor Standing Cabinet - Rear Access
MAN0923_Issue 3_04/15 Touchpoint Pro Operating Instructions 3. Mechanical Installation 3.4.2 Floor Standing Cabinet - Rear Access The rear access floor standing cabinet is available in options with no ventilation, natural ventilation or forced ventilation. The dimensions are shown below (all dimensions in mm): Front View Rear View Right View PLINTH PLINTH Figure 3.9 Rear Access No Ventilation... - Page 36 MAN0923_Issue 3_04/15 Touchpoint Pro Operating Instructions 3. Mechanical Installation Front View Rear View Right View PLINTH PLINTH Figure 3.11 Rear Access Forced Ventilation...
-
Page 37: Rack Mounted Unit
MAN0923_Issue 3_04/15 Touchpoint Pro Operating Instructions 3. Mechanical Installation 3.5 19” Rack mounted unit This module is designed to fit into an industry standard 19” rack, with a height of 5U. The dimensions of the 19” rack mounted unit (Controller or Remote version) are shown below (all dimensions in mm): 483 mm 462.1 mm Figure 3.12 19” Rack dimensions The weight of the unit is 10 kg. - Page 38 MAN0923_Issue 3_04/15 Touchpoint Pro Operating Instructions 3. Mechanical Installation The weight of the unit is 1 kg. The dimensions of the required cut out for the panel are 368 mm (W) x 232 mm (H). A bezel mounting kit is supplied to enable the panel to be neatly mounted in an enclosure.
-
Page 39: Touchpoint Pro Battery Box
• The Touchpoint Pro Battery Box should have a clearance of 200 mm to either side, and there should be no heat sources below or adjacent to the unit. •... - Page 40 MAN0923_Issue 3_04/15 Touchpoint Pro Operating Instructions 3. Mechanical Installation Caution: Do not block the vents The dimensions of the Touchpoint Pro Battery Box and mounting points are shown below.
-
Page 41: Touchpoint Pro Battery Box Assembly
8 mm, to a depth of minimum 50 mm. Caution: It is the installer’s responsibility to select the appropriate fixings taking into account the structure of the mounting surface and the weight of the enclosure. 3.7.3 Touchpoint Pro Battery Box Assembly Identify all required parts as follows: •... - Page 42 MAN0923_Issue 3_04/15 Touchpoint Pro Operating Instructions 3. Mechanical Installation 3. Insert the first battery and slide to the right. Note: The battery mounting plate is offset. Fit the right hand battery first to avoid the second battery being restricted by the enclosure. 4. Insert the second battery. Note: Ensure that the batteries are orientated as shown in the diagram, large batteries with the terminals at the centre of the enclosure, small batteries with the terminals at the front of the enclosure.
-
Page 43: Cooling And Ventilation
15. On completion of installation, close and lock the enclosure door. WARNING Unauthorised modification of the Touchpoint Pro system or components is not allowed, as this will invalidate the legal certifications and may render the system dangerous or inoperable. 3.8 Cooling and Ventilation The following items may be supplied with your purchase. -
Page 44: Electrical Installation
Touchpoint Pro disconnect device. The wiring used between the isolator and Touchpoint Pro must be appropriately rated and approved. -
Page 45: Dc Power Input
Ensure that the power supply is able to maintain sufficient voltage level for the connected field devices. 4.2.3 DC Power Output Touchpoint Pro power output can be adjusted to between 24 Vdc and 28 Vdc (default 24 Vdc). Touchpoint Pro power supplies include a DC OK relay, which is closed when the output voltage reaches the adjusted output voltage level, and opens when the output voltage dips more than 10% below the adjusted output voltage level. -
Page 46: Ring Network
4.3.6 Touchpoint Pro Battery Box The cable between the Touchpoint Pro System UPS and the Touchpoint Pro Battery Box must be 4 mm UL/CSA approved wiring material, tri-rated (105 °C). The maximum cable length between the Battery Box and the UPS is 5 m. Bootlace ferrules must be used on all terminations. -
Page 47: Vdc Power - Controller
Please refer to the Ring Network cable recommendations given above. 4.5 Ring Network Distance Restrictions The total round trip distance of the Touchpoint Pro network must not exceed 3 km (1.86 miles). The distance between individual Touchpoint Pro units (e.g. between a Controller and a Remote Unit) must not exceed 1 km (0.62 miles). -
Page 48: Earthing
The Wall mount enclosures contain a pre-fitted screen bar for earthing the field cables.A suitable termination is provided for the ring cables and earth terminals for all others. It is recommended that an earth screen bar be installed in the Touchpoint Pro enclosure / rack to connect the field and network cable screens. If armoured or steel wire braided cable is used for field devices, and earthed in the field, it is recommended that care is exercised to avoid earth (ground) loops by preventing cable armour from coming into contact with the TPPR enclosure or cable screening. - Page 49 MAN0923_Issue 3_04/15 Touchpoint Pro Operating Instructions 4. Electrical Installation • Instrument Earth is preferred to connect the cable screen • Risk is that screen is connected at both ends = earth loops Three Core Cable with Screen Earthed at Contoller...
-
Page 50: Emc / Rfi Considerations
European Standards for RFI and EMC. The cable screen should be properly terminated to earth at one end only (the Touchpoint Pro side) to avoid earth loops. All screens should be terminated at the instrument earth bar provided in the enclosure. -
Page 51: Electrical Connections
Operating Instructions 4. Electrical Installation 4.8 Electrical Connections 4.8.1 Touchpoint Pro Power Supplies Caution - TPPR power supplies are supplied already wired. Do not modify any factory fitted cabling 4.8.1.1 120 W DC 24 V Power Supply Unit Note: The power supply units are equipped with spring-clamp terminals. - Page 52 MAN0923_Issue 3_04/15 Touchpoint Pro Operating Instructions 4. Electrical Installation 4.8.1.2 240 W DC 24 V Power Supply Unit Note: The power supply units are equipped with spring-clamp terminals. Figure 4.7 240 W PSU Label Purpose AC Supply Neutral AC Supply Line...
- Page 53 MAN0923_Issue 3_04/15 Touchpoint Pro Operating Instructions 4. Electrical Installation 4.8.1.3 480 W DC 24 V Power Supply Unit Note: The power supply units are equipped with spring-clamp terminals. Figure 4.8 480 W PSU Label Purpose AC Supply Neutral AC Supply Line...
-
Page 54: Power Redundancy Module
MAN0923_Issue 3_04/15 Touchpoint Pro Operating Instructions 4. Electrical Installation 4.8.2 Power Redundancy Module Failure Monitor Input Input 24V, 20A 24V, 20A Power Power Redundancy Supply Supply Module Output L N PE L N PE Load Figure 4.9 Power Redundancy Module... -
Page 55: Ups And Battery Box
Label Purpose DC Supply +V DC Supply -V Input DC 24 V DC Supply -V (spare) +V Supply to Touchpoint Pro system Output DC 24 V 20 A -V Supply to Touchpoint Pro system Battery + Battery Battery - The UPS is equipped with status relays as follows:... - Page 56 When handling the batteries, take great care not to connect the terminals together, e.g. by a tool such as a screwdriver. Note: The maximum cable length between the Touchpoint Pro Battery Box and the Touchpoint Pro System UPS is 5 m. Wire size must be 4 mm...
-
Page 57: Analogue Input Module 4-20 Ma
Note: The isolator is designed to be located in the centre of the DIN rail, do not move it from this location. 4. Connect the Touchpoint Pro Battery box to protective earth. An earth stud (M8) is provided for this purpose. - Page 58 MAN0923_Issue 3_04/15 Touchpoint Pro Operating Instructions 4. Electrical Installation Touchpoint Pro 3 Wire Detector +24 Vdc 4-20 mA 101 Ω 0 Vdc Figure 4.10 Three wire device 2 Wire Detector Touchpoint Pro +24 Vdc 4-20 mA 101 Ω 0 Vdc...
- Page 59 MAN0923_Issue 3_04/15 Touchpoint Pro Operating Instructions 4. Electrical Installation 2 Wire Detector Touchpoint Pro Barrier +24 Vdc 4-20 mA 101 Ω 0 Vdc Figure 4.12 Two wire device with a barrier Note: For intrinsically safe (I.S.) field devices, please refer to the device manufacturer’s instructions for details of suitable approved I.S.
-
Page 60: Analogue Input Module Mv Bridge
Note: Channel wiring is from left to right for terminals on the top and bottom of the module. It is not possible to move a plug from top to bottom of a module after wiring. Please ensure correct wiring by system verification tests. See Commissioning, First Time Switch On, and Maintenance, Testing the Touchpoint Pro System Terminal Identification Label... -
Page 61: Digital Input Module
Please ensure correct wiring by system verification tests. See Commissioning, First Time Switch On, and Maintenance, Testing the Touchpoint Pro System. DIMs have two modes of operation. A DIM channel may be configured to generate an alarm, fault or warning signal when activated. -
Page 62: Relay Output Module
Please ensure correct wiring by system verification tests. See Commissioning, First Time Switch On, and Maintenance, Testing the Touchpoint Pro System The Relay Output Module (ROM) provides relay outputs to switch field devices such as sounders, beacons and actuators. In addition, an auxiliary voltage supply is available to provide power to such devices. - Page 63 MAN0923_Issue 3_04/15 Touchpoint Pro Operating Instructions 4. Electrical Installation The auxiliary voltage supply can provide 18-32 Vdc (24 Vdc nominal) to the field devices at a maximum current of 1.5 A per channel, with the additional limitation that the total current drawn from the module must not exceed 1.5 A. The supply is short circuit protected – if a short circuit is detected the supply to all four channels will be disconnected to prevent damage to the module.
-
Page 64: Ring Coupling Module
MAN0923_Issue 3_04/15 Touchpoint Pro Operating Instructions 4. Electrical Installation Touchpoint Pro +24 Vdc VAux+ VAux- 0 Vdc Figure 4.19 ROM connection 4.8.8 Ring Coupling Module Terminal Identification Label Channel Ring A In Drain Ring B Out Drain Ring B in... - Page 65 MAN0923_Issue 3_04/15 Touchpoint Pro Operating Instructions 4. Electrical Installation Figure 4.20 Ring screen clamp Local Remote Ring A out Ring A in Ring B in Ring B out Drain Drain Screen Ring A in Ring A out Ring B out...
- Page 66 MAN0923_Issue 3_04/15 Touchpoint Pro Operating Instructions 4. Electrical Installation 4.8.9 System State Relays The System State Relay connections are found at TB4 and TB5 on the Control Module. They are rated at 30 Vdc 3 A or 250 Vac 3 A.
- Page 67 MAN0923_Issue 3_04/15 Touchpoint Pro Operating Instructions 4. Electrical Installation The PSU Status Inputs are supplied with the following configuration. PSU Status Input Function 1 PSU – DC OK UPS – BAT RDY UPS – BAT RPL Temperature Sensor (Forced Ventilation Only) If the UPS or the forced ventilation options are not being used, those inputs can be configured by the user to act as Global Acknowledge, Global Reset or Global Inhibit.
- Page 68 The table also shows which functions are not available via the Web Server for safety reasons (for example, Calibration). Touchpoint Pro is supplied with a default Administrator level account. For security reasons this will be attached to the system touchscreen. When the system is configured, at least one new Administrator account should be created.
- Page 69 MAN0923_Issue 3_04/15 Touchpoint Pro Operating Instructions 5. User Interface Engineer can create users with Engineer level access or lower. Caution: Forgotten or deleted passwords cannot be recovered. It is therefore advisable to have two Administrators so that one can replace the passwords of any other users.
- Page 70 MAN0923_Issue 3_04/15 Touchpoint Pro Operating Instructions 5. User Interface System Configuration Channel Name Settings View Channel Configuration CCB Management CCB Configuration User Management System Setup Channel Pop-Up Channel Source Data Commission Channel Decommission Channel Pop-Up Module Pop-Up Commission Module Replace Module...
- Page 71 MAN0923_Issue 3_04/15 Touchpoint Pro Operating Instructions 5. User Interface Calibration Reminder Settings Calibration Signal Settings Calibration Span Gas Settings Inhibit Signalling Settings Fault Signalling Settings 1 Custom Fault X Detail Settings Fault Signalling Settings 2 Digital Input Settings Alarm Settings...
- Page 72 Please contact your local Honeywell supplier or distributor to obtain a 12-month user licence. They will need your Company details, a valid e-mail address, and the serial number of the Touchpoint Pro system. In return, they will e-mail you the licence token and details on how an authorised Honeywell Engineer can install it in the system, and details on how to activate the licence on a maximum of five PCs.
- Page 73 Note: the PC Configuration Software is compatible with Windows 7. Please refer to Chapter 6, Commissioning for the necessary settings. 5.7 SD Card The SD card is used to store the event history of the system. Touchpoint Pro logs all events and all changes to input readings. A notification will be given when the SD card is 80% full. If the card is not replaced, a further notification will be given when it is full, and when data is being overwritten.
- Page 74 MAN0923_Issue 3_04/15 Touchpoint Pro Operating Instructions 5. User Interface WARNING! SD Memory Card Remove top and bottom Plugs BOTTOM of TB9, TB8, before opening the cover. Screen_TB9 Screen_TB8 PSU2_Stat 2 PSU4_Stat 2 PSU4_Stat 1 PSU2_Stat 1 PSU3_Stat 2 PSU1_Stat 2...
- Page 75 3. The system start up sequence lasts for 3 - 10 minutes depending on the size of the system 4. When start up is completed, Touchpoint Pro will display the System Status screen, indicating the current status of the system Note: If Analogue Input mV Bridge channels have been configured but not calibrated, the channels will be in Inhibit, which will be indicated on the System Status screen.
- Page 76 4. Select the language required (English (default), French, German, Spanish. Italian, Dutch or Russian) 5. Press Save 6. If the time zone or language has been changed, the User Interface software will reboot to apply the new settings Note: During the restart of the User Interface software, the Touchpoint Pro system remains available...
- Page 77 Note: If the date and time are changed to a time in the past (for example ending daylight savings time), Touchpoint Pro will retain the backup of previous data but this backed up data will not be available in the generated reports.
- Page 78 4. To access the Web Server from a remote PC connected to the network, navigate to https:// <IP Address> Note: The Web Server can only be accessed after the Touchpoint Pro system has completed its start up sequence Note: If the Subnet Mask is set to 255.255.0.0, this means that the first two bytes of the IP Address must match both in the controller and the device that is trying to connect to it.
- Page 79 6.6 Setup PC Configuration Software (optional) Note: Engineer level access is required To connect a PC to Touchpoint Pro via the Ethernet port, the TCP/IP settings in the Touchpoint Pro and the PC must be configured appropriately. Note: PC Screen Resolution is limited to 1024 x 768. Other resolutions may show a grey patch, which does not affect the software operation.
- Page 80 Operating Instructions 6. Commissioning To access the TCP/IP settings: 1. On the Touchpoint Pro Controller touchscreen, from the System Status screen select the Extras icon then Global Settings 2. Select “TCP/IP Settings” to display the current values 3. Select “Edit” to change the values as appropriate to match the PC being used Note: If the Subnet Mask is set to 255.255.0.0, this means that the first two bytes of the IP Address must...
- Page 81 6. Commissioning Figure 6.3 PC Configuration Interface 6.7 Verify Default Configuration and Program Tags Note: Read this section ONLY if your system has been programmed by Honeywell Analytics with the default configuration during manufacture. Otherwise proceed to section 6.8 If the system has been delivered with a default configuration, then all Analogue Input channels (mA and mV) have been configured. This section explains how to verify that the channel configuration is correct, and how...
- Page 82 MAN0923_Issue 3_04/15 Touchpoint Pro Operating Instructions 6. Commissioning 14. The system will return the new value, press Accept to confirm 15. Press Exit and close the menu window 16. Repeat steps 7 – 15 for each configured channel 17. Proceed to section 6.8 Figure 6.4 System Setup Data 6.8 Commission Input / Output Modules Note: Administrator level access is required 1.
- Page 83 MAN0923_Issue 3_04/15 Touchpoint Pro Operating Instructions 6. Commissioning Note: After network initialisation, the Input / Output modules are shown according to their physical order on the Ring A network (clockwise). As soon as the module ID is assigned (Input / Output module is commissioned), the Input / Output modules will be sorted according to the assigned module ID (M01, M02, etc.).
- Page 84 MAN0923_Issue 3_04/15 Touchpoint Pro Operating Instructions 6. Commissioning 6.9.2 Configuring a Channel Note: Have the configuration information to hand Note: When you enter the System Setup menu, a configuration timeout is active separate to the user login timeout. If no values are sent to the system for 20 minutes, you will be logged out of configuration. If a first time channel configuration has not been completed, all changes will be erased and the channel will be decommissioned.
- Page 85 6.9.4 Removing an I/O Module It is good engineering practice to remove modules from the software before physically removing them from the Touchpoint Pro, even if you consider the module(s) to be unserviceable or beyond repair. To remove a module: 1.
-
Page 86: Commission Power Supply Unit Status Channels
MAN0923_Issue 3_04/15 Touchpoint Pro Operating Instructions 6. Commissioning 6.10 Commission Power Supply Unit Status Channels Note: The PSU Status Inputs do not need to be used to monitor the power supplies if this function is not required. They can also be configured to be used as Global Acknowledge, Global Reset or Global Inhibit. -
Page 87: Buzzer Activation And Button Password Protection
6. Commissioning 6.12 Buzzer Activation and Button Password Protection The Touchpoint Pro buzzer can be configured to determine under which conditions it activates. There is also a facility to password protect the Accept and Reset buttons on the Touchpoint Pro front panel. 1. If not already logged in, login with a valid administrator level user name 2. From the System Status screen select the Extras icon then System Configuration 3. -
Page 88: Calibrate Touch Panel
6.15 Back up Configuration Note: Engineer access level is required It is recommended to back up the Touchpoint Pro system configuration once it is completed. Note: Touchpoint Pro will prompt for a configuration back up after any configuration parameter is changed. Note: The USB Device port is not EMC safe and is for maintenance use only. To back up the configuration: 1. -
Page 89: Calibrate Mv Input Channels
For catalytic bead type detectors, the Touchpoint Pro Analogue Input Module forms part of the measuring circuit. Therefore all commissioned mV channels remain in Inhibit state until they are calibrated. Touchpoint Pro monitors the ageing of catalytic bead detectors and can provide a warning when a sensor should be replaced. Please select First Span when calibrating a new or replacement sensor for the first time, and Span for all calibrations thereafter. -
Page 90: Calibrate Ma Input Channel Loops
100% v/v Nitrogen, and the span gas should normally be air at 20.9% v/v Oxygen. The Touchpoint Pro controller calibration should not be used to correct deficiencies in the sensor calibration; instead carry out a gas calibration at the sensor according to the manufacturer’s instructions. - Page 91 MAN0923_Issue 3_04/15 Touchpoint Pro Operating Instructions 6. Commissioning 1. If not already logged in, login with a valid engineer level user name 2. From the System Status screen select the Inputs icon then select the channel to be calibrated 3. Select Calibration from the popup menu 4.
-
Page 92: Normal Operation
7.1 Safety Function During normal operation: • The Touchpoint Pro system will collect data every 250 ms from all of the Input/Output modules on the Ring Network • The Cause and Effect matrix will be evaluated every 250 ms, and commands sent accordingly to the appropriate output channels. - Page 93 MAN0923_Issue 3_04/15 Touchpoint Pro Operating Instructions 7. Normal Operation Figure 7.1 System Status Screen Figure 7.2 System Status Screen with Active Events...
-
Page 94: Navigation - Inputs And Outputs Screens
MAN0923_Issue 3_04/15 Touchpoint Pro Operating Instructions 7. Normal Operation 7.2.2 Navigation - Inputs and Outputs Screens The icons in the navigation bar are used to navigate through the User Interface Software. System Status screen Inputs Outputs Back Figure 7.3 Examples of Input/Output screens... -
Page 95: Navigation - Active Events
MAN0923_Issue 3_04/15 Touchpoint Pro Operating Instructions 7. Normal Operation 7.2.3 Navigation - Active Events Active Events Filter Figure 7.4 Example of navigating through Active Events Inputs 7.2.4 Login To login to the system you must have a user name and password. -
Page 96: Overview – Web Server Interface
Chapter 5 – User interface, Access Levels for details. 7.3.1 Start the Web Server To use the Web Server, the Touchpoint Pro system must be connected to a network, please refer to Chapter 6 - Commissioning, Setup Web Server for details. - Page 97 MAN0923_Issue 3_04/15 Touchpoint Pro Operating Instructions 7. Normal Operation Figure 7.5 Web Server System Status Screen Figure 7.6 Web Server System Status Screen with Active Events...
-
Page 98: Navigation – Inputs And Outputs Screens
MAN0923_Issue 3_04/15 Touchpoint Pro Operating Instructions 7. Normal Operation 7.3.3 Navigation – Inputs and Outputs Screens System Status screen Inputs Outputs Back Event History Figure 7.7 Web Server Input and Output Screen Navigation... -
Page 99: Navigation – Active Events
MAN0923_Issue 3_04/15 Touchpoint Pro Operating Instructions 7. Normal Operation 7.3.4 Navigation – Active Events Active Events Inputs Figure 7.8 Web Server Active Event Navigation Filter 7.3.5 Navigation – Extras Extras Login User is logged in Figure 7.9 Web Server Extras... -
Page 100: Alarms
MAN0923_Issue 3_04/15 Touchpoint Pro Operating Instructions 7. Normal Operation 7.4 Alarms WARNING High ‘off-scale’ readings may indicate an explosive concentration. AVERTISSEMENT Des résultats dépassant considérablement l’échelle peuvent être indicateurs d’une concentration explosive. 7.4.1 View active alarms Active alarms can be viewed in three ways: 1. -
Page 101: Acknowledge An Active Alarm
When an alarm is acknowledged the buzzer will be silenced and the alarm will stop flashing. Note: The Accept button on the front panel of the Touchpoint Pro must be pressed for > 0.5 s to take effect. Note: If a Relay Output channel has the Alarm Update function enabled, the alarm will be ignored for the Cause and Effect matrix once it is acknowledged. -
Page 102: Faults And Warnings
3. From the Active Events screen, select the alarm and select Reset from the popup menu. This will reset only the selected alarm Note: The Reset button on the front panel of the Touchpoint Pro must be pressed for > 0.5 s to take effect. 7.5 Faults and Warnings 7.5.1 View Faults and Warnings... -
Page 103: Reset A Latched Fault Or Warning
This will acknowledge only the selected fault or warning When a fault or warning is acknowledged the channel, LED and icon will stop flashing. Note: The Accept button on the front panel of the Touchpoint Pro must be pressed for > 0.5 s to take effect. 7.5.3 Reset a latched Fault or Warning Note: Operator access level is required. -
Page 104: View Input Channels And Input Details
MAN0923_Issue 3_04/15 Touchpoint Pro Operating Instructions 7. Normal Operation Note: When you manually place an Output Relay into ‘Inhibit’, it holds the Relay in the current state. I.e. if the Relay is in a Normal (Healthy) state at the time of ‘inhibit’ it stays in that state and, if the Relay is in an Alarm (Non- Healthy) state at the time of ‘inhibit’... -
Page 105: View Output Channels
MAN0923_Issue 3_04/15 Touchpoint Pro Operating Instructions 7. Normal Operation Figure 7.13 Inputs Screen with menu options Figure 7.14 Input Details Screen 7.8 View Output Channels Note: In the Touchscreen view, the Inputs and Outputs icons toggle – from the System Status screen navigation bar only the Inputs icon is visible, the Outputs icon is visible from the Inputs screen and vice versa. - Page 106 Option to force a relay output channel to its active state, or force an analogue output channel to a set mA Engineer level. On a forced channel, this option is Clear Force. See Maintenance Ch. 8.1 Testing the Touchpoint Pro System for more information.
-
Page 107: View Trend Graph
Note: Touchpoint Pro logs the trend data point when the system is in Field Inputs Test Mode, but does not log it when in the Configuration Settings Test or Cause and Effect Test modes. -
Page 108: View Event History
Note: Touchpoint Pro does not adjust automatically for daylight savings time. Be aware that if the date and time are changed to a time in the past, (for example ending daylight savings time) Touchpoint Pro will retain a backup of the previous data. -
Page 109: Access Diagnostic Information
Note: Engineer access level is required The Diagnostics screen gives information about the firmware versions of system components, and details of the status and any errors. This information could be required by Honeywell Analytics to assist with technical support. The Diagnostics screen also provides access to the Touchpoint Pro system test modes (see “Testing the Touchpoint Pro System”). -
Page 110: Maintenance
Once a test mode is active, the system will remain in test mode until the test is exited. The only exception is in the case of a power cycle of the Touchpoint Pro system, when it will restart in normal mode. Cause and Effect Test inputs can be forced and cleared from any output in that Test. -
Page 111: Field Inputs Test
MAN0923_Issue 3_04/15 Touchpoint Pro Operating Instructions 8. Maintenance The optional PC Configuration Software cannot be used while a test mode is active. All events generated while the system is in test mode will be logged in the event history. Therefore a record of the testing can be generated once it is complete (see Normal Operation, Generate Reports). -
Page 112: Configuration Settings Test
MAN0923_Issue 3_04/15 Touchpoint Pro Operating Instructions 8. Maintenance 8.1.3 Configuration Settings Test Note: Engineer access level is required During this test, all field device inputs will be ignored by the Touchpoint Pro system. The Cause and Effect matrix will not be evaluated. No outputs will be generated. The purpose of this test is to check that input channels are configured correctly, including alarm, warning, fault thresholds etc. The gas concentration and alarm states raised for the channel as a consequence of forcing the input to a given value can be viewed on the touchscreen or the Web Server. -
Page 113: Cause And Effect Test
MAN0923_Issue 3_04/15 Touchpoint Pro Operating Instructions 8. Maintenance 8.1.4 Cause and Effect Test Note: Engineer access level is required. During this test, all field device inputs will be ignored by the Touchpoint Pro system. The Cause and Effect matrix will be evaluated based on simulated input states and outputs will be generated. Caution: During the Cause and Effect Test, outputs will be generated and relays will be activated. To avoid any unwanted activation of output devices (e.g. -
Page 114: Routine Maintenance
Visually inspect all cabling • Check for perishing or loose connections • Clean the screen of the Touchpoint Pro Controller with a soft cloth and mild detergent • Check for dust contamination (particularly for rack mount units) • Periodically exercise the relays to confirm functionality •... -
Page 115: How To Replace A Faulty I/O Module
WARNING If the relays are switching mains voltages, hazardous live terminals may be present within the Relay Output Module even if the Touchpoint Pro system is isolated. Caution: When installing or replacing an I/O module, avoid static discharge Note: Administrator level access is required Note: The new module must be the same type as the old module. - Page 116 MAN0923_Issue 3_04/15 Touchpoint Pro Operating Instructions 8. Maintenance 30° Figure 8.1 Detaching a module 3. Fit a new module of the required type to the same slot on the Communication / Power Rail: • Ensure that the module is the correct way up with the label towards you •...
- Page 117 MAN0923_Issue 3_04/15 Touchpoint Pro Operating Instructions 8. Maintenance Figure 8.2 Attaching a module • Push the bottom of the module into place so that it clips onto the DIN rail. Caution: Clipping the module to the DIN rail should not require any force. If the module does not clip easily, check that it is correctly aligned to the connector on the DIN rail.
- Page 118 MAN0923_Issue 3_04/15 Touchpoint Pro Operating Instructions 8. Maintenance 4. Re-connect the field equipment by plugging the field terminals into the new module 5. If not already logged in, login with a valid administrator level user name 6. From the System Status screen select the Extras icon then System Configuration 7. Re-enter the password and press Login 8.
- Page 119 8. Maintenance 8.5 How to add a new I/O Module The Touchpoint Pro system can easily be expanded by adding new I/O modules. Caution: When installing or replacing an I/O module, avoid static discharge Note: Administrator level access is required Note: A module which has previously been configured in one system cannot be added to another system, unless it was correctly removed from the original system’s configuration.
-
Page 120: How To Remove Or Decommission An I/O Module
WARNING If the relays are switching mains voltages, hazardous live terminals may be present within the Relay Output Module even if the Touchpoint Pro system is isolated. Caution: When installing or replacing an I/O module, avoid static discharge Note: Administrator level access is required 1. - Page 121 MAN0923_Issue 3_04/15 Touchpoint Pro Operating Instructions 8. Maintenance 5. Highlight each channel in turn and select “Decommission” from the popup menu 6. Once all channels are decommissioned. highlight the module and select Remove Module from the popup menu 7. If still connected, disconnect the field equipment from the faulty module, by unplugging the field terminals 8.
-
Page 122: Backup / Restore Configuration
Note: The SD Card fitted in the Touchpoint Pro Controller is used for logging event history. When the SD Card is removed, data is logged in internal memory. To avoid potential loss of event history data, please minimise the length of time that the SD Card is removed from the system. -
Page 123: Change The Sd Card
(see Commissioning, Editing a Configured Channel and Configurable Parameter Reference Guide, Calibration Reminder Settings) Touchpoint Pro tracks and monitors the ageing of catalytic bead detectors and can provide a warning when a sensor should be replaced. Select First Span when calibrating a new or replacement sensor for the first time, and Span for all calibrations thereafter. When the sensitivity of the sensor has dropped below 50% of the original value, a “Sensor Lifetime Expired”... - Page 124 MAN0923_Issue 3_04/15 Touchpoint Pro Operating Instructions 8. Maintenance 1. If not already logged in, login with a valid engineer level user name 2. From the System Status screen select the Inputs icon then select the channel to be calibrated 3. From the popup menu, select Inhibit to inhibit the channel Figure 8.7 Inputs Screen with menu options...
- Page 125 MAN0923_Issue 3_04/15 Touchpoint Pro Operating Instructions 8. Maintenance Figure 8.9 Zero Calibration Screen 7. Confirm that the gas reading is zero, and press Save then OK Figure 8.10 Zero Calibration Confirmation 8. Select Span Adjust 9. Enter the concentration of the span gas and press Accept...
-
Page 126: Touchpoint Pro Battery Box
13. Remove the span gas from the sensor, and confirm that the gas reading has returned to zero 14. Select Clear Inhibit to remove the inhibit from the channel 8.10 Touchpoint Pro Battery Box 8.10.1 DC-UPS LED Indications The DC-UPS module has a range of LEDs that indicate UPS system states, as listed both on the DC-US module cover, and in the table below. - Page 127 MAN0923_Issue 3_04/15 Touchpoint Pro Operating Instructions 8. Maintenance Status Flashing Sequence (1 = On) Indication Ready Charging Green Good Refreshing Buffering Overload Replace batteries Yellow Check Buffertime expired Inhibit active Check wiring and fuse Check Input Voltage Fault Check Temperature (not used)
-
Page 128: Routine Maintenance
Operating Instructions 8. Maintenance 8.10.2 Routine maintenance • Visually inspect the Touchpoint Pro Battery Box and all cabling • Check for physical security, cable damage, or loose connections • Periodically check that the vents have not become obstructed. If necessary, vacuum to remove... -
Page 129: Problem Solving
Operating Instructions 9. Problem Solving This section explains how to deal with problems that may be encountered when using Touchpoint Pro. If a problem persists please contact Honeywell Analytics for advice, using the contact details given on the last page of this manual. - Page 130 Inhibit mA input channel There is a discrepancy The mA loop Touchpoint Pro converts the 4-20 mA signal it receives from the between the sensor requires sensor to a gas reading. If the discrepancy is significant,...
- Page 131 PC Configuration No PC Configuration Check IP settings, check proper cable connections. The PC should SW connection be connected to the Ethernet port of the Touchpoint Pro Control Module. System System does not start Check power supply / wiring, check fuses. Check RCD and UPS/ Battery Backup if fitted.
-
Page 132: List Of Error Codes
PC wireless adapter is off before connecting to the Web Server, check proper cable connections. The Ethernet port of the Touchpoint Pro Control Module should be connected to a network. Please refer to cable recommendations (chapter 4). - Page 133 MAN0923_Issue 3_04/15 Touchpoint Pro Operating Instructions 9. Problem Solving Error Message Possible Cause Remedial Action Code I/O Module parameter write failed; The CCB may not 1. Please initialise the ring network and try again. UDID does not match recognise the module 2.
- Page 134 Please refer to error 23 Please refer to error 23 match Operation failed; an I/O Module with Each Touchpoint Pro Contact your local representative to obtain a the same UDID does already exist on component has a unique replacement module.
- Page 135 MAN0923_Issue 3_04/15 Touchpoint Pro Operating Instructions 9. Problem Solving Error Message Possible Cause Remedial Action Code State Change operation failed; could Potential issue with the 1. Check the Active Events screen for any reported not communicate with I/O Module ring network connection, failure of the ring communication.
- Page 136 Configuration restore operation failed Please refer to error 42 Please refer to error 42 Input channel cannot be de- Touchpoint Pro will not 1. Identify the output channel(s) that the input commissioned, because it is used allow the removal of an channel is linked to.
- Page 137 Gas calibration failed - sensor Touchpoint Pro monitors 1. Contact your local service representative to lifetime exceeded. The sensor the performance of mV schedule a sensor replacement.
- Page 138 MAN0923_Issue 3_04/15 Touchpoint Pro Operating Instructions 9. Problem Solving Error Message Possible Cause Remedial Action Code Operation failed; CRC calculation There has been a file 1. Please retry the operation. timeout transfer error between 2. If still unsuccessful, on the front panel, press the...
- Page 139 If more channels than 64 inputs and 128 outputs commissioned: The maximum maximum capacity of are required an additional Touchpoint Pro system is number of 16 Input Modules has 16 Input and 32 Output needed. Contact your local representative to discuss...
- Page 140 The controller needs a restart to A system error has Please cycle the power to the Touchpoint Pro system proceed further. Please power cycle occurred that can only the controller and try again.
- Page 141 I/O Module and initialize the ring network again. Ring initialisation has failed. Ring Network 1. Power cycle the Touchpoint Pro system Please cycle the power to the system Initialisation has failed 2. Return to the System Setup screen and retry the Ring Initialisation operation.
- Page 142 If more channels than 64 inputs and 128 outputs no free Channel ID available. Please maximum capacity of are required an additional Touchpoint Pro system is de-commission an adequate channel 64 input and 128 output needed. Contact your local representative to discuss...
-
Page 143: Further Assistance
9.3 Further Assistance If the problem is still unresolved, please contact Honeywell Analytics technical support using the contact details at the back of this manual. Please have the following information to hand: - •... -
Page 144: Specifications
Operating Instructions 10. Specifications This section contains basic information about the various Touchpoint Pro major equipment and assemblies. Note: Power Supply Fluctuations are not to exceed ±10 % of nominal. Note: All equipment in this manual is rated to +2000 m (6562 ft) altitude maximum. -
Page 145: U Remote Unit Enclosure Without User Interface
MAN0923_Issue 3_04/15 Touchpoint Pro Operating Instructions 10. Specifications 10.1.3 19” 5U Remote Unit Enclosure without User Interface Part Number TPPR-V-0612 Material Mild Steel Earthing Points M8 (main grounding) other M6 Dimensions (H x W x D) 483 x 222 x 110 mm... - Page 146 MAN0923_Issue 3_04/15 Touchpoint Pro Operating Instructions 10. Specifications 10.2.2 Wall Mount Remote Unit Enclosures without User Interface These units are IP 66 Type 4 & 12, Class 1 (grounded), and can be installed indoors or outdoors in a Pollution Degree 4 environment, and can be exposed to rain, snow and direct sunlight.
-
Page 147: Floor Standing Enclosures
MAN0923_Issue 3_04/15 Touchpoint Pro Operating Instructions 10. Specifications WARNING Do not disconnect terminals or remove modules when energised. (Class 1 Div.2, Class 1 Zone 2, and Zone 2 [ATEX]) AVERTISSEMENT Ne pas déconnecter les terminaux ou supprimer les modules lorsque l’appareil est sous tension. -
Page 148: Floor Standing Cabinets Front Access
MAN0923_Issue 3_04/15 Touchpoint Pro Operating Instructions 10. Specifications 10.3.1 Floor Standing Cabinets Front Access Part Number TPPR-V-1250 TPPR-V-1252 TPPR-V-1254 Material No Ventilation Natural Ventilation Forced Ventilation Dimensions (H x W x D) 2075 x 800 x 694 mm Weight 230 Kg Operating Conditions Ventilated: -20 to +55 °C (T... -
Page 149: Din Rail (Module Supply And Communication)
MAN0923_Issue 3_04/15 Touchpoint Pro Operating Instructions 10. Specifications 10.4.2 DIN Rail (Module Supply and Communication) Description 5, 7, 9 or 10-way Communication / Power Rail consists of 1 DIN Rail, 1 Ring Coupling Module (RCM), and a 5, 7, 9 or 10-way Backplane... -
Page 150: Power Supply Redundancy Module (Rdn Module)
MAN0923_Issue 3_04/15 Touchpoint Pro Operating Instructions 10. Specifications 10.4.5 Power Supply Redundancy Module (RDN Module) Description Suitable for redundant operation of DC 24 V Input Voltage Range 8.4 – 36.4 VDC Number of Inputs Input Current (max.) 20 A per input Output Reverse Voltage (max.) -
Page 151: Backup Batteries
MAN0923_Issue 3_04/15 Touchpoint Pro Operating Instructions 10. Specifications 10.4.7 Backup Batteries Description 2 x 12 V (24 V nominal) sealed lead acid batteries Battery type FIAMM 12 V 12 Ah FG21202 or 12 V 27 Ah FG22703 Dimensions 395 mm x 300 mm x 215 mm (W x H x D) Weight 15.7 kg (12 Ah) / 25 kg (27 Ah) -
Page 152: Control Module And User Interface
MAN0923_Issue 3_04/15 Touchpoint Pro Operating Instructions 10. Specifications 10.5 Control Module and User Interface 10.5.1 Controller & Remote Unit DC Input Supply Input Voltage DC 24 V (nominal) DC Input Voltage Range 18 – 32 VDC (Supplied from Self Enclosed Low Voltage source only) 10.5.2 Control Module and User Interface... -
Page 153: Analogue Input Module Mv Bridge
MAN0923_Issue 3_04/15 Touchpoint Pro Operating Instructions 10. Specifications 10.6.2 Analogue Input Module mA Description 4-channel 4 – 20 mA Analogue Input Module with two or three-wire interface to detector Sensor Configuration 4 x two-wire or three-wire (current sourced from detector) Signal Measurement Range 0 –... -
Page 154: Digital Input Module
MAN0923_Issue 3_04/15 Touchpoint Pro Operating Instructions 10. Specifications 10.6.4 Digital Input Module Description 4-channel Digital Input Module for switched input devices Electrical Connection 4 x two-wire Switch Inputs Supply Voltage 18 – 32 VDC (Supplied from Self Enclosed Low Voltage source only) Power Consumption 2.8 W maximum (no inputs connected) -
Page 155: Certification
AVERTISSEMENT La performance en conformité avec la CSA est valide uniquement lorsque l’appareil est connecté aux détecteurs de gaz catalytiques Honeywell modèle 705 ou à des détecteurs de gaz 4 - 20 mA dûment approuvés. 11.2 Applicable National and International Standards The Touchpoint Pro systems described in this manual are declared to conform to the following National and International Standards when installed and operated in accordance with the Manufacturer’s specifications... -
Page 156: National And International Certificates
MAN0923_Issue 3_04/15 Touchpoint Pro Operating Instructions 11. Certification 11.3 National and International Certificates The Touchpoint Pro Zone 2 Div. 2 Systems and System Components hold the following National and International Certificates and Certification Codes: Description Certificates ATEX/IECEx: II 3G Ex nA nC IIC T4 Gc (ROM) Tamb –40 °C to +70 °C... - Page 157 Operating Instructions 11. Certification Touchpoint Pro is a fully customizable installation, so it is not possible to certify all of the possible variations in one guide. Instead each purchased system will have its personalized parameters inscribed on a label attached to each major component (i.e. Controller, Remote, and Battery Box).
-
Page 158: Ordering Information
MAN0923_Issue 3_04/15 Touchpoint Pro Operating Instructions 12. Ordering Information 12.1 TPPR-M Input and Output Configurator (I/O Configurator) Part Number Description TPPR-M Input and Output Configurator (I/O Configurator) TPPR-M 10 Way Communication/Power Rail (Select up to maximum 10 I/Os) Consists of a DIN Rail blank panel, 1 Ring Coupling Module and 10 Backplanes... - Page 159 MAN0923_Issue 3_04/15 Touchpoint Pro Operating Instructions 12. Ordering Information TPPR-M 9 Way Communication/Power Rail (Select up to maximum 9 I/Os) Consists of a DIN Rail blank panel, 1 x Ring Coupling Module, 1 x DIM, and 9 Backplanes; (with additional DIM...
-
Page 160: Touchpoint Pro Control System Part Number Generator
MAN0923_Issue 3_04/15 Touchpoint Pro Operating Instructions 12. Ordering Information 12.2 Touchpoint Pro Control System Part Number Generator Touchpoint Pro Control System Part Number Generator TPPR-S 19” Rack controller or Remote Unit 19’’ Rack 5U Controller includes HMI, PCBs, SD card 19’’... -
Page 161: Tppr-V Controllers And Remote Units
MAN0923_Issue 3_04/15 Touchpoint Pro Operating Instructions 12. Ordering Information 12.3 TPPR-V Controllers and Remote Units 1. Touchpoint Pro Controller and Remote Unit Wall Mount 9U and 19’’ Rack enclosure versions TPPR-V-0602 19'' Rack 5U Controller includes HMI, PCBs, SD Card TPPR-V-0612... - Page 162 Redundant Control Centre Board Software TPPR-V-1111 PC Config SW licences 12 months TPPR-V-2223 WebServer SW licences 12 months 3. Touchpoint Pro Accessories and Spares TPPR-V-0405 27Ah 24V Battery (2x27Ah 12V in series) TPPR-V-0406 12Ah 24V Battery (2x12Ah 12V in series) TPPR-V-2600...
-
Page 163: Tppr-H Enclosures
Door Inlet Vent Floor Cabinet Natural or Forced Ventilation TPPR-V-1998 Thermostat Floor Cabinet Forced Ventilation TPPR-V-1999 24V DC Filter Fan Floor Cabinet Forced Ventilation 4. Touchpoint Pro Manuals TPPR-L-2500 TPPR CD (multi language) TPPR-L-2501 TPPR Operating Instruction Hard Copy (English) 12.4 TPPR-H Enclosures... - Page 164 MAN0923_Issue 3_04/15 Touchpoint Pro Operating Instructions 12. Ordering Information TPPR-HW-M-LXMHXX Wall Mount Controller 800Hx600Wx300D includes HMI, PCBs, SD Card, Modbus Interface Board ® TPPR-HW-M-LRMHXX Wall Mount Controller 800Hx600Wx300D includes HMI, PCBs, SD Card, Redundant Control Centre Board, Modbus Interface Board ®...
- Page 165 MAN0923_Issue 3_04/15 Touchpoint Pro Operating Instructions 12. Ordering Information TPPR-HF-F-LXXXXX Floor Standing Cabinet with Front Access 2000Hx800Wx600D includes Controller with HMI, PCBs, SD Card, w/o HON Logo, w/o ventilation TPPR-HF-F-LRXXXX Floor Standing Cabinet with Front Access 2000Hx800Wx600D includes Controller with HMI, PCBs,...
- Page 166 MAN0923_Issue 3_04/15 Touchpoint Pro Operating Instructions 12. Ordering Information Without ventilation, with plinth, without power distribution TPPR-HF-FS-LXXHPX Floor Standing Cabinet with Front Access 2000Hx800Wx600D includes Controller with HMI, PCBs, SD Card, with 100mm plinth, w/o ventilation, w/o power distribution TPPR-HF-FS-LRXHPX...
- Page 167 MAN0923_Issue 3_04/15 Touchpoint Pro Operating Instructions 12. Ordering Information TPPR-HF-FS-LRMHXN Floor Standing Cabinet with Front Access 2000Hx800Wx600D includes Controller with HMI, PCBs, SD Card, Redundant Control Centre Board, Modbus Interface Board, natural ventilation, w/o power distri- ® bution TPPR-HF-FS-LXXXXN Floor Standing Cabinet with Front Access 2000Hx800Wx600D includes Controller with HMI, PCBs,...
- Page 168 MAN0923_Issue 3_04/15 Touchpoint Pro Operating Instructions 12. Ordering Information TPPR-HF-FS-LRXXPN Floor Standing Cabinet with Front Access 2000Hx800Wx600D includes Controller with HMI, PCBs, SD Card, Redundant Control Centre Board, with 100mm plinth, w/o HON Logo, natural ventilation, w/o power distribution TPPR-HF-FS-LXMXPN...
- Page 169 MAN0923_Issue 3_04/15 Touchpoint Pro Operating Instructions 12. Ordering Information Forced Ventilation and with plinth TPPR-HF-F-LXXHPF Floor Standing Cabinet with Front Access 2000Hx800Wx600D includes Controller with HMI, PCBs, SD Card, with 100mm plinth, forced ventilation TPPR-HF-F-LRXHPF Floor Standing Cabinet with Front Access 2000Hx800Wx600D includes Controller with HMI, PCBs,...
- Page 170 MAN0923_Issue 3_04/15 Touchpoint Pro Operating Instructions 12. Ordering Information TPPR-HF-R-LRXHXX Floor Standing Cabinet with Rear Access 2000Hx800Wx600D includes Controller with HMI, PCBs, SD Card, Redundant Control Centre Board, w/o ventilation TPPR-HF-R-LXMHXX Floor Standing Cabinet with Rear Access 2000Hx800Wx600D includes Controller with HMI, PCBs, SD Card, Modbus ®...
- Page 171 MAN0923_Issue 3_04/15 Touchpoint Pro Operating Instructions 12. Ordering Information TPPR-HF-R-LXXXPX Floor Standing Cabinet with Rear Access 2000Hx800Wx600D includes Controller with HMI, PCBs, SD Card, w/o HON Logo, with 100mm plinth, w/o ventilation TPPR-HF-R-LRXXPX Floor Standing Cabinet with Rear Access 2000Hx800Wx600D includes Controller with HMI, PCBs, SD Card,...
- Page 172 MAN0923_Issue 3_04/15 Touchpoint Pro Operating Instructions 12. Ordering Information TPPR-HF-R-LRMXXN Floor Standing Cabinet with Rear Access 2000Hx800Wx600D includes Controller with HMI, PCBs, SD Card, Redundant Control Centre Board, Modbus Interface Board, w/o HON Logo, natural ventilation ® Natural ventilation, without plinth, without power distribution...
- Page 173 MAN0923_Issue 3_04/15 Touchpoint Pro Operating Instructions 12. Ordering Information TPPR-HF-RS-LXMHPN Floor Standing Cabinet with Rear Access 2000Hx800Wx600D includes Controller with HMI, PCBs, SD Card, Modbus Interface Board, with 100mm plinth, natural ventilation, w/o power distribution ® TPPR-HF-RS-LRMHPN Floor Standing Cabinet with Rear Access 2000Hx800Wx600D includes Controller with HMI, PCBs, SD Card, Redundant Control Centre Board, Modbus ®...
- Page 174 MAN0923_Issue 3_04/15 Touchpoint Pro Operating Instructions 12. Ordering Information TPPR-HF-RS-LRXXXF Floor Standing Cabinet with Rear Access 2000Hx800Wx600D includes Controller with HMI, PCBs, SD Card, Redundant Control Centre Board, w/o HON Logo, forced ventilation, w/o power distribution TPPR-HF-RS-LXMXXF Floor Standing Cabinet with Rear Access 2000Hx800Wx600D includes Controller with HMI, PCBs, SD Card, Modbus ®...
-
Page 175: Tppr-W Psus
MAN0923_Issue 3_04/15 Touchpoint Pro Operating Instructions 12. Ordering Information 12.5 TPPR-W PSUs TPPR-W PSUs TPPR-W-000-1 2 Way DC Distribution Only TPPR-W-000-2 4 Way DC Distribution Only TPPR-W-000-3 8 Way DC Distribution Only TPPR-W-005-1 5A PSU Only TPPR-W-010-1 10A PSU Only... -
Page 176: Honeywell Analytics Product Warranty
3rd-party cables and components Honeywell Analytics’ financial liability under this warranty shall not exceed the original net purchase price. In no event shall Honeywell Analytics be liable for any damages or injury of any nature or kind, no matter how caused, that arise from incorrect handling or use of this equipment. In no event shall Honeywell Analytics be liable for any equipment malfunction or damages whatsoever,... -
Page 177: Appendix 1 - Modbus Option
The host computer system will therefore require programming in order to interpret the signal and status data made available by the Touchpoint Pro. It is recommended that the host computer system should, as a minimum, be programmed to use Function 02 to collect alarm and status data from all channels of the Touchpoint Pro Control System. -
Page 178: Installation
MAN0923_Issue 3_04/15 Touchpoint Pro Operating Instructions 14. Appendix 1 - Modbus Option 14.2 Installation 14.2.1 Installing the Bus Interface Board (Upgrade or Assembly by system integrators) Caution: All electronic hardware and PCB assemblies contain static sensitive components. Take appropriate precautions to minimise the risk of electrostatic discharge. -
Page 179: Cable Recommendation
MAN0923_Issue 3_04/15 Touchpoint Pro Operating Instructions 14. Appendix 1 - Modbus Option 9. Secure the Bus Interface Board using the four sets of screws and washers supplied 10. Carefully slide the cover back into place and secure using the M4 locknuts 11. -
Page 180: Electrical Connections
The diagram below gives example configurations of which the second and third offer redundancy: 14.2.5 Termination resistor If the Touchpoint Pro is the last node in a Modbus system highway, it is necessary to connect a termination resistor between A and B, to avoid reflections on the RS485 circuit. For convenience, Touchpoint Pro has a set of jumpers which will switch a 120 Ω resistor across the connection. - Page 181 MAN0923_Issue 3_04/15 Touchpoint Pro Operating Instructions 14. Appendix 1 - Modbus Option Touchpoint Pro Host Mobus Master Touchpoint Pro Host Mobus Master Touchpoint Pro Host Mobus Master Touchpoint Pro Host Mobus Master Host Mobus Master 14.3 Configuration Examples...
- Page 182 3 and 4 (A OUT and B OUT) of TB6 and / or TB7 without using the internal termination resistor. To connect the termination resistor using the Touchpoint Pro jumpers located on the Bus Interface Board: Caution: The SD Card, any USB device and all cables must be removed before attempting to remove the Control Module cover panel.
- Page 183 MAN0923_Issue 3_04/15 Touchpoint Pro Operating Instructions 14. Appendix 1 - Modbus Option WARNING! SD Memory Card Remove top and bottom Plugs BOTTOM of TB9, TB8, before opening the cover. Screen_TB9 Screen_TB8 PSU4_Stat 2 PSU2_Stat 2 PSU4_Stat 1 PSU2_Stat 1 PSU1_Stat 2...
-
Page 184: Multi-Drop Mode
MAN0923_Issue 3_04/15 Touchpoint Pro Operating Instructions 14. Appendix 1 - Modbus Option 7. Set the jumpers for the appropriate channel to the “Termination On” position according to the diagram and table below 8. Carefully replace the cover on the Control Module, refit and re-tighten the three locknut screws 9. Refit the cables Note: The termination resistor should only be switched across a channel that forms the final node of an RS485 highway. -
Page 185: Configuration
1 s between each poll, and a minimum timeout of 2 s. Refer to the documentation supplied with the host computer for details of its communication and Modbus configuration. Touchpoint Pro Modbus communication uses 8 data bits and 2 stop bits. To configure the Touchpoint Pro Modbus communication parameters, follow the procedure below. -
Page 186: Register Allocation For Function 02 – Read Input Status
MAN0923_Issue 3_04/15 Touchpoint Pro Operating Instructions 14. Appendix 1 - Modbus Option 14.4 Register Allocation for Function 02 – Read Input Status This function reads the input channel status bits. Each status bit can have the value 1 = Active or 0 = Not active. -
Page 187: Register Allocation For Function 04 – Read Input Registers
MAN0923_Issue 3_04/15 Touchpoint Pro Operating Instructions 14. Appendix 1 - Modbus Option 14.5 Register Allocation for Function 04 – Read Input Registers There are three sets of input registers for each channel: 1. The analogue signal expressed as a 16 bit signed integer value 2. The analogue signal expressed as a 32 bit floating point value... -
Page 188: Query Poll Registers
MAN0923_Issue 3_04/15 Touchpoint Pro Operating Instructions 14. Appendix 1 - Modbus Option The data value for each register can be one of the following: Value Status Channel operating normally RATE alarm active LTEL alarm active STEL alarm active A1 alarm active... -
Page 189: Query Types Available
MAN0923_Issue 3_04/15 Touchpoint Pro Operating Instructions 14. Appendix 1 - Modbus Option Allowed values for the Result register 40n05 (n = 0 to 9) Value Meaning Success Command not permitted Inter process communication failure Failure 14.6.2 Query Types available Poll No... -
Page 190: Command Poll Registers
MAN0923_Issue 3_04/15 Touchpoint Pro Operating Instructions 14. Appendix 1 - Modbus Option 14.6.3 Command Poll Registers Command Poll Block Active Channel Type Channel ID Command Type Command Data Result Block 41001 41002 41003 41004 41005 41006 41101 41102 41103 41104... -
Page 191: Exception Responses
If the Command Data is set to 0, the command will apply to all the channel alarms if a specific channel is identified, or to all channels if the channel type is Global. 14.7 Exception Responses The Modbus exception response is detailed in the Modicon Modbus manual. Any one of the following exception responses may be returned by the Touchpoint Pro Modbus interface: Exception Description 01 ILLEGAL FUNCTION Only Modbus functions 02, 03, 04 and 06 are supported. This response is returned if any other requests are received. -
Page 192: Appendix 2 - Configurable Parameter Reference Guide
MAN0923_Issue 3_04/15 Touchpoint Pro Operating Instructions 15. Appendix 2 - Configurable Parameter Reference Guide Note: For text fields, the maximum number of characters that can be entered is given throughout this reference guide. However, in exceptional cases where many wide characters are used the text may be too long for the field. -
Page 193: Sensor Settings
MAN0923_Issue 3_04/15 Touchpoint Pro Operating Instructions 15. Appendix 2 - Configurable Parameter Reference Guide 15.1.3 Sensor Settings Access Level: Administrator Parameter Name Default Setting Value Range Comment Gas Name “Gas” Maximum 10 Alphanumeric Characters Gas Unit “%FSD” %FSD, %LEL, % Vol., ppm, ppb, mA, mV, mg/ FSD –... -
Page 194: Suppression Settings
MAN0923_Issue 3_04/15 Touchpoint Pro Operating Instructions 15. Appendix 2 - Configurable Parameter Reference Guide 15.1.6 Suppression Settings Access Level: Engineer Parameter Name Default Setting Value Range Comment Zero Suppression Positive 0.0 to 25.0 %FSD The gas concentration shall be set to 0.0 when the... -
Page 195: Threshold Alarm Hysteresis
15.1.12 Long Term Exposure Limit (LTEL) Alarm Settings Caution: The Touchpoint Pro LTEL calculation assumes an 8 hour working period. In some countries, the use of STEL and LTEL alarms with fixed gas detection equipment is not recommended. Refer to local and national regulations. -
Page 196: Rate Alarm Settings 1
MAN0923_Issue 3_04/15 Touchpoint Pro Operating Instructions 15. Appendix 2 - Configurable Parameter Reference Guide LTEL = (TEN_MIN_TWA1 + TEN_MIN _TWA2 + ……….+ TEN_MIN _TWAN ) / LTELN Where LTEL = Long Term Exposure Limit TWA. TEN_MIN_TWA1 = 1st Ten Minute TWA, TEN_MIN_TWA2 = 2nd Ten Minute TWA TEN_MIN_TWAN = Nth Ten Minute TWA LTELN = Number of Ten Minute TWA Samples received in 8 hours... -
Page 197: Inhibit Delay Settings
Note: When commissioning or testing sensors with a Transmitter, check that all fault messages from the 4-20 mA transmitter match the Touchpoint Pro settings. Some typical diagnostic signal levels and equivalent %FSD values that may be used by intelligent... -
Page 198: Gas Range Fault Settings
MAN0923_Issue 3_04/15 Touchpoint Pro Operating Instructions 15. Appendix 2 - Configurable Parameter Reference Guide Access Level: Engineer Parameter Name Default Value Range Comment Setting Signal Under Range Limit 1.5mA 0.7 to 4.0 The ‘Signal Under Range Fault’ will be set if the sensor signal reading is less than the configured ‘Signal Under Range Limit’. -
Page 199: Calibration Signal Settings
MAN0923_Issue 3_04/15 Touchpoint Pro Operating Instructions 15. Appendix 2 - Configurable Parameter Reference Guide 15.1.19 Calibration Signal Settings Access Level: Engineer Note: These settings refer to the range of signal values from the sensor over which calibration will be permitted, and are used to avoid incorrect calibration e.g. due to incorrect application of gas. -
Page 200: Fault Signalling Settings 1
MAN0923_Issue 3_04/15 Touchpoint Pro Operating Instructions 15. Appendix 2 - Configurable Parameter Reference Guide 15.1.22 Fault Signalling Settings 1 Access Level: Engineer Parameter Name Default Setting Value Range Comment Custom Transmitter Fault Disabled Enabled / Disabled If enabled, a specific signal level from the sensor will activate a 1 Enable custom fault condition for the channel. -
Page 201: Analogue Input Module Mv Bridge
Note: If a channel is configured from the sensor catalogue, it is possible to edit individual settings afterwards (see Section “Editing a Configured Channel”). Note: For catalytic bead type detectors, the Touchpoint Pro controller is necessary to complete the measuring circuit. Therefore all commissioned mV channels remain in Inhibit state until they are calibrated. -
Page 202: Sensor Settings
MAN0923_Issue 3_04/15 Touchpoint Pro Operating Instructions 15. Appendix 2 - Configurable Parameter Reference Guide 15.2.3 Sensor Settings Access Level: Administrator Parameter Name Default Setting Value Range Comment Gas Name “Gas” Maximum 10 Alphanumeric Characters Gas Unit “%FSD” %FSD, % Vol., ppm, ppb, mA, mV, mg/ FSD –... -
Page 203: Suppression Settings
MAN0923_Issue 3_04/15 Touchpoint Pro Operating Instructions 15. Appendix 2 - Configurable Parameter Reference Guide 15.2.6 Suppression Settings Access Level: Engineer Parameter Name Default Setting Value Range Comment Zero Suppression Positive 0.0 to 25.0 %FSD The gas concentration shall be set to 0.0 when the gas... -
Page 204: Threshold Alarm Hysteresis
MAN0923_Issue 3_04/15 Touchpoint Pro Operating Instructions 15. Appendix 2 - Configurable Parameter Reference Guide 15.2.10 Threshold Alarm Hysteresis Access Level: Engineer Parameter Name Default Setting Value Range Comment Threshold Alarm Hysteresis 2 %FSD 0.0 to 10.0 %FSD The hysteresis value will be applied to a channel coming out of an alarm condition, e.g. -
Page 205: Inhibit Delay Settings
MAN0923_Issue 3_04/15 Touchpoint Pro Operating Instructions 15. Appendix 2 - Configurable Parameter Reference Guide 15.2.13 Inhibit Delay Settings Access Level: Engineer Parameter Name Default Setting Value Range Comment Power-On Delay Enable Enabled Enabled / Disabled If enabled, the channel will be inhibited for a specific time interval (the Inhibit Delay Time) after power-up in order to prevent false alarms (e.g. -
Page 206: Calibration Reminder Settings
MAN0923_Issue 3_04/15 Touchpoint Pro Operating Instructions 15. Appendix 2 - Configurable Parameter Reference Guide 15.2.16 Calibration Reminder Settings Access Level: Engineer Note: Once the Calibration Overdue Warning is active, it can only be cleared by calibrating the channel. Parameter Name... -
Page 207: Digital Input Module
MAN0923_Issue 3_04/15 Touchpoint Pro Operating Instructions 15. Appendix 2 - Configurable Parameter Reference Guide 15.3 Digital Input Module The Digital Input Module has the option to configure a custom channel, or copy from a configured channel. Note: The Digital Input will be treated as an alarm unless one of the Remote Interaction Settings is enabled Note: If a channel is configured by copying from another channel, it is possible to edit individual settings afterwards (see Section “Editing a Configured Channel”). -
Page 208: Alarm Settings
MAN0923_Issue 3_04/15 Touchpoint Pro Operating Instructions 15. Appendix 2 - Configurable Parameter Reference Guide 15.3.3 Alarm Settings Access Level: Engineer Parameter Name Default Setting Value Range Comment Input Latch Latching Non-Latching / Latching Event Type Alarm Alarm, Fault, Warning 15.3.4 Remote Interaction Settings... -
Page 209: Relay Output Module
MAN0923_Issue 3_04/15 Touchpoint Pro Operating Instructions 15. Appendix 2 - Configurable Parameter Reference Guide 15.4 Relay Output Module The Relay Output Module has the option to configure a custom channel, or copy from a configured channel. Note: If a channel is configured by copying from another channel, it is possible to edit individual settings afterwards (see Section “Editing a Configured Channel”). -
Page 210: Cause And Effect Type Selection
MAN0923_Issue 3_04/15 Touchpoint Pro Operating Instructions 15. Appendix 2 - Configurable Parameter Reference Guide Alarm Update Disabled Enabled / Disabled If enabled, only unacknowledged alarm conditions will be Enable considered during C&E evaluation for this output channel. An alarm acknowledgement will reset a relay output that is configured for alarm update function. -
Page 211: Appendix 3 - Wiring Diagrams
+24VDC Channel 3 4-20mA 101 Ω 0VDC 3 Wire Detector Input 4 +24VDC Channel 4 4-20mA 101 Ω 0VDC Note: 1. For all shielded cables, shield (screen) should be connected to Earth tag bar/bus bar provided in Touchpoint Pro enclosure. -
Page 212: Aim 4-20 Ma With 2 Wire Device Powered By Aim Ma
+24VDC 4-20mA Channel 3 101 Ω 0VDC Input 4 2 Wire Detector +24VDC 4-20mA Channel 4 101 Ω 0VDC Note: 1. For all shielded cables, shield (screen) should be connected to Earth tag bar/bus bar provided in Touchpoint Pro enclosure. -
Page 213: Aim 4-20 Ma With 3 Wire Device Powered By External Power Supply
0VDC Notes: 1. For all shielded cables, shield (screen) should be connected to Earth tag bar/bus bar provided in Touchpoint Pro enclosure. 2. A separate enclosure/ provision should be considered for mounting of external power supply and its field wiring. -
Page 214: Aim 4-20 Ma With 2 Wire Device Powered By External Power Supply
0VDC Notes: 1. For all shielded cables, shield (screen) should be connected to Earth tag bar/bus bar provided in Touchpoint Pro enclosure. 2. A separate enclosure/ provision should be considered for mounting of external power supply and its field wiring. -
Page 215: Dim In Unsupervised Configuration
0VDC Notes: 1. For all shielded cables, shield (screen) should be connected to Earth tag bar/bus bar provided in Touchpoint Pro enclosure. 2. Switch can be manually operated push button or potential free contact. 3. Maximum current through closed contact limited to 15mA. -
Page 216: Dim In Supervised Open Circuit Configuration
0VDC Notes: 1. For all shielded cables, shield (screen) should be connected to Earth tag bar/bus bar provided in Touchpoint Pro enclosure. 2. Switch can be manually operated push button or potential free contact. 3. Components marked with ‘*’ in field for individual channels R = 10KΩ... -
Page 217: Dim In Supervised Configuration
0VDC Notes: 1. For all shielded cables, shield (screen) should be connected to Earth tag bar/bus bar provided in Touchpoint Pro enclosure. 2. Switch can be manually operated push button or potential free contact. 3. Components marked with ‘*’ in field for individual channels, R = 10KΩ... -
Page 218: Aim Mv With Sensor Connectivity
AIM mV Module Catalytic Sensor Channel 1 Catalytic Sensor Channel 2 Catalytic Sensor Channel 3 Catalytic Sensor Channel 4 Notes: 1. For all shielded cables, shield (screen) should be connected to Earth tag bar/bus bar provided in Touchpoint Pro enclosure. -
Page 219: Rom With Internal Auxiliary Supply In Nc And No Configuration
(NO Configuration) Notes: 1. For all shielded cables, shield (screen) should be connected to Earth tag bar/bus bar provided in Touchpoint Pro enclosure. 2. Maximum +24Vdc Output Load, 1.5A per channel, and 1.5A total per module. With Overload protection. 3. Maximum Relay contact rating, 5A@ 24Vdc and 5A@230Vac (resistive loads only) -
Page 220: Rom With External Auxiliary Supply In Nc And No Configuration
(NO Configuration) Notes: 1. For all shielded cables, shield (screen) should be connected to Earth tag bar/bus bar provided in Touchpoint Pro enclosure. 2. Maximum +24Vdc Output Load, 1.5A per channel, and 1.5A total per module. With Overload protection. 3. Maximum Relay contact rating, 5A@ 24Vdc and 5A@230Vac (resistive loads only) -
Page 221: Appendix 4 - Abbreviations
MAN0923_Issue 3_04/15 Touchpoint Pro Operating Instructions 17. Appendix 4 - Abbreviations Abbreviation Meaning A1, A2 or A3 Level 1, 2 or 3 Threshold Alarm Analogue Input Module Analogue Output Module Control Centre Board Communication Board Control Module C&E Cause and Effect, usually used in conjunction with the C&E Matrix... -
Page 222: Appendix 5 - User Interface Software Menu Structure
MAN0923_Issue 3_04/15 Touchpoint Pro Operating Instructions 18. Appendix 5 - User Interface Software Menu Structure 18.1 Menu Structure The diagrams on the following pages show the menu structure of the interface software. They can be used to gain familiarity with the interface and to assist navigation. - Page 223 MAN0923_Issue 3_04/15 Touchpoint Pro Operating Instructions 18. Appendix 5 - User Interface Software Menu Structure 18.1.1 Screen Navigation Sequence for Local UI and WebServer Touchpoint Pro-Menüfolge für lokale Benutzeroberfläche und Webserver Navigationsleiste Eingänge Startbildschirm Sicherheit Systemstatus Aktive Ereignisse Extras Nicht beim ·...
- Page 224 MAN0923_Issue 3_04/15 Touchpoint Pro Operating Instructions 18. Appendix 5 - User Interface Software Menu Structure 18.1.2 Sequence of System Configuration Screens for Local Configuration (and PC Configuration SW) Touchpoint Pro-Menüfolge für lokale Benutzeroberfläche und Webserver Navigationsleiste Eingänge Sicherheit Startbildschirm Systemstatus...
- Page 225 MAN0923_Issue 3_04/15 Touchpoint Pro Operating Instructions 18. Appendix 5 - User Interface Software Menu Structure 18.1.3 Navigation Sequence for PC Configuration SW Connection State Selection of Connection Type • Connect / Disconnect TPPR • Controller Request Username and Password •...
- Page 226 MAN0923_Issue 3_04/15 Touchpoint Pro Operating Instructions 18. Appendix 5 - User Interface Software Menu Structure 18.1.4 Calibration from the Local User Interface (Touchscreen) Calibration • Sensor Signal • Gas Concentration • Calibration (last & due) Date • Fault • Warning •...
-
Page 227: Appendix 6 - Glossary Of Icons
MAN0923_Issue 3_04/15 Touchpoint Pro Operating Instructions 19. Appendix 6 - Glossary of Icons 19.1 Icons T/screen PC Config T/screen PC Config Meaning Meaning Icon Icon Icon Icon About Extras About Active User Filter Active Events Screen Firmware Update (no active events) - Page 228 MAN0923_Issue 3_04/15 Touchpoint Pro Operating Instructions 19. Appendix 6 - Glossary of Icons T/screen PC Config T/screen PC Config Meaning Meaning Icon Icon Icon Icon Password Change User Management Zoom in Regional settings (X axis) Zoom in Remove User Menu Item...
- Page 229 MAN0923_Issue 3_04/15 Touchpoint Pro Operating Instructions 19. Appendix 6 - Glossary of Icons 19.2 Icons for System Setup Tree (Configuration Mode) Icon Meaning Module State is normal Channel state is normal Module is in configuration state Channel is in configuration state...
-
Page 230: Appendix 7 - Logged Events And Where They Are Displayed
MAN0923_Issue 3_04/15 Touchpoint Pro Operating Instructions 20. Appendix 7 - Logged events and where they are displayed All of the events listed below are captured in the Event History of the system. In addition, some are displayed on the Active Events, Input/Output Details, or Inputs/Outputs screens as appropriate. Each event is logged with a timestamp and if applicable the module or channel to which it applies. - Page 231 MAN0923_Issue 3_04/15 Touchpoint Pro Operating Instructions 20. Appendix 7 - Logged events and where they are displayed Displayed Specific Input Output Active Inputs / Event Comment Channel Type Details Details Events Outputs (if applicable) screen screen screen screen Alarm 3 Acknowledged...
- Page 232 MAN0923_Issue 3_04/15 Touchpoint Pro Operating Instructions 20. Appendix 7 - Logged events and where they are displayed Displayed Specific Input Output Active Inputs / Event Comment Channel Type Details Details Events Outputs (if applicable) screen screen screen screen C&E Test Mode Acknowledged...
- Page 233 MAN0923_Issue 3_04/15 Touchpoint Pro Operating Instructions 20. Appendix 7 - Logged events and where they are displayed Displayed Specific Input Output Active Inputs / Event Comment Channel Type Details Details Events Outputs (if applicable) screen screen screen screen Fault Acknowledged...
- Page 234 MAN0923_Issue 3_04/15 Touchpoint Pro Operating Instructions 20. Appendix 7 - Logged events and where they are displayed Displayed Specific Input Output Active Inputs / Event Comment Channel Type Details Details Events Outputs (if applicable) screen screen screen screen UI SW Update...
- Page 235 MAN0923_Issue 3_04/15 Touchpoint Pro Operating Instructions 20. Appendix 7 - Logged events and where they are displayed Displayed Specific Input Output Active Inputs / Event Comment Channel Type Details Details Events Outputs (if applicable) screen screen screen screen mV Configuration State Inhibit...
- Page 236 MAN0923_Issue 3_04/15 Touchpoint Pro Operating Instructions 20. Appendix 7 - Logged events and where they are displayed Displayed Specific Input Output Active Inputs / Event Comment Channel Type Details Details Events Outputs (if applicable) screen screen screen screen PSU Channel Modified...
- Page 237 SD Card memory 80% full ✔ SD Card missing ✔ SD card system ID mismatch The inserted SD card contains data from a different Touchpoint Pro system Sensor Catalogue Logged when sensor catalogue is updated Sensor Lifetime Exceeded Sensitivity of the mV sensor has ✔...
- Page 238 System date and time not set System ID missing System ID updated System SRAM Failed There is a problem with the Touchpoint Pro internal memory System Time Zone changed Uncommissioned Module Removed User {0} added {0} will be replace with the user...
- Page 239 MAN0923_Issue 3_04/15 Touchpoint Pro Operating Instructions 20. Appendix 7 - Logged events and where they are displayed Displayed Specific Input Output Active Inputs / Event Comment Channel Type Details Details Events Outputs (if applicable) screen screen screen screen Wiring Fault Cleared...
- Page 240 MAN0923_Issue 3_04/15 Touchpoint Pro Operating Instructions Notes...