
Related Manuals for Miele KF 18 Vi Series


Summary of Contents for Miele KF 18 Vi Series
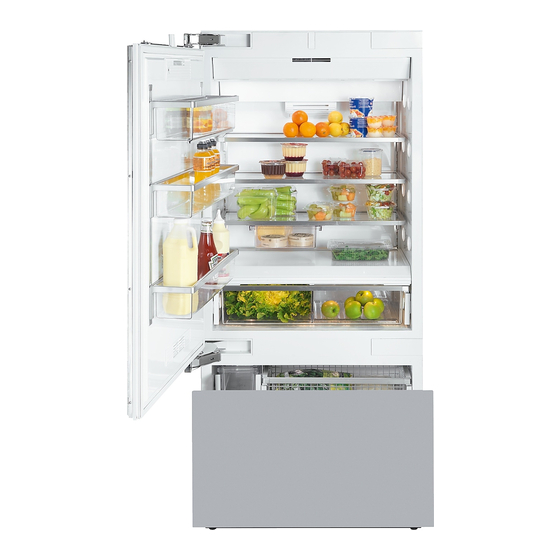
- Page 1 TECHNICAL INFORMATION KF 18xx, K 19xx Refrigerator-Freezers (Vi and SF Models) All US Models © 2019 Miele USA...
-
Page 2: Table Of Contents
KF 18xx/19xx Technical Information Table of Contents Warning and Safety Instructions ............8 1 General Information ..................8 Modification History ................. 9 Technical Data ..................9 Layout of Electrical Components ............10 1 ... - Page 3 KF 18xx/19xx Technical Information 4.2 Service Programming ................ 34 4.3 Service Mode ..................35 4.4 Heater Test ..................37 4.5 Temperature Test ................38 4.6 Removing the Refrigerator Evaporator Cover ........38 4.7 Removing Refrigerator Air NTC R30/1 ..........40 4.8 ...
- Page 4 KF 18xx/19xx Technical Information 4.46 Optical Interface (MDU) Position Indication ........75 4.47 Manually Defrosting the Evaporators ..........75 Icemaker ....................76 2 Function ......................76 2.1 Plumbing .................... 76 2.2 Water Valves ..................76 2.3 Icemaker NTC (R30/21) ..............77 2.4 ...
- Page 5 KF 18xx/19xx Technical Information Figure 030-13: Air Flow into Refrigerator ................ 27 Figure 030-14: Air Flow into SmartFresh Drawers ............28 Figure 030-15: Air Flow into Freezer ................29 Figure 030-16: Test Setup ....................37 Figure 030-17: Lamp Cover Removal ................38 Figure 030-18: Panel Removal ..................
- Page 6 KF 18xx/19xx Technical Information Figure 030-61: Condenser Fan M2/1 ................63 Figure 030-62: Condenser Fan Installation ..............63 Figure 030-63: Ambient-Air NTC ..................63 Figure 030-64: Transformers ..................64 Figure 030-65: Stop Valve Cover ..................65 Figure 030-66: Terminal Block Cover and Screws ............65 Figure 030-67: Inlet Valve Connections ................
- Page 7 KF 18xx/19xx Technical Information Table 030-7: Compressor Specifications ................ 14 Table 030-8: Temperature Limiter Cutoff ................ 14 Table 030-9: Temperature Limiter Cutoff ................ 14 Table 030-10: NTCs ......................15 Table 030-11: Ambient Temperatures and Condenser Fan Speed ........ 16 Table 030-12: Compartment Temperatures ..............19 Table 030-13: Temperature Alarm Thresholds ...............
-
Page 8: Warning And Safety Instructions
KF 18xx/19xx Technical Information Warning and Safety Instructions General Information Danger! These appliances are top-heavy and must be prevented from tipping over. Follow the installation instructions. Use a finger guard to prevent fingers from being jammed when the door is opened. -
Page 9: B Modification History
KF 18xx/19xx Technical Information Modification History When What 6/25/2019 Jessica Naples Minor changes throughout 10/23/2018 Jessica Naples Evaporator defrost instructions added 11/4/2016 Jessica Naples Minor changes throughout 2/28/2012 Jessica Naples Filter programming updated 2/7/2012 Jessica Naples Tech service bulletins added 8/10/2011 Jessica Naples Icemaker faults updated... -
Page 10: D Layout Of Electrical Components
KF 18xx/19xx Technical Information Layout of Electrical Components Appliance Cabinet Component list follows on next page. - Page 11 KF 18xx/19xx Technical Information 1 (R30/8) Ambient-air NTC 33 (2F1) Temperature monitor 2 (2N1) Power electronic 34 (R30/1) Refrigerator air NTC 3 (X10/1) RemoteVision module 35 (1H3/3) Refrigerator interior lighting 4 (M2/1) Condenser (cooling) fan 36 (R17/11) Side-wall heater 5 (2T1–6T1) Lighting transformers 37 (R17/6) Refrigerator interior heater 6 (R17/2) Freezer defrost heater 38 (2X5/3) Coupler for control electronic...
-
Page 12: 2 Icemaker
KF 18xx/19xx Technical Information Icemaker 1 Infrared transmitter, on/off switch 4 Electronic 2 Fault code LED 5 Motor 3 Infrared receiver 6 Electronic position of the ice-cube tray... -
Page 13: Cooling Components
KF 18xx/19xx Technical Information Cooling Components Technical Data Temperature Resistance °F °C kΩ 10.0 12.7 16.3 21.2 27.8 36.5 48.6 65.3 88.7 121.8 169.1 Table 030-1: NTC Resistance Values R17/5 (refrigerator) R17/4 (freezer) KF 19xx KF 18xx KF 19xx KF 18xx Power rating Resistance 576Ω... -
Page 14: Table 030-5: Other Component Specifications
KF 18xx/19xx Technical Information Evaporator Evaporator Condenser fan, Air flap motor fan, freezer fan (M2/1) refrigerator (M28, M32) (M2/3) (M2/4) Voltage [V] 12 (DC) Power rating [W] Resistance [kΩ] 0.06 Current [A] 0.03 0.02 0.02 Frequency [Hz] Speed [rpm] 2000 1650 1650 Table 030-5: Other Component Specifications... -
Page 15: 2 Function
KF 18xx/19xx Technical Information Function Electrical Supply Each appliance will be connected to its own 120VAC, 15-amp power supply. When column units are installed, there will be separate outlets for each column (see Figure 030-1). Every cooling appliance also has a main power on/off switch located inside the appliance, under the main control panel. -
Page 16: Temperature Control
KF 18xx/19xx Technical Information Temperature Control The refrigerator with a SmartFresh compartment and freezer has 2 separate cooling circuits. The same evaporator cools both the cooling compartment and the SmartFresh compartment in the refrigerator. If both areas require simultaneous cooling, then the SmartFresh compartment has priority. The cooled air passes through a flap mechanism, either directly into the refrigerator or via an air duct (set in Styrofoam in the appliance rear wall) into the SmartFresh compartment. -
Page 17: Refrigerant Stop Valve (Y30/1)
KF 18xx/19xx Technical Information 1 Condenser 2 Condenser fan 3 Compressors Figure 030-3: Condenser Fan and Components (Top View) Refrigerant Stop Valve (Y30/1) The stop valve enables one compressor to channel R134a (refrigerant) to two separate evaporators. The outputs are connected to two separate capillary tubes and evaporators in appliances where more than one evaporator is needed. -
Page 18: Starting Program
KF 18xx/19xx Technical Information Starting Program The starting program operates at the time of commissioning under the following circumstances: No defective NTCs The temperature read by both the ambient air and SmartFresh NTCs is greater than 41°F (5°C) The appliance door is closed ... -
Page 19: Lighting
KF 18xx/19xx Technical Information 2.11 Lighting The bright ClearView lighting system illuminates every nook of the interior cabinet on each level to achieve maximum exposure of all contents. With this unique halogen-based lighting system cascading from the top and sides of the appliance, blind or dark spots are eliminated, making it easy to see and access virtually all food items. -
Page 20: Temperature Alarm
The freezer door switch (S4/2) is a mechanical switch, located on the freezer interior wall. The drawer rail activates this switch when the freezer door is closed. This switch can easily be removed with a lid opener or Miele yellow tool. 2.17... -
Page 21: Superfrost
KF 18xx/19xx Technical Information After stocking the refrigerator with a significant amount of food, including bulky items like fresh poultry or large items like fruit and vegetable platters, engaging SuperCool will override the thermostat and begin cooling the cabinet to a lowered temperature of 35°F (2°C). SuperCool will continue working to reach this reduced temperature until it reaches this exact degree or it is disengaged by the user. -
Page 22: Drain Heater, Drain Channel
KF 18xx/19xx Technical Information At the start of the defrost cycle, the appropriate evaporator fan is switched on for 5 minutes. After 5 minutes the appropriate defrost and drain heaters are switched on. If the evaporator NTC measures a temperature of 49°F (9.5°C) or after 60 minutes, the defrost heater is shut off. -
Page 23: Vcc ® Compressor
KF 18xx/19xx Technical Information As ice is defrosted from the evaporator, it drips water into the evaporator pan below the evaporator (see Figure 030-7). This pan routes the water into the drain channel (Figure 030-8, Item 1), which is set into Styrofoam in the rear of the appliance. -
Page 24: Evaporator
KF 18xx/19xx Technical Information Speed control: Compressor speed varies with cooling requirements. To control speed, the power electronic uses 4 set frequencies. Frequency [Hz] Speed [rpm] 116.7 3500 100.0 3000 53.3 1600 73.3 3600 Table 030-15: Compressor Speed versus Frequency 2.22 Evaporator The evaporator is located at the top of the cabinet in both refrigerators and... -
Page 25: Air Flow
KF 18xx/19xx Technical Information 2.23.3 Air Flap Control The air flaps are controlled by the control electronics and the temperature programmed by the customer. Closing the air flaps (Figure 030-10, Item 1) creates a high humidity level. The air flap motor (Figure 030-10, Item 3) will drive a rotary cam into such a position that the lever arms (Figure 030-10, Item 2) are not pressed down and the microswitch (Figure 030-10, Item 4) is not activated. -
Page 26: Figure 030-12: Air Flow Through The Appliance
KF 18xx/19xx Technical Information 1 Freezer 2 Freezer air channel 3 Freezer evaporator fan (M2/3) 4 Freezer evaporator 5 Air channel in the door 6 SmartFresh compartment 7 Refrigerator 8 Refrigerator air channel 9 Air flap position switch (S60/7) 10 Air flap motor (M28) 11 Air flap 12 Refrigerator evaporator fan (M2/4) 13 Refrigerator evaporator... -
Page 27: Figure 030-13: Air Flow Into Refrigerator
KF 18xx/19xx Technical Information Figure 030-13: Air Flow into Refrigerator 2.24.2 Air Flow into the SmartFresh Drawers In this circuit, the air flap blocks the air channel to the refrigerator compartment. The cooled air is directed into the SmartFresh drawers through the air flaps. Via an air channel in the door, the warmed air flows back to the evaporator where it is cooled off again. -
Page 28: Figure 030-14: Air Flow Into Smartfresh Drawers
KF 18xx/19xx Technical Information Figure 030-14: Air Flow into SmartFresh Drawers... -
Page 29: Remotevision
Figure 030-15: Air Flow into Freezer 2.25 RemoteVision The Miele RemoteVision system is designed to send messages directly to Miele and/or the customer's PC. The customer's wireless system must meet the following requirements: A router that supports an 802.11 wireless standard ... -
Page 30: 3 Fault Repair
Do not store food directly in front of the air channel. Advise the customer about this. Cause: Air flap is defective. Remedy: Test the air flap in service mode; see Table 030-20. Cause: SmartFresh air NTC is defective. Remedy: Read the temperature of this NTC using the Miele diagnostic support tool (MDU). -
Page 31: Ice Forms On Interior Of Refrigerator, Freezer And/Or Condenser
KF 18xx/19xx Technical Information Ice Forms on Interior of Refrigerator, Freezer and/or Condenser Cause: Defrost heater defective. Remedy: Test defrost heater in service mode. Perform heater test outlined in Section 030-4.4. Cause: Drain heater defective. Remedy: Test drain heater in service mode. Perform heater test outlined in Section 030-4.4. Cause: Drain channel clogged or frozen. -
Page 32: Table 030-17: Fault Codes
KF 18xx/19xx Technical Information Code Displayed as Cause Remedy F121 Faulty icemaker See footnote (2) below F 01 21 F122 Ambient-air NTC faulty. Replace ambient-air NTC. F 01 22 Test electrical component(s) in F123 Faulty electrical component. service mode; replace any F 01 23 or (refrigerator), defective part(s). -
Page 33: 4 Service
KF 18xx/19xx Technical Information Service Customer Settings 1. Turn on the appliance. 2. Touch the thermometer . 3. Touch the refrigerator icon to access the refrigerator or the freezer icon access the freezer. 4. Note the position of the down arrow . -
Page 34: Service Programming
KF 18xx/19xx Technical Information Service Programming 1. Turn on the appliance. 2. Touch the thermometer . 3. Touch the refrigerator icon to access the refrigerator or the freezer icon to access the freezer. 4. Note the position of the down arrow . -
Page 35: Service Mode
KF 18xx/19xx Technical Information Service programming settings Symbol Function Options Factory setting b0: Button sound off Button sounds on/off On (b1) b1: Button sound on n0: Demo mode off Demo mode on/off Off (n0) n1: Demo mode on h0: Filter is installed in appliance h1: Filter is not installed Filters h2: Filter replacement confirmation. -
Page 36: Table 030-20: Service Functions
KF 18xx/19xx Technical Information Note: The door and temperature alarms are suppressed during service mode. Service functions Symbol Function Options Main menu ID number of the 6-digit ID will display, 2 digits at a time. Example: service electronics _C 00 20 82 corresponds to an ID number of 2082. F0: No saved faults Viewing/saving/ F1: At least one saved fault... -
Page 37: Heater Test
KF 18xx/19xx Technical Information Heater Test Note: Steps and amperage readings may vary per heater element. Heater elements inside a freezer can require between 10 and 200 watts. This means that an amperage increase ranging from as low as 0.05 amps to as high as 3.00 amps could be registered on the multimeter during heater element testing. -
Page 38: Temperature Test
KF 18xx/19xx Technical Information Temperature Test Refrigerator: Have the customer place a glass of water in the appliance about 2 to 3 hours before the technician arrives. The glass should be located in the center of the cavity. Make sure that there is nothing around the glass of water so that the airflow can bring the water to temperature properly. -
Page 39: Figure 030-18: Panel Removal
KF 18xx/19xx Technical Information Figure 030-18: Panel Removal 5. Press the glass plate to the rear, and pull down and forward to remove. See Figure 030-19, Items A and B. Note: The glass plate can fall. Do not remove the glass plate from the cover strips. Figure 030-19: Glass Plate Removal Remove the left and right retaining screws from behind. -
Page 40: Removing Refrigerator Air Ntc R30/1
KF 18xx/19xx Technical Information Figure 030-20: Retaining Screws for the Evaporator Cover Plate 7. Remove the cover retaining screws. See Figure 030-21, Item 1. 8. Unclip the cover plate at the top and pull it out partway. 9. Disconnect the NTC connection. See Figure 030-21, Item 2. 10. -
Page 41: Removing The Refrigerator Lighting Assembly
KF 18xx/19xx Technical Information Figure 030-22: NTC R30/1 Removal Removing the Refrigerator Lighting Assembly 1. Disconnect the appliance from the power supply. 2. Remove the refrigerator evaporator cover. See Section 030-4.6. 3. Disconnect the NTC connection. 4. Remove the Styrofoam insulation. 5. -
Page 42: Installing The Refrigerator Lighting Assembly
KF 18xx/19xx Technical Information Figure 030-24: Screws Securing the Lighting Assembly Retainers 9. Press in on the left and right retainers. See Figure 030-25, Item A. Unclip each retainer and remove it downwards. See Figure 030-25, Item B. 10. Remove the front of the lighting assembly downwards. See arrow, Figure 030-25. 11. -
Page 43: Removing The Refrigerator Lighting Assembly Temperature Monitors (1F1, 2F1)
KF 18xx/19xx Technical Information Figure 030-26: Lighting Assembly and Retainers 2. Insert the lighting assembly partway, leaving enough space for the insulation to be inserted. See Figure 030-27. 3. Insert the Styrofoam insulation. 4. Fully insert the lighting assembly. 5. For further assembly, follow the removal instructions in reverse order; see Section 030-4.8. -
Page 44: Removing The Refrigerator Drain Channel & Defrost Heaters
KF 18xx/19xx Technical Information Figure 030-28: Lighting Assembly Temperature Monitor 4.11 Removing the Refrigerator Drain Channel & Defrost Heaters 1. Disconnect the appliance from the power supply. 2. Remove the refrigerator evaporator cover; see Section 030-4.6. 3. Remove the refrigerator lighting assembly. See Section 030-4.8. 4. -
Page 45: Removing Refrigerator Evaporator Temperature Limiter 1F2
KF 18xx/19xx Technical Information Figure 030-30: Defrost & Drain Channel Heater Connections 4.12 Removing Refrigerator Evaporator Temperature Limiter 1F2 1. Disconnect the appliance from the power supply. 2. Remove the refrigerator evaporator cover; see Section 030-4.6. 3. Remove the refrigerator lighting assembly. See Section 030-4.8. 4. -
Page 46: Removing Refrigerator Evaporator Ntc R30/2
KF 18xx/19xx Technical Information Figure 030-31: Temperature Limiter 1F2 4.13 Removing Refrigerator Evaporator NTC R30/2 1. Disconnect the appliance from the power supply. 2. Remove the refrigerator evaporator cover; see Section 030-4.6. 3. Remove the refrigerator lighting assembly. See Section 030-4.8. 4. -
Page 47: Removing Refrigerator Evaporator Fan M2/4
KF 18xx/19xx Technical Information Figure 030-32: Retainers Holding Evaporator in Place 6. Disconnect the evaporator NTC electrical connection. See Figure 030-33, Item 1. 7. Remove the evaporator NTC from the insulation plate. See Figure 030- 33, Item 2. Figure 030-33: Evaporator NTC and Electrical Connection 4.14 Removing Refrigerator Evaporator Fan M2/4 1. -
Page 48: Removing Air Flap Motor M28
KF 18xx/19xx Technical Information Figure 030-34: Bottom Fan Retaining Screws 6. Unclip the evaporator from its retainers and remove it (see Figure 030-32). 7. Disconnect the fan electrical connection. See Figure 030-35, Item 1. 8. Remove the two top fan retaining screws. See Figure 030-35, Item 2. 9. -
Page 49: Removing The Smartfresh Compartment Shelf With Control Electronics
KF 18xx/19xx Technical Information 4.17 Removing the SmartFresh Compartment Shelf with Control Electronics Note: The shelf above the SmartFresh drawers contains several components, including the air flaps and the control electronics. The control electronics cannot be taken out of the shelf; if they are faulty, the entire shelf must be replaced. -
Page 50: Figure 030-37: Molex Connections On Shelf
KF 18xx/19xx Technical Information Figure 030-37: Molex Connections on Shelf Note: Lay the shelf on a smooth, clean surface so that it won't get scratched. 1 Air flaps and moisture filters 2 On/off switch 3 SmartFresh NTC 4 Lights Figure 030-38: Underside of Shelf with Control Electronics Note: The moisture filters can be accessed without removing the shelf from the appliance. -
Page 51: Air Flap Control Check
KF 18xx/19xx Technical Information 4.18 Air Flap Control Check 1. Unclip the cover caps. See Figure 030-39, Item 1. 2. Remove the retaining screws. See Figure 030-39, Item 2. 3. Take off the housing. 4. Activate the air flap in service mode and check positioning with a mirror. Figure 030-39: Cover Caps and Retaining Screws of Air Flap Housing 4.19 Refrigerator Door Switch (S4/1) Removal... -
Page 52: Removing The Freezer Evaporator Cover
KF 18xx/19xx Technical Information Figure 030-41: Reed Switch Removal 1 Reed switch 2 Relay Figure 030-42: Reed Switch Module 4.20 Removing the Freezer Evaporator Cover 1. Disconnect the appliance from the power supply. 2. Unclip all holders (Figure 030-43, Item 1) and push to the side to remove (Figure 030-43, Items A and B). -
Page 53: Figure 030-43: Evaporator Cover Holders And Retainers
KF 18xx/19xx Technical Information Figure 030-43: Evaporator Cover Holders and Retainers 4. Remove the retaining screws (Figure 030-44, Item 1). 5. Remove the evaporator cover and Styrofoam insulation. Figure 030-44: Evaporator Cover Retaining Screws 6. Disconnect the freezer air NTC and lighting assembly connections (Figure 030-45, Items 1 and 2). -
Page 54: Removing Freezer Air Ntc R30/3
KF 18xx/19xx Technical Information 1 Freezer air NTC connection 2 Lighting assembly connection 3 Evaporator cover 4 Styrofoam insulation Figure 030-45: Freezer Evaporator Cover Removal 4.21 Removing Freezer Air NTC R30/3 1. Disconnect the appliance from the power supply. 2. Remove the freezer evaporator cover. See Section 030-4.20. 3. -
Page 55: Removing The Freezer Drain Channel & Defrost Heaters (R17/4, R17/2)
KF 18xx/19xx Technical Information 2. Remove the freezer evaporator cover; see Section 030-4.20. 3. Remove the lighting assembly. 4. Remove the appropriate temperature monitor. See Figure 030-47, Item 1. Figure 030-47: Freezer Lighting Assembly Temperature Monitors 4.23 Removing the Freezer Drain Channel & Defrost Heaters (R17/4, R17/2) 1. -
Page 56: Removing Freezer Evaporator Temperature Limiter 2F2
KF 18xx/19xx Technical Information 4.24 Removing Freezer Evaporator Temperature Limiter 2F2 1. Disconnect the appliance from the power supply. 2. Remove the freezer evaporator cover; see Section 030-4.20. 3. Remove the freezer drain channel/defrost heater plate. See Section 030-4.23. 4. Disconnect the temperature limiter electrical connection. See Figure 030-49, Item 1. -
Page 57: Removing Freezer Evaporator Ntc R30/4
KF 18xx/19xx Technical Information Figure 030-50: Retainers Holding Evaporator in Place 4.26 Removing Freezer Evaporator NTC R30/4 1. Disconnect the appliance from the power supply. 2. Remove the freezer evaporator cover; see Section 030-4.20. 3. Remove the drain channel/defrost heater plate. See Section 030-4.23. 4. -
Page 58: Removing Evaporator Fan M2/3
KF 18xx/19xx Technical Information Figure 030-51: Evaporator NTC and Electrical Connection 4.27 Removing Evaporator Fan M2/3 1. Disconnect the appliance from the power supply. 2. Remove the freezer evaporator cover; see Section 030-4.20. 3. Remove the drain channel/defrost heater plate. See Section 030-4.23. 4. -
Page 59: Removing The Power Electronic/Condenser Fan Assembly
KF 18xx/19xx Technical Information Figure 030-53: NTC Connection and Styrofoam Insulation 8. Disconnect the evaporator fan connection. See Figure 030-54, Item 1. 9. Remove the screws securing the top of the evaporator fan. See Figure 030-54, Item 2. 10. Take out the evaporator fan. Figure 030-54: Freezer Evaporator Fan Connection and Top Screws 4.28 Removing the Power Electronic/Condenser Fan Assembly... -
Page 60: Figure 030-55: T20 Screw On Center Wall
KF 18xx/19xx Technical Information Figure 030-55: T20 Screw on Center Wall 4. Pull the center wall slightly forward. See Figure 030-56, Item A. Figure 030-56: Center Wall Removal 5. Cut the cable ties (Figure 030-57, Item 1). 6. Disconnect the condenser fan electrical connection (Figure 030-57, Item 2). 7. -
Page 61: Installing The Power Electronic/Condenser Fan Assembly
KF 18xx/19xx Technical Information Figure 030-57: Condenser Fan Connection and Cable Ties 4.29 Installing the Power Electronic/Condenser Fan Assembly 1. Ensure that the seal is not pushed out of position. See Figure 030-58, Item 1. 2. For installation, follow the removal instructions in reverse order; see Section 030-4.28. -
Page 62: Removing Condenser Fan M2/1
KF 18xx/19xx Technical Information Figure 030-59: Power Electronic Cover 5. Remove the screws securing the holder. See Figure 030-60, Item 1. 6. Disconnect the power electronic connections. See Figure 030-60, Item 2. 7. Take off the protective foil. See Figure 030-60, Item 3. 8. -
Page 63: Installing Condenser Fan M2/1
KF 18xx/19xx Technical Information Figure 030-61: Condenser Fan M2/1 4.32 Installing Condenser Fan M2/1 1. Ensure that the direction of air flow is correct. See Figure 030-62, Item 1. Figure 030-62: Condenser Fan Installation 4.33 Removing Ambient-Air NTC R30/8 1. Disconnect the appliance from the power supply. 2. -
Page 64: Lighting Transformer (T1) Removal
KF 18xx/19xx Technical Information 4.35 Lighting Transformer (T1) Removal Note: There will be several lighting transformers in the base of the appliance. Transformer quantity will depend on appliance model and number of halogen lights inside the cabinet. 1. Disconnect the appliance from the power supply. 2. -
Page 65: Inlet Valve (1Y63, 2Y63) Removal
KF 18xx/19xx Technical Information Figure 030-65: Stop Valve Cover 5. Remove the screws securing the terminal block cover (Figure 030-66, Item 1) and remove the cover. Figure 030-66: Terminal Block Cover and Screws 4.37 Inlet Valve (1Y63, 2Y63) Removal 1. Disconnect the appliance from the power supply. 2. -
Page 66: Vcc Control Voltage Check
KF 18xx/19xx Technical Information Figure 030-67: Inlet Valve Connections 4.38 VCC Control Voltage Check 1. Remove the terminal block cover; see Section 030-4.36. 2. With the appliance connected to power and switched on, check the voltage at the terminal block. There should be approximately 120VAC going to the VCC control. -
Page 67: Figure 030-69: Terminal Block Retaining Bracket
KF 18xx/19xx Technical Information 4. Remove the three screws securing the bracket. See Figure 030-69, Item 1. 5. Take out the bracket. See Figure 030-69, Item 2. Figure 030-69: Terminal Block Retaining Bracket 6. Remove the screw securing the holding plate; see Figure 030-70, Item 1. 7. -
Page 68: Figure 030-71: Screw For Accessing Vcc Control Connections
KF 18xx/19xx Technical Information Figure 030-71: Screw for Accessing VCC Control Connections 9. Remove the hidden screw securing the VCC mount. See Figure 030-72, Item 1. 10. Lift the VCC control up and then pull forward to remove it from the mounting bracket on the compressor housing. -
Page 69: Compressor Coil Check
KF 18xx/19xx Technical Information Figure 030-73: Three-Pronged Connector and VCC Control 4.40 Compressor Coil Check 1. Disconnect the appliance from the power supply. 2. Remove the VCC control; see Section 030-4.39. 3. Once the VCC control is removed, the compressor and control can be checked. -
Page 70: Vcc Control Testing
KF 18xx/19xx Technical Information continuity exists. Note: VCC compressors are three-phase motors. Do not do a voltage check! Note: The measured resistance value may deviate slightly due to temperature fluctuations on the compressor winding. 6. If the measured resistance values deviate significantly, then the winding is defective (short circuit, interruption or short-circuited coil) and the compressor will need to be replaced. -
Page 71: Figure 030-75: Compressor Removal, Part 1
KF 18xx/19xx Technical Information 6. Lever off the compressor to remove. See Figure 030-75, Item A. Figure 030-75: Compressor Removal, Part 1 7. Remove the retaining screw. See Figure 030-76, Item 1. 8. Pull off the rubber seal. See Figure 030-76, Item 2. Figure 030-76: Compressor Removal, Part 2... -
Page 72: Compressor Installation
KF 18xx/19xx Technical Information 4.43 Compressor Installation 1. Screw in the retaining screw at the front left. See Figure 030-77, Item 1. 2. Press the rubber seal into the compressor holder. See Figure 030-77, Item 2. 3. Coat the rubber seal with a lubricant (such as liquid dish detergent). 4. -
Page 73: Lightbulb Replacement
KF 18xx/19xx Technical Information Figure 030-78: RemoteVision Installation, Part 1 2. Remove the cover. 3. Push the module into the slot until it locks into place. See Figure 030-79. Bend the antenna (Figure 030-79, Item 4) into a vertical/upright position. Figure 030-79: RemoteVision Installation, Part 2 4.45 Lightbulb Replacement... -
Page 74: Figure 030-81: Removing And Replacing Lightbulbs
KF 18xx/19xx Technical Information Warning: Never touch a halogen bulb with bare fingers. When inserting a glass halogen bulb, always hold it with a soft cloth. 3. Remove the defective lightbulb. 4. Insert the new bulb in the socket. See Figure 030-81. Figure 030-81: Removing and Replacing Lightbulbs Note: Halogen bulb type: 20W/12V/ socket GY 6.35. -
Page 75: Optical Interface (Mdu) Position Indication
KF 18xx/19xx Technical Information Note: Halogen bulb type: 5W/12V/ socket G 4. 4. Put the light cover back on and turn clockwise into place. 4.46 Optical Interface (MDU) Position Indication 1. Press and hold the thermometer for 10 seconds. 2. A yellow LED in the far right of the control panel will illuminate faintly to indicate where the MDU/optical interface should be placed. -
Page 76: Icemaker
KF 18xx/19xx Technical Information Icemaker Function Plumbing Freezers are the only cooling appliances with a water connection (for the icemaker and/or water dispenser). Be aware that the water line may need to be disconnected when uninstalling the freezer. See Section 032-4.4 for disconnection instructions. -
Page 77: Icemaker Ntc (R30/21)
KF 18xx/19xx Technical Information Icemaker NTC (R30/21) When this NTC, located under the ice-cube drawer (catch bin) reaches 5°F (-15°C), ice-cube dispensing is initiated via the electronic. Subsequently, the solenoids are activated and water intake started. This NTC also protects the icemaker from emitting too much heat into the freezer. -
Page 78: 3 Fault Repair
See Section 030- 4.2. If an external filter is used, a bypass cartridge must be inserted in place of the appliance's water filter. Contact Miele to purchase a bypass cartridge. Fault Repair Icemaker Self-Test Before replacing the icemaker, perform this self-test. -
Page 79: Fault Code Summary
KF 18xx/19xx Technical Information the ice tray resets (rotates back to its starting position), the icemaker’s electrical components (heaters, valves, etc.) will be powered. A single flash of the icemaker LED indicates that a step was performed successfully; a double flash indicates that the self-test is finished. Otherwise, the icemaker LED will flash with the appropriate fault code. - Page 80 KF 18xx/19xx Technical Information Problem Remedy Switch appliance off and on. If fault code is not displayed again, then this was a temporary fault. Inform customer Icemaker motor faulty. accordingly. If fault code is displayed again, replace icemaker because motor is not replaceable.
-
Page 81: Table 032-1: Icemaker Fault Codes
KF 18xx/19xx Technical Information Problem Remedy Switch appliance off and on. If fault code is not displayed again, then this was a Internal icemaker fault. temporary fault. Inform customer accordingly. If fault code is displayed again, replace icemaker. Input voltage is too high. Check input voltage. -
Page 82: 4 Service
KF 18xx/19xx Technical Information Service Water Filter Replacement Note: After installing a new water filter and switching on the icemaker, discard the first 24 hours' worth of ice production. If the icemaker has not been used for a long time, discard any ice cubes in the freezer, empty the container and discard the ice production of the next 24 hours. -
Page 83: Icemaker Removal
KF 18xx/19xx Technical Information Figure 032-6: Water Filter Replacement, Part 3 The filter change now needs to be confirmed. Press and hold the filter icon and the thermometer at the same time for approximately 5 seconds until a beep is heard and the filter icon goes out. Whenever the filter is replaced, the system must be reset. -
Page 84: Figure 032-7: Evaporator Ntc And Insulation
KF 18xx/19xx Technical Information Figure 032-7: Evaporator NTC and Insulation 7. Remove the screws securing the retainer (Figure 032-8, Item 1) and take out the retainer. Figure 032-8: Icemaker Retainer 8. Remove the screws securing the wiring harness cover. See Figure 032-9, Item 1. 9. -
Page 85: Disconnecting The Water Line
KF 18xx/19xx Technical Information Figure 032-9: Icemaker Wiring Harness 11. Remove the icemaker retaining screws. See Figure 032-10, Item 1. Figure 032-10: Icemaker Retaining Screws 12. Take out the icemaker. Disconnecting the Water Line 1. Shut off the water supply before disconnecting the water line. The water connection is located at the front of the appliance behind the lower black toekick. -
Page 86: Figure 032-11: Removing The Black Toekick
KF 18xx/19xx Technical Information Figure 032-11: Removing the Black Toekick Figure 032-12: Water Connection 2. After removing the black toekick, use two 13-millimeter (½-inch) wrenches to disconnect the water line from the appliance. See Figure 032-13. Figure 032-13: Disconnecting the Water Line... -
Page 87: Technical Service Bulletins
KF 18xx/19xx Technical Information Technical Service Bulletins How to Make Sure the Door Switch is Working All single-door units and the refrigerator compartments of bottom-mount units use a magnetic actuator to signal the door closure. If the door closure is not recognized, the unit will not cool properly. -
Page 88: Control Electronic On Some Cooling Appliances May Randomly Stop Responding
Insert the replacement part – be sure it is fully seated. Refrigerator Door Reminder This reminder applies to all Miele Independence refrigeration products. Under no circumstances are we to attempt to change the hinge orientation of any unit. All refrigeration units are available in left or right hinged models (except the 18”... -
Page 89: How To Replace The Rear Wheels On A Refrigerator
KF 18xx/19xx Technical Information How to Replace the Rear Wheels on a Refrigerator 1. Uninstall the refrigerator and secure it to a refrigeration dolly. 2. This procedure is for the RIGHT rear wheel. 3. Remove black toekick and upper rear cover from refrigerator. - Page 90 KF 18xx/19xx Technical Information 4. Remove the E-clips securing the 8mm hex adjustment to the bracket at the front of the unit. On the bottom of the refrigerator is a Phillips-head screw next to the wheel. Turn the Phillips-head screw counterclockwise to totally unscrew the assembly from the bottom of the refrigerator.
- Page 91 KF 18xx/19xx Technical Information 6. To install the new wheel, simply route the flexible cable (without the metal tube – it is not listed on the ETD either?) up through the bottom of the refrigerator, and screw the new wheel assembly into place. Reinstall the E-clips securing the 8mm hex adjustment to the bracket at the front of the unit.
-
Page 92: Refrigeration Merge Kits: Replacement Cover Strip Is Now Available
All about Master Cool and Icemakers All Miele refrigeration units that are freezers or contain freezers have an automatic ice cube maker. All units use the same basic icemaker (the F 1471 uses a different part number because of the dispensing functions). - Page 93 KF 18xx/19xx Technical Information begin with, but a missing or improperly installed air separator can cause this zone to be 20° warmer than normal. ottom- ount units it is also possible for ice cubes to pile up and block the infrared sensor that detects when the bin is full.
-
Page 94: F 1471 Dispenser Flap
KF 18xx/19xx Technical Information No ice with F0121 icemaker fault On new Installations, remove the toekick/grille and check the electrical connections to the water valves. The installer may have inadvertently knocked the Molex connector off one of the valves. ... -
Page 95: Advanced Icemaker Troubleshooting
KF 18xx/19xx Technical Information Advanced Icemaker Troubleshooting This bulletin applies to bottom-mount models and single-door freezers EXCEPT the F 1471 dispenser model. Please see the service manual to understand the slight differences in the wiring plan. The purpose of this bulletin is to illustrate how to narrow down the cause of a ‘no ice’... -
Page 96: Banking Pins Are Now Available For Refrigerators
KF 18xx/19xx Technical Information Perform the following tests with the unit powered on: Power - check for line voltage (120VAC) between pins 10 and 11. This power passes through the power electronic, so if there is no voltage here the power electronic is faulty. On/Off signal –... -
Page 97: Conversion Kit - Cover For Freezer Door
KF 18xx/19xx Technical Information These pins are most typically used with the 30” and 36” bottom-mount units. They can be used with a 30” or 36” single-door refrigerator if necessary. Note: These pins should not be used on any freezers. The 90° door swing will prevent the use of the slide-out baskets due to the thickness of the door. -
Page 98: 14 Master Cool - Filter Light Reset
KF 18xx/19xx Technical Information designed for more than two units. Additionally, there are no Top-Frames available for SF appliances that would span more than two units. The combined weight and size of three or more boxes merged as one makes installation and service prohibitive and dangerous. - Page 99 = Filter not installed (should be displayed if using an external filter or filter bypass) h2 = Filter change confirmed (option used to reset the light after the Miele filter is changed) h - = Return to menu Example: Customer changed the Miele filter and wants to reset the filter light.
- Page 100 KF 18xx/19xx Technical Information 5. The filter change indicator goes out. 6. Close the door.