Miele KF 1801 Vi Operating And Installation Instructions
Miele kf 1801 vi; kf 1811 vi; kf 1901 vi; kf 1911 vi fridge-freezer combination
Hide thumbs
Also See for KF 1801 Vi:
- Operating and installation instructions (96 pages) ,
- Specification (3 pages) ,
- Operating and installation manual (88 pages)
Table of Contents

Related Manuals for Miele KF 1801 Vi


Summary of Contents for Miele KF 1801 Vi
- Page 1 Operating and installation instructions Fridge-freezer combination To prevent the risk of accidents or damage to the appliance, it is essential to read these instructions before it is installed and used for the first time. en - AU, NZ M.-Nr. 09 761 090...
-
Page 2: Table Of Contents
Contents Description of the appliance ......... 5 Caring for the environment . - Page 3 Contents Large freezer basket with dividing panel ....... 40 Freezing and storing food ......... . 41 Freezing fresh food .
- Page 4 Contents Ventilation ............70 Side-by-side installation.
-
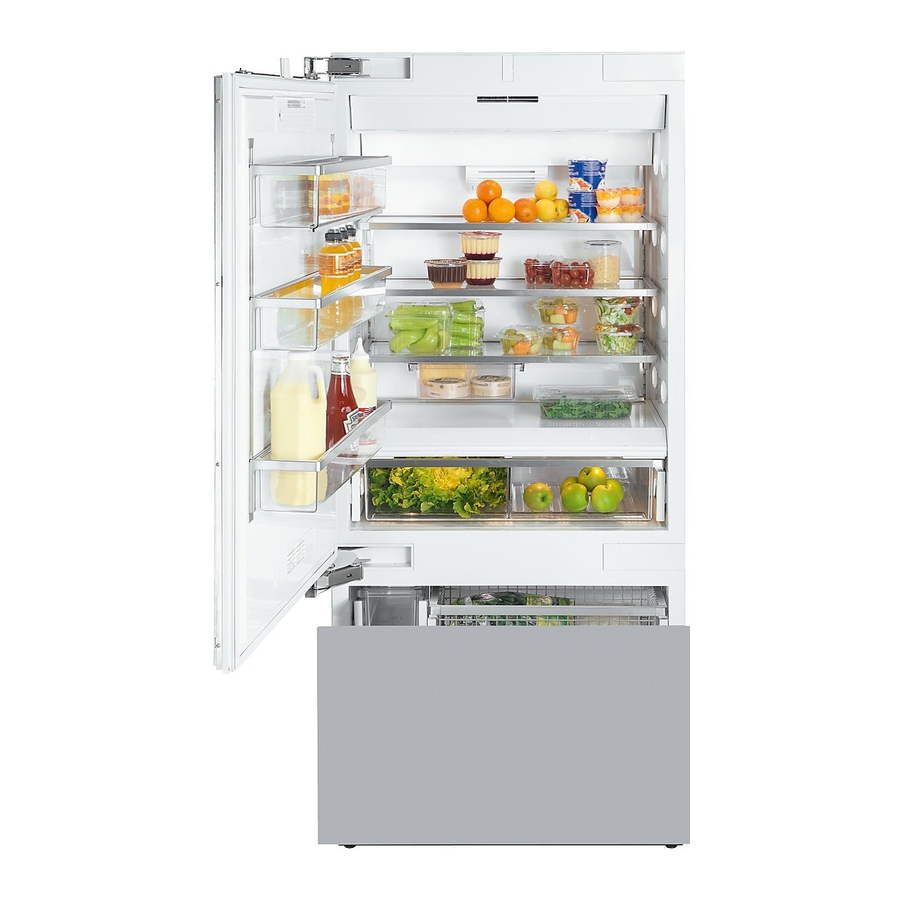
Page 5: Description Of The Appliance
Description of the appliance g Sensors for selecting the humidity in a Access sensor the MasterFresh drawers b Sensor for selecting the refrigerator (left: high humidity; zone right: low humidity) c Sensor for selecting the left-hand h On/Off sensor for the SuperCool and MasterFresh drawer SuperFreeze functions d Sensor for selecting the right-hand... - Page 6 Description of the appliance a Butter and cheese compartment g Rocker switch for switching the whole appliance on and off b Adjustable shelf h MasterFresh zones c Door shelf i Ice cube maker d Floating deli drawer j Water filter e Control panel k Small freezer basket f Humidity filters for the MasterFresh...
-
Page 7: Caring For The Environment
Caring for the environment Disposal of the packing Disposing of your old material appliance The transport and protective packing Electrical and electronic appliances has been selected from materials which often contain materials which, if are environmentally friendly for disposal handled or disposed of incorrectly, and can normally be recycled. -
Page 8: Warning And Safety Instructions
They contain important notes on the installation, safety, operation and care of the appliance. Miele cannot be held liable for damage caused by non-compliance with these Warning and Safety instructions. - Page 9 Furthermore, the appliance must not be operated in areas where explosions may occur. Miele cannot be held liable for damage resulting from improper or incorrect use of the appliance. This appliance is not intended for use by persons (including...
- Page 10 Warning and Safety instructions Children should be supervised when they are near the appliance. This appliance is not a toy! To avoid the risk of injury, do not allow children to play with it or to use the controls. They will not understand the potential dangers posed by it.
- Page 11 If the connection cable is faulty, it must only be replaced by a Miele approved service technician to protect the user from danger. Do not connect the appliance to the mains electricity supply by a multi-socket unit or an extension lead.
- Page 12 Repairs and installation work by unqualified persons could be dangerous. The manufacturer cannot be held liable for unauthorised work. Installation, maintenance work and repairs to electrical appliances must only be carried out by a Miele approved service technician. The manufacturer's warranty will be invalidated if the appliance is...
- Page 13 The manufacturer can only guarantee the safety of the appliance when Miele replacement parts are used. Miele cannot be held liable for damage caused by a faulty connection to the mains water supply. Connection to the mains water supply and any repairs to the ice cube maker must only be carried out by a Miele approved technician.
- Page 14 Warning and Safety instructions Make sure that any oil, or foods containing oil, do not come into contact with plastic components as this could cause stress cracks. Do not store explosive materials in the appliance or any products containing propellants (e.g. spray cans). Flammable gas mixtures can be ignited by electrical components.
- Page 15 To avoid the risk of any potential illness, do not deactivate the reminder to change the water filter. Use only Miele Original spare parts. If spare parts or accessories from other manufacturers are used, the warranty will be invalidated, and Miele cannot accept liability.
- Page 16 Warning and Safety instructions Never place electric heaters or candles in the appliance to defrost it. These can damage the plastic parts. Do not use defrosting sprays or de-icers, as they might contain substances which could damage the plastic parts or which could cause a build-up of gases and pose a danger to health.
-
Page 17: How To Save Energy
How to save energy Normal energy Increased energy consumption consumption Installation/Mainte- In a ventilated room. In an enclosed, nance unventilated room. Protected from direct In direct sunlight. sunlight. Not situated near a heat Situated near a heat source source (radiator, oven). (radiator, oven). - Page 18 How to save energy Normal energy Increased energy consumption consumption Do not change the arrangement of the drawers and shelves as when delivered. Only open the door when Frequent opening of the door necessary and for as short a for long periods will cause a time as possible.
-
Page 19: Switching On And Off
Switching on and off Before using for the first time To enable the temperature to get ^ Clean the inside of the appliance and sufficiently cold inside the the accessories with lukewarm water appliance, allow the appliance to and a little washing-up liquid, and run for a few hours before placing then dry with a soft cloth. -
Page 20: Switching Off
Switching on and off To switch off a section again, The On/Off sensor for the ice cube maker appears on the right-hand side ^ touch the sensor of the selected zone of the control panel (only visible if the again so that it is highlighted in white, freezer zone has been selected). -
Page 21: Further Settings
Switching on and off Further settings To switch the sensor tone on/off Further settings can be selected in the The tone which sounds each time a settings mode. sensor is touched can be deactivated. In settings mode, you can select certain appliance functions via the control panel and adjust the settings. -
Page 22: Switching Off For Longer Periods Of Time
Switching on and off ^ Leave your finger on the X sensor for Switching off for longer another 4 seconds until c and the Y periods of time sensor also appear in the display. If the appliance is not going to be used for a longer period of time, e.g. -
Page 23: The Correct Temperature
The correct temperature DynamicCooling It is very important to set the correct temperature for storing food in the The DynamicCooling fan automatically appliance. Micro-organisms will cause switches on when the cooling system food which is not stored at the correct for the refrigerator switches on. -
Page 24: Setting The Temperature In The Refrigerator/Freezer Zones
The correct temperature Setting the temperature in the If the highest or lowest temperature that it is possible to set is reached, the X or refrigerator/freezer zones Y sensor will disappear from the The temperatures in the refrigerator and display. freezer zones are set independently of one another. -
Page 25: Temperature (Fahrenheit/Celsius)
The correct temperature Temperature (Fahrenheit/Celsius) The temperature can be displayed in degrees Celsius or degrees Fahrenheit. ^ Now touch the X sensor repeatedly until † appears in the display. ^ Touch the access sensor again. ^ By touching the X sensor, you can ^ Touch the access sensor so that it is now set the temperature to be displayed in Fahrenheit or Celsius. -
Page 26: Temperature Display
The correct temperature Temperature display The temperature display on the control panel always shows the selected temperature. The temperature displays flash if – a different temperature is being set, – the temperature in the appliance has risen by several degrees, indicating that the appliance is warming up too much. -
Page 27: Alarm
Alarm Your appliance has been fitted with a The alarm will stop and the Alarm off warning system which ensures that the sensor in the display will go out again temperature in the appliance cannot as soon as the temperature has rise unnoticed and to avoid energy dropped down to the correct level being wasted if a door is left open. -
Page 28: Door Alarm
Alarm Door alarm The alarm will sound if a door is left open for more than 5 minutes. The Alarm off button will also light up. The alarm will stop and the Alarm off sensor in the display will go out as soon as the door has been shut. -
Page 29: Supercool And Superfreeze
SuperCool and SuperFreeze SuperCool Switching off SuperCool The SuperCool function can be used to The SuperCool function will switch itself rapidly reduce the temperature in the off automatically after approx. 6 hours. refrigerator to its lowest setting The sensor is highlighted in white and (depending on the room temperature). - Page 30 SuperCool and SuperFreeze SuperFreeze Switching off SuperFreeze Switch the SuperFreeze function on Depending on the amount of food before putting fresh food into the placed in the freezer section, the freezer section. SuperFreeze function will switch off automatically after approx. 52 hours. This helps food to freeze quickly and The sensor is highlighted in white and retain its nutrients, vitamins, flavours...
-
Page 31: Using The Refrigerator Efficiently
Using the refrigerator efficiently Different storage zones – pre-packed vegetables and other fresh food with a label stating it Due to the natural circulation of the air should be kept at a temperature of in the appliance, there are different approx. - Page 32 Using the refrigerator efficiently Do not store explosive materials in Ensure that when placing food in the the appliance or any products refrigerator, a gap of at least 35 mm containing propellants (e.g. spray is maintained under the ceiling of cans).
-
Page 33: Food Which Should Not Be Stored In A Refrigerator
Using the refrigerator efficiently Food which should not be the refrigerator and freezer upon arrival home. stored in a refrigerator Not all food is suitable for refrigeration Storing food correctly at temperatures below 5 °C. Cucumbers, for example, become Food should generally be stored glassy, eggplants bitter and potatoes covered or packaged in the refrigerator sweet. -
Page 34: Storing Food In The Masterfresh Zones
Storing food in the MasterFresh zones Food is stored in the MasterFresh The closer the storage humidity is to the zones at a lower temperature than in moisture content of the food, the crisper the conventional refrigerator section. and fresher the food remains over a The humidity level in the MasterFresh longer period, as the water content of zones can be regulated to provide the... - Page 35 Storing food in the MasterFresh zones ^ You can deselect the type of food by Foods that prefer a dry atmosphere touching the relevant sensor again. include: You cannot store foods that like high – fresh fish, shellfish, meat, poultry, humidity alongside foods that prefer a sausages, dairy products and dry atmosphere.
-
Page 36: Food Which Should Not Be Stored In A Refrigerator
Storing food in the MasterFresh zones If you are not satisfied with the results of your stored food (e.g. food loses firmness and wilts shortly after placing in the appliance), keep in mind the following instructions: ^ Only place fresh food in the appliance as the initial condition of the food is crucial to maintaining freshness. -
Page 37: Arranging The Interior Fittings
Arranging the interior fittings Moving the shelves The MasterFresh drawer The shelves can be adjusted according The MasterFresh drawer sits on to the height of the food. telescopic runners, and can be fully pulled out for loading and unloading. ^ Hold the shelf on both sides and raise it slightly so that it can be lifted For cleaning, the MasterFresh drawer over the catches at the back. -
Page 38: Adjusting The Door Shelves/Bottle Shelf
Arranging the interior fittings Adjusting the door To avoid damaging the telescopic shelves/bottle shelf runners, make sure that they are pushed back into the appliance. The dividing panel in the MasterFresh drawer can be removed for cleaning. ^ Take the MasterFresh drawer out of the appliance completely. -
Page 39: To Remove The Shelf Above The Masterfresh Drawer
Arranging the interior fittings Small freezer basket For the purposes of loading and unloading or to clean, the containers The small basket can be removed for can be removed from their frame cleaning. completely. ^ Pull the small basket out as far it will To remove the container in the top door shelf from its frame, To prevent children from hurting... -
Page 40: Large Freezer Basket With Dividing Panel
Arranging the interior fittings Large freezer basket with To replace the dividing panel dividing panel ^ Place the fittings in an upright position, and locate the dividing The large basket can be removed for panel in the fittings so that you hear it cleaning. -
Page 41: Freezing And Storing Food
Freezing and storing food Freezing fresh food Storing frozen food Fresh food should be frozen as quickly When buying frozen food to store in as possible. This way the nutritional your freezer section, check value of the food, its vitamin content, –... -
Page 42: Home Freezing
Freezing and storing food Home freezing – Do not season fresh foods or blanched vegetables before Only freeze fresh food which is in good freezing. Only season cooked food condition. lightly before freezing, but care should be taken as the taste of some Hints on home freezing spices alters when frozen. -
Page 43: Defrosting
Freezing and storing food Defrosting Before placing food in the freezer ^ When freezing more than 2 kg of Frozen food can be defrosted in fresh food, switch on the Super- different ways: Freeze function for some time before – in a microwave oven, placing the food in the freezer (see "SuperFreeze"). -
Page 44: Cooling Drinks
Freezing and storing food Cooling drinks To cool drinks quickly, place them in the refrigerator section, and switch on the SuperCool function. If bottles are, however, placed in the freezer section for rapid cooling, make sure they are not left in for more than one hour, as they could burst. -
Page 45: Making Ice Cubes
Making ice cubes temperature in the freezer: The lower For the automatic ice cube maker to the temperature, the more ice cubes operate, it must be connected to the are produced within a certain time mains water supply (see "Mains frame. - Page 46 Making ice cubes Switching off the ice cube maker The appliance must be disconnected from the mains water supply a few hours before the ice cube maker is switched off. The ice cube maker can be switched off independently of the freezer section if you do not want the appliance to make any ice cubes.
-
Page 47: Defrosting
Defrosting Refrigerator section and Freezer section MasterFresh zone This appliance is equipped with a "Frost free" system. The freezer section Condensate and frost can build up on defrosts automatically. the back wall of the refrigerator section and the MasterFresh zone whilst in use. The moisture generated in the You do not need to remove this, as it appliance collects on the condenser... -
Page 48: Cleaning And Care
Cleaning and care Before cleaning Do not let water get into the electronic unit or the ventilation gaps. Do not use a steam cleaning apparatus to clean the appliance. ^ Switch the appliance off by pressing Steam could reach the electrical the On/Off rocker switch. -
Page 49: Ice Cube Container
Cleaning and care Ice cube container Aluminium frames The frames on the shelves inside the The ice cube container sits on appliance and in the door are made telescopic runners, and can be fully from aluminium. extended for loading and unloading. Aluminium is affected by the way that For cleaning, this drawer can be light falls on it, by the surrounding... -
Page 50: Humidity Filters
Cleaning and care Humidity filters The two special humidity filters above the MasterFresh drawers have to be removed for cleaning. ^ Take off the filter mat. ^ Clean the filter mat in lukewarm water without any detergent. ^ Pull out the MasterFresh drawer and remove it. -
Page 51: Door Seals
Cleaning and care Door seals Do not use any oils or grease on the door seals as these will cause the seals to deteriorate and become porous over time. The door seals should be cleaned regularly with clean water, and then wiped dry with a soft cloth. -
Page 52: Problem Solving Guide
If this is the case, contact a qualified ^ Check that the appliance doors are electrician or Miele. closed properly. ^ Check the temperature settings..the compressor runs continuously. - Page 53 Has the appliance door been open for The water filter will soon need to be longer than 5 minutes? changed. ^ Close the appliance door. ^ You can order a replacement filter from your Miele Chartered Agent or from Miele.
- Page 54 Problem solving guide ^ Check that the correct valve was . . . the indicator for the reminder to installed; an incorrect valve may change the water filter flashes red. cause a drop in water pressure. ^ Replace the water filter. Remember it can take up to .
- Page 55 ^ Check that the ice cube container is in the temperature display. clean and wash it if necessary. There is a fault. Call Miele..the ice cube maker is producing . . . the interior lighting is not too few or misshapen ice cubes.
- Page 56 Problem solving guide Top lighting: Side lighting: ^ Hold the lamp cover at the front with ^ Turn the lamp cover anti-clockwise to both hands and push it back. remove it. ^ Then lift the lamp cover forwards to Do not touch halogen lamps with remove.
- Page 57 Problem solving guide If you still cannot remedy the fault having followed these suggestions, please contact Miele. However, a call-out charge will be applied for unnecessary service visits where the problem could have been rectified as described in these operating instructions.
-
Page 58: Water Filter
New water filters (bypass and active to be changed. charcoal filter) can be obtained from your Miele Chartered Agent or ^ Make sure that you have a spare Miele. water filter ready to fit. -
Page 59: To Change The Water Filter
Water filter To change the water filter Air in the system can cause water to gush out and the filter to spring out when it is removed. Take great care, therefore, when changing the filter. ^ Remove the cap from the old filter cartridge (3). -
Page 60: To Confirm The Water Filter Has Been Changed
Water filter All ice cubes that are produced in the 24 hours after you have changed the water filter should be discarded. ^ After the filter has been changed, the reminder to change the filter will Using an external water filter continue to flash in the control panel. -
Page 61: Noises
Noises Normal noises What causes them Brrrrr ... A humming noise is made by the motor (compressor). This noise can get louder for brief periods when the motor switches on. Blubb, blubb ... A gurgling noise can be heard when coolant is circulating through the pipes. -
Page 62: After Sales / Warranty
After Sales / Warranty In the event of a fault which you cannot correct yourself, please contact: – Miele The contact details for Miele are given on the back cover of these operating instructions. When contacting Miele, please quote the model and serial number of your appliance. -
Page 63: Mains Water Connection
Replace the stainless steel hose if it hose for the ice cube maker. is defective. It must only be replaced by an original Miele hose (available from Miele). Please note that this The water quality must conform to hose is suitable for conveying the requirements for drinking water drinking water. -
Page 64: Preparing For Plumbing The Appliance Into The Mains Water Supply
Mains water connection Preparing for plumbing the The appliance must only be connected to a cold water pipe that appliance into the mains water supply is directly connected to the fresh water supply in order to ensure circulation of the water in the cold water pipe. Plumbing connections must be correctly in place before the Avoid using a water inlet in which... - Page 65 Mains water connection Before using the appliance for the first On appliances with a feed-through for time, the water inlet pipe should be the water inlet hose, purged of air by a qualified and competent person: – To do so the stainless steel hose should be filled as much as possible with water before being connected to the appliance.
-
Page 66: Fitting The Stainless Steel Hose To The Appliance
Mains water connection Fitting the stainless steel hose to the appliance When fitting the stainless steel hose, make sure that it is neither kinked nor damaged. ^ Remove the cap (1.) from the water connection at the front of the appliance. -
Page 67: Electrical Connection
Electrical connection All electrical work should be carried out Do not connect the appliance to the by a suitably qualified and competent mains electricity supply by an extension person in strict accordance with current lead or a plug adapter. Extension leads local and national safety regulations. -
Page 68: Installation Advice
Should you require further assistance, please contact – 3 cm away from an electric oven or Miele. range – 30 cm away from an oil or coal-fired Climate range range... - Page 69 The weight of the appliance when empty is: KF 1801 Vi, KF 1811 Vi ..206 kg KF 1901 Vi, KF 1911 Vi ..225 kg...
-
Page 70: Floor
This appliance may be installed "side-by-side" with another suitable KF 1801 Vi, KF 1811 Vi ..431 kg refrigerator or freezer. KF 1901 Vi, KF 1911 Vi ..537 kg... - Page 71 Installation advice Joining the appliances together If the partition wall between the two without a partition wall using the appliances is between 16 mm and 160 mm thick, each appliance must be side-by-side installation kit built into its own niche using the assembly parts supplied.
-
Page 72: Limiting The Opening Angle Of The Door
Installation advice Limiting the opening angle of the door The door hinges are set at the factory to enable the door to be opened wide. However, if the appliance door hits an adjacent wall when opened, for example, the opening angle can be limited to 90°. -
Page 73: Appliance Door Dimensions (Opening Angle 90°)
Installation advice Appliance door dimensions (opening angle 90°) * The dimensions of the door fronts and handles will vary according to the individual kitchen. KF 1801 Vi, KF 1811 Vi Door 829 mm Door front (max. 38 mm)* handle* KF 1901 Vi, KF 1911 Vi... -
Page 74: Appliance Door Dimensions (Opening Angle 115°)
Installation advice Appliance door dimensions (opening angle 115°) * The dimensions of the door fronts and handles will vary according to the individual kitchen. KF 1801 Vi, KF 1811 Vi Door 829 mm Door front (max. 38 mm)* 363 mm... -
Page 75: Building-In Dimensions
Building-in dimensions Niche width KF 1801 Vi, KF 1811 Vi 762 – 765 mm KF 1901 Vi, KF 1911 Vi 915 – 918 mm... - Page 76 Building-in dimensions Laying the electrical cabling Door/drawer front dimensions and the pipework for the mains water supply KF 1801 Vi, 1354 KF 1811 Vi KF 1901 Vi, 1354 KF 1911 Vi...
-
Page 77: Installation
Installation Other Due to the size and weight of the – Step ladder appliance, it is essential that – Sack barrow installation is carried out by two people. – Wooden beam (min. 75 mm x 100 mm) if required, to prevent Tools and accessories tilting;... -
Page 78: Weight Of The Door Fronts
The size of the side panel must match door in kg door in kg that of the furniture panel opposite. KF 1801 Vi, KF 1811 Vi KF 1901 Vi, KF 1911 Vi Fitting a door which is heavier than the maximum permitted could damage the hinges. -
Page 79: Aligning The Housing Unit
Installation Aligning the housing unit Checking the building-in niche – The building-in dimensions now need to be checked. – Check the position of the electrical and plumbing connections (see "Electrical connection" and "Mains water connection"). – Check that all surrounding furniture/units are securely fixed to the wall. -
Page 80: Preparing The Niche
Installation The appliance can be rolled along the floor using the wheels at the back. Preparing the niche Keep the door and drawer to the appliance closed until it is fixed inside the building-in niche. ^ Do not remove the installation aids Due to the sheer size and weight of from the appliance doors. -
Page 81: Anti-Tipping Mechanism
Installation Anti-tipping mechanism Use two anti-tipping mechanisms for each appliance or four for each The anti-tipping mechanism a side-by-side combination of ensures the housing unit b is securely appliances. fixed to the wall and tipping of the appliance is prevented. ^ Position the anti-tipping mechanisms a at the rear of the housing unit on the left and right, leaving a gap to the... - Page 82 Installation ^ Mark the position of the lower edge of An alternative anti-tipping mechanism the wooden beam on the rear wall of the niche. If it is not possible to fix the anti-tipping ^ Select screws of a length depending mechanisms securely to the floor of the niche, the appliance can be secured at on the thickness of the wood.
-
Page 83: Placing The Appliance In The Niche
Installation ^ Plug in the appliance a. Placing the appliance in the niche Connection should be made via a suitable switched socket. The If you are installing two appliances socket should be close to the side by side, now secure the appliance and easily accessible. -
Page 84: Aligning The Appliance
Installation Aligning the appliance Important! ^ Align the appliance with Proceed carefully when adjusting neighbouring furniture fronts. the feet, alternating between the left and right feet. ^ A mark is located on the appliance base. When adjusting the height, this mark needs to be aligned at 32 mm from the floor. -
Page 85: Securing The Appliance In The Niche
Installation ^ If a wooden beam has been fitted above the appliance to prevent tipping, the appliance height needs to be adjusted so that the appliance fits snuggly under the woodden beam. Securing the appliance in the niche ^ Pull out the lugs for the side fixing plates g. - Page 86 Installation ^ Open both appliance doors. When installing two appliances side by side, the trims for the two appliances need to be joined together to form one long strip: ^ Insert the joining peg from the side-by-side kit halfway into the channel in the trim for the left-hand appliance.
-
Page 87: Preparing The Furniture Fronts
Installation Connect the water inlet hose to the appliance (see "Mains water connection"). Preparing the furniture fronts To ensure the correct alignment of the furniture fronts, it is vital to fix the furniture door to the refrigerator before fixing the drawer front to the freezer. - Page 88 Installation ^ Mark the gap X on the inside of the – The mounting frame has several furniture front. different types of holes to take account of a variety of furniture fronts. – When securing the frame, always screw into the strongest part of the furniture door.
-
Page 89: Securing And Aligning The Furniture Door
Installation Securing and aligning the furniture door ^ Press the pieces of angle trim m on both sides into the white plastic frame, and screw them down securely. Spare screws can be found in the plastic bag marked "E". ^ Screw the nuts o loosely onto the threaded bolts, but do not tighten yet. - Page 90 Installation When fitting the drawer front, bear in Fitting the fixing brackets mind the gap between the drawer and the refrigerator door front: The fixing brackets are used to secure the furniture front to the freezer drawer at the bottom. ^ Measure the gap Y between the adjusting bar on the freezer drawer ^ Open the freezer drawer as far as it...
-
Page 91: Securing The Covers
Installation Securing the covers ^ Now attach the covers onto the retaining clips on both sides. ^ Fit the two cover strips to both sides In the case of side-by-side of the refrigerator door and freezer installation, the cover strips are only drawer, clicking them into the space required on the outer side. -
Page 92: Fitting The Plinth Facing
Installation Fitting the plinth facing Do not cover the vents in the plinth. This will damage the appliance. ^ Trim the plinth facing to the required length and height (cut along the lower edge of the plinth facing where it touches the floor). ^ Fit the cover to the light contact switch so that it clicks into place as shown. -
Page 93: Fitting The Air Separator
Installation Fitting the air separator The air separator in the vent underneath separates air entering the appliance from that leaving it. It also stops warm air flowing into the appliance, which would cause a short circuit. ^ If necessary, the three parts of the air separator can be shortened to the ^ Clip the air separator to the left and correct height. -
Page 95: Contact Details
Miele Australia Pty. Ltd. ACN 005 635 398 ABN 96 005 635 398 Miele Center and Head Office Melbourne: 1 Gilbert Park Drive Knoxfield, VIC 3180 Miele Center and Office Melbourne: 206-210 Coventry Street South Melbourne, VIC 3205 Miele Center and Office Sydney:... - Page 96 KF 1801 Vi, KF 1811 Vi KF 1901 Vi, KF 1911 Vi en - AU, NZ M.-Nr. 09 761 090 / 01...