Toshiba TS2000 Instruction Manual
Robot controller
Hide thumbs
Also See for TS2000:
- Instruction manual (115 pages) ,
- Instruction manual (38 pages) ,
- Instruction manual (40 pages)
Table of Contents
Advertisement
Quick Links
INSTRUCTION MANUAL
TS2000 ROBOT CONTROLLER
• Make sure that this instruction manual is delivered to the
final user of Toshiba Machine's industrial robot.
• Before operating the industrial robot, read through and
completely understand this manual.
• After reading through this manual, keep it nearby for future
reference.
TOSHIBA MACHINE CO., LTD.
STARTUP MANUAL
Notice
TOKYO, JAPAN
STE 71366-4
Advertisement
Table of Contents

Related Manuals for Toshiba TS2000


Summary of Contents for Toshiba TS2000
- Page 1 STARTUP MANUAL Notice • Make sure that this instruction manual is delivered to the final user of Toshiba Machine's industrial robot. • Before operating the industrial robot, read through and completely understand this manual. • After reading through this manual, keep it nearby for future reference.
- Page 2 STARTUP MANUAL series Robot Controller Copyright 2002 by Toshiba Machine Co., Ltd. All rights reserved. No part of this document may be reproduced in any form without obtaining prior written permission from Toshiba Machine Co., Ltd. The information contained in this manual is subject to change without prior notice to effect improvements.
- Page 3 Before reading this manual, install the robot according to the Safety Manual and Installation & Transport Manual. When you use the TS2000 robot controller for the first time, be sure to read through this manual. Structure of TS2000 robot controller instruction manuals:...
- Page 4 STARTUP MANUAL series Robot Controller [Maintenance Manual] This manual deals with the daily and regular inspections to be made on the robot and controller. Read through this manual to use the robot safely over long years to come. [Communication Manual] This manual describes the serial communication between the robot controller and other equipment.
- Page 5 STARTUP MANUAL series Robot Controller Cautions on Safety This manual contains the important information on the robot and controller to prevent injury to the operators and persons nearby, to prevent damage to assets and to assure correct use. Make sure that the following details (indications and symbols) are well understood before reading this manual.
- Page 6 STARTUP MANUAL series Robot Controller [Operation] DANGER • During operation, NEVER enter the dangerous area of the robot. Otherwise, you will be injured seriously. • DO NOT leave in the working range any machinery or materials Prohibited which will hinder the operation. If the equipment went wrong, a person nearby will be injured or involved in an accident.
- Page 7 STARTUP MANUAL series Robot Controller CAUTION • DO NOT change the data of the system structure file. Otherwise, the robot will move abnormally, resulting in damage or an accident. Prohibited • In principle, teaching operation should be performed outside the dangerous area of the robot.
- Page 8 STARTUP MANUAL series Robot Controller CAUTION • Before operating the equipment, perform the following inspection. (1) Make sure that visual appearance of the robot, controller, peripheral equipment and cables is in the good condition. Mandatory (2) Make sure that no obstacle stands in or near the working range of the robot and peripheral equipment.
-
Page 9: Table Of Contents
STARTUP MANUAL series Robot Controller Table of Contents Page Before Power ON.................... Control Panel ..................Teach Pendant..................Power ON ....................... Power ON..................... Emergency Stop................... Servo ON ..................... Main Display..................Power OFF................... Manual Operation ................... Enable Switch ..................Joint Guide ................... Guide in Cartesian Coordinate System .......... -
Page 10: Before Power On
STARTUP MANUAL series Robot Controller Before Power ON Before turning the power on, confirm the following matters, referring to the Installation & Transport Manual. Is the robot secured? Is the power supply connected? Single phase, 180 ~ 250 V AC power supply STE 71366 –... - Page 11 STARTUP MANUAL series Robot Controller Are the cables between the controller and robot connected? Is the I/P jumper connector connected? (Brake, hand I/O) (Encoder feedback) Motor power cable The I/O jumper connector is short-circuited to the external signals required for the robot operation, such as external emergency stop, servo OFF and stop.
-
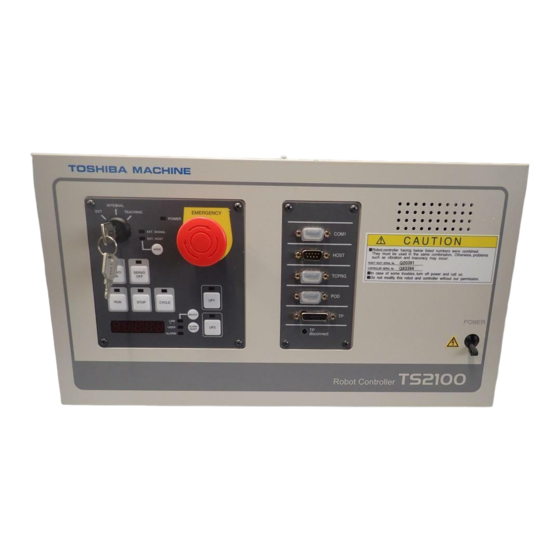
Page 12: Control Panel
STARTUP MANUAL series Robot Controller Control Panel The control panel is shown below. EMERGENCY MANU POWER EXT. SIGNAL EXT. HOST MODE SERVO SERVO STOP CYCLE SELECT LINE USER ALARM RESET ALARM Key switch : Used to select the operation master mode. MODE : Used to change over the EXT. - Page 13 STARTUP MANUAL series Robot Controller SELECT : Each time this switch is pressed, the display content changes. (LINE) No. of execution steps of program. (USER) Value set in system variable PLCDATAW. (The value is input by the program.) (ALARM) Alarm number generated in the controller. If two (2) or more alarms have generated, such alarm numbers are displayed at two (2)-second intervals.
-
Page 14: Teach Pendant
STARTUP MANUAL series Robot Controller Teach Pendant Display EMERGENCY STOP switch SERVO ON pushbutton switch Guidance condition LED lamp Enable switch Guide keys STE 71366 – 13 –... -
Page 15: Power On
STARTUP MANUAL series Robot Controller Power ON Power ON If an error has occurred or if the POWER LED equipped on the control panel will not illuminate when the main CAUTION power switch of the controller was turned on, turn the power off immediately and check for the wiring. -
Page 16: Emergency Stop
STARTUP MANUAL series Robot Controller Emergency Stop If a problem related to safety has occurred in the robot or peripheral equipment, press the EMERGENCY stop pushbutton switch immediately. The robot stops instantly with the servo power turned off. EMERGENCY stop switch Control panel Teach pendant EMERGENCY... -
Page 17: Servo On
STARTUP MANUAL series Robot Controller Servo ON If the robot has operated abnormally when the servo power was turned on, press the EMERGENCY stop CAUTION switch immediately to turn the servo power off. Before entering the working envelope of the robot, be sure to turn the servo power off. - Page 18 STARTUP MANUAL series Robot Controller Turn the servo power on. EMERGENCY MANU POWER EXT. SIGNAL EXT. HOST MODE SERVO SERVO STOP CYCLE SELECT LINE USER ALARM RESET ALARM Make sure that the SERVO ON lamp on the control panel or teach pendant is illuminated.
-
Page 19: Main Display
STARTUP MANUAL series Robot Controller Main Display Turn the power on, select the TEACHING mode by means of the MODE switch and turn the servo power on. M O D E : T E A C H I N G / C O N T 2 0 % M : F R E E S : S T O P... - Page 20 STARTUP MANUAL series Robot Controller (Machine) On the TS1000 screen, "FREE" is always indicated. (Status) Indicates the program run status of the controller. The run status comes in the following four (4) types. During program execution STOP RESET During stop of initialization mode (When the RUN mode takes effect, the program is executed from the top.) STOP RETRY...
-
Page 21: Power Off
STARTUP MANUAL series Robot Controller Power OFF Make sure that the robot is not working. Make sure that the red-colored STOP EMERGENCY lamp equipped on the control panel is MANU POWER illuminated. EXT. SIGNAL EXT. HOST Unless the STOP lamp is illuminated, MODE press the STOP switch and wait until the robot motion stops with the STOP... - Page 22 STARTUP MANUAL series Robot Controller Turn off the controller power. Turn off the controller power. STE 71366 – 21 –...
-
Page 23: Manual Operation
STARTUP MANUAL series Robot Controller Manual Operation Enable Switch To manually guide the robot, set ON the enable switch. Enable switch When gripped light, the switch turns When gripped strong, the switch turns off. (The robot stops) η The robot cannot be guided manually if the enable switch is set OFF. -
Page 24: Joint Guide
STARTUP MANUAL series Robot Controller Joint Guide Turn on the controller power, select "TEACHING for the master mode and turn on the servo power. Select the guidance coordinate system. Press the COORDINATE key to select the guidance coordinate system. Each time the key is pressed, the status of the guidance coordinate system select lamps on the keyboard changes as shown below. - Page 25 STARTUP MANUAL series Robot Controller Press the SPEED key to change the guide speed, then move the robot in the plus (+) and minus (–) directions by means of the –X –1 keys. Press the REMOTE key to change –1 the guidance mode to "INCHING", and move the robot by inching, –X...
- Page 26 STARTUP MANUAL series Robot Controller [12] Move the axis 4 by means of the –C +4 and –4 keys. –1 –4 STE 71366 – 25 –...
-
Page 27: Guide In Cartesian Coordinate System
STARTUP MANUAL series Robot Controller Guide in Cartesian Coordinate System Select the guidance conditions. Press the COORDINATE key to select "WORLD". Press the SPEED key to select a guide speed. Press the REMOTE key to select "JOG" or "INCHING". Set ON the enable switch. –X Move the robot in the X-axis direction by means of the +1 and... - Page 28 STARTUP MANUAL series Robot Controller Press the UTILITY key, and the teach pendant display as shown below is called. R O B O T U T I L I T Y A U X I / O P O S T R A N S W K –...
-
Page 29: Programming
STARTUP MANUAL series Robot Controller Programming Now, let's create a simple program in which the robot moves from P1 to P2. Starting Editor Press the MODE key equipped on the control panel to select "TEACHING" for the master mode. Make sure that [EDIT] is assigned to the [F1] key of the function menu. M O D E : T E A C H I N G / C O N T 2 0 % M : F R E E... - Page 30 STARTUP MANUAL series Robot Controller When [EDIT] is selected, the file select screen appears. ( 0 0 1 / 0 0 6 ) F I L E S E L E C T A U T O S T R .
- Page 31 STARTUP MANUAL series Robot Controller The display changes as shown below. F I L E 0 0 0 5 . 0 1 2 1 2 3 4 5 6 F e b – 1 6 – 2 0 0 1 >...
- Page 32 STARTUP MANUAL series Robot Controller The alphabetic input and numeric input modes can be changed over alternately by pressing the ALPH key. When the numeric input mode is selected, the key lamp is turned on. Numeric key input Select the numeric input (NUM) mode and press an appropriate numeric key. Example: To input number "8", press TUV key.
-
Page 33: Entering Program
STARTUP MANUAL series Robot Controller Entering Program Program editor File name currently edited Cursor position Cursor line T E S T C : 1 L : 1 Cursor S A V E D E D I T J U M P F I N D C H A N G >... -
Page 34: Entering Data (Teach Points)
STARTUP MANUAL series Robot Controller Entering Data (Teach Points) Start of data editor Make sure that "DEDIT" is assigned to the [F2] key of the function menu on the program editor screen. S A V E D E D I T J U M P F I N D C H A N G... - Page 35 STARTUP MANUAL series Robot Controller Enter teach point name "P1" and press the EXE key. w / . w o r l S A V E D E D I T F U L L T R A N S P Y L D >...
- Page 36 STARTUP MANUAL series Robot Controller Press the [F3] key and teach the current robot position. T E A C H : P R E S S < E X E > w / . w o r l d N O S A V F I N D T E A C H M –...
- Page 37 STARTUP MANUAL series Robot Controller To display the teach points in detail, press the [FULL] key of the function menu. 1 0 ] 3 0 0 . 0 0 0 C O N F I G : F R E E 3 0 0 .
-
Page 38: Quitting Editor
STARTUP MANUAL series Robot Controller Quitting Editor Press the NEXT key a few times to display [SAVE]. w / . w o r l d S A V E D E D I T F U L L T R A N S P Y L D >... -
Page 39: Starting Program
STARTUP MANUAL series Robot Controller Starting Program Selecting Program Select program "TEST" which was created in Section 4 above. Select "TEACHING" for the master mode by pressing the MODE switch provided on the control panel. Make sure that [SEL] is assigned to the [F3] key of the function menu. M O D E : T E A C H I N G / C O N T 2 0 % M : F R E E... - Page 40 STARTUP MANUAL series Robot Controller Press the EXE key to select program "TEST". U S E R . P A R 2 5 8 4 N o v – 0 1 – 2 0 0 1 T E S T N A M E T I M E I N P U T...
- Page 41 STARTUP MANUAL series Robot Controller Once the program has been selected, it is compiled. ("Compile" signifies the program check and conversion of the program into a format which the robot controller can operate arithmetically at high speed.) If an error is found in the program at this time, an alarm is generated without selecting the program.
-
Page 42: Test Operation
STARTUP MANUAL series Robot Controller Test Operation A programmed operation in the TEACHING mode is called the "test operation." Change the speed override. The current override value is shown by "O: %" on the right side of the screen. M O D E : T E A C H I N G / C O N T T E S T 2 0 % M : F R E E... - Page 43 STARTUP MANUAL series Robot Controller Press the NEXT key to assign [STEP] to the [F4] key of the function menu. Press the [F4] key then. R E S E T M O D E : S T E P C O N T C Y C L E S E G S T E P...
- Page 44 STARTUP MANUAL series Robot Controller R E S E T M O V E E D I T D E D I T S E L R U N F I L E > To terminate the step operation, press the EXE key. Cycle operation Press the NEXT key to assign [CYCLE] to the [F2] key of the function menu.
- Page 45 STARTUP MANUAL series Robot Controller The robot executes to the end command of the program and stops. Press the NEXT key to assign [CONT] to the [F1] key of the function menu. Press the [F1] key then. R E S E T M O D E : C O N T C O N T C Y C L E...
- Page 46 STARTUP MANUAL series Robot Controller To stop the ongoing robot operation, the break and feed hold functions are also available, in addition to the stop function. To use the break function, select [BREAK] from the function functions. Then the robot will decelerate and stop even during the motion command.
-
Page 47: Internal Automatic Operation
STARTUP MANUAL series Robot Controller Internal Automatic Operation Change over the key switch provided on the control panel to select "INTERNAL" for the master mode. INTERNAL TEACHING EXT. SIGNAL EXT. HOST MODE Before starting the operation, confirm the selected program name, operation mode and override set value. - Page 48 STARTUP MANUAL series Robot Controller Select the execution mode by means of the [MODE] key of the function menu. In the internal automatic mode, program start and stop are performed through the control panel. SERVO SERVO STOP CYCLE Change the override value, using [OVRD] of the function menu. In the INTERNAL mode, the override of up to 100 % can be entered.
-
Page 49: Input/Output Control
STARTUP MANUAL series Robot Controller Input/Output Control You can use the UF1 and UF2 switches and LEDs equipped on the control panel as the user's I/Os. This section describes the programs, using the I/Os of the control panel. For the other I/Os (i.e., standard input/output and hand input/output), see the Interface Manual. -
Page 50: I/O Control Program
STARTUP MANUAL series Robot Controller I/O Control Program Program using an input signal Now, let's change the program created in Section 4. PROGRAM MAIN ······ Start of main program MOVE P1 ······ Move to point P1 MOVE P2 ······ Move to point P2 WAIT DIN (63) ······... - Page 51 STARTUP MANUAL series Robot Controller Program using an output signal Now, let's change the program in Para. [1] above. PROGRAM MAIN ······ Start of main program MOVE P1 ······ Move to point P1 DOUT (63) ······ Output 63 (UF1 lamp) turns on. MOVE P2 ······...
- Page 52 STARTUP MANUAL APPROVED BY: CHECKED BY: PREPARED BY: STE 71366 – 51 –...