
Related Manuals for Toro 09802 HydroJect 3010


Summary of Contents for Toro 09802 HydroJect 3010
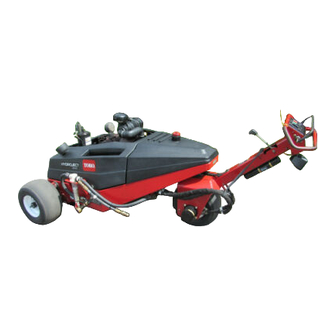
- Page 1 Form No. 3356–184 Rev B HydroJect 3010 Aerator Model No. 09802—250000001 and Up Operator’s Manual Domestic English (EN)
-
Page 2: Table Of Contents
........Water System Schematic ....The Toro Aerator Commercial Products Warranty . . . Loose Parts . -
Page 3: Introduction
Authorized Service them. Dealer or Toro Customer Service and have the model and • Become familiar with the safe operation of the serial numbers of your product ready. The model and serial equipment, operator controls, and safety signs. -
Page 4: Slope Operation
Authorized Toro Distributor. Do not run engine indoors or in an enclosed area. • Stop on level ground, disengage drives, engage parking brake, shut off engine before leaving the operator’s... -
Page 5: Sound Pressure Level
• Park machine on level, hard ground. Never allow • Use only Toro-approved attachments. Warranty may be untrained personnel to service machine. voided if used with unapproved attachments. Sound Pressure Level • Use jack stands or safety latches to support components when required. - Page 6 80-8040 80-8010 IMPORTANT THE FIVE MICRON FILTER ELEMENT (86–8620) MUST BE IN PLACE AT ALL TIMES. OPERATION WITHOUT PROPER FILTRATION WILL RESULT IN PREMATURE WEAR AND FAILURE OF THE WATER SYSTEM COMPONENTS. USE OF ADDITIONAL FILTRATION OR POTABLE WATER MAY BE NECESSARY TO PROLONG THE LIFE OF THE FILTRATION SYSTEM.
- Page 7 108-1317 80-9450 108-1263 1. Choke...
- Page 8 108-1264 108-1265...
-
Page 9: Specifications
Specifications Note: Specifications and design subject to change without notice. General Specifications Kohler, 4 cycle, V–twin, air cooled, 27 hp @ 3600 RPM, 44 cu. in (725 cc) displacement. Electric start. Heavy duty air cleaner. 2 quart oil capacity. Solid state Engine ignition. -
Page 10: Water Injection System
Senses for water pressure after filter and turns on when pressure is over 20–28 psi Water Pressure Switch and turns off when pressure drops below 7–13 psi. Pump is a Toro exclusive design with cast stainless steel head and 3 piston plungers. Vee packing seals and Kevlar guides. Forged crankshaft with plasma Pump sprayed ceramic on stainless steel plungers and cast iron connecting rods. -
Page 11: Depths And Nozzle Configurations
4–6 in. 86-8133 0.081 2.057 6–8 in. * Use only with varied size configurations Note: Aluminum Washer, Toro Part no. 80-6680, is required with any nozzle change. Optional Staggered Size Nozzle Configuration Quantity of Nozzles Decimal Decimal Metric Size Metric Size Approx. -
Page 12: Setup
Setup Note: Determine the left and right sides of the machine from the normal operating position. Loose Parts Note: Use this chart as a checklist to ensure that all parts have been received. Without these parts, total setup cannot be completed. -
Page 13: Before Operating
Before Operating Activating and Charging the Battery Warning Battery posts, terminals, and related accessories contain lead and lead compounds, chemicals known to the State of California to cause cancer and reproductive harm. Wash hands after handling. Figure 2 1. Since the battery is not filled with electrolyte or 1. -
Page 14: Checking The Engine Oil
Toro Premium Engine oil is available from your distributor in 10W–30 viscosity. See the parts catalog for part 1. Remove the cap from the fuel tank (Fig. 4) and fill the numbers. -
Page 15: Checking The Gear Case Fluid Level
Note: Toro will not assume responsibility for damage Danger caused by improper substitutions, so use only products from reputable manufacturers who will stand behind their recommendation. In certain conditions, gasoline is extremely flammable and highly explosive. A fire or Antiwear Hydraulic Fluid, ISO VG 68... -
Page 16: Checking The Pump Case Fluid Level
0.1 150 Charge Exxon Terresstic 150 Have the accumulator charge checked before and after each Philllips Magnus Oil 150 operating season by an Authorized Toro Distributor. Sunvis 150 76 Lubricants Turbine Oil 150 Warning Castrol Paradene 150 R&O Charge accumulators contain high pressure... -
Page 17: Operation
Operation Spray Wash Control Pull the handle (Fig. 7) upward to activate the roller spray wash system. Move the control knob up or down to adjust Note: Determine the left and right sides of the machine the spray rate to keep the rollers free of debris. from the normal operating position. -
Page 18: Operating Precautions
Operating Precautions Follow these precautions when operating the aerator: • Before aerating, inspect the work area for debris and determine the best direction and pattern to operate the machine. • If the machine starts to vibrate abnormally, shut the engine off. Remove the wires from the spark plugs to prevent the possibility of accidental starting. -
Page 19: Training Period
4. Insert the key into the ignition switch and rotate it clockwise to start the engine. Release the key when the engine starts. Gradually return the choke lever to the OFF position (lever all the way in) after the engine starts and warms up. -
Page 20: Checking The Interlock System
6. Reach under the hood and open the bleed valve on the 10. Engage and hold the transport/aerate toggle switch to main valve at the rear of the machine (Fig. 11). Bleed fully lower the machine onto the rollers. Release the the system until a steady flow of water comes from the switch when the machine is fully lowered;... -
Page 21: Transport Operation
To do a functional check of interlock system: 1. Position the machine in a flat, open area on rough turf and away from buried wires, plumbing, etc. Stop the engine. 2. Move the traction bail up and down while trying to start the engine. - Page 22 Important Do not use chemicals! Concern for environmental issues and corrosive affects on machine components. Figure 14 1. Bypass valve...
-
Page 23: Maintenance
Storing the Hydroject for extended periods of time (3 months or longer) and/or seasonal temperature variances can affect the accumulators ability to retain a sufficient pre–charge and seasonal servicing (recharge) may be required. If one of the accumulator charge indicator lamps illuminates, contact your authorized Toro Distributor for accumulator maintenance services. _____... -
Page 24: Daily Maintenance Checklist
Daily Maintenance Checklist Duplicate this page for routine use. For the week of: Mon. Tues. Wed. Thurs. Fri. Sat. Sun. Maintenance Check Item Check safety interlock operation. Check brake operation. Check the engine oil level. Check the engine air filter pre-cleaner. Check the engine cooling fins for debris. -
Page 25: Lubricating The Machine
Caution If you leave the key in the ignition switch, someone could accidently start the engine and seriously injure you or other bystanders. Remove the key from the ignition and disconnect the wire from the spark plug before you do any maintenance. -
Page 26: Servicing The Pre-Filter
Note: To ease the removal of the filter body from the filter Figure 18 head, a filter wrench is available. Contact your Authorized 1. Body 3. Ball valve for flushing Toro Distributor. 2. Clear cover Caution Replacing the Main Water Filter The water filter body is very heavy when filled with water and the filter. -
Page 27: Changing The Engine Oil And Filter
Changing the Engine Oil and Filter For new engines, change the oil after the first 50 operating hours. Thereafter, under normal conditions, change the oil and the filter after every 100 hours of operation. However, an engine operated in dusty or dirty conditions requires more frequent oil changes. -
Page 28: Checking And Replacing The Spark Plugs
1. Release the latches and securing the air cleaner cover to 3. Remove and replace the primary filter. Cleaning of the the air cleaner body (Fig. 22). used element is not recommended due to the possibility of damage to the filter media. Inspect the new filter for shipping damage, checking the sealing end of the filter and the body. -
Page 29: Changing The Gear Case Oil And Filter
2. Clean the area around the spark plugs (Fig. 25) so that Important The gear case oil and filter must be changed dirt does not fall into the cylinder when the plugs are immediately when any contamination, sludge, water or removed. -
Page 30: Changing The Pump Case Oil
Checking the Hydraulic Lines 7. Remove the filler cap and add approximately 4–5 quarts of Mobil DTE 26 hydraulic oil or equivalent oil to the and Hoses gear case reservoir. Install the filler cap. 8. Check for leaks around the oil filter. Tighten the filter Check the hydraulic lines and hoses daily for leaks, kinked only enough to eliminate leaks. -
Page 31: Adjusting The Transmission For Neutral
3. If an adjustment is necessary, adjust as follows: A. Loosen the pivot nut securing the pump mount to the pump support (Fig. 30). Figure 31 1. Neutral adjustment cam 3. Switch tab 2. Locknut Figure 30 1. Pump 3. Adjusting nut 5. -
Page 32: Adjusting The Parking Brake
8. Loosen the jam nuts and adjust the LOWER speed rod 2. Loosen the upper jam nut securing the brake cable to (Fig. 32) until the traction wheel rotates at 20–22 RPM. the bracket (Fig. 34). Tighten the jam nuts. 9. -
Page 33: Servicing The Spray Wash Nozzles Or Strainers
Warning Incorrect battery cable routing could damage the aerator and cables causing sparks. Sparks can cause the battery gasses to explode, resulting in personal injury. • Always disconnect the negative (black) battery cable before disconnecting the positive (red) cable. • Always connect the positive (red) battery cable before connecting the negative (black) cable. -
Page 34: Seasonal Storage
Seasonal Storage Preparing the Engine 1. Drain the engine oil from the crankcase. Preparing the Water System 2. Remove and discard the oil filter. Install a new filter. 3. Refill the engine with 2 qts. of recommended motor oil. Important It is very important that the water system be 4. -
Page 35: Troubleshooting
Troubleshooting Problem Possible Causes Corrective Action The unit will not move when the 1. Check that motion occurs at the 1. Inspect the traction push/pull traction ball is engaged. pump pivot plate when the cable and override assembly traction ball is moved. under the tiller handle. - Page 36 4. Have the system serviced by an Authorized Toro Distributor. The engine does not start (will not 1. The traction bail is not in the 1. Correct the traction bail engage the starter).
- Page 37 3. The soil composition is hard. 3. A different nozzle configuration may be required. 4. Have the water system checked by an Authorized Toro Distributor. The unit is not producing aeration 1. This is a normal condition of 1. The operator must hold the holes (the injection pump stops the neutral interlock system.
- Page 38 If mechanical noise continues during aeration, stop the unit and have it serviced by an Authorized Toro Distributor. 2. A nozzle is missing or there are 2. Open the bleed valve and too many large nozzle installed. examine the nozzles. Verify the size and quantity per the recommendation chart.
-
Page 39: Hydraulic Schematic
Hydraulic Schematic PUMP MOTOR FILTER... -
Page 40: Electrical Schematic
Electrical Schematic... -
Page 41: Electrical Schematic
Electrical Schematic... -
Page 42: Water System Schematic
Water System Schematic ROLLER WASH ACCUMULATOR NOZZLES 2500 PSI NITROGEN PRE-CHARGE WATER VALVE ELECTRIC CLUTCH WATER RELIEF VALVE PUMP 5000 PSI ENGINE ELECTRIC GEARBOX CAM BRAKE CLUTCH PRESSURE ROLLER WASH SWITCH NOZZLES 20 PSI - ON 10 PSI - OFF HIGH PRESSURE AERATION NOZZLES PRESSURE GAUGE... -
Page 44: The Toro Aerator Commercial Products Warranty
If for any reason you are dissatisfied with your Distributor’s service or have difficulty obtaining guarantee information, contact the Toro importer. If all other remedies fail, you may contact us at Toro Warranty Company.