Cisco WVC200 - Wireless-G PTZ Internet Camera Administration Manual
Small business wireless-g ptz internet video camera with 2-way audio
Hide thumbs
Also See for WVC200 - Wireless-G PTZ Internet Camera:
- Release note (4 pages) ,
- Datasheet (4 pages)

Related Manuals for Cisco WVC200 - Wireless-G PTZ Internet Camera


Summary of Contents for Cisco WVC200 - Wireless-G PTZ Internet Camera
- Page 1 ADMINISTRATION GUIDE Cisco Small Business WVC210 Wireless-G PTZ Internet Video Camera With 2-Way Audio...
- Page 2 Collaboration Without Limitation, EtherFast, EtherSwitch, Event Center, Fast Step, Follow Me Browsing, FormShare, GigaDrive, HomeLink, Internet Quotient, IOS, iPhone, iQuick Study, IronPort, the IronPort logo, LightStream, Linksys, MediaTone, MeetingPlace, MeetingPlace Chime Sound, MGX, Networkers, Networking Academy, Network Registrar, PCNow, PIX, PowerPanels, ProConnect, ScriptShare, SenderBase, SMARTnet, Spectrum Expert, StackWise, The Fastest Way to Increase Your Internet Quotient, TransPath, WebEx, and the WebEx logo are registered trademarks of Cisco Systems, Inc.
-
Page 3: Table Of Contents
Contents Chapter 1: Introduction Minimum Requirements Chapter 2: Planning Your Wireless Network Ad-Hoc and Infrastructure Modes Wireless Network Layout Security Threats Facing Wireless Networks Additional Security Tips Chapter 3: Getting to Know the Cisco WVC210 Internet Camera Side Panel Front Panel LCD Screen Built-in Microphone Camera LEDs... - Page 4 Contents Chapter 6: Upgrading the Cisco WVC210 Internet Camera Firmware Chapter 7: Using the Web-Based Configuration Utility Launching the Web-Based Configuration Utility Home Refresh Setup Connected Users Log Out About Help Video Options Panel Setup Options Chapter 8: Configuring the Cisco WVC210 Internet Camera Software Setup >...
- Page 5 Contents Configuration Audio/Video Audio/Video > Video Settings Audio/Video > Audio Settings Applications > Mail Applications > FTP Applications > SMB/CIFS Applications > Motion Detection Event Pan/Tilt Applications > DDNS Settings Pan/Tilt Settings Set Preset Pan/Tilt Control Rotation Sequence Status System Status Image Status Network Status Wireless Status...
- Page 6 Contents Appendix A: Troubleshooting Questions and Answers Windows Help TCP/IP Shared Resources Network Neighborhood/My Network Places Appendix B: Specifications Appendix C: Where to Go From Here WVC210 Wireless-G PTZ Internet Video Camera With 2-Way Audio Administration Guide...
-
Page 7: Chapter 1: Introduction
Introduction Congratulations on purchasing your Cisco Small Business WVC210 Wireless-G PTZ Internet Camera. Cisco is the leader in Wi-Fi certified Internet cameras, and the Cisco WVC210 Network Camera is part of the largest portfolio of Wi-Fi certified cameras in the marketplace. The Cisco WVC210 Wireless-G PTZ Internet Video Camera sends live video through the Internet to a web browser anywhere in the world. -
Page 8: Minimum Requirements
Introduction Minimum Requirements The guide focuses on the hardware and software features of the Cisco Small Business WVC210 Wireless-G PTZ Internet Camera. Advanced video monitoring features and procedures are covered in the Cisco Small Business Video Monitoring System Administration Guide. Before installing a surveillance system, check with local government agencies to NOTE determine if video surveillance and audio monitoring are permitted in your area. - Page 9 Introduction Minimum Requirements Minimum System Requirements (for up to eight cameras) Pentium 4 class, 3 GHz dual-core Memory 1 GB Operating Microsoft Windows 2000, XP, or Vista System Hard Drive 4 GB of available space Graphics Card NVidia high performance or equivalent with a minimum of 256 MB Browser Internet Explorer 6.0 (or later) with ActiveX support for...
-
Page 10: Chapter 2: Planning Your Wireless Network
Planning Your Wireless Network Careful planning is required for a wireless network, to ensure that your users can access the network resources that they need and to ensure that intruders are kept out. This chapter includes the following sections: • Ad-Hoc and Infrastructure Modes, page 4 •... -
Page 11: Wireless Network Layout
Planning Your Wireless Network Wireless Network Layout • Ad-hoc mode—Wireless computers communicate directly with one another. Choose this mode if your wireless network does not require access to data or peripherals on a wired network. If the wireless network is relatively small and needs to share resources only with the other computers on the wireless network, then ad-hoc mode can be used. -
Page 12: Security Threats Facing Wireless Networks
Planning Your Wireless Network Security Threats Facing Wireless Networks Security Threats Facing Wireless Networks Cisco wants to make wireless networking as safe and easy for you as possible. The current generation of Cisco products provide several network security features, but they require specific action on your part for implementation. So, keep the following suggestions in mind whenever you are setting up or using your wireless network. - Page 13 Planning Your Wireless Network Security Threats Facing Wireless Networks MAC Addresses—Enable MAC Address filtering. MAC addresses are unique identification numbers that are assigned to a device at the factory. MAC Address filtering allows you to provide access only to devices that you specify. This feature makes it harder for a hacker to access your network with a random MAC Address.
-
Page 14: Additional Security Tips
Planning Your Wireless Network Security Threats Facing Wireless Networks Always remember that each device in your wireless network MUST use the same CAUTION encryption method and encryption key or your wireless network will not function properly. Additional Security Tips The following tips can help prevent hackers from gaining access into your wireless network. -
Page 15: Chapter 3: Getting To Know The Cisco Wvc210 Internet Camera
Getting to Know the Cisco WVC210 Internet Camera In this chapter, you’ll find the following sections: • Side Panel, page 9 • Front Panel, page 10 • Bottom Panel, page 11 Side Panel On the side panel, you’ll find the antenna connector. Attach the antenna here. WVC210 Wireless-G PTZ Internet Video Camera With 2-Way Audio Administration Guide... -
Page 16: Front Panel
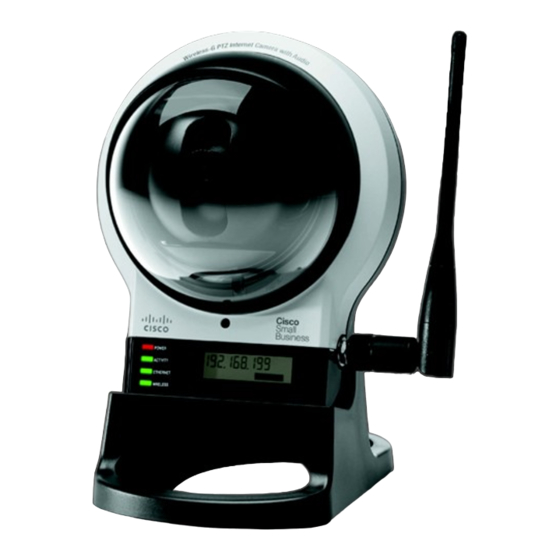
Getting to Know the Cisco WVC210 Internet Camera Front Panel Front Panel The camera, LEDs, built-in microphone, and LCD screen are located on the front of the camera. Microphone LCD screen LEDs LCD Screen The LCD screen indicates the camera’s current IP address and whether it is a fixed or dynamic address. -
Page 17: Camera Leds
Getting to Know the Cisco WVC210 Internet Camera Bottom Panel Camera LEDs Four LEDs let you know how the camera is functioning. Color Description Power Amber The POWER LED lights up when the camera is powered on. It flashes for about 10-15 seconds while the camera is initializing. - Page 18 Getting to Know the Cisco WVC210 Internet Camera Bottom Panel The following features are found on the bottom of the camera. Port, Description Jack, or Button POWER The Power port is where you connect the 5V power adapter. SPKR Use the SPKR OUT input to connect with the 3.5 mm input jack of your optional external speaker.
-
Page 19: Chapter 4: Connecting The Cisco Wvc210 Camera
Connecting the Cisco WVC210 Camera This chapter describes how to connect the camera and contains the following sections: • Camera Installation Guidelines, page 13 • Cisco Wireless Network, page 14 • Connecting to a Wired Network for Setup, page 15 •... -
Page 20: Cisco Wireless Network
Connecting the Cisco WVC210 Camera Cisco Wireless Network Cisco Wireless Network The illustration provides an example of a Cisco wireless network. WVC210 Wireless-G PTZ Internet Video Camera With 2-Way Audio Administration Guide... -
Page 21: Connecting To A Wired Network For Setup
Connecting the Cisco WVC210 Camera Connecting to a Wired Network for Setup Connecting to a Wired Network for Setup You must perform the initial configuration of the Cisco WVC210 camera from a personal computer connected to the camera using a wired connection to the LAN port. - Page 22 Connecting the Cisco WVC210 Camera Connecting to a Wired Network for Setup Connect the other end of the cable to the Cisco WVC210 camera’s LAN port. STEP 5 Camera Network Switch or Router Connect the included power adapter to the camera's Power port. Insert the other STEP 6 end into a standard electrical outlet.
-
Page 23: Changing Your Network Mode
Connecting the Cisco WVC210 Camera Changing Your Network Mode Verify that the camera LEDs are lit. STEP 7 Changing Your Network Mode After the initial configuration, you can use the camera in one of two modes: wired or wireless. You cannot use the camera in both modes simultaneously. When you move the camera from a wired network to a wireless network, or vice versa, you must power off the camera before connecting to the new network. -
Page 24: Wired To Wireless
Connecting the Cisco WVC210 Camera Changing Your Network Mode Wired to Wireless To move the camera from a wired network to a wireless network, follow these instructions: Unplug the power adapter from the camera. STEP 1 Unplug the Ethernet network cable from the camera. STEP 2 Re-connect the power adapter to the Power port on the camera. -
Page 25: Audio Options
Connecting the Cisco WVC210 Camera Audio Options Audio Options If you want to use your own microphone instead of the camera’s built-in microphone, then follow these instructions. The microphone you use must have its own source of power, like your computer speakers. Connect the 3.5 mm input jack of your microphone to the MIC IN port on the STEP 1 camera’s bottom panel. -
Page 26: Chapter 5: Installing The Cisco Wvc210 Internet Camera Software
Installing the Cisco WVC210 Internet Camera Software The product CD for your camera includes a Setup Wizard software program, which helps to set up your Cisco WVC210 Internet camera. There are two ways to use the Wizard: 1. You can launch the Wizard from the CD without installing the software on the PC. This option is useful if you do not want to install anything on your computer. - Page 27 Installing the Cisco WVC210 Internet Camera Software Configuring Basic Camera Settings Insert the Setup CD into your CD-ROM drive. If the CD doesn’t run automatically, go STEP 1 to My Computer and click on your CD-ROM drive. The Welcome window appears. Click Start. STEP 2 WVC210 Wireless-G PTZ Internet Video Camera With 2-Way Audio Administration Guide...
- Page 28 Installing the Cisco WVC210 Internet Camera Software Configuring Basic Camera Settings The License Agreement window appears. Click Next if you agree and wish to STEP 3 proceed. The Wizard searches your network for your camera and displays a list of all cameras it found.
- Page 29 Installing the Cisco WVC210 Internet Camera Software Configuring Basic Camera Settings Highlight the camera you wish to configure and click Next to continue. STEP 4 If the camera you want is not displayed in the Selection box, enable UPnP on your computer as described in Appendix A, “Troubleshooting,”...
- Page 30 Installing the Cisco WVC210 Internet Camera Software Configuring Basic Camera Settings The default user name and password is admin. Type admin in lowercase letters, in STEP 5 the Administrator Name and Administrator Password fields, and then click OK. For security purposes, it is highly recommended that you change the default name NOTE and password using the camera’s web-based utility at a later time.
- Page 31 Installing the Cisco WVC210 Internet Camera Software Configuring Basic Camera Settings On the Basic Settings window, configure the following settings as desired: STEP 6 • Camera Name—Enter a unique name for the camera, up to 16 characters in length. Unique names are helpful when you are using multiple cameras on the same network.
-
Page 32: Configuring The Network Settings
Installing the Cisco WVC210 Internet Camera Software Configuring the Network Settings Configuring the Network Settings Follow these steps to configure the network settings of the camera. These steps continue from the previous section. In the Network Settings window, if you want to assign the IP address, then select STEP 1 Static IP address, otherwise leave the default setting, Obtain An IP Address Automatically (DHCP). - Page 33 Installing the Cisco WVC210 Internet Camera Software Configuring the Network Settings The current settings of the camera are displayed. Make any changes as needed STEP 2 for your network, and then click Next to continue. A confirmation window appears. Click Next to confirm the settings, or Back to go STEP 3 back and make any changes.
- Page 34 Installing the Cisco WVC210 Internet Camera Software Configuring the Network Settings In the confirmation window, click OK to continue or click Cancel to close the STEP 4 window. If you click Cancel, you can then click Back and make changes. WVC210 Wireless-G PTZ Internet Video Camera With 2-Way Audio Administration Guide...
- Page 35 Installing the Cisco WVC210 Internet Camera Software Configuring the Network Settings Once OK is clicked, the new settings are saved. WVC210 Wireless-G PTZ Internet Video Camera With 2-Way Audio Administration Guide...
- Page 36 Installing the Cisco WVC210 Internet Camera Software Configuring the Network Settings A dialog box appears informing you that your configuration has been saved STEP 5 successfully. Click OK to continue WVC210 Wireless-G PTZ Internet Video Camera With 2-Way Audio Administration Guide...
- Page 37 Installing the Cisco WVC210 Internet Camera Software Configuring the Network Settings Congratulations! Your camera is now configured. Click Finish to complete the STEP 6 process. WVC210 Wireless-G PTZ Internet Video Camera With 2-Way Audio Administration Guide...
- Page 38 Installing the Cisco WVC210 Internet Camera Software Configuring the Network Settings The Cisco WVC210 Wireless-G PTZ Internet Camera Home window launches. STEP 7 Internet Explorer may prompt you to accept ActiveX to view video; follow the NOTE instructions to accept ActiveX. The basic installation procedure is now complete.
-
Page 39: Chapter 6: Upgrading The Cisco Wvc210 Internet Camera Firmware
Upgrading the Cisco WVC210 Internet Camera Firmware The Cisco WVC210 Internet camera may not always ship with the most up-to-date firmware. You can update the camera's firmware through the web-based utility's Maintenance window. Microsoft Internet Explorer (IE) is the official supported browser for the Cisco NOTE WVC210 Internet camera. - Page 40 Upgrading the Cisco WVC210 Internet Camera Firmware To upgrade the camera firmware, follow these steps: Click Download Software on the Cisco Small Business Video Surveillance STEP 1 Cameras page. Login is required. Follow the online directions to download the appropriate firmware. STEP 2 Launch the web-based configuration utility.
-
Page 41: Chapter 7: Using The Web-Based Configuration Utility
Using the Web-Based Configuration Utility This section provides an overview of the Cisco WVC210 Internet camera’s web- based utility software. This chapter contains the following sections: • Launching the Web-Based Configuration Utility, page 36 • Home, page 37 • Setup Options, page 42 Please note that Microsoft Internet Explorer (IE) is the official supported browser for the Cisco WVC210 Internet camera. -
Page 42: Launching The Web-Based Configuration Utility
Using the Web-Based Configuration Utility Launching the Web-Based Configuration Utility Launching the Web-Based Configuration Utility By default, the Cisco WVC210 Internet camera is set to receive an IP address from a DHCP server. If you do not have a DHCP server on your network, you can set a static IP address by pressing the Reset button on the camera for less than three seconds. -
Page 43: Home
Using the Web-Based Configuration Utility Home Home The Home window is the default display. From this window, live video can be viewed and the output can be updated. This window identifies the camera in the upper left hand corner. You can always return to the Home window by clicking the Home icon in the toolbar. -
Page 44: Log Out
Using the Web-Based Configuration Utility Home Log Out Allows you to log out of your camera session. About Describes the camera, including the current firmware version. Help The camera software includes detailed Help files for all configuration tasks. To view a Help page, click the Help link in the top right corner of the window. A new window appears with information about the task that you are currently viewing. - Page 45 Using the Web-Based Configuration Utility Home Icon Description Image Resolution Use this drop-down list to select the desired video size. The options are Auto, 640 x 480, 320 x 240, 160 x 120. The default is Auto and lets the camera determine the resolution.
- Page 46 Using the Web-Based Configuration Utility Home Icon Description Start/Stop Click the black icon to start recording, and click the red Recording icon to stop recording. Consider the following: • The default location for saved recordings is \My Documents\Record. • Click Browse to choose another location to save your recordings.
- Page 47 Using the Web-Based Configuration Utility Home Icon Description Motion Detection Click to move the camera to the previously defined Motion Detection area. Instructions on defining a motion detection area can be found in “Applications > Motion Detection,” on page On-Image PT Click in the video image and adjust/move the image.
-
Page 48: Setup Options
Using the Web-Based Configuration Utility Setup Options Setup Options To access the setup options for your Cisco WVC210 Internet camera, click Setup in the toolbar. The login window appears: WVC210 Wireless-G PTZ Internet Video Camera With 2-Way Audio Administration Guide... - Page 49 Using the Web-Based Configuration Utility Setup Options Enter the default username (admin) and the default password (admin) and the Setup > Basic Settings window appears: The following section, Configuring the Cisco WVC210 Internet Camera Software, page 44 describes all of the options available in the navigation tree. The inactivity timeout for the camera’s web-based utility software is 5 minutes.
-
Page 50: Chapter 8: Configuring The Cisco Wvc210 Internet Camera Software
Configuring the Cisco WVC210 Internet Camera Software This section describes the basic functions of the camera’s web-based utility. For information on how to use your camera for advanced monitoring, please see the Cisco Small Business Video Monitoring System Administration Guide. This chapter contains the following sections: •... -
Page 51: Setup > Basic Settings
Configuring the Cisco WVC210 Internet Camera Software Setup > Basic Settings Setup > Basic Settings The Setup > Basic Settings window has options for Device Settings, Network Settings, and Wireless Settings. WVC210 Wireless-G PTZ Internet Video Camera With 2-Way Audio Administration Guide... -
Page 52: Device Settings
Configuring the Cisco WVC210 Internet Camera Software Setup > Basic Settings Device Settings • Camera Name—Enter the preferred name for the camera. The camera name must not exceed 16 alphanumeric characters. By default, the last six digits of the camera name come from the last three bytes of the MAC address, but this can be overwritten. -
Page 53: Network Settings
Configuring the Cisco WVC210 Internet Camera Software Setup > Basic Settings • Check here if you want to update the time automatically through the NTP Server on the Internet—Enable or disable the time server feature as required. If enabled, the camera will contact a network time server at regular intervals and update its internal timer. -
Page 54: Wireless Settings
Configuring the Cisco WVC210 Internet Camera Software Setup > Basic Settings Wireless Settings • SSID—Enter the network’s SSID or network name here. The default is ciscosb. • Network Type—Select the network’s mode. Choices are: Infrastructure or Ad-hoc. • Channel No—If the camera is set to Ad-hoc mode, select the appropriate channel from the list provided to correspond with your network settings. - Page 55 Configuring the Cisco WVC210 Internet Camera Software Setup > Basic Settings WEP is a basic encryption method, which is not as secure as later methods such as WPA. WEP stands for Wired Equivalent Privacy. • TX Key—Select the number of the key used on the wireless network. •...
- Page 56 Configuring the Cisco WVC210 Internet Camera Software Setup > Basic Settings WPA Personal This method offers two encryption methods, TKIP (default) and AES with dynamic encryption keys. Select the type of encryption method you want to use, TKIP or AES. Enter the Shared Key, which can have 8 to 63 characters. Then enter the Key Renewal Timeout, which instructs the device how often it should change the encryption keys.
- Page 57 Configuring the Cisco WVC210 Internet Camera Software Setup > Basic Settings WPA2 Personal This method always set to AES encryption methods, with dynamic encryption keys. Enter the Shared Key, which can have 8 to 63 characters. Then enter the Key Renewal Timeout, which instructs the device how often it should change the encryption keys.
- Page 58 Configuring the Cisco WVC210 Internet Camera Software Setup > Basic Settings EAP-TLS With EAP-TLS you enter the User ID and Password for the RADIUS server and choose where the camera should check for the Server and User certificate. • User ID—The user ID used to login to your RADIUS server. •...
- Page 59 Configuring the Cisco WVC210 Internet Camera Software Setup > Basic Settings EAP-TTLS With EAP-TTLS you choose the authentication protocol (MS-CHAP V2, MS-CHAP, PAP, EAP-MD5, and EAP-GTC) to transfer the CA to the RADIUS server. You will also enter the User ID, Password, and anonymous ID for the RADIUS server and choose where the camera should check for the server certificate.
-
Page 60: Setup > Advance Settings
Configuring the Cisco WVC210 Internet Camera Software Setup > Advance Settings Setup > Advance Settings The Setup > Advance Settings window has options for RTSP/RTP and Other. RTSP/RTP Real Time Streaming Protocol (RTSP) is a standard for connected client(s) to control streaming data (MPEG-4) over the World Wide Web. -
Page 61: Http
Configuring the Cisco WVC210 Internet Camera Software Setup > Advance Settings • Enable Multicast—The camera’s video and audio IP addresses have been pre-configured and can be used for multicasting. Normally these settings do not need to be reconfigured. If an address does need to be changed, please contact your network administrator and refer to the camera’s online Help. -
Page 62: Administration > Users Settings
Configuring the Cisco WVC210 Internet Camera Software Administration > Users Settings Administration > Users Settings The Administration > Users Settings window gives options for Authentication, Administrator, and User List. Authentication • Authentication—Enables an authentication check when the box is checked. The user will need to login for all activities, even to see video on Home window. -
Page 63: Administrator
Configuring the Cisco WVC210 Internet Camera Software Administration > Users Settings Administrator • Admin—The default administrator name and password should be changed for security purposes. To change the administrator name and password, enter the desired name and password (enter the password twice). Click Change to apply the change. -
Page 64: Administration > Maintenance
Configuring the Cisco WVC210 Internet Camera Software Administration > Maintenance Administration > Maintenance The Administration > Maintenance window gives options for Restore Factory Defaults, Restart, Firmware Upgrade, and Configuration. Restore Factory Defaults • Restore Defaults—Restores the camera to the factory default settings. Restart •... -
Page 65: Audio/Video
Configuring the Cisco WVC210 Internet Camera Software Audio/Video Audio/Video Clicking on the Audio/Video window shows options for Video Settings and Audio Settings. Audio/Video > Video Settings Higher video quality settings and higher frame rate settings require more NOTE bandwidth. WVC210 Wireless-G PTZ Internet Video Camera With 2-Way Audio Administration Guide... - Page 66 Configuring the Cisco WVC210 Internet Camera Software Audio/Video MPEG-4 Settings MPEG is the designation for a group of audio and video coding standards and related technology agreed upon by the ISO/IEC. The primary uses for the MPEG-4 standard are web (streaming media) and CD distribution, and broadcast television. •...
- Page 67 Configuring the Cisco WVC210 Internet Camera Software Audio/Video Max Frame Rate—Select the desired maximum frame rate. The default maximum frame rate is set to 15 fps. Access Code—Entered at the end of a URL to access a live video camera feed through another source, for example, a cell phone connection: rtsp://<IP Address>/access_code Adjustments...
-
Page 68: Audio/Video > Audio Settings
Configuring the Cisco WVC210 Internet Camera Software Audio/Video Audio/Video > Audio Settings Audio is disabled by default. • Enable Audio—Enable audio by checking the check box. When audio is enabled, an icon is displayed on the Home window and audio is picked up through the camera. - Page 69 Configuring the Cisco WVC210 Internet Camera Software Audio/Video • Audio Type—When the microphone is enabled, this drop-down list allows you to select the audio compression type. Compression Settings Description G.711 A-Law A standard compression algorithm that uses 64 kbps of bandwidth and is primarily used in Europe.
-
Page 70: Applications > Mail
Configuring the Cisco WVC210 Internet Camera Software Applications > Mail Applications > Mail Clicking on the Applications > Mail window shows options for Primary and Secondary SMTP Servers and E-mail Setup. Only one SMTP server is used, even if both the primary and secondary SMTP NOTE servers are enabled. - Page 71 Configuring the Cisco WVC210 Internet Camera Software Applications > Mail • Authentication—Check the box if your mail server requires authentication and enter the following options: Account Name—Enter the account name to be used on the e-mail server. Password—Enter the password associated with the account name. •...
-
Page 72: Applications > Ftp
Configuring the Cisco WVC210 Internet Camera Software Applications > FTP Applications > FTP Clicking on the Applications > FTP window shows options for Primary and Secondary FTP. Only one FTP server is used, even if both the primary and secondary FTP servers NOTE are enabled. - Page 73 Configuring the Cisco WVC210 Internet Camera Software Applications > FTP • Enable Passive Mode—Check the box to enable the passive mode feature. Passive mode is a more secure form of data transfer. The use of passive mode FTP ensures all data flow initiation comes from inside the network rather than from the outside.
-
Page 74: Applications > Smb/Cifs
Configuring the Cisco WVC210 Internet Camera Software Applications > SMB/CIFS Applications > SMB/CIFS The Applications > SMB/CIFS window shows options for SMB/CIFS. SMB/CIFS allows the camera to record directly into a Network Attached Storage (NAS) device. There is no need to record to a computer and keep a computer active all the time. -
Page 75: Applications > Motion Detection
Configuring the Cisco WVC210 Internet Camera Software Applications > Motion Detection Applications > Motion Detection The Applications > Motion Detection window shows options for Event and Pan/Tilt. Event Complete the Mail or FTP sections prior to enabling alerts. NOTE • Enable E-mail Alert—If enabled, e-mail alert with attachments are sent when motion is detected. -
Page 76: Pan/Tilt
Configuring the Cisco WVC210 Internet Camera Software Applications > Motion Detection File Path—Enter the folder name to upload video to your NAS device (SMB/CIFS host server). Login Name—Enter your login name for the NAS device. Password—Enter your password for the NAS device. Checking either alert box will display options for the attachment. -
Page 77: Applications > Ddns Settings
Configuring the Cisco WVC210 Internet Camera Software Applications > DDNS Settings Motion detection can be triggered by rapid changes in lighting conditions, as well NOTE as by moving objects. For this reason, it should only be used indoors. Applications > DDNS Settings The Applications >... -
Page 78: Pan/Tilt Settings
Configuring the Cisco WVC210 Internet Camera Software Pan/Tilt Settings To complete the DDNS Service setup, port forwarding needs to be configured on NOTE your router. See “Configuring Port Forwarding” on page Pan/Tilt Settings The Pan/Tilt Settings window shows the Set Preset, Pan/Tilt Control, and Rotation Sequence settings for the camera. -
Page 79: Pan/Tilt Control
Configuring the Cisco WVC210 Internet Camera Software Pan/Tilt Settings • Set Home—Sets the desired Home position. • Current Position—Name the current desired position and then click Add to add into the preset list. You can add up to nine preset points. •... -
Page 80: Status
Configuring the Cisco WVC210 Internet Camera Software Status Status The Status window shows options for System, Image, Network, Wireless, and Syslog. System Status • Firmware Version—Version of the firmware currently installed. • MAC Address—Displays the MAC address of the camera. •... -
Page 81: Image Status
Configuring the Cisco WVC210 Internet Camera Software Status Image Status • MPEG-4/MJPEG Resolution—Displays the image size of the video stream. Image Quality—Displays the image quality of the video stream. Frame Rate—Displays the frame rate of the video stream. Network Status •... -
Page 82: Wireless Status
Configuring the Cisco WVC210 Internet Camera Software Status • Primary DNS—Displays the IP address of the primary Domain Name Server used by the camera. • Secondary DNS—Displays the IP address of the secondary Domain Name Server used by the camera. Wireless Status •... -
Page 83: Syslog
Configuring the Cisco WVC210 Internet Camera Software Status Syslog • Syslog Server—Check this to enable the Syslog server, and then enter the IP address of your Syslog server. • Log—Displays the systems activities. Click Clear Log to erase all the entries in the System Log. -
Page 84: Chapter 9: Sample Configurations For The Cisco Wvc210 Internet Camera
Sample Configurations for the Cisco WVC210 Internet Camera Your Cisco WVC210 Internet camera is capable of many functions. The following are sample configurations for the most popular Cisco WVC210 camera settings: • Configuring Instant Recording, page 78 • Defining Preset Locations for Auto Patrol, page 79 •... -
Page 85: Defining Preset Locations For Auto Patrol
Sample Configurations for the Cisco WVC210 Internet Camera Defining Preset Locations for Auto Patrol On the Home window, click Start Recording in the Video Options Panel (see STEP 2 Video Options Panel, page 38 for more information). Recording is enabled. Click Save in the dialog box if you agree with the default location (\My STEP 3 Documents\Record). -
Page 86: Using Auto Patrol
Sample Configurations for the Cisco WVC210 Internet Camera Using Auto Patrol Using Auto Patrol Once your preset positions are set, you can use the Rotational Sequence window to set a patrol schedule. The camera will go to the first position, then move through the list of preset positions until it is finished. -
Page 87: Configuring E-Mail Alerts
Sample Configurations for the Cisco WVC210 Internet Camera Configuring E-Mail Alerts Configuring E-Mail Alerts When using motion detection, you may want to be advised by e-mail when something is detected. Configure your e-mail settings first, and then configure Motion Detection. See Configuring Motion Detection, page The Cisco WVC210 camera does not support Secure Sockets Layer (SSL) NOTE... - Page 88 Sample Configurations for the Cisco WVC210 Internet Camera Configuring E-Mail Alerts If both the Primary and Secondary SMTP servers are configured, e-mail alerts are NOTE sent out only through the Primary Server. If there is an e-mail failure with the Primary Server, then the camera attempts to route the e-mail alert through the Secondary Server.
-
Page 89: Configuring Motion Detection
Sample Configurations for the Cisco WVC210 Internet Camera Configuring Motion Detection Configuring Motion Detection Motion Detection cannot be configured using the Firefox browser. Internet Explorer NOTE must be used to configure motion detection. To set the motion detection area of the video image to be examined and adjust the sensitivity of detection, follow these steps: Access the setup options for your Cisco WVC210 Internet camera by clicking STEP 1... - Page 90 Sample Configurations for the Cisco WVC210 Internet Camera Configuring Motion Detection Click Set Area & Sensitivity near the bottom of the window. The Set Area and STEP 7 Sensitivity window is displayed Customize the desired areas of sensitivity. You can choose the entire window to STEP 8 monitor by selecting Full Screen.
-
Page 91: Configuring Port Forwarding
Sample Configurations for the Cisco WVC210 Internet Camera Configuring Port Forwarding Configuring Port Forwarding Port forwarding allows Internet access to multiple cameras that are located inside a private network. For example, you have two cameras behind a NAT router – one is on alternate port 1024 and the second one is on port 1028. - Page 92 Sample Configurations for the Cisco WVC210 Internet Camera Configuring Port Forwarding From the web-based configuration utility, click Firewall > Port Range Forwarding. STEP 5 This example shows the Port Range Forwarding window of the Cisco WRVS4400N router. In the Port Range Forwarding window, configure the following: STEP 6 a.
- Page 93 Sample Configurations for the Cisco WVC210 Internet Camera Configuring Port Forwarding This example shows the Summary window of the Cisco WRVS4400N router. Now you should be able to access your camera over the Internet by typing in the WAN IP address of your router, a colon, and the defined port number in the following format: http://router’s WAN IP address:port For example, http://12.19.89.212:1028 WVC210 Wireless-G PTZ Internet Video Camera With 2-Way Audio Administration Guide...
-
Page 94: Setting Security Precautions On The Cisco Wvc210
Sample Configurations for the Cisco WVC210 Internet Camera Setting Security Precautions on the Cisco WVC210 Setting Security Precautions on the Cisco WVC210 The following is a short list of recommended security precautions: Change the default SSID from the Setup > Basic window, scroll to Wireless STEP 1 settings. -
Page 95: Appendix A: Troubleshooting
Troubleshooting Questions and Answers This appendix provides solutions to problems that may occur during the installation and operation of the Cisco WVC210 Wireless-G Internet Camera. Read the description below to solve your problems. If you can't find an answer here, check the Cisco Small Business Video Surveillance Cameras homepage at www.cisco.com/go/surveillance. - Page 96 Troubleshooting Questions and Answers Also check that your PC and the Wireless Network Camera have compatible Wireless settings. The mode (Infrastructure or Ad-hoc) must be correct. The SSID must match. The wireless security settings must match. In Ad-hoc mode, the channel should match, although this is often not required.
- Page 97 Troubleshooting Questions and Answers The video image is blurry. Try cleaning the dome, or adjusting the MPEG-4 or MJPEG image quality setting found in Audio/Video > Video Settings, page How do I set up UPnP so my cameras broadcast their availability to my network? UPnP networking technology provides automatic IP configuration and dynamic discovery of devices added to a network.
-
Page 98: Windows Help
Troubleshooting Windows Help Another way to enable UPnP on Windows XP is to go to My Network Places and on the left tab click on Show icons for networked UPnP devices. Windows Help Almost all wireless products require Microsoft Windows. Windows is the most used operating system in the world and comes with many features that help make networking easier. -
Page 99: Appendix B: Specifications
Specifications Cisco WVC210 Resource Description IEEE802.11g, IEEE802.11b, IEEE802.3, IEEE802.3u, Standards IEEE802.1p (QoS Priority), IEEE802.1q (VLAN), 802.11e (Wireless QoS) Ports Ethernet, Antenna, Microphone in, Speaker Out, Power Protocols TCP/IP, HTTP, DHCP, SMTP, FTP, NTP, DNS, UPnP, RTP, RTSP, and DDNS Button One Reset Button Cabling UTP CAT 5... - Page 100 Specifications Resource Description Tilt -34 degrees (down) to +30 degrees (up) Web UI Built in Web UI for Easy Browser-Based Configuration (HTTP) Web Browser Browser Internet Explorer 6.0 (or later) with ActiveX support for viewing, recording, playback and setting motion detection; limited support for Safari and Mozilla Firefox (no motion detection).
- Page 101 Specifications Resource Description Network Time Protocol synchronizes camera date and time with your network. SMTP Simple Mail Transfer Protocol Client allows video clips to be emailed. FTP Client FTP Client facilitates scheduling transfer of images to an FTP server. Dynamic DNS facilitates accessing the camera by DDNS name, irrespective of the camera IP address.
-
Page 102: Appendix C: Where To Go From Here
Where to Go From Here Cisco provides a wide range of resources to help you and your customer obtain the full benefits of the Cisco WVC210 Internet Video Cameras. Product Resources Support Location Online Technical Support and www.cisco.com/support Documentation Product Information www.cisco.com/go/surveillance Phone Support Contacts www.cisco.com/en/US/support/... - Page 103 Where to Go From Here Cisco Small Business http://www.cisco.com/en/US/products/ Model WVC210 Wireless-G PTZ ps9944/ Internet Video Camera with 2-Way prod_maintenance_guides_list.html Audio Administration Guide Cisco Small Business Location Cisco Partner Central site for www.cisco.com/web/partners/sell/smb Small Business (Partner Login Required) Cisco Small Business Home www.cisco.com/smb Marketplace www.cisco.com/go/marketplace...