Table of Contents
Advertisement
Quick Links
Advertisement
Table of Contents

Related Manuals for Sony PMW-50


Summary of Contents for Sony PMW-50
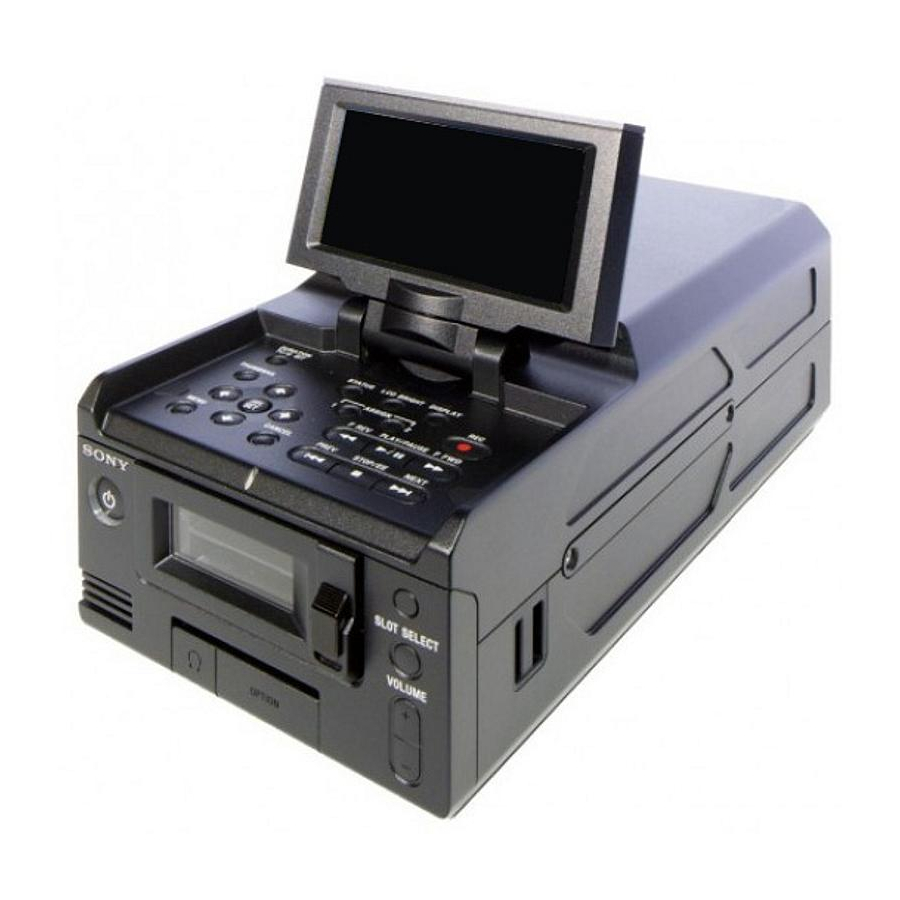
- Page 1 PORTABLE MEMORY RECORDER PMW-50 SERVICE MANUAL 1st Edition...
- Page 2 Ce manual est destiné uniquement aux personnes compétentes en charge de l’entretien. Afin de réduire les risques de décharge électrique, d’incendie ou de blessure n’effectuer que les réparations indiquées dans le mode d’emploi à moins d’être qualifié pour en effectuer d’autres. Pour toute réparation faire appel à une personne compétente uniquement. PMW-50...
- Page 3 Batterien nur durch den vom Hersteller empfohlenen Kasser batteriet i henhold til gjeldende avfallsregler. oder einen gleichwertigen Typ ersetzen. Wenn Sie die Batterie entsorgen, müssen Sie die Gesetze der jeweiligen Region und des jeweiligen Landes befolgen. PMW-50...
-
Page 5: Table Of Contents
DPR Board........................2-26 PMW-50... - Page 6 Frame Wiring......................... . .6-1 PMW-50...
-
Page 7: Manual Structure
Manual Structure Purpose of this manual This document is the service manual of Portable Memory Recorder PMW-50. When servicing this unit, parts are replaced on a board basis in principle. Therefore, this manual includes no circuit diagram or board layout. -
Page 9: Service Overview
EXT DC transmit B (–) TPB+ IN/OUT Strobe on receive, data on - External View - transmit B (+) TPA– IN/OUT Data on receive, strobe on transmit A (–) TPA+ IN/OUT Data on receive, strobe on transmit A (+) PMW-50... - Page 10 — SHIELD Signal Specifications TMDS CLOCK– — — USB Vcc CEC (N.C.) — — D– IN/OUT I/O USB– RESERVED (N.C.) — — IN/OUT I/O USB+ — — IN/OUT — — Ground DDC/CEC GND — — +5V POWER — — PMW-50...
-
Page 11: Location Of Printed Wiring Boards
1-2. Location of Printed Wiring Boards DCP-60 IF-1188 KSW-64 KSW-63 DC-168 HN-408 PSW-100 IO-257 SWC-55 DPR-350 EC-115 AU-349 HN-407 RE-299 RE-298 RE-300 IO-256 RM-239 PMW-50... -
Page 12: Circuit Description
Controlled by the system controller (IC2101) in the same way as other main devices, the DPR-350 board performs video/ audio stream control, SxS memory card access, mass storage operation through the USB connection, and HDV device control through the i-LINK connection. PMW-50... -
Page 13: Audio System
DSP. • Signal processing The DSP enables many functions including monitor volume, monitor switching control, and SG Tone. • Output processing by FPGA The FPGA receives recording signals and SDI output signals from the DSP and outputs them. PMW-50... -
Page 14: System Control
The serial terminal of the battery connector is connected to IC202 on the RE-298 board. This IC202 read the battery authentication, battery type, remaining power, and other information and send them to the system controller via I C bus communication. PMW-50... -
Page 15: Power Supply System
Furthermore, Q107 on the RE-298 board is turned off to reduce current in the control system. DC/DC converter function Power supply is grouped into three blocks as shown below. • Audio/video signal system (Name: xx_DP) • System controller system (Name: xx_SY) • Media recording/playback system (Name: xx_MD) PMW-50... - Page 16 In the specified battery pack, information such as the number of recycling times and the internal temperature can be monitored internally. This allows the operation with detailed information about the battery, including information whether the battery pack is damaged or has reached its lifetime. PMW-50...
-
Page 17: Service Tools/Measuring Equipment List
J-6252-510-A Torque driver (6 kg•cm) (0.6 N•m) 7-432-114-11 Locking compound 200 g For preventing screws from being loosened 7-651-000-10 Sony (SGL-601) 50 g grease Lubricant 1-4-2. Measuring Equipment Use the following calibrated equipment or equivalent for adjustments. Equipment Model name... -
Page 18: Firmware Upgrade
Install the upgrade software in the PC. Note For how to obtain the upgrade software, contact your local Sony Sales Office/Service Center. When a PC is connected to the unit for the first time, driver software need to be installed in the PC. For details, check the readme file supplied with the upgrade software. -
Page 19: Electrical Alignment
1-6. Electrical Alignment When making electrical adjustment or self-diagnosis, contact your local Sony Sales Office/Service Center. Notes on Adjustments • When adjusting this unit, use an AC adapter or a fully-charged battery pack. • When disconnecting the AC adapter or the battery pack after adjustment, turn off the power switch and wait for at least 10 seconds. -
Page 20: Circuit Protection Parts
After that, replace the defective parts. Board name Ref.No. Address Part No. Rating IF-1188 PS100 A1 (Side A) 0.4 A/72 V 1-576-122-21 PS101 A1 (Side A) 0.4 A/72 V 1-576-122-21 RE-299 F100 A2 (Side B) 10A/125V 1-576-329-21 1-12 PMW-50... -
Page 21: Notes On Service
• KSW-63 board • RE-298 board • SWC-55 board When any of the following boards or part has been replaced, make adjustments again. For the adjustment method, contact your local Sony Sales Office/Service Center. • DCP-60 board • 3.5-inch LCD assembly 1-8-2. -
Page 22: Flexible Card Wire And Fine-Wire Coaxial Cable
• When disconnecting the fine-wire coaxial cable, be sure to hold the connector. Do not attempt to pull the cable. • Check that the contact surface of the fine-wire coaxial cable connector is free from dirt or dust. 1-14 PMW-50... - Page 23 Both sides of connector Hold the connector to disconnect. Do not attempt to disconnect by Fine-wire coaxial cable pulling the cable. Hold both sides of the fine-wire coaxial cable connector, and pull the connector straight to disconnect it. 1-15 PMW-50...
- Page 24 Connecting Both sides of connector Fine-wire coaxial cable Note When connecting the fine-wire coaxial cable, insert it straight into the connector. Insert firmly the connector of fine-wire coaxial cable in the interior. 1-16 PMW-50...
-
Page 25: Lead-Free Solder
• The ordinary soldering iron can be used but the iron tip has to be applied to the solder joint for a slightly longer time. The printed pattern (copper foil) may peel away if the heated tip is applied for too long, so be careful. 1-17 PMW-50... -
Page 27: Replacement Of Main Parts
• SxS lid (D) assembly Bottom panel assembly SWC-55 board/EC-115 board Front frame assembly • KSW-63/KSW-64 board Bottom frame IO-256 board Battery case assembly DCP board • DC board RE-299 board RE-298 board RE-300 board AU board DPR board PMW-50... -
Page 28: Lcd Assembly
Remove the two screws and the four claws to detach the control panel assembly. Note Carefully handle the claws because they are likely to be damaged. CTRL panel cushions (unreusable) P2 x 5 (black) P2 x 5 (black) Control panel assembly Claws PMW-50... - Page 29 Disconnect the fine-wire coaxial cable from the connector CN305 on the KSW-63 board. P2 x 4 KSW GND plate Hole P2 x 4 Boss Fine-wire coaxial cable CN305 KSW GND plate KSW-63 board Note When installing the KSW GND plate, fit the boss with the hole. PMW-50...
- Page 30 Remove the two screws to detach the LCD assembly. Precision screws P2.6 x 5 (black) LCD assembly Holes Bosses Note When installing the LCD assembly, fit the two bosses with the two holes. Install the removed parts by reversing the steps of removal. PMW-50...
-
Page 31: Top/Bottom Panel Assembly
P2 x 5 (black) Portion B Note Install the top panel assembly aligning portion A with portion B as shown in the figure. Remove the screw to detach the battery lid. Remove the screw to detach the WIFI lid. PMW-50... - Page 32 Bosses P2 x 5 (black) Battery lid Boss P2 x 5 (black) Bottom side Note When installing the bottom panel assembly, fit the four bosses with the four holes. Install the removed parts by reversing the steps of removal. PMW-50...
-
Page 33: Front Panel Assembly/Sxs Lid
When installing the front panel assembly, fit the three bosses A with the three holes A and two bosses B with the two holes B. Remove the three screws to detach the SxS shaft retainer and the SxS lid spring plate. PMW-50... - Page 34 P1.7 x 4 Compression spring Install the removed parts by reversing the steps of removal. Firmly attach the SxS knob sheets. After the SxS lock holder and the SxS lock knob are installed, check whether the SxS lock knob works smoothly. PMW-50...
-
Page 35: Option Cover/Hp Jack Cover
Remove the four parallel pins in the direction of the arrow. Parallel pins P2 x 5 Parallel pins Option shaft retainer Remove the option cover and the HP jack cover. Option cover HP jack cover Install the removed parts by reversing the steps of removal. PMW-50... -
Page 36: Rear Panel Assembly
Remove the screw to detach the USB cover. USB cover P2 x 5 (black) IO cover Remove the two screws to detach the rear panel assembly. Rear panel assembly P2 x 5 (black) Install the removed parts by reversing the steps of removal. 2-10 PMW-50... -
Page 37: Bottom Frame
“2-4. Front Panel Assembly/SxS Lid”) Remove the top/bottom panel assembly. (Refer to “2-3. Top/Bottom Panel Assembly”) Remove the rear panel assembly. (Refer to “2-6. Rear Panel Assembly”) Procedure Remove the two DCP conductive tape (D). DCP conductive tape (D) (unreusable) 2-11 PMW-50... - Page 38 P2 x 4 P2 x 4 Holes Bosses P2 x 4 SDI CN GND plate Note When installing the bottom frame, fit the two bosses with the two holes. Install the removed parts by reversing the steps of removal. 2-12 PMW-50...
-
Page 39: Front Frame Assembly
Disconnect the flexible flat cable and the HN-407 board from the two connectors on the AU board. Disconnect the harness from the connector CN202 on the RE-298 board. Disconnect the two fine-wire coaxial cables from the two connectors on the DPR board. 2-13 PMW-50... - Page 40 IO-256 board Harness CN100 Notes Connect the fine-wire coaxial cable paying attention to the presence of a mark. Remove the two DCP conductive tapes (D). Disconnect the fine-wire coaxial cable from the connector CN303 on the KSW-63 board. 2-14 PMW-50...
- Page 41 Bosses Hole Bosses P2.6 x 5 Hole CN303 Front frame assembly KSW-63 board Note When installing the front frame assembly, fit the four bosses with the four holes. Install the removed parts by reversing the steps of removal. 2-15 PMW-50...
-
Page 42: Board
Remove the two screws to detach the GND plate (RM) and the front bracket assembly. Harness IO-256 board Front bracket assembly GND plate (RM) CN104 Harness P2 x 4 CN100 (RM-239 board) P2 x 4 Note Carefully handle the GND plate (RM) because it is likely to be deformed. 2-16 PMW-50... - Page 43 Remove the two screws to detach the IO-256 board and the IO-256 GND plate. P2 x 4 IO-256 board Hole Boss IO-256 GND plate Hole Boss Notes When installing the IO-256 GND plate, fit the two bosses with the two holes. Install the removed parts by reversing the steps of removal. 2-17 PMW-50...
-
Page 44: Board/Ec-115 Board
Remove the four screws to detach the SxS assembly. Holes Boss Holes Hole SxS assembly P2 x 4 Bosses P2 x 4 Bosses Notes When installing the SxS assembly, fit the four bosses with the four holes. Remove the two screws to detach the SxS holder. 2-18 PMW-50... - Page 45 • Install the escutcheon assembly (SxS) with the board and the indicator placed at the locations shown in the figure. • When installing the escutcheon assembly (SxS), be careful not to damage LED on the board. Remove the tape. Remove the two screws to detach the SxS holder. 2-19 PMW-50...
- Page 46 Remove the two (b) screws to detach the SWC-55 board. (a) P2 x 4 SWC bracket CN300 Fine-wire coaxial cable SWC-55 board (b) P2 x 4 10. Disconnect the fine-wire coaxal cable from the connector CN100 on the EC-115 board. 2-20 PMW-50...
- Page 47 11. Remove the three screws to detach the EC-115 board. P2 x 4 P2 x 4 Fine-wire coaxial cable EC-115 board CN100 12. Install the removed parts by reversing the steps of removal. 2-21 PMW-50...
-
Page 48: Ksw-63/Ksw-64/Hn-407 Board
Remove the screw and lift up the KSW-63 board to the direction of the arrow. Disconnect the HN-407 board and the harness from the two connectors CN300, CN306 on the KSW-63 board. Remove the tape 50 and the cushion (HN-407) from the HN-407 board. 2-22 PMW-50... - Page 49 CN306 UL tape Tape 50 Hole KSW-63 board HN-407 board Hole Cushion (HN-407) Bosses Note When installing the KSW-63 board, fit the two bosses with the two holes. Install the removed parts by reversing the steps of removal. 2-23 PMW-50...
-
Page 50: Dcp Board
• Carefully attach the tape (BT) so that the coaxial cable does not touch the USB GND plate. Remove the six screws to detach the heat spreader DCP. Remove the two screws (P1.7 x 4) and the two screws (P2 x 4) to detach the HDMI bracket. 2-24 PMW-50... - Page 51 Coaxial cable Note When installing the heat spreader DCP, hold the coaxial cables as shown in the figure. Detach the DCP board from the connector. DCP board Connector Install the removed parts by reversing the steps of removal. 2-25 PMW-50...
-
Page 52: Dpr Board
Remove the DCP board. (Refer to “2-12. DCP Board”) Procedure Remove the two screws to detach the USB bracket. Remove the four screws to detach the heat spreader DPR. P2 x 4 Heat spreader DPR P2 x 4 P2 x 4 USB bracket 2-26 PMW-50... - Page 53 Disconnect the three harnesses from the three connectors on the DPR board. Harness Connector Connector Connector DPR board Harness Disconnect the DPR board from the connector. DPR board Connector Install the removed parts by reversing the steps of removal. 2-27 PMW-50...
-
Page 54: Au Board
Remove the cushion RE. P2 x 4 P2 x 4 AU bracket Position of adhesives Cushion RE Adhesives P2 x 4 Adhesives Note When installing the cushion RE, apply adhesive at the four locations shown in the figure. 2-28 PMW-50... - Page 55 Remove the two screws to detach the RE board assembly from the two connectors on the AU board. RE board assembly P2 x 4 Connectors AU board Remove the five screws to detach the AU board. P2 x 4 P2 x 4 AU board Install the removed parts by reversing the steps of removal. 2-29 PMW-50...
-
Page 56: Re-298/Re-299/Re-300 Board
RE-299 board Connector (c) P2 x 4 (b) P2 x 4 (d) P2 x 4 (c) P2 x 4 (a) P2 x 4 Bracket (RE) RE-298 board RE-300 board Install the removed parts by reversing the steps of removal. 2-30 PMW-50... -
Page 57: Battery Case D Sub Assembly/Dc Board
RE-299 board Battery case assembly P2 x 5 (black) P2 x 4 BNC bracket Remove the two screws (P2 x 4) to detach the DC board. Remove the two screws (P2 x 4) to detach the side bracket. 2-31 PMW-50... - Page 58 Remove the two screws (PVTP2 x 5) (black) to detach the DC bracket. Battery case D SUB assembly DC board P2 x 4 DC bracket Side bracket PVTP2 x 5 (black) P2 x 4 Install the removed parts by reversing the steps of removal. 2-32 PMW-50...
-
Page 59: If-1188 Board/Lcd Panel
“2-2. LCD Assembly”) Procedure Remove the two screws. Remove the two claws to detach the hinge cabinet (DT) and the hinge cabinet (DB). P2 x 5 (black) Hinge cabinet (DT) Hinge cabinet (DB) Claws Remove the two screws. 2-33 PMW-50... - Page 60 LCD front cover assembly Claws LCD front cover assembly Claws Claws P2 x 5 (black) Note When installing the LCD front cover assembly, engage it as shown in the figure. Remove the tape 25, Conductive tape (LCD (D)), gasket. 2-34 PMW-50...
- Page 61 Gasket 10 x 3 (unreusable) P2 x 4 Remove the tape BT and the EMC radiation sheet (LCD S). Disconnect the fine-wire coaxial cable and the flexible board from the two connectors on the IF-1188 board. Remove the ferrite core. 2-35 PMW-50...
- Page 62 Ferrite core Flexible board Note If the EMC radiation sheet (LCD L) is peeled off, stick it at the location shown in the figure. 11. Remove the LCD retainer (D) and the panel cushion. 12. Remove the LCD panel. 2-36 PMW-50...
- Page 63 13. Remove the panel cushion. LCD retainer (D) Panel cushion LCD panel Panel cushion 14. Install the removed parts by reversing the steps of removal. 2-37 PMW-50...
-
Page 64: Lithium Battery
Procedure Remove the screw to detach the battery lid. Battery lid P2 x 5 (black) Remove the two claws to detach the lithium battery. Claws Lithium battery (CR2032) Install the removed parts by reversing the steps of removal. 2-38 PMW-50... -
Page 65: Service Menu
LCD BRIGHT DISPLAY THUMBNAIL THUMBNAIL ASSIGN F REV PLAY /PAUSE F FWD PREV MENU CANCEL STOP/EE NEXT MENU Press the MENU button, the THUMBNAIL button, and the DISPLAY button on the top operation panel simultaneously. The SERVICE menu is displayed. PMW-50... - Page 66 Once the SERVICE menu is displayed, it is displayed instead of the ordinary setup menus by pressing the MENU button, unless the power is turned off. To Exit the SERVICE Menu Display Press the MENU button again. The display of the SERVICE menu is finished. PMW-50...
-
Page 67: Service Menu List
This item is not selectable.(Display only) Item11 — This item is not selectable.(Display only) Item12 — This item is not selectable.(Display only) Item13 — This item is not selectable.(Display only) Log Dump — Execute, Cancel Records the error log to media. PMW-50... -
Page 68: Self-Diagnosis
The self-diagnosis can be executed only under the following conditions. When executing the self-diagnosis, change the conditions to the following conditions with the SETUP menu of menu mode. Item Menu Submenu Setting for self-diagnosis OTHERS menu System Country NTSC Area UDF/FAT HD/SD Rec Format HD422 50/1080/59.94i PMW-50... -
Page 69: Details Of Self-Diagnosis
— pander (SAD) Item3 (Media block diagnosis) The media block diagnosis tests the following contents. An error value of "-6" is displayed in some cases with any ID other than the following IDs, but this is not a problem. PMW-50... - Page 70 Non-installation "-6" is al- Startup must be com- line ) Ramiel) check ways returned. pleted 0x01 — Command response on- Normal end "0" is always Startup must be com- returned. pleted Details of diagnosis Error value Diagnosis Normal end Continued PMW-50...
- Page 71 The signal is output from IC601 on the AU-349 board (pin number: shown below) and is returned to IC601 through IC501 (pin number: shown below). • The output signal from Pin P7 is checked in units of two channels. PMW-50...
- Page 72 Path: Pin A2 → pin G10 Data: 0x55550000 Starting serial output channel: Channel 6 (IC601) Starting serial output channel: Channel 2 (IC501) Path: Pin A2 → pin G10 Data: 0xaaaa0000 Starting serial output channel: Channel 6 (IC601) Starting serial output channel: Channel 2 (IC501) PMW-50...
- Page 73 0x09 -1: Error 1, 2 The unit must have started C communication test (I/O expand- and a sub-microcomputer must be connected. Continued PMW-50...
- Page 74 Diagnosis between the display block and the media block tests the following contents. Diagnosis Error value Type1/2 Note 0x91 Video signal line communication test -1: Test pattern check error 1, 2 — in playback direction (Direction from MEDIA to DIS- PLAY) 3-10 PMW-50...
-
Page 75: Error Code List
Repair the DPR-350 board or replace it. E-17001 The media ID data in the EEPROM is abnormal Rewrite the media ID data in the EEPROM. For details, contact your local Sony Sales Office/Serv- ice Center. E-17003 The display block does not start Repair the DCP-60 board or replace it. -
Page 77: Spare Parts
Therefore, specified parts should be used in the case 指定の部品を使ってください。 of replacement. 2. Standardization of Parts 2. 部品の共通化 Some repair parts supplied by Sony differ from those ソニーから供給する補修用部品は,セットに使われ used for the unit. These are because of parts common- ているものと異なることがあります。 ality and improvement. -
Page 78: Exploded Views
4-2. Exploded Views LCD Assembly P2.6 x 5 (1/2) PMW-50... - Page 79 4-453-701-01 s COVER, HINGE 4-457-882-01 s CUSHION, LCD 4-461-424-01 s HINGE (A), GASKET 4-461-425-01 s HINGE (B), GASKET 4-461-468-01 s SHEET (LCD L), EMC RADIATION 4-461-469-01 s SHEET (LCD S), EMC RADIATION 4-459-282-31 s GASKET (10X7) 7-627-556-58 s SCREW +P 2.6X5 PMW-50...
- Page 80 Panel (1/2) PMW-50...
- Page 81 X-2586-501-1 s BOTTOM PANEL ASSY X-2586-502-1 s REAR PANEL ASSY 3-080-203-41 s SCREW(M2),LOCK ACE,P2 4-453-651-01 s BATTERY LID 4-453-653-01 s COVER,USB 4-457-323-01 s WIFI LID 4-457-367-01 s BLIND SHEET,BNC 4-457-881-01 s TAPE (D), DCP CONDUCTIVE 4-459-282-31 s GASKET (10X7) PMW-50...
- Page 82 4-453-675-01 s COVER, HP JACK 4-457-884-01 s CUSHION, SXS LID 4-453-682-01 s KNOB, SXS LOCK 4-457-887-01 s CUSHION (FP-SXS) 4-453-685-01 s COVER, OPTION 4-457-791-01 s SCREEN, SPEAKER 4-453-686-01 s RETAINER, OPTION SHAFT 4-453-687-01 s RETAINER, SXS SHAFT 4-453-692-01 s LID, SXS PMW-50...
- Page 83 SP Description Part No. SP Description 3-056-233-21 s SCREW (M2), LOCK ACE, P2 4-459-281-11 s GASKET (B), BOTTOM 4-453-652-01 s HOLDER, BELT 4-453-670-01 s SHEET, BELT HOLDER 4-459-282-31 s GASKET (10X7) 4-453-673-01 s GASKET,BOTTOM A 4-459-282-41 s GASKET (10X7) PMW-50...
- Page 84 Bottom Frame Part No. SP Description 4-459-282-51 s GASKET (10X7) 7-627-556-58 s SCREW +P 2.6X5 PMW-50...
- Page 85 3-056-233-21 s SCREW (M2), LOCK ACE, P2 3-080-203-41 s SCREW (M2), LOCK ACE, P2 3-278-255-01 s TAPE (BT) 4-428-162-01 s SPEAKER HOLDER 4-453-674-01 s BUTTON, PS 4-453-680-01 s GND PLATE (IO-256) 4-453-683-01 s LIGHT GUIDE, PS 4-453-695-01 s VOLUME, BUTTON PMW-50...
- Page 86 A-1905-310-A s MOUNTED CIRCUIT BOARD, HN-407 1-968-818-11 s HARNESS, SUB (KSW-HP) 1-968-824-11 s HARNESS, SUB (KSW63-64) 3-056-233-21 s SCREW (M2), LOCK ACE, P2 3-878-657-01 s TAPE 50 4-457-886-01 s CUSHION (HN-407) 4-121-237-01 s TAPE (20X30) 4-459-282-31 s GASKET (10X7) 4-10 PMW-50...
- Page 87 A-1906-129-A s MOUNTED CIRCIT BOARD, SWC-55 1-968-822-11 s HARNESS (DPR-EC/SWC) A-1906-130-A s MOUNTED CIRCIT BOARD, EC-115 X-2586-453-1 s ESCUTCHEON ASSY (SXS) 3-056-233-21 s SCREW (M2), LOCK ACE, P2 1-846-498-11 s CABLE, FLEXIBLE FLAT (20 CORE) 4-459-284-11 s GASKET (A), TOP 4-11 PMW-50...
- Page 88 1-968-821-11 s HARNESS, SUB (DPR-IO) 1-968-823-11 s HARNESS (DCP-KSW) 2-635-562-31 s SCREW (M1.7) 3-056-233-21 s SCREW (M2), LOCK ACE, P2 3-278-255-01 s TAPE (BT) 4-427-941-01 s CUSHION CONNECTOR (MAIN) 4-427-951-02 s RADIATION SHEET C 4-427-952-02 s RADIATION SHEET D 4-12 PMW-50...
- Page 89 4-427-953-02 s RADIATION SHEET E 4-427-955-02 s RADIATION SHEET G 4-427-956-02 s RADIATION SHEET H 4-453-672-01 s RADIATION SHEET I 4-457-322-01 s HOLDER WIFI HARNESS 4-460-685-01 s RADIATION SHEET (F), EMC 4-459-282-51 s GASKET (10X7) 4-459-283-11 s GASKET, SDI 4-13 PMW-50...
- Page 90 1-528-174-72 s BATTERY, LITHIUM (CR2032 TYPE) 1-968-344-21 s SUB HARNESS (EXT DC-RE299) 1-968-820-11 s HARNESS, SUB (RE-PSW) 3-056-233-21 s SCREW (M2), LOCK ACE, P2 3-080-203-41 s SCREW (M2), LOCK ACE,P2 3-080-206-21 s SCREW, TAPPING, P2 4-457-792-01 s CUSHION (RE) 4-14 PMW-50...
-
Page 91: Electrical Parts List
PSW-100 BOARD Ref. No. or Q'ty Part No. SP Description Ref. No. A-1905-310-A s MOUNTED CIRCUIT BOARD, HN-407 or Q'ty Part No. SP Description CN101 1-817-820-11 s CONNECTOR, BOARD TO BOARD 30P A-1905-308-A s MOUNTED CIRCUIT BOARD, PSW-100 4-15 PMW-50... - Page 92 A-1905-313-A s MOUNTED CIRCUIT BOARD, RM-239 SWC-55 BOARD Ref. No. or Q'ty Part No. SP Description A-1906-129-A s MOUNTED CIRCUIT BOARD, SWC-55 1-821-531-13 s CONNECTOR, EX CARD(GUIDE UNIT) CN100 1-774-260-31 s CONNECTOR, FFC/FPC(ZIF) AN 20P CN301 1-821-530-12 s CONNECTOR, EX CARD (HOST) 4-16 PMW-50...
-
Page 93: Supplied Accessories
1-479-570-14 s REMOTE COMMANDER (RM-F300) 1-482-018-11 s FERRITE CORE (GRFC-8) 1-782-476-14 s CORD, POWER (For(CN)) 1-824-211-41 s CORD, CONNECTION 3-278-903-01 s SHORUDER BELT 4-450-408-01 s CD-ROM (INSTRUCTION MANUAL) 4-456-463-01 s BEFORE USING THIS UNIT (For(SY)) 4-456-463-11 s BEFORE USING THIS UNIT 4-17 PMW-50... -
Page 95: Block Diagrams
SLOT B CN101 POWER CN100 CN101 (EXPRESS CARD) DDR2 CN101 CN100 DC IN IC2101 IC1101 CN2200 USB(SERVICE) IC2007 FLASH SYSTEM FLASH IO-257 CONTROL IC2006 (MELON) SY_I2C CN101 SDRAM VIDEO_OUT IC2201 CN100 EPROM CN102 AUDIO OUT L/R CN2400 CN2500 Overall PMW-50... -
Page 97: Schematic Diagrams
EXT DC-RE299 CN101 EC-115 CN101 DC IN DC-168 SLOT B CN200 CN102 CN100 CN202 HARNESS IO-256 RE-PSW BATTERY CN104 CN201 CN101 USB(OPTION) UNREG CN106 (For Wireless ADP) HEADPHONE CN103 CN105 HARNESS DPR-EC/SWC SPEAKER Frame Wiring HARNESS DPR-EC/SWC HARNESS DPR-IO PMW-50... - Page 100 PMW-50 (SY) Printed in Japan Sony Corporation PMW-50 (CN) J, E 2012. 12 08 9-878-425-01 © 2012...