Table of Contents
Advertisement
Quick Links
Advertisement
Table of Contents

Related Manuals for Blomberg KFD4952XD


Summary of Contents for Blomberg KFD4952XD
- Page 1 Refrigerator User Manual KFD4952XD-KFD4953XD EN / 57 6043 0000/AO...
- Page 2 Please read these instructions first before using your appliance Thank you for choosing a Blomberg appliance. Please take some time to read this user manual before using your appliance, to ensure you know how to safely operate the controls and functions.
-
Page 3: Table Of Contents
CONTENTS 1. Safety and environment instructions 3 5 Using the product 1.1.1 HC warning ..... .4 5.1. Indicator panel....15 1.1.2 For models with water dispenser . -
Page 4: Safety And Environment Instructions
Safety and environment instructions This section provides the safety In case of malfunction, unplug the • instructions necessary to prevent the risk device. of injury and material damage. Failure to After unplugging, wait at least 5 • observe these instructions will invalidate minutes before plugging in again. -
Page 5: Hc Warning
Safety and environment instructions In case of malfunction, do not use • the product, as it may cause electric shock. Contact the authorised service as soon as possible. Plug the product into an earthed • socket. Earthing must be done by a qualified electrician. - Page 6 Safety and environment instructions 1.2. Intended use 1.6. Package information This product is designed for home use. • • Packaging materials of the product are It is not intended for commercial use. manufactured from recyclable materials in The product should be used to store accordance with our National Environment •...
-
Page 7: Refrigerator
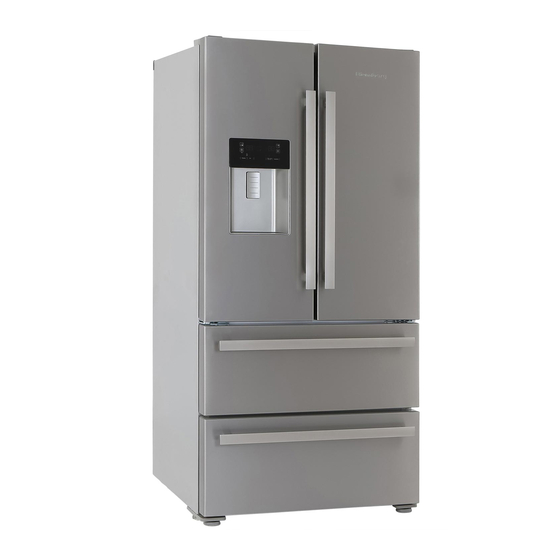
Refrigerator Congratulations on your choice of a BLOMBERG quality Appliance which has been designed to give you service for many years. Frozen food storing compartments A- Cooler compartment Vegetable bins B- Freezer compartment Zero degree compartment Butter-cheese shelf Odour filter... -
Page 8: Installation
Installation 3.1. Right place for installation To ready the product for installation, see the information in the user guide and make sure the electric and water utilities are as required. If not, call an electrician and plumber to arrange the utilities as necessary. -
Page 9: Power Connection
Installation 3.4. Power connection Check to see the following parts are supplied with your product’s model: WARNING: Do not use extension or multi sockets in power connection. WARNING: Damaged power cable must be replaced by Authorized Service. When placing two coolers in adjacent position, leave at least 4 cm distance between the two units. -
Page 10: Connecting To Water Mains
Installation 1. Detach the connector (1) from the tap adaptor (2). 2. Push the water hose down tightly and connect to the hose nozzle adaptor. 2. Connect the tap adaptor to the water mains valve. 3. Tighten the connector manually to fix on the hose nozzle adaptor. -
Page 11: For Products Using Water Carboy
Installation 2. Connect the other end of the water hose to the water pump by pushing the hose into the pump’s hose inlet. 5. To avoid damaging, shifting or accidentally disconnecting the hose, use the clips provided to 3. Place and fasten the pump hose inside the fix the water hose appropriately. -
Page 12: Fixing External Filter On The Wall (Optional)
Installation 3.9.1. Fixing external filter 2. Determine the location to fix the external filter. Fix on the wall (Optional) the filter’s connecting apparatus (5) on the wall. WARNING: Do not fix the filter on the product. Check to see the following parts are supplied with your product’s model: 3. -
Page 13: Internal Filter
Installation 3.9.2. Internal filter The internal filter provided with the product is not installed upon delivery; please follow the instructions below to install the filter. 1. “Ice Off ” indicator must be active while installing the filter. Switch the ON-OFF indicator using the “Ice”... - Page 14 Installation 5. Push the “Ice” button on the screen again to cancel the “Ice Off ” mode. The water filter will clear certain foreign particles in the water. It will not clear the microorganisms in the water. The filter replacement period of your product is 6 months.
-
Page 15: Preparation
Preparation 4.1. What to do for energy saving Connecting the product to electronic energy-saving systems is harmful, as it may damage the product. • Do not keep the refrigerator doors open for long periods. • Do not place hot food or beverages into the refrigerator. -
Page 16: Using The Product
Using the product 5.1. Indicator panel Indicator panels may vary depending on the model of your product. Audio and visual functions of the indicator panel will assist in using the refrigerator. Cooler compartment indicator Error status indicator Temperature indicator Vacation function button Temperature adjustment button Compartment selection button Freezer compartment indicator... - Page 17 Using the product 1. Cooler compartment indicator 8. Economy mode indicator The cooler compartment light will turn on when Indicates the refrigerator is running on energy- adjusting the cooler compartment temperature. saving mode. This indicator will be active when the temperature in the freezer compartment is set to 2.
-
Page 18: Indicator Panel
Using the product 5.2. Indicator panel This touch-control indicator panel allows you to set the temperature without opening the door of your refrigerator. Just touch the relevant button with your finger to set the temperature. *7.2 *7.1 1- Economic use 2- High temperature / fault alert 3. - Page 19 Using the product 5. Vacation function 1. Economic use To activate the Vacation function, press the button This sign will light up when the freezer for ( ) 3 seconds; this will activate the vacation compartment is set to -18°C', the most economical mode indicator ( ).
- Page 20 Using the product Press the keypad lock button ( ) to prevent changing the refrigerator's temperature settings. 9. Eco-fuzzy To activate the eco-fuzzy function, press and hold the eco-fuzzy button for 1 second. When this function is active, the freezer will switch to the economic mode after at least 6 hours and the economic use indicator will light up.
- Page 21 Using the product *10.2 *10.1 1. Freezer compartment temperature setting 2. Economy mode 3. Energy saving function (display off) 4. Power failure/High temperature / error warning indicator 5. Cooler compartment temperature setting 6. Rapid cooling 7. Vacation function 8. Keypad lock / filter replacing alert cancellation 9.
- Page 22 Using the product 7. Vacation function 1. Freezer compartment temperature setting Pressing the button ( ) will enable the freezer When the Vacation function ( ) is active, the compartment temperature to be set at -18,-19,- cooler compartment temperature indicator displays 20,-21 ,-22,-23,-24,-18...
- Page 23 Using the product 12. Rapid freezing Press the button ) for rapid freezing. Press the button again to deactivate the function. Any time after energising, by pressing the Fridge Set and Quick Fridge buttons for 3 seconds, you can make Celsius>Fahrenheit, Fahrenheit>Celsius conversions. C>F Conversio n (3 sec)
-
Page 24: Zero Degree Compartment
Using the product 5.3. Zero degree compartment Odor filter must be cleaned once in a year. (Optional) Use this compartment to keep delicatessen at lower temperatures or meat products for immediate consumption. Do not place fruits and vegetables in this compartment. You can expand the product's internal volume by removing any of the zero degree compartments. -
Page 25: Telescopic Drawer
Using the product 5.7. Telescopic drawer 5.8. Ionizer Pay attention not to squeeze any parts of your (Optional) body such as hands, feet and etc. between the The ionizer system in the cooler compartment’s movable parts while the drawer is in use in order air duct serves to ionize the air. -
Page 26: Movable Middle Section
Using the product 5.10. Ice container 5.9. Movable middle section Movable middle section is intended to prevent (Optional) the cold air inside your refrigerator from escaping Ice container allows you to obtain ice from the outside. product easily. Sealing is provided when the gaskets on the door Using the ice container presses on the surface of the movable middle section 1. -
Page 27: Ice Box
Using the product 5.11. Ice box Do not consume the first few lots of ice cubes after installation. The ice container is used for ice collection from • It will take around 1-2 days for the system to the ice cube machine. Do not put water in it to make produce the full amount of ice. -
Page 28: Freezing Fresh Food
Using the product 5.13. Freezing fresh food • Mark each food pack by writing the date on the package before freezing. This will allow you to • To preserve food quality, the food items placed determine the freshness of each pack every in the freezer compartment must be frozen as time the freezer is opened. -
Page 29: Door Open Alert
Care and Cleaning Using the product Service life of the product will extend and frequently encountered problems will decrease if Zero degree Wrapped meat and fish the product is cleaned periodically. compartment products WARNING: Switch off the product 5.17. Door open alert before cleaning. -
Page 30: Care And Cleaning
Care and Cleaning Sponges and other types of cleaning cloths 6.4. Stainless Steel may scratch the surface. Outer Surfaces 6.1. Avoiding Bad Odours Use a stainless steel cleaning agent that is non- Materials that may cause odour are not used in abrasive and apply it with a lint-free, soft cloth. -
Page 31: Troubleshooting
Troubleshooting Please review this list before calling the service. • Protective thermal of the compressor will This will save you time and money. This list blow out during sudden power failures or contains frequently encountered problems that are plug-out plug-ins as the refrigerant pressure not results of faulty workmanship or material use. - Page 32 Troubleshooting • Your new product may be bigger than the • The fridge compartment temperature may be previous one. Larger refrigerators operate for set to a very high value. >>> Set the fridge a longer period of time. compartment temperature to a lower value • The room temperature may be high.
- Page 33 Troubleshooting • Foods may be touching the upper wall of the Damp accumulates on the inner walls of crisper. >>>Re-organise the foods in the refrigerator. crisper. • Hot and humid weather increases icing and condensation. This is normal and not a fault. If The Surface Of The Product Is Hot.
- Page 34 • Repairs necessary as a direct or indirect result of: Accidental damage, misuse or abuse of a product. An attempted repair of a product by anyone other than a Blomberg Approved Engineer (the “Engineer”). Installation or use of a product where such installation or use fails to meet the requirements contained in this guarantee or the User Instructions Booklet.
- Page 35 11. Optional extras, where available (i.e. extendable feet) are supplied on a chargeable basis only. Does Blomberg offer replacements? This is a repair-only guarantee. On occasion, the Manufacturer may at its sole discretion, replace your product with a new product instead of carrying out a repair.
- Page 36 Will there be any charge for the repairs? It is your responsibility to provide evidence to the Engineer that your product is covered by this guarantee with a proof of purchase. The Manufacturer reserves the right to charge for the reasonable cost of any service call if: • You cannot provide evidence that your product is covered by this guarantee.
- Page 37 2 years, you will automatically activate the Optima Inverter Motor 10 year guarantee. You do not need to register twice. To make a claim against your Blomberg Optima Inverter Motor Guarantee (the “Guarantee”), all customer and product details must be registered with Beko plc using the procedure outlined below.
- Page 38 13. These Terms and Conditions are governed by the laws of England and Wales; manufacturer: Beko plc, Beko House, 1 Greenhill Crescent, Watford WD18 8QU. Company Registration Number: 02415578. HOW TO OBTAIN SERVICE FOR YOUR APPLIANCE Please keep your purchase receipt or other proof of purchase details in a safe place; you will need to have this documentation available should the product require attention under guarantee.
- Page 39 UK Mainland & Northern Ireland: 0333 207 9870 Landline or mobile calls to 0333 numbers cost no more than calls to geographic numbers 01 or 02, and are charged at the basic rate. Calls from landlines and mobiles are included in free call packages but please check with your telephone service provider for exact call charges.