Table of Contents
Advertisement
Quick Links
Advertisement
Table of Contents

Related Manuals for ABB ACS880-207LC


Summary of Contents for ABB ACS880-207LC
- Page 1 — ABB INDUSTRIAL DRIVES ACS880-207LC IGBT supply units Hardware manual...
- Page 3 ACS880-207LC IGBT supply units Hardware manual Table of contents 3. Electrical installation 6. Start-up and operation © 2019 ABB Oy. All Rights Reserved. 3AXD50000174782 Rev A EFFECTIVE: 2019-06-30...
-
Page 5: Table Of Contents
Table of contents 5 Table of contents 1 Introduction to the manual Contents of this chapter ................Applicability ..................Safety instructions ................Target audience ................... Purpose of the manual ................Categorization by frame size and option code ..........Use of component designations ..............Terms and abbreviations ................. - Page 6 6 Table of contents Type designation label(s) ................ Type designation key ................3 Electrical installation Contents of this chapter ................Required tools ..................Electrical safety precautions ..............Isolation from AC supply networks ............. Isolation from common DC bus ..............Checking the insulation of the assembly ............Checking the insulation of the drive system ..........
- Page 7 Table of contents 7 6 Start-up and operation Contents of this chapter ................Safety ....................Start-up procedure ................Additional instructions for closing the DC switch-disconnector ......7 Maintenance Contents of this chapter ................Maintenance intervals ................Maintenance timers and counters .............. Cabinet .....................
- Page 8 8 Table of contents Fuses ....................Main circuit AC fuses ................. Main circuit DC fuses ................. Dimensions, weights and free space requirements .......... Dimensions and weights ..............Free space requirements ..............Losses, cooling data and noise ..............Internal cooling circuit data ..............Terminal and lead-through data for the input power cable ........
- Page 9 Table of contents 9 Coolant flow rate limits ............... Cooling circuit materials ..............Further information...
-
Page 11: Introduction To The Manual
This chapter also includes a list of related manuals. Applicability The manual is applicable to liquid-cooled, cabinet-installed ACS880-207LC IGBT supply units that form a part of an ACS880 multidrive system. Safety instructions Follow all safety instructions delivered with the drive. -
Page 12: Purpose Of The Manual
The unit size can be identified from the basic code visible on the type designation label, for example, ACS880-207LC-4360A-7 where 4360A is the unit size. The option codes of the unit are listed after the plus sign. Section... - Page 13 Introduction to the manual 13 Term/ Description Abbreviation FDIO-01 Optional digital I/O extension module FDNA-01 Optional DeviceNet™ adapter module FDPI Diagnostics and panel interface board FEA-03 Optional I/O extension adapter FECA-01 Optional EtherCAT® adapter module FEN-01 Optional TTL incremental encoder interface module FENA-11 Optional Ethernet adapter module for EtherNet/IP™, Modbus TCP®...
-
Page 14: Related Documents
Drive composer start-up and maintenance PC tool user’s manual 3AUA0000094606 Manuals for I/O extension modules, fieldbus adapters, safety options etc. You can find manuals on the Internet. See www.abb.com/drives/documents. For manuals not available in the document library, contact your local ABB representative. -
Page 15: Operation Principle And Hardware Description
Contents of this chapter This chapter describes the operation basics and the hardware of the IGBT supply unit (ACS880-207LC). Operation principle IGBT supply unit rectifies three-phase AC current to direct current for the intermediate DC link of the drive. The intermediate DC link supplies the inverters that run the motors. There can be one inverter unit only (single drives) or several inverter units (multidrives) connected to the intermediate circuit. -
Page 16: Simplified Main Circuit Diagram
16 Operation principle and hardware description ■ Simplified main circuit diagram The following figure shows the simplified main circuit diagram of the rectifier. AC voltage AC fuses LCL filter IGBT supply module DC fuses DC voltage ■ Charging A charging circuit powers up the DC link capacitors of the drive system smoothly. Discharged capacitors cannot be directly connected to the full supply voltage. -
Page 17: Overview Diagram Of The Drive
Operation principle and hardware description 17 Overview diagram of the drive Operation principle and hardware description 17 This diagram shows a simplified diagram of a drive with IGBT supply unit and inverter unit. liquid-cooled units: Auxiliary voltage transformer ([T21], option +G344) The figure includes: Auxiliary voltage switch [Q21] Description... -
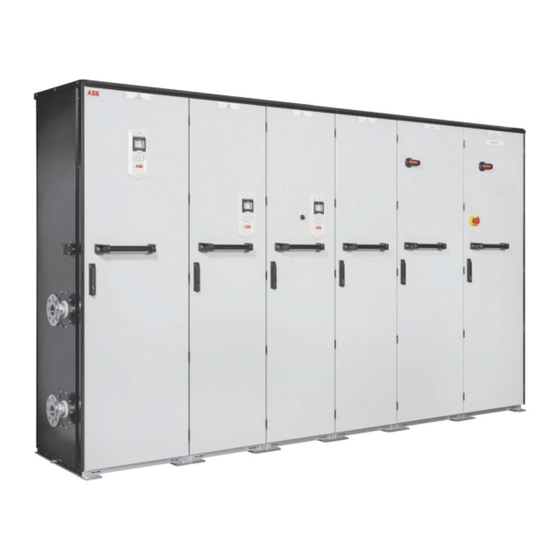
Page 18: Layout Drawings
18 Operation principle and hardware description Layout drawings This section contains layout drawings of cubicles that are included in a supply unit. The components, layout and size of the cubicles vary depending on the supply unit size and selected options. ■... -
Page 19: Incoming Cubicle
Operation principle and hardware description 19 ■ Incoming cubicle This section shows examples of incoming cubicle layout. The cubicle contains the main switching and disconnecting devices. The input power cables are connected to the incoming cubicle through cabinet bottom. The components, layout and size vary depending on the supply unit size and selected options. -
Page 20: Door Open
20 Operation principle and hardware description Door open Auxiliary voltage disconnector Charging circuit disconnector, AC side DC fuses Option +F259: Grounding switch Charging circuit disconnector, DC side BAMU measurement unit Option +F255: Main circuit breaker Cooling fan and heat exchanger Charging resistors Input power cable terminals [L1, L2, L3]... -
Page 21: Supply Module Cubicle
Operation principle and hardware description 21 ■ Supply module cubicle This section shows an example of supply module cubicle layout. The cubicle contains IGBT supply modules. There are no switches or devices on the cabinet door. Door open DC fuses Common mode filters IGBT supply module of frame size R8i Coolant connections... -
Page 22: Filter Cubicle
22 Operation principle and hardware description ■ Filter cubicle This section shows an example of LCL filter cubicle layout. The cubicle contains LCL filter(s). There are no switches or devices on the cabinet door. Door open AC fuses Capacitors. Inductors are located behind the capacitors. CIO-01 I/O module Cooling fan and heat exchanger... -
Page 23: Auxiliary Control Cubicle
Operation principle and hardware description 23 ■ Auxiliary control cubicle This section shows an example of auxiliary control cubicle layout. The composition and size of the cubicle vary depending on the selected options. Door closed Control panel Operating switches... -
Page 24: Door Open
24 Operation principle and hardware description Door open CIO-01 I/O module BCU control unit Cooling fan and heat exchanger Transformer. Two transformers can also be behind the assembly plates. -
Page 25: Overview Of Power And Control Connections
Operation principle and hardware description 25 Overview of power and control connections Input power connections of the IGBT supply unit are terminals L1, L2 and L3 located in the lower part of the incoming cubicle. Power cables enter the cabinet via lead-throughs on the floor of the cubicle as standard. -
Page 26: Overview Of The Control Connections Of The Bcu Control Unit
26 Operation principle and hardware description ■ Overview of the control connections of the BCU control unit The diagram shows the control connections and interfaces of the BCU control unit. Analog and digital I/O extension modules and Control panel. fieldbus communication modules can be inserted into slots 1, 2 and 3. -
Page 27: Supply Unit Control Devices
Operation principle and hardware description 27 Supply unit control devices Run enable is the main control signal of the supply unit. The control program reads it from digital input DI2. You can control the signal, for example, with an operating switch installed on the supply module cubicle door, and wired to DI2. -
Page 28: Charging Switch
28 Operation principle and hardware description ■ Charging switch The charging switch [Q3] is a standard device. To charge the drive, the charging switch must be closed. The charging switch does not control the charging circuit, it just provides power to the charging circuitry. The charging circuit is controlled by the charging contactor [Q4], which is controlled by the control unit. -
Page 29: Charging Switch For Unit Charging
Operation principle and hardware description 29 ■ Charging switch for unit charging Before closing the DC switch-disconnector [Q11], the user closes the charging switch for DC-DC unit charging [Q10]. After the precharging completes, the DC switch-disconnector [Q11] can be closed, and the charging switch [Q10] opened. Note: The charging switch [Q10] must be opened before the supply unit can be started. -
Page 30: Cooling System
30 Operation principle and hardware description Cooling system See chapter Internal cooling circuit. ■ Coolant connectors The coolant pipe inlet and outlet connectors are located at the bottom front of the IGBT supply module. The connectors are for 16/13 millimeter PA (polyamide) pipe. WARNING! For a reliable connection, the end of the pipe entering the connector must be completely intact for a length of at least 5 cm (2 in). -
Page 31: Type Designation Key
Operation principle and hardware description 31 Type designation key The type designation contains information on the specifications and configuration of the supply unit. The first digits from left express the basic supply unit type. The optional selections are given thereafter, separated by plus signs, eg, +F255. The main selections are described below. - Page 32 32 Operation principle and hardware description Code Description C245 1000 mm wide IPU cubicle C243 Additional voltage measurement for optimal grid control Filters E205 du/dt filtering by choke E210 2nd environment, C3, grounded (TN) and ungrounded (IT) networks Line options F250 Main (line) contactor F253...
- Page 33 Operation principle and hardware description 33 Code Description K450 Panel bus Cabling H350 Supply cabling direction down H351 Supply cabling direction up H358 Cable gland plates (Steel 3 mm, undrilled) H364 Cable gland plates (Aluminum 3 mm, undrilled) H367 Control cable entry through the floor of cabinet H368 Control cable entry through the roof of cabinet Fieldbus adapters and other communication options...
- Page 34 34 Operation principle and hardware description Code Description Q964 Stop category 1 without opening main contactor / main circuit breaker Q979 Emergency stop (configurable for category 0 or 1) by activating the Safe torque off function Q984 E-stop button monitoring Full set of printed manuals in the selected language Note: The delivery may include manuals in English if the requested language is not available.
-
Page 35: Electrical Installation
This chapter instructs how to check the insulation of the assembly and how to install the input power cables and control cables. The information is valid for cabinet-installed ACS880-207LC supply units. Required tools The tools required for tightening the connections are listed below: •... - Page 36 36 Electrical installation 3. Disconnect all possible voltage sources. Lock out and tag out. • Open the main disconnecting device of the drive. • Open the charging switch if present. • Open the disconnector of the supply transformer. (The main disconnecting device in the drive cabinet does not disconnect the voltage from the AC input power busbars of the drive cabinet.) •...
-
Page 37: Isolation From Ac Supply Networks
Electrical installation 37 Isolation from AC supply networks 1. Clearly identify the work location. 2. Disconnect all possible voltage sources. • Open the main switch-disconnector [Q1], or rack out the main breaker [Q1] of the drive (whichever is present). Note that some drives have two switch-disconnectors or main breakers [Q1.1 and Q1.2]. -
Page 38: Isolation From Common Dc Bus
38 Electrical installation Isolation from common DC bus In case of units with DC voltage remaining: if there are several power sources for the DC bus, the supply unit which shall be isolated must be equipped with a DC switch-disconnector (option +F286). -
Page 39: Connecting The Input Power Cables
Electrical installation 39 Connecting the input power cables ■ Connection diagram Components for main charging circuit. For details, see the delivery-specific circuit diagrams. Components for DC charging circuit. For details, see the delivery-specific circuit diagrams. Incoming cubicle LCL filter cubicle IGBT supply module cubicle Notes: For the conductivity requirements for the shield and the PE conductor, see ACS880... - Page 40 40 Electrical installation 5. Prepare the ends of the cables. WARNING! Apply grease to stripped aluminum conductors before attaching them to non-coated aluminum cable lugs. Obey the grease manufacturer's instructions. Aluminum-aluminum contact can cause oxidation in the contact surfaces. 6. If fire insulation is used, make an opening in the mineral wool sheet according to the diameter of the cable.
- Page 41 9. Seal the gap between the cable and mineral wool sheet (if used) with sealing compound (eg. CSD-F, ABB brand name DXXT-11, code 35080082). 10. Connect the twisted shields of the cables to the PE busbar of the cabinet. Tighten the...
-
Page 42: Connecting The External Power Supply Cable For The Auxiliary Circuit
42 Electrical installation Connecting the external power supply cable for the auxiliary circuit The customer/installer must provide the auxiliary voltage from an external supply to the drive. For details, see the delivery-specific circuit diagrams. ■ Connection diagram External control voltage supply External fan voltage supply Q115... -
Page 43: Checking The Settings Of The Auxiliary Voltage Transformer (Option +G344)
Electrical installation 43 Checking the settings of the auxiliary voltage transformer (option +G344) Check the tap settings of all auxiliary voltage transformers. Transformer T21 is optional equipment; T115 and T125 are present depending on drive configuration. The voltage settings of transformer T21 are made at terminal blocks T21_X1/X2 and T115_X1/X2 respectively. -
Page 44: Checking The Settings Of The Cooling Fan Transformer
44 Electrical installation Checking the settings of the cooling fan transformer Check the tap settings of all cooling fan transformers. Cooling fan transformers T115 and T125 are present depending on drive configuration. If the delivery contains an incoming unit, the cooling fan transformer connections are made at the factory. The connection of the primary winding of the fan transformer depends on the actual system voltage. -
Page 45: Connecting The Power Supply Cable For The Charging Circuit
Electrical installation 45 Connecting the power supply cable for the charging circuit If the delivery contains an incoming unit, the charging circuit connections are made at the factory. The charging circuit components are located in the incoming cubicle. If the delivery contains an IPU unit, see the delivery-specific circuit diagrams for wiring. -
Page 46: Connecting The Control Cables For The Supply Unit
46 Electrical installation Connecting the control cables for the supply unit ■ Connection diagram See the delivery-specific circuit diagrams, and the default I/O diagram. ■ Connection procedure WARNING! Obey the instructions in Safety instructions for ACS880 liquid-cooled multidrive cabinets and modules (3AXD50000048633 [English]). If you ignore them, injury or death, or damage to the equipment can occur. - Page 47 Electrical installation 47 • Cover the turned shield and the stripped cable with copper foil to keep the shielding continuous. Stripped cable Conductive surface of the shield exposed Stripped part covered with copper foil Cable shield Copper foil Shielded twisted pair Grounding wire Note for top entry of cables: When each cable has its own rubber grommet, sufficient IP and EMC protection can be achieved.
-
Page 48: Routing The Control Cables Inside The Cabinet
48 Electrical installation Routing the control cables inside the cabinet Use the existing trunking in the cabinet wherever possible. Use sleeving if cables are laid against sharp edges. When running cables to or from a swing-out frame, leave enough slack at the hinge to allow the frame to open fully. -
Page 49: Connecting Control Cabling
Electrical installation 49 Connecting control cabling Connect the conductors to the appropriate terminals. Refer to the wiring diagrams delivered with the drive. Connect the inner twisted pair shields and all separate grounding wires to the grounding clamps closest to the terminals. The drawing below represents the grounding of the control cabling when connecting to a terminal block inside the cabinet. -
Page 50: Powering The Heating And Lighting Equipment (Options +G300 And +G301)
50 Electrical installation Powering the heating and lighting equipment (options +G300 and +G301) See the circuit diagrams delivered with the supply unit. Cabinet heaters and/or lighting (230 or 115 V AC, options +G300/+G301) are to be supplied from external power sources. Connect the external power supply wires for the cabinet heater and lighting to terminal block X22 at the mounting plate. -
Page 51: Connecting A Pc
Electrical installation 51 Connecting a PC A PC (with eg, the Drive composer PC tool) can be connected as follows: 1. Connect an ACx-AP-x control panel to the unit either • by inserting the control panel into the panel holder or platform (if present), or •... -
Page 53: Control Units Of The Drive
Control units of the drive 53 Control units of the drive Contents of this chapter This chapter • describes the connections of the control unit, • contains the specifications of the inputs and outputs of the control unit. General The BCU-x2 control unit is used with frame size R8i and multiples. The BCU-x2 consists of a BCON-12 control board (and a BIOC-01 I/O connector board and power supply board) built in a metal housing. -
Page 54: Bcu-X2 Control Unit Layout And Connections
54 Control units of the drive BCU-x2 control unit layout and connections Description I/O terminals (see following diagram) SLOT 1 I/O extension, encoder interface or fieldbus adapter module connection. (This is the sole location for an FDPI-02 diagnostics and panel interface.) SLOT 2 I/O extension, encoder interface or fieldbus adapter module connection... - Page 55 Control units of the drive 55 Description Analog inputs Analog outputs Digital inputs, Digital input interlock (DIIL) XRO3 XD24 XPOW XDIO Digital input/outputs XD2D Drive-to-drive link XRO2 XDIO XD24 +24 V output (for digital inputs) XETH Ethernet port – Not in use XRO1 XPOW External power input...
-
Page 56: Default I/O Diagram Of The Supply Control Unit
56 Control units of the drive Default I/O diagram of the supply control unit The diagram below shows the default I/O connections on the supply control unit (A51), and describes the use of the connections in the supply unit. Under normal circumstances, the factory-made wiring should not be changed. -
Page 57: External Power Supply For The Control Unit (Xpow)
(nominal impedance 100 to 165 ohm, for example Belden 9842) for the wiring. For best immunity, ABB recommends high quality cable. Keep the cable as short as possible. Avoid unnecessary loops and parallel runs near power cables such as motor cables. -
Page 58: The X485 Connector
The BCU-x2 has an on-board data logger that collects real-time data from the power modules to help fault tracing and analysis. The data is stored onto the SDHC memory card inserted into the SD CARD slot and can be analyzed by ABB service personnel. -
Page 59: Connector Data
Power supply Connector pitch 5 mm, wire size 2.5 mm (XPOW) 24 V (±10%) DC, 2 A Control units of the drive 59 External power input. Two supplies can be connected for redundancy. Relay outputs RO1…RO3 Connector data Connector pitch 5 mm, wire size 2.5 mm (XRO1…XRO3) 250 V AC / 30 V DC, 2 A Power supply (XPOW) - Page 60 60 Control units of the drive Analog inputs AI1 and AI2 Connector pitch 5 mm, wire size 2.5 mm (XAI:4 … XAI:7). Current input: –20…20 mA, R = 100 ohm Current/voltage input mode selection by Voltage input: –10…10 V, R >...
-
Page 61: Bcu-X2 Ground Isolation Diagram
Control units of the drive 61 Control units of the drive 137 ■ BCU-x2 ground isolation diagram Ground isolation diagram XPOW +24VI +24VI +VREF -VREF AGND AI1+ Common mode voltage AI1- AI2+ between each AI input and AI2- AGND is +30 V AGND AGND XD2D... -
Page 63: Installation Checklist Of The Drive
Installation checklist of the drive 63 Installation checklist of the drive Contents of this chapter This chapter contains a checklist of the mechanical and electrical installation of the drive. Checklist Examine the mechanical and electrical installation of the drive before start-up. Go through the checklist together with another person. - Page 64 64 Installation checklist of the drive Make sure that … The input power cable has been connected to the appropriate terminals, the phase order is right, and the terminals have been tightened to the proper torque. There is an adequately sized protective earth (ground) conductor between the motor and the drive, and the conductor has been connected to appropriate terminal, and the terminal has been tightened to the proper torque.
-
Page 65: Start-Up And Operation
Contents of this chapter This chapter describes the start-up procedure of the IGBT supply unit. The information is valid for cabinet-installed ACS880-207LC IGBT supply units. Note: These instructions do not cover all possible start-up tasks of a customized drive. Always refer to the delivery-specific circuit diagrams when proceeding with the start-up. -
Page 66: Start-Up Procedure
66 Start-up and operation Start-up procedure Action Checks/Settings with no voltage connected Ensure that the disconnector of the supply transformer is locked to the off (0) position, ie. no voltage is, and cannot be connected to the drive inadvertently. Make sure that the main disconnecting device of the supply unit is open and locked: •... - Page 67 Start-up and operation 67 Action Check the voltage range setting in parameter 195.01 Supply voltage. For more information on setting up the supply control program, see the ACS880 IGBT supply control program firmware manual (3AUA0000131562 [English]). For more information on setting up the Optimal grid control mode, see Optimal grid control of ACS880 IGBT supply control program supplement (3AXD50000164745 [English]).
-
Page 68: Additional Instructions For Closing The Dc Switch-Disconnector
68 Start-up and operation ■ Additional instructions for closing the DC switch-disconnector If the DC bus is not alive and the main DC switch-disconnector [Q11] is in OFF position, the main DC switch-disconnector [Q11] is mechanically locked to OFF position by interlock [K11]. -
Page 69: Maintenance
Maintenance 69 Maintenance Contents of this chapter This chapter instructs how to maintain the IGBT supply unit and how to interpret its fault indications. The information is valid for cabinet-installed ACS880-207LC IGBT supply units. -
Page 70: Maintenance Intervals
70 Maintenance Maintenance intervals The table below shows the maintenance tasks which can be done by the end user. The complete maintenance schedule is available on the Internet (www.abb.com/drivesservices). For more information, consult your local ABB Service representative (www.abb.com/searchchannels). Maintenance task/object Years from start-up …... -
Page 71: Maintenance Timers And Counters
Maintenance 71 Maintenance and component replacement intervals are based on the assumption that the equipment is operated within the specified ratings and ambient conditions. ABB recommends annual drive inspections to ensure the highest reliability and optimum performance. Note: Long term operation near the specified maximum ratings or ambient conditions may require shorter maintenance intervals for certain components. -
Page 72: Power Connections
72 Maintenance Power connections ■ Retightening the power connections WARNING! Read the safety instructions given in Safety instructions for ACS880 liquid-cooled multidrive cabinets and modules (3AXD50000048633 [English]). If you ignore them, injury or death, or damage to the equipment can occur. 1. -
Page 73: Fuses
Maintenance 73 Fuses ■ Replacing the supply unit AC fuses WARNING! Read the safety instructions given in Safety instructions for ACS880 liquid-cooled multidrive cabinets and modules (3AXD50000048633 [English]). If you ignore them, injury or death, or damage to the equipment can occur. - Page 74 74 Maintenance...
-
Page 75: Replacing The Supply Unit Dc Fuses
See the firmware manual for the actual signal which indicates the running time of the cooling fan. Reset the running time signal after fan replacement. Replacement fans are available from ABB. Do not use other than ABB specified spare parts. -
Page 76: Replacing The Heat Exchanger Fan In The Supply Module Cubicle
76 Maintenance ■ Replacing the heat exchanger fan in the supply module cubicle WARNING! Wear protective gloves and long sleeves. Some parts have sharp edges. 1. Repeat the steps described in section Electrical safety precautions (page 35). 2. Remove any shrouding in front of the cooling fan. 3. -
Page 77: Replacing The Heat Exchanger Fan In The Filter Cubicle
Maintenance 77 ■ Replacing the heat exchanger fan in the filter cubicle WARNING! Read the safety instructions given in Safety instructions for ACS880 liquid-cooled multidrive cabinets and modules (3AXD50000048633 [English]). If you ignore them, injury or death, or damage to the equipment can occur. -
Page 78: Replacing The Fan In The Incoming Cubicle
78 Maintenance ■ Replacing the fan in the incoming cubicle WARNING! Read the safety instructions given in Safety instructions for ACS880 liquid-cooled multidrive cabinets and modules (3AXD50000048633 [English]). If you ignore them, injury or death, or damage to the equipment can occur. - Page 79 Maintenance 79...
-
Page 80: Replacing The Fan In The Auxiliary Control Cubicle
80 Maintenance ■ Replacing the fan in the auxiliary control cubicle Auxiliary control cubicle has a fan in the lower part of the cubicle. WARNING! Read the safety instructions given in Safety instructions for ACS880 liquid-cooled multidrive cabinets and modules (3AXD50000048633 [English]). -
Page 81: Supply Modules
Maintenance 81 Supply modules ■ Replacing the supply module WARNING! Obey the safety instructions given in Safety instructions for ACS880 liquid-cooled multidrive cabinets and modules (3AXD50000048633 [English]). If you ignore the safety instructions, injury or death, or damage to the equipment can occur. If you are not a qualified electrician, do not do installation or maintenance work. - Page 82 82 Maintenance 6. Close the inlet valve (a) and outlet valve (located on the right-hand side of the cubicle) valves. Lead the drain hoses (b, on both sides of the cubicle) into a suitable container. Open the drain valves (c, on both sides of the cubicle). This will drain all modules in the cubicle.
-
Page 83: Reinstalling The Module
Maintenance 83 9. Pull the module carefully out onto a table or other platform. Keep the module secured to a hoist or equivalent to prevent the module from falling. For information on using the lifting device, see Converter module lifting device for drive cabinets hardware manual (3AXD50000210268 [English]). -
Page 84: Lcl Filters
84 Maintenance LCL filters ■ Replacing the capacitors of the LCL filter WARNING! Read the safety instructions given in Safety instructions for ACS880 liquid-cooled multidrive cabinets and modules (3AXD50000048633 [English]). If you ignore them, injury or death, or damage to the equipment can occur. -
Page 85: Charging Resistors
Maintenance 85 Charging resistors ■ Replacing the charging resistors Charging resistors are located next to the cooling fan of the incoming cubicle. WARNING! Read the safety instructions given in Safety instructions for ACS880 liquid-cooled multidrive cabinets and modules (3AXD50000048633 [English]). If you ignore them, injury or death, or damage to the equipment can occur. -
Page 86: Capacitors Of The Dc Circuit
Capacitor failure is usually followed by damage to the unit and an input cable fuse failure, or a fault trip. Contact ABB if capacitor failure is suspected. Replacements are available from ABB. Do not use other than ABB specified spare parts. Contact an ABB service representative for spare parts and repair services. -
Page 87: Memory Unit
Maintenance 87 Memory unit ■ Replacing the memory unit After replacing a control unit, you can retain the existing parameter settings by transferring the memory unit from the defective control unit to the new control unit. WARNING! Do not remove or insert the memory unit when the control unit is powered. 1. -
Page 88: Leds
88 Maintenance LEDs This table shows the LEDs visible on the BCU-xx control unit. Color Indication BATT OK Green Battery voltage of the real-time clock is OK (higher than 2.8 V). When the LED is not lit, • battery voltage is below 2.8 V, •... -
Page 89: Technical Data
Technical data 89 Technical data Contents of this chapter This chapter contains the technical data valid for the cabinet-installed ACS880-207LC IGBT supply units. -
Page 90: Ratings
90 Technical data Ratings The nominal ratings for are given below. The definitions are described below the table. Light-over- Heavy-duty Basic No-overload use load use module ACS880- Frame type 207LC- size ACS880- 104LC- (AC) (DC) (AC) (DC) (DC) (DC) (DC) (DC) (DC) = 690 V... -
Page 91: Derating
For a more accurate derating, use the DriveSize PC tool. Coolant temperature derating See section Temperature limits (page 114). Antifreeze content derating See section Temperature limits (page 114). Switching frequency derating Switching frequencies other than default can require output current derating. Contact ABB for more information. -
Page 92: Type Equivalence Table
92 Technical data Type equivalence table Modules used LCL filter ACS880-207LC-… ACS880- DC capacitance LCL filter type 104LC-… (mF) = 690 V 0360A-7 0390A-7 BLCL-15LC-7 0400A-7 0430A-7 BLCL-15LC-7 0450A-7 0480A-7 BLCL-15LC-7 0480A-7 0530A-7 BLCL-15LC-7 0560A-7 0600A-7 BLCL-15LC-7 0620A-7 0670A-7 BLCL-15LC-7... -
Page 93: Fuses
Technical data 93 Fuses ■ Main circuit AC fuses AC fuses ACS880-207LC-… Manufacturer Type = 690 V 0360A-7 Bussmann 170M6410 0400A-7 Bussmann 170M6411 0450A-7 Bussmann 170M6412 0480A-7 Bussmann 170M6412 0560A-7 Bussmann 170M6413 0620A-7 1000 Bussmann 170M6414 0700A-7 1250 Bussmann 170M6416... -
Page 94: Main Circuit Dc Fuses
Fuses from other manufacturers can be used if they meet the ratings and the melting curve of the fuse does not exceed the melting curve of the fuse mentioned in the table. DC fuses ACS880-207LC-… Manufacturer Type = 690 V... -
Page 95: Dimensions, Weights And Free Space Requirements
(if present). Front Sides Above 1500 5.90 9.85 Losses, cooling data and noise Coolant Coolant flow Heat dissipation quantity Noise (total) ACS880-207LC-… into coolant l/min US gal/min into air (kW) dB(A) (kW) = 690 V 0360A-7 13.7 0400A-7 13.7 0450A-7 13.7 11.1... -
Page 96: Internal Cooling Circuit Data
96 Technical data Internal cooling circuit data See chapter Internal cooling circuit. -
Page 97: Terminal And Lead-Through Data For The Input Power Cable
Technical data 97 Terminal and lead-through data for the input power cable These drawings (from front, side and above) show the terminal and lead-through dimensions for incoming and input cubicles. The dimensions are given in millimeters. Tightening torque for the cable lug connection depends on the bolt size and type. See section Tightening torques (page 101). - Page 98 98 Technical data...
-
Page 99: 600 Mm Wide Incoming Cubicle Or Input Cubicle
Technical data 99 ■ 600 mm wide incoming cubicle or input cubicle... -
Page 100: 1000 Mm Wide Input Cubicle
100 Technical data ■ 1000 mm wide input cubicle... -
Page 101: Tightening Torques
Technical data 101 Tightening torques Unless a tightening torque is specified in the text, the following torques can be used. ■ Electrical connections Size Torque Note 0.5 N·m (4.4 lbf·in) Strength class 4.6...8.8 1 N·m (9 lbf·in) Strength class 4.6...8.8 4 N·m (35 lbf·in) Strength class 8.8 9 N·m (6.6 lbf·ft) -
Page 102: Typical Power Cable Sizes
102 Technical data Typical power cable sizes The tables below give current carrying capacity (I ) for aluminum and copper PVC/XLPE Lmax insulated cables. A correction factor K = 0.70 is used. Time const is the temperature time constant of the cable. The cable sizing is based on max. - Page 103 Technical data 103 Copper cable PVC insulation XLPE insulation Conductor temperature 70° Conductor temperature 90° Size ⌀ [mm] Time const. [s] Time const. [s] Lmax Lmax 3 × 1.5 + 1.5 3 × 2.5 + 2.5 (3 × 4 + 4) 3 ×...
-
Page 104: Electrical Power Network Specification
Max. ± 3% of nominal phase-to-phase input voltage Short-circuit withstand IEC/EN 61439-1:2009 strength (IEC/EN 61439-1) Supply units with R8i module(s): Supply units with ABB-defined main breaker and fuses: Rated peak withstand current (I ): 143 kA Rated short-time withstand current (I ): 65 kA/1 s... -
Page 105: Ambient Conditions
Installation site altitude 0…2000 m (0…6562 ft) above sea level. For alti- tudes over 2000 m, contact ABB. Output derated above 1000 m (3281 ft). Air temperature 0 … +45 °C -40 to +70 °C (- -40 to +70 °C (-... -
Page 106: Materials
IEC 62635 guidelines. To aid recycling, plastic parts are marked with an appropriate identification code. Contact your local ABB distributor for further information on environmental aspects and recycling instructions for professional recyclers. End of life treatment must follow international and local regulations. -
Page 107: Compliance With The En 61800-3 (2004)
ABB and its affiliates are not liable for damages and/or losses related to such security breaches, any unauthorized... -
Page 109: Internal Cooling Circuit
Internal cooling circuit 109 Internal cooling circuit Contents of this chapter The cooling system of a liquid-cooled drive consists of two circuits: the internal cooling circuit and the external cooling circuit. The internal cooling circuit covers the heat-generating electrical components of the drive and transfers the heat to the cooling unit. In the cooling unit, the heat is transferred to the external cooling circuit which is usually part of a larger external cooling system. - Page 110 110 Internal cooling circuit Supply modules Inverter modules To/From cooling unit Air-to-liquid heat exchanger Heat sink Inlet valve Inlet-side drain valve Outlet valve Outlet-side drain valve The coolant used with ACS880 liquid-cooled drive systems is Antifrogen® L 25% or 50% water mixture.
-
Page 111: Connection To A Cooling Unit
Internal cooling circuit 111 Connection to a cooling unit ■ Connection to an ACS880-1007LC cooling unit Refer to ACS880-1007LC cooling unit user’s manual (3AXD50000129607 [English]). ■ Connection to a custom cooling unit General requirements Equip the system with an expansion tank to damp pressure rise due to volume changes when the temperature varies. -
Page 112: Filling Up And Bleeding The Internal Cooling Circuit
112 Internal cooling circuit Filling up and bleeding the internal cooling circuit Both the drive and coolant must be at room temperature before filling up the cooling circuit. WARNING! Make sure that the maximum permissible operating pressure is not exceeded. When necessary regulate the pressure to appropriate level by draining excess coolant out of the system. - Page 113 Internal cooling circuit 113 13. Start the coolant pump. Let any air remaining in the system out through the bleed valve at the cooling unit. 14. After one to two minutes, stop the pump or block the coolant flow with a valve. 15.
-
Page 114: Draining The Internal Cooling Circuit
Coolant type Antifrogen® L (by Clariant International Ltd, www.clariant.com) 25% or 50% water mixture, available from Clariant distributors and ABB Service representatives. Antifrogen® L 25% mixture is usable in storage temperatures down to -16 °C (3.2 °F). Antifrogen® L 50% mixture is usable in storage temperatures down to -40 °C (-40 °F). - Page 115 Internal cooling circuit 115 The higher the concentration of heat transfer fluid, the higher the viscosity of the coolant. This results in a higher pressure loss in the system. See Pressure limits (page 116). The nominal current ratings of drive system modules apply to an Antifrogen® L / water solution of 25/75% (volume).
-
Page 116: Pressure Limits
116 Internal cooling circuit Min. T (°C) coolant (°C) RH = 95% RH = 80% RH = 65% RH = 50% RH = 40% -0.1 -3.0 14.2 11.5 19.2 16.5 13.2 24.1 21.4 17.9 13.8 10.5 29.1 26.2 22.7 18.4 15.0 34.1 31.1... - Page 117 Internal cooling circuit 117 • rubber gasketing NBR (nitrile rubber). WARNING! If connecting external piping to the internal cooling circuit, use only materials that are specified above. Copper, brass or bronze must not be used under any circumstances. Even minor dissolution of copper can cause copper precipitation on aluminum and subsequent galvanic corrosion.
- Page 119 Product and service inquiries Address any inquiries about the product to your local ABB representative, quoting the type designation and serial number of the unit in question. A listing of ABB sales, support and service contacts can be found by navigating to www.abb.com/searchchannels.
- Page 120 3AXD50000174782A © 2019 ABB Oy. All Rights Reserved. Specifications subject to change without notice.