Table of Contents
Advertisement
Advertisement
Table of Contents

Related Manuals for ABB ACS880-207


Summary of Contents for ABB ACS880-207
- Page 1 ABB industrial drives Hardware manual ACS880-207 IGBT supply units...
- Page 2 3AXD50000020967 ACS880-1607 DC/DC converter units hardware manual 3AXD50000023644 ACS880 DC/DC converter control program firmware manual 3AXD50000024671 System description Parallel connected ACS880-207 IGBT supply units system 3AXD50000032517 description Parallel connected ACS880-307 +A018 diode supply units 3AXD50000032421 system description Parallel connected ACS880-907 regenerative rectifier units...
- Page 3 Hardware manual ACS880-207 IGBT supply units Table of contents 3. Electrical installation 5. Start-up 2017 ABB Oy. All Rights Reserved. 3AUA0000130644 Rev C EFFECTIVE: 2017-11-29...
-
Page 5: Table Of Contents
Table of contents 1. Introduction to the manual What this chapter contains ..........9 Applicability . - Page 6 Type designation label of the supply unit ....... . . 33 Type designation label of the supply module .
- Page 7 (including the input power terminals) ........67 6.
- Page 8 Product training ............141 Providing feedback on ABB Drives manuals ....... . 141...
-
Page 9: Introduction To The Manual
What this chapter contains This chapter gives basic information on the manual. Applicability The manual is applicable to the cabinet-installed ACS880-207 IGBT supply units that form a part of an ACS880 multidrive system. Safety instructions Follow all safety instructions delivered with the drive. -
Page 10: Purpose Of The Manual
The unit size can be identified from the basic code visible on the type designation label, for example, ACS880-207-0420A-3 where 0420A is the unit size. The option codes of the unit are listed after the plus sign. Section... -
Page 11: Terms And Abbreviations
Introduction to the manual 11 Terms and abbreviations Term/Abbreviation Description Auxiliary control cubicle The cubicle with auxiliary devices such as auxiliary voltage circuit breakers, (ACU) control electronics, measurement boards, etc. BCON Type of a control board Type of a control unit (contains BCON) Control board Circuit board in which the control program runs. - Page 12 12 Introduction to the manual Term/Abbreviation Description IGBT Insulated gate bipolar transistor; a voltage-controlled semiconductor type widely used in drives due to their easy controllability and high switching frequency IGBT supply module IGBT type rectifier and related components enclosed inside a metal frame or enclosure.
-
Page 13: Operation Principle And Hardware Description
What this chapter contains This chapter describes the operation basics and the hardware of the IGBT supply unit (ACS880-207). Operation principle IGBT supply unit rectifies three-phase AC current to direct current for the intermediate DC link of the drive. The intermediate DC link supplies the inverters that run the motor. There can be one inverter unit only (single drives) or several inverter units (multidrives) connected to the intermediate circuit. -
Page 14: Main Circuit Diagram
The voltage must be increased gradually until the capacitors are charged and ready for normal use. In ACS880-207 IGBT supply units, a resistive charging circuit consisting of fuses, a contactor and charging resistors, is used. -
Page 15: Overview Diagram Of The Drive
Operation principle and hardware description 15 Overview diagram of the drive The following figure shows a single-line diagram of a drive with an IGBT supply unit. The figure includes: Description Auxiliary voltage transformer ([T21], option +G344) Auxiliary voltage switch [Q21] Main switch-disconnector ([Q1], option +F253) (standard, always with +F250) AC fuses [F1] Main contactor ([Q2], option +F250) (standard, always with +F253) -
Page 16: Layout Drawing Of An Igbt Supply Unit 1×R8I (Limited Scope Version)
16 Operation principle and hardware description Layout drawing of an IGBT supply unit 1×R8i (limited scope version) Note that there is also another version of 1×R8i supply unit available, see the drawings below. The multidrive version contains separate auxiliary control and incoming cubicles. Doors closed Doors open Description... -
Page 17: Overview Drawing Of A Drive
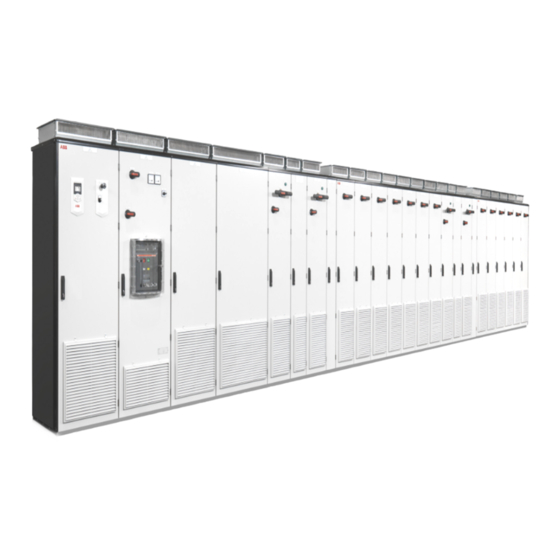
Operation principle and hardware description 17 Overview drawing of a drive This drawing shows an example of a drive with an IGBT supply unit and an inverter unit. Cables enter the cabinet through the bottom. Supply unit Inverter unit Description Auxiliary control cubicle (ACU). -
Page 18: Layout Drawings Of The Cubicles In The Supply Unit
18 Operation principle and hardware description Layout drawings of the cubicles in the supply unit This section contains layout drawings of cubicles that are included in a supply unit: auxiliary control cubicle, incoming cubicle and supply module cubicle. The components, layout and size of the cubicles vary depending on the supply unit size and options. - Page 19 Fuses, direct-on-line cooling fans of the module (option +C188) F101 Fuses, IP54 roof fans (option +B055) Fuses, auxiliary voltage transformer Control unit (BCU) for IGBT supply unit ACS880-207 T130 24 V DC power supply for cabinet lighting (option +G301) Reserved space for customer-defined equipment At the backside of the assembly plate: Auxiliary voltage transformer (option +G344).
-
Page 20: Layout Drawings Of Incoming Cubicles
20 Operation principle and hardware description Layout drawings of incoming cubicles This section shows examples of the incoming cubicle layouts. The input power cables are connected to the incoming cubicle and it contains the main switching and disconnecting devices. The components, layout and size vary depending on the supply unit size and options. -
Page 21: Layout Drawing Of A 600 Mm Incoming Cubicle
Operation principle and hardware description 21 Layout drawing of a 600 mm incoming cubicle These layout drawings show a 600 mm wide incoming cubicle. Options used with this cubicle are bottom cable entry (standard) and main switch-disconnector (option +F253). Door closed Door open Description Main switch-disconnector... -
Page 22: Layout Drawing Of A 1000 Mm Incoming Cubicle
22 Operation principle and hardware description Layout drawing of a 1000 mm incoming cubicle These layout drawings show a 1000 mm wide incoming cubicle. The cubicle contains the circuit breaker. Door closed Door open Description Auxiliary voltage switch handle Earthing/grounding switch handle ([Q9], option +F259) Charging switch handle Auxiliary voltage switch [Q21] Grounding (PE) busbar... -
Page 23: Layout Drawing Of A Supply Module Cubicle 2×R8I
Operation principle and hardware description 23 Layout drawing of a supply module cubicle 2×R8i These layout drawings show the supply module cubicle. The cubicle contains IGBT supply module(s) and LCL filter module(s). Door closed Door open No. Description Supply module (see page 24) LCL filter module (see page 25) DC fuses AC fuses... -
Page 24: Layout Drawings Of Supply And Lcl Filter Modules
24 Operation principle and hardware description Layout drawings of supply and LCL filter modules IGBT supply module (frame R8i) Description ISU module, frame size R8i, front ISU module, frame size R8i, back DC output busbars Handle LEDs, fiber optic connectors of the module (wired to the control board) Cooling fan (standard speed-controlled fan shown;... -
Page 25: Lcl Filter Module (Blcl-1X-X)
Operation principle and hardware description 25 LCL filter module (BLCL-1x-x) Description LCL filter module, front LCL filter module, back Input (AC) connection Output (AC) connection Handle Wheels... -
Page 26: Lcl Filter Module (Blcl-2X-X)
26 Operation principle and hardware description LCL filter module (BLCL-2x-x) Description LCL filter module, front LCL filter module, back Input (AC) connection Output (AC) connection Handle Wheels... -
Page 27: Overview Of Power And Control Connections
Operation principle and hardware description 27 Overview of power and control connections Input power connections of the IGBT supply unit are terminals L1, L2 and L3 located in the lower part of the incoming cubicle. Power cables enter the cabinet via lead-throughs on the floor of the cubicle as standard. -
Page 28: Overview Of The Control Connections On The Bcu Control Unit
28 Operation principle and hardware description Overview of the control connections on the BCU control unit BCU control unit is used with frame size R8i IGBT supply module. The diagram shows the control connections and interfaces of the BCU control unit. Description Description Analog and digital I/O extension modules... -
Page 29: Supply Unit Control Devices
Operation principle and hardware description 29 Supply unit control devices The following figure shows examples of the door control devices of the IGBT supply unit. The selection and exact location of control devices varies in different deliveries. The purpose of the devices is explained in the following sections. Door switches and devices for frame R8i cabinet (limited scope version) Description Main switch-disconnector /... -
Page 30: Door Switches And Devices For Frame R8I Cabinet
30 Operation principle and hardware description Door switches and devices for frame R8i cabinet Auxiliary control cubicle Incoming cubicle Desig. Description / See section … Main switch-disconnector / breaker on page 31. Auxiliary voltage switch on page 31. Operating switch on page 31. -
Page 31: Main Switch-Disconnector / Breaker
Operation principle and hardware description 31 Main switch-disconnector / breaker The supply unit is equipped with a main switch-disconnector ([Q1], option +F253) or a main breaker in high powers ([Q1], option +F255) as standard. With this device, you can isolate the main circuit of the drive from the power line. The switch has an operating handle on the cabinet door. -
Page 32: Emergency Stop Button
32 Operation principle and hardware description will be closed and the charging contactor [Q4] opened. The supply module starts operating. • The OFF position: The control program opens the main contactor [Q2] and the supply module stops rectifying. Emergency stop button The emergency stop button is an optional device ([S61], option +G331). -
Page 33: Pc Connection
Operation principle and hardware description 33 PC connection There is a USB connector on the front of the panel that can be used to connect a PC to the drive. When a PC is connected to the control panel, the control panel keypad is disabled. See also section Connecting a PC on page 60. -
Page 34: Type Designation Label Of The Supply Module
34 Operation principle and hardware description Type designation label of the supply module Each IGBT supply module also has a type designation label attached to it. The type designation stated on the label contains information on the specifications and configuration of the module. -
Page 35: Type Designation Keys
Operation principle and hardware description 35 Type designation keys Type designation key of the cabinet-installed IGBT supply unit Type designation describes the composition of the unit in short. The type designation is visible on the label (sticker) which is attached to the cabinet. The complete designation code is divided in subcodes: •... - Page 36 36 Operation principle and hardware description Code Description Filters E202 EMC 1st environment, restricted (max 1070A, only 400 V and 500 V) E210 EMC 2nd Environment Switchgear F250 Line contactor, standard in small power, (always with disconnector, option +F253) F253 Disconnector switch (door interlocked), standard in small power, (always with line contactor, option +F250) F255...
- Page 37 Operation principle and hardware description 37 Code Description Control panel and PC options J400 Control panel ACS-AP-W (max. 4 panels on the door) J401 LED monitoring display J410 Drive control panel connection kit J411 Remote supply ON/OFF control (from upper controller) J412 Common control panel for a line up Fieldbus adapter modules...
-
Page 38: Type Designation Key Of The Igbt Supply Module
38 Operation principle and hardware description Code Description Documentation Note: English-language manuals may be included if a translation in the specified language is not available. R701 German R702 Italian R705 Swedish R706 Finnish R707 French R708 Spanish R711 Russian R716 Hard copies of documentation R717 Second set of hard copies of documentation... -
Page 39: Type Designation Key Of The Filter Module
Operation principle and hardware description 39 Type designation key of the filter module The designation code of the BLCL filter is divided in subcodes: • The first 4 letters and two numbers give the type of the filter, for example, BLCL-25-7. •... - Page 40 40 Operation principle and hardware description...
-
Page 41: Electrical Installation
This chapter instructs how to check the insulation of the assembly and how to install the input power cables and control cables. The information is valid for cabinet-installed ACS880-207 supply units. For more information on cable selection, protections, etc, see Electrical planning instructions for ACS880 multidrive cabinets and modules (3AUA0000102324 [English]). -
Page 42: Electrical Safety Precautions
42 Electrical installation Electrical safety precautions This information is for all personnel who do work on the supply unit. WARNING! Obey these instructions. If you ignore them, injury or death, or damage to the equipment can occur. If you are not a qualified electrician, do not do installation or maintenance work. -
Page 43: Checking The Insulation Of The Assembly
Electrical installation 43 Checking the insulation of the assembly Supply unit Do not make any voltage tolerance or insulation resistance tests on the supply unit. Every drive system has been insulation tested between the main circuit and the chassis at the factory. -
Page 44: Connecting The Input Power Cables
44 Electrical installation Connecting the input power cables Connection diagram (frame 1×R8i, limited scope version) LCL filter IGBT supply module Components for charging circuit ICU cubicle ISU cubicle Fuses or other protection means. Use a separate grounding PE cable or a cable with a separate PE conductor if the conductivity of the shield does not meet the requirements for the PE conductor. -
Page 45: Connection Diagram (Frame R8I And Multiples)
Electrical installation 45 Connection diagram (frame R8i and multiples) IGBT supply modules LCL filter Components for charging circuit ICU cubicle ISU cubicle Notes: Fuses or other protection means. Use a separate grounding PE cable or a cable with separate PE conductor if the conductivity of the shield does not meet the requirements for the PE conductor. -
Page 46: Connection Procedure (Frame R8I, Limited Scope Version)
46 Electrical installation Connection procedure (frame R8i, limited scope version) The cable lead-through details, and cable connection details are shown in chapter Terminal and lead-through data for the input power cable on page 118. WARNING! Only qualified electricians are allowed to this work. Read the complete safety instructions of the drive. - Page 47 Electrical installation 47...
- Page 48 48 Electrical installation Recommendation: 360° grounding of the cable shield at the lead-through suppresses interference.
-
Page 49: Connection Procedure (Frame R8I And Multiples)
7. Fasten the conductive sleeves to the cable shields with cable ties. 8. Seal the slot between the cable and mineral wool sheet (if used) with sealing compound (eg, CSD-F, ABB brand name DXXT-11, code 35080082). 9. Tie up the unused conductive sleeves with cable ties. - Page 50 50 Electrical installation...
- Page 51 Electrical installation 51...
-
Page 52: Setting The Voltage Range Of The Auxiliary Voltage Transformers (Option +G344)
52 Electrical installation Setting the voltage range of the auxiliary voltage transformers (option +G344) The auxiliary voltage transformer ([T21, T101, T111], option +G344) connections are made at the factory according to the supply voltage and desired output voltage and you do not need to change the settings during the installation. -
Page 53: [T21/T101] Connections (690 V Units)
Electrical installation 53 [T21/T101] connections (690 V units) T21_X1 or T101_X1 T21_X2 or T101_X2 without +G304 with +G304 690 V 1 1 230 V 1 115 V 660 V 2 600 V 3 575 V 4 2 115 V 540 V 5 Θ... -
Page 54: [T111] Connections
54 Electrical installation [T111] connections 3~ input 3~ output 3~ input 3~ output Tap settings Terminals Supply Terminals 400 V 320/340 V voltage A1– B1– C1– (50 Hz) (60 Hz) 690 V A1, B1, C1 a1, b1, c1 a2, b2, c2 660 V A1, B1, C1 a1, b1, c1... -
Page 55: Connecting The Control Cables For The Supply Unit
Electrical installation 55 Connecting the control cables for the supply unit Default I/O connection diagram See chapter The control unit. Connection procedure (frame R8i, limited scope version) The following procedure instructs how to connect the control cables of a supply unit. See the circuit diagrams delivered with the supply unit. - Page 56 56 Electrical installation The detailed figure of step 4 has been rotated 180 degrees.
-
Page 57: Connection Procedure (Frame R8I And Multiples)
Electrical installation 57 Connection procedure (frame R8i and multiples) WARNING! Only qualified electricians are allowed to do this work. Read the complete safety instructions of the drive. Ignoring the instructions can cause physical injury or death, or damage to the equipment. 1. - Page 58 58 Electrical installation Note: If the outer surface of the shield is non-conductive: • Cut the shield at the midpoint of the bare part. Be careful not to cut the conductors or the grounding wire (if present). • Turn the shield inside out to expose its conductive surface. •...
- Page 59 Electrical installation 59 Note for top entry of cables: When each cable has its own rubber grommet, sufficient IP and EMC protection can be achieved. However, if very many control cables come to one cabinet, plan the installation beforehand as follows: 1.
-
Page 60: Wiring The Functional Safety Options +Q951, +Q952, +Q963, +Q964 Or +Q979
60 Electrical installation Wiring the functional safety options +Q951, +Q952, +Q963, +Q964 or +Q979 The wiring instructions for the functional safety options +Q951, +Q952, +Q963, +Q964 and +Q979 are given in separate option manuals. For the manuals, see section List of related manuals on page 2. -
Page 61: Installation Checklist
Installation checklist 61 Installation checklist What this chapter contains This chapter contains a list for checking the installation of the ACS880-207 IGBT supply unit. Checklist Check the mechanical and electrical installation of the drive before start-up. Go through the checklist together with another person. - Page 62 If the drive has been stored over one year: The electrolytic DC capacitors in the DC link of the drive have been reformed. See the separate reforming instructions (available in the Internet or from your local ABB representative). There is an adequately sized protective earth (ground) conductor between the drive and the switchboard, and the conductor has been connected to the appropriate terminal and tighten.
-
Page 63: Start-Up
What this chapter contains This chapter describes the start-up procedure of the IGBT supply unit. The information is valid for cabinet-installed ACS880-207 IGBT supply units. The underlined tasks are needed for certain cases only. The option codes (if any) are given in brackets. -
Page 64: Start-Up Procedure
64 Start-up Start-up procedure Tasks Safety WARNING! Follow the safety instructions during the start-up procedure. See Safety instructions for ACS880 multidrive cabinets and modules (3AUA0000102301 [English]). Only qualified electricians are allowed to start-up the drive. Checks/Settings with no voltage connected Ensure that the disconnector of the supply transformer is locked to the off (0) position, that means no voltage is, or cannot be connected to drive inadvertently. -
Page 65: Setting Up The Supply Unit Parameters
Start-up 65 Tasks Setting up the supply unit parameters Check the correct voltage range, parameter 195.01 Supply voltage. If your supply unit consists of more than one module, parameters 195.30 Parallel type filter and 195.31 Parallel connection rating id need to be set. First, select the correct voltage range with parameter 195.30 Parallel type filter. -
Page 66: Switching Off The Unit
66 Start-up Switching off the unit 1. Stop the motors connected to IGBT supply units. See the IGBT supply unit firmware manual. 2. Turn the operating switch [S21] to the off (0) position to deactivate the Run enable signal of the supply unit and to switch the main contactor [Q2] off. Disconnecting and temporary grounding the drive (excluding the input power terminals) 1. -
Page 67: (Including The Input Power Terminals)
Start-up 67 Disconnecting and temporary grounding the drive (including the input power terminals) 1. Perform the tasks listed in section Disconnecting and temporary grounding the drive (excluding the input power terminals) on page 66. 2. Switch off and disconnect the breaker of the supply transformer. 3. - Page 68 68 Start-up...
-
Page 69: Maintenance
What this chapter contains This chapter instructs how to maintain the IGBT supply unit and how to interpret its fault indications. The information is valid for cabinet-installed ACS880-207 IGBT supply units. WARNING! Only qualified electricians are allowed to do the work described in this chapter. -
Page 70: Maintenance Intervals
R Replacement Maintenance and component replacement intervals are based on the assumption that the equipment is operated within the specified ratings and ambient conditions. ABB recommends annual drive inspections to ensure the highest reliability and optimum performance. Note: Long term operation near the specified maximum ratings or ambient conditions may require shorter maintenance intervals for certain components. -
Page 71: Maintenance Timers And Counters
Maintenance 71 Maintenance timers and counters The control program has maintenance timers and counters that can be configured to generate a warning when a pre-defined limit is reached. Each timer/counter can be set to monitor any parameter. This feature is especially useful as a service reminder. For more information, see the firmware manual. -
Page 72: Cleaning The Door Air Inlets (Ip22 And Ip42, Option +B054)
72 Maintenance Cleaning the door air inlets (IP22 and IP42, option +B054) WARNING! Use a vacuum cleaner with an antistatic hose and nozzle. Using a normal vacuum cleaner creates static discharges which can damage circuit boards. Check the dustiness of the air inlet meshes. If the dust cannot be removed by vacuum cleaning from outside through the grating holes with a small nozzle, proceed as follows: 1. -
Page 73: Cleaning The Door Air Inlets (Ip54, Option +B055)
Maintenance 73 Cleaning the door air inlets (IP54, option +B055) 1. Recommendation: De-energize the fans by switching off the supply unit. 2. Remove the fasteners at the top of the grating. 3. Lift the grating and pull it away from the door. 4. -
Page 74: Replacing The Outlet (Roof) Filters (Ip54, Option +B055)
74 Maintenance Replacing the outlet (roof) filters (IP54, option +B055) WARNING! De-energize the fans by switching off the supply unit. Make sure that no restart is possible during the maintenance work. Rotating fan blades can cause serious hand injury. 1. -
Page 75: Fans
To reset the running time signal after a fan replacement, contact your local ABB representative. Replacement fans are available from ABB. Do not use other than ABB specified spare parts. Replacing the cooling fan of the IGBT supply module (frame R8i) ... - Page 76 76 Maintenance...
-
Page 77: Replacing The Direct-On-Line (Option +C188) Module Fan (Frame R8I)
Maintenance 77 Replacing the direct-on-line (option +C188) module fan (frame R8i) If the module is equipped with a standard speed-controlled cooling fan, see page 75. WARNING! Only qualified electricians are allowed to this work. Read the complete safety instructions of the drive. Ignoring the instructions can cause physical injury or death, or damage to the equipment. -
Page 78: Replacing The Circuit Board Compartment Fan (Frame R8I)
78 Maintenance Replacing the circuit board compartment fan (frame R8i) The R8i module is equipped with a fan blowing air through the circuit board compartment. The fan is accessible from the front of the module. WARNING! Only qualified electricians are allowed to this work. Read the complete safety instructions of the drive. - Page 79 Maintenance 79 8. Put the fan onto the threaded studs on the fan holder with the airflow direction arrow pointing towards the fan holder. 9. Install and tighten the four nuts removed earlier. 10. Connect the fan cable. 11. Align and push the fan holder into the module. 12.
-
Page 80: Replacing The Fan Of The Lcl Filter (Blcl-1X-X)
80 Maintenance Replacing the fan of the LCL filter (BLCL-1x-x) WARNING! Only qualified electricians are allowed to this work. Read the complete safety instructions of the drive. Ignoring the instructions can cause physical injury or death, or damage to the equipment. WARNING! Wear protective gloves and long sleeves! Some parts have sharp edges. -
Page 81: Replacing The Fan Of The Lcl Filter (Blcl-2X-X)
Maintenance 81 Replacing the fan of the LCL filter (BLCL-2x-x) WARNING! Only qualified electricians are allowed to this work. Read the complete safety instructions of the drive. Ignoring the instructions can cause physical injury or death, or damage to the equipment. 1. -
Page 82: Replacing The Fan In The Incoming Cubicle
82 Maintenance Replacing the fan in the incoming cubicle WARNING! Only qualified electricians are allowed to this work. Read the complete safety instructions of the drive. Ignoring the instructions can cause physical injury or death, or damage to the equipment. 1. -
Page 83: Replacing The Fan In The Auxiliary Control Cubicle
Maintenance 83 Replacing the fan in the auxiliary control cubicle WARNING! Only qualified electricians are allowed to do this work. Read the complete safety instructions of the drive. Ignoring the instructions can cause physical injury or death, or damage to the equipment. 1. -
Page 84: Replacing The Roof Fan For Ip54 Cabinet (Option +B055)
84 Maintenance Replacing the roof fan for IP54 cabinet (option +B055) WARNING! Only qualified electricians are allowed to do this work. Read the complete safety instructions of the drive. Ignoring the instructions can cause physical injury or death, or damage to the equipment. 1. -
Page 85: Igbt Supply Module
Maintenance 85 IGBT supply module Cleaning the module The supply module heatsink fins pick up dust from the cooling air. Modules run into overtemperature warnings and faults if the heatsink is not clean. WARNING! Only qualified electricians are allowed to this work. Read the complete safety instructions of the drive. -
Page 86: Reduced Run
86 Maintenance Reduced run The reduced run function is available for IGBT supply units consisting of parallel- connected IGBT supply modules. The function makes it possible to continue operation with limited current even if one (or more) module is out of service, for example, because of maintenance work. -
Page 87: Replacing The Igbt Supply Module (Limited Scope Version)
Do not use the module pull-out ramp with plinth heights over 50 mm.The ramp supplied with the drive system is designed for a plinth height of 50 mm (the standard plinth height of ABB cabinets). Support the top and Do not leave the module... - Page 88 88 Maintenance Lift the module by the upper part Mind your fingers! Keep fingers Support the top and bottom only using the lifting holes at the top! away from the edges of the of the module while front flange of the module! replacing! 1.
- Page 89 Maintenance 89...
-
Page 90: Replacing The Igbt Supply Module (Frame R8I And Multiples)
Do not use the module pull-out ramp with plinth heights over 50 mm.The ramp supplied with the drive system is designed for a plinth height of 50 mm (the standard plinth height of ABB cabinets). Support the top and Do not leave the module... - Page 91 Maintenance 91 Lift the module by the upper part Mind your fingers! Keep fingers Support the top and bottom only using the lifting holes at the top! away from the edges of the of the module while front flange of the module! replacing! 1.
- Page 92 92 Maintenance...
-
Page 93: Lcl Filter
Do not tilt the module. Do not leave the module unattended on a sloping floor. • Do not use the ramp with plinth heights over 50 mm.The ramp supplied with the drive system is designed for a plinth height of 50 mm (the standard plinth height of ABB cabinets). - Page 94 94 Maintenance 1. Disconnect the drive from the AC power line and make sure it is safe to start the work. See section Electrical safety precautions on page 42. 2. Open the cubicle door. 3. Undo the four screws of the shroud in the upper part of the cubicle. Remove the shroud.
- Page 95 Maintenance 95...
-
Page 96: Replacing The Lcl Filter (Frame R8I And Multiples)
Do not tilt the module. Do not leave the module unattended on a sloping floor. • Do not use the ramp with plinth heights over 50 mm.The ramp supplied with the drive system is designed for a plinth height of 50 mm (the standard plinth height of ABB cabinets). - Page 97 Maintenance 97 1. Disconnect the drive from the AC power line and make sure it is safe to start the work. See section Electrical safety precautions on page 42. 2. Open the cubicle door. 3. Undo the four screws of the shroud in the upper part of the cubicle. Remove the shroud.
- Page 98 98 Maintenance...
- Page 99 Maintenance 99...
-
Page 100: Capacitors
Capacitor failure is usually followed by damage to the unit and an input fuse failure, or a fault trip. Contact ABB if capacitor failure is suspected. Replacements are available from ABB. Do not use other than ABB-specified spare parts. Contact an ABB service representative for spare parts and repair services. -
Page 101: Fuses
Maintenance 101 Fuses Checking and replacing the DC fuses (limited scope version) WARNING! Only qualified electricians are allowed to this work. Read the complete safety instructions of the drive. Ignoring the instructions can cause physical injury or death, or damage to the equipment. 1. - Page 102 102 Maintenance...
-
Page 103: Checking And Replacing The Ac Fuses (Limited Scope Version)
Maintenance 103 Checking and replacing the AC fuses (limited scope version) WARNING! Only qualified electricians are allowed to this work. Read the complete safety instructions of the drive. Ignoring the instructions can cause physical injury or death, or damage to the equipment. 1. -
Page 104: Checking And Replacing The Dc Fuses (Frame R8I And Multiples)
104 Maintenance Checking and replacing the DC fuses (frame R8i and multiples) WARNING! Only qualified electricians are allowed to this work. Read the complete safety instructions of the drive. Ignoring the instructions can cause physical injury or death, or damage to the equipment. 1. - Page 105 Maintenance 105...
-
Page 106: Control Panel
106 Maintenance Control panel Replacing the battery 1. Turn the lid on the back of the panel counter-clockwise until the lid opens. 2. Replace the battery with a new CR2032 battery. 3. Put the lid back and tighten it by turning it clockwise. 4. -
Page 107: Memory Unit
Maintenance 107 Memory unit When a drive is replaced, the parameter settings can be retained by transferring the memory unit from the defective drive to the new drive. The memory unit is located on the control board. After power-up, the drive will scan the memory unit. If different parameter settings are detected, they are copied to the drive. -
Page 108: Leds And Other Status Indicators
108 Maintenance LEDs and other status indicators This section instructs how to interpret the status indications of the ACS880-207 IGBT supply unit. Warnings and faults reported by the control program are displayed on the control panel on the cabinet door. For further information, see the firmware manual delivered with the IGBT supply unit. -
Page 109: Technical Data
Technical data 109 Technical data What this chapter contains This chapter contains the technical data valid for the cabinet-installed ACS880-207 IGBT supply units. Ratings Unit type Consists of No-overload use Light-overload Heavy-duty module type Frame ACS880-207- … ACS880-104- … A (DC) A (AC) A (DC) -
Page 110: Definitions
Consists of No-overload use Light-overload Heavy-duty module type Frame ACS880-207- … ACS880-104- … A (DC) A (AC) A (DC) kVA A (DC) kW (DC) A (DC) kW (DC) = 500 V (with U1 = 3~400/480/500 V AC and U2 = 566/679/707 V DC) -
Page 111: Derating
Technical data 111 Derating Temperature derating In the temperature range +40…50 °C (+104…122 °F), the rated output current is derated by 1% for every added 1 °C (1.8 °F). The output current can be calculated by multiplying the current given in the rating table by the derating factor (k): 1.00 0.90 0.80... -
Page 112: Fuses
112 Technical data Fuses Main circuit AC fuses Unit type Rating Type Example ACS880-207-... = 400 V (Range 380 … 415 V) 0420A-3 630 A, 690 V, size 3 Flush end type 170M6410 0580A-3 1000 A, 690 V, size 3... -
Page 113: Main Circuit Dc Fuses
Technical data 113 Main circuit DC fuses Unit type Rating Type Example ACS880-207-... = 400 V (Range 380 … 415 V) 0420A-3 900 A, 690 V, size 3 Flush end contact 170M6413 0580A-3 1100 A, 690 V, size 3... -
Page 114: Lcl Filters
114 Technical data LCL filters Unit type Frame LCL filter type ACS880-207-... = 400 V (Range 380 … 415 V) 0420A-3 BLCL-13-5 0580A-3 BLCL-13-5 0810A-3 BLCL-15-5 1130A-3 2×R8i BLCL-24-5 1330A-3 2×R8i BLCL-24-5 1580A-3 2×R8i BLCL-25-5 2350A-3 3×R8i 2×BLCL-24-5 3110A-3 4×R8i 2×BLCL-25-5... -
Page 115: Dimensions
Technical data 115 Dimensions Unit type Height 1 Height 2 Width 1 Width 2 Depth 1 Depth 2 ACS880-207-… = 400 V (Range 380 … 415 V) 0420A-3 2145 84.5 2315 91.1 1000 39.4 1600 63.0 29.8 0580A-3 2145 84.5 2315 91.1... -
Page 116: Free Space Requirements
116 Technical data Free space requirements Unit type Left Right Above Front ACS880-207-… = 400 V (Range 380 … 415 V) 0420A-3 15.7 27.6 0580A-3 15.7 27.6 0810A-3 15.7 27.6 1130A-3 15.7 27.6 1330A-3 15.7 27.6 1580A-3 15.7 27.6 2350A-3 15.7... -
Page 117: Losses, Cooling Data And Noise
Possible end plate Right Possible end plate Losses, cooling data and noise Unit type Air flow Noise Efficiency lossISU lossLCL lossTOTAL ACS880-207-… /min = 400 V (Range 380 … 415 V) 0420A-3 2200 1295 96.9 0580A-3 12.0 2200 1295 97.1 0810A-3 17.4... -
Page 118: Terminal And Lead-Through Data For The Input Power Cable
118 Technical data Terminal and lead-through data for the input power cable Frame R8i Frame Busbar Bolt Tightening torque Screw holes Cable lead-through holes size N·m lbf·ft 0.55 2.36 (½”) 400 mm incoming cubicle with main switch, bottom cable entry ... -
Page 119: Mm Incoming Cubicle - Main Switch (+F253)
Technical data 119 600 mm incoming cubicle – main switch (+F253) These drawings show the terminal and lead-through dimensions for a 600 mm wide incoming cubicle. This cubicle is used in supply units with main switch-disconnector (option +F253) and bottom cable entry. The dimensions are given in millimeters. -
Page 120: 600 Mm Incoming Cubicle With Main Switch, Bottom Cable Entry
120 Technical data 600 mm incoming cubicle with main switch, bottom cable entry These drawings show the terminal and lead-through dimensions for a 600 mm wide incoming cubicle. This cubicle is used in supply units with main switch-disconnector (option +F253) and bottom cable entry. The dimensions are given in millimeters. -
Page 121: 600 Mm Incoming Cubicle With Main Breaker, Bottom Cable Entry
Technical data 121 600 mm incoming cubicle with main breaker, bottom cable entry These drawings show the terminal and lead-through dimensions for a 600 mm wide incoming cubicle. This cubicle is in supply units with a main breaker (option +F255) and bottom cable entry. -
Page 122: 600 Mm Incoming Cubicle With Main Breaker, Top Cable Entry
122 Technical data 600 mm incoming cubicle with main breaker, top cable entry These drawings show the terminal and lead-through dimensions for a 600 mm wide incoming cubicle. This cubicle is in supply units with a main breaker (option +F255) and top cable entry. -
Page 123: 1000 Mm Incoming Cubicle With Main Breaker, Bottom Cable Entry
Technical data 123 1000 mm incoming cubicle with main breaker, bottom cable entry These drawings show the terminal and lead-through dimensions for a 1000 mm wide incoming cubicle. This cubicle is in high-power supply units with a main breaker (option +F255) and bottom cable entry. -
Page 124: 1000 Mm Incoming Cubicle With Main Breaker, Top Cable Entry
124 Technical data 1000 mm incoming cubicle with main breaker, top cable entry These drawings show the terminal and lead-through dimensions for a 1000 mm wide incoming cubicle. This cubicle is in high-power supply units with a main breaker (option +F255) and top cable entry. -
Page 125: Tightening Torques
Technical data 125 Tightening torques Unless a tightening torque is specified in the text, the following torques can be used. Cable lugs Size Max. torque Note N·m Strength class 8.8 Strength class 8.8 Strength class 8.8 Electrical connections Size Torque Note... -
Page 126: Electrical Power Network Specification
126 Technical data Electrical power network specification Supply voltage 400 V AC units; 380/400/415 V AC 3-phase ± 10%. This is indicated in type designation label as typical input voltage levels (3~ 400 V AC). 500 V AC units; 380/400/415/440/460/480/500 V AC 3-phase ± 10%. This is indicated in type designation label as typical input voltage levels (3~ 400/480/500 V AC). -
Page 127: Control Unit Connection Data (Bcu)
Technical data 127 Control unit connection data (BCU) See chapter The control unit on page 131. Degrees of protection Degrees of protection IP22 (standard), IP42 (option +B054), IP54 (option +B055) (IEC/EN 60529) Enclosure types (UL50) UL Type 1 (standard), UL Type 1 Filtered (option +B054), UL Type 12 (option +B055). -
Page 128: Ambient Conditions
IEC/EN 60721-3-1:1997 60721-3-1:1997 58…150 Hz 1 g Classification of IEC 60068-2-6:2007, Classification of environmental conditions - Tested in ABB multidrive EN 60068-2-6:2008 environmental conditions - Part 3: Classification of cabinet (ACS880-x07) Environmental testing Part 3: Classification of groups of environmental... -
Page 129: Materials
To aid recycling, plastic parts are marked with an appropriate identification code. Please contact your local ABB distributor for further information on environmental aspects and recycling instructions for professional recyclers. End of life treatment must follow international and local regulations. -
Page 130: Disclaimers
ABB and its affiliates are not liable for damages and/or losses related to such security breaches, any... -
Page 131: The Control Unit
The control unit 131 The control unit What this chapter contains This chapter • describes the connections of the control units used in ACS880 multidrives • contains the specifications of the inputs and outputs of the control units. Note: In this manual, the name “BCU-x2” represents the control unit types BCU-02, BCU-12 and BCU-22. -
Page 132: Layout And Connections
132 The control unit Layout and connections The layout and connections of the BCU-x2 are shown below. Description I/O terminals (see following diagram) SLOT 1 I/O extension, fieldbus adapter module connection. (This is the sole location for an FDPI-02 diagnostics and panel interface.) SLOT 2 I/O extension, fieldbus adapter module... - Page 133 The control unit 133 Description Analog inputs Analog outputs Digital inputs, Digital input interlock (DIIL) XRO3 XDIO Digital input/outputs XD24 XPOW XD2D Drive-to-drive link XD24 +24 V output (for digital inputs) XRO2 XETH Ethernet port XDIO XPOW External power input XRO1 Relay output RO1 XRO1...
-
Page 134: Default I/O Connection Diagram (Bcu)
134 The control unit Default I/O connection diagram (BCU) XD2D Drive-to-drive link Drive-to-drive link (not in use by default) BGND Shield D2D.TERM Drive-to-drive link termination X485 RS485 connection Not in use (not in use by default) BGND Shield XRO1…XRO3 Relay outputs XRO1: Charging (Energized = Closes charging contactor.) 250 V AC / 30 V DC / 2 A... - Page 135 The control unit 135 The table above shows the control connections of the IGBT supply unit, and the default meaning or use of the signals in the control program. Most I/O connections are reserved and wired for the internal use at the factory. Do not change the connections. Wire sizes and tightening torques: 0.5 …...
-
Page 136: External Power Supply For The Control Unit (Xpow)
The BCU-x2 has an on-board data logger that collects real-time data from the power modules to help fault tracing and analysis. The data is stored onto the SDHC memory card inserted into the SD CARD slot and can be analyzed by ABB service personnel. - Page 137 The control unit 137 Control unit connector data Power supply Connector pitch 5 mm, wire size 2.5 mm (XPOW) 24 V (±10%) DC, 2 A External power input. Two supplies can be connected to BCU for redundancy. Relay outputs RO1…RO3 Connector pitch 5 mm, wire size 2.5 mm (XRO1…XRO3) 250 V AC / 30 V DC, 2 A...
- Page 138 138 The control unit Analog outputs AO1 and AO2 Connector pitch 5 mm, wire size 2.5 mm (XAO) 0…20 mA, R < 500 ohm load Frequency range: 0…500 Hz Resolution: 11 bit + sign bit Inaccuracy: 2% of full scale range Drive-to-drive link Connector pitch 5 mm, wire size 2.5 mm (XD2D)
- Page 139 The control unit 139 Ground isolation diagram XPOW +24VI +24VI +VREF -VREF AGND AI1+ Common mode voltage between AI1- each AI input and AGND is +30 V AI2+ AI2- AGND AGND XD2D BGND SHIELD XRO1, XRO2, XRO3 XD24 +24VD DICOM +24VD DIOGND XDIO...
- Page 140 140 The control unit...
-
Page 141: Further Information
Product and service inquiries Address any inquiries about the product to your local ABB representative, quoting the type designation and serial number of the unit in question. A listing of ABB sales, support and service contacts can be found by navigating to www.abb.com/searchchannels. - Page 142 Contact us www.abb.com/drives www.abb.com/drivespartners 3AUA0000130644 Rev C (EN) 2017-11-29...