Sign In
Upload
Manuals
Brands
Craftsman Manuals
Garage Door Opener
139.53918D
Craftsman 139.53918D Manuals
Manuals and User Guides for Craftsman 139.53918D. We have
3
Craftsman 139.53918D manuals available for free PDF download: Owner's Manual
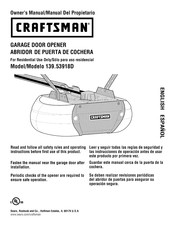
Craftsman 139.53918D Owner's Manual (80 pages)
Brand:
Craftsman
| Category:
Garage Door Opener
| Size: 2.03 MB
Table of Contents
English
2
Table of Contents
2
Introduction
2
Safety Symbolreviewand Signal Wordreview
2
Preparingyour Garage Door
3
Tools Needed
3
Planning
5
Cartoninventory
6
Hardwareinventory
7
Assembly
7
Assemble the Rail and Install the Trolley
8
Fastenthe Rail to the Motor Unit
9
Install the Belt
10
Tightenthe Belt
10
Install the Sprocketcover
11
Installation
11
Determine the Headerbracketlocation
12
Install the Header Bracket
13
Attachthe Rail to the Headerbracket
14
Positionthe Opener
15
Hang the Opener
16
Install the Door Control
17
Install the Battery
18
Install the Lights
18
Attachthe Emergency Release Ropeand Handle
19
Electrical Requirements
19
Install the Protectorsystem
20
Fastenthe Door Bracket
23
Adjustment
27
Program the Travel Limits
27
Set the Force
28
Testthe Safetyreversal System
29
Test the Protector System
29
Operation
30
Using Your Garage Door Opener
30
Usingthe Wall-Mounteddoor Control
31
Careof Your Opener
32
To Openthe Door Manually
32
Battery Backup
33
Having a Problem (Troubleshooting)
34
Diagnosticchart
35
Smart Controlpanel®Messages
36
Programming
37
To Add or Reprogram a Hand-Held Remote Control
37
To Erase All Codes from Motor Unit Memory
37
3-Button Remotes
37
To Add, Reprogram or Change a Keyless Entry PIN
38
Repair Parts
39
Rail Assembly Parts
39
Installation Parts
39
Motor Unitassemblyparts
40
Accessories
41
Warranty
41
Español
42
Herramientasnecesarias
43
Preparaci6Nde la Puerta de Su Cochera
43
Planificaci6N
44
Inventario de la Caja de Cart6N
46
Inventario de Piezas
47
Fije el Riel a la Unidad del Motor
49
Instale la Polea Ioca
49
Montaje
49
Ajuste de la Correa
50
Instalaci6N
51
Instalaci6N de la Cubierta de la Rueda Dentada
51
Instrucci6Nes Importantes para la Instalaci6N
51
Determine D6Nde Va a Instalar la M_Nsula del Cabezal
52
Coloque el Riel en la M_Nsula del Cabezal
54
Coloque el Abridor en Posici6N
55
Cuelgueel Abridor
56
Instale la Control de la Puerta
57
Instale la Bateria
58
Instale las Luces
58
Instale la Manija y la Cuerda de Emergencia
59
Requisitos para la Instalaci6N El_Ctrica
59
Fije la M_Nsula de la Puerta
63
Conecte el Brazo de la Puerta al Trole
65
Ajustes
67
Programaci6N de Los Limites del Recorrido
67
Ajuste Lafuerza
68
Pruebe el Sistema de Seguridad de Reversa
69
Pruebe la Protector System
69
C6Mousarsu Abridorde Puerta de Cochera
70
Instrucci6Nes Importantes de Seguridad
70
Operaci6N
70
C6Moabrir la Puerta Manualmente
72
Mantenimiento de Su Abridor de Puerta de Cochera
72
Reserva de Bateria
73
Tabla de Diagn6Stico
75
Mensajes de la Smart Control Panep
76
C6Mo Agregar O Reprogramar un Control Remoto Manual
77
Controles Remotos de 3 Botones
77
C6Mo Agregar, Reprogramar O Cambiar un C6Digo de Entrada sin Ilave
78
Accesorios
79
Garantia
79
Advertisement
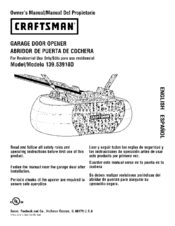
CRAFTSMAN 139.53918D Owner's Manual (80 pages)
Brand:
CRAFTSMAN
| Category:
Garage Door Opener
| Size: 10.15 MB
Table of Contents
English
2
Table of Contents
2
Introduction
2
Safety Symbolreviewand Signal Wordreview
2
Preparingyour Garage Door
3
Tools Needed
3
Planning
5
Cartoninventory
6
Hardwareinventory
7
Assembly
7
Assemble the Rail and Install the Trolley
8
Fastenthe Rail to the Motor Unit
9
Install the Idler Pulley
9
Set the Tension
11
Installation
11
Determine the Headerbracketlocation
12
Install the Header Bracket
13
Attachthe Rail to the Headerbracket
14
Positionthe Opener
15
Hang the Opener
16
Install the Door Control
17
Install the Battery
18
Install the Lights
18
Attachthe Emergency Release Ropeand Handle
19
Electrical Requirements
19
Install the Protectorsystem
20
Fastenthe Door Bracket
23
Adjustment
27
Program the Travel Limits
27
Set the Force
28
Testthe Safetyreversal System
29
Test the Protector System
29
Adjustment
29
Operation
30
Using Your Garage Door Opener
30
Usingthe Wall-Mounteddoor Control
31
Care of Youropener
32
To Openthe Door Manually
32
Battery Backup
33
Having a Problem (Troubleshooting)
34
Diagnosticchart
35
Smart Controlpanel®Messages
36
Operation
36
Programming
37
To Add or Reprogram a Hand-Held Remote Control
37
To Erase All Codes from Motor Unit Memory
37
3-Button Remotes
37
To Add, Reprogram or Change a Keyless Entry PIN
38
Repair Parts
39
Rail Assembly Parts
39
Installation Parts
39
Motor Unitassemblyparts
40
Accessories
41
Warranty
41
Español
42
Herramientasnecesarias
43
Preparaci6N de la Puerta de Su Cochera
43
Planificaci6N
44
Inventario de la Caja de Cart6N
46
Inventario de Piezas
47
Fije el Riel a la Unidad del Motor
49
Instale la Polea Ioca
49
Montaje
49
Instale la Banday Sujete el Ret_N de la Cubierta de la Banda
50
Fije la Tensi6N de la Banda
51
Instalaci6N
51
Instrucci6Nes Importantes para la Instalaci6N
51
Coloque el Riel en la M_Nsula del Cabezal
54
Coloqueel Abridoren Posici6N
55
Cuelgueel Abridor
56
Instale la Control de la Puerta
57
Instale la Manija y la Cuerda de Emergencia
59
Requisitos para la Instalaci6N El_Ctrica
59
Fije la M_Nsula de la Puerta
63
Conecte el Brazo de la Puerta al Trole
65
Ajuste Lafuerza
68
Ajustes
68
Pruebe la Protector System
69
C6Mousarsu Abridorde Puerta de Cochera
70
Instrucci6Nes Importantes de Seguridad
70
Operaci6N
70
Cdmo Abrir la Puerta Manualmente
72
Mantenimiento de Su Abridor de Puerta de Cochera
72
Reserva de Bateria
73
Tabla de Diagndstico
75
Mensajes de la Smart Control Panep
76
C6Mo Agregar O Reprogramar un Control Remoto Manual
77
Controles Remotos de 3 Botones
77
C6Mo Agregar, Reprogramar O Cambiar un C6Digo de Entrada sin Ilave
78
Accesorios
79
Garantia
79
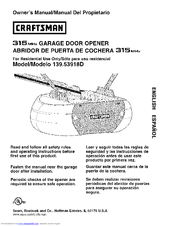
Craftsman 139.53918D Owner's Manual (79 pages)
315MHz
Brand:
Craftsman
| Category:
Garage Door Opener
| Size: 8.42 MB
Table of Contents
English
2
Table of Contents
2
Introduction
2
Safety Symbol Review and Signal Word Review
2
Preparing Your Garage Door
3
Tools Needed
3
Planning
4
Carton Inventory
6
Hardware Inventory
7
Assembly
8
Assemble the Rail and Install the Trolley
8
Fasten the Rail to the Motor Unit
9
Install the Idler Pulley
9
Set the Tension
11
Installation
12
Determine the Header Bracket Location
12
Install the Header Bracket
13
Attach the Rail to the Header Bracket
14
Hang the Opener
16
Install the Control Console
17
Install the Battery
18
Install the Lights
18
Attach the Emergency Release Rope and Handle
18
Electrical Requirements
19
Install the Protector System ®(Safety Sensors)
20
Fasten the Door Bracket
23
Adjustment
27
Program the Travel Limits
27
Setting the Force
28
Test the Safety Reversal System
29
Test the Protector System ®(Safety Sensors)
29
Operation
30
Using Your Garage Door Opener
30
Using the Wall-Mounted Control Console
31
Using Wall-Mounted Control Console
31
Care of Your Opener
32
To Open the Door Manually
32
Battery Backup
33
Having a Problem (Troubleshooting)
34
Diagnostic Chart
35
LCD Motion Detecting Control
36
Console Messages
36
Programming
37
To Erase All Codes from Motor Unit Memory
37
3-Function Remotes
37
Add/Reprogram Hand-Held Remote Control
37
Keyless Entry PIN
38
Using Learn Button
38
Using Motion Detecting Control Console
38
Repair Parts
39
Rail Assembly Parts
39
Installation Parts
39
Español
41
Planificaci6N
43
Inventario de la Caja de Carton
45
Montaje
47
Monte el Riel y Instale el Trole
47
Fije el Riel a la Unidad del Motor
48
Instale la Polea Ioca
48
Fije la Tensi6N de la Banda
50
Instalaci6N
50
Instrucci6Nes Importantes para la Instalaci6N
50
Determine D6Nde Va a Instalar la Mensula del Cabezal
51
Coloque el Riel en la Mensula del Cabezal
53
Coloque el Abridor en Posici6N
54
Cuelgue el Abridor
55
Instale la Consola de Control
56
Instale la Bateria
57
Instale la Manija y la Cuerda de Emergencia
57
Instale las Luces
57
Instale la Sistema de Protecci6N
59
Ajustes
66
Ajuste la Fuerza
67
Pruebe la Sistema de Proteccion
68
C6Mo Usar Su Abridor de Puerta de Cochera
69
Instrucciones Importantes de Seguridad
69
Operaci6N
69
C6Mo Usar la Consola de Control de Pared
70
Mantenimiento de Su Abridor de Puerta de Cochera
71
Reserva de Bateria
72
Tabla de Diagn6Stico
74
Mensajes de la Consola de Control
75
C6Mo Agregar O Reprogramar un Control Remoto Manual
76
Controles Remotos de 3 Funciones
76
Para Borrar todos Los Codigos de la Memoria de la Unidad la Motor
76
C6Mo Agregar, Reprogramar O Cambiar un
77
Accesorios
78
Garantia
78
Advertisement
Advertisement
Related Products
Craftsman 139.53915D
Craftsman 139.5391
CRAFTSMAN 139.53916D
CRAFTSMAN 139.53910D
CRAFTSMAN 139.53919
CRAFTSMAN 139.53914D
CRAFTSMAN 139.53919D
CRAFTSMAN 139.53914
Craftsman 139.53915SRT- 1/2 HP
Craftsman 139.53910
Craftsman Categories
Lawn Mower
Trimmer
Saw
Pressure Washer
Snow Blower
More Craftsman Manuals
Login
Sign In
OR
Sign in with Facebook
Sign in with Google
Upload manual
Upload from disk
Upload from URL