
Related Manuals for Hitachi LAB-X5000


Summary of Contents for Hitachi LAB-X5000
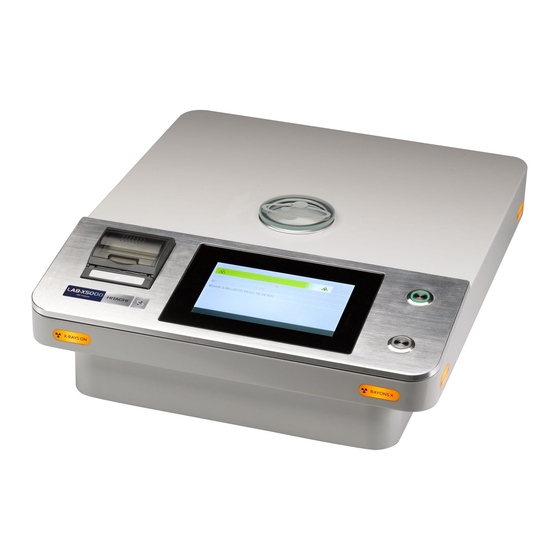
- Page 1 User Guide Issue 7.0 54-5103546 November 2018 LAB-X5000 Benchtop XRF Analyzer...
- Page 2 2. This manual is copyrighted by Hitachi High-Tech Analytical Science with all rights reserved. No part of this manual may be reproduced, transmitted or disclosed to a third party in any form or by any means without the express written permission of Hitachi High-Tech Analytical Science.
- Page 4 X-ray fluorescence technology. It is designed to measure a range of materials including solids, powders, gels and liquids in seconds or minutes. The LAB-X5000 is available in several hardware configurations that are optimized for specific applications. In order to get the best performance it is necessary to create an empirical calibration curve derived from standards with known values.
-
Page 5: Table Of Contents
1.5. Beryllium precautions ......... 5 1.6. Spillages ..........6 1.7. Safety with samples ........6 1.8. Disposal ..........6 2. INTRODUCTION TO THE LAB-X5000 ..........7 2.1. Unpacking and Setting up ......7 2.2. Equipment Supplied ........8 2.3. Mains Power Connections ....... 8 2.4. - Page 6 6.4. Mass Absorption Corrections ......46 6.5. Setting Up Samples (SUSs)for Instrument Corrections ... 47 7. TECHNICAL SPECIFICATION ............48 7.1. LAB-X5000 Series ........48 7.2. X-Ray Tube ........... 48 8. APPENDICES ..................49 Appendix A: Access for each PIN user level ....49 Appendix B: Sample Preparation ......
-
Page 7: Safety Information
0.1 µSv/hr (0.01 mrem per hour). The unit can be operated like any other piece of laboratory equipment, and users do not need to wear personal radiation dosimeters. If the Lab-X5000 is used in a manner not specfified by Hitachi High-Tech Analytical Science, the safety features can be impaired. -
Page 8: Electrical Safety And Electromagnetic Compatibility
1.4. Electrical Safety and Electromagnetic Compatibility 1.4.1. The LAB-X5000 unit contains high voltages. It is not necessary to remove the cover and the instrument should never be operated with its outer case removed. Service work should only be carried out by Hitachi High-Tech Analytical Science Qualified Service engineers. -
Page 9: Spillages
1.8.1. Contact the local Hitachi High-Tech Analytical Science representative for assistance. WEEE: Within the EU, return the Lab-X5000 to the local Hitachi High-Tech Analytical Science representative for proper disposal in accordance with WEEE regulations. The symbol means that used electrical and electronic products should not be moxed with general household waste. -
Page 10: Introduction To The Lab-X5000
Optional wireless (Wi-Fi) capabilities allow for transmission and receipt of data. The LAB-X5000 is available in a range of models, differing mainly in the application packages and options supplied. -
Page 11: Equipment Supplied
This instrument must be connected to a grounded mains supply. If you are in any doubt about your power supply, consult a qualified electrician before proceeding. 2.3.2. The LAB-X5000 is operated from a single-phase supply in the range of 100-240 V and 47 - 63 Hz. 2.3.3. - Page 12 Start button Touch screen computer 2.5.1. The instrument is identified by model and serial numbers located on plates at the rear of the instrument. Any inquiries and correspondence relating to the instrument must include these numbers. ▶ Hitachi High-Tech Analytical Science...
-
Page 13: Connectors
2.6. Connectors 2.7. Secondary Safety Windows 2.7.1. Secondary safety windows should be fitted into the sample port of the LAB-X5000 before any measurements are made. These prevent dust, accidental sample spillage, etc. from entering the analysis head and contaminating the system. -
Page 14: Cleaning And Maintaining The Instrument
Outer cover: Use a damp, not wet, cloth. Do not allow water to get inside instrument. Do not use solvents or pre-moistened wipes. 2.8.2. Computer touch screen: Use a dedicated screen wipe of microfiber or similar material. 2.8.3. Lab-X5000 has no periodic maintenance requirements ▶ Hitachi High-Tech Analytical Science... -
Page 15: Using The Lab-X5000
3.4 Analyze a Sample 3.5 Analysis Results All of the operations of the LAB-X5000 are controlled by the built-in touch-screen computer. All calibrations, methods, settings, and standards are available through this touchscreen interface. The computer is controlled through a series of taps and gestures that are intuitive and easily learned. -
Page 16: User Access And Pins
3.3. How to Use the Software The LAB-X5000 is controlled through a touch-screen on-board computer. Basic user training is provided at installation. All functions of the LAB-X5000 can be executed using the on-board touch-screen computer. ▶... - Page 17 LAB-X5000 Series User Guide 3.3.1. Gestures: There are six basic gestures used in navigating the software. 3.3.1.1. Tap is used to make selections. 3.3.1.2. Slide or Drag is used to scroll views and menus. 3.3.1.3. Long press is used to “pin” and “unpin” elements in Measurements results.
-
Page 18: Analyze A Sample
Only works on most recent result, will not delete older data. Use to toggle between viewing numerical results and spectral results. Settings menu – not available in all screens. Tap this icon to access more options. 3.4. Analyze a Sample ▶ Hitachi High-Tech Analytical Science... - Page 19 LAB-X5000 Series User Guide Information This section assumes that a calibration has already been established. If not, refer to sections 5.4 and 5.5. for details on creating a calibration. 3.4.1. Check that the Method is appropriate for the sample. In the pull-down menu, select...
- Page 20 Name the sample (if Sample Naming is active in the pull-down menu). 3.4.3. Remove the glass cover from the sample port and insert a secondary safety window, if there is not one already installed. For instructions on secondary safety window assembly, see Section 2.6.3.5. ▶ Hitachi High-Tech Analytical Science...
- Page 21 LAB-X5000 Series User Guide Remove glass cover and insert secondary safety window or sample cup into sample port here. 3.4.4. Leaving secondary safety window in place inside the sample port, insert a sample cup into the sample port on the top of the instrument as shown above.
-
Page 22: Analysis Results
3.5.2. Swipe left or right to access previous results. 3.5.3. Tapping the button will toggle to the spectral view of the results. ▶ Hitachi High-Tech Analytical Science... - Page 23 LAB-X5000 Series User Guide 3.5.4. to return to numerical results. 3.5.5. To delete a result, tap the trashcan icon in the bottom black bar. 3.5.5.1. Note: only the current result can be deleted. Past results cannot be deleted in this manner.
-
Page 24: Pull-Down Menu And Quick Options
From there you can quickly toggle wi-fi and other measurement settings on or off, access programs, sample naming, result history and settings. 4.1.3. Note that not all menus may be available, depending on the user level of access. ▶ Hitachi High-Tech Analytical Science... -
Page 25: Quick Access Buttons
LAB-X5000 Series User Guide Unavailable options may be visible, but greyed out, and tapping them will have no effect. Some options will not be visible when logged in as an Operator. 4.2. Quick Access Buttons 4.2.1. The Quick Access Buttons are on the left-hand side of the pulldown menu. They are shortcuts to frequently used options within the software. -
Page 26: Standard Deviation
Forget network. 4.3.6. To see details of a network you’re currently connected to, tap its name. A status popup will open and display the Mac address, IP address, State, Signal Strength and Security 4.4. Standard Deviation ▶ Hitachi High-Tech Analytical Science... -
Page 27: Pass/Fail
LAB-X5000 Series User Guide 4.4.1. The Standard Deviation button toggles whether the error data displays on the analysis results screen after each measurement. 4.5. Pass/Fail 4.5.1. Use the Pass/Fail toggle to choose whether to display pass/fail data in the analytical results screen. -
Page 28: Sample Naming
When the Start button is pressed, the screen will change to allow you to name the sample prior to analysis. 4.7.2.2. Once the done button is tapped, the X-rays will turn on and the analysis will begin. 4.8. Font Size ▶ Hitachi High-Tech Analytical Science... - Page 29 LAB-X5000 Series User Guide 4.8.1. To view the results in large format, select Font Size from the pull-down menu. 4.8.2. Only the first three rows of the results will display on the screen, in a larger font. 4.8.3. This is a persistent setting – once chosen, the icon will remain orange and the results will display as shown above until the icon is tapped again, turning off the large font display.
-
Page 30: Options Menu
Slide a finger from top to bottom of the screen to access the pulldown menu. All Options are visible on the right-hand side of the pulldown menu. Method is used to choose the parameters for the analysis ▶ Hitachi High-Tech Analytical Science... -
Page 31: Method
LAB-X5000 Series User Guide Results are used to view the entire results history and choose results for exports. Settings is used to access the menu of settings available to the operator QC Check Sample is used to measure a pre-defined check sample and compare results to set limits to validate calibration stability. -
Page 32: Restandardize
Defining the measurement conditions, typing in the concentration data for a set of standards, then analyzing those standards (this section) 5.4.2.2. Measuring a set of calibration standards using a Hitachi pre-programmed calibration (see section 5.5 Import Calibration) 5.4.2.3. Importing a calibration from another LAB-X instrument (see section 5.5 Import Calibration) 5.4.3. - Page 33 LAB-X5000 Series User Guide 5.4.3.2. Standards can be certified reference materials, samples that have been well-analyzed using another analytical technique, or synthetics. 5.4.4. Using the chosen standards, a calibration can be derived by specifying the instrument measurement conditions, then measuring the standards and performing regression calculations, which may involve instrument or matrix corrections.
- Page 34 Select Analytes. Tap to add an analyte. 5.4.6.3. Tap one analyte to select, then tap to accept the data and return to the Calibration menu. 5.4.6.4. For each element, determine the settings for the following parameters: ▶ Hitachi High-Tech Analytical Science...
- Page 35 LAB-X5000 Series User Guide Measurement Choose from saved conditions parameters conditions Measurement Type in a number of seconds for analysis (<999) time Region Type in numbers for lower limit (keV) and upper limit (keV). Pre-defined interest (ROI) values are offered by default. The user can choose to use different values.
- Page 36 Tap an element. Type in the concentration of the element in the standard in the defined unit. An individual analyte from a standard can be omitted from the regression by tapping the box by “Active” to remove the checkmark. ▶ Hitachi High-Tech Analytical Science...
-
Page 37: Regressions
LAB-X5000 Series User Guide 5.4.6.10. Repeat for each element in the standard, until all elements included in the calibration have concentration values. 5.4.6.11. Press the Start button to analyze the standard. 5.4.6.12. When analysis is complete, tap to add another standard. Repeat for each standard in the set. -
Page 38: Import Calibration
Corrected intensities are used when instrument corrections (Blank, Overlap) are applied. 5.6. Import Calibration 5.6.1. Measuring a set of calibration standards using a Hitachi pre-programmed calibration 5.6.1.1. Pre-programmed calibrations cannot be edited or deleted. 5.6.1.2. In order to use a pre-programmed calibration as the basis for a new one, it is necessary to copy the pre-programmed calibration and save it as a new calibration name, then measure an appropriate set of standards and SUSs. - Page 39 LAB-X5000 Series User Guide 5.7.3.1. Display: choose from XRF line. Elements from Na – U are available; multiple elements can be selected. Tap to accept input and return to Test Measurement menu. 5.7.3.2. Analysis time: Any time can be specified up to a maximum of 999 seconds. Type...
- Page 40 Test Measurement menu. Information There are three filter options on the LAB-X5000, depending on options chosen and which X-ray tube is installed. 1. No filters. 2. Ti: (0) Open; (1) W1 Ti; (2) A6 thick Al; (3) Z1 Pd; (4) KF Kapton 3.
- Page 41 LAB-X5000 Series User Guide 5.7.3.6. Load condition: Use this option if you wish to choose a pre-loaded condition. Select the conditions you wish to use, then tap to accept the value and return to Test Measurement menu. 5.7.3.7. Save condition: This is to save the conditions you have specified into the computer memory to be available later as a preconfigured set of conditions under Load Conditions.
-
Page 42: Results
5.8.5. To search, tap on and type the date in the date box, or part of the sample name in the sample name box and press to begin the search. ▶ Hitachi High-Tech Analytical Science... - Page 43 LAB-X5000 Series User Guide 5.8.1. To select results, tap on the box at the right side of the sample name or date. 5.8.1.1. Selecting a week date will select all samples analyzed that week. Tap the to view all samples analyzed that week. The number of samples in the batch is indicated in parentheses after the date.
-
Page 44: Settings
To delete samples, tap the box on the right to select. A green check mark will show for selected samples. Then tap in the bottom black bar. A warning box will appear to confirm deletion. 5.8.1.1. to confirm deletion. 5.8.1.2. Deletion is not reversible. 5.9. Settings ▶ Hitachi High-Tech Analytical Science... - Page 45 LAB-X5000 Series User Guide The settings menu contains the options for configuring, updating, and connecting your instrument. Not all options are available at all user levels. Screen Determine the idle time before the screen goes dark. Timeout Wi-Fi settings Connect to a Wi-Fi network...
- Page 46 Does not reference state or local registration or licensing. Backup Create, restore, backups to USB, or export instrument logs. Only available to Manager and Service. Versions View data on current software build ▶ Hitachi High-Tech Analytical Science...
-
Page 47: Calibration Corrections
LAB-X5000 Series User Guide 6. Calibration Corrections 6.1 Blank Subtraction 6.2 Overlapping Segment 6.3 Ratio Correction 6.4 Mass Absorption Corrections 6.4 Setting Up Samples (SUSs)for Instrument Corrections If a poor correlation of X-ray intensity against concentration is seen after Regressions are performed, then a correction may be necessary to improve the calibration fit. -
Page 48: Overlapping Segment
Select the Ratio Model. Tap Ratio Model: Reference Analyte, and select from the available options. 6.3.4. Define the Radio Model: power. This allows the denominator to be raised to the power required between 0.1 and 2. Normally if a simple ratio is required, the value would be ▶ Hitachi High-Tech Analytical Science... -
Page 49: Mass Absorption Corrections
LAB-X5000 Series User Guide entered as 1 (one). 6.4. Mass Absorption Corrections 6.4.1. This correction should be applied when the intensity of radiation coming from a sample for one element has been modified by the presence of another element in the sample. -
Page 50: Setting Up Samples (Suss)For Instrument Corrections
Setting Up Sample (SUS) must be measured before a Regression is performed. 6.5.2. If a Blank Subtraction has been specified, then a blank sample or SUS needs to be measured as an instrument correction. ▶ Hitachi High-Tech Analytical Science... -
Page 51: Technical Specification
LAB-X5000 Series User Guide 7. Technical Specification 7.1. LAB-X5000 Series Device type code LXDS2860 Rated voltage 100 V AC to 240 V AC Rated current 1.5A Rated frequency 47 Hz – 63 Hz Fuse T 2A H 250 V Average power consumption +10 ˚C to +35 ˚C / +50 F to + 95 F... -
Page 52: Appendices
Toggle Wi-fi Pull-down menu: Toggle Std sample naming Pull-down menu: Toggle auto printing Pull-down menu: Toggle font size QC check sample Software update Select method View stored results Delete last result Test measurement Backup Restore ▶ Hitachi High-Tech Analytical Science... -
Page 53: Appendix B: Sample Preparation
Basic requirements are the sample should have a flat surface, be homogenous, have an adequate thickness, and fit into the sample port of the instrument. The LAB-X5000 will accept samples of diameter between 28 and 41 mm and height less than 39mm. -
Page 54: Filling Sample Cups
Calculate the standard deviation of these measurements for the error introduced by sample preparation. 8.8.4. To test for sample thickness error, analyze a sample, then double the thickness of the sample by either stacking an identical solid sample on it, or increasing the depth of the ▶ Hitachi High-Tech Analytical Science... -
Page 55: Manufacturer
An increase in the signal implies that the original sample was not thick enough for the X-ray penetration depth, and samples must be made thicker, or of constant thickness. Hitachi High-Tech Analytical Science Customer Support Manufacturer... -
Page 56: Customer Support
Customer Support ▶ Hitachi High-Tech Analytical Science...