Table of Contents
Advertisement
Quick Links
★ Please read through this Instruction Manual as well as the separate Instruction
Manual "Safety (MN1-5982)" and "Cleaning, Disinfection and Sterilization
(MN1-5998)" carefully prior to use.
★ Keep this Instruction Manual together with the ultrasound diagnostic instrument
for any future reference.
Q1E-EP1473-4
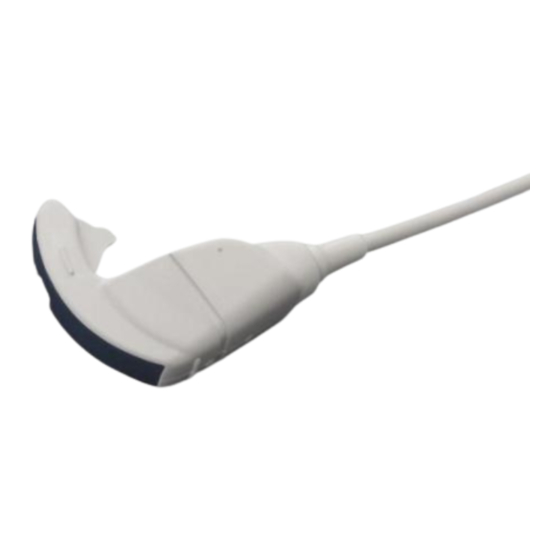
C25P Probe
Instruction Manual
Specification
MN1-5821 Rev. 4
Notes for operators and responsible maintenance personnel
© Hitachi, Ltd. 2014, 2017. All rights reserved.
i
MN1-5821 Rev. 4
Advertisement
Table of Contents

Related Manuals for Hitachi C25P


Summary of Contents for Hitachi C25P
- Page 1 ★ Please read through this Instruction Manual as well as the separate Instruction Manual “Safety (MN1-5982)” and “Cleaning, Disinfection and Sterilization (MN1-5998)“ carefully prior to use. ★ Keep this Instruction Manual together with the ultrasound diagnostic instrument for any future reference. © Hitachi, Ltd. 2014, 2017. All rights reserved. Q1E-EP1473-4...
- Page 2 MN1-5821 Rev. 4...
- Page 3 MN1-5821 Rev. 4 Introduction This is the instruction manual for C25P probe. The probe is available by connecting to Hitachi’s ultrasound diagnostic instrument and can be mainly used for puncture of abdominal organs. Prior to use, read this manual as well as the separate instruction manual “Safety” in which information for safe use is provided.
-
Page 4: Table Of Contents
MN1-5821 Rev. 4 CONTENTS 1. General Information ...........................1 1-1. Intended use ...................................1 1-2. Classification of ME equipment ............................1 1-3. Standard components ..............................1 1-4. Options ..................................2 2. Specifications and Parts name ........................3 2-1. Specifications .................................3 2-2. Name of each parts ................................4 3. -
Page 5: General Information
• Operation mode ....................Continuous operation • Method of sterilization ..................Refer to the separate instruction manual “Cleaning, Disinfection and Sterilization” 1-3. Standard components The standard components of C25P probe are as follows. C25P Probe ··························································· 1 set Storage case ··························································· 1 set Instruction Manual •... -
Page 6: Options
• Biopsy Attachment Table 1 provides biopsy attachments needed for performing a puncture. The attachments listed are manufactured by Hitachi Medical Corporation and sold as the options of biopsy probe EUP-B715, but they are fully compatible with C25P probe. EZU-PA7B1-C is the attachment for Cool-tip (17G) or LeVeen SuperSlim. -
Page 7: Specifications And Parts Name
At the time of publication of this manual, the connectable diagnostic ultrasound instrument or instrument software version available with this probe is different for each country, please refer to the instrument instruction manual or contact your local Hitachi representative. Field of view: 70°... -
Page 8: Name Of Each Parts
MN1-5821 Rev. 4 2-2. Name of each parts The name of each part is shown in Figure 2 and the explanation for each part is listed in Table 3. ・Probe Cable Probe tip Biopsy Attachment Mounting Plate Connector Ultrasonic radiation part Orientation mark side ・Biopsy Attachment (Option) Needle... - Page 9 MN1-5821 Rev. 4 Table 3 Name of each part and its explanation Name Explanation Ultrasound is radiated from this part. The electronic Ultrasonic radiation part convex transducer is integrated underneath this part. The side of the orientation mark corresponds to the side Orientation mark side of the orientation mark on the image.
- Page 10 MN1-5821 Rev. 4...
-
Page 11: Preparations Before Use
MN1-5821 Rev. 4 3. Preparations before use This chapter describes preparations needed to use the probe safely. Please prepare the probe prior to each use by following the instructions below. 3-1. Preparation for probe 3-1-1. Visual check Visually check the probe tip, ultrasonic radiation part, cable, and connector. If any holes, indentations, abrasion, cracks, deformation, looseness, discoloration, or other abnormalities are found, do not use the probe. -
Page 12: Preparation For The Biopsy Attachment
MN1-5821 Rev. 4 3-2. Preparation for the biopsy attachment 3-2-1. Inspection for the biopsy Attachment Visually inspect the biopsy attachment for any break, deformation, crack or denaturalization. If you find any damage, do not use them and contact our office written on the back cover. 3-2-2. -
Page 13: How To Attach A Probe Cover And The Biopsy Attachment
MN1-5821 Rev. 4 4. Operation This chapter describes how to attach a probe cover and the biopsy attachment to the probe, the operation of the probe, and how to attach/release the magnetic position sensor and magnetic position sensor attachment. 4-1. How to attach a probe cover and the biopsy attachment (1) Apply sterile ultrasound gel to the ultrasonic radiation part (Figure 4). - Page 14 MN1-5821 Rev. 4 (4) Assemble the needle Insert to the needle guide (Figure 7). Be sure that the gauze size engraved on each parts is same. Open the biopsy attachment mounting arm outward to attach the biopsy attachment to the probe (Figure 8). (5) Place the projected parts of the attachment on the grooves of the probe in order to attach the biopsy attachment to the probe.
- Page 15 MN1-5821 Rev. 4 (6) Fix the biopsy attachment to the biopsy attachment mounting plate by pushing it towards the direction shown in Figure 10. (7) Fix the biopsy attachment mounting arm to the probe while pulling the probe cover as shown in Figure 11. Note that the wrinkle at the part indicated in Figure 11 should be smoothed as possible.
- Page 16 MN1-5821 Rev. 4 (8) Confirm that the probe cover does not interfere with the needle path by inserting a needle in each needle insertion groove (Figure 12). (9) Confirm that the biopsy attachment is properly attached to the probe (Figure 13). Visually inspect that there is no hole or tear in the probe cover.
-
Page 17: Operation
MN1-5821 Rev. 4 4-2. Operation Mount a probe cover according to 4-1, apply sterile ultrasound gel to either the ultrasonic radiation part or the body of the patient, and place the ultrasonic radiation part of the probe onto the skin surface. An image of the region of interest is displayed on the monitor of the ultrasound diagnostic instrument. - Page 18 MN1-5821 Rev. 4 Remove the Needle Insert. ③ Needle ③ Slide the Needle Insert ② upward. ② Needle Insert ① ① ① Push the lever of the Needle Insert. Figure 15 Release of the probe from the biopsy attachment during puncture Warning Use only sterile ultrasound gel.
-
Page 19: How To Attach/Release The Magnetic Position Sensor And The Magnetic Position Sensor Attachment
MN1-5821 Rev. 4 4-3. How to attach/release the magnetic position sensor and the magnetic position sensor attachment This section provides the procedure to attach the magnetic position sensor and the magnetic position sensor attachment to the probe. Note that a probe cover is mounted after attaching these devices to the probe. After use, reverse the procedure to remove these devices from the probe. - Page 20 +81-3-6284-3668 http://www.hitachi.com/businesses/healthcare/index.html Overseas Offices: Hitachi Medical Systems GmbH Otto-von-Guericke-Ring 3 D-65205 Wiesbaden, Germany EU Importer: Hitachi Medical Systems Europe Holding AG Address: Sumpfstrasse 13 CH-6300 Zug, Switzerland US Importer: Hitachi Healthcare Americas Corporation Address: 1959 Summit Commerce Park, Twinsburg, Ohio 44087 Distributor MN1-5821 Rev.