Cisco Router 3600 Hardware Installation Manual
Cisco systems router hardware installation guide
Hide thumbs
Also See for Router Cisco 3600:
- Installation manual (58 pages) ,
- Configuration manual (36 pages) ,
- Upgrade instructions (30 pages)
Table of Contents
Advertisement
Quick Links
Advertisement
Table of Contents
Troubleshooting

Related Manuals for Cisco Router Cisco 3600


Summary of Contents for Cisco Router Cisco 3600
- Page 1 Cisco 3600 Series Routers Hardware Installation Guide Corporate Headquarters Cisco Systems, Inc. 170 West Tasman Drive San Jose, CA 95134-1706 http://www.cisco.com Tel: 408 526-4000 800 553-NETS (6387) Fax: 408 526-4100 Text Part Number: OL-2056-05...
-
Page 2: Cisco 3600 Series
CCIP, CCSP, the Cisco Arrow logo, the Cisco Powered Network mark, Cisco Unity, Follow Me Browsing, FormShare, and StackWise are trademarks of Cisco Systems, Inc.; Changing the Way We Work, Live, Play, and Learn, and iQuick Study are service marks of Cisco Systems, Inc.; and Aironet, ASIST, BPX, Catalyst, CCDA, CCDP, CCIE,... -
Page 3: Table Of Contents
Preface Objectives Audience Organization Conventions Safety Warnings Related Documentation Cisco 90-Day Limited Hardware Warranty Terms Obtaining Documentation Cisco.com Documentation CD-ROM Ordering Documentation Documentation Feedback Obtaining Technical Assistance Cisco TAC Website Opening a TAC Case TAC Case Priority Definitions Obtaining Additional Publications and Information Overview of Cisco 3600 Series Routers C H A P T E R Hardware Features... - Page 4 Contents Cisco 3660 Interfaces Slot Numbering Voice Interface Numbering System Specifications Regulatory Compliance Preparing to Install the Router C H A P T E R Safety Recommendations Safety with Electricity Preventing Electrostatic Discharge Damage General Site Requirements Power Supply Considerations Site Environment Site Configuration Equipment Racks...
-
Page 5: Connections
Rack-Mounting the Chassis Attaching Brackets to the Router Mounting the Router in the Rack Wall-Mounting the Cisco 3620 Router Attaching Rubber Feet to the Router Attaching Wall-Mount Brackets to the Router Mounting the Router on the Wall Installing Chassis Ground Connection Cisco 3620 and Cisco 3640 Chassis Ground Connection Cisco 3631 Chassis Ground Connection Cisco 3660 Chassis Ground Connection... - Page 6 Contents Troubleshooting A P P E N D I X Isolating Problems Troubleshooting the Power and Cooling Systems Environmental Reporting Features Troubleshooting Modules, Cables, and Connections Reading Front-Panel LEDs Front-Panel LEDs on Cisco 3620, Cisco 3640, and Cisco 3660 Routers Front-Panel LEDs on Cisco 3631 Routers Reading Rear-Panel LEDs Rear-Panel LEDs on Cisco 3631 Routers...
- Page 7 Preface This preface discusses the objectives, audience, organization, and conventions of this hardware installation guide, and points to related documents that have information beyond the scope of this document. It contains the following sections: Objectives, page vii • • Audience, page viii Organization, page viii •...
-
Page 8: Preface
Audience Audience This guide is designed for the person installing, configuring, and maintaining the router, who should be familiar with electronic circuitry and wiring practices and has experience as an electronic or electromechanical technician. It identifies certain procedures that should be performed only by trained and qualified personnel. -
Page 9: Safety Warnings
Preface Safety Warnings Means reader take note. Notes contain helpful suggestions or references to material not covered in the Note manual. Means the described action saves time. You can save time by performing the action described in the Timesaver paragraph. Means the following information will help you solve a problem. - Page 10 Safety Warnings Varoitus TÄRKEITÄ TURVALLISUUSOHJEITA Tämä varoitusmerkki merkitsee vaaraa. Tilanne voi aiheuttaa ruumiillisia vammoja. Ennen kuin käsittelet laitteistoa, huomioi sähköpiirien käsittelemiseen liittyvät riskit ja tutustu onnettomuuksien yleisiin ehkäisytapoihin. Turvallisuusvaroitusten käännökset löytyvät laitteen mukana toimitettujen käännettyjen turvallisuusvaroitusten joukosta varoitusten lopussa näkyvien lausuntonumeroiden avulla.
- Page 11 Preface Safety Warnings Aviso INSTRUÇÕES IMPORTANTES DE SEGURANÇA Este símbolo de aviso significa perigo. Você está em uma situação que poderá ser causadora de lesões corporais. Antes de iniciar a utilização de qualquer equipamento, tenha conhecimento dos perigos envolvidos no manuseio de circuitos elétricos e familiarize-se com as práticas habituais de prevenção de acidentes.
- Page 12 Preface Safety Warnings Aviso INSTRUÇÕES IMPORTANTES DE SEGURANÇA Este símbolo de aviso significa perigo. Você se encontra em uma situação em que há risco de lesões corporais. Antes de trabalhar com qualquer equipamento, esteja ciente dos riscos que envolvem os circuitos elétricos e familiarize-se com as práticas padrão de prevenção de acidentes.
- Page 13 Preface Safety Warnings Cisco 3600 Series Routers Hardware Installation Guide xiii OL-2056-05...
-
Page 14: Related Documentation
Preface Related Documentation Related Documentation The Cisco IOS software running your Cisco 3600 series router includes extensive features and functionality. For information that is beyond the scope of this document, or for additional information, use the following resources: Timesaver Make sure that you have access to the documents listed in Table 3. -
Page 15: Cisco 3620
Preface Table 3 Related and Referenced Documents Cisco Product Cisco 3600 series routers Network management Cisco IOS software OL-2056-05 Document Title Cisco 3620 and Cisco 3640 Modular Access Routers Quick Start Guide Cisco 3631 Router Quick Start Guide Cisco 3660 Modular Access Router Quick Start Guide Cisco Modular Access Router Cable Specifications Quick Start Guide: Network Modules for Cisco 2600 Series, Cisco 3600 Series, and Cisco 3700 Series Routers... -
Page 16: Cisco 90-Day Limited Hardware Warranty Terms
Cisco 90-Day Limited Hardware Warranty Terms Cisco 90-Day Limited Hardware Warranty Terms There are special terms applicable to your hardware warranty and various services that you can use during the warranty period. Your formal Warranty Statement, including the warranty applicable to Cisco software, is included on the Cisco Documentation CD and on Cisco.com. -
Page 17: Obtaining Documentation
Obtaining Documentation Cisco provides several ways to obtain documentation, technical assistance, and other technical resources. These sections explain how to obtain technical information from Cisco Systems. Cisco.com You can access the most current Cisco documentation on the World Wide Web at this URL: http://www.cisco.com/univercd/home/home.htm... -
Page 18: Ordering Documentation
Nonregistered Cisco.com users can order documentation through a local account representative by • calling Cisco Systems Corporate Headquarters (California, USA) at 408 526-7208 or, elsewhere in North America, by calling 800 553-NETS (6387). Documentation Feedback You can submit e-mail comments about technical documentation to bug-doc@cisco.com. -
Page 19: Opening A Tac Case
Preface Opening a TAC Case Using the online TAC Case Open Tool (http://www.cisco.com/tac/caseopen) is the fastest way to open P3 and P4 cases. (P3 and P4 cases are those in which your network is minimally impaired or for which you require product information.) After you describe your situation, the TAC Case Open Tool automatically recommends resources for an immediate solution. -
Page 20: Obtaining Additional Publications And Information
Information about Cisco products, technologies, and network solutions is available from various online and printed sources. The Cisco Product Catalog describes the networking products offered by Cisco Systems, as well as • ordering and customer support services. Access the Cisco Product Catalog at this URL: http://www.cisco.com/en/US/products/products_catalog_links_launch.html... - Page 21 Overview of Cisco 3600 Series Routers Cisco 3600 series routers are modular access routers with LAN and WAN connections that can be configured by means of interchangeable modules and WAN interface cards. With over 70 modular interface options, Cisco 3600 series routers provide solutions for data, voice, video, hybrid dial access, Virtual Private Networks (VPNs), and multiprotocol data routing.
-
Page 22: Overview Of Cisco 3600 Series Routers
Hardware Features Cisco 3620 The Cisco 3620 router includes these additional features: High-performance 80-MHz Reduced Instruction Set Computer (RISC) processor • Two slots for network modules • • Can be installed in a 19-, 23-, or 24-inch rack, on a wall, or on a desk Can receive DC power from the Cisco Redundant Power System (RPS) •... - Page 23 Chapter 1 Overview of Cisco 3600 Series Routers Cisco 3640 The Cisco 3640 router includes these additional features: High-performance 100-MHz RISC processor • Four slots for network modules • • Can be installed in a 19-, 23-, or 24-inch rack, or on a desk Can receive DC power from the Cisco Redundant Power System (RPS) •...
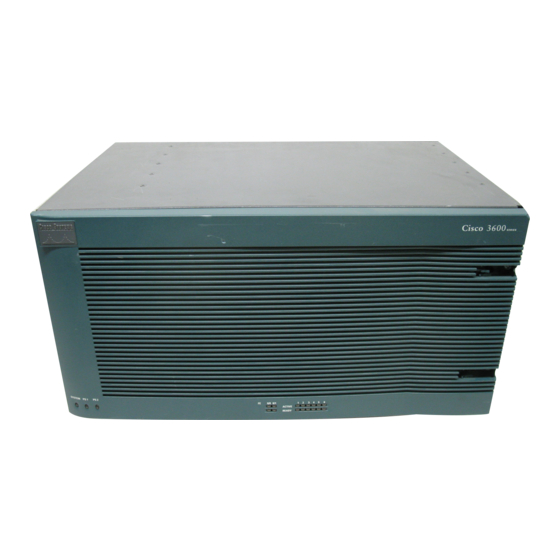
- Page 24 Hardware Features Figure 1-4 Front Panel of the Cisco 3660 Router The Cisco 3660 router platform consists of two router models: Cisco 3661 and Cisco 3662. The Note Cisco 3661 router with one Fast Ethernet interface (part number CISCO3661-xC) is shown in Figure 1-5, and the Cisco 3662 router with two Fast Ethernet interfaces (part number CISCO3662-xC or CISCO3662-xC-CO) is shown in...
-
Page 25: Modules And Interface Cards
Chapter 1 Overview of Cisco 3600 Series Routers Figure 1-6 Cisco 3662 Router with Two Fast Ethernet Interfaces VOICE SERIAL SERIA L 3 CN/LP RXC Modules and Interface Cards The latest information on network modules, WAN interface cards (WICs), voice interface cards (VICs), and advanced integration modules (AIMs) is available online and on the documentation CD-ROM. -
Page 26: Memory
Memory Memory This section describes the various types of memory that may be present in a Cisco 3600 series router. Memory Types Cisco 3600 series routers support the following types of memory: DRAM or SDRAM—Stores the running configuration and routing tables, and is used for packet •... - Page 27 Chapter 1 Overview of Cisco 3600 Series Routers Table 1-2 Cisco 3631 Router Processor and Memory Specifications Description Processor SDRAM (main plus shared) 64 to 256 MB NVRAM Flash memory (compact Flash) Boot ROM Table 1-3 Cisco 3640 Router Processor and Memory Specifications Description Processor DRAM (main plus shared)
-
Page 28: Interface Numbering
Interface Numbering Interface Numbering Cisco 3620 and Cisco 3640 Interfaces Each individual network interface on a Cisco 3620 or Cisco 3640 router is identified by a slot number and a unit number. Slot Numbering The Cisco 3620 or Cisco 3640 router chassis contains two or four slots in which you can install modules. You can install any module into any available slot in the chassis. -
Page 29: Voice Interface Numbering
Chapter 1 Overview of Cisco 3600 Series Routers Voice Interface Numbering Voice interfaces are numbered as follows: interface-type chassis-slot/voice-module-slot/voice-interface For example, Slot 1, voice network module slot 0, is referred to as voice 1/0/0 (closest to chassis slot 0). Cisco 3631 Interfaces Each individual interface (port) on a Cisco 3631 router is identified by number as described in the following sections. - Page 30 Interface Numbering Figure 1-8 Interface Numbering—Example AI C- 64 CO NN CO NN AS YN C AS YN C 24- 31 AS YN C 8-1 5 The slot number for all WIC interfaces is always 0. (The W0 and W1 slot designations are for physical Note slot identification only.) Interfaces in the WICs are numbered from right to left, starting with 0/0 for each interface type, regardless of which physical slot the WICs are installed in.
-
Page 31: Cisco 3660 Interfaces
Chapter 1 Overview of Cisco 3600 Series Routers Cisco 3660 Interfaces Each individual network interface on a Cisco 3600 series router is identified by a slot number and port number. Slot Numbering The Cisco 3660 router chassis has six network module slots. Each network module slot accepts a variety of network module interface cards, supporting a variety of LAN and WAN technologies. -
Page 32: System Specifications
System Specifications Voice Interface Numbering Voice interfaces are numbered differently from WAN interfaces. Voice interfaces are numbered as follows: interface-type chassis-slot/voice-module-slot/voice-interface If you have a 4-channel voice network module installed in slot 1 of your router, the voice interfaces will be as follows: Chassis-slot 1, voice-network-module-slot 0, voice-interface 0, referred to as voice 1/0/0 (closest to •... - Page 33 Chapter 1 Overview of Cisco 3600 Series Routers Table 1-6 Cisco 3631 Router System Specifications Description Dimensions (H x W x D) Weight Input voltage, AC power supply Current Frequency Input surge current (AC) Input rating, DC power supply Operational between Current Input surge current (DC) Power dissipation...
- Page 34 System Specifications Table 1-7 Cisco 3640 Router System Specifications Description Dimensions (H x W x D) Weight Input voltage, AC power supply Current Frequency Input surge current (AC) Input rating, DC power supply Current Input surge current (DC) Power dissipation Console and auxiliary ports Operating humidity Operating temperature...
-
Page 35: Regulatory Compliance
Chapter 1 Overview of Cisco 3600 Series Routers Table 1-8 Cisco 3660 Router System Specifications Description Dimensions (H x W x D) Weight Input voltage, AC power supply (dual, redundant) Current Frequency Input surge current (AC) Input rating, DC power supply (dual, redundant) Operational between... - Page 36 Chapter 1 Overview of Cisco 3600 Series Routers Regulatory Compliance Cisco 3600 Series Routers Hardware Installation Guide 1-16 OL-2056-05...
-
Page 37: Safety Recommendations
Preparing to Install the Router This chapter describes site requirements and equipment needed to install your Cisco 3600 series router. It includes the following sections: • Safety Recommendations, page 2-1 General Site Requirements, page 2-3 • Installation Checklist, page 2-6 •... -
Page 38: Preventing Electrostatic Discharge Damage
Safety Recommendations • Locate the emergency power-off switch in the room in which you are working. Then, if an electrical accident occurs, you can quickly turn off the power. • Disconnect all power before doing the following: Installing or removing a chassis –... -
Page 39: General Site Requirements
Chapter 2 Preparing to Install the Router General Site Requirements This section describes the requirements your site must meet for safe installation and operation of your router. Ensure that the site is properly prepared before beginning installation. If you are experiencing shutdowns or unusually high errors with your existing equipment, this section can also help you isolate the cause of failures and prevent future problems. -
Page 40: Site Environment
General Site Requirements Site Environment All Cisco 3600 series routers can be placed on a desktop or mounted in a rack. The Cisco 3620 and Cisco 3640 routers can also be installed on a wall. The location of your router and the layout of your equipment rack or wiring room are extremely important for proper operation. -
Page 41: Equipment Racks
Chapter 2 Preparing to Install the Router Equipment Racks You can mount the Cisco 3620 and Cisco 3640 routers in a 19-inch rack (with a 17.5- or 17.75-inch opening), a 23-inch rack, or a 24-inch rack. The Cisco 3631 and Cisco 3660 routers can be mounted in a 19-inch rack (with a 17.5- or 17.75-inch opening), or a 23-inch rack. -
Page 42: Installation Checklist
Installation Checklist Installation Checklist The sample Installation Checklist lists items and procedures for installing a new router. Make a copy of this checklist and mark the entries when completed. Include a copy of the checklist for each router in your Site Log (described in the next section, Installation checklist for site_____________________________________________ Router name_______________________________________________________ Task... -
Page 43: Creating A Site Log
Chapter 2 Preparing to Install the Router Creating a Site Log The Site Log provides a record of all actions related to the router. Keep it in an accessible place near the chassis where anyone who performs tasks has access to it. Use the Installation Checklist to verify steps in the installation and maintenance of the router. -
Page 44: Tools And Equipment For Installation And Maintenance
Tools and Equipment for Installation and Maintenance Inspect all items for shipping damage. If anything appears to be damaged, or if you encounter problems installing or configuring your router, contact customer service. Warranty, service, and support information is in the quick start guide that shipped with your router. Tools and Equipment for Installation and Maintenance You need the following tools and equipment to install and upgrade the router and its components: ESD-preventive cord and wrist strap... -
Page 45: Console And Auxiliary Port Considerations
Chapter 2 Preparing to Install the Router Console and Auxiliary Port Considerations The router includes an asynchronous serial console port and an auxiliary port. The console and auxiliary ports provide access to the router either locally using a console terminal, or remotely using a modem connected to the auxiliary port. -
Page 46: Preparing To Connect To A Network
Preparing to Connect to a Network Preparing to Connect to a Network When setting up your router, consider distance limitations and potential electromagnetic interference (EMI) as defined by the applicable local and international regulations. Network connection considerations are provided for several types of network interfaces and are described in the following sections: •... -
Page 47: Token Ring Connections
Chapter 2 Preparing to Install the Router Token Ring Connections The IEEE has established Token Ring as standard IEEE 802.5. Specifications indicate a maximum segment distance of 328 feet (100 meters) for UTP cabling. Note To ensure agency compliance with FCC Class B electromagnetic emissions requirements (EMI), make sure that you use a shielded RJ-45 Token Ring cable when connecting your router to a Token Ring network. -
Page 48: Signaling Standards Supported
Preparing to Connect to a Network Table 2-2 Typical DTE and DCE Devices Device Type 1. If pins protrude from the base of the connector, the connector is male. 2. If the connector has holes to accept pins, the connector is female. Signaling Standards Supported The synchronous serial ports available for the router support the following signaling standards: EIA/TIA-232, EIA/TIA-449, V.35, X.21, and EIA-530. -
Page 49: Asynchronous/Synchronous Serial Module Baud Rates
Chapter 2 Preparing to Install the Router Table 2-3 Serial Signal Transmission Speeds and Distances Rate (bps) 2400 4800 9600 19200 38400 56000 1544000 (T1) Balanced drivers allow EIA/TIA-449 signals to travel greater distances than EIA/TIA-232 signals. The recommended distance limits for EIA/TIA-449 shown in EIA-530. -
Page 50: 56-K/Switched-56-Kbps Dsu/Csu Connections
Preparing to Connect to a Network Table 2-4 ISDN BRI Cable Specifications Specification Resistance (at 96 kHz) Capacitance (at 1 kHz) Impedance (at 96 kHz) Wire diameter Distance limitation 1. nF = nanoFarad For more information on BRI WAN interface cards, refer to the online document. -
Page 51: Installing The Router
Installing the Router This chapter describes how to install your Cisco 3600 series router and connect it to networks and external devices. It contains the following sections: • Installing Modules, Interface Cards, and Power Supplies, page 3-2 Installing the Chassis, page 3-3 •... -
Page 52: Installing Modules, Interface Cards, And Power Supplies
Installing Modules, Interface Cards, and Power Supplies Installing Modules, Interface Cards, and Power Supplies Cisco routers are normally shipped with network modules, WAN interface cards (WICs), voice interface cards (VICs), advanced integration modules (AIMs), and power supplies already installed. If you need to remove or install any of these items, refer to the applicable documents online. -
Page 53: Installing The Chassis
Chapter 3 Installing the Router Installing the Chassis Depending on your router, you can set the chassis on a desktop, install it in a rack, or mount it on a wall or other flat surface. Select the procedure that best meets the needs of your network: Setting the Chassis on a Desktop, page 3-3 •... - Page 54 Installing the Chassis The router is shipped with one set of brackets and the screws to attach the brackets to the router chassis. Figure 3-1 through Figure 3-1 Cisco 3620 Rack-Mount Brackets Bracket for 19-inch rack Figure 3-2 Cisco 3631 Rack-Mount Brackets for 19-Inch Rack Narrow bracket for chassis side opposite fans Figure 3-3...
-
Page 55: Attaching Brackets To The Router
Chapter 3 Installing the Router Figure 3-4 Cisco 3640 Rack-Mount Brackets Bracket for 19-inch rack Figure 3-5 Cisco 3660 Rack-Mount Brackets Bracket for 19-inch rack Attaching Brackets to the Router You can rack-mount a Cisco 3600 series router with either the front or the rear of the chassis facing forward. - Page 56 Installing the Chassis In this publication, references to Cisco 3660 routers include both Cisco 3661 and Cisco 3662 models. Note Front-Panel-Forward Installation Figure 3-6 through When installed in a 19-inch rack with a 17.5-inch opening, the Cisco 3620 and Cisco 3640 routers Note protrude beyond the front of the rack.
- Page 57 Chapter 3 Installing the Router Figure 3-8 Cisco 3620 or Cisco 3640 Bracket Attachment—Front Panel Forward (23- or 24-Inch Rack) 1 2 3 ACTIV E READ Y Note: The second bracket attaches to the other side of the chassis. Figure 3-9 Cisco 3631 Bracket Attachment—Front Panel Forward (19- and 23-Inch Racks) Left bracket for 23-inch rack...
- Page 58 Installing the Chassis Figure 3-10 Cisco 3660 Bracket Attachment—Front Panel Forward (19-Inch Rack) Note: The second bracket attaches to the other side of the chassis. Figure 3-11 Cisco 3660 Bracket Attachment—Front Panel Forward (23-Inch Rack) Note: The second bracket attaches to the other side of the chassis. Cisco 3600 Series Routers Hardware Installation Guide Chapter 3 Installing the Router...
- Page 59 Chapter 3 Installing the Router Rear-Panel-Forward Installation Figure 3-12 through Figure 3-12 Cisco 3620 or Cisco 3640 Bracket Attachment—Rear Panel Forward (19-Inch Rack with a 17.5-Inch Opening) Note: The second bracket attaches to the other side of the chassis. Figure 3-13 Cisco 3620 or Cisco 3640 Bracket Attachment—Rear Panel Forward (19-Inch Rack with a 17.75-Inch Opening) Note: The second bracket attaches to the other side of the chassis.
- Page 60 Installing the Chassis Figure 3-14 Cisco 3620 or Cisco 3640 Bracket Attachment—Rear Panel Forward (23- or 24-Inch Rack) Note: The second bracket attaches to the other side of the chassis. Figure 3-15 Cisco 3631 Bracket Attachment—Rear Panel Forward (19- or 23-Inch Rack) AIC -64 ASY NC Right bracket...
- Page 61 Chapter 3 Installing the Router Installing the Chassis Figure 3-16 Cisco 3660 Bracket Attachment—Rear Panel Forward (19-Inch Rack) Note: The second bracket attaches to the other side of the chassis. Figure 3-17 Cisco 3660 Bracket Attachment—Rear Panel Forward (23-Inch Rack) Note: The second bracket attaches to the other side of the chassis.
- Page 62 Installing the Chassis Center-Mount Installation Figure 3-18 through Figure 3-18 Cisco 3620 Center-Mount Bracket Attachment Note: The second bracket attaches to the other side of the chassis. Figure 3-19 Cisco 3631 Center-Mount Bracket Attachment—Front Panel Forward (19- or 23-Inch Rack) Left bracket for 23-inch rack Left (narrow) bracket...
- Page 63 Chapter 3 Installing the Router Figure 3-21 Cisco 3640 Center-Mount Bracket Attachment (Requires Optional NEBS/ETSI Kit) 1 2 3 ACTIV E READ Y Note: The second bracket attaches to the other side of the chassis. Figure 3-22 Cisco 3660 Center-Mount Bracket Attachment Note: The second bracket attaches to the other side of the chassis.
-
Page 64: Mounting The Router In The Rack
Installing the Chassis Mounting the Router in the Rack After you attach the brackets to the router, slide the router into the rack in the position shown in one of the following illustrations. Using your own screws, fasten the chassis to the rack. To prevent bodily injury when mounting or servicing this unit in a rack, you must take special Warning precautions to ensure that the system remains stable. - Page 65 Chapter 3 Installing the Router Figure 3-24 Mounting the Cisco 3620 or Cisco 3640 Router (19-Inch Rack with a 17.75-Inch Opening) Note: The second bracket attaches to the rack at the other side of the chassis. The brackets can also be installed with the front panel forward. Figure 3-25 Mounting the Cisco 3620 or Cisco 3640 Router (23- or 24-Inch Rack) Note: The second bracket attaches to the rack at the other side of the chassis.
- Page 66 Chapter 3 Installing the Router Installing the Chassis Figure 3-26 Mounting the Cisco 3631 Router (19-Inch Rack) S E R IE S Note: The brackets can also be installed with the rear panel forward. Figure 3-27 Mounting the Cisco 3631 Router (23- Inch Rack) S E R IE S Note: The brackets can also be installed with the rear panel forward.
- Page 67 Chapter 3 Installing the Router Installing the Chassis Figure 3-28 Mounting the Cisco 3660 Router (19-Inch Rack) Note: The second bracket attaches to the rack at the other side of the chassis. The brackets can also be installed with the front panel forward. Figure 3-29 Mounting the Cisco 3660 Router (23-Inch Rack) Note: The second bracket attaches to the rack at the other side of the chassis.
-
Page 68: Wall-Mounting The Cisco 3620 Router
Installing the Chassis Wall-Mounting the Cisco 3620 Router This section explains how to mount the Cisco 3620 router on a wall. When choosing a wall-mounting location, consider cable limitations and wall structure. The router is shipped with 19-inch rack-mount brackets, which can also be used for wall-mounting. If you ordered the 23- or 24-inch brackets, either pair could be used to wall-mount your router. -
Page 69: Installing Chassis Ground Connection
Chapter 3 Installing the Router Installing Chassis Ground Connection All Cisco 3600 series router chassis require a reliable earth ground connection. You must connect the chassis to a reliable earth ground; the ground wire must be installed in accordance with local electrical safety standards. - Page 70 Installing Chassis Ground Connection Figure 3-32 Required Ground-Lug Bracket Attachment on a Cisco 3640 Router (DC Power Supply Shown) Mounting screws Power supply Strip one end of the ground wire to the length required for the ground lug or terminal. Step 2 –...
- Page 71 Chapter 3 Installing the Router Figure 3-34 NEBS-Compliant Ground Lug Attachment on a Cisco 3620 Router with Redundant Power Supply (Cisco RPS) Figure 3-35 NEBS-Compliant Ground Lug Attachment on a Cisco 3640 Router Power supply OL-2056-05 DC INPU T FOR USE WITH CISC O RPS +5V–...
- Page 72 Installing Chassis Ground Connection Figure 3-36 Ground Lug Attachment Using Ring Terminal on a Cisco 3620 Router with Internal AC or DC Power Supply Ring terminal attached to a bracket Figure 3-37 Ground Lug Attachment Using Ring Terminal on a Cisco 3620 Router with Redundant Power Supply (Cisco RPS) Cisco 3600 Series Routers Hardware Installation Guide 3-22...
- Page 73 Chapter 3 Installing the Router Figure 3-38 Ground Lug Attachment Using Ring Terminal on a Cisco 3640 Router Power supply After the router has been installed and properly grounded, you can connect the power wiring; the WAN, LAN, and voice cables; and the cables for administrative access, as required for your installation. For cable connection procedures, see the LAN, and Voice Cables”...
-
Page 74: Cisco 3631 Chassis Ground Connection
Installing Chassis Ground Connection Cisco 3631 Chassis Ground Connection To connect a Cisco 3631 chassis to ground, perform this procedure: Strip one end of the ground wire to the length required for the ground lug or terminal. Step 1 For the NEBS ground lug—approximately 0.75 in. (20 mm) –... -
Page 75: Cisco 3660 Chassis Ground Connection
Chapter 3 Installing the Router Cisco 3660 Chassis Ground Connection To connect a Cisco 3660 chassis to ground, perform this procedure: Strip one end of the ground wire to the length required for the ground lug or terminal. Step 1 For the NEBS ground lug—approximately 0.75 in. - Page 76 Installing Chassis Ground Connection Figure 3-42 Chassis Ground Connection Using Ring Terminal on a Cisco 3660 Router VOICE SERIAL SERIA L 3 CN/LP RXC After the router has been installed and properly grounded, you can connect the power wiring; the WAN, LAN, and voice cables;...
-
Page 77: Power Connections
Chapter 3 Installing the Router Power Connections This section explains how to connect AC or DC power to Cisco 3600 series routers. It covers the following topics: Connecting Routers to AC Power, page 3-27 • Connecting Routers to a DC-Input Power Supply, page 3-27 •... -
Page 78: Wiring The Dc-Input Power Supply In Cisco 3620 And Cisco 3640 Routers
Power Connections Depending on the type of router you are installing, see one of the following procedures: Wiring the DC-Input Power Supply in Cisco 3620 and Cisco 3640 Routers, page 3-28 • Wiring the DC-Input Power Supply in Cisco 3631 Routers, page 3-30 •... - Page 79 Chapter 3 Installing the Router The illustration shows the DC power supply terminal block. Wire the DC power supply as illustrated. Warning The proper wiring sequence is ground to ground, positive to positive, and negative to negative. The ground wire should always be connected first and disconnected last. Statement 239 Caution The terminal arrangement on your router may not be identical to the arrangement shown in Figure...
- Page 80 Power Connections Wiring the DC-Input Power Supply in Cisco 3631 Routers If your router has a DC-input power supply, follow the directions in this section for proper wiring. DC Wiring Requirements A Cisco 3631 router with a DC-input power supply requires copper wire and crimp-type terminals for the power connections.
- Page 81 Chapter 3 Installing the Router When stranded wiring is required, use approved wiring terminations, such as closed-loop or Warning spade-type with upturned lugs. These terminations should be the appropriate size for the wires and should clamp both the insulation and conductor. Statement 1002 Remove the plastic covers from the terminal block.
- Page 82 Power Connections The safety cover is an integral part of the product. Do not operate the unit without the safety cover Warning installed. Operating the unit without the cover in place will invalidate the safety approvals and pose a risk of fire and electrical hazards. Statement 117 Secure the wires using cable ties as shown in Step 7 and to the right of the terminal block.
- Page 83 Chapter 3 Installing the Router Table 3-3 DC Wiring Requirements for Cisco 3660 Routers Installed Power Supply Nominal 24/48 VDC Identified by a terminal block and the following printed label: 24-36V INPUT +/- 36-60V Nominal 48 VDC Identified by a plug connector and the following printed label: AC PS 100-240V~, 4-2A, 50/60 Hz...
- Page 84 Power Connections Figure 3-48 Terminal Block Connections for –DC Input Power to Cisco 3660 Routers -48 V Figure 3-49 Terminal Block Connections for +DC Input Power to Cisco 3660 Routers 0 V (return) If the power supply in your router has a plug connector, press the corresponding orange-colored release, and insert the positive, negative, and ground wires into the corresponding receptacles of the plug connector.
- Page 85 Chapter 3 Installing the Router Figure 3-51 DC Wiring—Power Supply with Plug Connector in Cisco 3660 Routers Wire management bracket OL-2056-05 Negative Ground Positive DC terminal block Cisco 3600 Series Routers Hardware Installation Guide Power Connections 3-35...
-
Page 86: Connecting Routers To The Cisco Redundant Power System
Power Connections Figure 3-52 DC Wiring—Power Supply with Terminal Block in Cisco 3660 Routers Wire management bracket If your router has two power supplies installed, repeat Step Step 6 Step 7 Turn on power to the DC circuit. Connecting Routers to the Cisco Redundant Power System If your router uses the Cisco Redundant Power System (RPS), refer to the Installation Guide location described in the... -
Page 87: Connecting Wan, Lan, And Voice Cables
Chapter 3 Installing the Router Connecting WAN, LAN, and Voice Cables This chapter describes how to connect the WAN, LAN, and voice interface cables. It includes the following sections: “Ports and Cabling” section on page 3-37 • “Connections for Cisco 3620, Cisco 3640, and Cisco 3631 Routers” section on page 3-39 •... - Page 88 Connecting WAN, LAN, and Voice Cables Table 3-4 WAN, LAN, and Voice Connections Port or Connection Port type, color Ethernet RJ-45, yellow T1/E1 WAN RJ-48C/CA81A, blue Cisco serial 60-pin D-sub Cisco Smart serial Cisco Smart compact connector, blue RJ-11C/CA111A, lavender T1 Digital voice RJ-48C/CA81A, Analog voice FXS...
-
Page 89: Connections For Cisco 3620, Cisco 3640, And Cisco 3631 Routers
Chapter 3 Installing the Router Connections for Cisco 3620, Cisco 3640, and Cisco 3631 Routers Connect each WAN, LAN, and voice cable to the appropriate connector on the chassis or on a network module or interface card. • Position the cables carefully, so that they do not put strain on the connectors. •... -
Page 90: Connecting Wan, Lan, And Voice Cables (With Chassis Shield-Telco Only)
Connecting WAN, LAN, and Voice Cables Figure 3-53 Typical Cable Arrangement LAN, WAN, and voice cables Connecting WAN, LAN, and Voice Cables (With Chassis Shield—Telco Only) To connect the cables, install the chassis shield, and organize the cables into bundles, perform this procedure: Note The Cisco 3660 router telco chassis is identified by its part number, CISCO3662-xC-CO. - Page 91 Chapter 3 Installing the Router Step 2 If all of the cables are routed through the cutout at the left, leave the small panels in place on the chassis shield. If cables are routed through the openings in the chassis shield, remove the small panels as required to provide openings for the cables.
-
Page 92: Cables
Connecting WAN, LAN, and Voice Cables Figure 3-55 Cables Routed Through Openings in the Chassis Shield VOICE SERIAL CN/LP RXC LAN, WAN, and voice cables Cisco 3600 Series Routers Hardware Installation Guide 3-42 HIGH SPEED SERIAL 1HSSI SEE MANUAL BEFORE INSTALLAT ETHERNET SERIA L 3 SERIA L 2... -
Page 93: Connecting To A Console Terminal Or Modem
Chapter 3 Installing the Router Figure 3-56 Cables Routed Through the Chassis Cutout LAN, WAN, and voice cables Connecting to a Console Terminal or Modem Your router has asynchronous serial console and auxiliary ports. These ports provide administrative access to your router either locally (with a console terminal or PC) or remotely (with a modem). Cisco provides the following cables and adapters for connecting your router to a console terminal, PC, or modem: One console adapter cable (RJ-45-to-DB-9, blue) -
Page 94: Connecting To The Console Port
Connecting to a Console Terminal or Modem Connecting to the Console Port To connect a console terminal or a PC running terminal emulation software to the console port on the router, perform the following procedure: Use the blue RJ-45-to-DB-9 console adapter cable to connect the router to a terminal. (See Step 1 through Figure... - Page 95 Chapter 3 Installing the Router Figure 3-58 Connecting a Console Terminal to a Cisco 3631 Router AI C- 64 CO NN CO NN AS YN C AS YN C 24- 31 AS YN C 8-1 5 Figure 3-59 Connecting a Console Terminal to a Cisco 3640 Router SYSTEM Console port (RJ-45) RJ-45-to-RJ-45...
-
Page 96: Connecting To The Auxiliary Port
Connecting to a Console Terminal or Modem Figure 3-60 Connecting a Console Terminal to a Cisco 3660 Router VOICE SERIAL SERIA L 3 CN/LP RXC RJ-45-to-RJ-45 Connecting to the Auxiliary Port To connect a modem to the auxiliary port on the router, perform the following procedure: Step 1 Use the black RJ-45-to-DB-25 modem adapter cable to connect the router to a modem. - Page 97 Chapter 3 Installing the Router Figure 3-61 Connecting a Modem to the Auxiliary Port on the Cisco 3620 Router SYSTE M Modem cable connector (RJ-45) (MMOD) RJ-45-to-DB-25 adapter Figure 3-62 Connecting a Modem to the Auxiliary Port on the Cisco 3631 Router AI C- 64 CO NN CO NN...
- Page 98 Connecting to a Console Terminal or Modem Figure 3-63 Connecting a Modem to the Auxiliary Port on the Cisco 3640 Router SYSTEM Modem cable RJ-45-to-DB-25 adapter Cisco 3600 Series Routers Hardware Installation Guide 3-48 1 2 3 ACTIVE READY AUX port (RJ-45) Modem EIA/TIA-232 Chapter 3...
- Page 99 Chapter 3 Installing the Router Figure 3-64 Connecting a Modem to the Auxiliary Port on the Cisco 3660 Router VOICE SERIAL SERIA L 3 CN/LP RXC RJ-45-to-RJ-45 rollover cable OL-2056-05 HIGH SPEED SERIAL 1HSSI SEE MANUAL BEFORE INSTALLAT ETHERNE T SERIA L 2 SERIA L 1 SERIA L 0...
-
Page 100: Identifying A Rollover Cable
Chapter 3 Installing the Router Connecting to a Console Terminal or Modem Identifying a Rollover Cable Use a rollover cable to connect to the asynchronous serial console and auxiliary ports. You can identify a rollover cable by comparing the two modular ends of the cable. Hold the cables side-by-side, with the tab at the back. -
Page 101: Powering Up The Router
Chapter 3 Installing the Router Powering Up the Router The plug-socket combination must be accessible at all times because it serves as the main Warning disconnecting device. Statement 1019 To ensure adequate cooling, never operate the router unless the unit is completely closed. Caution This section covers the following topics: Checklist for Power Up, page 3-51... -
Page 102: Power-Up Procedure
Powering Up the Router Power-Up Procedure To power up your Cisco router and verify that it goes through its initialization and self-test, follow this procedure. When the procedure is finished, the Cisco router is ready to configure. If you encounter problems when you power on the router, see information about the ROM monitor and the bootstrap program, see ROM Monitor.”... -
Page 103: Configuring The Router
Chapter 3 Installing the Router If SDM is installed on your router, Cisco recommends using SDM to perform the initial configuration. For configuration procedures using SDM, refer to the quick start guide that shipped with your router. You can also access the http://www.cisco.com/univercd/cc/td/doc/product/access/acs_mod/cis3600/36xx_qsg/index.htm •... -
Page 104: Initial Configuration Using The Setup Command Facility
Configuring the Router If you need help with interface and port numbering, see the Note Initial Configuration Using the Setup Command Facility This section shows how to use the setup command facility to configure a host name for the router, set passwords, and configure an interface for communication with the management network. - Page 105 Chapter 3 Installing the Router Enter an enable password that is different from the enable secret password. This password is not Step 5 encrypted (less secure) and can be seen when viewing the configuration: The enable password is used when you do not specify an enable secret password, with some older software versions, and some boot images.
- Page 106 Configuring the Router interface FastEthernet0/0 no shutdown media-type 100BaseX half-duplex ip address 172.1.2.3 255.255.0.0 interface FastEthernet0/1 shutdown no ip address Respond to the following prompts. Select [2] to save the initial configuration.: Step 12 [0] Go to the IOS command prompt without saving this config. [1] Return back to the setup without saving this config.
-
Page 107: Initial Configuration Using The Cli (Manual Configuration)
Step 2 Would you like to terminate autoinstall? [yes] Return Several messages are displayed, ending with a line similar to the following: Copyright (c) 1986-2000 by cisco Systems, Inc. Compiled <date> <time> by <person> Step 3 Press Return to bring up the Router> prompt. - Page 108 Chapter 3 Installing the Router Configuring the Router Cisco 3600 Series Routers Hardware Installation Guide 3-58 OL-2056-05...
-
Page 109: Appendix
Troubleshooting Your Cisco 3600 series router goes through extensive testing and burn-in before leaving the factory. If you encounter problems, use the information in this appendix to help isolate problems or to eliminate the router as the source of the problem. This appendix contains the following sections: •... -
Page 110: Troubleshooting The Power And Cooling Systems
Isolating Problems When problem solving, consider the following router subsystems: Power and cooling systems—External power source, power cable, router power supply and circuit • breaker, and router blower and fan. Also consider inadequate ventilation or air circulation. Modules—LEDs on the modules can help identify a failure. •... -
Page 111: Environmental Reporting Features
Appendix A Troubleshooting Environmental Reporting Features If the router is operating at an abnormally high temperature, you see the following message on the console screen: %SYS-1-OVERTEMP: System detected OVERTEMPERATURE condition. Please resolve cooling problem immediately! Some causes of abnormally high router temperature are: Fan failure •... -
Page 112: Reading Front-Panel Leds
Reading Front-Panel LEDs • Router boots, but the console screen is frozen. Check the external console connection. – Verify that the parameters for your terminal are set as follows: – (a) The same data rate as configured for the router (9600 bps is the default) (b) 8 data bits (c) No parity generated or checked (d) 2 stop bits... -
Page 113: System
Appendix A Troubleshooting Figure A-2 Cisco 3640 Router Front-Panel LEDs SYSTEM System and RPS LEDs Figure A-3 Cisco 3660 Router Front Panel LEDs SYSTEM SYSTEM PS1 The Cisco 3660 router has system LEDs on the front and rear panels. Both system LEDs function as Note described in Table... - Page 114 Reading Front-Panel LEDs Table A-1 SYSTEM LED in Cisco 3620, Cisco 3640, and Cisco 3660 Routers Color Blinking green Solid green Amber Alternating amber and green Note The Cisco 3660 router does not have the RPS LED described in Table A-2 RPS LED in Cisco 3620, Cisco 3640, and Cisco 3660 Routers Color Blinking green...
-
Page 115: Front-Panel Leds On Cisco 3631 Routers
Appendix A Troubleshooting Your router’s front or rear panel shows ACTIVE slot# and READY slot# LEDs corresponding to the Note number of network module slots in the router. (See The Cisco 3620 router has two slots numbered 0 and 1; the Cisco 3640 router has four slots numbered 0, 1, 2, and 3;... -
Page 116: Reading Rear-Panel Leds
Reading Rear-Panel LEDs Table A-5 Cisco 3631 Front-Panel LEDs POWER SYS/RPS ACTIVITY Reading Rear-Panel LEDs Rear-Panel LEDs on Cisco 3631 Routers For an explanation of the Cisco 3631 rear-panel LEDs, see Figure A-5 Cisco 3631 Router Rear-Panel LEDs AI C- 64 CO NN CO NN AS YN C... -
Page 117: Rear-Panel Leds On Cisco 3660 Routers
Appendix A Troubleshooting Rear-Panel LEDs on Cisco 3660 Routers For an explanation of the Cisco 3660 rear-panel LEDs, see: SYSTEM LED (see • • Power LED (see Fast Ethernet connector LEDs (see • PCMCIA card LEDs (see • Power supply LEDs (see •... -
Page 118: Error Messages
Error Messages Table A-8 Fast Ethernet Connector LEDs LINK 100Mbps Error Messages Cisco 3600 Series Error Messages This section describes error and recovery messages that may appear when operating a Cisco 3600 series router. Error messages for Cisco 3620 and Cisco 3640 routers powered by the Cisco RPS redundant power system are described in the publication messages for the Cisco 3660 router are described in the page... - Page 119 Appendix A Troubleshooting Table A-9 Cisco 3600 Series Error Messages Message Error: %C3600-3-NOMAC: Can’t allocate MAC address for interface 1/1 Explanation: MAC address allocation failed because the specified slot and port combination exceeds the hardware configuration. Recovery: Reallocate the MAC address. Error: %C3600-3-BADPLAT: Unknown platform type Explanation:...
-
Page 120: Cisco 3660 Error Messages
Error Messages Table A-9 Cisco 3600 Series Error Messages (continued) Message Error: %C3600-3-SLOTS: Number of slots in chassis is undefined. Explanation: The number of slots is undefined in the cookie. Recovery: Contact your technical support representative to upgrade your system. (See the “Obtaining Technical Assistance”... - Page 121 Appendix A Troubleshooting Table A-10 Cisco 3660 System Error and Status Messages (continued) LED Type LED Color Message System Amber Error: %SYS-1-OVERTEMP: System detected OVERTEMPERATURE condition. Please resolve cooling problem immediately! Explanation: The router is operating at an abnormally high temperature, possibly caused by one or more of the following: •...
- Page 122 Error Messages Table A-10 Cisco 3660 System Error and Status Messages (continued) LED Type LED Color Message PS1, PS2, Amber Error: LED on %PS-3-DCOUTPUTVOLTFAIL: System detected Power System # DC FAIL condition. power Explanation: supply rear panel The cable connected to the specified DC power supply (1 or 2) is loose or the DC power supply has failed.
- Page 123 Appendix A Troubleshooting Table A-10 Cisco 3660 System Error and Status Messages (continued) LED Type LED Color Message System Amber Error: %PS-3-MULTFAIL: There is more than one failure with the Power System #; please resolve problems immediately. PS1, PS2, Amber Explanation: LED on power...
-
Page 124: Recovering A Lost Password
Recovering a Lost Password Table A-10 Cisco 3660 System Error and Status Messages (continued) LED Type LED Color Message — — Error: %OIR-6-INSCARD: Card inserted in slot x, interfaces administratively shut down. Explanation: The online-insertion-and-removal (OIR) function detected the insertion of a network module processor in the specified chassis slot (1 through 6). -
Page 125: Appendix
Using the ROM Monitor This appendix describes the use of the ROM monitor (also called the bootstrap program), which is the firmware that runs when you power up or restart a Cisco router. During normal operation, the ROM monitor helps to initialize the processor hardware and boot the operating system software. You can also use the ROM monitor to: •... -
Page 126: Rom Monitor Commands
ROM Monitor Commands As long as the configuration register value remains 0x0, you must manually boot the operating system from the console. Refer to the boot command in the section on page The two methods of entering the ROM monitor mode are as follows: Enter ROM Monitor Mode by Using the reload Command Connect to the router from a console, and follow these steps: Restart the router with the reload command. -
Page 127: Rom Monitor Syntax Conventions
Appendix B Using the ROM Monitor list the device table list files in the file system display instruction stream dnld serial download a program module frame print out a selected stack frame help monitor builtin command help history monitor command history iomemdef meminfo main memory information... -
Page 128: Rom Monitor Command Descriptions
ROM Monitor Command Descriptions ROM Monitor Command Descriptions Router Management Commands This section lists some useful ROM monitor commands. Refer to the Cisco IOS configuration guides and command references for more information on ROM monitor commands. Boot Commands in the ROM Monitor Functions of Boot Commands The router always boots first from a Cisco IOS image in the Flash memory, because there is no separate, dedicated boothelper image ([rx]boot). -
Page 129: Tftp Server
Appendix B Using the ROM Monitor Entering Boot Commands The boot command syntax is as follows, where: partition is a partition number in the Flash memory • filename is the Cisco IOS image file name • • tftpserver is the IP address of the TFTP server -x directs the router to load the image but not execute the boot process •... -
Page 130: Informational Commands In The Rom Monitor
ROM Monitor Command Descriptions Informational Commands in the ROM Monitor dev—List boot device identifications on the router, for example: rommon 10 > dev Devices in device table: flash: slot0: slot1: eprom: dir device:[partition:]—Lists the files on the named device. For example: rommon 8>... -
Page 131: Debugging Commands
Appendix B Using the ROM Monitor Debugging Commands Most debugging commands are functional only when Cisco IOS software has crashed or failed to initialize (boot). Debugging commands should normally be entered only under the direction of a Cisco engineer. If you enter a debugging command and Cisco IOS crash information is not available, the following error message appears: “xxx: kernel context state is invalid, cannot proceed.”... - Page 132 ROM Monitor Command Descriptions Modifying the Configuration Register in Menu Mode Entering the confreg command without an argument displays the contents of the configuration register, and prompts you to alter the contents by describing the meaning of each bit. The following display shows an example of menu mode: rommon 7>...
-
Page 133: Recovering Cisco Ios Software Images
Appendix B Using the ROM Monitor Recovering Cisco IOS Software Images If both the boot and system images have been erased and only the ROM monitor is available, you can use the ROM monitor xmodem command to copy a Cisco IOS image to Flash memory from the console. The console can be connected directly to the router through the console port, or remotely through a modem connected to the auxiliary port. -
Page 134: Procedure For The Xmodem Command
Recovering Cisco IOS Software Images Procedure for the xmodem Command To copy a Cisco IOS image from a console to Flash memory, perform the following procedure. File transfer from a console is slow and will take many minutes. Note Connect the console using the instructions in the Step 1 on page 3-43. -
Page 135: Appendix
Configuration Register This appendix describes the factory default settings of the configuration register, and procedures for changing those settings. This appendix has the following sections: Configuration Register Settings, page C-1 • Changing Configuration Register Settings, page C-2 • Configuring the Boot Field, page C-4 •... -
Page 136: Changing Configuration Register Settings
Changing Configuration Register Settings Table C-1 Configuration Register Bit Meanings Number Hexadecimal 00–03 0x0000-0x000F Boot field. (See 0x0040 0x0080 0x0100 0x0200 0x0400 5, 11, 12 0x0020, 0x0800, 0x1000 0x2000 0x4000 0x8000 Changing Configuration Register Settings You might want to modify the value in the configuration register to perform the following tasks: Recover a lost password •... - Page 137 Appendix C Configuration Register In this publication, references to Cisco 3660 routers include both Cisco 3661 and Cisco 3662 models. Note Configure your terminal or terminal emulation software for 9600 baud (default), 8 data bits, no parity, Step 2 and 2 stop bits. Power on the router.
-
Page 138: Configuring The Boot Field
Configuring the Boot Field Configuring the Boot Field The lowest four bits of the configuration register (bits 3, 2, 1, and 0) form the boot field. (See Table C-2 Explanation of Boot Field Configuration Register Bits (00-03) Boot Field 02-F The boot field specifies a number in binary form. -
Page 139: Configuration Register Settings For Broadcast Address
Appendix C Configuration Register Table C-3 Configuration Register Settings for Broadcast Address Destination Bit 10 Bit 14 Bit 13 determines the router’s response to a bootload failure. Setting bit 13 causes the router to load operating software from ROM after six unsuccessful attempts to load a boot file. Clearing bit 13 causes the router to continue indefinitely to attempt loading a boot file. -
Page 140: Enabling Booting From Flash Memory
Appendix C Configuration Register Enabling Booting from Flash Memory Enabling Booting from Flash Memory To enable booting from Flash memory, set bits 3, 2, 1, and 0 to a value between 2 to 15. To specify a filename to boot, enter the system software configuration command boot system flash [device:] [partition:] [filename] in the configuration file. -
Page 141: I N D E X
Symbols ? (help) command Numerics 100Mbps LED (Cisco 3631 rear panel) 100Mbps LED (Cisco 3660 rear panel) AC power connection 3-27 ACTIVE LED (Cisco 3620, 3640, 3660) ACTIVITY LED (Cisco 3631 front panel) ACT LED (Cisco 3631 rear panel) AIMs, installing asynchronous serial baud rates 2-13 auxiliary port... -
Page 142: Error Messages A
Index reload reset ROM monitor B-1 to B-10 stack sysret xmodem compact Flash memory cards, installing compliance 1-15 configuration register boot field changing settings B-7, C-2 enabling booting from Flash memory configuration-register command confreg command connections AC power 3-27 asynchronous/synchronous serial auxiliary port console port 2-9, 3-44... - Page 143 Figures auxiliary port connection 3-47 to 3-49 bracket attachment for rack-mounting bracket attachment for wall-mounting brackets, rack-mounting 3-4, 3-5 cable routing 3-42, 3-43 chassis views 1-2 to 1-5 console terminal connection 3-44 to 3-46 DC power connections 3-29, 3-31 DC wire routing 3-32, 3-35, 3-36 Grounding Lug Fastened to Cisco 3660 Chassis ground lug attachment...
- Page 144 Index meminfo command memory 1-6 to 1-7 modem connection 3-46 netboot network connections 2-10 network modules, installing nonvolatile random-access memory See NVRAM. NVRAM packing list PCMCIA cards PCMCIA LED (Cisco 3620, 3640, 3660) PCMCIA LED (Cisco 3660 rear panel) port numbering 1-8 to 1-12 power requirements...
- Page 145 specifications Cisco 3620 1-12 Cisco 3631 1-13 Cisco 3640 1-14 Cisco 3660 1-15 memory processor serial ports 2-12 system 1-12 stack command static electricity damage SYS/RPS LED (Cisco 3631 front panel) sysret command SYSTEM LED (Cisco 3660 rear panel) Tables configuration register bits configuration register settings for boot field configuration register settings for broadcast...
- Page 146 Index Warnings DC power supply 3-31 installation lightning activity 3-37 main disconnection 3-51 qualified personnel restricted access secure power cabling 3-28, 3-30 SELV circuit 2-10 TN power systems WAN port voltages 2-13 warnings, translations of WICs See WAN interface cards wiring AC power supplies 3-27...