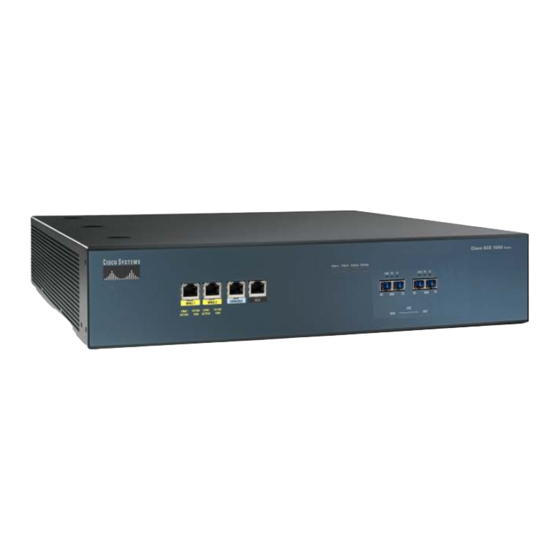
Cisco SCE 1000 Quick Start Manual
Service control engine 1000 2xgbe
Hide thumbs
Also See for SCE 1000:
- Installation and configuration manual (140 pages) ,
- Configuration manual (512 pages) ,
- Quick start manual (59 pages)
Table of Contents
Advertisement
Quick Links
Download this manual
See also:
Configuration Manual
Q
S
G
UICK
TART
Cisco Service Control Engine 1000 2xGBE Quick Start Guide,
Release 3.7.x
1
Prepare for Installation
2
Rack-Mount the SCE 1000
3
Connect the Power Supply Units
4
Connect the Management Interfaces and Perform Initial System Configuration
5
Cable the Line Ports
6
Completing the Installation
7
Installing a Service Control Application
8
Troubleshoot Startup Problems
9
Obtaining Documentation and Submitting a Service Request
UIDE
Advertisement
Table of Contents

Related Manuals for Cisco SCE 1000


Summary of Contents for Cisco SCE 1000
- Page 1 UICK TART UIDE Cisco Service Control Engine 1000 2xGBE Quick Start Guide, Release 3.7.x Prepare for Installation Rack-Mount the SCE 1000 Connect the Power Supply Units Connect the Management Interfaces and Perform Initial System Configuration Cable the Line Ports Completing the Installation...
-
Page 2: Prepare For Installation
• Locate and have accessible the Site Log for recording information about this installation. Tools and Parts Use the following list of tools and parts as a checklist for preparing for installing the SCE 1000 platform: • Appropriate cables to connect the SCE 1000 to the network and console terminal •... -
Page 3: Prepare For Rack-Mount Installation
• An adequate chassis ground (earth) connection exists for the SCE 1000 platform. • The SCE 1000 platform has at least 2 inches (5 cm) of clearance at each side and at least 5 inches (12.7 cm) of clearance at the rear to allow proper air flow. -
Page 4: Sce 1000 Mounting Brackets
Mounting Bracket for 4-post Racks The SCE 1000 mounts to the two front rack posts with brackets that attach to the front of the SCE 1000. The inside width between the two posts or mounting strips (left and right) must be at least 17.3 inches (44 cm). -
Page 5: Attach The Brackets To The Sce 1000
To install the rack-mount brackets on the SCE 1000 chassis, complete the following steps: Before installing the SCE 1000 in the rack, you must first install a rack-mount bracket on each side of the front of the SCE 1000. Align the rack-mount bracket to the side of the SCE 1000. Choose the proper bracket for your installation (2-post rack... -
Page 6: Installing The Crossrail Supports (Four-Post Rack Only)
Step 1 Figure 6 Assembling the Slider Brackets Make sure that they are oriented so that both crossrails will support the SCE 1000 when they are attached to the rack. Step 2 Attach the Crossrail Supports to the Rack Align the crossrail supports with the side of the rack, parallel to the floor. -
Page 7: Mount The System To The Rack
1. Make sure that the rack brakes are locked or that the rack is otherwise stabilized. 2. Position the SCE 1000 so that the front end is closest to you, and lift it carefully to place it into the rack. To prevent injury, avoid sudden twists or moves. - Page 8 Step 5 For each bracket, insert and tighten two appropriate screws to the rack. Since the brackets support the weight of the entire SCE 1000 chassis, be sure to use all four screws to fasten the two Note rack-mount brackets to the rack posts.
-
Page 9: Connect The Chassis Ground
Connect the Power Supply Units This section provides information for grounding the SCE 1000 platform and connecting the AC or DC power supply units. • Connect the Chassis Ground, page 9 • Connecting the Power, page 10 Connect the Chassis Ground... -
Page 10: Connecting The Power
A Grounding kit is provided with each SCE 1000. Use this Grounding kit to properly ground the SCE 1000 chassis. When installing the unit, the chassis ground connection must always be made first and disconnected last. On the rear panel of the SCE 1000, locate the chassis grounding connector (refer to the appropriate figure for an AC- Step 1 or DC-powered SCE 1000 above). -
Page 11: Connect The Dc-Input Power Supply Unit
Connect the DC-Input Power Supply Unit Figure 12 Connecting the DC Power BY PA SS PO W ER B PO W ER A Before completing any of the following steps, and to prevent short-circuit or shock hazards, ensure that power is removed from the DC circuit. -
Page 12: Connect The Ac-Input Power Supply Unit
Connect the AC-Input Power Supply Unit Plug the AC-input power cable into the AC-input power receptacle on the AC-input power supply Step 1 For AC-input power, we recommend powering the SCE 2000 platform from a 120 VAC, 15A receptacle U.S. (240 VAC, 10A international) at the power source. -
Page 13: Connect The Local Console
NE T You must first connect the unit to a local console and configure the initial settings for the SCE 1000 to support remote management. When the initial connection is established, the setup utility will run automatically, prompting you to perform the initial system configuration. -
Page 14: Perform The Initial System Configuration
IP address of the SCE 1000. subnet mask Subnet mask of the SCE 1000. default gateway Default gateway. hostname Character string used to identify the SCE 1000. Maximum 20 characters. admin password Admin level password. Character string from 4-100 characters beginning with an alpha character. - Page 15 Sets the status of the Authentication Failure traps. enterprise traps status Sets the status of the enterprise traps. system administrator Name of the system administrator. Topology Configuration connection mode Is the SCE 1000 installed using inline topology or receive-only topology using an optical splitter?
-
Page 16: Step 1: Configuring Initial Settings
SCE 1000? (cascade topology only) operational status of the SCE after abnormal boot After a reboot due to a failure, should the SCE 1000 remain in a Failure status or move to operational status provided no other problem was detected? Following are some general instructions regarding the setup dialog: •... -
Page 17: Step 2: Configuring The Hostname
Enter IP address of default gateway [10.1.1.3]: Step 2: Configuring the Hostname The hostname is used to identify the SCE 1000. It appears as part of the CLI prompt and is also returned as the value of the MIB-II object sysName. -
Page 18: Step 4: Configuring Time Settings
Passwords are case sensitive. Note The default password for all levels is “Cisco”. Note Configure the User password Step 1 The default User password is displayed. To accept the displayed value, press Enter. – To change the value, type the desired string and press Enter. - Page 19 Summary Steps 1. Enter the time settings menu. 2. Configure the time zone name. 3. Specify the offset from UTC. 4. Confirm the local time and date. 5. Enter the SNTP configuration menu. 6. Configure the SNTP broadcast client. By default the SNTP broadcast client is not enabled. 7.
-
Page 20: Step 5: Configuring The Dns Settings
Define the time interval between unicast updates. Step 7 To accept the displayed default value, press Enter. – Enter time interval in seconds between unicast updates [1024]: Step 8 Specify an IP address for the SNTP unicast server. Type in the hostname or the IP address in the form x.x.x.x, and press Enter. Would you like to configure SNTP unicast servers? [no]: y Enter IP address or hostname of SNTP unicast server: 10.1.1.1 Example:... -
Page 21: Step 6: Configuring The Rdr Formatter Destination
Step 6: Configuring the RDR Formatter Destination The SCE 1000 passes Raw Data Records (RDRs) to an external collection system via the RDR-Formatter. In order for the data to reach the correct location, the IP address of the external collection system and its port number must be configured. -
Page 22: Step 7: Configuring Access Control Lists (Acls)
• Order of Entries, page 23 Configuring ACLs The SCE 1000 can be configured with Access Control Lists (ACLs), which are used to permit or deny incoming connections on any of the management interfaces. ACL #0 is a pre-defined list that permits access to all IP addresses. - Page 23 Entry Formats Each ACL may permit/deny access to any IP address, one or more ranges of IP addresses, or one or more individual IP address. Three entry formats are available to support these options: • Any IP address — Type the word “any”. Any IP address will be permitted or denied access. •...
- Page 24 8. When all entries are added to one list, you are asked whether you would like to create another ACL. You may define up to 99 ACLs. 9. Restrict IP access to the SCE 1000 by assigning the appropriate ACL. 10. Restrict Telnet access to the SCE 1000 by assigning the appropriate ACL.
- Page 25 To accept the default ACL, press Enter. Enter IP access-class [0]: Step 10 Restrict Telnet access to the SCE 1000 by assigning the appropriate ACL. Type the number of the ACL to be assigned to the Telnet interface and press Enter.
-
Page 26: Step 8: Configuring Snmp
Enter Telnet access-class [0]: 22 Step 8: Configuring SNMP Managing the SCE 1000 is possible also via a Network Management System (NMS) that supports SNMP. By default, SNMP is disabled on the SCE 1000. To enable SNMP management you must configure the following basic SNMP parameters: •... - Page 27 Configure the SNMP GET community. a. Type the SNMP GET community name and press Enter. The SNMP agent that resides inside the SCE 1000 will respond only to GET requests that use this community string. Enter SNMP GET community name: Note that there is no default for this parameter.
- Page 28 Configure additional SET communities. Step 6 a. To add more entries, do not accept the default: Would you like to add another SNMP SET community? [no]: Type y and press Enter. b. Enter up to 20 SNMP SET communities as described in step 5. c.
-
Page 29: Step 9: Configuring The Topology-Dependent Parameters
About the Topology-Dependent Parameters The topology configuration menu is a series of guided questions relating to the deployment of the SCE 1000 in the network and its mode of operation. Values for the parameters are configured based on the user answers. - Page 30 Enter On-failure behavior: 1- bypass 2- cutoff Enter your choice [1]: Specify the admin status of the SCE 1000 after abnormal boot. Step 4 To specify Not-Operational status after abnormal boot, press Enter. – To specify Operational status after abnormal boot, type and press Enter.
-
Page 31: Step 10: Completing And Saving The Configuration
• For a non-redundant topology, link bypass on-failure should be Bypass, so that traffic continues to flow through the link. • After operation of the system resumes, and the SCE 1000 reboots, the SCE 1000 will resume operation. (Admin status after abnormal reboot is Operational.) - Page 32 3. Apply and save the configuration. 4. Confirm saving and applying the configuration. 5. Save the configuration to a remote location. 6. This completes the procedures for initial configuration of the SCE 1000 platform. Detailed Steps Review the new configuration.
- Page 33 Enter. The system will ask for FTP path: Enter a full FTP path of the remote destination: This completes the procedures for initial configuration of the SCE 1000 platform. Step 6 The system informs you that the configuration is complete.
-
Page 34: Connect The Management Interface
Connect the other end of the Ethernet cable into your management network. The Link LED on the SCE 1000 management port should light up. Test connectivity. From the host that you intend to use for remote management, ping to the SCE 1000 by typing ping Step 3 and the SCE 1000 IP address, and pressing Enter (see the example, below). -
Page 35: Information About Cabling
(in other topologies), and the network side, usually a router or layer 3 switch network element. This is the inline topology, providing both traffic monitoring and control capabilities. In this topology, all the traffic of the SCE 1000 is deployed as a transparent layer2 overlay on the customer’s existing network. Figure 16... -
Page 36: Single Link: Receive-Only Topology
The external splitter is connected to the SCE 1000 via Rx links only. In this topology, the traffic passes through the external splitter, which splits traffic to the SCE 1000. The SCE 1000, therefore, is in receive-only topology, having only traffic monitoring capabilities. -
Page 37: Connect The Gbe Line Interface Ports
10 km for 9.0µm Core Single Mode Diameter SMF Plug the specified fiber optic cable (see table above) into the appropriate GBE port on the front panel of the SCE 1000. Step 1 Verify that the link LED is green. -
Page 38: Completing The Installation
Examining the LEDs The GBE Link LED must be green to verify that an active connection exists. The GBE Rx and Tx LEDs (if flashing green) indicate that traffic is being received or transmitted by the SCE 1000 platform, respectively. -
Page 39: Viewing The User Log Counters
Viewing the User Log Counters View the user log for errors that occurred during the installation process. To display the user log device counters, complete the following steps: At the SCE 1000# prompt, type and press Enter. Step 1 show logger device User-File-Log counters Example: The following example shows the current User-File-Log device counters. -
Page 40: Saving The Configuration Settings
To view the running configuration, use the following command: At the SCE 1000# prompt, type show running-config. Step 1 The system shows the running configuration. SCE 1000number show running-config #This is a general configuration file (running-config). #Created on 15:50:56 CET MON December 11 2005... - Page 41 0 4 no timeout exit SCE 1000# SCE 1000#copy running-config startup-config Writing general configuration file to temporary location... Backing-up general configuration file... Copy temporary file to final location... SCE 1000number For backup purposes, the old startup-config file is saved under the directory: tffs0:system/prevconf.
-
Page 42: Advanced Configuration Of The Sce Platform
Advanced Configuration of the SCE Platform After you have installed your SCE 1000 platform hardware, checked all external connections, turned on the system power, allowed the system to boot up, and performed the initial system configuration, you are ready to install the Service Control application. -
Page 43: Sce 1000 Operational Status
SCE 1000 Operational Status The following table lists the operational states of the SCE 1000. The Status LED on the SCE 1000 Front Panel reflects the current SCE 1000 operational status. The operational status can be displayed using CLI command show system operation-status. -
Page 44: Identifying Startup Problems
• If the banner is displayed, but the Status LED is flashing orange, indicating a warning state, check the user log: At the prompt, type: more user log • If any of the following warning messages appear, turn the SCE 1000 platform off and call technical support. “voltage problem” –... - Page 45 • Troubleshooting the management subsystem: show interface Mng — Displays IP address and auto-negotiation information for the management interfaces. Following – is a sample output from the show interface Mng command. Following is a sample output from the show interface Mng command. ip address: 10.1.6.145 subnet mask: 255.255.0.0 Configured speed: auto, configured duplex: auto...
- Page 46 • Troubleshooting the link interface subsystem: show interface GigabitEthernet 0/# — Displays information for a specific GBE Interface. – Following is a sample output from the show interface command. ip address: 10.1.6.145 subnet mask: 255.255.0.0 Configured duplex: auto AutoNegotiation is On, link is Up, actual duplex: half show interface GigabitEthernet 0/# counters —...
-
Page 47: Obtaining Documentation And Submitting A Service Request
Subscribe to the What’s New in Cisco Product Documentation as a Really Simple Syndication (RSS) feed and set content to be delivered directly to your desktop using a reader application. The RSS feeds are a free service and Cisco currently supports... - Page 48 Cisco and the Cisco Logo are trademarks of Cisco Systems, Inc. and/or its affiliates in the U.S. and other countries. A listing of Cisco's trademarks can be found at www.cisco.com/go/trademarks. Third party trademarks mentioned are the property of their respective owners. The use of the word partner does not imply a partnership relationship between Cisco and any other company.