Table of Contents
Advertisement
Quick Links
Advertisement
Table of Contents

Related Manuals for Blomberg TKF 8439 A


Summary of Contents for Blomberg TKF 8439 A
- Page 1 TKF 8439 A Dryer...
- Page 2 Read this manual prior to initial operation of the product! Dear Customer, We hope that your product, which has been manufactured in modern facilities and passed through a strict quality control procedure, will give you very good results. We advise you to read through this manual carefully before using your product and keep it for future reference.
-
Page 3: Table Of Contents
TABLE OF CONTENTS 1 Your Dryer table ..........18 Programme table .......18 Overview ..........4 Auxiliary function ........19 Technical Specifications .......5 Drying degree ........19 Anti-creasing ........19 2 Important safety instructions 6 Changing the contrast .......19 General safety ........6 Warning indicators ......19 Intended use ........7 Changing the delay time ....20 Children’s safety ........7 Canceling the time delay ....20... -
Page 4: Your Dryer
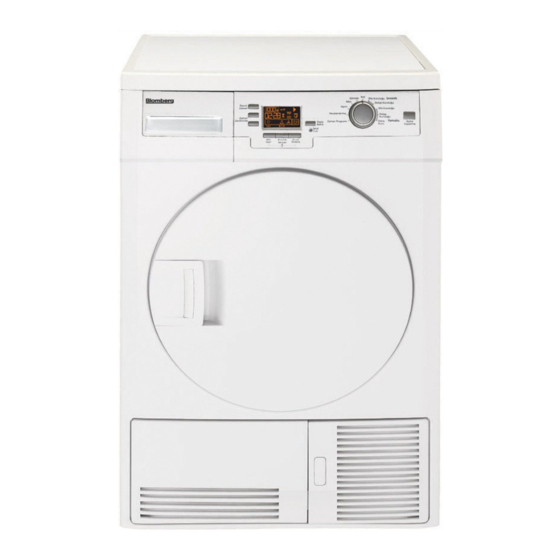
Overview 1- Control panel 4-Rating plate 2- Adjustable feet 5- Fluff filter 6- Power cord 3-Kick plate 4 EN... -
Page 5: Technical Specifications
Technical Specifications Height (adjustable) 84,6 cm Width 59,5 cm Depth 59,8 cm Capacity (max.) 8 kg Weight (net) 38 kg Voltage Rated power input See rating plate Model code Type label is located behind the loading door. Specifications of this appliance may change without notice to improve the quality of the product. -
Page 6: Important Safety Instructions
Important safety instructions This section includes safety information or adaptors to connect the dryer to that will help protection from risks of power supply in order to decrease the personal injuries or materialistic damages. risk of electric shock. Failure to follow these instructions •... -
Page 7: Intended Use
outdoor conditions. • Underwear that contains metal • Do not tamper with the controls. reinforcements should not be placed in • Do not perform any repair or part a dryer. Damage to the dryer can result replacing procedures on the product if metal reinforcements come loose even if you know or have the ability to during drying. -
Page 8: Installation
Installation Refer to the nearest Authorised Service Agent for installation of your product. C Preparation of location and electrical installation for the product is under customer’s responsibility. BInstallation and electrical connections must be carried out by a qualified personnel. A Prior to installation, visually check if the product has any defects on it. -
Page 9: Connection To Water Drain
Adjusting the feet Connecting the water drain hose; In order to ensure that your machine operates more silently and vibration-free, it must stand level and balanced on its feet. Balance the machine by adjusting the feet. Rotate the feet to adjust until the machine stands level and firmly. -
Page 10: Disposing Of The Old Machine
Disposing of the old machine Dispose of your old machine in an environmentally friendly manner. Refer to your local dealer or solid waste collection centre in your area to learn how to dispose of your machine. Before disposing of your old machine, cut off the power cable plug and make the loading door lock unusable to avoid dangerous conditions to children. -
Page 11: Electrical Connection
Electrical Connection worktop. Make sure that you have an earthed A Undercounter installation without the power outlet socket rated at 13 amps top cover must only be carried out by an (minimum). authorised agent.Risk of electric shock. Attention! Important If you use your dryer as built-in, Fitting a different plug the socket must be reachable after As the colours of the wires in the mains... -
Page 12: Initial Preparations For Drying
Initial preparations for drying Things to be done for energy A B C saving: • Make sure that you operate the product at its full capacity but pay attention to not exceeding it. • Spin your laundry at the highest speed possible when washing them. -
Page 13: Preparing Laundry For Drying
Correct load capacity emit flammable or explosive vapor. • Do not dry items cleaned with industrial chemicals in the dryer. • Do not dry your unwashed laundry in the dryer. • Items soiled with cooking oils, acetone, alcohol, fuel oil, kerosene, stain remover, turpentine, paraffin and paraffin removers must be washed in hot water with plenty of detergent before being dried in the... - Page 14 Following weights are given as examples. Approximate Home articles weights (g) Cotton quit covers 1500 (double) Cotton quit covers (single) 1000 Bed sheets (double) Bed sheets (single) Large tablecloths Small tablecloths Tea napkins Bath towels Hand towels Approximate Garments weights (g) Blouses Cotton shirts Shirts...
-
Page 15: Selecting A Programme And Operating Your Machine Control Panel
Selecting a Programme and Operating Your Machine Control panel 1. Washing machine spin speed*/ Timer pro- 5. On/Off button gramme selection Used to turn on and off the machine. Spin speed used to spin the laundry in the 6. Anti-creasing washing macthine / Indicates the time for Prevents the laundry from creasing after the timer programs. -
Page 16: Preparing The Machine
synthetic/cotton blended laundry, etc.). Preparing the machine C Do not dry curtains and lace in your 1. Plug in your machine. machine. 2. Place the laundry in the machine. Special programmes 3. Press the “On/Off” button. For special cases, there are also extra C Pressing the “On/Off”... -
Page 17: Time Display
Time display •Lingerie Suitable to dry the 100% synthetic or The display shows the time remaining synthetic-mixture satin type underwear for the programme to complete while a (night gown, garments for upper body, programme is running. Time is displayed pajamas) with the word dryable in the in hours and minutes as “02:30”. -
Page 18: Programme Selection And Consumption
Programme selection and consumption table Programme table Approximate amount of Drying time Spin speed in washing Programmes Capacity (kg) remaining (minutes) machine (rpm) humidity Cottons / Coloreds A Extra dry 1000 % 60 A Cupboard dry 1000 % 60 A Iron dry 1000 % 60 Mini 35'... -
Page 19: Auxiliary Function
Auxiliary function Changing the contrast Audio Warning Contrast can be adjusted in order to make the symbols on the display appear clearer. It may particularly be necessary to change the contrast setting of the display Cancel Audio warning Audio warning Audio warning audio warning level 1... -
Page 20: Changing The Delay Time
intervals to remind that the condenser 3. Press “Start/Pause/Cancel” button. The needs cleaning. Time delay symbol lights up. Pause Door open symbol fades. Start symbol lights up. 4. The “:” in the middle of the displayed time delay will start flashing. Cancelling the time delay If you want to cancel the time delay countdown and start the programme... -
Page 21: Changing The Programme After It Has
end of the programme if anti-creasing laundry before the drying programme function is active. has started. C If you select a new programme by Changing the programme after the turning the programme selection knob programme has started while your machine is in standby, You can use this feature to dry your laundry in a then the current program is cancelled different program after your machine has started... -
Page 22: End Of Programme
Ending the programme through cancelling A new programme can be selected and started after “Program cancel” is activated in order to change the drying program. To cancel any selected programme: Press “Start/Pause/Cancel” button for about 3 seconds. “Lint filter cleaning” and “Water tank”... -
Page 23: Maintenance And Cleaning Filter Cartridge / Door Inner Surface
Maintenance and cleaning There are humidity sensors in your dryer Filter Cartridge / Door Inner that detect whether the laundry is dry or Surface not. Lint and fibres released from the laundry to To clean the sensor: the air during the drying cycle are collected 1. -
Page 24: For The Condenser
2. If there is lint accumulation in the water 3. Pull out the condenser. tank cover, clean it and press to close. 3. Place the water tank into its seat. 4. Clean the condenser by applying For the condenser pressurized water with a shower head Hot and humid air in the condenser is and wait until the water drains. -
Page 25: Suggested Solutions For Problems
Suggested solutions for problems Drying process takes too much time • Meshes of the filter may be clogged. Wash with water. Laundry comes out wet at the end of drying. • Meshes of the filter may be clogged. Wash with water. •... -
Page 26: Guarantee
• The cost of functional replacement product is resold. parts, but excluding consumable items. • Blomberg disclaims any liability for • The labour costs of a Blomberg incidental or consequential damages. approved repairer to carry out the • The guarantee does not in anyway repair. -
Page 27: Service
Otherwise please call the appropriate number above where service can be obtained at a charge. Should you experience any difficulty in obtaining service please contact the Blomberg Customer Help-Line. Tel: 0845 604 6859 27 EN... - Page 28 Blomberg, 36-38 Caxton Way, Watford, Hertfordshire, WD18 8UF Tel: 0845 6048340 Fax: 0845 6004922, email: service@blomberguk.com www.blomberguk.com...