Table of Contents
Advertisement
Quick Links
Advertisement
Table of Contents

Related Manuals for Blomberg TKF 8431


Summary of Contents for Blomberg TKF 8431
- Page 1 Dryer TKF 8431 User manual...
- Page 2 Please read this user manual first! Dear Customer, Thank you for prefering a Grundig product. We hope that your product which has been manufactured with high quality and technology will give you the best results. We advise you to read through this manual and the other accompanying documentation carefully before using your product and keep it for future reference.
-
Page 3: Table Of Contents
TABLE OF CONTENTS 1 Important safety and environmental 6 Selecting a Programme and Operating Your Machine instructions 6.1 Control panel ..........18 1.1 General safety .........4 6.2 Preparation of the dryer ......19 1.1.1 Electrical safety ........4 6.3 Programme selection ......19 1.1.2 Product safety ........5 6.4 Time display ...........20 1.2 Mounting over a washing machine ....7 6.5 Programme selection and consumption table 21... -
Page 4: Important Safety And Environmental Instructions
Important safety and environmental instructions This section contains safety instructions that will help protect from risk of personal injury or property damage. Failure to follow these instructions shall void any warranty. 1.1 General safety • The dryer can be used by children at and above 8 years old and by persons whose physical, sensory or mental capabilities were not fully developed or who lack experience and knowledge provided that they are supervised or trained on the safe usage of the product and the risks... -
Page 5: Product Safety
Important safety and environmental instructions • Unplug the dryer when it is not in use. • Unplug the dryer from the mains during installation, maintenance, cleaning and repair works. • Do not touch the plug with wet hands! Never unplug by pulling on the cable, always pull out by grabbing the plug. • Do not use extension cords, multi-plugs or adaptors to connect the dryer to power supply in order to decrease the risk of fire and electric shock. - Page 6 Important safety and environmental instructions Below specified laundry or items must not be dried in the dryer due to the fire hazard: • Garments or pillows bolstered with rubber foam (latex foam), shower bonnets, water resistant textiles, materials with rubber reinforcement and rubber foam pads. • Clothing cleaned with industrial chemicals.
-
Page 7: Mounting Over A Washing Machine
Important safety and environmental instructions the operating instructions or the published service manual. Otherwise, you will be putting your life and others' lives in danger. • There must not be a lockable, sliding or hinged door that may block the opening of the loading door in the place where your dryer is to be installed. -
Page 8: Intended Use
Important safety and environmental instructions Installation Table for Washing Machine and Dryer Washing Machine Depth Dryer Depth 62cm 60 cm 54 cm 50 cm 49 cm 45 cm 40 cm May be May be May be May be May be May be Cannot be 54 cm installed installed... -
Page 9: Compliance With The Weee Regulation And Disposing Of The Waste Product
Take them to the packaging material collection points designated by the local authorities. Please visit the following website to get more information on the product. www.blomberg.com.tr Dryer / User Manual 9 / 32 EN... -
Page 10: Technical Specifications
Important safety and environmental instructions 1.7 Technical Specifications Height (min./maks.) 84.6 cm / 86.6 cm* Width 59.5 cm Depth 59.8 cm Capacity (max.) 8 kg** Weight (net) 38 kg Voltage Rated power input See rating plate*** Model code Type label is located behind the loading door. * Min. -
Page 11: Your Dryer
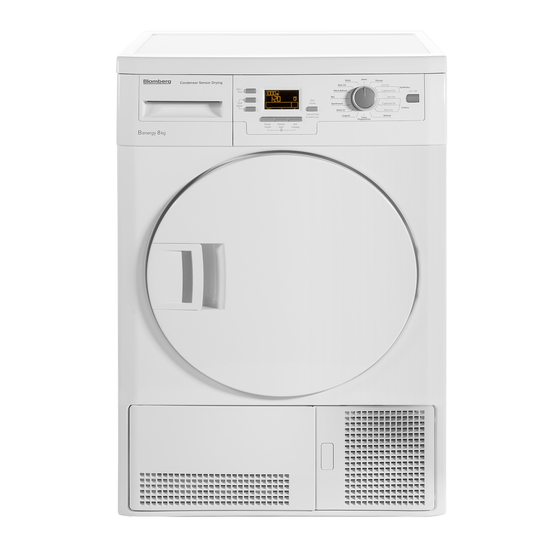
2.1 Overview 1- Control panel 5- Rating plate 2- Kick plate opening tab 6- Fluff filter 3-Adjustable feet 7- Power cord 4-Kick plate Dryer / User Manual 11 / 32 EN... -
Page 12: Package Contents
Your dryer 2.2 Package Contents 1. Water drain hose * 2. Filter drawer spare sponge* 3. User Manual 4. Drying basket* 5. Drying basket user manual* *It can be supplied with your machine depending on its model. Dryer / User Manual 12 /32 EN... -
Page 13: Insallation
Insallation Before the calling the nearest Authorized Service for the 3.2 Removing the transportation safety installation of the dryer, ensure that electrical installation assembly and water drain is appropriate referring to the user's manual. (See 3.4 Connecting to the drain and 3.6 Remove the transportation safety Electrical connection) If they are not suitable, contact assembly before using the dryer for the... -
Page 14: Connecting To The Drain
Installation 3.4 Connecting to the drain 3.5 Adjusting the feet In products equipped with condenser unit, water In order to ensure that the dryer operates more silently accumulates in the water tank during the drying cycle. and vibration-free, it must stand level and balanced on You should drain accumulated water after each drying its feet. -
Page 15: Electrical Connection
Electrical Connection Make sure that you have an earthed power outlet socket Important rated at 13 amps (minimum). 4.3 Fitting a different plug 4.1 Attention! As the colours of the wires in the mains lead of this When installed, the socket must be reachable after appliance may not correspond with the coloured installation, or a separate switch (which can disconnect markings identifying the terminals on your plug, proceed... -
Page 16: Preparation
Preparation 5.1 Laundry suitable for drying in the dryer • Always obey the instructions given on the garment tags. Dry only the laundry having a label stating that they are suitable for drying in a dryer and make sure that you select the appropriate programme. LAUNDRY DRYING SYMBOLS Drying Suitable for... -
Page 17: Correct Load Capacity
Preparation 5.5 Correct load capacity Follow the instructions in the “Programme selection and consumption table”. Do not load more than the capacity values stated in the table. It is not recommended to load the dryer with laundry exceeding the level indicated in the figure. -
Page 18: Selecting A Programme And Operating Your Machine
Selecting a Programme and Operating Your Machine 6.1 Control panel 1. Washing machine spin speed*/ Timer programme 5. On/Off button selection Used to turn on and off the machine. Spin speed used to spin the laundry in the washing 6. Anti-creasing macthine / Indicates the time for timer programs. -
Page 19: Preparation Of The Dryer
Selecting a Programme and Operating Your Machine 6.2 Preparation of the dryer For further programme details, see, • Plug in the dryer. “Programme Selection Table • Open the loading door. • Place the laundry in the machine without compressing. Main programmes • Push the loading door to close. -
Page 20: Time Display
Selecting a Programme and Operating Your Machine •Timer programmes Review the relevant section in the programme table. •Mix Used to dry synthetic and cotton laundry that do not release colour. Used for laundry that is suitable for drying. •Sportswear Used to dry the laundry that are made of synthetic, cotton or mixed fabrics and have a tag indicating that they are suitable for drying. -
Page 21: Programme Selection And Consumption Table
Selecting a Programme and Operating Your Machine 6.5 Programme selection and consumption table Approximate Spin speed in washing Drying time Programmes Capacity (kg) amount of remaining machine (rpm) (minutes) humidity Cottons / Coloreds Extra dry 1000 % 60 Cupboard dry 1000 % 60 Iron dry... -
Page 22: Auxiliary Function
Selecting a Programme and Operating Your Machine 6.6 Auxiliary function in order to indicate that the process is complete. Perform the same procedure to revert back to the Audio Warning previous contrast setting. 6.10 Warning indicators Cancel Audio warning Audio warning Audio warning audio warning level 1... -
Page 23: Time Delay
Selecting a Programme and Operating Your Machine 6.11 Time delay 6.14 Starting the programme 1. Press “Start/Pause/Cancel” button to start the programme. 2. “Start/Pause” symbol will light up to indicate that the programme has started and “:” symbol between the remaining time will continue flashing. -
Page 24: Child-Proof Lock
Selecting a Programme and Operating Your Machine For example; Press and hold the “Start/Pause/Cancel” button for about 3 seconds to “Cancel” the programme in order to select “Extra Dry” programme instead of “Iron Dry” programme. Select the “Extra Dry” program by rotating the program knob. -
Page 25: End Of Programme
6.19 End of programme “Filter cleaning” and “Water tank” warning symbols light up and “End” label appears on the screen in the programme follow-up indicator when the programme ends. The door can be opened and the machine becomes ready for a second cycle. Press “On/Off”... -
Page 26: Maintenance And Cleaning
Maintenance and cleaning Service life of product extends and frequently experienced problems will be reduced if it is cleaned at regular intervals. 7.1 Cleaning Lint Filter / Loading Door Inner Surface Lint and fiber released from the laundry to the air during the drying cycle are collected in the Lint Filter. -
Page 27: Cleaning The Sensor
Maintenance and cleaning 7.2 Cleaning the sensor If you forget to drain the water tank, the machine will stop during the subsequent drying cycles when the water There are dampness sensors in the dryer that detect tank is full and the Water Tank warning symbol will flash. whether the laundry is dry or not. -
Page 28: For The Condenser
Maintenance and cleaning 7.4 For the condenser 4. Clean the condenser by applying pressurized water with a shower head and wait until the water drains. Hot and humid air in the condenser is cooled with the cold air from the room. Thus, the humid air circulating in your dryer is condensed and then pumped into the tank. -
Page 29: Suggested Solutions For Problems
Suggested solutions for problems Drying process takes too much time • Meshes of the filter may be clogged. Wash with water. Laundry comes out wet at the end of drying. • Meshes of the filter may be clogged. Wash with water. • Excessive laundry might have been loaded in. Do not load the dryer in excess. Dryer does not switch on or the programme does not start. Dryer is not activated when set. • It might have not been plugged in. Make sure that the machine is plugged in. -
Page 30: Guarantee
Guarantee 9.3 Important notes. Your new Blomberg product is guaranteed against the cost of breakdown repairs for 3 years from the date of the • Your Blomberg product is designed and built for original purchase. domestic household use only. • The guarantee will be void if the product is installed 9.1 What is covered? or used in commercial or non-residential domestic household premises. -
Page 31: Service
Otherwise please call the appropriate number above where service can be obtained at a charge. Should you experience any difficulty in obtaining service please contact the Blomberg Customer Help-Line. Tel: 0845 604 6859 Dryer / User Manual 31 / 32 EN... - Page 32 Blomberg, 36-38 Caxton Way, Watford, Hertfordshire, WD18 8UF Tel: 0845 6048340 Fax: 0845 6004922, email: service@blomberguk.com www.blomberguk.com...
Need help?
Do you have a question about the TKF 8431 and is the answer not in the manual?
Questions and answers