Table of Contents
Advertisement
Available languages
Available languages
Quick Links
Download this manual
See also:
Manual
Advertisement
Table of Contents

Related Manuals for Blomberg TKF 8451 AG 50


Summary of Contents for Blomberg TKF 8451 AG 50
- Page 1 TKF 8451 AG 50 Wasdroger Dryer...
- Page 2 Gelieve deze gebruikershandleiding eerst te lezen! Geachte klant, Wij hopen dat u de beste resultaten verkrijgt met dit product dat in ultramoderne fabrieken is vervaardigd en dat een strikte kwaliteitscontroleprocedure heeft doorstaan. Lees daarom deze volledige gebruikershandleiding aandachtig door voor het product in gebruik te nemen en houdt deze als naslagwerk voor de toekomst.
-
Page 3: Algemene Veiligheid
Belangrijke veiligheidsinstructies Deze sectie bevat veiligheidsinformatie die zal zijn ontstaan door het gebruik van het helpen om de risico's op persoonlijk letsel of product zonder aarding volgens de lokale materiële schade te beperken. Indien deze voorschriften. instructies niet worden opgevolgd, vervalt de •... - Page 4 staat aangegeven. Anders kunt u uw leven schuimrubber (latexschuim), en dat van anderen in gevaar brengen. douchekapjes, waterproof textiel, • Als storingen, na het toepassen van de materiaal met rubberen versterking en handelingen in de veiligheidsinstructies, rubberen schuimkussentjes mogen niet in niet te verhelpen zijn, dient u het product de wasdroger worden gedroogd.
- Page 5 machine uit met de Aan/Uit-knop. Als de Aan/Uit-knop op Aan staat (terwijl de machine in werking is) houdt u de vuldeur gesloten. Bedoeld gebruik • Dit product is ontworpen voor huishoudelijk gebruik. Het mag niet voor andere doeleinden worden gebruikt. •...
- Page 6 Installatie Neem contact op met uw dichtstbijzijnde niets aanraakt (kraan, contactdoos, enz.). Let er ook op dat u een installatielocatie Erkend Servicebedrijf voor installatie van het product. Om het product gereed te maken kiest die u niet naderhand moet voor gebruik dient u zich ervan te verzekeren veranderen.
- Page 7 Diepte 60 cm 54 cm droogautomaat Stocknummer van installatieonderdeel 2979700100 2973600100 onder aanrecht • Laat, bij installatie onder een aanrecht of in een kast, minstens een ruimte van 3 cm tussen de zijwanden en achterwand van het product. Aansluiten van de waterafvoerslang Montage bovenop een Trek de slang met de hand in het wasmachine...
-
Page 8: Eerste Gebruik
machine waterpas en stevig staat. en "Installatie". Verpakkingsmateriaal wegwerpen Verpakkingsmateriaal is gevaarlijk voor kinderen. Bewaar alle verpakkingsmateriaal op een veilige plaats buiten het bereik van kinderen. Het verpakkingsmateriaal van het product is vervaardigd uit recycleerbaar materiaal. Verwijder de verstelbare voetjes nooit uit Werp het op de juiste manier weg en hun behuizing. - Page 9 Waarschuwingen over geluiden Het tijdens de werking opgevangen Het is normaal dat u tijdens de werking water wordt naar de watertank gepomp. soms metaalachtige geluiden uit de Het is normaal dat u tijdens dit proces compressor waarneemt. pompgeluiden waarneemt. Technische specificaties Hoogte (aanpasbaar) 84,6 cm Breedte...
- Page 10 Voorbereidingen voor het drogen Dingen die u kunt doen om Wasgoed dat in de machine energie te besparen kan worden gedroogd De volgende informatie zal u helpen het Volg altijd de instructies in de product op een ecologische en energiezuinige kledinglabels op.
- Page 11 of bevlekt met stookolie, chemische Volg de instructies in de "programmakeuze- oplosmiddelen, industriële chemicaliën of en verbruikstabel" op. Laad niet meer dan de andere ontvlambare of explosieve stoffen capaciteitswaarden zoals vermeld in de tabel. mogen niet in de wasdroger gedroogd Het is niet aanbevolen de wasdroger te worden.
- Page 12 Het laden van het wasgoed Open de vuldeur. Plaats het wasgoed in de machine zonder het samen te drukken. Duw de vuldeur om te sluiten. Zorg dat er niets tussen de deur zit. 12 FL...
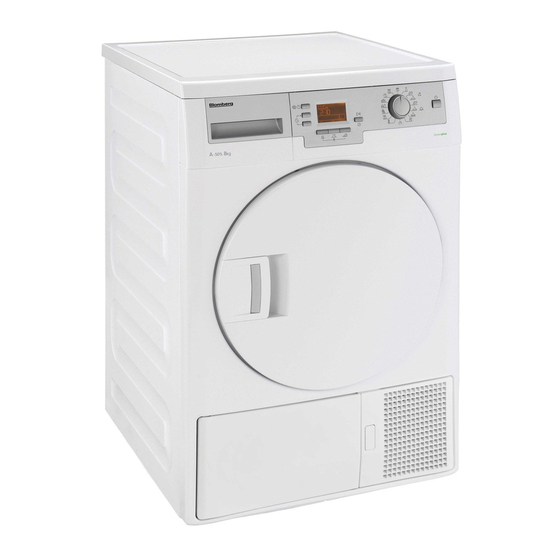
- Page 13 Een programma selecteren en uw machine bedienen Bedieningspaneel Keuzeknop wasmachinecentrifigureersnelheid / Programmatijdschakelaar Display Starten/Pauze/Annuleren-knop Programmakeuzeknop Aan/Uit-knop Antikreukknop Droogniveauknop Audiowaarschuwing annuleerknop Knoppen voor startuitstel Centrifugeersnelheid / Tijdschakelaarprogramma´s* In-bedrijfsymbool Pauzesymbool Waarschuwingssymbool waterreservoir Waarschuwingssymbool Filter reinigen Waarschuwingssymbool Filterlade reinigen Indicator resterend tijd** Waarschuwingssymbool kinderslot Modus tijdvertraging Waarschuwingssymbool Vuldeur open Antikreukmodus...
- Page 14 Voorbereiden van de machine • Synthetisch Droog minder duurzaam wasgoed met dit Steek de stekker van de machine in het programma. Aanbevolen voor synthetische stopcontact. stoffen. Plaats het wasgoed in de machine. Extra programma's Druk op de Aan / Uit-knop. Het drukken op de knop Aan / Uit Voor bijzondere gevallen is de machine betekent niet noodzakelijkerwijze dat...
- Page 15 en katoenen wasgoeditems gezamenlijk dankzij dit programma om onaangename te drogen met de gemengde stoffen geuren te ontgeuren. wasgoeditems. • Tijdschakelaarprogramma´s • Verluchten wol U kunt een van de timerprogramma's 10 Gebruik dit programma om uw wollen min., 20 min., 30 min., 40 min., 50 min., 60 wasgoed dat in de wasmachine kan worden min., 80 min., 100 min., 120 min., 140 min.
- Page 16 Programmaselectie en verbruikstabel Hoeveelheid Capaciteit Centrifugeersnelheid in resterende Programma’s Droogtijd (minuten) (kg) wasmachine (tpm) vochtigheid bij benadering Katoen/Gekleurde was Extra droog 1000 % 60 Kastdroog 1000 % 60 Strijkdroog 1000 % 60 Hemd 30’ 1200 % 60 Hemden 1200 % 50 Jeans 1200 % 50...
- Page 17 Hulpfuncties Het contrast wijzigen Wijzig het schermconstrast om de symbolen Audiowaarschuwing op het scherm duidelijker te laten verschijnen. De machine geeft een audiowaarschuwing Het kan met name nodig zijn om de wanneer het programma ten einde is. contrastinstelling van het display te wijzigen Indien u niet wilt dat de machine een als de wasdroger op een wasmachine is audiowaarschuwing geeft, drukt u...
- Page 18 Het reiningen van de filterlade. Start / Pauze / Annuleren-knop in de Waarschuwingssymbolen knipperen met een hierbovenstaante afbeelding. zekere interval om u eraan te herinneren dat de De uitsteltijd wijzigen filterlade gereinigd dient te worden. Indien u tijdens het aftellen de tijd wilt wijzigen: Druk de knop Starten/Pauze/Annuleren gedurende 3 seconden in om het programma te annuleren.
- Page 19 het relevante symbool uit een reeks symbolen Het kinderslot is gedeactiveerd wanneer branden en aan het einde van het programma de machine uitgezet wordt door op de zullen bijgevolg alle symbolen branden. Het aan/uit-knop te drukken. uitersrechtse symbool op het scherm geeft de Wanneer het kinderslot geactiveerd is: uitvoerende fase weer.
- Page 20 droogproces zal stoppen. Tijdens de Pauzemodus opent u de vuldeur, voegt u wasgoed toe of neemt u wasgoed uit en sluit u de vuldeur. Druk op de knop Start / Pauze / Annuleren om het programma te starten. Alle wasgoed dat toegevoegd werd na het starten van het droogproces, kan de reeds droge kleding in de machine Gezien de binnenkant van de...
- Page 21 Onderhoud en reiniging Levensduur van het product wordt verlengd en veelvoorkomende problemen worden verminderd indien reiniging regelmatig plaatsvindt. Dit product dient van de stroom afgekoppeld te worden tijden onderhouds- en reinigingswerkzaamheden (bedieningspaneel, centrale deel, enz.). Pluisfilter / Binnenkant vuldeur De pluizen en vezels die vrijkomen van het Reinig de volledige binnenkant van de wasgoed in de lucht tijdens de droogbeurt, vuldeur en de vuldeurpakking.
- Page 22 Maak het waterreservoir leeg. Open de vuldeur van de machine. Laat de machine afkoelen indien deze nog steeds heet is door het droogproces. Veeg de metalen oppervlakken van de sensoren met een zachte doek, bevochtigd met azijn, af en droog ze af. Reinig de metalen oppervlakken van de sensoren 4 maal per jaar.
- Page 23 filterdoek grondig drogen voordat u deze Trek de filterlade uit. terugplaatst in de filterlade. Was de spons van de filterlade om deze te ontdoen van haar en pluizen,¡, Kneed de spons met de hand uit om overmatig water te verwijderen. Het is niet nodig de spons te reinigen als de pluis- en vezelophoping niet noemenswaardig is.
- Page 24 Het reinigen van de verdamper 11. Plaats de beschermplaat terug. Reinig de op de verdamperflappen verzamelde pluizen, die zich achter de filterlade bevinden, met een stofzuiger. Het drogen zonder de geplaatste filterladespons zal uw machine beschadigen! Een vuil pluisfilter en filterlade zullen langere droogduur en hoger energieverbruik Indien u beschermende handschoenen veroorzaken.
- Page 25 Probleemoplossing Het droogproces duurt te lang. • Pluisfilterporieën zijn verstopt. >>> Was het pluisfilter met warm water. • Filterlade is verstopt. Reinig de spons en het filterdoek in de filterlade. >>> • Ventilatieroosters aan de voorkant van de machine zijn geblokkeerd. Verwijder de >>>...
- Page 26 Het symbool “Einde/Antikreuk” brandt. • Het antikreukprogramma is ingeschakeld om te voorkomen dat het achtergebleven wasgoed in de machine kreukt. >>> Schakel de wasdroger uit en verwijder het wasgoed. Eind-symbool brandt. • Het programma is afgelopen. Schakel de wasdroger uit en verwijder het wasgoed. Het symbool “Reinigen van pluisfilter”...
- Page 28 Please read this user manual first! Dear Customer, We hope that you get the best results from the product which has been manufactured in state-of-the-art plants and passed through a strict quality control procedure. Therefore, please read the entire user manual carefully before using the product and keep it as a reference for future use.
-
Page 29: Important Safety Instructions
Important safety instructions This section contains safety instructions checked by a qualified electrician or that will help protect from risk of personal the Authorized Service Agent. Our injury or property damage. Failure to company shall not be liable for any follow these instructions shall void any damages that will arise when the warranty. - Page 30 break off during drying. product regularly. Do not allow fibre, • Never attempt to repair the product dust and dirt accumulation around yourself. Do not perform any the exhaust exit and at adjacent repair or replacement procedures areas. on the product even if you know •...
-
Page 31: Intended Use
the drying compartment before not let them tamper with the product. decommissioning or disposing of the • Do not allow children sit/climb on or product. enter in the product. • Check all garments before loading • Do not forget to close the loading and make sure that there is no any door when leaving the room where lighters, coins, metal pieces, needles,... -
Page 32: Removing The Transportation Safety Assembly
Installation should stay at the same place where Refer to the nearest Authorized Service its connections have been made. Agent for installation of the product. When installing the product, make To make the product ready for use, sure that the rear wall of it does make sure that the electricity and water not touch anywhere (tap, socket, drainage system are appropriate before... -
Page 33: Connecting To The Drain
should never be operated without undercounter installation part. Dryer Depth 60 cm 54 cm Stock number of under-bench 2979700100 2973600100 installation part • Leave at least 3 cm of space around the sides and the rear wall of the product when installing it under a Connecting the water drain hose counter or in a cupboard. -
Page 34: First Use
First use Turn the feet to left or right until the machine stands level and firmly. Before starting to use the product, make sure that all preparations are made in accordance with the instructions in sections "Important safety instructions" and "Installation". Disposing of packaging material Packaging materials are dangerous to... -
Page 35: Warnings About Sounds
Warnings about sounds It is normal to hear metallic noise from the compressor sometimes during operation. Water collected during operation is pumped to water tank. It is normal to hear pumping noise during this process. 35 EN... -
Page 36: Technical Specifications
Technical specifications Height (adjustable) 84,6 cm Width 59,5 cm Depth 59,8 cm Capacity (max.) 8 kg Net weight (plastic front door usage) 52 kg Net weight (glass front door usage) 54,5 kg Voltage Rated power input See type label Model code Type label is located behind the loading door. -
Page 37: Preparations For Drying
Preparations for drying Things to be done for energy machine is not in use. Laundry suitable for drying in saving the machine Following information will help you use the product in an ecological and energy- Always obey the instructions given efficient manner. -
Page 38: Preparing Laundry For Drying
load more than the capacity values stated Items cleaned, washed or spotted in the table. with gasoil/fuel oil, dry-laundry It is not recommended to load the solvents, industrial chemicals or other dryer with laundry exceeding the combustible or explosive materials level indicated in the figure. -
Page 39: Loading The Laundry
Loading the laundry 1. Open the loading door. 2. Place the laundry in the machine without compressing. 3. Push the loading door to close. Ensure that no items are caught in the door. 39 EN... -
Page 40: Your Machine
Selecting a Programme and Operating Your Machine Control panel 1. Washing Machine Spin Speed / Timer Programme Selection button 2. Display 3. Start / Pause / Cancel button 4. Programme Selection knob 5. On / Off button 6. Anti-creasing button 7. -
Page 41: Preparing The Machine
Preparing the machine bathrobes, etc.). • Synthetics 1. Plug in the machine. Dry less durable laundry with this 2. Place the laundry in the machine. programme. Recommended for 3. Press the On / Off button. synthetics. Pressing the On / Off button does Additional programmes not necessarily mean that the programme has started. - Page 42 pigmenting synthetic and cotton laundry It is not recommended to dry items together. garments and evening gowns that • Sport contain accessories such as lace, Use this programme to dry together the tulle, gems, and etc. . synthetic and cotton laundry items and •...
-
Page 43: Programme Selection And Consumption Table
Programme selection and consumption table Approximate Spin speed in Capacity amount of Drying time Programs washing machine (kg) remaining (minutes) (rpm) humidity Cottons / Coloreds Extra dry 1000 % 60 Cupboard dry 1000 % 60 Iron dry 1000 % 60 Shirt 30’... -
Page 44: Auxiliary Functions
Auxiliary functions Audio Warning The machine will give an audio warning when the programme comes to an end. If you do not want the machine give an audio warning, press the Volume Level button repeatedly until “x” appears on the Press Anti-creasing button to activate display. - Page 45 symbol will start to flash and machine will period. At the end of the Time Delay pause. Drain the water in the water tank countdown process, Time Delay and press Start / Pause / Cancel button symbol disappears, drying process to resume the programme.
-
Page 46: Starting The Programme
Starting the programme Child-proof Lock Press Start / Pause / Cancel button to Machine is equipped with a Childproof start the programme. Lock which prevents interfering with the Start / Pause symbol will light up to current programme flow by pressing indicate that the programme has started any button. - Page 47 programme instead of Iron Dry the programme time and energy programme, press and hold the consumption since the drying Start / Pause / Cancel button for 3 process will be interrupted repeatedly. seconds to cancel the programme. Therefore, it is recommended to add 2.
-
Page 48: End Of Programme
End of programme Lint Filter Cleaning and Water Tank warning symbols light up in the programme follow-up indicator and “End” label appears on the display when the programme comes to an end. The loading door can be opened and the machine becomes ready for a second cycle. -
Page 49: Maintenance And Cleaning
Maintenance and cleaning Service life of the product extends and up on the lint filter surface. Dry the lint frequently faced problems decrease if filter completely before reinstalling it. cleaned at regular intervals. This product must be unplugged during maintenance and cleaning works (control panel, body, etc.). -
Page 50: Cleaning The Filter Drawer
There are dampness sensors in the 2. Drain the water in the tank. machine that detect whether the laundry is dry or not. To clean the sensors: 1. Open the loading door of the machine. 2. Allow the machine to cool down if it is still hot due to the drying process. - Page 51 2. Remove the filter drawer cover by 6. Clean lint, fibre, and cotton from turning it in the direction of arrow. the filter cloth by hand or with a soft piece of cloth. 3. Pull out the filter drawer. When you notice a layer that may lead clogging on filter cloth, please clean the layer by washing in warm water.
-
Page 52: Cleaning The Evaporator
9. Close the filter drawer as to lock the A layer can build up on the lint filter red button. pores that can cause clogging of the lint filter after using your machine for a while. Wash the lint filter with warm water to remove the layer that builds up on the lint filter surface. -
Page 53: Troubleshooting
Troubleshooting Drying process takes too much time. • Pores of the lint filter are clogged. >>> Wash the lint filter with warm water. >>> Clean the sponge and the filter cloth in the filter drawer. • Filter drawer is clogged. >>>... - Page 54 Drum lighting does not turn on. (On models with lamp) • Dryer is not switched on with the On / Off button. >>> Make sure that the dryer is switched on. • Lamp is defective. >>> Call Authorized Service Agent to have the lamp replaced. End/Anti-creasing symbol is on.