Toro 30605 Operator's Manual
Hide thumbs
Also See for 30605:
- Operator's manual (60 pages) ,
- Service manual (374 pages) ,
- Operator's manual (64 pages)

Related Manuals for Toro 30605


Summary of Contents for Toro 30605
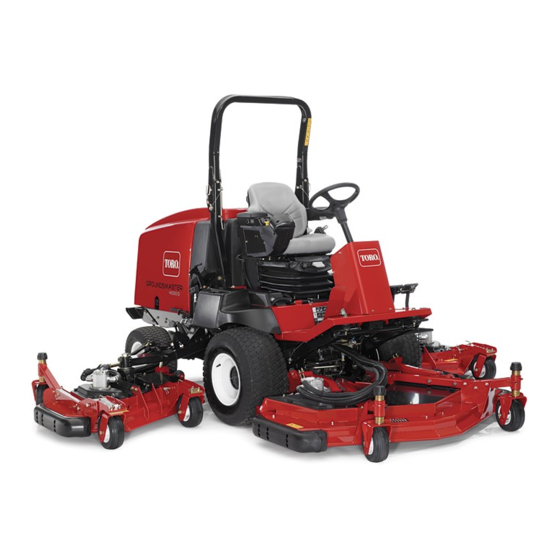
- Page 1 Form No. 3401-488 Rev A Groundsmaster ® 4000 Rotary Mower Model No. 30605—Serial No. 316000001 and Up *3401-488* A Register at www.Toro.com. Original Instructions (EN)
-
Page 2: Table Of Contents
California to cause cancer, birth defects, and other reproductive harm. g028455 Figure 1 Genuine Toro spark arresters are approved by the USDA 1. Model and serial number location Forestry Service. It is a violation of California Public Resource Code Section 4442 or 4443 to use or operate the engine on any Model No. - Page 3 Specifications ............19 Servicing the Battery..........44 Attachments/Accessories........19 Locating the Fuses..........45 Before Operation ............19 Drive System Maintenance .........45 Before Operation Safety ..........19 Adjusting the Traction-Pedal Angle......45 Checking the Engine-Oil Level.........20 Checking the Planetary-Gear-Drive Oil .....45 Checking the Cooling System ........20 Changing the Planetary-Gear-Drive Oil .....46 Checking the Hydraulic System ........20 Checking the Rear-Axle Lubricant......46 Filling the Fuel Tank ..........20...
-
Page 4: Safety
Sound Pressure Level Safety This unit has a sound pressure level at the operator’s ear of 91 This machine has been designed in accordance with EN ISO dBA, which includes an Uncertainty Value (K) of 1 dBA. 5395:2013 and ANSI B71.4-2012. Sound pressure level was determined according to the Improper use or maintenance by the operator or owner can procedures outlined in EN ISO 5395:2013. -
Page 5: Safety And Instructional Decals
Safety and Instructional Decals Safety decals and instructions are easily visible to the operator and are located near any area of potential danger. Replace any decal that is damaged or lost. 93-7272 1. Cutting/dismemberment hazard; fan—stay away from moving parts. 100-5622 1. - Page 6 100-5693 104-3579 1. Height-of-cut adjustment 1. Low height-of-cut 2. High height-of-cut adjustment adjustment 106-6754 100-5694 1. Warning—do not touch the hot surface. 1. Height-of-cut adjustment 2. Cutting/dismemberment hazard, fan and entanglement hazard, belt—stay away from moving parts. 100-6578 1. Entanglement hazard, belt—do not operate the machine with the shields or guards removed;...
- Page 7 114-0846 1. Read the Operator’s 4. Pull the knob out to Manual for information on engage the PTO. starting the engine—1) Set to neutral; 2) Engage the brake; 3) Set the engine speed to slow; 4) Turn the ignition key to preheat; 5) Turn the ignition key to engine start.
- Page 8 120-4159 1. Off 8. High 2. Lights 9. Traction drive 3. On 10. Low 120-4130 4. Light-switch location 11. Power takeoff (PTO) 1. Read the Operator’s 3. Parking brake 5. Fast 12. Lower, left deck Manual. 6. Variable-speed adjustment 13. Lower, center deck 2.
- Page 9 121-3884 1. Engine—stop 3. Engine—start 2. Engine—preheat 120-8947 1. Warning—read the 4. If the roll bar is raised, Operator’s Manual. wear the seat belt. 2. There is no rollover 5. If the roll bar is lowered, protection when the roll do not wear the seat belt.
- Page 10 Battery Symbols Some or all of these symbols are on your battery. 1. Explosion hazard 6. Keep bystanders a safe distance from the battery. 2. No fire, open flame, or 7. Wear eye protection; smoking. explosive gases can cause blindness and other injuries.
- Page 11 117-2766 (Affix over Part No. 117-2754 for CE*) * This safety decal includes a slope warning required on the machine for compliance to the European Lawn Mower Safety Standard EN836:1997. The conservative maximum slope angles indicated for operation of this machine are prescribed by and required by this standard. 1.
-
Page 12: Setup
Setup Loose Parts Use the chart below to verify that all parts have been shipped. Procedure Description Qty. – No parts required Grease the machine. Warning decal Replace the warning decal. – No parts required Check the tire pressure. – No parts required Check the fluid levels. -
Page 13: Checking The Fluid Levels
Product Overview Controls Checking the Tire Pressure Note: Determine the left and right sides of the machine from the normal operating position. No Parts Required Procedure Check the tire pressure; refer to Checking the Tire Pressure (page 21). Checking the Fluid Levels No Parts Required g020756 Figure 3... - Page 14 Parking-Brake Latch PTO Switch A knob on the left side of the console actuates the The PTO switch has 2 positions: O ) and I START STOP parking-brake lock (Figure Pull the PTO button out to engage the mower-deck blades. Push the button in to disengage the mower-deck blades To engage the parking brake, connect the pedals with the (Figure...
- Page 15 Power-Point Port Using the InfoCenter Control The power-point port is used to power optional electrical The InfoCenter LCD display shows information about your accessories (Figure machine such as the operating status, various diagnostics and other information about the machine (Figure 7).
- Page 16 InfoCenter Icon Description InfoCenter Icon Description (cont'd.) SERVICE DUE Indicates when scheduled service should be performed Denied or not allowed Engine rpm/status—indicates the engine rpm Engine Start Hour meter PTO—indicates that the PTO is on Info icon Stop or shutdown Sets the maximum traction speed Engine Fast...
- Page 17 Description Sit down or set the parking brake Engine Run Refer to the Service Manual or your Authorized Toro Distributor for more information on the Engine Using the Menus Run menu and the information contained there. To access the InfoCenter menu system, press the menu access...
- Page 18 the passcode. Changing Protect Settings to the O position Trans Speed Controls the maximum speed while in transport (high range) hides the protected options and requires entering a passcode to change the setting in the Protected Menu. After you have Smart Power Smart Power prevents set the passcode, you must turn the key switch off and then...
-
Page 19: Specifications
A selection of Toro approved attachments and accessories is operate the machine properly and safely. available for use with the machine to enhance and expand its capabilities. Contact your Authorized Service Dealer or Distributor or go to www.Toro.com for a list of all approved attachments and accessories. -
Page 20: Checking The Engine-Oil Level
Fuel Safety Checking the Engine-Oil Level Before you start the engine and use the machine, check DANGER the oil level in the engine crankcase; refer to Checking the In certain conditions, fuel is extremely flammable Engine-Oil Level (page 41). and highly explosive. A fire or explosion from fuel can burn you and others and can damage property. -
Page 21: Checking The Tire Pressure
Biodiesel Ready Checking the Tire Pressure This machine can also use a biodiesel blended fuel of up Service Interval: Before each use or daily to B20 (20% biodiesel, 80% petrodiesel). The petrodiesel portion should be low or ultra-low sulfur. Observe the DANGER following precautions: Low tire pressure decreases machine side-hill... -
Page 22: Checking The Torque Of The Wheel-Lug Nuts
Checking the Torque of the Adjusting the Rollover Protection System (ROPS) Wheel-Lug Nuts Service Interval: After the first hour WARNING After the first 10 hours To avoid injury or death from rollover: keep the Every 200 hours roll bar in the raised locked position and use the seat belt. -
Page 23: Adjusting The Height Of Cut
Lowering the ROPS Adjusting the Height of Cut Important: Lower the roll bar only when absolutely Front Mower Deck necessary. The height of cut is adjustable from 25 to 127 mm (1 to 5 Important: Ensure that the seat is secured with the seat inches) in 13 mm (1/2 inch) increments. - Page 24 Wing Mower Decks To adjust the height of cut on the wing mower decks, add or remove an equal number of spacers from the caster forks, position the caster-wheel axles in the high or low height-of-cut holes in the caster forks, and secure the pivot arms to the selected height-of-cut bracket holes.
- Page 25 5. Remove the hairpin cotter and clevis pins from the caster-pivot arms (Figure 20). 6. Rotate the tension rod to raise or lower the pivot arm until the holes are aligned with the selected height-of-cut bracket holes in the mower-deck frame (Figure 20 Figure 21).
-
Page 26: Adjusting The Skids
Adjusting the Skids Adjusting the Mower-Deck Rollers Mount the skids in the lower position when operating at heights of cut greater than 64 mm (2-1/2 inches) and in the The mower-deck rollers should be mounted in the lower higher position when operating at heights of cut lower than position when operating at height of cuts greater than 64 mm 64 mm (2-1/2 inches). - Page 27 Setting up the Front Mower Deck 1. Rotate the blade on each spindle until the ends face forward and backward. 2. Measure from the floor to the front tip of the cutting edge. 3. Adjust the shims (3 mm or 1/8 inch) on the front caster fork(s) to match the height-of-cut decal (Figure 26);...
-
Page 28: Checking The Safety-Interlock Switches
(3 mm or 1/8 inch) from the front, outside caster arm engine does move, there is a malfunction in the of the wing mower deck. interlock system that should be corrected before beginning operation. 7. If the inside edge of the wing mower deck is too low relative to the outside edge of the front mower deck, add a shim (3 mm or 1/8 inch) to the bottom of the During Operation... -
Page 29: Starting And Stopping The Engine
Do not use the machine as a towing vehicle. • Maintenance has been performed upon the fuel system • Use accessories and attachments approved by The Toro® components. Company only. 1. Remove your foot from the traction pedal and ensure that it is in neutral. -
Page 30: Understanding Smart Power™ Traction
Traction Adjusting the Mowing Speed With Toro Smart Power™ traction, the operator does not have to listen to the engine speed in heavy conditions. Smart Power prevents bogging down in heavy turf by automatically Supervisor (Protected Menu) -
Page 31: Adjusting The Transport Speed
Mow either in the late morning to avoid the dew, which causes grass clumping, or late afternoon to avoid the damage that With Toro Smart Power™, the operator does not have direct sunlight can cause on the sensitive, freshly mowed grass. -
Page 32: After Operation
After Operating After Operation To ensure optimum performance, clean the underside of the mower housing after each use. If residue builds up in the After Operation Safety mower housing, cutting performance decreases. Also, remove any debris which may have collected between General Safety the deck-lift cylinders and the foam deck pads (Figure... -
Page 33: Pushing Or Towing The Machine
Pushing or Towing the Locating the Jacking Points Machine There are jacking points located at the front and rear of the machine. In an emergency, the machine can be moved forward by actuating the bypass valve in the variable-displacement WARNING hydraulic pump and pushing or towing the machine. -
Page 34: Maintenance
Maintenance Note: Download a free copy of the schematic by visiting www.Toro.com and searching for your machine from the Manuals link on the home page. Note: Determine the left and right sides of the machine from the normal operating position. -
Page 35: Daily Maintenance Checklist
Maintenance Service Maintenance Procedure Interval • Check and adjust the engine-valve clearance. Every 1,000 hours • Flush the cooling system and replace the fluid. Every 2 years • Replace moving hoses. CAUTION If you leave the key in the ignition switch, someone could accidently start the engine and seriously injure you or other bystanders. -
Page 36: Service Interval Chart
Important: Refer to your engine operator’s manual for additional maintenance procedures. Notation for Areas of Concern Inspection performed by: Item Date Information Service Interval Chart Figure 32 Premaintenance 4. Move the traction pedal to the N position. EUTRAL Procedures 5. Engage the parking brake. 6. -
Page 37: Preparing The Machine For Maintenance
Note: The machine has grease fittings that you must lubricate regularly with No. 2 lithium grease. • Use only genuine Toro replacement parts and accessories. Replacement parts and accessories made by other The grease fitting locations and quantities are as follows: manufacturers could be dangerous, and such use could void the product warranty. - Page 38 g017810 Figure 38 Front Lift Assemblies • 2 (each side) lift-arm-cylinder bushings (Figure • 2 lift-arm-ball joints (Figure Figure 36 Front Mower Deck Figure 39 • 2 caster-fork-shaft bushings (Figure • 3 spindle-shaft bearings—located under the pulley (Figure • 2 idler-arm-pivot bushings (Figure Figure 40 Figure 37...
- Page 39 Wing Mower Decks • 1 caster-fork-shaft bushing (Figure • 2 (each side) spindle-shaft bearings—located under the pulley • 1 idler-arm-pivot bushings—located on the idler arm Figure 43 Figure 41 Figure 44 Side Lift Assemblies • 6 main lift-arm bushings (Figure 42 Figure •...
-
Page 40: Engine Maintenance
Engine Maintenance Engine Safety Shut off the engine before checking the oil or adding oil to the crankcase. Servicing the Air Cleaner Service Interval: Before each use or daily—Check the air-cleaner indicator Every 50 hours—Inspect the air cleaner. Every 400 hours—Service the air cleaner (earlier if the air cleaner indicator shows red, and more frequently in extremely dirty or dusty conditions). -
Page 41: Checking The Engine-Oil Level
Preferred oil: SAE 15W-40 (above -18°C [0°F]) • Alternate oil: SAE 10W-30 (all temperatures) Note: Toro Premium Engine oil is available from your distributor in either 15W-40 or 10W-30 viscosity. See the Parts Catalog for part numbers. Note: The best time to check the engine oil is when the engine is cool before it has been started for the day. -
Page 42: Changing The Engine Oil And Filter
Changing the Engine Oil and Fuel System Filter Maintenance Service Interval: Every 250 hours Servicing the Fuel System 1. Start the engine and let it run 5 minutes to allow the oil to warm up. 2. Park the machine on a level surface, shut off the engine, Draining the Fuel Tank remove the key, and wait for all moving parts to stop before leaving the operating position. -
Page 43: Servicing The Water Separator
Servicing the Water Separator Electrical System Maintenance Service Interval: Before each use or daily—Drain water or other contaminants from the water separator. Electrical System Safety Every 400 hours • Disconnect the battery before repairing the machine. Service the water separator as shown in Figure Disconnect the negative terminal first and the positive last. -
Page 44: Servicing The Battery
Rinse with clear water. Coat the battery posts and cable connectors with Grafo 112X (skin-over) grease (Toro Part No. 505-47) or petroleum jelly to prevent corrosion. WARNING 1. -
Page 45: Locating The Fuses
Locating the Fuses Drive System Maintenance The traction-unit fuses are located under the power-center cover (Figure Figure 55, and Figure 56). Remove the 2 screws securing the power-center cover to the Adjusting the Traction-Pedal frame and remove the cover (Figure 54). -
Page 46: Changing The Planetary-Gear-Drive Oil
Note: The oil level should be at the bottom of the 6. Through the open hole, slowly fill the planetary with check-plug hole. 0.65 L (22 oz) of high quality SAE 85W-140 wt gear lube. 3. If the oil level is low, remove the plug at the 12 o’clock position and add oil until it begins to flow out of the Important: If the planetary fills before the 0.65 L hole at the 3 o’clock position. -
Page 47: Checking The Rear-Axle-Gearbox Lubricant
Checking the Rear-Axle-Gearbox Lubricant Service Interval: Every 400 hours The gearbox is filled with SAE 85W-140 gear lube. The capacity is 0.5 L (16 oz). Visually inspect for leaks daily. 1. Position the machine on a level surface. 2. Remove the check/fill plug from the left side of the gearbox and ensure that lubricant is up to the bottom of the hole (Figure... -
Page 48: Checking The Rear Wheel Toe-In
Checking the Rear Wheel Cooling System Toe-In Maintenance Service Interval: Every 800 hours Cooling System Safety 1. Measure the center-to-center distance (at axle height) at the front and rear of the steering tires. CAUTION Note: The front measurement must be 6 mm (1/4 inch) less than the rear measurement. -
Page 49: Servicing The Engine-Cooling System
Brake Maintenance Important: Do not use water only or alcohol/methanol base coolants, as this may cause damage. Adjusting the Service Brakes 4. Install the radiator cap and expansion-tank cap. Adjust the service brakes when there is more than 25 mm (1 Servicing the Engine-Cooling inch) of “free travel”... -
Page 50: Belt Maintenance
Belt Maintenance Servicing the Alternator Belt Service Interval: After the first 10 hours Every 100 hours Proper tension allows 10 mm (3/8 inch) of deflection when a force of 44 N∙m (10 ft-lb) is applied on the belt midway between the pulleys. If the deflection is not 10 mm (3/8 inch), loosen the alternator-mounting bolts (Figure... -
Page 51: Replacing The Blade-Drive Belt
Figure 71 1. Hydraulic motor 2. Mounting bolts Figure 70 5. Lift the motor off the mower deck and lay it on top 1. Belt 4. Belt guide of the mower deck. 2. Eye bolt 5. Flange nut 6. Remove the old belt from around the spindle pulleys 3. -
Page 52: Hydraulic System Maintenance
19 L (5 US gallon) pails or 208 L (55 US gallon) drums. See • Use cardboard or paper to find hydraulic leaks. the Parts Catalog or your Toro Distributor for part numbers) • Safely relieve all pressure in the hydraulic system... -
Page 53: Changing The Hydraulic Fluid
Service Interval: Every 800 hours Change the hydraulic fluid after every 800 operating hours, in normal conditions. If the fluid becomes contaminated, contact your local Toro distributor because the system must be flushed. Contaminated fluid looks milky or black when compared to clean oil. -
Page 54: Replacing The Hydraulic Filters
(Figure 75). The recommended Use Toro replacement filters Part No. 94-2621 for the rear counterbalance pressure is 2,241 kPa (325 psi). To adjust (mower deck) of the machine and Part No. 75-1310 for the the counterbalance pressure, loosen the locknut, rotate the front (charge) of the machine. -
Page 55: Mower Maintenance
Mower Maintenance 4. Sit on the seat, start the engine, and lower the mower deck until it is slightly off the floor. 5. Secure the height-of-cut chains to the rear of the Pivoting (Tilting) the Front mower deck. Mower Deck to the Upright 6. -
Page 56: Servicing The Caster-Arm Bushings
Adjusting the Wing Mower-Deck Pitch Service Interval: Every 800 hours 1. Remove the tensioning cap from the spindle shaft and slide the spindle out of the caster arm (Figure 78). Note: Position the shims, as required, to raise or lower the caster wheel until the mower deck has the correct pitch. -
Page 57: Blade Maintenance
Blade Maintenance Blade Safety DANGER A worn or damaged blade can break, and a piece of the blade could be thrown at you or bystanders, resulting in serious personal injury or death. Trying to repair a damaged blade may result in discontinued safety certification of the product. -
Page 58: Removing And Installing The Mower Blade(S)
Always use genuine blade—the sail and the cutting edge. Both cutting edges Toro replacement blades to ensure safety and optimum and the sail, which is the turned-up portion opposite of the performance. -
Page 59: Correcting A Mower-Deck Mismatch
Correcting a Mower-Deck Mismatch If there is mismatch between the blades, on a single mower deck, the grass will appear streaked when it is cut. This problem can be corrected by ensuring that the blades are straight and all of the blades are cutting on the same plane. 1. -
Page 60: Storage
B. Clean the battery, terminals, and posts with a wire brush and baking soda solution. C. Coat the cable terminals and battery posts with Grafo 112X skin-over grease (Toro Part No. 505-47) or petroleum jelly to prevent corrosion. D. Slowly recharge the battery every 60 days for 24 hours to prevent lead sulfation of the battery. - Page 61 Notes:...
- Page 62 Notes:...
- Page 63 The Way Toro Uses Information Toro may use your personal information to process warranty claims, to contact you in the event of a product recall and for any other purpose which we tell you about. Toro may share your information with Toro's affiliates, dealers or other business partners in connection with any of these activities. We will not sell your personal information to any other company.
- Page 64 Countries Other than the United States or Canada Customers who have purchased Toro products exported from the United States or Canada should contact their Toro Distributor (Dealer) to obtain guarantee policies for your country, province, or state. If for any reason you are dissatisfied with your Distributor's service or have difficulty obtaining guarantee information, contact the Toro importer.