Table of Contents
Advertisement
Advertisement
Table of Contents

Related Manuals for Blomberg TKF 1350


Summary of Contents for Blomberg TKF 1350
- Page 1 Condenser drier with heat pump TKF 1350 S Operating instructions...
-
Page 2: Table Of Contents
Dear customer, dear user of the Elektrabregenz-Dryer, We would kindly like to thank you for your purchase decision. For a user-friendly handling of the dryer, we would like to ask you to read the oper- ating instructions carefully. Please pay attention to the security infor- mation on the first pages of this manual and store it safely. -
Page 3: Safety Information
Safety information The safety of Electrabregenz electric ap- pliances conforms with the demands of appliance and product safety law, as well as of applicable technical regulations. Please note the following Safety recommendations: • In order for the dryer to develop its full potential, it is recommended to leave the dryer in its customary position for ap- proximately two hours prior to the initial... -
Page 4: Old Appliance
The plastic wrapping must not get into the hands of children! Risk of suffocation! Separate the packing material by type: • Styropor parts and plastic wrapping go to a valuable substance collection point • Battens go into bulky refuse. The packag- ing is not to be disposed of in the regular household refuse! Old appliance... -
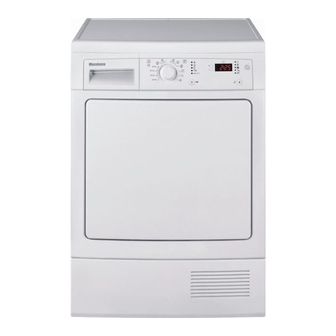
Page 5: Machine Overview
Machine Overview Display Program selector Program progress Indicator Leds indicator On/ Off Switch Time delay Water tank Start/Pause/Cancel Buzzer Cancel Button Button Display Electrical cable Type plate Fluff filter (in the door) Height adjustment Water drain hose Filter unit (behind the slit) feet... -
Page 6: Installation
Installation Proper location For drying the appliance requires a sufficient supply of fresh air. Install the dryer therefore in well- ventilated, if possible, low-dust rooms only. The vent slots of the dryer must not be blocked nor covered. The appliance must not be installed in rooms at risk of frost. -
Page 7: Electrical Connection
2. Connect the drain hose securely to the water drain connection. 3. Lay and connect the drain hose to the drainage. 4. Secure the drain hose against slipping when hanging it over the sink or tub. Electrical connection Connect the dryer to a properly installed earthed outlet, protected by a fuse of adequate capacity. -
Page 8: Small Introduction Into Textile Lore
Small introduction into textile lore Labels and symbols Care symbols: Check whether your textiles are suitable for drying. On the garment label, you find the following symbols: In principle, the drying in the condenser dryer with heat pump is possible. Please note that the dryer has special programs for wool, wool- and silk-containing fabrics! Regular drying... -
Page 9: What Must Not Be Dried
Empty pockets and remove all foreign objects. Close zippers, hooks and eyes. What must not be dried? Do not load dripping wet laundry! Your dryer can be damaged, ener- gy consumption rises significantly and the desired dryness cannot be attained. Sensitive textiles may crease. -
Page 10: Drying Programs
Drying programmes Turning the appliance on and off With the On/Off-switch, you switch the dryer on and off. Start/Pause/Cancel button With the Start/Pause/Cancel button you start or interrupt the program to remove laundry, change the program group or end the program at an early stage. Program selection The program selector can be turned either clockwise or counter-clockwise. -
Page 11: Timed Programs
wool and is also suitable for textiles with similar fabrics. Delicates: Gentle drying at low temperature with limited program duration. Textiles usually labeled “dry-cleaning” or “hand wash”, can be treated in the dryer with the help of new care-products. Airing / Refreshing: for white/colored cottons and easy-care textiles with normal loading. -
Page 12: Program Charts
Program charts Program group COTTON Care symbols Program Textile type EXTRA DRY thick or multi-layered textiles, that should be thoroughly dried LINEN CUPBOARD textiles of even thickness, that should be thoroughly dried IRONING DRY cotton or linen laundry of normal thickness Program group Easy-care Care symbols... -
Page 13: Optional Functions
Program Delicates This program permits the drying of very delicate laundry (e.g. sensitive underwear, microfibre, lycra). For additional protection of the textiles, it is recommended to dry them in a laundry bag. Textiles usually labeled or “hand wash” can be treated in the dryer with the help of new care-products. -
Page 14: Time-Delay
• Press the “+”-button to adjust the time- delay “1”, “2”, … until “19”, the “-“-button to reset from “19” to “1”. 2. Press the button “Start/Pause/Cancel”, the appropriate control indicator flashes, the time-delay starts. 3. During the time-delay period more laundry can be added. -
Page 15: The Fluff Filter
or with a soft, dry cloth. 4. Insert the fluff filter the right way round. The fluff filter/sponge filter unit Fluff balls, that are not retained by the main fluff filter, will be caught in the air tube by a second filter. This is made of a second fluff filter or a filter-mat made of sponge. -
Page 16: The Water Tank
Notes on the positioning of the sponge filter After cleaning, the sponge filter should be reinserted without any squeezing. Reinsertion should be done as indicated by the arrow below. Insert sponge filter without squeezing as indicated below Condenser- sponge filter An optimal retention of fluff balls is nec- essary for the regular operation of the condenser dryer with heat pump. -
Page 17: The Water Tank
via the included drain hose (see “Con- necting the drain hose”) Emptying the water tank: 1. Pull the water tank carefully out of the slit. Support the tank underneath with your second hand. 2. Open the latch of the water tank 3. -
Page 18: Do It Yourself, When
Do it yourself, when… Problem The drying operation is taking excep- tionally long The drying result is not satisfactory, the laundry is too wet Drier cannot be turned on or the pro- gram will not start Drier does not react to input Textiles are shrunk, felted, damaged Drum lighting does not work Indicator “Empty tank”... -
Page 19: Technical Specifications / Energy Consumption
Technical Specifications / Energy Consumption Load quantity (dry weight) White/colored cottons Easy-care Single piece Airing / Refreshing Wool / silk Delicates Drying method Dimensions Height / height for built-under installation Width Depth / depth for built-under installation Depth with door open Height adjustment of feet Weight, empty Admissible operating temperature...