Table of Contents

Related Manuals for Makita DUC101SF


Summary of Contents for Makita DUC101SF
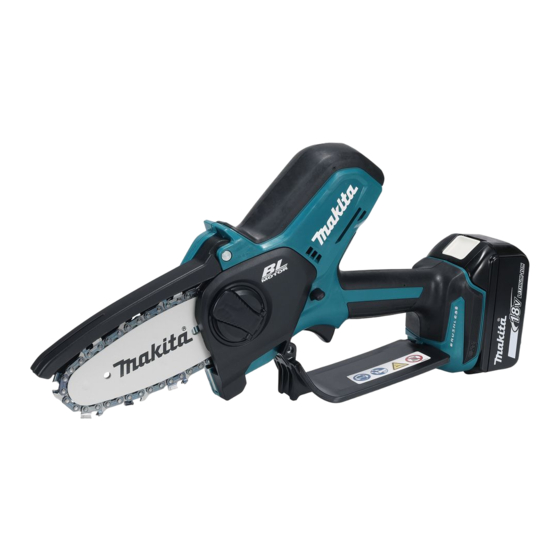
- Page 1 INSTRUCTION MANUAL MANUEL D'INSTRUCTION MANUAL DE INSTRUCCIONES Cordless Pruning Saw Scie d'élagage sans fil Sierra Inalámbrica para Podar DUC101 IMPORTANT: Read Before Using. IMPORTANT : Lire avant usage. IMPORTANTE: Lea antes de usar.
-
Page 2: Specifications
ENGLISH (Original instructions) SPECIFICATIONS Model: DUC101 Overall length 357 mm (14″) (without guide bar and battery) Rated voltage D.C. 18 V Net weight 1.1 kg (2.4 lbs) 1.6 - 2.0 kg (3.5 - 4.4 lbs) Standard guide bar length 100 mm (4″) Recommended guide bar length 100 mm (4″) Applicable saw chain type... -
Page 3: General Power Tool Safety Warnings
Recommended cord connected power source Portable power pack PDC01 • The cord connected power source(s) listed above may not be available depending on your region of residence. • Before using the cord connected power source, read instruction and cautionary markings on them. Power tools can produce electromagnetic SAFETY WARNINGS fields (EMF) that are not harmful to the user. - Page 4 Do not use the power tool if the switch does Do not expose a battery pack or tool to fire or not turn it on and off. Any power tool that cannot excessive temperature. Exposure to fire or tem- be controlled with the switch is dangerous and perature above 130 °C may cause explosion.
-
Page 5: Additional Safety Instructions
Carry the pruning saw with the pruning saw Only use replacement guide bars and saw • switched off and away from your body. When chains specified by the manufacturer. transporting or storing the pruning saw, Incorrect replacement guide bars and saw always fit the guide bar cover. - Page 6 12. Use the batteries only with the products feet per minute specified by Makita. Installing the batteries to non-compliant products may result in a fire, exces- sive heat, explosion, or leak of electrolyte. parts number of applicable saw chain and 13.
-
Page 7: Parts Description
10 °C - 40 °C (50 °F - 104 °F). Let causing fires, personal injury and damage. It will a hot battery cartridge cool down before also void the Makita warranty for the Makita tool and charging it. charger. -
Page 8: Functional Description
Indicating the remaining battery capacity FUNCTIONAL DESCRIPTION Only for battery cartridges with the indicator CAUTION: Always be sure that the tool is switched off and the battery cartridge is removed before adjusting or checking function on the tool. Installing or removing battery cartridge CAUTION: Always switch off the tool before... -
Page 9: Overheat Protection
Overheat protection ASSEMBLY When the tool or battery is overheated, the tool stops automatically. In this case, let the tool and battery cool CAUTION: Always be sure that the tool is before turning the tool on again. switched off and the battery cartridge is removed Overdischarge protection before carrying out any work on the tool. - Page 10 Remove the sprocket cover then remove the saw Align the hole on the guide bar with the pin on the tool chain and guide bar from the tool body. body, and then place the guide bar as shown in the figure. Installing the saw chain To install the saw chain, perform the following steps: Pull the lever up.
-
Page 11: Adjusting Saw Chain Tension
Fit one end of the saw chain on the top of the Turn the lever clockwise until the sprocket cover is guide bar. secured then return it to the original position. Fit the other end of the saw chain around the sprocket, then attach the guide bar to the tool body so that the hole on the guide bar is aligned with the pin on the body. -
Page 12: Operation
The oil delivery may otherwise be impaired. NOTICE: Use the saw chain oil exclusively for Makita tools or equivalent oil available in the market. NOTICE: Never use oil including dust and parti- cles or volatile oil. -
Page 13: Working With The Tool
Push the button on the oil tank cap so that the After refilling, hold the tool away from the material to button on the other side stands up, and then remove the be cut. Start it and wait until lubrication on saw chain is oil tank cap by turning it. -
Page 14: Maintenance
Discoloration, deformation or cracks may result. To maintain product SAFETY and RELIABILITY, repairs, any other maintenance or adjustment should be performed by Makita Authorized or Factory Service Centers, always using Makita replacement parts. Sharpening the saw chain Sharpen the saw chain when: •... -
Page 15: Cleaning The Guide Bar
— Sharpen the shortest cutter first. Then the length Cleaning the guide bar of this shortest cutter becomes the standard for all other cutters on the saw chain. Chips and sawdust will build up in the guide bar groove. — Guide the file as shown in the figure. -
Page 16: Storing The Tool
Always fit a new locking ring when replacing the Cleaning the oil discharge hole sprocket. Small dust or particles may be built up in the oil discharge hole during operation. These dust or particles may impair the oil to flow and cause an insufficient lubrication on the whole saw chain. -
Page 17: Instructions For Periodic Maintenance
Instructions for periodic maintenance To ensure long life, prevent damage and ensure the full functioning of the safety features, the following maintenance must be performed regularly. Warranty claims can be recognized only if this work is performed regularly and properly. Failure to perform the prescribed maintenance work can lead to accidents! The user of the tool must not perform maintenance work which is not described in the instruction manual. -
Page 18: Troubleshooting
Before asking for repairs, conduct your own inspection first. If you find a problem that is not explained in the manual, do not attempt to dismantle the tool. Instead, ask Makita Authorized Service Centers, always using Makita replace- ment parts for repairs.