
Related Manuals for Makita XGT GML01


Summary of Contents for Makita XGT GML01
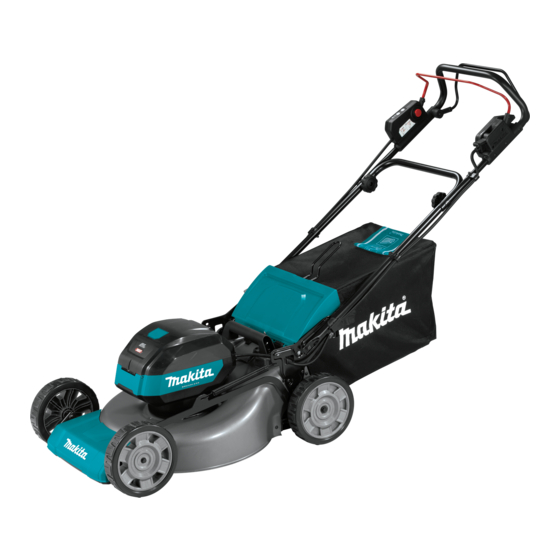
- Page 1 INSTRUCTION MANUAL MANUAL DE INSTRUCCIONES Cordless Lawn Mower Cortadora de Cesped GML01 IMPORTANT: Read Before Using. IMPORTANTE: Lea antes de usar.
-
Page 2: Specifications
ENGLISH (Original instructions) SPECIFICATIONS Model: GML01 Mowing width (blade diameter) 534 mm (21″) No load speed Normal mode 2,800 /min Soft no-load mode 2,300 - 2,800 /min Noise reduction mode 2,300 /min Part number of replacement Straight mower blade 191V96-5 mower blade Straight mower blade *1 191W87-2... -
Page 3: Safety Warnings
Don't Force Lawn Mower - It will do the job better SAFETY WARNINGS and safer at the rate for which it was designed. Don't Overreach - Keep proper footing and balance at all times. Do not mow near drop offs, IMPORTANT SAFETY INSTRUCTIONS ditches, or embankments. - Page 4 18. Don't grasp the exposed cutting blades or 12. Always allow the mower to cool down before cutting edges when picking up or holding the storing. appliance. 13. When servicing the blades be aware that, even 19. Never attempt to make cutting height adjust- though the power source is switched off, the ments while mower is running if the mower blades can still be moved.
- Page 5 Electrical and battery safety Symbols Do not dispose of the battery(ies) in a fire. The cell may explode. Check with local codes for The followings show the symbols used for tool. possible special disposal instructions. Do not open or mutilate the battery(ies). Released volts electrolyte is corrosive and may cause damage to the eyes or skin.
-
Page 6: Installing The Handle
Use of non-genuine Makita batteries, or batteries that have been altered, may result in the battery bursting causing fires, personal injury and damage. It will also void the Makita warranty for the Makita tool and charger. Tips for maintaining maximum... -
Page 7: Removing The Mulching Plug
Turn the knob 90° while pulling the knob on the Removing the mulching plug lower handle to release the locking pin. Perform the same procedure on the other side. Raise the handle, Open the rear cover. and then turn the knob on both sides 90°. Make sure that the knobs are securely fixed. - Page 8 Insert the frame into the grass basket as far as it Attach all the other clips as shown in the figure. will go while holding the handle of the frame. Make sure that all the clips are securely attached to the frame.
- Page 9 Hold the handle of the grass basket, and then Attach the mulching plug by pushing it as far as it hook the grass basket on the rod of the mower body as will go so that the protrusions on the mulching plug fit shown in the figure.
-
Page 10: Functional Description
Let the machine and battery(ies) cool down. If no improvement can be found by restoring protection system, then contact your local Makita Service Center. NOTICE: If the machine stops due to a cause not described above, refer to the section for troubleshooting. -
Page 11: Control Panel
Indicating the remaining battery Indicator lamps Remaining capacity capacity Lighted Blinking 75% to 100% 50% to 75% 25% to 50% 0% to 25% Charge the battery. The battery may have malfunctioned. Fig.18 ► 1. Battery indicator When the remaining battery capacity gets low, the bat- NOTE: Depending on the conditions of use and the tery indicator blinks on the applicable battery side. -
Page 12: Main Power Switch
This machine is equipped with the switch button. If you notice anything unusual with the switch button, stop the operation immediately and have it checked by your nearest Makita Authorized Service Center. Install the battery cartridges, and then close the battery cover. -
Page 13: Adjusting The Mowing Height
Hold the lower handle with one hand, and then move Adjusting the mowing height the mowing height adjusting lever with the other hand. WARNING: Never put your hand or leg under the mower body when adjusting the mowing height. WARNING: Always make sure that the lever fits in the groove properly before operation. -
Page 14: Adjusting The Handle Height
Adjusting the traveling speed NOTE: This indicator is a rough guide. Depending on the conditions of inside of the basket, this indicator may not work properly. Adjusting the handle height The handle height can be adjusted in two levels. Hold the lower handle, and then turn the knob 90° while pulling the knob on the lower handle to release the locking pin. -
Page 15: Electronic Function
If the machine consistently fails to quickly stop Fig.32 the mower blades after releasing the switch lever, have the machine serviced at Makita Authorized NOTE: When cutting long lawn or dense lawn, if the Service Center. unevenness in the length of lawn or poor finish is found... -
Page 16: Maintenance
Discoloration, deformation or cracks may result. To maintain product SAFETY and RELIABILITY, repairs, any other maintenance or adjustment should be performed by Makita Authorized or Factory Service Centers, always using Makita replacement parts. Maintenance Fig.35 Remove all the battery cartridges, and then close NOTE: Mowing long lawn to short length all at once the battery cover. -
Page 17: Carrying The Mower
Storing NOTICE: Do not pour water on the machine while the machine is in the upright position as shown in the figure. If the machine is in the upright position, CAUTION: When putting the machine in the water may pour down the motor unit, and cause a upright position, place the machine on a flat and malfunction of the machine. - Page 18 Turn the knob on both sides 90°. Make sure that Store the grass basket as shown in the figure. the knobs are securely fixed. Fig.43 ► 1. Grass basket Fig.41 ► 1. Knob Fig.44 ► 1. Grass basket NOTICE: Be careful not to pinch the cords when folding the handle.
- Page 19 Removing the mower blade Installing the mower blade Put the mower on its side so that the mowing WARNING: Install the mower blade carefully. height adjusting lever comes to the upper side. It has a top/bottom facing. To lock the blade, insert the pin into the hole on WARNING: Tighten the bolt clockwise firmly the mower body as far as it will go.
-
Page 20: Troubleshooting
Before asking for repairs, conduct your own inspection first. If you find a problem that is not explained in the manual, do not attempt to disassemble the machine. Instead, ask Makita Authorized Service Centers, always using Makita replacement parts for repairs. -
Page 21: Especificaciones
ESPAÑOL (Instrucciones originales) ESPECIFICACIONES Modelo: GML01 Amplitud de corte del césped (diámetro de la cuchilla) 534 mm (21″) Velocidad sin carga Modo normal 2 800 r/min Modo suave y sin carga 2 300 r/min - 2 800 r/min Modo de reducción de ruido 2 300 r/min Número de pieza de la cuchilla Cuchilla recta de la cortadora... -
Page 22: Advertencias De Seguridad
Revise cuidadosamente que las cuchillas o ADVERTENCIAS DE los pernos de las cuchillas no tengan grietas o daños antes de la operación. Reemplace inme- SEGURIDAD diatamente las cuchillas o los pernos de las cuchillas que presenten grietas o daños. Antes de la operación, inspeccione la corta- INSTRUCCIONES IMPORTANTES dora de césped o las cuchillas para detectar DE SEGURIDAD... - Page 23 12. Libere la palanca interruptora y espere a que Mantenimiento y almacenamiento la rotación de la cuchilla se detenga antes de Almacene la cortadora de césped en interiores cruzar avenidas, caminos, calles y cualquier cuando no esté en uso - Cuando no se esté área cubierta con grava.
- Page 24 Uso y cuidado de la herramienta a batería Seguridad eléctrica y de la batería No arroje la(s) batería(s) al fuego. La celda Evite una puesta en marcha accidental. Asegúrese de que el interruptor esté en podría explotar. Consulte los códigos locales para la posición apagada antes de conectar el ver si hay instrucciones especiales relativas al paquete de baterías, levantar la herramienta o...
- Page 25 Siga las regulaciones locales relacionadas al desecho de las baterías. Instrucciones importantes de 12. Utilice las baterías únicamente con los pro- ductos especificados por Makita. Instalar las seguridad para el cartucho de baterías en productos que no cumplan con los batería requisitos podría ocasionar un incendio, un calen-...
-
Page 26: Montaje
Makita, o de baterías alteradas, puede ocasio- nar que las baterías exploten causando un incendio, lesiones personales y daños. Asimismo, esto inva- lidará la garantía de Makita para la herramienta y el cargador Makita. Consejos para alargar al máximo la vida útil de la batería... - Page 27 Levante el tapón para mantillo ligeramente, y NOTA: Cuando tira de la perilla, dar soporte al mango luego quítelo. facilita liberar el pasador de bloqueo. NOTA: Al girar la perilla, tenga cuidado de no engan- char el cable en la perilla. Fig.5 ►...
- Page 28 Asegúrese de que no haya secciones flojas de las Instalación o remoción del canasto esquinas del canasto para césped. para césped Para instalar el canasto para césped, siga los pasos a continuación. Abra la cubierta posterior. Fig.8 Abra el sujetador de presión superior, y colóquelo sobre el marco.
-
Page 29: Descripción Del Funcionamiento
Enganche los orificios de la tolva de descarga a Acoplamiento del tapón para las protuberancias del cuerpo de la cortadora de cés- mantillo ped como se muestra en la figura. Abra la cubierta posterior y luego retire el canasto para césped. Fig.13 ►... -
Page 30: Protección Contra Sobrecarga
Deje que la máquina y la(s) batería(s) se enfríen. Si no hay ninguna mejora al restaurar el sistema de protección, comuníquese con su centro local de servi- cio Makita. AVISO: Si la máquina se detiene debido a una causa no descrita anteriormente, consulte la sec- ción de detección y solución de problemas. -
Page 31: Panel De Control
Indicación de capacidad restante de Luces indicadoras Capacidad restante la batería Iluminadas Apagadas Parpadeando 75% a 100% 50% a 75% 25% a 50% 0% a 25% Cargar la batería. La batería pudo haber funcionado Fig.18 mal. ► 1. Indicador de batería Cuando la capacidad restante de la batería esté... - Page 32 Si observa alguna anomalía con el botón interruptor, detenga la operación de inmediato y llévelo a su centro ADVERTENCIA: Siempre apague el interrup- de servicio autorizado Makita más cercano para su tor de alimentación principal cuando no lo vaya inspección. a utilizar.
- Page 33 Sujete el mango inferior con una mano, y luego mueva Ajuste de la altura de corte del la palanca de ajuste de la altura de corte del césped césped con la otra mano. ADVERTENCIA: Nunca coloque su mano o pierna debajo del cuerpo de la cortadora de cés- ped cuando esté...
- Page 34 Cuando el canasto para césped está casi lleno, el Ajuste la altura del mango, y luego gire la perilla indicador deja de oscilar mientras las cuchillas están en en ambos lados 90°. Asegúrese de que las perillas funcionamiento. En este caso, pare inmediatamente la estén bien fijadas.
-
Page 35: Operación
Makita. 35 ESPAÑOL... - Page 36 Las líneas centrales de las ruedas delanteras sirven Corte de césped largo como línea de guía para la amplitud de corte del cés- ped. Usando las líneas centrales como guía, corte el No intente cortar el césped largo en una sola pasada. césped en franjas.
-
Page 37: Mantenimiento
Fig.38 tenimiento o ajuste deberán ser realizadas en centros Traslado de la cortadora de césped de servicio autorizados o de fábrica Makita, empleando siempre repuestos Makita. Mantenimiento PRECAUCIÓN: Antes de transportar la cor- tadora de césped, asegúrese de quitar todos los... - Page 38 Gire la perilla a ambos lados a 90°. Asegúrese de Almacenamiento que las perillas estén bien fijadas. PRECAUCIÓN: Cuando coloque la máquina en posición vertical, colóquela sobre una super- ficie plana y estable. Si la máquina se coloca sobre una superficie inestable, la máquina puede caerse y causar lesiones.
- Page 39 Extracción de la cuchilla de la Almacene el canasto para césped como se mues- tra en la figura. cortadora de césped Coloque de lado la cortadora de césped de tal forma que la palanca de ajuste de la altura de corte del césped quede orientada hacia el lado de arriba.
-
Page 40: Resolución De Problemas
Antes de solicitar alguna reparación, primero realice una inspección por su cuenta. Si detecta algún problema que no esté explicado en el manual, no intente desarmar la máquina. En vez de esto, solicite la reparación a un centro de servicio autorizado de Makita, usando siempre piezas de repuesto Makita. Estado de la anomalía Causa probable (avería) -
Page 41: Accesorios Opcionales
PRECAUCIÓN: Estos accesorios o aditamen- tos están recomendados para utilizarse con su máquina Makita especificado en este manual. El uso de cualquier otro accesorio o aditamento puede ocasionar riesgo de lesiones personales. Use los accesorios o aditamentos sólo para los propósitos para los que fueron diseñados. - Page 44 Makita Corporation 3-11-8, Sumiyoshi-cho, 885993-947 Anjo, Aichi 446-8502 Japan GML01-1 EN, ESMX 20220721 www.makita.com...