
Related Manuals for Makita XML09 Series


Summary of Contents for Makita XML09 Series
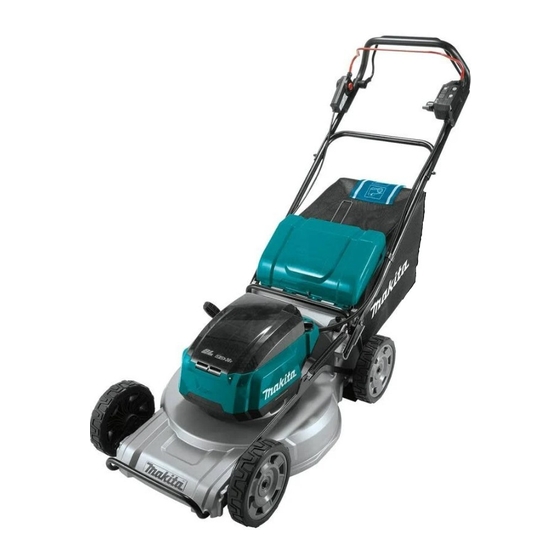
- Page 1 INSTRUCTION MANUAL MANUAL DE INSTRUCCIONES Cordless Lawn Mower Cortadora de Cesped XML09 IMPORTANT: Read Before Using. IMPORTANTE: Lea antes de usar.
-
Page 2: Specifications
ENGLISH (Original instructions) SPECIFICATIONS Model: XML09 Mowing width (blade diameter) 534 mm (21″) No load speed 2,300 /min Maximum speed 2,800 /min Part number of replacement mower blade 191D52-7 Dimensions L: 1,655 mm to 1,740 mm (65″ to 68-1/2″) (L x W x H) W: 590 mm (23-1/4″) H: 990 mm to 1,100 mm (39″... - Page 3 Watch for holes, ruts, bumps, rocks, or other 13. Do not operate machine without the entire hidden objects. Uneven terrain could cause a slip grass catcher, discharge guard, rear guard, or other safety protective devices in place and and fall accident. Tall grass can hide obstacles. working.
- Page 4 Maintenance and storage Battery tool use and care Prevent unintentional starting. Ensure the Store Idle Lawn Mower Indoors - When not in use, lawn mower should be stored in an indoor dry switch is in the off-position before connecting and locked-up place - out of reach of children. to battery pack, picking up or carrying the machine.
- Page 5 Use of non-genuine Makita batteries, or batteries that revolutions or reciprocation per minute have been altered, may result in the battery bursting causing fires, personal injury and damage. It will also void the Makita warranty for the Makita tool and charger. 5 ENGLISH...
-
Page 6: Installing The Handle
Tips for maintaining maximum Firmly tighten 4 bolts which were temporarily tightened in step 1 using box wrench 13. battery life Align the hole in the lower handle with the hole in Charge the battery cartridge before completely dis- the upper handle, then insert the bolt from inside, and charged. -
Page 7: Removing The Mulching Plug
Hold the handle of the grass basket, and then Removing the mulching plug hook the grass basket on the rod of the mower body as shown in the figure. Open the rear cover. ► 1. Rear cover ► 1. Rod 2. Handle 3. Grass basket Remove the mulching plug while holding down the To remove the grass basket, open the rear cover, and lever. -
Page 8: Functional Description
Align the tongue on the battery cartridge with the FUNCTIONAL slot on the machine, and then slide the cartridge until it locks in place with a little click. DESCRIPTION Installing or removing battery cartridge CAUTION: Always switch off the machine before installing or removing of the battery cartridge. -
Page 9: Overload Protection
Switching the battery cartridges Indicating the remaining battery capacity Only for battery cartridges with the indicator ► 1. Battery selection switch The machine uses 2 battery cartridges for operation at a time. Up to 4 battery cartridges can be installed to ►... -
Page 10: Control Panel
Makita Authorized Service Center. Mode switching button Install the battery cartridges. Insert the lock key, and then close the battery cover. -
Page 11: Adjusting The Mowing Height
Pull the switch lever toward you while holding down the switch button. Release the switch button as soon as the motor starts running. ► 1. Switch button 2. Switch lever ► 1. Mowing height adjusting lever The table below shows the relationship between the NOTE: If the lock key is not inserted, the power lamp number on the mower body and the approximate mow- blinks in green when you pull the switch lever. -
Page 12: Adjusting The Handle Height
Grass level indicator Adjusting the handle height Grass level indicator shows the volume of mowed CAUTION: Before removing the bolts, hold grass. When the grass basket is not full, the indicator the upper handle firmly. Otherwise, the handle may floats while the blades are running. fall and cause an injury. -
Page 13: Operation
This machine is equipped with an electric brake. If the machine consistently fails to quickly stop the mower blades after releasing the switch lever, have the machine serviced at Makita Authorized Service Center. The center lines of the front wheels are guidelines to mowing width. -
Page 14: Maintenance
Discoloration, deformation or cracks may result. To maintain product SAFETY and RELIABILITY, repairs, any other maintenance or adjustment should be performed by Makita Authorized or Factory Service Centers, always using Makita replacement parts. Maintenance Remove the lock key and battery cartridges, and then close the battery cover. -
Page 15: Carrying The Mower
Storing NOTICE: Do not wash the machine with high pressure water. Store mower indoors in a cool, dry and locked place. Check all nuts, bolts, knobs, screws, fasteners etc. Don't store the mower and charger in locations where for tightness. the temperature may reach or exceed 40 °C (104 °F). -
Page 16: Troubleshooting
Before asking for repairs, conduct your own inspection first. If you find a problem that is not explained in the manual, do not attempt to disassemble the machine. Instead, ask Makita Authorized Service Centers, always using Makita replacement parts for repairs. -
Page 17: Optional Accessories
Only use accessory or attach- ment for its stated purpose. If you need any assistance for more details regard- ing these accessories, ask your local Makita Service Center. • Mower blade •... -
Page 18: Especificaciones
ESPAÑOL (Instrucciones originales) ESPECIFICACIONES Modelo: XML09 Amplitud de corte del césped (diámetro de la cuchilla) 534 mm (21″) Velocidad sin carga 2 300 r/min Velocidad máxima 2 800 r/min Número de pieza de la cuchilla de repuesto de la cortadora de césped 191D52-7 Dimensiones Largo: 1 655 mm a 1 740 mm (65″... - Page 19 Use gafas de seguridad - Siempre utilice • Pare la cortadora de césped. Suelte el careta o máscara contra polvo si la operación es interruptor. Espere hasta que la cuchilla se detenga por completo. polvorienta. Los objetos que sean golpeados por la cuchi- •...
- Page 20 21. Evite usar la cortadora de césped en pasto Revise el canasto para césped con frecuencia húmedo. para ver si presenta desgaste o deterioro. Al almacenar el equipo, asegúrese siempre de 22. Pare la operación inmediatamente si nota algo vaciar el canasto para césped. Por seguridad, anormal.
- Page 21 Desconecte el paquete de baterías de la herra- No cargue la batería bajo la lluvia ni en lugares mienta antes de hacer cualquier ajuste, cam- mojados. biar accesorios o almacenar la herramienta. No cargue la batería en exteriores. Estas medidas de seguridad preventivas reducen No manipule el cargador, incluida la clavija el riesgo de poner en marcha la herramienta del cargador, ni los terminales con las manos...
- Page 22 Podría lesiones personales y daños. Asimismo, esto inva- correrse el riesgo de sobrecalentamiento, lidará la garantía de Makita para la herramienta y el posibles quemaduras e incluso explosión. cargador Makita. En caso de que ingresen electrolitos en sus Consejos para alargar al máximo...
-
Page 23: Montaje
Alinee el orificio del mango inferior con el orificio MONTAJE del mango superior, a continuación inserte el perno por el interior, luego apriete la tuerca por el exterior con la llave de bujías 13. Repita el mismo procedimiento en el ADVERTENCIA: Asegúrese siempre de que otro lado. - Page 24 Sostenga el mango del canasto para césped y Extracción del tapón para mantillo luego enganche el canasto para césped en la barra del cuerpo de la cortadora de césped tal como se muestra Abra la cubierta posterior. en la figura. ►...
-
Page 25: Descripción Del Funcionamiento
Alinee la lengüeta sobre el cartucho de batería DESCRIPCIÓN DEL con la ranura en la máquina y luego deslice el cartucho hasta que quede asegurado en su lugar y se escuche FUNCIONAMIENTO un clic. Instalación o extracción del cartucho de batería PRECAUCIÓN: Apague siempre la máquina antes de instalar o extraer el cartucho de batería. -
Page 26: Protección Contra Sobrecarga
Cambio de los cartuchos de batería Indicación de la capacidad restante de la batería Únicamente para cartuchos de batería con el indicador ► 1. Interruptor de selección de baterías La máquina utiliza 2 cartuchos de batería para operar a la vez. Se pueden instalar hasta cuatro cartuchos de batería en la máquina. -
Page 27: Panel De Control
Botón de conmutación de modo Panel de control Puede conmutar el modo de operación pulsando el El panel de control contiene el interruptor de alimenta- botón de conmutación de modo. Cuando se enciende, ción principal, el botón de conmutación de modo, y el la máquina arranca en el modo normal. - Page 28 Si observa alguna césped anomalía con cualquiera de la llave de cierre o el inte- rruptor, detenga la operación de inmediato y llévelos a su centro de servicio autorizado de Makita más cercano ADVERTENCIA: Nunca coloque su mano o para su inspección.
- Page 29 Sujete la empuñadura delantera o el mango inferior con Cuando el canasto para césped está casi lleno, el una mano, y luego mueva la palanca de ajuste de la indicador deja de oscilar mientras las cuchillas están en altura de corte del césped con la otra mano. funcionamiento.
-
Page 30: Operación
Para disminuir la velocidad, tire servicio a un centro de servicio autorizado de Makita. de la palanca hacia usted y, para aumentar la veloci- dad, gire la palanca hacia adelante. - Page 31 AVISO: El uso de la cortadora de césped con el canasto para césped lleno impide una rotación uniforme de la cuchilla e implica una sobrecarga del motor que puede causar alguna avería. Corte de césped largo No intente cortar el césped largo en una sola pasada. Procure hacerlo en diferentes pasos.
-
Page 32: Mantenimiento
Para mantener la SEGURIDAD y FIABILIDAD del producto, las reparaciones, y cualquier otra tarea de mantenimiento o ajuste deberán ser realizadas en centros de servicio autorizados o de fábrica Makita, empleando siempre repuestos Makita. Mantenimiento Retire la llave de cierre y los cartuchos de batería, y luego cierre la cubierta de la batería. - Page 33 Extracción de la cuchilla de la Instalación de la cuchilla de la cortadora de césped cortadora de césped Coloque de lado la cortadora de césped de tal ADVERTENCIA: Instale la cuchilla de la forma que la palanca de ajuste de la altura de corte del cortadora de césped con cuidado.
-
Page 34: Resolución De Problemas
Antes de solicitar alguna reparación, primero realice una inspección por su cuenta. Si detecta algún problema que no esté explicado en el manual, no intente desarmar la máquina. En vez de esto, solicite la reparación a un centro de servicio autorizado de Makita, usando siempre piezas de repuesto Makita. Estado de la anomalía Causa probable (avería) - Page 36 Makita Corporation 3-11-8, Sumiyoshi-cho, 885774B949 Anjo, Aichi 446-8502 Japan XML09-1 EN, ESMX 20200116 www.makita.com...