
Related Manuals for Makita XML05


Summary of Contents for Makita XML05
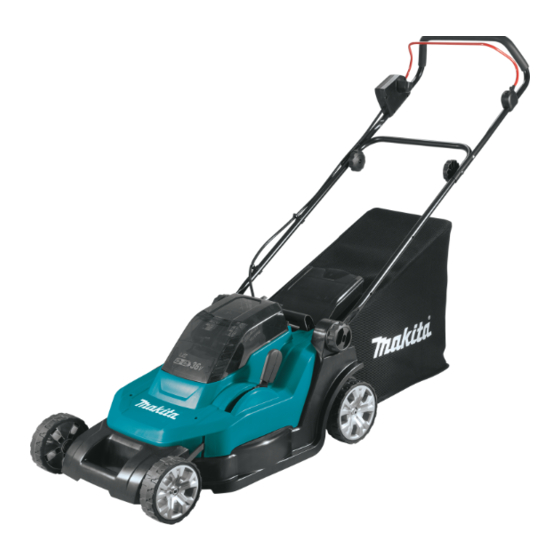
- Page 1 INSTRUCTION MANUAL MANUAL DE INSTRUCCIONES Cordless Lawn Mower Cortadora de Cesped XML05 IMPORTANT: Read Before Using. IMPORTANTE: Lea antes de usar.
-
Page 2: Specifications
ENGLISH (Original instructions) SPECIFICATIONS Model: XML05 Mowing width (blade diameter) No load speed 3,600 /min Part number of replacement mower blade 191D43-8 Dimensions during operation (L x W x H) when stored (without grass basket) Rated voltage D.C. 36 V Net weight 17.1 - 17.8 kg (37.7 - 39.2 lbs) - Page 3 Check the blades or blade bolts carefully for 15. Shut the motor off and wait until the blade cracks or damage before operation. Replace comes to a complete stop before removing the cracked or damaged blades or blade bolts grass catcher. Beware that the blades coast after immediately.
- Page 4 Never remove or tamper with safety devices. Do not modify or attempt to repair the machine or the battery pack except as indicated in the Check their proper operation regularly. Never do anything to interfere with the intended instructions for use and care. function of a safety device or to reduce the Electrical and battery safety protection provided by a safety device.
-
Page 5: Installing The Battery Cover
13. If the tool is not used for a long period of time, the battery must be removed from the tool. SAVE THESE INSTRUCTIONS. 1. Protrusion 2. Hole 3. CAUTION: Only use genuine Makita batteries. Use of non-genuine Makita batteries, or batteries that charger. 5 ENGLISH... -
Page 6: Installing The Handle
Align the screw holes of upper handle and lower cover and push it. handle. Secure them with the clamping screws and nuts. 1. Clamping nut 2. Clamping screw NOTE: Attach the holders to the handle. Position the 1. Pivot point 2. Installing the handle 1. -
Page 7: Installing The Grass Basket
Attaching the mulching plug Optional accessory Open the rear cover, and then remove the grass basket. 1. Mulching plug 2. Handle Installing the grass basket 1. Rear cover 2. Grass basket Open the rear cover. 1. Rear cover Hook the grass basket on the rod of the mower 1. -
Page 8: Functional Description
FUNCTIONAL as far as it will go. DESCRIPTION Installing or removing battery cartridge CAUTION: Always switch off the machine before installing or removing of the battery cartridge. CAUTION: Make sure that you lock the battery cover before use. CAUTION: Always install the battery cartridge fully until the red indicator cannot be seen. - Page 9 Indicating the remaining battery capacity NOTE: Depending on the conditions of use and the Switch action WARNING: Before installing the battery car- tridge, always check to see that the switch lever actuates properly and returns to the original position when released. Operating a machine with a NOTE: The mower does not start without pressing the switch button even the switch lever is pulled.
-
Page 10: Operation
Adjusting the mowing height OPERATION WARNING: Never put your hand or leg under Mowing the mower body when adjusting the mowing height. WARNING: Always make sure that the lever WARNING: Before mowing, clear away sticks and stones from mowing area. Furthermore, clear away any weeds from mowing area in advance. -
Page 11: Maintenance
The outside edges of the front wheels are guidelines Release the switch lever. to mowing width. Using the outside edges of the front Open the rear cover and take out the grass basket 1. Mowing width 2. Overlapping area 3. Outside 1. - Page 12 Store the grass basket between the handle and Storage WARNING: When carrying or storing the mower, do not hold the folded handles but the front grip of the mower. Holding the folded handles Don't store the mower and charger in locations where 1.
-
Page 13: Troubleshooting
Replace the blade. NOTE: OPTIONAL ACCESSORIES CAUTION: These accessories or attachments MAKITA LIMITED WARRANTY are recommended for use with your Makita tool accessories or attachments might present a risk of for its stated purpose. United States of America: www.makitatools.com • Mower blade Canada: www.makita.ca... -
Page 14: Especificaciones
ESPAÑOL (Instrucciones originales) ESPECIFICACIONES Modelo: XML05 Amplitud de corte del césped (diámetro de la cuchilla) Velocidad sin carga 3 600 r/min Número de pieza de la cuchilla de repuesto de la cortadora de 191D43-8 césped Dimensiones durante la operación (La x An x Al) durante el almacenamiento (sin el canasto para césped) - Page 15 Los objetos que sean golpeados por la cuchi- lla de la cortadora de césped pueden causar usar la cortadora de césped. Remplace la lesiones personales graves. El césped debe cuchilla si presenta algún tipo de daño. ser examinado cuidadosamente y despejado 10.
- Page 16 Mantenimiento y almacenamiento Uso y cuidado de la herramienta a batería Almacene la cortadora de césped en interiores Evite una puesta en marcha accidental. cuando no esté en uso - Cuando no se esté Asegúrese de que el interruptor esté en utilizando, la cortadora de césped deberá...
- Page 17 Seguridad eléctrica y de la batería Símbolos No arroje la(s) batería(s) al fuego. La celda para la herramienta. desecho. volts o voltios No abra ni dañe la(s) batería(s). Los electrolitos corriente directa o continua se llegan a tragar. No cargue la batería bajo la lluvia ni en lugares mojados.
-
Page 18: Montaje
GUARDE ESTAS INSTRUCCIONES. PRECAUCIÓN: Utilice únicamente baterías originales de Makita. cargador Makita. Consejos para alargar al máximo la vida útil de la batería 1. Protuberancia 2. Cargue el cartucho de batería antes de que se descargue completamente. - Page 19 Antes de realizar la primera operación, com- pruebe que el punto de pivote de la cubierta de la bate- superior con aquellos en el mango inferior. Asegúrelos abrirá hasta que la palanca de bloqueo de la cubierta NOTA: 1. Punto de pivote 2. Palanca de bloqueo de la forma que no se desprenda de su mano.
- Page 20 Acoplamiento del tapón para mantillo Accesorio opcional para césped. 1. Tapón para mantillo 2. Mango Instalación del canasto para césped 1. Cubierta posterior 2. Canasto para césped Abra la cubierta posterior. luego insértelo en el cuerpo de la cortadora de césped, 1.
-
Page 21: Descripción Del Funcionamiento
Inserte la llave de cierre hasta el fondo en el lugar DESCRIPCIÓN DEL FUNCIONAMIENTO Instalación o extracción del cartucho de batería PRECAUCIÓN: Apague siempre la máquina antes de instalar o extraer el cartucho de batería. PRECAUCIÓN: Asegúrese de haber asegu- rado la cubierta de la batería antes de utilizar el equipo. - Page 22 En este caso, aumente la altura de corte. Esta cortadora de césped está equipada con un a su centro de servicio autorizado Makita más cercano para su inspección. 1. Luces indicadoras 2. nos segundos.
-
Page 23: Operación
Uso del tapón para mantillo interruptora. Accesorio opcional El tapón para mantillo permite echar el pasto cortado al suelo sin recolectarlo en el canasto para césped. Cuando opere la máquina con el tapón para mantillo, asegúrese de retirar el canasto para césped. AVISO: Cuando utilice la máquina con el tapón para mantillo, asegúrese de que la longitud total... - Page 24 Cambie la dirección del corte de césped cada vez para evitar que el patrón de grano del césped se forme sólo en una dirección. el césped. La referencia de velocidad del corte es de aproximada- Revise periódicamente el canasto para césped para ver el nivel de mente 1 metro (3,3 ft.) por 4 segundos.
-
Page 25: Mantenimiento
Nunca use gasolina, bencina, diluyente cuerpo de la cortadora de césped. (tíner), alcohol o sustancias similares. Puede que esto ocasione grietas o descoloramiento. de servicio autorizados o de fábrica Makita, empleando siempre repuestos Makita. Mantenimiento Quite la llave de cierre. Almacénela en un lugar seguro fuera del alcance de los niños. - Page 26 Almacene el canasto para césped entre el mango Gire el perno con la llave en sentido inverso al de 1. Canasto para césped 1. Cuchilla de la cortadora de césped 2. Destornillador 3. Llave NOTA: Cuando coloque la cortadora de césped en Retire el perno, la brida exterior, la cuchilla de la empuñadura delantera de la cortadora de césped.
-
Page 27: Resolución De Problemas
Antes de solicitar alguna reparación, primero realice una inspección por su cuenta. Si detecta algún problema que no esté explicado en el manual, no intente desensamblar la herramienta. En vez de esto, solicite la reparación a un centro de servicio autorizado de Makita, usando siempre piezas de repuesto Makita. Estado de la anomalía Causa probable (avería) - Page 28 Makita Corporation 3-11-8, Sumiyoshi-cho, 885748-940 XML05-1 Anjo, Aichi 446-8502 Japan EN, ESMX 20190903 www.makita.com...