Makita DLM461 Instruction Manual
Cordless lawn mower
Hide thumbs
Also See for DLM461:
- Instruction manual (125 pages) ,
- Instruction manual (113 pages) ,
- Instruction manual (93 pages)
Table of Contents
Advertisement
Advertisement
Table of Contents

Related Manuals for Makita DLM461


Summary of Contents for Makita DLM461
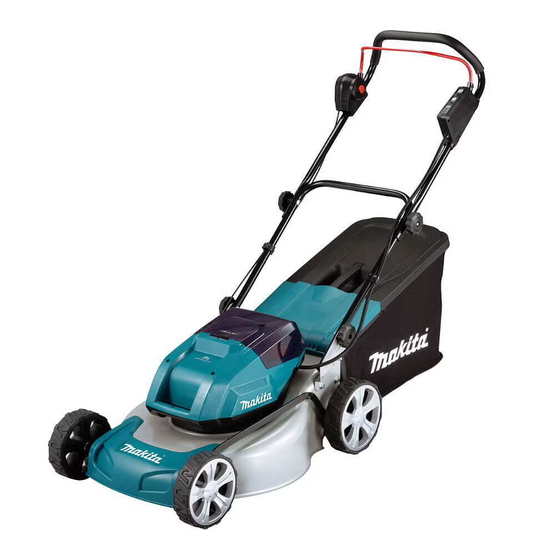
- Page 1 INSTRUCTION MANUAL Cordless Lawn Mower DLM460 DLM461 Read before use.
-
Page 2: Specifications
SPECIFICATIONS Model: DLM460 DLM461 Mowing width (blade diameter) 460 mm No load speed 2,500 min Maximum speed 3,300 min Part number of replacement mower blade 199367-2 199368-0 Dimensions during operation L: 1,319 mm to 1,518 mm (L x W x H) - Page 3 Always wear protective goggles to protect 16. Keep hands and feet away from rotating your eyes from injury when using power tools. blades. Caution - Blades coast after the mower The goggles must comply with ANSI Z87.1 in is switched off. the USA, EN 166 in Europe, or AS/NZS 1336 17.
- Page 4 54. When washing the machine, be sure to remove 32. Do not start the mower when standing in front of the discharge opening. the battery and lock key and close the battery cover, and pour water toward the bottom of the 33.
-
Page 5: Installing The Handle
12. Use the batteries only with the products specified by Makita. Installing the batteries to non-compliant products may result in a fire, exces- sive heat, explosion, or leak of electrolyte. SAVE THESE INSTRUCTIONS. CAUTION: Only use genuine Makita batteries. Use of non-genuine Makita batteries, or batteries that have been altered, may result in the battery bursting causing fires, personal injury and damage. It will also void the Makita warranty for the Makita tool and charger. Tips for maintaining maximum battery life Charge the battery cartridge before completely discharged. - Page 6 Hold the upper handle firmly so that it does not drop off your hand. Otherwise, the handle may fall and cause an injury. ► 1 . Lever 2. Mulching attachment Attach holder A and holder B to the handle. For DLM461 Position the cords as shown in the figure. Open the rear cover. ► 1 . Cord 2. Holder A 3. Holder B ► 1 . Rear cover NOTE: When attaching holder A, be sure to fix the cord with the holder as shown in the figure.
-
Page 7: Installing The Grass Basket
Open the rear cover. ► 1 . Lever 2. Mulching attachment ► 1 . Rear cover For DLM461 Hook the grass basket on the rod of the mower Open the rear cover, and then remove the grass body as shown in the figure. -
Page 8: Functional Description
Attach the mulching attachment while pulling the To install the battery cartridge; lever, and then release the lever to lock the mulching Pull up the locking lever, and then open the battery cover. attachment. ► 1 . Battery cover 2. Locking lever Align the tongue on the battery cartridge with the slot on the mower then slide the cartridge until it locks in place with a little click. ► 1 . Mulching attachment 2. Lever FUNCTIONAL DESCRIPTION Installing or removing battery... -
Page 9: Overload Protection
Tool / battery protection system Indicator lamps Remaining capacity The tool is equipped with a tool/battery protection sys- tem. This system automatically cuts off power to the Lighted Blinking motor to extend tool and battery life. The tool will auto- The battery matically stop during operation if the tool or battery is may have placed under one of the following conditions: malfunctioned. Overload protection When the battery is operated in a manner that causes it to NOTE: Depending on the conditions of use and the draw an abnormally high current, the tool automatically stops ambient temperature, the indication may differ slightly and the main power lamp blinks in green. In this situation, from the actual capacity. -
Page 10: Adjusting The Mowing Height
Always make sure that the lever fits in the groove properly before operation. For DLM460 0% - 20% The mowing height can be adjusted in the range of between 20 mm and 75 mm. For DLM461 Switch action The mowing height can be adjusted in the range of between 16 mm and 71 mm. Remove the lock key, and then pull the mowing height WARNING: Before installing the battery car-... -
Page 11: Electronic Function
Using mulching attachment The mulching attachment allows you to return the cut grass to the ground without gathering the cut grass in the grass basket. When you operate the machine with the mulching attachment, be sure to remove the grass basket. Electronic function The machine is equipped with the electronic functions for easy operation. • Constant speed control Electronic speed control for obtaining constant ► 1 . Mowing height adjusting lever 2. Front grip speed. Possible to get fine finish, because the rotating speed is kept constant even under load NOTE: The mowing height figures should be used... -
Page 12: Emptying The Grass Basket
Mowing a long-grass lawn Do not try to cut long grass all at once. Instead, mow the lawn in steps. Leave a day or two between mowings until the lawn becomes evenly short. The center lines of the front wheels are guidelines to mowing width. Using the center lines as guidelines, mow in strips. Overlap by one half to one third the previ- ous strip to mow the lawn evenly. NOTE: Mowing long grass to a short length all at once may cause the grass to die. The cut grass may also block up inside of the mower body. Emptying the grass basket WARNING: To reduce a risk of accident, reg- ularly check the grass basket for any damage or weakened strength. -
Page 13: Maintenance
Never use gasoline, benzine, thinner, alcohol or the like. Discoloration, deformation or cracks may result. To maintain product SAFETY and RELIABILITY, ► 1 . Rear cover 2. Handle 3. Grass basket repairs, any other maintenance or adjustment should be performed by Makita Authorized or Factory Service Loosen the thumb nuts and fold the upper handle. Centers, always using Makita replacement parts. Maintenance Remove the lock key and battery cartridges, and then close the battery cover. - Page 14 For DLM461 Removing or installing the mower blade Put the mower on its side so that the mowing height adjusting lever comes to the upper side. Turn the bolt counterclockwise with the wrench WARNING: Always remove the lock key and while holding the base plate. battery cartridge when removing or installing the blade. Failure to remove the lock key and battery cartridge may cause a serious injury.
-
Page 15: Troubleshooting
For DLM461 To remove the individual blade, turn the bolt counter- clockwise with the wrench while holding the base plate. NOTICE: When installing the mower blade, slide the mower blade as shown in the figure so that the protrusions touch the mower blade. ► 1 . Base plate 2. Mower blade 3. Wrench... -
Page 16: Optional Accessories
OPTIONAL ACCESSORIES CAUTION: These accessories or attachments are recommended for use with your Makita tool specified in this manual. The use of any other accessories or attachments might present a risk of injury to persons. Only use accessory or attachment for its stated purpose. If you need any assistance for more details regard- ing these accessories, ask your local Makita Service Center. • Mower blade • Makita genuine battery and charger NOTE: Some items in the list may be included in the tool package as standard accessories. They may...