
Related Manuals for Makita GAU02


Summary of Contents for Makita GAU02
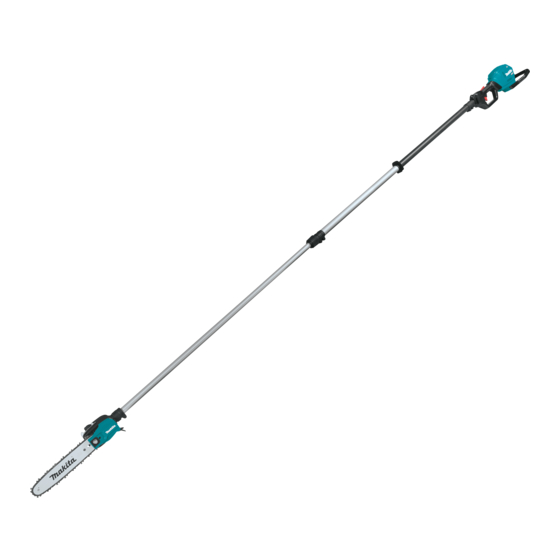
- Page 1 INSTRUCTION MANUAL MANUAL DE INSTRUCCIONES Cordless Telescopic Pole Saw Sierra de Extensión Telescópica Inalámbrica GAU02 IMPORTANT: Read Before Using. IMPORTANTE: Lea antes de usar.
-
Page 2: Specifications
ENGLISH (Original instructions) SPECIFICATIONS Model: GAU02 Overall length 2,516 - 3,748 mm (without guide bar and battery) (99″ - 147-1/2″) Rated voltage D.C. 36 V - 40 V max Net weight 7.8 - 8.4 kg (17.2 - 18.5 lbs) Standard guide bar length 250 mm (10″) -
Page 3: Safety Warnings
Recommended cord connected power source Portable power pack PDC01 / PDC1200 • The cord connected power source(s) listed above may not be available depending on your region of residence. • Before using the cord connected power source, read instruction and cautionary markings on them. Saw chain, guide bar, and sprocket combination Saw chain type 90PX... - Page 4 Do not Force Appliance - It will do the job better 23. Remove or disconnect battery before ser- and with less likelihood of a risk of injury at the vicing, cleaning or removing material from the appliance. Such preventive safety mea- rate for which it was designed.
- Page 5 10. If the tool gets heavy impact or fall, check the cartridge. condition before continuing work. If there is Before handling the saw chain or adjusting the any damage or doubt, ask Makita authorized chain tension, wear protective gloves. service center for the inspection and repair. 5 ENGLISH...
- Page 6 19. Before cutting limbs, keep an escape area poor, ask Makita authorized service center to away from the falling limb. First, clear sharpen it or replace it with new one. obstructs such as limbs and branches from Do not attempt any maintenance or repair the work area.
- Page 7 Under abusive conditions, liquid may be Symbols ejected from the battery; avoid contact. If con- tact accidentally occurs, flush with water. If The followings show the symbols used for tool. liquid contacts eyes, seek medical help. Liquid ejected from the battery may cause irritation or volts burns.
- Page 8 Use of non-genuine Makita batteries, or batteries that have been altered, may result in the battery bursting causing fires, personal injury and damage. It will also void the Makita warranty for the Makita tool and charger. Tips for maintaining maximum...
-
Page 9: Parts Description
PARTS DESCRIPTION Fig.1 Main power lamp Main power switch Hanger Lock-off lever Battery cartridge Switch trigger Rear grip Saw chain Guide bar Oil tank cap Lock ring Retaining nut Chain adjusting screw Guide bar cover Front grip 9 ENGLISH... -
Page 10: Functional Description
Indicating the remaining battery capacity FUNCTIONAL DESCRIPTION Press the check button on the battery cartridge to indi- cate the remaining battery capacity. The indicator lamps light up for a few seconds. CAUTION: Always be sure that the tool is switched off and the battery cartridge is removed before adjusting or checking function on the tool. -
Page 11: Overheat Protection
Release the switch trigger to stop. Let the machine and battery(ies) cool down. If no improvement can be found by restoring protection system, then contact your local Makita Service Center. Main power switch WARNING: Always turn off the main power switch when not in use. - Page 12 Insert the pipe into the tool body all the way, and ASSEMBLY then align the hole on the pipe with the hole on the tool body. CAUTION: Always be sure that the tool is switched off and the battery cartridge is removed before carrying out any work on the tool.
- Page 13 Loosen the lock ring by turning the lock ring coun- Installing or removing saw chain terclockwise, then extend the pipe approximately 10 cm (3-15/16″) or more, and then tighten the lock ring by CAUTION: turning the lock ring clockwise. The saw chain and the guide bar are still hot just after the operation.
-
Page 14: Removing The Saw Chain
Removing the saw chain Attach the guide bar to the tool body, aligning the hole on the guide bar with the pin on the tool body. To remove the saw chain, perform the following steps: Loosen the chain adjusting screw, then the retain- ing nut. -
Page 15: Operation
The oil delivery may otherwise be impaired. NOTICE: Use the saw chain oil exclusively for Makita chain saws or equivalent oil available in the market. NOTICE: Never use oil including dust and parti- cles or volatile oil. - Page 16 Makita. If you put on the shoulder harness included in the tool package and the shoulder harness of the back-...
-
Page 17: Working With The Tool
Adjust the shoulder harness to a comfortable Working with the tool working position. CAUTION: Keep all parts of the body away from the saw chain when the motor is operating. CAUTION: Hold the tool firmly with both hands when the motor is running. CAUTION: Do not overreach. - Page 18 When cutting thick branches, first make a shallow Using the tool with portable power undercut and then make the finish cut from the top. pack Optional accessory Use the hanging band when you use the tool with porta- ble power pack. Attaching the hanging band Attach the hooks of the hanging band to the rings of the shoulder harness or waist belt as shown in the...
-
Page 19: Maintenance
Never use gasoline, benzine, thinner, alcohol or the like. Discoloration, deformation or cracks may result. To maintain product SAFETY and RELIABILITY, repairs, any other maintenance or adjustment should be performed by Makita Authorized or Factory Service Centers, always using Makita replacement parts. 19 ENGLISH... -
Page 20: Sharpening The Saw Chain
— The sharpening angle of 30° must be the same on Sharpening the saw chain all cutters. Different cutter angles cause the chain to run roughly and unevenly, accelerate wear, and Sharpen the saw chain when: lead to chain breaks. •... -
Page 21: Cleaning The Guide Bar
Before fitting a new saw chain, check the condition of Cleaning the sprocket cover the sprocket. If the sprocket is worn or damaged, ask Makita Authorized Service Centers for replacement. Chips and saw dust will accumulate inside of the sprocket cover. Remove the sprocket cover and saw chain from the tool then clean the chips and saw dust. -
Page 22: Storing The Tool
Storing the tool Clean the tool before storing. Remove any chips and sawdust from the tool after removing the sprocket cover. After cleaning the tool, run it under no load to lubri- cate the saw chain and guide bar. Cover the guide bar with the guide bar cover, and then shorten the pipe. -
Page 23: Troubleshooting
Before asking for repairs, conduct your own inspection first. If you find a problem that is not explained in the manual, do not attempt to dismantle the tool. Instead, ask Makita Authorized Service Centers, always using Makita replace- ment parts for repairs. -
Page 24: Especificaciones
ESPAÑOL (Instrucciones originales) ESPECIFICACIONES Modelo: GAU02 Longitud total 2 516 - 3 748 mm (sin barra de guía y batería) (99″ - 147-1/2″) Tensión nominal c.c. 36 V - 40 V máx. Peso neto 7,8 kg - 8,4 kg (17,2 lbs - 18,5 lbs) Longitud de la barra de guía estándar... -
Page 25: Advertencias De Seguridad
Fuente de alimentación conectada por cable recomendada Unidad portátil de alimentación eléctrica PDC01 / PDC1200 • La o las fuentes de alimentación conectadas por cable enumeradas arriba podrían no estar disponibles depen- diendo de su área de residencia. • Antes de utilizar la fuente de alimentación conectada por cable, lea las instrucciones e indicaciones de precaución sobre ellas. Combinación de cadena de la sierra, barra de guía y pieza dentada Tipo de cadena de la sierra 90PX... - Page 26 No agarre las cuchillas ni los bordes de corte 20. Utilice siempre ambas manos cuando opere la expuestos al levantar o sostener el aparato. podadora de extensión. Sostenga la podadora de extensión con las dos manos para evitar la No fuerce el aparato - Éste realizará la tarea pérdida de control.
- Page 27 33. Este aparato no está diseñado para ser utili- Opere la herramienta únicamente en condicio- zada por personas (incluidos niños) con dis- nes de buena visibilidad y a la luz del día. No capacidades físicas, sensoriales o mentales, o opere la herramienta en la oscuridad o la niebla. que carezcan de experiencia y conocimientos.
- Page 28 Makita. abrir el corte de sierra y libere la cadena de la No toque el cabezal de la herramienta. El sierra.
- Page 29 Siempre utilice piezas de repuesto y acceso- que en las instrucciones para el uso y cuidado. rios originales de Makita solamente. El uso de Seguridad eléctrica y de la batería piezas o accesorios suministrados por un tercero podría provocar fallas en la herramienta, daños...
- Page 30 12. Utilice las baterías únicamente con los pro- batería ductos especificados por Makita. Instalar las baterías en productos que no cumplan con los Antes de utilizar el cartucho de batería, lea requisitos podría ocasionar un incendio, un calen- todas las instrucciones e indicaciones de tamiento excesivo, una explosión o una fuga de...
-
Page 31: Descripción De Las Piezas
10 °C - 40 °C (50 °F - 104 °F). lesiones personales y daños. Asimismo, esto inva- Si un cartucho de batería está caliente, déjelo lidará la garantía de Makita para la herramienta y el enfriar antes de cargarlo. cargador Makita. -
Page 32: Descripción Del Funcionamiento
DESCRIPCIÓN DEL PRECAUCIÓN: Introduzca siempre com- pletamente el cartucho de batería hasta que FUNCIONAMIENTO el indicador rojo no pueda verse. Si no, podría accidentalmente salirse de la herramienta y caer al suelo causando una lesión a usted o alguien a su PRECAUCIÓN: Asegúrese siempre de que la alrededor. -
Page 33: Protección Contra Sobrecarga
Si no hay ninguna mejora al restaurar el sistema de protección, comuníquese con su centro local de servi- cio Makita. PRECAUCIÓN: Antes de insertar el cartucho de batería en la herramienta, compruebe siem- pre y cerciórese de que el gatillo interruptor se... -
Page 34: Montaje
MONTAJE AVISO: No jale fuerte el gatillo interruptor sin presionar la palanca de desbloqueo. Esto podría dañar el interruptor. PRECAUCIÓN: Asegúrese siempre de que la Se proporciona una palanca de desbloqueo para evitar herramienta esté apagada y el cartucho de batería que el gatillo interruptor sea jalado accidentalmente. - Page 35 Inserte el tubo en el cuerpo de la herramienta por Afloje el anillo de bloqueo girando el anillo de blo- completo, y luego alinee el orificio del tubo con el orifi- queo en sentido inverso al de las manecillas del reloj, cio del cuerpo de la herramienta.
- Page 36 Coloque la barra de guía al cuerpo de la herra- Instalación o extracción de la mienta, alineando el orificio de la barra de guía con el cadena de la sierra pasador del cuerpo de la herramienta. PRECAUCIÓN: La cadena de la sierra y la barra de guía siguen estando calientes justo después de la operación.
- Page 37 Extracción de la cadena de la sierra Levante ligeramente la punta de la barra de guía y ajuste la tensión de la cadena. Gire el tornillo de ajuste Para extraer la cadena de la sierra, siga los pasos a de la cadena en sentido inverso al de las manecillas del continuación: reloj para apretar la cadena, y gírelo en el sentido de las manecillas del reloj para aflojar la cadena.
-
Page 38: Operación
De lo contrario, el suministro de aceite podría ser deficiente. AVISO: Utilice el aceite para la cadena de la sie- rra exclusivamente para sierras eléctricas Makita o un aceite equivalente disponible en el mercado. AVISO: Nunca use aceite que tenga polvo y partí- culas, ni aceite volátil. - Page 39 Makita. Si se pone el arnés para hombro incluido en el paquete de la herramienta y el arnés para hombro de la fuente de alimentación tipo mochila al mismo...
- Page 40 Arranque la herramienta, luego presione la cadena de Operación con la herramienta la sierra contra la rama ligeramente. Al cortar ramas largas, para controlar la posición de PRECAUCIÓN: Mantenga todas las partes caída de las ramas cortadas, divida la rama en seccio- del cuerpo alejadas de la cadena de la sierra nes y corte la rama desde la punta.
- Page 41 Transporte de la herramienta Antes de transportar la herramienta, extraiga siempre el cartucho de batería de la herramienta, luego coloque la cubierta de la barra de guía, y posteriormente acorte el tubo. Asimismo, cubra el cartucho de batería con la cubierta de la batería.
-
Page 42: Mantenimiento
Makita, empleando Si necesita soltar la herramienta rápidamente, siga los siempre repuestos Makita. pasos a continuación. - Page 43 Fig.44 Fig.46 ► 1. Sujetador de limas — El ángulo de afilado de 30° deberá ser el mismo en todas las partes cortadoras. Las diferencias de — Tras el afilado de la cadena, verifique la altura del ángulos en las partes cortadoras causan que la calibrador de profundidad usando la herramienta cadena corra de forma brusca e irregular, acelera de calibración de la cadena (accesorio opcional).
- Page 44 Si la pieza den- tada se daña o se desgasta, solicite el reemplazo a los centros de servicio autorizado de Makita. Fig.49 Limpieza del orificio de descarga de Fig.51...
- Page 45 Instrucciones para el mantenimiento periódico Para asegurar una vida útil prolongada, prevenga el daño y asegure un funcionamiento total de las funciones de seguridad, efectuando el siguiente programa de mantenimiento de forma periódica. Las reclamaciones de garantía podrán ser reconocidas solamente si este programa de mantenimiento es realizado periódicamente y como corres- ponde.
-
Page 46: Resolución De Problemas
Antes de solicitar alguna reparación, primero realice una inspección por su cuenta. Si detecta algún problema que no esté explicado en el manual, no intente desensamblar la herramienta. En vez de esto, solicite la reparación a un centro de servicio autorizado de Makita, usando siempre piezas de repuesto Makita. Estado de la avería Causa Solución... - Page 48 Para reducir la exposición a estos productos químicos: trabaje en un área bien ventilada y póngase el equipo de seguridad indicado, tal como las máscaras contra polvo que están especialmente diseñadas para filtrar partículas microscópicas. Makita Corporation 3-11-8, Sumiyoshi-cho, Anjo, Aichi 446-8502 Japan 885930A941...