Makita UB002C Instruction Manual
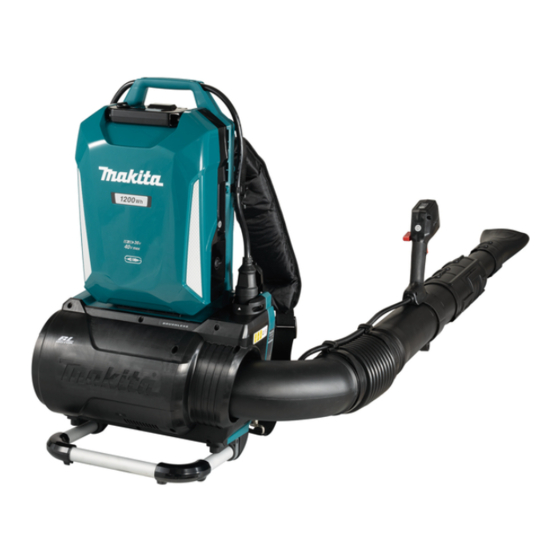
Battery powered backpack blower
Hide thumbs
Also See for UB002C:
- Instruction manual (105 pages) ,
- Instruction manual (85 pages) ,
- Instruction manual (97 pages)

Related Manuals for Makita UB002C


Summary of Contents for Makita UB002C
- Page 1 INSTRUCTION MANUAL Battery Powered Backpack Blower UB002C Read before use. Read before use.
-
Page 2: Specifications
SPECIFICATIONS Model: UB002C Capacities Air volume 0 - 19.0 m /min Air speed (average) 0 - 60.0 m/s Air speed (max.) 0 - 71.7 m/s Dimensions (L x W x H) 1,368 mm x 694 mm x 715 mm (with end nozzle) Rated voltage D.C. -
Page 3: Ec Declaration Of Conformity
SAFETY WARNINGS NOTE: The declared noise emission value(s) has been measured in accordance with a standard test method and may be used for comparing one tool with General power tool safety warnings another. NOTE: The declared noise emission value(s) may also be used in a preliminary assessment of WARNING: Read all safety warnings, instruc- exposure. tions, illustrations and specifications provided with this power tool. - Page 4 Use personal protective equipment. Always Disconnect the plug from the power source wear eye protection. Protective equipment such and/or remove the battery pack, if detachable, from the power tool before making any adjust- as a dust mask, non-skid safety shoes, hard hat or ments, changing accessories, or storing power hearing protection used for appropriate conditions will reduce personal injuries.
- Page 5 The goggles must comply with ANSI Z87.1 in Do not use nozzles other than the nozzles • the USA, EN 166 in Europe, or AS/NZS 1336 provided by Makita. in Australia/New Zealand. In Australia/New • Do not use the blower to inflate balls, Zealand, it is legally required to wear a face rubber boat or the similar.
- Page 6 Recharge only with the charger specified by before restarting and operating the blower. If the manufacturer. A charger that is suitable for the blower is damaged, ask Makita Authorized one type of battery pack may create a risk of fire Service Centers for repair. when used with another battery pack.
- Page 7 Do not short the battery cartridge: CAUTION: Only use genuine Makita batteries. Do not touch the terminals with any con- Use of non-genuine Makita batteries, or batteries that ductive material. have been altered, may result in the battery bursting Avoid storing battery cartridge in a con- causing fires, personal injury and damage. It will...
- Page 8 Loosen the screw on the hose clamp, and then ASSEMBLY attach the hose clamp to the flexible pipe. Attach the swivel pipe to the flexible pipe, and then tighten the screw on the hose clamp. CAUTION: Always be sure that the machine is switched off and the battery cartridge is removed before carrying out any work on the machine. Assembling blower pipes Loosen the clamp screw.
- Page 9 Installing the end nozzle NOTICE: Make sure that the screws on the hose clamps are facing the direction shown in the figure. Align the triangle mark on the end nozzle with that on the swivel pipe, then attach the end nozzle to the swivel pipe, and then turn the end nozzle to lock it into place.
- Page 10 Installing the flat nozzle or Adjusting the belt and shoulder extension nozzle harness Optional accessory Put on the machine, then lock the buckle of the waist belt, and then adjust the length of the waist belt. NOTE: If the end nozzle is installed, remove it before installing the adapter pipe. Align the triangle mark on the adapter pipe with that on the swivel pipe, then attach the adapter pipe to the swivel pipe, and then turn it to lock it into place.
-
Page 11: Functional Description
Install the portable power pack to the machine as FUNCTIONAL shown in the figure. DESCRIPTION CAUTION: Always be sure that the machine is switched off and the battery cartridge is removed before adjusting or checking function on the machine. Installing or removing portable power pack CAUTION: Always switch off the machine... - Page 12 NOTICE: Do not insert the socket forcibly. If CAUTION: When removing the portable the socket cannot be inserted easily, it is not being power pack, press the lock button while holding inserted correctly. the handle firmly. NOTICE: When disconnecting the socket from the plug, do not hold the cord but hold the socket. Otherwise, the cord may be damaged and cause a malfunction of the machine.
- Page 13 Turn the machine off, and then turn it on again to restart. Charge the battery(ies) or replace it/them with recharged battery(ies). Let the machine and battery(ies) cool down. If no improvement can be found by restoring protection system, then contact your local Makita Service Center. NOTICE: If the machine stops due to a cause Fig.22 not described above, refer to the section for troubleshooting. ► 1 . Switch trigger 13 ENGLISH...
-
Page 14: Electronic Function
Press the power button on the portable power Cruise control function pack. The main power lamp will light up. The cruise control function allows the operator to main- tain a constant speed without pulling the trigger. To increase the speed, turn the control lever forward. To decrease the speed, turn the control lever backward. -
Page 15: Cleaning The Machine
You can connect the band of the pipe to the machine as switched off and the battery cartridge is removed shown in the figure to stand up the pipe. before attempting to perform inspection or maintenance. To maintain product SAFETY and RELIABILITY, repairs, any other maintenance or adjustment should be performed by Makita Authorized or Factory Service Centers, always using Makita replacement parts. Fig.29 ► 1 . Socket 2. Plug cover 3. Band 15 ENGLISH... -
Page 16: Troubleshooting
Remove the battery immediately! OPTIONAL ACCESSORIES CAUTION: These accessories or attachments are recommended for use with your Makita prod- uct specified in this manual. The use of any other accessories or attachments might present a risk of injury to persons. Only use accessory or attachment for its stated purpose. If you need any assistance for more details regard- ing these accessories, ask your local Makita Service Center. - Page 20 Makita Europe N.V. Jan-Baptist Vinkstraat 2, 3070 Kortenberg, Belgium Makita Corporation 3-11-8, Sumiyoshi-cho, Anjo, Aichi 446-8502 Japan 885979-220 www.makita.com 20220316...