Makita UB001C Instruction Manual
Battery powered blower
Hide thumbs
Also See for UB001C:
- Instruction manual (101 pages) ,
- Instruction manual (113 pages) ,
- Instruction manual (89 pages)
Table of Contents
Advertisement
Available languages
Available languages
Quick Links
Advertisement
Table of Contents

Related Manuals for Makita UB001C


Summary of Contents for Makita UB001C
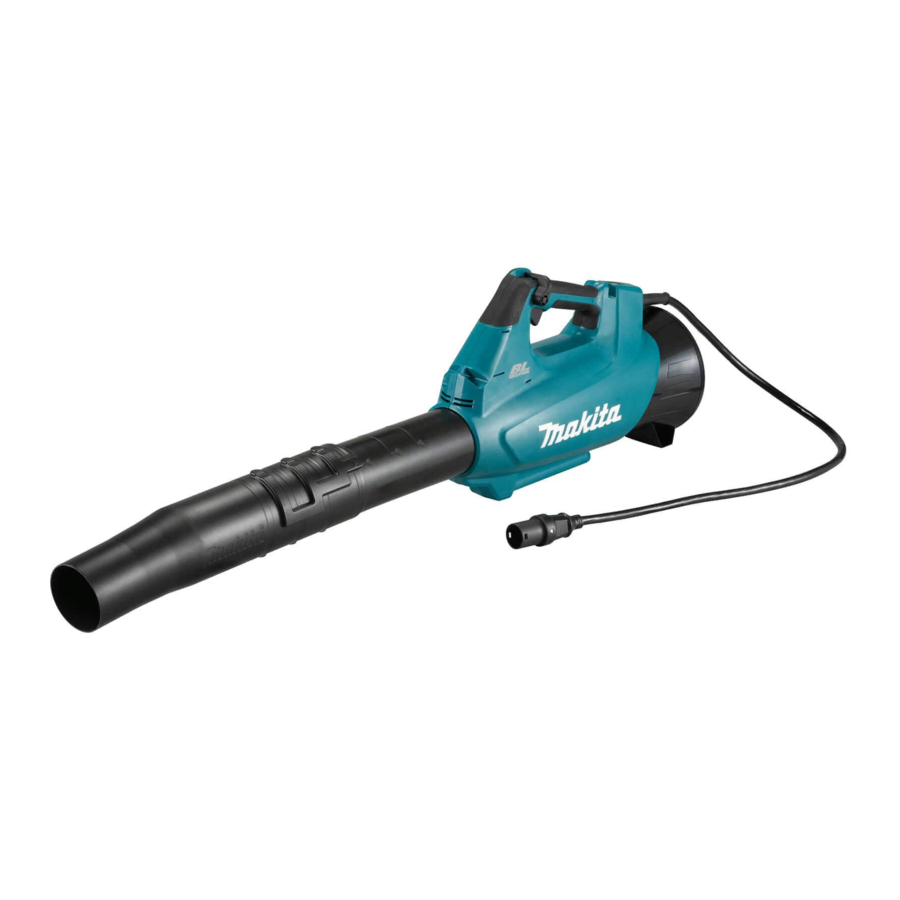
- Page 1 INSTRUCTION MANUAL MANUEL D'INSTRUCTION MANUAL DE INSTRUCCIONES Battery Powered Blower Souffleur à batterie Sopladora Alimentada a Batería UB001C IMPORTANT: Read Before Using. IMPORTANT : Lire avant usage. IMPORTANTE: Lea antes de usar.
-
Page 2: Specifications
Remove battery from appliance when not in Inspect the cord before operating the machine. use and before servicing. If the cord is damaged, ask Makita Authorized Do not expose to rain. Store indoors. Service Centers for repair. Do not allow to be used as a toy. Close... - Page 3 Battery tool use and care restarting and operating the blower. If the blower is damaged, ask Makita Authorized Prevent unintentional starting. Ensure the Service Centers for repair. switch is in the off-position before connecting to battery pack, picking up or carrying the 14.
- Page 4 Do not use a battery pack or machine that is WARNING: DO NOT let comfort or familiarity damaged or modified. Damaged or modified with product (gained from repeated use) replace batteries may exhibit unpredictable behaviour strict adherence to safety rules for the subject resulting in fire, explosion or risk of injury.
- Page 5 Only use genuine Makita batteries. Use of non-genuine Makita batteries, or batteries that have been altered, may result in the battery bursting causing fires, personal injury and damage. It will also void the Makita warranty for the Makita tool and charger. 5 ENGLISH...
- Page 6 To remove the end nozzle, perform the installation Align the groove on the flat nozzle or extension procedure in reverse. nozzle with the protrusion on the adapter pipe, then attach the flat nozzle or extension nozzle to the adapter NOTE: The length of the nozzle can be changed by pipe, and then turn it to lock it into place.
- Page 7 Connect the extension pipe to the adapter pipe. Connect the end nozzle to the extension pipe. When connecting, align the triangle marking on the end Align the groove on the extension pipe with the protru- nozzle and the extension pipe, and then push the end sion on the adapter pipe, and then slide the extension nozzle until it clicks.
-
Page 8: Functional Description
FUNCTIONAL DESCRIPTION NOTE: This machine employs the auto power-off function. To avoid unintentional start up, the main power switch will automatically shut down when the switch trigger is not pulled for a certain period after CAUTION: Always be sure that the machine the main power switch is turned on. -
Page 9: Operation
Makita. If you put on the shoulder harness not recommended by Makita and the shoulder harness of the back- pack-type power supply at the same time, removing the machine or backpack-type power supply is dif- ficult in case of an emergency, and it may cause an accident or injury. - Page 10 Attach the cord to the cord holders. Wear the shoulder harness of the portable power pack and lock the buckle on the waist belt. Attach the shoulder harness to the machine using the hook on the hanging band. Be sure to hook on the hanger of the machine.
- Page 11 Insert the plug of the machine into the socket of Adjust the length of the hanging band as necessary. the portable power pack. When inserting, align the triangle marking on both the plug and the socket. ► 1. Plug 2. Socket 3. Triangle marking Press the main power switch to turn on the machine.
- Page 12 When setting down the machine, unlock the buckle When setting down the machine and the portable power on the hanging band with one hand while holding the pack at the same time, unlock the buckle on the waist machine with the other hand. belt, and then set down the machine and the portable power pack.
- Page 13 CAUTION: CAUTION: When using the gutter nozzle set, When using the gutter nozzle set, do not hold the blower with single hand but with keep other people or animal more than 15 m (50 ft) both hands. away from the blower. CAUTION: Do not use the gutter nozzle set 15m ( 50ft )
-
Page 14: Maintenance
Makita Authorized or Factory Service Centers, always using Makita replacement parts. Cleaning the machine Clean the machine by wiping off dust with a dry cloth or one dipped in soapy water and wrung out. -
Page 15: Troubleshooting
Before asking for repairs, conduct your own inspection first. If you find a problem that is not explained in the man- ual, do not attempt to dismantle the machine. Instead, ask Makita Authorized Service Centers, always using Makita replacement parts for repairs. -
Page 16: Spécifications
FRANÇAIS (Mode d’emploi original) SPÉCIFICATIONS Modèle : UB001C Capacités Volume d’air 0 - 17,6 m /min (0 - 622 cu.ft./min) Vitesse du flux d’air (moyenne) 0 - 58,0 m/s (0 - 130 MPH) Vitesse du flux d’air (max.) 0 - 70,0 m/s (0 - 157 MPH) Longueur hors-tout (avec buse d’extrémité) - Page 17 N’abandonnez pas la machine à l’extérieur ser. Si le souffleur est endommagé, demandez sous la pluie. à votre centre de service après-vente Makita Ne lavez pas la machine avec de l’eau sous agréé de le réparer. haute pression.
- Page 18 Lorsque vous remisez la machine, évitez la 10. L’entretien doit être confié à un réparateur qua- lumière directe du soleil et la pluie, et mettez-la lifié et n’utilisant que des pièces de rechange identiques aux pièces d’origine. Cela assurera dans un emplacement où elle ne sera pas chaude ou humide.
- Page 19 Respectez la réglementation locale concernant l’élimination de la batterie. courant continu 12. N’utilisez les batteries qu’avec les produits spécifiés par Makita. Installer les batteries sur des produits non conformes peut entraîner un Consignes de sécurité importantes incendie, une chaleur excessive, une explosion ou une fuite d’électrolyte.
- Page 20 Makita. Les batteries autres NOTE : La longueur de la buse peut être modifiée en que celles fabriquées par Makita ou les batteries déplaçant la buse tel qu’illustré sur la figure. modifiées peuvent exploser et causer un incendie, une blessure ou des dommages.
- Page 21 Alignez la rainure de la buse plate ou de la buse Connectez le tuyau de rallonge au tuyau de rallonge sur la partie saillante du tuyau adaptateur, adaptateur. puis fixez la buse plate ou la buse de rallonge au tuyau Alignez la rainure du tuyau de rallonge sur la partie sail- adaptateur et tournez-la pour la verrouiller en place.
-
Page 22: Description Du Fonctionnement
Connectez la buse d’extrémité au tuyau de ral- DESCRIPTION DU longe. Lors de la connexion, alignez la marque triangu- laire de la buse d’extrémité et du tuyau de rallonge, puis FONCTIONNEMENT enfoncez la buse d’extrémité jusqu’à ce qu’elle s’en- clenche. Ensuite, tournez la buse d’extrémité jusqu’à une position adéquate pour le travail à... - Page 23 Pour allumer la machine, appuyez sur l’interrupteur Vous pouvez utiliser la machine en mode Amplifié. En mode d’alimentation principale. Le témoin d’alimentation sec- Amplifié, le volume d’air est plus grand qu’en mode normal. Pour uti- teur s’allume en vert. Pour couper le contact, appuyez liser la machine en mode Amplifié, appuyez sur la gâchette jusqu’à...
- Page 24 Makita. Si vous mettez en même temps une sangle d’épaule non recommandée par Makita et la sangle d’épaule d’une source d’alimentation de type sac à dos, il sera difficile d’enlever la machine ou la source d’alimenta- tion de type sac à...
- Page 25 Appuyez sur le bouton d’alimentation du support Si nécessaire, réglez la longueur de la bande de suspension. d’alimentation portable. Le témoin d’alimentation princi- pale s’allumera. Insérez la fiche de la machine dans la prise du support d’alimentation portable. ► 1. Bouton d’alimentation 2. Témoin d’alimentation Lors de l’insertion, alignez les marques triangulaires de principale la fiche et de la prise.
- Page 26 Tenez fermement la machine avec la main et effectuez NOTE : Vous pouvez également utiliser la bande de le soufflage en la déplaçant lentement. Lorsque vous suspension tel qu’illustré sur la figure. soufflez autour d’un bâtiment, d’une grosse pierre ou d’un véhicule, ne pointez pas la buse vers ces derniers.
- Page 27 Lorsque vous déposez la machine et le support d’ali- ATTENTION : Lorsque vous utilisez l’en- mentation portable en même temps, déverrouillez la semble de buse pour gouttière, ne tenez pas le boucle de la ceinture de taille, puis déposez la machine souffleur d’une seule main, mais à...
-
Page 28: Entretien
Pour maintenir la SÉCURITÉ et la FIABILITÉ du pro- duit, les réparations et tout autre travail d’entretien ou de réglage doivent être effectués dans un centre de service après-vente autorisé ou une usine Makita, exclusivement avec des pièces de rechange Makita. Nettoyage de la machine Nettoyez la machine en essuyant les poussières avec... -
Page 29: Dépannage
Avant de faire une demande de réparation, faites d’abord votre propre inspection. Si vous rencontrez un problème non indiqué dans ce manuel, n’essayez pas de démonter la machine. Demandez plutôt à un centre de service après-vente Makita agréé de faire la réparation avec des pièces de rechange Makita. État anormal... -
Page 30: Especificaciones
ESPAÑOL (Instrucciones originales) ESPECIFICACIONES Modelo: UB001C Capacidades Volumen de aire /min - 17,6 m /min (0 cu.ft./min - 622 cu.ft./min) Velocidad del aire (promedio) 0 m/s - 58,0 m/s (0 MPH - 130 MPH) Velocidad del aire (máx.) 0 m/s - 70,0 m/s (0 MPH - 157 MPH) Longitud total (con boquilla de extremo) 960 mm (37-3/4″) / 1 010 mm (39-3/4″) / 1 060 mm (41-3/4″) - Page 31 Almacene la máquina lejos de la lluvia y la luz servicio autorizado de Makita. directa del sol y en un sitio donde no haga 14. No introduzca los dedos u otros objetos en calor ni haya humedad.
- Page 32 10. Realice las inspecciones y labores de manteni- 10. Pida que el servicio lo realice un técnico en miento en un sitio protegido de la lluvia. reparaciones calificado y que utilice única- mente piezas de repuesto idénticas a las Después de utilizar la máquina, quite la sucie- originales.
- Page 33 12. Utilice las baterías únicamente con los pro- ductos especificados por Makita. Instalar las batería baterías en productos que no cumplan con los requisitos podría ocasionar un incendio, un calen- Antes de utilizar el cartucho de batería, lea...
-
Page 34: Montaje
Asimismo, esto inva- lidará la garantía de Makita para la herramienta y el cargador Makita. Consejos para alargar al máximo la vida útil de la batería Cargue el cartucho de batería antes de que... - Page 35 Alinee la ranura de la boquilla plana o de la boquilla Conexión del tubo de extensión al tubo adaptador. de extensión con la protuberancia del tubo adaptador, Alinee la ranura del tubo de extensión con la protube- luego coloque la boquilla plana o la boquilla de extensión al rancia del tubo adaptador, y luego deslice el tubo de tubo adaptador y luego gírelo para asegurarlo en su lugar.
-
Page 36: Descripción Del Funcionamiento
Conecte la boquilla de extremo al tubo de exten- DESCRIPCIÓN DEL sión. Cuando los conecte, alinee la marca triangular de la boquilla de extremo y el tubo de extensión, y luego FUNCIONAMIENTO empuje la boquilla de extremo hasta que haga clic. Después de esto, gire la boquilla de extremo a una posición adecuada para su trabajo. - Page 37 Para encender la máquina, oprima el interruptor de ali- Puede utilizar la máquina en el modo de propulsión mentación principal. La luz indicadora de alimentación reforzada (boost). En el modo de propulsión reforzada, principal se iluminará en verde. Para apagarla, oprima el volumen de aire es mayor que en el modo normal.
-
Page 38: Operación
Makita. Si se pone el arnés para hombros que no sea recomen- dado por Makita y el arnés para hombros de la fuente de alimentación tipo mochila al mismo tiempo, es difícil qui- tar la máquina o la fuente de alimentación tipo mochila... - Page 39 Acople los ganchos de la banda para colgado a Coloque el arnés para hombros en la máquina los anillos del arnés para hombros y del cinturón. mediante el gancho de la banda para colgado. Asegúrese de engancharse al colgador de la máquina. ►...
- Page 40 Oprima el interruptor de alimentación principal Ajuste la longitud de la banda para colgado como sea para encender la máquina. necesario. La máquina está lista para funcionar. La máquina fun- cionará cuando jale del gatillo interruptor. ► 1. Interruptor de alimentación principal NOTA: Usted también puede usar la banda para colgado tal como se muestra en la ilustración.
- Page 41 Cuando ponga la máquina en el piso, desbloquee la Cuando ponga la máquina y la unidad portátil de ali- hebilla de la banda para colgado con una mano mien- mentación eléctrica en el piso al mismo tiempo, desblo- tras sostiene la máquina con la otra mano. quee la hebilla del cinturón, y luego ponga la máquina y la unidad portátil de alimentación eléctrica en el piso.
- Page 42 PRECAUCIÓN: PRECAUCIÓN: Cuando utilice el juego de Cuando utilice el juego de extensión para boquilla para canaleta, no sujete extensión para boquilla para canaleta, mantenga la sopladora con una sola mano, sino con las dos. a las personas o animales alrededor a más de 15 m (50 ft) de distancia de la sopladora.
-
Page 43: Mantenimiento
Makita, empleando siempre repuestos Makita. Limpieza de la máquina Quite el polvo de la máquina con un paño seco o humedezca un paño en agua y jabón y exprímalo para... -
Page 44: Resolución De Problemas
Antes de solicitar alguna reparación, primero realice una inspección por su cuenta. Si detecta algún problema que no esté explicado en el manual, no intente desensamblar la máquina. En vez de esto, solicite la reparación a un cen- tro de servicio autorizado de Makita, usando siempre piezas de repuesto Makita. Estado de la anomalía Causa probable (avería) - Page 48 Makita Corporation 3-11-8, Sumiyoshi-cho, 885801-930 Anjo, Aichi 446-8502 Japan UB001C-1 EN, FRCA, ESMX 20200821 www.makita.com...