Baratza Vario W+ Operation Manual
Hide thumbs
Also See for Vario W+:
- Quick start manual (2 pages) ,
- Quick start manual (25 pages) ,
- User manual
Advertisement
VARIO W+ OPERATIONS MANUAL
®
Vario W+
™
INTRODUCTION
Thank you for choosing the Vario W+ coffee grinder!
The Vario W+ makes it easier than ever to make
professional quality coffee at home.
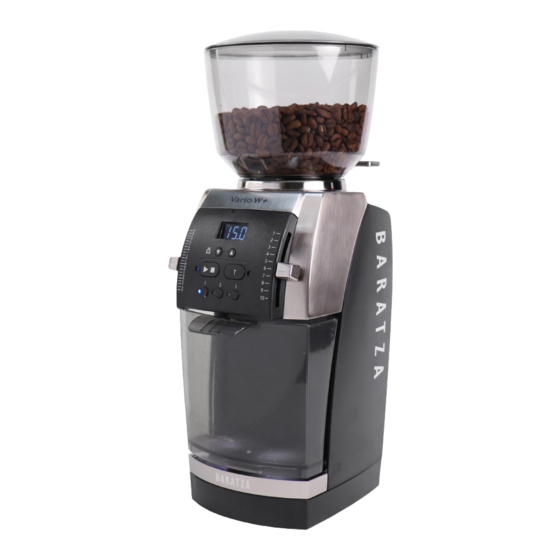
The Vario W+ is a compact, weight-based grinder that is capable of grinding for
a wide range of brew methods. The Vario W+ has a small footprint, an intuitive
control panel, a scale that is accurate to a tenth of a gram, and macro/micro
adjustment levers for accurate grind adjustment.
The grinder is fitted with 54mm flat steel burrs. The replaceable steel burrs
generally last around 10 years of standard home use.
January 2022 (v1.5)
Advertisement

Related Manuals for Baratza Vario W+


Summary of Contents for Baratza Vario W+
- Page 1 VARIO W+ OPERATIONS MANUAL ® Vario W+ ™ INTRODUCTION Thank you for choosing the Vario W+ coffee grinder! The Vario W+ makes it easier than ever to make professional quality coffee at home. The Vario W+ is a compact, weight-based grinder that is capable of grinding for a wide range of brew methods.
-
Page 2: Table Of Contents
VARIO W+ OPERATIONS MANUAL ® CONTENTS SAFETY INFORMATION PARTS IDENTIFICATION GRINDER SETUP GRINDING OPERATION BURR CALIBRATION CLEANING THE GRINDER WARRANTY & SERVICE January 2022 (v1.5) -
Page 3: Safety Information
Baratza will not accept any liability for damage, of the appliance in a safe way and understand the injury, or warranty if the grinder is used other than hazards involved. -
Page 4: Parts Identification
VARIO W+ OPERATIONS MANUAL ® PARTS IDENTIFICATION Hopper Lid Grind Weight Presets Bean Hopper Grounds Bin Bean Shut-off Knob Burr Calibration Tool Grind Weight Preset Burr Removal Tool Adjustment Buttons Upper Burr Carrier Micro Adjustment Steel Burrs Lever Knob Scale Platform Macro Adjustment Lever Knob START/STOP Button... -
Page 5: Grinder Setup
VARIO W+ OPERATIONS MANUAL ® GRINDER SETUP Place the grinder on a level surface. Hand wash the hopper hopper lid (1), and grounds bin (10) with warm soapy water. Let air dry or dry with a clean cloth. To install the hopper: With the hopper upright and the shut-off knob pointing toward the back left of the grinder, place the hopper on top of the grinder and find the point where it settles into place. -
Page 6: Grinding Operation
VARIO W+ OPERATIONS MANUAL ® GRINDING OPERATION After setting up the grinder as outlined in the previous section, press a preset button (9). The screen will show the corresponding programmed grind weight in grams. Press START/STOP to begin grinding. While grinding, the screen will count up the weight as coffee is ground into the grounds bin. - Page 7 VARIO W+ OPERATIONS MANUAL ® Some recipes use visual descriptions to describe the grind size required, such as “ground to the consistency of kosher salt.” To visually determine the necessary grind setting, grind a small amount of coffee into the grounds bin (10) by pressing the START/STOP button, then press it again to stop the grinding.
- Page 8 VARIO W+ OPERATIONS MANUAL ® SLEEP MODE: To minimize standby power consumption, the Vario W+ will go into “sleep mode” automatically after 3 minutes of non-use. While in sleep mode, the display will turn off. To “wake up” the Vario W+, press any button.
- Page 9 • If the hopper is in place and open, the motor is engaging, but no coffee is being ground, a clog may have formed. Please check the Troubleshooting page on Baratza.com for information on clearing clogs. • Some different varieties and roasts of coffees may grind more slowly than others. If this seems to be the...
-
Page 10: Burr Calibration
VARIO W+ OPERATIONS MANUAL ® BURR CALIBRATION The Vario W+ factory calibration will accommodate a wide range of brew methods and calibration should not need to be adjusted out of the box for most brew methods. However, if the Vario W+ is unable to grind finely enough or coarsely enough for a particular brew method at the finest and coarsest settings, respectively, follow the instructions below. - Page 11 VARIO W+ OPERATIONS MANUAL ® If the grind setting is at 1M and the burrs are not in contact, use the calibration tool to turn the calibration screw toward the finer direction (as indicated on the tool) until a change in motor pitch is heard.
-
Page 12: Cleaning The Grinder
VARIO W+ OPERATIONS MANUAL ® CLEANING THE GRINDER Routinely cleaning the grinder is important to ensure that the grinder performs as intended. With standard home use, the grinder should be cleaned at least once per month. If darkly roasted coffee, oily coffee, or flavored coffee (which has added oils) is being used, more frequent cleaning may be necessary. - Page 13 VARIO W+ OPERATIONS MANUAL ® CLEANING THE BURRS AND GRIND CHAMBER: To manually clean the burrs (14) and the grind chamber, the upper burr carrier (13) will need to be removed from the grinder. Place the included burr removal tool (12) on the upper burr carrier so that the notches on the tool interlock with the wings on the upper burr carrier.
- Page 14 VARIO W+ OPERATIONS MANUAL ® UPPER BURR CARRIER REINSTALLATION: Place the upper burr carrier on top of the grind chamber. It should sit level with the grind chamber. It will not thread on properly if it is not level. Use the burr removal tool to rotate the upper burr carrier counterclockwise to carefully thread it into the grind chamber.
-
Page 15: Warranty & Service
The customer is responsible for paying the freight Email: support@baratza.com charges and any duties and taxes for replacement parts that Baratza may send. The customer is also responsible to For Parts and Information go to: www.baratza.com provide any labor required to repair the grinder.