Baratza Vario+ Coffee Grinder Manual
- Quick start manual (25 pages) ,
- Operation manual (13 pages) ,
- Quick start manual (2 pages)
Advertisement
INTRODUCTION
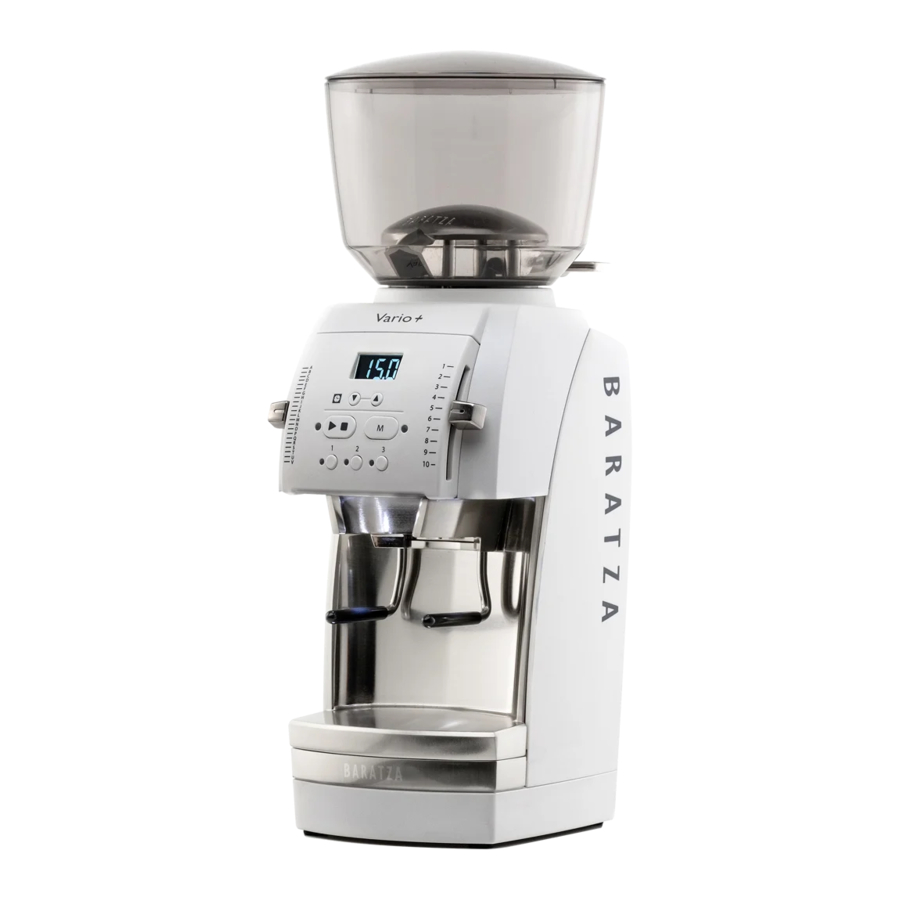
The Vario+ makes it easier than ever to make professional quality coffee at home. The Vario+ is a compact, time-based grinder that is capable of grinding for a wide range of brew methods. The Vario+ has a small footprint, an intuitive control panel, and macro/micro adjustment levers for accurate grind adjustment.
The grinder is fitted with 54mm flat ceramic burrs. The replaceable ceramic burrs generally last around 10 years of standard home use.
The included PortaHolder allows for convenient grinding directly into a portafilter. It can be adjusted to fit various sizes of portafilters.
SAFETY INFORMATION
Keep these instructions for future reference. Read the information below very carefully as it contains important safety information for use of this appliance.
 Use only with AC current and the correct voltage. See the label on the base of the grinder to determine the correct voltage.
Only clean the grinder housing with a dry or slightly damp cloth. Do not immerse the grinder, plug or cord in water or any other liquid.
Baratza will not accept any liability for damage, injury, or warranty if the grinder is used other than for its intended purpose (i.e. grinding roasted whole coffee beans) or is improperly operated or repaired.
Do not operate the grinder with a damaged cord or plug. If the supply cord is damaged, it must be replaced by the manufacturer, its service agent or similarly qualified persons in order to avoid a hazard.
Keep the appliance and its cord out of reach of children aged less than 8 years.
Do not leave your grinder unattended while turned ON.
This appliance can be used by children aged from 8 years and above and persons with reduced physical, sensory or mental capabilities or lack of experience and knowledge if they have been given supervision or instruction concerning use of the appliance in a safe way and understand the hazards involved.
Cleaning and user maintenance shall not be made by children without supervision.
Always unplug the grinder from the electrical supply before assembling, disassembling or cleaning. To unplug, grasp plug and remove from the outlet. Never pull on the cord.

ALWAYS unplug the electrical supply cord prior to cleaning the grinder.
PARTS IDENTIFICATION

- Hopper Lid
- Bean Hopper
- Bean Shut-off Knob
- Grind Time Preset Adjustment Buttons
- Micro Adjustment Lever Knob
- Macro Adjustment Lever Knob
- START/STOP Button
- Manual Mode Button
- Grind Time Presets
- PortaHolder
- Burr Calibration Tool
- Burr Removal Tool
- Grounds Bin
- Upper Burr Carrier
- Ceramic Burrs
GRINDER SETUP
- Place the grinder on a level surface.
- Hand wash the hopper (2), hopper lid (1) and grounds bin (13) with warm soapy water. Let air dry or dry with a clean cloth.
- To install the hopper: With the hopper upright and the shut-off knob (3) pointing toward the back left of the grinder, place the hopper on top of the grinder and find the point where it settles into place. Push down and rotate the hopper clockwise to center the shut-off knob and lock the hopper into place. The hopper must be locked into place to engage the microswitch so that the grinder can operate.1
- The grinder will come with the PortaHolder (10) installed. To use the grinder with the included grounds bin instead, pull the PortaHolder straight out and replace it with the grounds bin.
- The PortaHolder arms can be adjusted up or down to accommodate different sizes of portafilters. To adjust the PortaHolder arms:
- Pull the PortaHolder out of the grinder.
- With a Phillips head screwdriver, loosen the two screws in the back of the PortaHolder.
- Move the PortaHolder arms up or down so that the portafilter fits. If the arms are difficult to move, loosen the screws further.
- While holding the arms in position, tighten the two screws to lock the arms into place.
- The PortaHolder arms can be adjusted up or down to accommodate different sizes of portafilters. To adjust the PortaHolder arms:
- Plug in the grinder. The display should illuminate and go through its startup process.
- Reference the grind settings chart and use the micro adjustment (5) and macro adjustment (6) arms to select a grind setting.2
- Add beans to the hopper. Ensure bean shut-off knob is turned open. 'OPEN' should be facing up on the knob.
1 Installing the hopper with the lid on top may make for easier installation.
2 Beans between the burrs will cause resistance when adjusting to a finer setting. Make finer adjustments either with the unit running, or completely empty of coffee.
GRINDING OPERATION
After setting up the grinder as outlined in the previous section, press a preset button (9). The screen will show the corresponding programmed grind time in seconds. Press START/STOP (7) to begin grinding. While grinding, the screen will count down the seconds to 0.0. When the screen reaches 0.0 seconds, the motor will stop, and the display will reset again to the programmed time.
ADJUSTING THE GRIND SETTING
The Vario+ has a micro adjustment lever knob (5) to the left of the display and a macro adjustment lever knob (6) to the right. The Micro adjustment arm is used to make smaller changes to the grind size, while the macro adjustment arm is used to make larger changes. Twelve micro adjustment clicks are equivalent to one macro adjustment click. The grind setting is adjusted by moving the micro and/or macro adjustment lever knobs up or down. Moving a lever arm up will result in a finer grind, whereas moving a lever arm down will result in a coarser grind. When making a finer grind adjustment with coffee in the hopper, the motor must be running.
At setting 2Q and settings finer, the burrs (15) will audibly contact each other. The grinder is calibrated for the burrs to touch at this point, and it will not damage the burrs to grind at their contact point or finer if there is coffee being ground. However, running the grinder without coffee while the burrs are touching for extended periods of time will reduce the lifespan of the burrs.
CHOOSING A GRIND SETTING FOR A BREW METHOD
The settings shown in the table below should be used as a general starting point. The actual grind size needed for a particular brew method will vary depending on many factors, such as: degree of roast (light vs. dark), freshness, environmental humidity, variety of bean, oil content, etc. Practice and personal preference will ultimately determine which setting is right for the desired taste, brewing style, and the particular beans used.
| Espresso | AeroPress | Hario V60 | Automatic Drippers | Chemex | French Press |
| 2Q | 4M | 6M | 7M | 9M | 10M |
Some recipes use visual descriptions to describe the grind size required, such as "ground to the consistency of kosher salt." To visually determine the necessary grind setting, grind a small amount of coffee into the grounds bin (13) by pressing the START/STOP button, then press it again to stop the grinding. Check the grind size. If the grind size is close to what is desired use the micro adjustment lever to fine-tune the grind size. If the grind size needs a large adjustment, adjust the macro adjustment lever to a new position.
TIME PRESET PROGRAMMING
The Vario+ is equipped with three programmable buttons labeled 1, 2, and 3. Each button comes standard with the following time presets (in seconds): 1 = 10s, 2 = 15s, 3 = 30s. The time saved under each preset can be adjusted by doing the following:
- Select either preset 1, 2, or 3 (9).
- Press the up or down arrow buttons (4) to adjust the time preset. Once the desired time value is reached, press and hold the numbered preset button for 3 seconds. The time value on the display will blink to indicate that the new preset setting is stored.
- To program the other presets, repeat steps 1 and 2. These grind time settings will still be saved even if the grinder is unplugged and then plugged back in.
MANUAL MODE
To grind continuously without using a preset, press MANUAL (8), then press START/STOP. The grinder will run, and the display will count up until START/STOP is pressed or until the max run time of 60.0 seconds is reached. When the grinder is stopped, the motor will stop, and the run time will be displayed for 1 second.
SLEEP MODE
To minimize standby power consumption, the Vario+ will go into "sleep mode" automatically after 3 minutes of non-use. While in sleep mode, the screen goes blank. To "wake up" the Vario+, press any button.
BURR CALIBRATION
The Vario+ factory calibration will accommodate a wide range of brew methods and calibration should not need to be adjusted out of the box for most brew methods. However, if the Vario+ is unable to grind finely enough or coarsely enough for a particular brew method at the finest and coarsest settings, respectively, follow the instructions below.
TO RECALIBRATE THE GRINDER TO FACTORY SETTINGS

- Empty all beans from the grinder.
- Lower the micro (5) and macro (6) levers all the way to the bottom of the range.
- With the hopper and grounds bin (13) in place, press MANUAL (8), then START/STOP (7) and run the grinder long enough to expel any remaining coffee; when remaining coffee is expelled, press STOP/STOP.
- Remove the grounds bin and insert the calibration tool (11) into the round hole behind the discharge chute until the tool settles into the head of calibration screw inside.
- Press START/STOP to run the motor.
- With the motor running, move the macro arm up to setting 2 or until burr contact is heard, whichever comes first.3 If there was no burr contact sound when adjusting the macro lever, move the micro arm to Q or to the point at which the burrs make contact, whichever comes first.
- If the grind setting is at 2Q and the burrs are not in contact, use the calibration tool to turn the calibration screw toward the finer direction (as indicated on the tool) until a change in motor pitch is heard. This will bring the grinder back to factory calibration.
- If the burrs make contact prior to reaching setting 2Q:
- Insert the tool and turn the calibration screw in the opposite direction of the arrow on the tool to loosen the calibration screw and thus coarsening the calibration.
- Move the macro arm to 2 and the micro arm to Q. If a change in motor pitch is heard before reaching this setting, the calibration screw may need to be loosened further.
- With the lever arms at setting 2Q, use the calibration tool to tighten the calibration screw until burr contact is heard.
3 With ceramic burrs installed, burr contact is indicated by a change in motor pitch.
The calibration point can be set anywhere between 1A and 3Q depending on user preferences. It is not recommended to set the calibration point to a setting outside these parameters.
CLEANING THE GRINDER
Routinely cleaning the grinder is important to ensure that the grinder performs as intended. With standard home use, the grinder should be cleaned at least once per month. If darkly roasted coffee, oily coffee, or flavored coffee (which has added oils) is being used, more frequent cleaning may be necessary.
Do not put the bean hopper, hopper lid, grounds bin, or PortaHolder in the dishwasher. Hand wash only. Do not immerse the grinder housing in water. Do NOT wash the burrs with water.
REMOVING THE HOPPER
- Ensure the bean shut-off knob (3) on the hopper (2) is in the closed position. The side of the tab on the bean shut-off knob that says 'CLOSED' should be facing up.
- Grip the hopper and rotate it counterclockwise to unlock it.
- Lift the hopper up and off the grinder.
CLEANING THE HOPPER AND GROUNDS BIN
- Empty the hopper and the grounds bin (13) if there is coffee in either.
- Wash the hopper and grounds bin with warm soapy water with a soft sponge or cloth. If necessary, rinse. The parts can be dried with a clean dry cloth or set aside to air dry.
CLEANING THE BURRS AND GRIND CHAMBER
To manually clean the burrs (15) and the grind chamber, the upper burr carrier (14) will need to be removed from the grinder.
- Place the included burr removal tool (12) on the upper burr carrier so that the notches on the tool interlock with the wings on the upper burr carrier.
- Rotate the burr removal tool clockwise to unscrew the upper burr carrier from the grind chamber.4 Set the burr removal tool aside.
- Once the upper burr carrier is unscrewed completely, lift it up to remove it from the grinder.
4 If the upper burr carrier does not rotate clockwise with the burr removal tool alone, a set of pliers can be used to grip the tool for additional leverage
UPPER BURR CARRIER AND UPPER BURR CLEANING
- With the upper burr carrier in one hand, use a non-metal, bristle brush such as a toothbrush to clean around the burr carrier and on the surface of the top burr.
- For a deeper clean of the upper burr carrier area, use a small flat-head screwdriver to remove the screws holding the burr in the burr carrier. Set the screws and burr aside and use a non-metal bristle brush to clean the rest of the upper burr carrier as well as the back of the burr. Once cleaning of the burr and carrier is complete, use the screwdriver to reinstall the screws and burr. Take care not to overtighten the screws during reinstallation.
GRIND CHAMBER, LOWER BURR CARRIER, AND LOWER BURR CLEANING
Note: It is not recommended to remove the lower burr carrier.
- Use a non-metal, stiff bristle brush such as a toothbrush to clean the area around the lower burr and the surface of the lower burr.
- For a deeper clean of the lower burr carrier, use a small flat head screwdriver to remove the screws holding the burr in the burr carrier. Set the screws aside and lift the burr out of the burr carrier. Then use a brush to clean the top of the lower burr carrier, the back of the burr, and the opening of the coffee exit chute. Once cleaning of the burr and carrier is complete, use the screwdriver to reinstall the screws and burr. Take care not to overtighten the screws during reinstallation.
UPPER BURR CARRIER REINSTALLATION
- Place the upper burr carrier on top of the grind chamber. It should sit level with the grind chamber. It will not thread on properly if it is not level.
- Use the burr removal tool to rotate the upper burr carrier counterclockwise to carefully thread it into the grind chamber. Threading the upper burr carrier into the grind chamber should be fluid with minimal resistance. If the upper burr carrier is difficult to rotate, rotate the upper burr carrier clockwise to free it from the threading, make sure it is level and that the threads on both the grind chamber and burr holder are free of ground coffee, and try again.
USE OF CLEANING TABLETS
Grinder cleaning tablets are designed to absorb and remove odors and coffee oil residue and should be considered supplementary to normal cleaning. Grinder cleaning tablets should be the only substance used to clean the internals of the grinder. Note that cleaning tablets do not take the place of normal cleaning steps listed above and cannot be used to remove a clog. For grinder tablet cleaning:
- Remove all beans from the hopper and use the START/STOP (7) button to run the grinder to expel any coffee that remains in the grinder.
- Adjust the grind setting to 10 and place the recommended amount of the chosen cleaning tablets into the empty bean hopper.
- Insert the grounds bin, then press the MANUAL (8) button and then the START/STOP button. Grind all the tablets into the bin, then press START/STOP once again.
- Once complete, we recommend grinding approximately 30g coffee (or the recommended amount in the cleaning tablet instructions) to remove any tablet residue.
- Discard the ground tablets/coffee.
WARRANTY & SERVICE
U.S. & CANADIAN WARRANTY INFORMATION
Limited Warranty for Baratza Grinders is 1 year from the original date of purchase. This warranty covers all defects in materials and workmanship (parts and labor) including free ground transportation to and from our repair facility within the US and Canada. If the purchased grinder fails within one year, email support@baratza.com or call +1 425-641-1245 or toll free 877-701-2021. For additional warranty, support, or troubleshooting information, go to www.baratza.com.
Please note: Grinders that are purchased in the US or Canada and shipped or taken out of the country have a one-year warranty for parts only. If the grinder fails within one year of date of purchase, simply email us at support@baratza.com or call +1 425-641-1245.
INTERNATIONAL WARRANTY INFORMATION
For all countries outside the US and Canada, the warranty, support and service is provided by the International Retailer the grinder was purchased from. If the grinder was purchased from a retailer outside of the country the customer resides in, the customer may be responsible for any shipping costs to service the grinder, and may need to pay for service.
PROOF OF PURCHASE & PRODUCT REGISTRATION
The grinder can be registered at www.baratza.com/register-your-grinder. Registration will enable us to contact the registrant in the unlikely event of a product safety notification and assist us in complying with the provisions of the Consumer Product Safety Act. The serial number is located on the bottom of the grinder. Please keep the sales receipt that shows the date of purchase.
FOR REPAIRS OR QUESTIONS
Email: support@baratza.com
For Parts and Information go to: www.baratza.com
For Troubleshooting Help: www.baratza.com/troubleshooting

Documents / Resources
References
Download manual
Here you can download full pdf version of manual, it may contain additional safety instructions, warranty information, FCC rules, etc.
Advertisement
Thank you! Your question has been received!


Need Assistance?
Do you have a question about the Vario+ that isn't answered in the manual? Leave your question here.