
Related Manuals for Canon DR-S130


Summary of Contents for Canon DR-S130
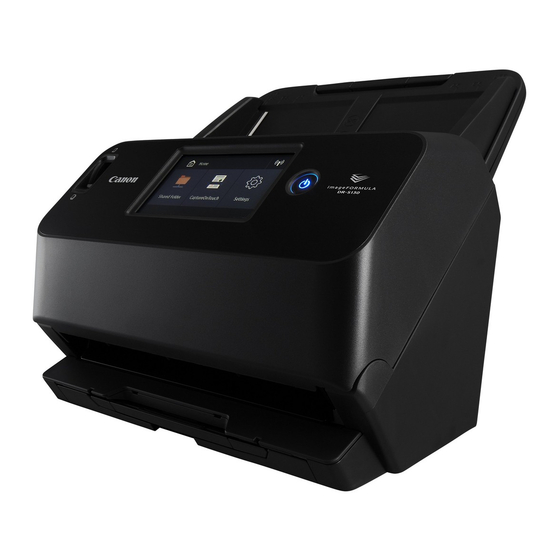
- Page 1 User Manual • Please read this manual before operating this scanner. • After you finish reading this manual, store it in a safe place for future reference.
- Page 2 (RF) Exposure Guidelines as this equipment has very low levels of RF energy. But it is desirable that it should be installed and operated keeping the radiator at least 20cm or more away from person’s body. Canon U.S.A. Inc. One Canon Park, Melville, NY 11747, U.S.A. Tel. No. 1-800-OK-CANON (1-800-652-2666)
- Page 3 This model doesn’t provide setting options for power management. This is not an exhaustive list. Only for European Union and EEA (Norway, Iceland and Canon is not responsible for how this scanner is used by an individual. Please note that certain intellectual property is protected by copyright Liechtenstein)
- Page 4 Trademarks Disclaimers • Canon and the Canon logo are registered trademarks, of Canon Inc. The information in this document is subject to change without notice. in the United States and may also be trademarks or registered trademarks in other countries.
-
Page 5: Introduction
Introduction Thank you for purchasing the Canon imageFORMULA Document Scanner. Please read the following manuals carefully and familiarize yourself with the functions of the scanner before use to ensure you sufficiently understand the functions and make the most of the scanner’s capabilities. -
Page 6: Symbols Used In This Manual
Symbols Used in This Manual The User Manual (electronic manual) will be registered to the The following symbols are used in this manual to explain procedures, following location. restrictions, handling precautions, and instructions that should be observed for safety. WARNING Indicates a warning concerning operations that may lead to death or injury to persons if not performed correctly. -
Page 7: Table Of Contents
Table of Contents Introduction ................. 5 Scanning ............ 50 Symbols Used in This Manual............6 Basic Operations: Various Scanning Operations Using a Computer (CaptureOnTouch)..52 Before Using the Scanner......9 Starting and Exiting CaptureOnTouch........52 System Requirements of Software....... 9 Selecting a scanner............... - Page 8 Cleaning the Sensor Glass and the Rollers ......107 Replacing Consumable Parts..........110 Removing the Document Feed Tray ........114 About the Canon imageFORMULA Driver Setting Tool ..114 Troubleshooting ........116 Common Problems and Solutions ......116 Software Troubleshooting ........121 Useful Tips..............
-
Page 9: Before Using The Scanner
CPU: Intel Core 2 Duo 1.66GHz or faster For details, consult your local authorized Canon dealer. • Scanning speeds are lower if your computer’s standard USB Intel Core i7 2.3GHz or faster interface is USB Full-Speed (equal to USB 1.1.) -
Page 10: Turning The Power On
Turning the Power ON The power of the scanner can be turned ON and OFF with the power button on the front of the scanner. Make sure that the scanner and computer are connected properly. Press the power button. When the scanner is properly connected to the computer, the (CaptureOnTouch) icon appears on the taskbar as follows. - Page 11 IMPORTANT • When turning on the scanner after it turns off, wait at least 10 seconds before turning it back on. • If you will not be using the scanner for an extended period, turn off the power and disconnect the power cord from the AC outlet for safety.
-
Page 12: Important Safety Instructions
If you have any questions regarding the power supply, contact your Avoid warm or humid locations, such as in the vicinity of a water local authorized Canon dealer or service representative for further faucet, water heater, or humidifier. Avoid locations where ammonia information. -
Page 13: Moving The Scanner
OFF the power, and disconnect the power plug from the power outlet. Then, contact your local authorized Canon dealer or service representative to have the unit serviced. Do not drop the scanner, or subject it to impact or strong shock. -
Page 14: Disposal
Do not place objects on top of the scanner. Such objects may tip or About wireless communication fall over, resulting in personal injury. Connect only to a power outlet of the rated voltage and power functions supply frequency (120 V, 60 Hz or 220-240 V, 50/60 Hz depending This device incorporates wireless communication functions. - Page 15 2. If radio frequency interference occurs between this device and other stations, immediately relocate the device or stop using it (stop transmitting). After stopping, consult with your retailer or with our sales staff regarding measures to avoid interference (e.g., partitioned installation).
- Page 16 (2.412 to 2.462 EIRP 11.48 dBm Luxembourg, Malta, Netherlands, Norway, GHz) Poland, Portugal, Romania, Slovak Republic, Slovenia, Spain, Sweden, Switzerland and Liechtenstein, United DR-S130 220-240V 4812C001 Kingdom, Russia, Turkey, Singapore, Malaysia, Indonesia, Thailand, Peru, Argentine, Hong Kong DR-S150 CA 4044C004...
-
Page 17: Features Of The Scanner
Documents can be scanned at a speed of up to 45 pages (DR- Touch Panel S150) / 30 pages (DR-S130) per minute (A4 size, 200dpi). The scanner is equipped with a touch panel , which makes intuitive Long Document Mode operations possible. - Page 18 Ultrasonic Double Feed Detection Deskew The scanner stops feeding when the ultrasonic sensor detects that If a scanned image is detected to be skewed, the skewed image is two or more document pages are feeding at the same time. straightened. “Detecting a document double feed”...
- Page 19 Folio Scan Other requirements Documents that are too large to fit in the feeder inlet can be folded Auto Start and scanned on both sides, with the images then combined into a The scanner is equipped with an auto start function, which enables single image.
-
Page 20: Names And Functions Of Parts
Names and Functions of Parts Front View (With the Document Eject Tray Closed) A OPEN Lever C Document Feed Tray Pull this toward you to open the front unit. Place the document. B Power button D Document Guides Press this to turn on the scanner. When pressed, the power Align the document guides with both edges of the document to indicator is lit. - Page 21 Front View (With the Document Eject Tray Open) A Feed Extension Support E Front Unit Open this when placing long paper in the scanner. Open this when cleaning the inside of the scanner or replacing rollers. B Feed Support F Document Eject Tray Pull this out to support loaded documents.
- Page 22 Back View DR-S130 DR-S150 A USB Connector Connect the supplied USB cable to this connector. B Power Connector A LAN Connector Connect the supplied AC adapter to this connector. Connect a network cable that supports RJ-45 (10Base-T/100Base- C Theft Prevention Hole (Security Slot) TX/1000Base-T).
- Page 23 C Shared Folder Button Touch Panel Use a job on the scanner to scan documents. (See p. 65) The content that appears on the touch panel varies depending on the state of the scanner. D CaptureOnTouch Button Refer to “Operating the Settings Menus” (See p. 44) for details and the Use a job in CaptureOnTouch to scan documents.
- Page 24 Input device PIN Screen Authentication Screen (DR-S150 only) When the PIN function is enabled, entry of a PIN is required when the This may be displayed when the COT Admin mode is enabled. scanner is turned on. PIN function can be enabled or disabled using To use this function, the optional Document Feed Tray with NFC the Web menu.
- Page 25 User Login Screen Admin User Login screen A Admin User Login Screen Button A Password Displays the Admin User Login screen. Enter a password. B Username B OK Button Enter a user name. Log in on the scanner as an administrator. The administrator password is the same as the one for Web menu.
-
Page 26: Basic Operation
Basic Operation Documents The scanner can scan documents ranging in size from business cards to LTR/A4. The document sizes that this scanner can scan are shown below. Align the centers Plain Paper Size Width: 50.8 mm to 216 mm (2" to 8.5") Align the leading edges Length: 54 mm to 356 mm (2.1"... - Page 27 • Scanning the following types of documents can cause a paper jam Passport or malfunction. To scan such a document, make a photocopy of the Size: 88 mm x 125 mm (3.464" x 4.921") (ISO standard) document and then scan the photocopy. Insert the passport into the separately sold carrier sheet (passport type) in an opened state.
-
Page 28: How To Place Documents
How to Place Documents IMPORTANT Scanning multiple documents Pull the document eject tray forward according to the various Standard paper feeding should be used when scanning multiple lengths. documents of a standard size at one time. Standard paper feeding enables multiple documents to be fed while separating each page. Pull out the feed support. - Page 29 Set the feed selection lever to Normal mode. Place the document. Align the document guides with both edges of the document. Adjust the document guides to fit the width of the document to be scanned. IMPORTANT • When placing documents into the feed tray, take care not to cut your hand on the edges of the paper.
-
Page 30: When Scanning A Document One Page At A Time
items may cause a fire or electrical shock, damage the document, When scanning a document one page or cause a paper jam or scanner malfunction. • Do not wear loose clothing or jewelry that may get caught in the at a time (Bypass mode) scanner while you are using it, as this may result in personal injury. -
Page 31: Placing Cards
• If double-feeding occurs, turn on [Disable double-feed Place the card horizontally, with the reverse side facing detection] on the scanner’s touch panel. (See p. 49) Or, clear the [Detect by Ultrasonic] check box in the [Error you, and the top of the card facing down. Detection] tab on the scanner driver settings screen. -
Page 32: Placing Folded Documents
Placing Folded Documents Fold the document in half. Crease the document firmly down its center to fold the Folio Scan enables you to scan documents that are larger than LTR/ document in half. Fold the document so that its edges are A4 and therefore do not fit in the feeder. - Page 33 Open the scanner driver settings screen. (See p. 69) Open the scanner driver settings screen. (See p. 72) Set [Page Size] on the [Basic] tab to a size that is half that Set the [Page Size] to half the size of the document (or of the paper to be actually scanned, and set [Scanning [Detect automatically] when scanning nonstandard Side] to [Folio].
-
Page 34: Scanning With Carrier Sheets
Scanning with Carrier Sheets Insert the document into the carrier sheet. To prevent damage to a document while scanning it, insert it into an optional carrier sheet before loading it in the scanner. Sets the scanning conditions. Set the Feed Selection Lever to Bypass Mode. Load the document with the sealed end of the carrier sheet as the leading edge. - Page 35 Click the [OK] button to close the settings screen. Open the scanner driver settings screen. (See p. 72) Click the [More] button. • The maximum thickness that can be scanned is 127g/m . If the The scanner driver’s Detail Settings screen opens. thickness exceeds 127g/m , the scanner may break down due to problems such as paper jam.
-
Page 36: Loading Passports
Loading passports Open the page of the passport that you want to scan. Insert the passport into the carrier sheet so that the To scan a passport, insert the passport into the separately sold carrier thicker side is positioned as close as possible to the sheet (for passports) and then place it onto the scanner. - Page 37 IMPORTANT • Depending on the condition of the carrier sheet or passport, the image may not be scanned completely or the scanner's image Open the scanner driver settings screen. (See p. 69) correction may not function properly. If this is the case, set [Page Size] to a larger paper size (A4, for example) on the Open the [Feeding] tab, and set [Document type] to scanner driver settings screen, and then scan again.
-
Page 38: Setting The Long Document Mode
the feeding area and be damaged. Be careful to place the document so that it is not skewed. • When scanning with the Long Document mode, paper jam Open the scanner driver settings screen. (See p. 72) detection may react slowly, resulting in damage to the document. Be careful to avoid paper jams. - Page 39 IMPORTANT Click the [Long Document Mode] tab and specify the When scanning documents with [Long Document Mode (3000 mm)] Long mode. selected on the [Long Document Mode] tab, the image may not be Depending on the length of the document, select [Long Document scanned completely if 400 dpi or 600 dpi is selected, or if [Color] is Mode (1000 mm)] or [Long Document Mode (3000 mm)].
-
Page 40: Detecting A Document Double Feed
Detecting a document double feed Select [Long Document mode (1,000 mm)] or [Long Document mode (3,000 mm)] depending on the length of This scanner includes a function to detect document double feeds. By the document. using this function, the scanner will automatically stop when it detects that multiple documents have been fed at the same time. - Page 41 Select either the [Detect by Length] or the [Detect by Ultrasonic] check box (or both). Open the scanner driver settings screen. (See p. 72) Select the [Double Feed Detection] check box, and then select any one of [Detect by Ultrasonic], [Detect by Length], and [Detect by Ultrasonic and Length].
- Page 42 What to do when a double feed is detected When not using the double feed detection ignore function If a document double feed is detected during scanning, document feeding stops when the double fed documents are ejected. When this happens, the following error is displayed in the touch panel. Also, the [Rapid Recovery System] screen appears to enable you to specify whether to continue scanning.
- Page 43 Buttons of [Rapid Recovery System] Description Screen Saves the preview image as a scanned [SAVE & CONTINUE] image and scans the rest of the document. Discards the preview image and stops [STOP] scanning. Discards the preview image and [DISCARD & continues scanning.
-
Page 44: Operating The Settings Menus
Operating the Settings Menus About the Settings Menus The setting menus are functions that allows users to change some of First Second Third Fourth Fifth the scanner's functions. hierarchy hierarchy hierarchy hierarchy hierarchy Total Procedure to operate the settings Scanning Count menu Roller... - Page 45 First Second Third Fourth Fifth hierarchy hierarchy hierarchy hierarchy hierarchy Connection Switching Network Information Automatic IP Address IP Address Subnet Setting Manual Mask Default Gateway Network Connect Available Settings Settings Network Wi-Fi Manual Setting Wireless Connection Tool Enable* Admin Connection Address* Setting* SSL*...
-
Page 46: Functions In The Settings Menus
Functions in the Settings Menus The settings menus have the following functions. Maintenance Device Settings Select the following menu to do maintenance on the scanner. Total Scanning Count Select the following menu items to configure scanner operation. Shows the total number of scanned images recorded by the scanner. Brightness Tap the [-] and [+] buttons or the slider bar to adjust the brightness. -
Page 47: Connect Settings
The field is empty if one has never been set. Network Settings DR-S130 Select the following menu to set the network information. Set the following menu to do settings related to how the scanner and IP Address Setting computer are connected. - Page 48 • If the entered subnet mask is not a contiguous left-justified value, a Manual warning screen is displayed and the entry is rejected. Manually type in the SSID and security key for the network to which • If the entered default gateway is "0.0.0.0", "255.255.255.255", you want to connect.
-
Page 49: Scan Setting
Connection Test Test the connection with COT Admin. Scan Setting Select the following menu items to configure scan-related settings. Detect Double Feed Enable/disable Double Feed Detection. Tap to switch between enabled and disabled. There are two methods of double feed detection: comparing the length of documents, and detecting unevenness between documents by ultrasonic sensors, which can be set by the scanner driver. -
Page 50: Scanning
Scanning With this device, you can scan documents by operating the touch Assigning a shortcut to a Job No. and scanning from the panel or an application on a smart device, as well as applications on scanner touch panel a computer. If you assign a registered shortcut to a Job No., you can recall the job and scan the document from the scanner touch panel. - Page 51 For smart devices Registering a job in the scanner and scanning from the scanner touch panel If you copy the registered job to the scanner, the job can be recalled from the scanner touch panel. Once the job is registered, you can scan documents without using a computer or a smart device.
-
Page 52: Basic Operations: Various Scanning Operations Using A Computer (Captureontouch)
Basic Operations: Various Scanning Operations Using a Computer (CaptureOnTouch) Starting and Exiting CaptureOnTouch By default, CaptureOnTouch becomes resident in the system when you start your computer. CaptureOnTouch becomes no longer resident in the system and the Double-click in the taskbar to start CaptureOnTouch and display icon disappears from the taskbar. -
Page 53: Selecting A Scanner
Hint Selecting a scanner In Windows 8.1, it is registered in the following location. The following is an explanation of how to select a scanner using CaptureOnTouch. Click the (CaptureOnTouch Icon) on the taskbar. Click [Select Scanner] on the menu. •... -
Page 54: Screen Descriptions
Hint Screen Descriptions If the scanner you are using does not appear, reinstall the scanner driver. There are two areas in the CaptureOnTouch main screen, [Scanning Shortcut] and [Standard Scanning]. Use the [>] [<] at the top right of the main window to move between sections. -
Page 55: Standard Scanning
Standard Scanning Click the output panel for the scan image application from [2 Select output]. Operations; The selected [Output] panel will be displayed in orange. Selecting the Select document panel -> Selecting the Select output panel -> Start scanning Place the document in the scanner. Click the select document panel for the document to be scanned from [1 Select document]. - Page 56 Hint Click the [SCAN] button. If scanning continuously, set the next document, and click the [Scan more pages] button to start the document scan. The document is scanned. While scanning is in progress, the number of pages scanned is displayed in addition to the scanner settings. When the scan is finished, the [Scanned image preview screen] opens.
-
Page 57: Scanning Shortcut
Scanning Shortcut To check the scanned image, click the [Finish] button. Operations; Save [Scanning Shortcut] -> Scan the document -> Output the scanned images By adding scanning shortcuts that combine frequently-used document selections and outputs, you can scan just by clicking the Scanning Shortcut panel. - Page 58 Registering and editing scanning The Edit Scanning Shortcut Panel dialog box appears shortcuts when you click the Edit button. Multiple scanning shortcuts can be allocated to CaptureOnTouch. Either click the [New shortcut] button in [Scanning shortcut], or select the document scan and output in [Standard Scanning], and click the [Save to Shortcut] button.
- Page 59 Click the [Batch separation] tab to set the batch Click the [Output] tab to set the outputs. separation.
- Page 60 Click the [Index] tab to set the index file. Click the [Option] tab to set the options. [Edit after scanning] Check it on to enable modifying the scanned images in Scan Editing screen. When unchecked, the Edit window is not displayed in Scan Editing screen.
- Page 61 [Job assignment] Click the [General] tab to make other settings. You can assign a scanning shortcut as a job. When a scanning shortcut is assigned as a job, an icon for the assigned job No. will be displayed in the scanning shortcuts panel. [Order of output] You can add or delete the output, and also change the order of output.
- Page 62 Selecting and scanning shortcuts Hint If scanning continuously, set the next document, and click the [Scan Place the document in the scanner. more pages] button to start the document scan. “Basic Operation” (See p. 26) If [Enable additional scan] is disabled in the scanning shortcut settings, the [Scan more pages] button will not be displayed.
- Page 63 Hint To check the scanned image, click the [Finish] button. If you click [Open storage folder], the folder in which the saved scanned images were saved opens. Depending on the output settings, the [Open storage folder] link may not be displayed. Hint If [Edit after scanning] is disabled in the scanning shortcut settings, the edit window will not be displayed.
-
Page 64: Scanning From The Scanner Touch Panel
When connected via a network Scanning from the Scanner Touch Panel (CaptureOnTouch) on the touch panel home screen. If you set frequently-used scans to the scanning shortcuts and assign them as jobs, you can select and run shortcut scans by operating the The PC List screen is displayed. -
Page 65: Advanced Operations: Scanning A Document And Saving It In A Shared Folder Without Using A Computer (Captureontouch Job Tool)
Advanced Operations: Scanning a Document and Saving it in a Shared Folder without Using a Computer (CaptureOnTouch Job Tool) Android devices Preparation Before Scanning Install CaptureOnTouch Job Tool on a smart device or a computer, Tap [Settings]. and then connect the scanner and computer/smart device to the The [Settings] screen appears. - Page 66 IMPORTANT Start the CaptureOnTouch Job Tool. The maximum number of jobs that can be copied is 99. The [Scan from app job] screen appears. Hint (Shared Folder) on the scanner touch panel home When using a smart device, you can change the screen screen.
- Page 67 To delete jobs registered in To delete jobs registered in CaptureOnTouch Job Tool (when using a CaptureOnTouch Job Tool (when using a smart device) computer) Deleting selected jobs Press and hold the icon of a job you want to delete. appears to indicate it is ready to be deleted.
- Page 68 To Delete Jobs Copied to the Scanner Enter the administrator password. Jobs copied to the scanner can be deleted. Enter the same password as for the Web menu. For details, “Displaying the Scanner’s Web Menu” on p. Delete the job(s) from the CaptureOnTouch Job Tool. For details, see “To delete jobs registered in CaptureOnTouch Tap/click [OK].
-
Page 69: Setting The Scanner Driver
Setting the Scanner Driver When you load the driver for the first time, the selected scanner and a [Basic] tab dialog for selecting the default paper size are displayed. Hint When you load the ISIS driver for the first time, the selected scanner and a dialog for selecting the default paper size are displayed. - Page 70 [Image processing] tab [Brightness] tab Set the processing method for scanned images. [Image control] tab Adjust the brightness and contrast of scanned images. In addition, you can also click [Gamma] and set the gamma correction value for scanned images. Set the image control method for the scanned image.
- Page 71 [Feeding] tab [Others] tab Specify scanner operations related to document feeding. Configure special scan method and image processing settings. [Error Detection] tab User’s Guide Set the items to be detected as errors during the scan. Informs you about the settings changed automatically by the driver. In addition, displays the image for which settings were currently made, in the illustrations.
- Page 72 Hint When the Advanced Settings screen is called from some When the scanner driver is opened from CaptureOnTouch, the applications, the Advanced Settings screen may have the Simple following settings screen of the scanner driver appears. mode and Advanced mode. Simple Mode Advanced Mode...
-
Page 73: Setting Basic Scanning Conditions
[Detect automatically] detects whether the document is in color, Setting Basic Scanning Conditions grayscale, or black and white. You can configure advanced settings related to the detection method by clicking [Setting]. For details, (See This section provides an overview of the basic setting items that are 81). - Page 74 Color mode Select the scanning mode. Confirming Basic Conditions for Scanning When you scan a document, make sure you confirm the [Color mode], [Dots per inch], [Page Size], and [Scanning Side] basic conditions in the settings screen of the scanner driver. •...
- Page 75 Page Size Scanning Documents of Unregistered Select the page size that matches the document to be scanned. Page Sizes You can register an unregistered paper of non-standard size with a name, as a custom paper size. Click the [Setting] button of [Page Size] in the [Basic] tab, to display the [Page Size Settings] dialog box.
- Page 76 Specifying the Scan Area Also, if you scan the document when [Check the image of the first page] is selected, only one page of the document is scanned and the Configure the following settings when you want to specify the area of corresponding scanned image is displayed in the preview window.
- Page 77 When you want to enhance contours in images Set the scanning side setting to [Skip blank page] to delete the images of the blank pages in the document. Adjust the edge emphasis setting on the [Image control] tab. Click [Image processing] and adjust the edge emphasis settings in the If [Skip blank page] is selected, you can adjust the level for judging dialog box which appears.
- Page 78 When you want to reduce the moire patterns that appear when color photos in magazines and other documents are Click [Image processing], and then configure moire reduction settings scanned at low resolutions in the dialog box that appears. Setting [Moire Reduction] on the [Image control] tab sheet allows you to reduce the moire patterns that are generated when color photos are scanned at low resolutions.
- Page 79 When you want to reduce the color unevenness Click [Image processing], and then set [Color Unevenness reduction] to [ON] in the dialog box that appears. You can adjust the level of color Unevenness. Check the check box of [Color unevenness reduction] on the [Image control] tab to reduce the color unevenness.
- Page 80 When you want to make lines and text in scanned images When you want to reverse black and white in scanned thicker or thinner images Drag the [Character Emphasis] slider in the [Image processing] tab to Select [Reverse Image] on the [Image control] tab sheet. This outputs make lines and text in the scanned images thicker or thinner.
- Page 81 When you want to enhance text that is difficult to read • [Advanced Text Enhancement II] is suitable for scanning a document with a uniform background color and light text and because of factors such as the background of the background.
- Page 82 When you want to detect multiple pages fed at the same time Select the [Double Feed Detection] check box on the [Error Detection] tab. You can enable either one or both of [Detect by Ultrasonic] and [Detect by Length]. When you want to match the orientation of images to the text when scanning a mixture of pages with different text orientations Select [Text orientation recognition] in [Document Orientation] on the...
- Page 83 When you want to rotate the images of a document placed horizontally to correct the orientation Select the [Text Orientation Recognition] check box. The text orientation on each page is detected, and the scanned image is rotated in 90-degree increments to correct the orientation. Specify the rotation angle in [Document Orientation] on the [Others] tab.
- Page 84 When you want to use batch separation for scanning Click [Image processing] and specify the rotation angle in [Document Orientation] in the dialog box that appears. When you want to divide and scan a document, you can separate a batch at the timing with which each next document is placed and scanned.
- Page 85 When [Batch Separation] is set to [Auto], the batch is separated after When you want to use multistream settings for scanning the next document is placed and scanning is continued. For more details about [Blank Page] and [Patchcode], see “Batch Separation Using Patch Code Sheets”...
- Page 86 D When specifying the scanning conditions of the back, configure the To scan barcodes settings in the same way as described in B to C. In this case, specify [Stream count of Back], and then set the scanning conditions for each of [Back 1st] to [Back 3rd]. Click the [Barcode] button on the [Others] tab to configure barcode Hint scanning conditions.
- Page 87 When you want to remove dots and notches that appear in documents Click [Image processing] and select [ON] for [Erase Dot] or [Erase Notch] in the dialog box that appears. You can remove dots and notches protruding from object outlines that appear in documents from scanned images.
- Page 88 When you want to save a scanner driver setting When you finish configuring a setting, click the [Save] button of [User Preference] to save the setting. The saved setting is registered to the list. You can delete a setting from the list with the [Delete] button, and save or load a configuration file with the [Back Up] or [Restore] button.
- Page 89 Function Restrictions Depending on Color Mode Setting Some of the setting items in each of the driver tabs are disabled as follows depending on the setting for [Color Mode] on the [Basic] tab. [Brightness] tab [Others] Tab Setting value Contrast Setting value Prescan Detect Automatically...
- Page 90 [Image control] tab Edge Background Character Prevent Bleed Through / Color Setting value Erase Dot Erase Notch emphasis smoothing Emphasis Remove Background drop-out Detect Automatically Active Threshold Black and White Error Diffusion Advanced Text Enhancement Advanced Text Enhancement II Grayscale Color (O: Available for setting, X: Not available for setting) Not available for setting if all of the following conditions in the [Auto Image Type Detection Settings] dialog box are met.
- Page 91 Advanced Mode Enable Back Side Enable Back Side Check the image of the Setting value Brightness Contrast first page Detect automatically Black and White Error Diffusion Advanced Text Enhancement II 256-level Gray 24-bit Color O: Available for setting X: Not available for setting Advanced mode (Image processing dialog) Prevent Bleed Edge...
- Page 92 Function limit due to the setting of the document type Depending on the setting of the [Document Type] of the [Feeding] tab, a part of the settings in each tab of the driver will be disabled, in the following manner. Document type Ultrasonic Double Feed Detection Plain paper...
-
Page 93: More Advanced Scanning Methods (Batch Separation)
More Advanced Scanning Methods (Batch Separation) Batch Separation Using Patch Code Sheets Batch Separation (Insert blank page) DR-S150/DR-S130 supports batch separation (automatic file Recognizes blank pages as batch separators and performs batch separation) separation (automatic file separation) when documents containing functions by using patchcodes. - Page 94 In Windows 8.1, it is registered at the following location. Print patchcode with a printer. Click [Start] – [Canon DR-S100 Series] and then select [Patchcode] from the menu. Patchcodes can be printed in A4 and letter (LTR) sizes. Open the application and print a patchcode that is the same size as the document to be scanned.
- Page 95 Place the documents in the scanner after inserting the patchcode sheet in front of the page that separates the files. Insert the patchcode sheets at the beginning of documents to change file separation. In an application, specify a patchcode as a type of batch separation.
-
Page 96: Web Menu
Web Menu Using the Web Menu The Web menu is used to display information about the scanner, to set up the network when connecting via wired LAN (DR-S150 only) or Wi-Fi, and to configure various Web services. Scanner settings can be configured using a Web browser. - Page 97 DR-S150 DR-S130 Open the Canon imageFORMULA Driver Setting Tool’s Settings screen. (See p. 114) Click the [Network monitor] tab. IMPORTANT To ensure security, we recommend changing the administrator password without leaving it as shipped from the factory. Change the password in the [Password Setting] screen of the Web menu.
-
Page 98: Web Menu Pages
On the Finder menu bar, click [Go] - [Applications]. Double-click [WebScanSettingTool]. WebScanSettingTool starts. Web Menu Pages When you click the items on the left menu, the following pages are displayed. Scanner Name Setting: Displays the scanner name. Network Setting: Configures the network settings. Device Configuration: Configures the mDNS, SNMP, PIN and COT Admin settings. -
Page 99: Web Menu Settings
Web Menu Settings This section describes the setting items on each of the Web menu pages. Scanner Name Setting If you click [Scanner Name Setting] on the left menu, the page below is displayed. Item Description Default Value Enable ([ON]) / disable ([OFF]) the DHCP protocol. -
Page 100: Device Configuration
Item Description Default Value Set the subnet mask of the scanner. If DHCP is enabled, it provides the subnet mask. The value must be four decimal numbers separated by dots and Subnet Mask None expressed in the [xxx.xxx.xxx.xxx] format. When set to [0.0.0.0], a subnet mask appropriate for the IP address is automatically used. - Page 101 Item Description Default Value Item Description Default Value Enable/disable multicast DNS. SNMP Sets the SNMP function to This setting allows scanning Service enabled/disabled. applications to search for and Input the location where the Location None automatically connect to the scanner is installed. scanner.
- Page 102 Community Setting In the SNMP settings screen, enable SNMP v1 and click [Community Setting] to open the page shown in the following diagram. Item Description Default Value Set a community name within 32 characters. Item Description You can use single-byte letters, Community numbers, hyphens, and underbars.
- Page 103 Item Description Default Value Item Description To specify a host to be accessed, Change the settings of the selected user. Click input its IP address or computer Modify to open a dialog box for editing the various Accepted name. You can specify a maximum None settings for a user.
- Page 104 Item Description Default Value MIB access Set either [Read/Write] or [Read Read only restrict only] as the user rights. Authentication Specify MD5 or SHA1 as the algorithm authentication method. Set an authentication password using 8 to 16 characters. You can use single-byte letters, numbers, Authentication hyphens, and underbars.
-
Page 105: Password Setting
Item Description Default Value Displays the COT Admin account name. Account If you click the [Change] button, a None name dialog box for changing the COT Admin account will be displayed. Password Setting If you click [Password Setting] on the left menu, the page below is displayed. -
Page 106: Maintenance Setting
Maintenance Setting If you click [Maintenance Setting] on the left menu, the page below is displayed. On this page, you can restore the scanner’s factory default settings and update the firmware. Item Description Restore the scanner’s factory default settings. If you click [Initialize] and then [Yes] in the screen Initialize that appears, the scanner’s factory default... -
Page 107: Maintenance
Maintenance Daily Maintenance Clean the scanner on a regular basis, as described below, to maintain Cleaning the Inside of the Scanner peak scanning quality. Dust or paper particles inside the scanner may cause lines or CAUTION smudges to appear on scanned images. Use compressed air to •... - Page 108 • Scratches on the sensor glass may cause marks on the images, as well as feeding errors. If there are scratches on the sensor glass, contact your local authorized Canon dealer or service representative. • Take care to ensure the anti-static brush in the front unit does not become deformed.
- Page 109 Remove the retard roller and feed roller. (See p. 111, Close the front unit by gently pushing it up on both sides p. 112) until it clicks into place. Make sure that the front unit is completely closed by pushing until you hear a click. IMPORTANT Remove the retard roller and feed roller from the scanner to clean them, and be sure to reattach them to the scanner when cleaning...
-
Page 110: Replacing Consumable Parts
Message that appears on the touch panel Replacing Consumable Parts The two rollers (feed roller and retard roller) installed in the scanner are consumable parts. The feed roller and retard roller wear with scanning. If the feed roller and retard roller are worn, documents may not feed correctly and paper jams and double feeds may occur. - Page 111 Opening and Closing the Front Unit When closing the front unit, make sure that it is completely closed by gently pressing the left and right Pull the OPEN lever and pull open the front unit toward until you hear a click. you.
- Page 112 Replacing the Retard Roller Remove the feed roller. Open the roller cover. Install the new feed roller. Pull the left lever that secures the retard roller to the scanner, and remove the roller. Close the roller cover.
- Page 113 Resetting the counter Install the new retard roller by inserting the right side first. (Settings) button on the touch panel. The settings menu screen appears. Tap [Maintenance] and then [Roller Feed Count], in that order. Push the left side of the retard roller to secure it to the scanner.
-
Page 114: Removing The Document Feed Tray
“Web Menu” (See p. 96) IMPORTANT A USB connection is required to make this setting with the Canon imageFORMULA Driver Setting Tool. When connected via wired LAN (DR-S150 only) or Wi-Fi, making this setting with the Canon imageFORMULA Driver Setting Tool is ineffective. - Page 115 Start-up of the Canon imageFORMULA Driver Setting Tool Click the Start button, then click [Canon DR-S100 Series] - [Canon imageFORMULA Driver Setting Tool] in that order. Canon imageFORMULA Driver Setting Tool will start. Hint In Windows 8.1, it is registered at the following location.
-
Page 116: Troubleshooting
If you have a problem that is not solved by the following, contact your (common): local authorized Canon dealer. (1) Confirm that the IP address is configured properly. (2) If a DHCP server does not exist on the network, you Problem 1 The scanner will not turn on. - Page 117 9. Set each item as follows, and then click [Next]. When connecting via Wi-Fi: Protocol type: UDP (1) Confirm that the access point is operating correctly. Local port: Specific Ports (2) Turn both this scanner and the access point off and Port Number: 5353 back on, and attempt the Wi-Fi connection again.
- Page 118 If the problem cannot address manually. be solved by cleaning, the internal glass may be scratched. Contact your local authorized Canon dealer. Problem 7 After doing settings on the Wireless Connection Tool, an error occurs and the scanner cannot be Problem 11 Pages are missing.
- Page 119 Problem 13 Multiple pages of scanned images cannot be saved Problem 15 Memory becomes insufficient and scanning stops. to a single file. Solutions If you configure scanning conditions that use a large Solutions Depending on the file format, multiple scanned image amount of the computer’s memory, scanning may stop pages cannot be saved as a single file with because of insufficient memory.
- Page 120 Problem 17 Passport cannot be scanned as intended Solutions Depending on the condition of the carrier sheet or passport, the image may not be scanned completely or the scanner's image correction may not function properly. Configure the settings as shown below. (1) Set [Page Size] to a larger paper size (A4, for example) on the scanner driver settings screen, and then scan again.
-
Page 121: Software Troubleshooting
Software Troubleshooting This section describes troubleshooting problems and solutions for operating the supplied software (CaptureOnTouch). If scanning is too slow (1) Close other running programs, if any. (2) Scanning can be slowed down by memory shortage caused by memory-resident applications such as anti-virus programs. Close such memory-resident programs if necessary to free up memory space. -
Page 122: Useful Tips
Useful Tips Here are some useful tips for scanning documents. Setting Description Where are scanned images saved? Can the save destination be Any specified text string to be included in the file changed? File name name. Images are saved to the following locations, according to program settings. - Page 123 How do I print scanned data? • For both Standard Scanning and Scanning Shortcut, select [Print] in the [Select output] panel. • To use this function, you need to install a plug-in. • The plug-in can be installed by selecting its checkbox when installing CaptureOnTouch.
-
Page 124: Clearing A Paper Jam
Clearing a Paper Jam When paper jams are detected during scanning, the following error Remove any documents that have been left in the feed codes are displayed in the touch panel and scanning is interrupted. Tray. When a paper jam or double feed occurs during scanning, use the following procedures to clear them. - Page 125 Pull the OPEN lever and pull open the front unit toward Remove the jammed document. you. IMPORTANT Make sure to pull the document out carefully, without applying too Hint much force. If the jammed paper tears while you are pulling it out, The following message appears on the touch panel when the make sure to remove any remaining pieces from inside the front unit is open.
- Page 126 Close the front unit by gently pushing it up on both sides until it clicks into place. Make sure that the front unit is completely closed by pushing until you hear a click. After removing the jammed paper, check to see if the last page was scanned correctly, and then continue scanning.
-
Page 127: Error Message
Error Message If one of the following messages appears on the touch panel, then an error has occurred on the scanner. Handle the error according to the countermeasure procedure. Error messages Symptom Countermeasure Scanner cover is open. Front unit is open. Close the front unit. -
Page 128: Uninstalling The Software
Uninstalling the Software Some scanner malfunctions can be resolved by reinstalling the software. Before reinstalling the software, make sure to completely uninstall any previous installation first. Uninstalling the ISIS/TWAIN Driver From the program list, select the application to be removed and click [Uninstall]. The following procedure uses the ISIS/TWAIN driver as an example. -
Page 129: Appendix
Make sure stacks do not exceed 6 mm in height for Duplex 200dpi 90 images/min either of the above. 300dpi 60 images/min Business Card DR-S130 Size: 50 mm x 85 mm (2" x 3.35") or larger Grayscale Simplex 200dpi 30 pages/min Paper thickness:... -
Page 130: Replacement Parts
• For the replacement procedure, see “Replacing Consumable Parts” Shortcut of CaptureOnTouch to the start button of Flatbed Scanner on p. 110. Unit. • Contact your local authorized Canon dealer or service representative for detailed information about the replacement parts. -
Page 131: Dimensions
Limitation of Restarting with Start Button Dimensions When CaptureOnTouch is set not to be resident in memory, CaptureOnTouch cannot be restarted by pressing the start button on Flatbed Scanner Unit after you end CaptureOnTouch. About Setting up the Scanner Driver When functions of this scanner cannot be selected with the Flatbed Scanner Unit settings dialog box, click [Option] in the dialog box to open the scanner driver and make the required settings. -
Page 132: Index
Index Advanced Mode(Mac) ..............72 Paper Feed Tray with NFC Reader .......... 130 Paper jam ................. 124 Passports ................36 Batch separation ..............84 Power supply ................10 Bypass mode ................30 Retard roller ..............110 CaptureOnTouch Roller ..................108 Restarting ................52 Cleaning ................ - Page 135 CANON ELECTRONICS INC. 3-5-10 SHIBAKOEN, MINATO-KU, TOKYO 105-0011, JAPAN CANON U.S.A. INC. ONE CANON PARK, MELVILLE, NY 11747, U.S.A. CANON CANADA INC. 8000 Mississauga Road Brampton, Ontario L6Y 5Z7, CANADA CANON EUROPA N.V. BOVENKERKERWEG 59, 1185 XB AMSTELVEEN, THE NETHERLANDS CANON AUSTRALIA PTY.