Table of Contents
Advertisement
Quick Links
Advertisement
Table of Contents

Related Manuals for Casio DT-X10 Series


Summary of Contents for Casio DT-X10 Series
- Page 1 Handheld Terminal Series User’s Guide Be sure to read “Safety Precautions” inside this manual before trying to use your Handheld Terminal. After reading this manual, keep it in a safe place for future reference. PQRS WXYZ Alpha...
-
Page 3: Operating Precautions
Operating Precautions Your Handheld Terminal is a precision digital instrument. Improper operation or rough handling can cause problems with data storage and other problems. Note and observe the following precautions to ensure proper operation. • Do not continue operating the Handheld Terminal when battery power is low. Doing so can cause data to be lost. -
Page 4: Introduction
• The contents of this manual are subject to change without notice. • Note that CASIO COMPUTER CO., LTD. shall not be held liable to you or any third parties for any losses or damages arising from the use of this manual. - Page 5 DT-X10M20URC, DT-X10M30U, DT-X10M20U, DT-X10M30URC, DT-160IOE, DT-167CHGE, DT-169CHGE, DT-5022CHGE Trade Name: CASIO Responsible party: CASIO, INC. Address: 570 Mt. Plesant Avenue, Dover, New Jersey 07801 Telephone number: 973-361-5400 This device complies with Part 15 of the FCC Rules, Operation is subject to the following two conditions: (1) This device may not cause harmful interference, and (2) this device must accept any interference received, including interference that may cause undesired operation.
- Page 6 Germany, Greece, Ireland, Italy, Luxembourg, The Netherlands, Portugal, Spain, Sweden, United Kingdom EFTA: Switzerland, Iceland, Lichtenstein, Norway Member states with restrictive use NONE Manufacturer CASIO COMPUTER CO., LTD. Brand CASIO Type DT-X10M30E, DT-X10M20E, DT-X10M30U, DT-X10M20U is tested to and conforms with the essential requirements for protection of health and the safety of the user...
-
Page 7: Table Of Contents
Contents Safety Precautions ..................E-1 Operating Precautions ................... E-8 Introduction ....................E-9 Before Getting Started ................. E-14 Handheld Terminal System Configuration ..........E-16 Optional Accessories ..................E-16 General Guide ....................E-19 Replacing the Battery .................. E-21 Replacing the Main Batteries ................E-21 Attaching the Hand Strap ................E-24 Configuring Handheld Terminal Settings ...........E-25 Calibrating Touch Screen Alignment .............. - Page 8 Using the Satellite Cradle (DT-160IOE) ............E-34 General Guide ....................E-34 Bundled Items ....................E-34 Connecting the Satellite Cradle AC Adapter and Connecting to a Computer .. E-36 Configuring DIP Switch Settings ..............E-38 Using a Wall Mount Configuration ..............E-39 Daisy Chaining Multiple Satellite Cradles (DT-160IOE) ........
-
Page 9: Before Getting Started
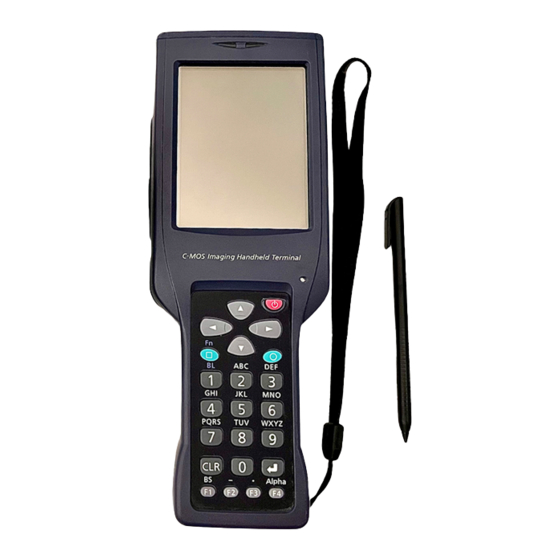
Before Getting Started Be sure to perform the following steps before trying to use the Handheld Terminal for the first time. 1. When unpacking, check to make sure that everything is included. Open the box and check to make sure that all of the items shown here are included. Handheld Terminal Stylus PQRS... - Page 10 2 Load a battery pack (DT-5023BAT) or a large-capacity battery pack (DT-5025LBAT). Take care that the battery pack is oriented correctly when you load it. 3 Replace the battery pack cover, and then slide the battery pack cover lock switches to the “LOCK”...
-
Page 11: Handheld Terminal System Configuration
Handheld Terminal System Configuration Optional Accessories Satellite Cradle DT-160IOE Bundled Items AC Adapter (AD-S42120AE) DT-X10M30E DT-X10M20E DT-X10M20U Cradle-type Battery Charger DT-X10M30U DT-169CHGE Bundled Items AC Adapter (AD-S42120AE) Wall Mount Unit PQRS WXYZ Alpha Wall Mount Unit Wall Mount Unit Screws Screws E-16... - Page 12 Battery Pack DT-5023BAT DT-5025LBAT (Battery Pack) (Large-capacity Battery Pack) Dual Battery Charger DT-5022CHGE Dual Battery Charger AC Adapter MPC-577ADP MPC-177ADP E-17...
- Page 13 CF Card Extension Unit DT-894CFU Bundled Items Large Card Cover Cables DT-882RSC Satellite Cradle – PC Connection Cable (RS-232C) DT-883RSC Satellite Cradle – PC Connection Cable (RS-232C) DT-887AXA Satellite Cradle – PC Connection Cable (RS-232C) DT-888RSC Satellite Cradle Daisy Chain Cable DT-380USB Satellite Cradle –...
-
Page 14: General Guide
General Guide Left Side Front Right Side Back PQRS WXYZ Alpha Indicator 1 Lights green to indicate normal barcode or other data reading. Indicator 2 Lights green to indicate charging is complete. LCD Panel/Touch Shows text, operation indicators, etc. Also, operations can be Screen performed and text can be input using the supplied stylus. - Page 15 IR Port This port is used for IR data communication with another Handheld Terminal or the Satellite Cradle. CLR Key Press to clear all key input. Fn Key Press this key and then a number key to access the function assigned to the number key.
-
Page 16: Replacing The Battery
Replacing the Battery Your Handheld Terminal uses two types of batteries: a main battery and a backup battery. The main battery is used to power normal operations and to store data, while the backup battery provides the power required to maintain memory contents when the main battery power is unable to supply power for some reason. - Page 17 To replace the battery pack 1. Make sure that the Handheld Terminal is turned off. If power is on, press the power button to turn it off. 2. Turn over the Handheld Terminal. 3. Slide the two battery pack lock switches on both sides of the Handheld Terminal to the “FREE”...
- Page 18 Loading the large-capacity battery pack into the Handheld Terminal After loading a large-capacity battery pack, you need to use the special large-capacity battery pack cover in place of the standard battery cover. Attachment and removal of the large-capacity battery pack cover are the same as attachment and removal of the standard battery pack cover.
-
Page 19: Attaching The Hand Strap
Attaching the Hand Strap Be sure to attach the hand strap and use it to protect against dropping the Handheld Terminal when carrying it around. To attach the hand strap 1. Pass the thin cord of the hand strap through the hand strap hole on the back of the Handheld Terminal. -
Page 20: Configuring Handheld Terminal Settings
Configuring Handheld Terminal Settings Calibrating Touch Screen Alignment Whenever you feel that touch screen response is poor or that the operations being executed do not match the location you are tapping on the touch screen, perform the following steps to calibrate the alignment of the touch screen. 1. -
Page 21: Display Auto Dimmer
Display Auto Dimmer The display auto dimmer automatically lowers display brightness if you do not perform any operation for a specific amount of time. This helps to conserve battery power. You can use the following procedure to specify the amount of that should be allowed to pass before auto dimming is performed. -
Page 22: Using The C-Mos Scanner
Using the C-MOS Scanner 1. Tuen on the Handheld Terminal, position its barcode reader port near the barcode or 2-dimensional bar code, and then press a Trigger key. 2-dimensional bar codes Green light Red light 2. The Handheld Terminal LED emits light and reads the barcode. Indicator 1 (read operation indicator lamp) lights green when reading is successful. -
Page 23: About The Warning Label
About the warning label • This label identifies the light source of the Handheld Terminal as a Class 1 LED under the JIS C 6802 standard. • A Class 1 LED momentarily emits strong light. Never look directly into the light emitted by the LED. -
Page 24: Performing Data Communication
Performing Data Communication IR Data Communication IR data communication can be used to transfer data between two Handheld Terminals. When performing IR data communication, orient the IR ports of both Handheld Terminals so they are pointing directly at each other. The ports can be in direct contact with each other, or they can be separated by up to 1 ⁄... -
Page 25: Bluetooth Tm Data Communication
Bluetooth Data Communication Bluetooth protocol can also be used to transfer data between two Handheld Terminals. With Bluetooth the two Handheld Terminals should be located within about three ⁄ meters (9 ) from each other, as long as there is nothing blocking the path between "... -
Page 26: Resetting The Handheld Terminal
Resetting the Handheld Terminal Resetting the Handheld Terminal is the same as restarting a computer. Performing a reset causes all unsaved inputs and edits to be lost, but data that is already stored in memory as well as all settings should be unaffected. Use reset to restore normal operation whenever the Handheld Terminal operates abnormally due to misoperation or some other reason. -
Page 27: Performing A Full Reset (Initialization
Performing a Full Reset (Initialization) Performing a full reset initializes memory. This means that all data stored in memory (RAM) is deleted and all Handheld Terminal settings are returned to their initial factory defaults. Perform a full reset whenever any one of the following conditions exists. •... -
Page 28: Dt-X10 Specifications
DT-X10 Specifications Model: DT-X10M30E, DT-X10M20E, DT-X10M20U, DT-X10M30U ® CPU: Intel PXA250 Application Processor (300MHz max.) Memory: 32MB RAM; 32MB Flash ROM (FlashFX built in) ® ® Microsoft Windows CE NET, English Version 3.5-inch, 240 × 320-dot color 2-Way TFT LCD Display: Serial Port: Interface: USB slave (Mini B5 Pin) -
Page 29: Using The Satellite Cradle (Dt-160Ioe
Using the Satellite Cradle (DT-160IOE) The optionally available Satellite Cradle (DT-160IOE) makes it possible to transfer system data and file data between the Handheld Terminal and a computer over an RS-232C connection or USB connection. You can also connect to the Satellite Cradle to charge the Handheld Terminal battery. - Page 30 USB Port This port accepts connection of a USB cable for connection to a computer for transfer of system data and file data. Use of the USB port requires installation of a special driver on the PC. RS-232C Port This port accepts connection of an RS-232C cable for connection to a computer for transfer of system data and file data.
-
Page 31: Connecting The Satellite Cradle Ac Adapter And Connecting To A Computer
Connecting the Satellite Cradle AC Adapter and Connecting to a Computer Use the AC adapter that comes bundled with the Satellite Cradle to supply power to it. Always make sure that power is being supplied to the Satellite Cradle by the AC adapter before performing any type of data communication operation with the Handheld Terminal. - Page 32 4. Turn on power. This causes the Satellite Cradle power indicator lamp to light red. 5. Making sure that their two IR ports come into contact with each other, place the Handheld Terminal onto the Satellite Cradle. This causes the Satellite Cradle power indicator lamp to light green.
-
Page 33: Configuring Dip Switch Settings
Configuring DIP Switch Settings A bank for DIP switches is located on the bottom of the Satellite Cradle. You can change the on/off settings of the DIP switches to configure the Satellite Cradle to meet your needs. After you change DIP switch settings, the new settings do not go into effect until you turn the Satellite Cradle off and then back on again. -
Page 34: Using A Wall Mount Configuration
Using a Wall Mount Configuration The following procedure explains how to use the optional wall mount unit to configure the Satellite Cradle for a wall-mounted configuration. 1. Remove the screws on the bottom of the Satellite Cradle, and remove the desktop unit. - Page 35 5. Drive the other screw into the wall at the location where the lower hole is located. 6. Drive the upper screw and lower screw into the wall the rest of the way. To remove the Satellite Cradle from the wall 1.
-
Page 36: Daisy Chaining Multiple Satellite Cradles (Dt-160Ioe
Daisy Chaining Multiple Satellite Cradles (DT-160IOE) You can daisy chain multiple Satellite Cradles by connecting the C-OUT port of the unit that is closer to the host computer to the C-IN port of the unit that is further from the host computer. RS-232C cable or USB cable... -
Page 37: Satellite Cradle (Dt-160Ioe) Specifications
Satellite Cradle (DT-160IOE) Specifications 1. IR Data Communication Interface: IR interface Protocol: IrDA Ver. 1.1 Standard Synchronization: Asynchronous Transfer Rate: 9,600, 115,200 bps/4Mbps (over USB connection with a host computer only) 2. RS-232C Protocol: Full duplex Synchronization: Asynchronous Transfer Rate: 115,200bps 3. -
Page 38: Using The Cradle-Type Battery Charger
Using the Cradle-type Battery Charger The optionally available Cradle-type Battery Charger (DT-169CHGE) lets you charge the Handheld Terminal’s battery simply by placing the Handheld Terminal onto the cradle. An optional wall mount unit lets you mount the Cradle-type Battery Charger on a wall. General Guide Back Bottom... - Page 39 AC Adapter Jack Connect the bundled AC adapter here. Wall Mount Unit The holes in this plate accept screws that secure the wall mount Fastening Plate unit in place. Power Contacts Power is supplied to the Handheld Terminal via these contacts. Power Indicator This lamp indicates the power status and the connection status Lamp...
-
Page 40: Connecting The Cradle-Type Battery Charger Ac Adapter And Mounting The Power Pc Terminal
Connecting the Cradle-type Battery Charger AC Adapter and Mounting the Power PC Terminal Use the special AC adapter that comes with the Cradle-type Battery Charger to connect to a power source. 1. After making sure that the Cradle-type Battery Charger power switch is turned off, plug the AC adaptor into the AC adapter jack on the back of the cradle. -
Page 41: Using A Wall Mount Configuration
Using a Wall Mount Configuration To wall mount the Cradle-type Battery Charger, use the same procedure as that described for the Satellite Cradle (DT-5060IO) on page 39. Cradle-type Battery Charger (DT-169CHGE) Specifications Power Requirements: Output: 5V DC 1.0A Charging: Charging System: Fixed-voltage (with current limiter) Charge Time: Approximately 4 hours (battery pack) Approximately 8 hours (large-capacity battery pack) Power Requirements:... -
Page 42: Using The Dual Battery Charger
Using the Dual Battery Charger The optionally available Dual Battery Charger (DT-5022CHGE) lets you charge two battery packs at the same time. General Guide Back Front Bundled Items Connection Bracket 2 screws E-47... - Page 43 Charge Indicator This lamp indicates the charge status of the battery pack(s). Lamp Off: Not charging Red: Charging Red Flashing: Battery pack problem Green: Charging complete AC Adapter Jack Connect the AC adapter here. Dual Battery Use this port to connect multiple Dual Battery Chargers to each Charger other.
-
Page 44: Charging A Battery Pack
Charging a Battery Pack 1. Plug the separately available special AC adapter into a wall outlet. 2. Plug the other end of the AC adapter into the AC adapter jack of the Dual Battery Charger. 3.Taking care that the battery pack is oriented correctly, insert it into the Dual Battery Charger. -
Page 45: Connecting Multiple Dual Battery Chargers
Connecting Multiple Dual Battery Chargers You can connect up to three Dual Battery Chargers. Doing so makes it possible to supply power to all Dual Battery Chargers using a single AC adapter. 1. As shown in the illustrations below, remove the connector covers of the Dual Battery Chargers you want to connect to each other. -
Page 46: Dual Battery Charger (Dt-5022Chge) Specifications
Dual Battery Charger (DT-5022CHGE) Specifications Model: DT-5022CHGE Charging: Charging System: Fixed-voltage (with current limiter) Charge Time: Approximately 2.5 hours for one battery pack Approximately 5 hours for one large-capacity battery pack Charging Two Battery Packs Approximately 5 hours for two battery packs Approximately 10 hours for two large-capacity battery packs Power Requirements: Special AC adapter (MPC-577ADP) -
Page 47: Using A Pc Card
Using a PC Card Your Handheld Terminal supports use of PC cards. Use the following procedure to load and remove PC cards. Affixing a PC Card Remover Tape Once loaded, some PC cards may be difficult to remove from the PC card slot. Affixing a PC card remover tape to the PC card before you load it makes it easier to pull the card out of the slot later. - Page 48 2. Remove the PC card slot cover. 3. Slide a PC card with a remover tape affixed into the Handheld Terminal. Make sure that the top surface of the card is facing in the same direction as the Handheld Terminal display. You will not be able to insert the card all the way into the slot if it is not oriented correctly.
-
Page 49: Using A Cf Card Extension Unit
Using a CF Card Extension Unit The CF Card Extension Unit (DT-894CFU) supports use of CF Type I cards and Type II cards (3.3/15V). Bundled Items DT-894CFU Large Card Cover Use the procedure below to load and remove CF cards. Important ! •... -
Page 50: Loading A Cf Card
Loading a CF Card 1. Wipe the surfaces of the card so it is free of any dirt, dust, or oil. 2. Remove the screws that secure CF Card Extension Unit in place, and then remove the card slot cover. 3. -
Page 51: Using A Rechargeable Battery Pack
Using a Rechargeable Battery Pack Your Handheld Terminal supports use of two battery back types of different capacity. You can select the one that best suits your needs in terms of operating time, the type of options you need to use, etc. When using the large-capacity battery pack, you need to use the special large-capacity battery pack cover that comes with the Handheld Terminal. - Page 52 Safety Precautions Congratulations upon your selection of this CASIO Product. Be sure to read the following Safety Precautions before trying to use it for the first time. Markings and Symbols The following are the meanings of the markings and symbols used in these Safety Precautions.
- Page 53 Foreign Objects • Should any foreign matter get into the Handheld Terminal, immediately turn off the power and contact your original dealer or an authorized CASIO service provider. Continued use creates the danger of fire and electric shock. Dropping and Damage •...
- Page 54 Warning! • Do not perform wireless data communication operations on the Handheld Terminal or turn the Handheld Terminal off when boarding an aircraft. Radio waves emitted by the Handheld Terminal can interfere with the aircraft’s navigation system. Caution Foreign Objects •...
- Page 55 Optional Lithium-ion Battery Pack Danger • Never allow the battery pack to become wet with either fresh water or salt water. Water can create the danger of battery pack heat emission, explosion, and fire. • Never use or leave the battery pack next to open flame, near a stove, or any other area exposed to high heat.
- Page 56 Warning • Never place the battery pack in a microwave oven or any other high-voltage device. Doing so creates the danger of battery pack heat emission, explosion, and fire. • Should the battery pack emit a strange odor or heat, change color or shape, or exhibit any other abnormal behavior, immediately stop using it.
- Page 57 • Should the power cord become severely damaged (to the point that wires are exposed or broken), contact your original dealer or a CASIO service provider about repair or replacement. Use of a damaged electrical cord creates the danger of fire and electric shock.
- Page 58 Backup Copies of All Important Data Caution • Note that CASIO Computer Co., Ltd. shall not be held liable to you or any third party for any damages or loss caused by deletion or corruption of data due to use of the Handheld Terminal, malfunction or repair of the Handheld Terminal or its peripherals, or due to batteries going dead.