Makita DGP180 Instruction Manual
Cordless grease gun
Hide thumbs
Also See for DGP180:
- Instruction manual (105 pages) ,
- Instruction manual (68 pages) ,
- Instruction manual (93 pages)
Table of Contents
Advertisement
Advertisement
Table of Contents

Related Manuals for Makita DGP180


Summary of Contents for Makita DGP180
- Page 1 INSTRUCTION MANUAL Cordless Grease Gun DGP180 Read before use.
-
Page 2: Specifications
SPECIFICATIONS Model: DGP180 Rated voltage D.C. 18 V Grease capacity Cartridge 410 g (with A-type barrel) Bulk 455 g Grease capacity Cartridge 450 g (with B-type barrel) Bulk 570 g Maximum operating pressure 69 MPa Maximum flow rate Slow speed mode... -
Page 3: Ec Declaration Of Conformity
Avoid body contact with earthed or grounded Vibration surfaces, such as pipes, radiators, ranges and refrigerators. There is an increased risk of elec- The vibration total value (tri-axial vector sum) deter- tric shock if your body is earthed or grounded. mined according to EN62841-1: Do not expose power tools to rain or wet con- Vibration emission (a... - Page 4 Always wear protective goggles to protect When using the tool, do not wear cloth work your eyes from injury when using power tools. gloves which may be entangled. The entangle- The goggles must comply with ANSI Z87.1 in ment of cloth work gloves in the moving parts may the USA, EN 166 in Europe, or AS/NZS 1336 result in personal injury.
- Page 5 It will also void the Makita warranty for the Makita tool and Avoid storing battery cartridge in a con- charger. tainer with other metal objects such as nails, coins, etc.
-
Page 6: Parts Description
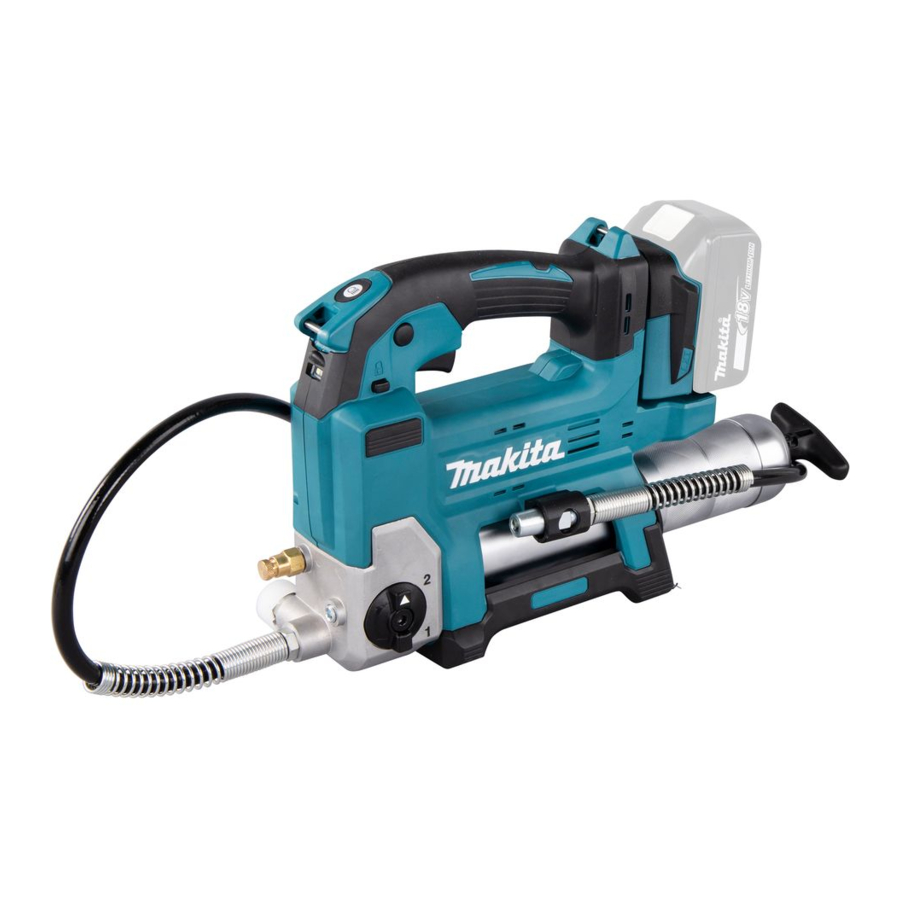
PARTS DESCRIPTION Switch trigger Lock button Lamp switch Lamp Trigger-lock button Speed mode changing knob Air drain Filler port plug Flexible hose Adapter Strap hole Battery cartridge Barrel Rod handle Hose holder Pressure relief valve Shoulder strap 6 ENGLISH... -
Page 7: Functional Description
Overheat protection FUNCTIONAL DESCRIPTION When the tool or battery is overheated, the tool stops automatically and the lamp blinks. In this case, let the CAUTION: Always be sure that the tool is tool and battery cool before turning the tool on again. switched off and the battery cartridge is removed Overdischarge protection before adjusting or checking function on the tool. -
Page 8: Selecting The Speed Mode
Switch action Selecting the speed mode NOTICE: Change the speed mode only after the CAUTION: Before installing the battery cartridge into tool comes to a complete stop. the tool, always check to see that the switch trigger actuates properly and returns to the "OFF" position when released. The tool employs the speed mode changing knob. -
Page 9: Hose Holder
To lock the rod handle fully pulled, pull the rod handle ASSEMBLY until the groove on the rod can be seen, and then hook the groove onto the slot. To unlock the rod handle, unhook the groove so the rod moves forward. CAUTION: Always be sure that the tool is switched off and the battery cartridge is removed... -
Page 10: Shoulder Strap
Remove the barrel from the tool then fully pull the Shoulder strap rod handle and lock it. Remove the plastic cap of the grease cartridge WARNING: Never use the strap hole for lan- and insert the grease cartridge into the barrel. yard (tether strap). - Page 11 Filling grease in the barrel from a bulk You can also fill grease into the barrel using a filler pump (commercially-bought) attached to the bulk container (commercially-bought) container. Remove the barrel from the tool. Remove the filler port plug. Attach a loader fitting (commercially-bought) to the filler port.
-
Page 12: Maintenance
CAUTION: Always check the speed mode To maintain product SAFETY and RELIABILITY, before operation. repairs, any other maintenance or adjustment should be performed by Makita Authorized or Factory Service Centers, always using Makita replacement parts. 12 ENGLISH... -
Page 13: Optional Accessories
These accessories or attachments to the connection part of the new flexible hose at are recommended for use with your Makita tool spec- the same time. If you replace the flexible hose with- ified in this manual. The use of any other accessories out the rubber ring or with the old rubber ring, grease or attachments might present a risk of injury to persons. - Page 14 Install B-type/C-type barrel. Cartridge barrel You can see the grease cartridge through the hole on the cartridge barrel. ► 1. Joint 2. Rubber packing 3. Tab 4. Groove When using the cartridge barrel, transfer the piston 5. Screw parts from the corresponding barrel to the cartridge barrel.
-
Page 15: Angle Adapter
Pull the the rod handle and lock it. Angle adapter When attaching the angle adapter, push the adapter of the tool straight to the angle adapter. Remove the empty grease cartridge from the barrel. Lock on adapter ► 1. Angle adapter CAUTION: Be careful not to pinch the finger in the lock on adapter. - Page 16 Makita Europe N.V. Jan-Baptist Vinkstraat 2, 3070 Kortenberg, Belgium Makita Corporation 3-11-8, Sumiyoshi-cho, Anjo, Aichi 446-8502 Japan 885731-226 www.makita.com 20200519...