Toro 07390 Workman HDX-Auto Operator's Manual
Hide thumbs
Also See for 07390 Workman HDX-Auto:
- Operator's manual (72 pages) ,
- Service manual (280 pages) ,
- Operator's manual (69 pages)
Table of Contents
Advertisement
Advertisement
Table of Contents

Related Manuals for Toro 07390 Workman HDX-Auto


Summary of Contents for Toro 07390 Workman HDX-Auto
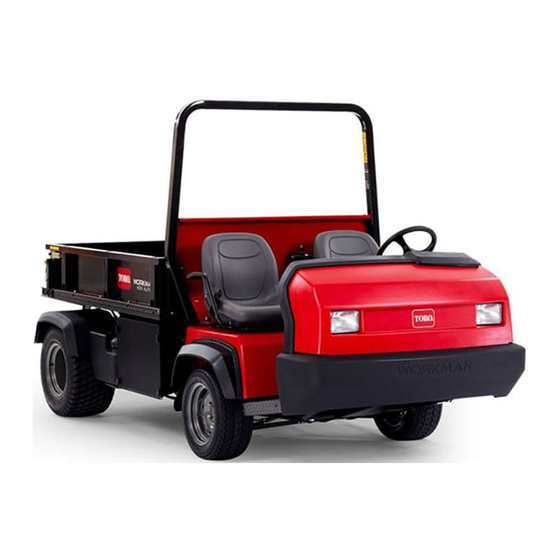
- Page 1 Form No. 3392-863 Rev B Workman ® HDX-Auto Utility Vehicle Model No. 07390—Serial No. 315000001 and Up Model No. 07390H—Serial No. 315000001 and Up Model No. 07390TC—Serial No. 315000001 and Up *3392-863* B Register at www.Toro.com. Original Instructions (EN)
- Page 2 You are responsible for operating the product properly and safely. You may contact Toro directly at www.Toro.com for product safety and operation training materials, accessory information, help finding a dealer, or to register your product. Whenever you need service, genuine Toro parts, or additional...
-
Page 3: Table Of Contents
Contents Jacking the Machine ..........37 Removing and Installing the Hood ......38 Lubrication ...............39 Safety ................4 Greasing the Bearings and the Bushings .....39 Safe Operating Practices........... 4 Engine Maintenance ..........40 Supervisor’s Responsibilities ........4 Servicing the Air Filter ..........40 Before Operating ............ 4 Changing the Engine Oil and Filter ......41 Safe Handling of Fuels .......... -
Page 4: Safety
Use only an approved fuel container. available by sending complete model and serial number • Never remove fuel cap or add fuel with the engine to: The Toro® Company, 8111 Lyndale Avenue South, running. Minneapolis, Minnesota 55420. • Allow engine to cool before refueling. -
Page 5: Operation
• Remove equipment from the truck or trailer and refuel it of the vehicle/bed. Operate the machine with extra on the ground. If this is not possible, then refuel such caution when handling off-center loads that cannot equipment with a portable container, rather than from a be centered. -
Page 6: Maintenance
Keep everyone away. • Do not overspeed the engine by changing the governor settings. The maximum engine speed is 3650 rpm. To ensure safety and accuracy, have an Authorized Toro Distributor check the maximum engine speed with a tachometer. •... -
Page 7: Sound Pressure
Sound Pressure • Measured vibration level for left hand = 0.4 m/s • Uncertainty Value (K) = 0.2 m/s This unit has a sound pressure level at the operator’s ear of 79 dBA, which includes an Uncertainty Value (K) of 1 dBA. Measured values were determined according to the procedures outlined in EN ISO 20643. - Page 8 115-7723 1. Warning—the hydraulic oil pressure is 124 bar (1800 psi). 2. Coupler A 3. Coupler B 106-7767 1. Warning—read the Operator's Manual; avoid tipping the machine; wear the seat belt; lean away from the direction the machine is tipping. 93-9899 1.
- Page 9 115-7739 1. Falling, crushing hazard, bystanders—no riders on machine. 93–9868 1. Crushing hazard of hand—read the Operator’s Manual. 105–7977 Battery Symbols 1. Tank 2. Pressure Some or all of these symbols are on your battery. 1. Explosion hazard 6. Keep bystanders a safe distance from the battery.
- Page 10 127–8626 127–8760 1. Power take-off—15A 5. Differential lock—15A 1. Park 4. Low gear 2. Engine start—10A 6. Speedometer—10A 2. Reverse 5. Drive 3. Hazards—10A 7. Headlights and rear 3. Neutral lights—15A 4. Engine ignition—10A 8. Horn—30A 115-7746 1. Warning—do not operate this machine unless you are trained. 3. Fire hazard—stop the engine before fueling. 2.
- Page 11 127-8620 1. Head lights 4. Horn 7. Engine—start 2. Differential lock—lock 5. Engine—stop 8. Brake 3. Differential lock—unlock 6. Engine—run 121-9890 1. Parking brake 4. Cylinder retract 7. Fast 2. Unlock—hydraulic system 5. Cylinder extend 8. Slow 3. Lock— hydraulic system 6.
-
Page 12: Setup
Setup Loose Parts Use the chart below to verify that all parts have been shipped. Procedure Description Qty. Steering wheel Install the steering wheel. Cover Washer (5/8 inch) ROPS frame Mount the ROPS (Rollover Protection System). Flange-head bolt (1/2 x 1-1/4 inch) –... -
Page 13: Installing The Rops
Figure 4 Figure 3 1. ROPS mounting bracket 2. Flange-head bolt 1. Cover 4. Steering wheel 2. Nut 5. Steering shaft 3. Secure each side of the ROPS mounting bracket to 3. Washer (5/8 inch) frame of the machine with 3 flange-head bolt (1/2 x 1-1/4 inch). -
Page 14: Connecting The Cvt Intake Duct (Tc And H Models Only)
Connecting the CVT Intake Duct (TC and H Models only) No Parts Required Procedure Important: Remove the plastic bag covering the end of the CVT duct before starting the engine of the machine. The CVT kit 121-9853 and adapter kit 127-8750 is required for this procedure. -
Page 15: Checking The Fluid Levels
Product Overview 4. Remove the bed support, lower the bed, shut off the engine, and remove the key from the ignition switch. Controls Note: Determine the left and right sides of the machine from the normal operating position. Checking the Fluid Levels Accelerator Pedal The accelerator pedal (Figure... -
Page 16: Parking Brake
Hydraulic Lift Lever The hydraulic lift raises and lowers the bed. Move the hydraulic lift lever rearward to raise the bed, and forward to lower it (Figure 11). Important: When lowering the bed, hold the lever in the forward position for 1 or 2 seconds after the bed contacts the frame to secure it in the lowered position. -
Page 17: Dashboard Switches
Light Switch Push the light switch down to toggle the headlights on or push the light switch up to toggle the headlights off (Figure 13). Differential-lock Switch The differential-lock switch allows you to lock the rear axle for increased traction. Push the differential-lock switch (Figure 13) to toggle the differential lock on or off. - Page 18 The check engine light (Figure 14) will illuminate to notify operator of a engine malfunction. Use the seat adjustment lever to adjust the seat forward or Contact your authorized Toro service dealer. backward for operator comfort (Figure 17). Oil Pressure Warning Light...
-
Page 19: Specifications
Contact your Authorized Service Dealer or unexpectedly tip open, injuring you or bystanders. Distributor or go to www.Toro.com for a list of all approved • Center the load in the cargo box, if possible. attachments and accessories. -
Page 20: Checking The Fluid Levels
Figure 18 1. Cargo-box lever Lowering the Box WARNING Figure 19 The weight of the box may be heavy. Hands or other body parts could be crushed. 1. Latch handle 3. Latch pin 2. Latch gate Keep hands and other body parts clear when lowering the box. - Page 21 Checking the Engine-oil Level 3. Remove dipstick and check the level of the oil (Figure 21). Service Interval: Before each use or daily—Check the 4. If the oil level is low, remove the filler cap (Figure engine-oil level. (Check the oil level and add enough oil to raise the level to the Full mark before and after the engine is first started on the dipstick.
- Page 22 Checking the Hydraulic Fluid Service Interval: Before each use or daily (Check the level of hydraulic fluid before the engine is first started and daily thereafter.) Hydraulic Fluid Type: Mobil M15 Hydraulic Fluid Capacity: (Non-TC model): 7.5 l (2 US gallons) Hydraulic Fluid Capacity: (Non-TC model with the High Flow Hydraulic Kit (option) or TC Model): 15.1 l (4 US...
- Page 23 2. Remove the cap and dipstick from the filler neck of the reservoir and wipe the dipstick clean with a rag (Figure Figure 24). 3. Insert the dipstick into the filler neck; then remove it and check the fluid level (Figure 23 Figure 24).
-
Page 24: Checking The Oil Pressure Warning Light
Checking the Brake Fluid Service Interval: Before each use or daily—Check the brake fluid level. (Check the level before the engine is first started and daily thereafter.) Every 1,000 hours/Every 2 years (whichever comes first)—Change the brake fluid. Brake fluid type: DOT 3 brake fluid Note: The brake-fluid reservoir is shipped from the factory filled with DOT 3 brake fluid. -
Page 25: Adding Fuel
Adding Fuel DANGER In certain conditions during fueling, static Fuel tank capacity: 25 L (6.5 US gallons). electricity can be released, causing a spark, which • For best results, use only clean, fresh (less than 30 days can ignite the gasoline vapors. A fire or explosion old), unleaded gasoline with an octane rating of 87 or from gasoline can burn you and others and can higher ((R+M)/2 rating method). -
Page 26: Checking The Tire Pressure
Check all fluid levels and add the appropriate amount of 2. Clean the engine area thoroughly of all debris. Toro specified fluids, if any are found to be low. 3. Unlatch and remove the radiator screen from the front •... -
Page 27: Starting The Engine
• Turn the steering wheel to the left and right to check the Gear Speed (kmh) Speed (mph) steering response. R (reverse) 0 to 21 0 to 13 • Stop the engine and wait for moving parts to stop, then L (low forward) 0 to 18 0 to 11... -
Page 28: Using The Differential Lock
The differential lock causes the rear wheels to spin at the same speed. When using differential lock your ability to make sharp turns is somewhat restricted and may scuff the turf. Use the differential lock only when needed and at slower speeds. Note: Vehicle motion plus a slight turn is required to engage or disengage differential lock. -
Page 29: Checking The Interlock System
Checking the Interlock System 1. Sit on the operator’s seat and engage the parking brake. 2. Move the shift lever to the Neutral position and ensure Service Interval: Before each use or daily that the hydraulic lift lever is in the center position. The purpose of the interlock system is to prevent the engine 3. -
Page 30: Towing The Machine
In case of an emergency, the machine can be towed for a may occur. Change the hydraulic fluid more frequently. short distance. However, Toro does not recommend this as a standard procedure. Hydraulic Control Positions WARNING •... -
Page 31: Operating Tips
causes the oil flow to go over a relief valve, which can 2. Pull the hose firmly from the coupler. damage the hydraulic system. Important: Clean and install the dust plug and • On position dust covers to the quick coupler ends when not in use. - Page 32 prescription drugs and cold medicines can cause drowsiness. Read the label on the medicine or check with your doctor or pharmacist if you are unsure about a certain medication. One of the most important rules to follow is to go slower in unfamiliar areas.
- Page 33 Operating the Machine on Hills More important, it can injure you and your passenger. Gross machine weight has a major impact on your ability to stop or turn. Heavier loads and heavier attachments make a machine WARNING harder to stop or turn. The heavier the load, the longer it Tipping or rolling the machine on a hill will cause takes to stop.
-
Page 34: Maintenance
Note: Looking for an Electrical Schematic or Hydraulic Schematic maintain, repair, adjust, and inspect the machine. for your machine? Download a free copy of the schematic by visiting www.Toro.com and searching for your machine from the Manuals link on the home page. CAUTION... -
Page 35: Heavy Duty Operation
Maintenance Service Maintenance Procedure Interval • Change the air-cleaner filter (more frequently in dusty or dirty conditions). • Change the engine oil and filter. • Inspect opening on filter. • Torque the front and rear wheel nuts Every 200 hours •... -
Page 36: Using The Bed Safety Support
Using the Bed Safety Support Removing the Full Bed Important: Always install or remove the bed support Full bed weight: approximately 147.5 kg (325 lb) from the outside of the bed. 1. Start the engine. 1. Raise the bed until the lift cylinders are fully extended. 2. -
Page 37: Installing The Full Bed
Installing the Full Bed in the rear frame channel and install 2 clevis pins and lynch pins (Figure 44). Full bed weight: approximately 147.5 kg (325 lb) Important: The full bed weighs approximately Note: If the bed sides will be installed on the flat bed, it is 147.5 kg (325 lb), so do not try to install or remove easier to install them before installing the bed on the machine. -
Page 38: Removing And Installing The Hood
Figure 45 1. Front jacking points Figure 47 1. Hood 2. Pivot the bottom of the hood upward until you can pull the top mounting tabs from the frame slots (Figure 47). 3. Pivot the top of hood forward and unplug the wire connectors from the head lights (Figure 47). -
Page 39: Lubrication
Lubrication Spring tower (2); refer to Figure 49 Greasing the Bearings and the Bushings Service Interval: Every 100 hours (lubricate more frequently in heavy duty applications). Lubrication type: No. 2 general-purpose, lithium-based grease Important: When greasing the drive shaft universal shaft bearing crosses, pump grease until it comes out of all 4 cups at each cross. -
Page 40: Engine Maintenance
Engine Maintenance • Drive shaft U-joints (2); refer to Figure 51 • Sliding yolk (1); refer to Figure 51 Servicing the Air Filter Service Interval: Every 200 hours—Change the air-cleaner filter (more frequently in dusty or dirty conditions). Inspect the air filter and hoses periodically to maintain maximum engine protection and to ensure maximum service life. -
Page 41: Changing The Engine Oil And Filter
6. Clean the dirt ejection port located in the air-cleaner cover, the dust valve cavity, and then replace the dust valve (Figure 52). 7. Inspect the new air filter for shipping damage, checking the sealing end of the filter and the body. Important: Do not use a damaged element. -
Page 42: Replacing The Spark Plug
Replacing the Spark Plug Fuel System Maintenance Service Interval: Every 400 hours Spark plug type: Champion RC14YC Replacing the Fuel Filter Air gap: 0.76 mm (0.030 inch) 1. Clean the area around the spark plug so foreign matter Service Interval: Every 400 hours cannot fall into the cylinder when you remove the 1. -
Page 43: Inspecting The Carbon Canister Air Filter
Electrical System 11. Connect the wires and secure the hose with the hose clamp. Maintenance Inspecting the Carbon Canister Servicing the Fuses Air Filter The fuses for the electrical system are located under the Service Interval: After the first 50 hours center of the dash panel (Figure 59 Figure... -
Page 44: Jump-Starting The Machine
Jump-Starting the Machine Note: The negative terminal has NEG on the battery cover. Do not connect the other end of the jumper cable to the negative post of the discharged WARNING battery—connect it to the engine or frame. Jump-starting can be dangerous. To avoid personal injury or damage to electrical components in machine, observe the following warnings: •... -
Page 45: Servicing The Battery
Servicing the Battery Drive System Maintenance Service Interval: Every 50 hours—Check the condition of the battery (every 30 days if the battery is in storage). Maintaining the Tires, Wheels, Every 50 hours—Check the battery cable connections. and Suspension WARNING Inspecting the Tires CALIFORNIA Proposition 65 Warning Service Interval: Every 100 hours... - Page 46 Checking the Torque of the Wheel Nuts Service Interval: After the first 2 hours After the first 10 hours Every 200 hours WARNING Failure to maintain proper torque of the wheel nuts could result in failure or loss of a wheel and may result in personal injury.
-
Page 47: Maintaining The Transmission
Maintaining the Transmission Changing the Transmission Fluid Transmission Fluid Type: Dexron VI Checking the Transmission-fluid Level Transmission Fluid Capacity: 700 ml (23.7 oz) Service Interval: After the first 50 hours 1. Move the machine to a level surface. Every 400 hours 2. - Page 48 5. Remove the drain plug from the drain port by rotating the plug counterclockwise and removing it from the transmission (Figure 69). Note: Allow the transmission fluid to drain completely. 6. Install the drain plug (Figure 69). 7. Add 700 ml (23.7 oz) of Dexron VI transmission fluid into the transmission through the fill port (Figure 68).
- Page 49 Checking the Drive Belt 5. Loosen the 2 hex-socket screws (5/16 x 3/4 inch) that secure the detent plate to the lever-support bracket Service Interval: Every 400 hours (Figure 72). 1. Remove the 9 hex-washer bolts (1/4 x 1 inch) that secure the transmission cover to the mounting plate of the transmission (Figure...
-
Page 50: Maintaining The Differential And Axles
Maintaining the Differential in step 1, and torque the bolts to 10.2 to 12.4 N-m (90 to 110 in-lb). and Axles Cleaning the Clutches Changing the Differential Oil Service Interval: Every 400 hours Oil type: 80W90 API GL-5 1. Remove the 9 hex-washer bolts (1/4 x 1 inch) that secure the transmission cover to the mounting plate of Oil capacity: 550 ml (18.6 oz) the transmission... -
Page 51: Cooling System Maintenance
Checking the Constant Velocity Boots Cooling System Service Interval: Every 100 hours Maintenance 1. Jack up the back end of the machine and support it with jack stands; refer to Jacking the Machine (page 37). Changing the Engine Coolant 2. Check the CV (constant velocity) boots at the rear axles for damage and leaking lubricant (Figure 76). -
Page 52: Brake Maintenance
Brake Maintenance Adjusting the Parking Brake Service Interval: After the first 10 hours Every 200 hours 1. Remove the rubber grip from the parking-brake lever (Figure 79). G021229 Figure 78 1. Cap (coolant-reserve tank) 5. Disconnect the lower radiator hose and allow the coolant to flow into a drain pan. -
Page 53: Adjusting The Brake Pedal
Adjusting the Brake Pedal 7. Tighten the jam nut securing the yoke to the master cylinder shaft (Figure 81). Service Interval: Every 200 hours Note: The brake-master cylinder must relieve the 1. Remove the hood; refer to Removing the Hood (page pressure from the service brake when it is properly 38). -
Page 54: Controls System Maintenance
Adjusting the Accelerator Controls System Pedal Maintenance Adjusting the Slow Idle for the Engine Converting the Speedometer 1. Start the engine and run it until the engine is at normal operating temperature (approximately 5–10 minutes). You can convert the speedometer from mph to kpm or kph to mph. - Page 55 Figure 85 Figure 86 1. Bellcrank 3. Jam nut 1. Floor 3. 6.35 mm (1/4 inch) gap 2. Fast-idle stop 2. Accelerator pedal 3. If the fast-idle speed for the engine is faster or slower 3. If the gap between the accelerator pedal and the floor than 3600 rpm, perform the following: (Figure 86) is larger than or smaller than 6.35 mm...
- Page 56 inch), repeat steps until you measure a 6.35 mm (1/4 inch) gap between the pedal and the floor. Adjusting the Accelerator Pedal Upstop 1. With the accelerator pedal up, measure the distance from the rearward-bottom corner of the accelerator-pedal arm to the floor (Figure 88).
-
Page 57: Hydraulic System Maintenance
Changing the Hydraulic Fluid Hydraulic System Maintenance Service Interval: Every 800 hours Hydraulic Fluid Type: Mobil M15 Replacing the Hydraulic Filter Hydraulic Fluid Capacity: (Non-TC model): 7.5 L (2 US gallons) Service Interval: After the first 10 hours Hydraulic Fluid Capacity: (Non-TC model with the High Every 800 hours Flow Hydraulic Kit (option) or TC model): 15.1 L (4 US gallons) -
Page 58: Raising The Box In An Emergency
7. Remove the siphoning equipment from the reservoir (Figure 91). 8. Add 7.5 L (2 US gallons)—Non-TC model or 15.1 L (4 US gallons)—Non-TC model with the High Flow Hydraulic Kit (option) or TC model of the specified hydraulic fluid into the hydraulic reservoir (Figure 91). -
Page 59: Storage
Storage 1. Position the machine on a level surface, set the parking brake, stop the engine, and remove the ignition key. 2. Clean dirt and grime from the entire machine, including the outside of the engine cylinder head fins and blower housing. - Page 60 12. Install the spark plugs and tighten each one to the recommended torque; refer to Replacing the Spark Plug (page 42). Note: Do not install the spark-plug wires on the spark plugs. 13. Check the anti freeze protection and add a 50/50 solution of water and anti freeze as needed for expected minimum temperature in your area.
-
Page 61: Troubleshooting
Troubleshooting Problem Possible Cause Corrective Action The quick couplers are difficult to 1. The hydraulic pressure not relieved 1. Shut off the engine, move the connector disconnect. (the quick coupler is under pressure). hydraulic-lift lever forward and backward several times, and connect the quick couplers for the fittings in the auxiliary hydraulic panel. - Page 62 Notes:...
- Page 63 The Way Toro Uses Information Toro may use your personal information to process warranty claims, to contact you in the event of a product recall and for any other purpose which we tell you about. Toro may share your information with Toro's affiliates, dealers or other business partners in connection with any of these activities. We will not sell your personal information to any other company.
- Page 64 Countries Other than the United States or Canada Customers who have purchased Toro products exported from the United States or Canada should contact their Toro Distributor (Dealer) to obtain guarantee policies for your country, province, or state. If for any reason you are dissatisfied with your Distributor's service or have difficulty obtaining guarantee information, contact the Toro importer.