Table of Contents
Advertisement
Available languages
Available languages
Quick Links
Advertisement
Table of Contents

Related Manuals for Blomberg TAF 7239


Summary of Contents for Blomberg TAF 7239
- Page 1 TAF 7239 Dryer Sušilica Tørrer Sèche-linge...
-
Page 2: Explanation Of Symbols
Read this manual prior to initial operation of the product! Dear Customer, We hope that your product, which has been manufactured in modern facilities and passed through a strict quality control procedure, will give you very good results. We advise you to read through this manual carefully before using your product and keep it for future reference. -
Page 3: Important Safety Information
Important safety information This section includes safety information that will fuel oil, dry-laundry solvents and other help protection from risks of personal injuries combustible or explosive materials as or materialistic damages. Failure to follow well as the items that are contaminated these instructions shall cause any warranty and or spotted with such materials should not reliability commitment to become void. -
Page 4: Intended Use
• Do not reach into the machine when the are attended by a person who will be drum is spinning. responsible for their safety or who will • Unplug the machine when it is not in use. instruct them accordingly for use of the •... -
Page 5: Appropriate Installation Location
Installation Refer to the nearest Authorised Service Agent approximate weight of both machines may for installation of your product. reach 180 kg when they are full. Therefore, Preparation of location and electrical the floor must be capable of carrying the installation for the product is under load on it! customer’s responsibility. -
Page 6: Adjusting Feet
2. Attach the drain hose and replace the The ventilation hose should not be bracket to its position. connected to the chimney of a stove or a fireplace. Do not operate your product at the same time with heaters such as a coal or gas stove. -
Page 7: Electrical Connection
First use parts: 1. Tilt your product to backwards. • To have the product ready for operation 2. Fit the plastic parts on to the front before calling the authorised service agent, adjustable feet. Press on the plastic parts make sure that its location and power to snap them into their seating. -
Page 8: Initial Preparations For Drying
Initial preparations for drying Things to be done for energy saving: A B C • Make sure that you operate the product at its full capacity but pay attention to not exceeding it. • Spin your laundry at the highest speed possible when washing them. - Page 9 • Do not dry items cleaned with industrial with the maximum load capacity. chemicals in the dryer. C Adding laundry to the machine more • Do not dry your unwashed laundry in the than the level shown in the figure is not dryer.
-
Page 10: Selecting A Programme And Operating Your Machine
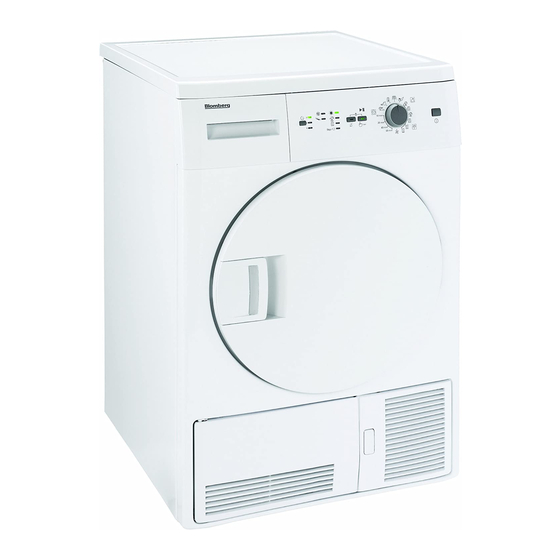
Selecting a Programme and Operating Your Machine Control panel 1. Filter cleaning warning light 5. Programme selection knob Warning light turns on when the filter is full. Used to select a programme. 2. Program follow-up indicator 6. Start/Pause/Cancel button Used to follow-up the progress of the Used to start, pause or cancel the current programme. -
Page 11: Special Programmes
Preparing the machine programme is over. This programme rotates 1. Plug in your machine. the laundry in 10-minute intervals to prevent 2. Place the laundry in the machine. creasing. 3. Press the “On/Off” button. Special programmes For special cases, there are also extra Pressing the “On/Off”... - Page 12 Program selection and consumption table Capacity Spin speed in washing Approximate amount of Drying time Programs (kg) machine (rpm) remaining humidity (minutes) Cottons / Coloreds 1200-1000 % 60 900-800 % 70 Ready to Wear 1200-1000 % 60 900-800 % 70 1200-1000 % 60 900-800...
- Page 13 Auxiliary function During the time delay period, laundry is Cancel audio warning rotated for 4 seconds in every 10 minutes Your dryer will give an audio warning when the to prevent creasing. programme comes to an end. If you do not Canceling the time delay want to hear the audio warning, press “Cancel If you want to cancel the time delay...
-
Page 14: Childproof Lock
Press “Start/Pause/Cancel” button for 3 seconds to cancel the programme or turn the programme selection knob in any direction to end the programme while the machine is running. Water tank and filter cleaning warning lights turn on to warn the user when the programme is cancelled by pressing the “Start/Pause/Cancel”... -
Page 15: End Of Programme
End of programme The “End/Anti-creasing”, “Filter cleaning” and “Water tank” warning lights on the programme follow up indicator will turn on when the programme comes to an end. The door can be opened and the machine becomes ready for a second cycle. -
Page 16: Maintenance And Cleaning
Maintenance and cleaning Filter Cartridge / Door Inner Surface .Sensor (models equipped with a sensor) Lint and fibres released from the laundry to the There are humidity sensors in your machine air during the drying cycle are collected in the that detect whether the laundry is dry or not. - Page 17 1 Carefully remove the water tank by opening the kick plate cover/pulling the drawer. 2 Drain the water by opening the water tank cover. 3 If there is lint accumulation in the water tank cover, clean it and press to close. 4 Place the water tank into its seat.
- Page 18 Maintenance and cleaning Drying process takes too much time • Meshes of the filter may be clogged. Wash with water Laundry come out wet at the end of drying. • Meshes of the filter may be clogged. Wash with water. •...
- Page 20 Læs denne vejledning, inden du tager produktet i brug! Kære Kunde, Vi håber, at dette produkt, der er fremstillet i en moderne fabrik og gennemgået en streng kvalitetskontrol, vil give dig meget gode resultater. Vi råder dig til at læse denne vejledning grundigt, inden du tager produktet i anvendelse, og at du gemmer den for senere opslag.
-
Page 21: Vigtig Sikkerhedsinformation
Vigtig sikkerhedsinformation Dette afsnit indeholder sikkerhedsoplysninger, dieselolie, renseopløsningsmider og andre der vil hjælpe med at beskytte mod risiko for brændbare eller eksplosive materialer personlige eller materielle skader. Hvis disse samt genstande, der er forurenet eller anvisninger ikke overholdes, vil enhver form for plettet med sådanne materialer, bør ikke garanti og løfter om funktionssikkerhed bliver tørres i produktet, eftersom de udsender... - Page 22 • Ræk ikke ind i maskinen, når tromlen der har mangel på viden eller erfaring snurrer. (herunder børn), med mindre de er under • Tag maskinen ud af stikket, når den ikke er overvågning af en person, som vil være i brug.
-
Page 23: Installation
Installation Henvend dig til den nærmeste autoriserede den samlede vægt af begge maskiner ikke serviceagent angående installationen af overstige 180 kg med fuldt læs. Derfor skal produktet. gulvet skal kunne bære vægten! Det er kundens ansvar at klargøre stedet Ventilationsslange og tilslutning (til og den elektriske installation af produktet. - Page 24 Lad ikke produktet køre samtidig med varmekilder som f.eks. en kul- eller gasovn. Luftstrømmen kan forårsage, at skorstenen blusser op. Tilslutning til vandafløb (Produkter med en kondensator); I produkter, der er udstyret med en kondensatorenhed, samles vandet, der akkumuleres under tørrecyklussen, i vandtanken.
-
Page 25: Tekniske Specifikationer
2. Fastgør plastikdelene til de forreste der ringes efter en autoriseret serviceagent, justerbare fodder. Tryk på plastikdelene for skal du sørge for, at dets placering og at sætte dem på plads. strømforsyningsintallationer er egnede. 3. Kontroller produktets balance igen, og juster Hvis de ikke er det, skal du ringe til en de justerbare fødder efter behov. - Page 26 Indledende forberedelser til tørring Ting, der kan gøres for at spare på energien: • Sørg for, at du bruger produktet ved dets fulde kapacitet, men pas på ikke at overstige den. • Centrifuger dit vasketøj ved den højest mulige hastighed, når du vasker det.
- Page 27 kemikalier, må ikke tørres i tørretumbleren. overensstemmelse med den maksimale • Tør ikke dit uvaskede vasketøj i indfyldningskapacitet. tørretumbleren. Det anbefales ikke at fylde mere vasketøj • Genstande, der er blevet tilsnavset i maskinen, end det er vist i figuren. med madlavningsolie, acetone, alkohol, Tørreresultaterne vil blive dårligere, dieselolie, petroleum, pletfjernere, terpentiv,...
- Page 28 Valg af program og betjening af maskinen Kontrolpanel 1. Advarselslys om filterrensning 5. Programvælgerknap Advarselslyset bliver tændt, når filteret er Bruges til at vælge et program. fuldt. 6. Start/pause/annuller-knap 2. Programopfølgningsindikator Bruges til at starte, pause eller annullere Bruges til opfølgning af det aktuelle programmet.
- Page 29 Tænd for maskinen sekunders intervaller for at forhindre krølning. Du kan gøre maskinen klar til programvalg ved Specialprogrammer at trykke på “Tænd/sluk” knappen. For særlige tilfælde er der også ekstra programmer til rådighed: At trykke på ”Tænd/sluk” knappen betyder ikke nødvendigvis, at programmet er Ekstra programmer kan variere i henhold til startet.
- Page 30 Programvælger og forbrugstabel Spinhastighed i Omtrentlig mængde af Programmer Kapacitet (kg) Tørringstid (minutter) vaskemaskine (rpm) resterende fugtighed Bomuld / Farvet 1200-1000 % 60 900-800 % 70 Klar til brug 1200-1000 % 60 900-800 % 70 1200-1000 % 60 900-800 % 70 Klar til brug + 1200-1000 % 60...
- Page 31 Ekstra funktioner 1. Tryk på ”start/pause/annuller” knappen i 3 Annuller lydadvarslen sekunder. Maskinen vil udsende en lyd, når programmet 2. Tryk på ”start/pause/annuller” knappen for slutter. Hvis du ikke vil høre denne brummen, at starte programmet med det samme. skal du trykke på knappen “Annuller Start af programmet lydadvarsel”.
- Page 32 de tørrende lys tænder, og maskinen Der vil kunne høres et dobbeltbip, forbliver på hold, indtil der vælges et nyt hvis du trykker på en knap eller drejer program, og der trykkes på start knappen. på programvælgerknappen, mens Maskinens børnesikringslås må ikke være børnesikringslåsen er aktiv.
-
Page 33: Vedligeholdelse Og Rengøring
Vedligeholdelse og rengøring Filter kassette / Lågens inderste Sensor (modeller med en sensor) overflade Papirstøv og fibre, der afgives fra vasketøjet til luften under tørrecyklussen, samles i ”Filterkassetten”. Der er fugtsensorer i tørretumbleren, der opdager, om vasketøjet er tørt eller ej. For rengøring af sensoren: 1. - Page 34 1. Fjern forsigtigt vandtanken ved at åbne sparkepladedækslet/trække skuffen ud. 2. Tøm vandet ud ved at åbne vandtankens dæksel. 3. Hvis der har samlet sig støv i vandtankens dæksel, skal det rengøres og trykkes i for at lukke. 4. Placer vandtanken på plads. For kondensatoren (produkter med en kondensator);...
- Page 35 Løsningsforslag til problemer Tørreprocessen tager for lang tid • Filterets trådnet kan blive tilstoppet. Vask med vand. Der er vådt vasketøj efter en tørreproces. • Filterets trådnet kan blive tilstoppet. Vask med vand. • Der kan være fyldt for meget vasketøj ind. Overfyld ikke maskinen. Maskinen tænder ikke, eller programmet starter ikke.
- Page 37 Prije rada s uređajem, molimo pročitajte ovaj korisnički priručnik! Poštovani kupci, Nadamo se da će Vam Vaš proizvod, proizveden u suvremenim postrojenjima i koji je prošao strogi postupak kontrole kvalitete, dati jako dobre rezultate. Savjetujemo Vam da prvo pažljivo pročitate ovaj priručnik i sačuvate ga za ubuduće. Ovaj korisnički priručnik će •...
-
Page 38: Važne Sigurnosne Informacije
Važne sigurnosne informacije Ovaj dio sadrži sigurnosne informacije koje sušiti u proizvodu jer ispuštaju zapaljivu ili će pomoći u zaštiti od opasnosti od ozljeda eksplozivnu paru. i oštećenja. Nepoštovanje ovih uputa će • Nemojte u sušilici sušiti predmete čišćene uzrokovati poništenje svih jamstava. industrijskim kemikalijama. -
Page 39: Sigurnost Djece
Sigurnost djece isključujte iz struje prije čišćenja. • Nikada nemojte dirati utikač mokrim • Električni uređaji su opasni za djecu. Držite rukama. Nikada nemojte isključivati tako da djecu podalje od perilice kad radi. Ne dajte povlačite za kabel, uvijek povlačite tako da im da diraju perilicu. - Page 40 INSTALACIJA Za instalaciju vašeg proizvoda, javite se Crijevo za ventilaciju omogućava izlaz zraka iz najbližem ovlaštenom serviseru. uređaja Priprema lokacije i elektroinstalacija Sušilica s ventilacijom ima 1 izlaz zraka. proizvoda je odgovornost kupca. Umjesto crijeva se mogu koristiti cijevi od Ugradnju i elektroinstalaciju mora izvršiti čeličnog lima ili aluminija.
- Page 41 spremnikom za vodu na dnu; Crijevo za ventilaciju ne smije biti spojeno Cijev se spaja na odljev za vodu na donjem na dimnjak peći ili kamina. stražnjem dijelu vašeg uređaja. Ne radite s uređajem u isto vrijeme kad i s 1.
-
Page 42: Tehničke Specifikacije
2 plastična dijela dostavljena s korisničkim raditi dok se ne popravi! Postoji opasnost priručnikom sprječavaju da uređaj padne na od strujnog udara! mokrim i klizavim površinama. Za instalaciju Prva uporaba plastičnih dijelova: • Da bi proizvod bio spreman za rad, 1. - Page 43 Početne pripreme za sušenje Što treba uraditi za uštedu energije: • Pazite da uređaj radi s punim kapacitetom, ali ga nemojte prelaziti. Ne sušiti u Sušenje na Susenje pri • Kod pranja stavljajte rublje na najjaču Za sušenje u sušilici malnim niskoj sušilici...
- Page 44 uklanjanje parafina se moraju oprati u toploj rublje se mogu oštetiti. vodi s puno deterdženta prije nego se Stavite svoje rublje u bubanj labavo tako da osuše u sušilici. se ne zapetlja. • Odjeća ili jastuci punjeni gumenom pjenom Sljedeće mase su dane kao primjeri. (pjena od lateksa), kape za tuširanje, Kućanski predmeti Približna masa (g)
- Page 45 Odabir programa i rad s Vašim aparatom Upravljačka ploča 1. Svjetlo upozorenja za čišćenje filtra 5. Tipka za odabir programa Svjetlo upozorenja se uključuje kad je filtar Koristi se za odabir programa. 6. Tipka za početak/pauzu/opoziv pun. 2. Oznaka za slijed programa Koristi se za početak, pauziranje ili opoziv Koristi se za praćenje napretka trenutnog programa.
-
Page 46: Odabir Programa
Priprema uređaja Protiv gužvanja 2-satni program protiv gužvanja koji sprječava 1. Uključite stroj u struju. gužvanje rublja će biti uključen ako ne izvadite 2. Stavite rublje u stroj. rublje kad program dođe do kraja. Ovaj 3. Pritisnite gumb za “Uključivanje/ program okreće rublje u intervalima od 10 isključivanje”. - Page 47 Tablica odabira programa i potrošnje Kapacitet Brzina centrifuge perilice Prosječna količina preostale Vrijeme sušenja Programi (kg) (o/min) vlažnosti (minute) Pamuk/obojeno 1200-1000 % 60 900-800 % 70 Spremno za nošenje 1200-1000 % 60 900-800 % 70 1200-1000 % 60 900-800 % 70 Spremno za nošenje + 1200-1000 % 60...
- Page 48 Pomoćne funkcije Promjena i opoziv odgode vremena. Ako želite opozvati odbrojavanje odgode Opoziv zvučnog upozorenja vremena i uključiti program: Vaš stroj će poslati zvučno upozorenje kad 1. Pritisnite tipku “Start/Pauza/Opoziv” na program dođe do kraja. Ako ne želite čuti otprilike 3 sekunde. zvučno upozorenje, pritisnite tipku “Opoziv 2.
- Page 49 pauza/opoziv na 3 sekunde. Međutim, lampice upozorenja se ne uključuju kad je program opozvan okretanjem tipke za odabir programa. Samo se lampice za sušenje uključuju a uređaj ostaje na čekanju dok se ne odabere novi program i ne pritisne se tipka Start/pauza/opoziv. Zaključavanje uređaja zbog djece ne smije Pritisnite odgovarajuće tipke na 3 sekunde biti uključeno da bi se izvršile ove dvije...
- Page 50 Kraj programa Lampice upozorenja “Završno/protiv gužvanja”, “Čišćenje filtra” i “Spremnik za vodu” na oznaci slijeda programa će zasvijetliti kad program dođe do kraja. Vrata se mogu otvoriti i stroj je sada spreman za drugi ciklus. Pritisnite tipku za “Uključivanje/isključivanje” da biste isključili vašu perilicu.
-
Page 51: Održavanje I Čišćenje
Održavanje i čišćenje Senzor (modeli sa senzorom) UUložak filtra / unutarnja površina vrata Nakupine i vlakna otpuštena iz rublja u zrak tijekom ciklusa sušenja se sakupljaju u “Ulošku filtra”. U sušilici postoje senzori za vlagu koji otkrivaju je li rublje suho ili ne. Za čišćenje senzora: 1. - Page 52 pauza/opoziv” da biste nastavili ciklus sušenja nakon pražnjenja spremnika za vodu. Za pražnjenje spremnika za vodu: 1. Pažljivo uklonite spremnik za vodu otvaranjem tipske pločice/povlačenjem ladice. 2. Izbacite vodu otvaranjem poklopca spremnika za vodu. 3. Ako na poklopcu spremnika za vodu ima nakupina, očistite ga i pritisnite da se zatvori.
- Page 53 Prijedlozi za rješavanje problema Postupak sušenja traje predugo • Možda su začepljene mrežice filtra. Operite vodom. Rublje je na kraju sušenja izašlo mokro. • Možda su začepljene mrežice filtra. Operite vodom. • Možda ste stavili previše rublja. Nemojte preopteretiti sušilicu. Stroj se ne uključuje ili program ne počinje.
- Page 55 Veuillez lire ce manuel avant la première utilisation de votre appareil ! Chère cliente, cher client, Nous espérons que ce produit, fabriqué dans des usines modernes et soumis à des procédures strictes d’assurance qualité, vous donneront des résultats optimaux. Nous vous conseillons de lire ce manuel attentivement avant d’utiliser votre appareil et de le conserver à...
-
Page 56: Consignes Importantes De Sécurité
Consignes importantes de sécurité Cette section comprend des informations d’électrocution. relatives à la sécurité qui vous aideront à • N’apportez aucune modification à la prise vous protéger contre les risques de blessures fournie avec le produit. Si la prise n’est corporelles ou de dégâts matériels. -
Page 57: Utilisation Prévue
les effectuer, sauf si cela est expressément en cours d’utilisation ou après avoir sorti mentionné dans les instructions d’utilisation le linge à la fin du processus de séchage, ou dans le manuel de service fourni. éteignez la machine en mettant le bouton •... - Page 58 Installation Consultez votre agent de service agréé le plus • Installez la machine sur un sol solide. Si le proche pour l’installation de votre produit. sèche-linge est placé sur un lave-linge, leur La préparation du site et de l'installation poids combiné peut atteindre 180 kg lorsque électrique du produit relève de la les machines sont pleines.
-
Page 59: Réglage Des Pieds
Raccord du tuyau de vidange d’eau pour les modèles équipés du réservoir d’eau dans la partie inférieure ; Le tuyau de vidange d’eau est situé dans la partie inférieure à l’arrière de votre machine. 1. Retirez le support et le bouchon en caoutchouc. -
Page 60: Branchement Électrique
Première mise en service 2 pièces en plastique sont fournies avec le manuel d’utilisation pour empêcher votre • Pour préparer l’appareil avant l’arrivée machine de glisser sur des surfaces mouillées et de l’agent de service autorisé, assurez- glissantes. Pour installer ces pièces en plastique : vous que le site et l’installation électrique 1. - Page 61 Préparations initiales au séchage Mesures à adopter pour économiser de l’énergie: • Assurez-vous de faire fonctionner l’appareil à pleine charge. Toutefois, veillez à ne pas surcharger la machine. • Essorez le linge à la vitesse maximale au cours du lavage. Cela permet de réduire le temps de séchage et la consommation énergétique.
- Page 62 type de matériaux, ne doivent pas être Veuillez consulter les informations contenues séchés dans le produit car ils dégagent des dans le « Tableau de sélection de vapeurs inflammables ou explosives. programmes ». Essayez de toujours lancer • Ne séchez pas d’articles nettoyés à l’aide le programme en fonction de la capacité...
-
Page 63: Bandeau De Commande
Sélection d’un programme et utilisation de votre appareil Bandeau de commande 1. Témoin d’avertissement de nettoyage du 5. Sélecteur de programmes filtre Utilisé pour sélectionner un Le témoin d’avertissement s’allume lorsque programme. 6. Bouton départ/pause/annulation le filtre est plein. 2. Indicateur de suivi du programme utilisé... -
Page 64: Mise En Marche De La Machine
Mise en marche de la machine •Anti-froissement Un programme anti-froissement de 2 heures 1. Branchez votre machine. s’activera si vous ne retirez pas le linge de la 2. Introduisez le linge dans la machine. machine à la fin d’un programme. Ce programme 3. - Page 65 Sélection de programmes et tableau de consommation Capacité Vitesse d’essorage du Quantité approximative Durée de séchage Programmes (kg) lave-linge (tr/min) d’humidité résiduelle (minutes) Coton / Couleur 1200-1000 % 60 900-800 % 70 Prêt-à-porter 1200-1000 % 60 900-800 % 70 1200-1000 % 60 900-800 % 70...
- Page 66 Fonctions optionnelles Annulation » pour lancer le programme immédiatement. Annulation de l’alerte sonore Lancement du programme Votre machine émet une alerte sonore lorsque le programme se termine. Si vous ne souhaitez 1. Appuyez sur le bouton « Départ/Pause/ pas entendre ce signal, vous pouvez appuyer Annulation »...
-
Page 67: Sécurité Enfants
sélectionné et que le bouton Départ est sécurité enfants est activée. Un double enfoncé. La sécurité enfant de la machine bip retentit si vous appuyez sur un bouton ne doit pas être activée pour pouvoir réaliser ou tournez la molette de sélection de ces deux opérations. -
Page 68: Entretien Et Nettoyage
Entretien et nettoyage Capteur Cartouche filtrante / Surface intérieure de la porte Les peluches et fibres qui se dégagent du linge dans l’air au cours du cycle de séchage sont récupérées par la « cartouche filtrante Votre machine est équipée de capteurs d’humidité... - Page 69 Pour la vidange du réservoir d’eau ; 1. Retirez avec précaution le réservoir d’eau en ouvrant la plaque de protection / le tiroir. 2. Videz l’eau du réservoir en ouvrant le couvercle du réservoir d’eau. 3. Si une accumulation de peluche est présente sur le couvercle, nettoyez-le et pressez dessus pour le refermer.
- Page 70 Suggestions de solutions aux problèmes Le processus de séchage est excessivement long • Les mailles du filtre peuvent être obstruées. Lavez-les à l’eau. Le linge est mouillé à la fin du séchage • Les mailles du filtre peuvent être obstruées. Lavez-les à l’eau. •...