Table of Contents
Advertisement
Quick Links
g
GE Multilin
215 Anderson Avenue
L6E 1B3 Markham, ON -CANADA
T (905) 294 6222 F (905) 294 8512
E gemultilin@ge.com
Internet: www.GEMultilin.com
GE Consumer & Industrial
Multilin
DTR
Digital Tap Changer Controller
Instruction Manual
GEK-106305A
Copyright © 2005 GE Multilin
GE Multilin
Avda. Pinoa, 10
48170 Zamudio SPAIN
T +34 94 485 88 00 F +34 94 485 88 45
E gemultilin.euro@ge.com
Advertisement
Table of Contents

Related Manuals for GE DTR GEK-106305A


Summary of Contents for GE DTR GEK-106305A
- Page 1 GE Consumer & Industrial Multilin Digital Tap Changer Controller Instruction Manual GEK-106305A Copyright © 2005 GE Multilin GE Multilin GE Multilin Avda. Pinoa, 10 215 Anderson Avenue 48170 Zamudio SPAIN L6E 1B3 Markham, ON -CANADA T +34 94 485 88 00 F +34 94 485 88 45 T (905) 294 6222 F (905) 294 8512 E gemultilin.euro@ge.com...
-
Page 2: Table Of Contents
TABLE OF CONTENTS TABLE OF CONTENTS 1. GENERAL DESCRIPTION AND APPLICATION 2. OPERATION PRINCIPLES CONTROL FUNCTIONS 2.1.1 REGULATION ALGORITHMS ........................8 2.1.2 OPERATING CURVE...........................11 2.1.3 REGULATION AUTOMATISM ........................12 2.1.4 EXCESSIVE OPERATIONS BLOCK......................15 2.1.5 SUCCESSIVE OPERATIONS IN A CERTAIN TIME FRAME BLOCK ............15 2.1.6 OVERVOLTAGE, UNDERVOLTAGE AND OVERCURRENT BLOCKS. - Page 3 7.9.2 VERIFICATION OF THE NUMBER OF “SUCCESSIVE OPERATIONS” ........... 80 8. INSTALLATION AND MAINTENANCE INSTALLATION CONNECTION TO GROUND AND SUPPRESSION OF DISTURBANCES MAINTENANCE 9. KEYPAD AND DISPLAY MENU TREE SETTINGS GROUP INFORMATION GROUP OPERATIONS GROUP SINGLE-KEY OPERATION. CONFIGURATION MENU DTR Digital Tap Changer Controller GE—106305A...
- Page 4 TABLE OF CONTENTS LIST OF TABLES Table I : Internal communications statuses Table II : Internal protection statuses Table III : Settings common to all tables Table IV : Independent settings for each table LIST OF FIGURES Fig. 1 : Wiring diagram for DTR units with taps coded in BCD Fig.
- Page 5 TABLE OF CONTENTS DTR Digital Tap Changer Controller GE—106305A...
- Page 6 1. GENERAL DESCRIPTION AND APPLICATION 1. GENERAL DESCRIPTION AND APPLICATION New technologies have allowed in the last years a significant development in the integration of functions performed by the different components of a power system. The reason for this integration is the bigger need for reducing and optimizing the investments in equipment and installations, as well as the management and use of energy, due to the significant savings involved.
- Page 7 RS232, RS485, plastic or glass fiber optic. The associated software for DTR units is as follows : • GE-LOCAL communications software, which allows the user to view and modify protection settings, alarms, internal status, etc. • GE-INTRO configuration software, which allows to program inputs, outputs, alarms and LEDs.
-
Page 8: Operation Principles
2. OPERATION PRINCIPLES 2. OPERATION PRINCIPLES 2.1 CONTROL FUNCTIONS The transformer tap changer controller controls manually or automatically the OLTC (transformer on load tap changer), originating tap-up and tap-down commands, in order to keep the power supply voltage practically constant, independently from the load. - Page 9 Algorithm 2: Compensating by means of the calculation of apparent current: DV = (V ) - V =setpoint, V = Measured voltage ==Calculation of current (Adjustable) =Measured current, I =Nominal current Only when V < V comax Otherwise comax ==Maximum voltage increase (Adjustable). comax DTR Digital Tap Changer Controller GE—106305A...
-
Page 10: Operating Curve
2. OPERATION PRINCIPLES 2.1.2 OPERATING CURVE The standard operation times (FT=1) for different values of Insensitivity Degree are shown in the following figure: GI[%] == Insensitivity Degree in % 0.5% 1% |DU[%]| == Voltage Deviation in % GEK-106305A DTR Digital Tap Changer Controller... -
Page 11: Regulation Automatism
Tap(n) - Tap(n-1) = 1 Tap(n) - Tap(n-1) <> 1 Tap(n) - Tap(n-1) <> -1 Tap(n) - Tap(n-1) = -1 Failed Successful Success Failed Raisi Raising Lowering Lowering Manual* Manual* Manual Automatic* Automatic* Automatic DTR Digital Tap Changer Controller GE—106305A... - Page 12 2. OPERATION PRINCIPLES The steady statuses of the automatism are the following: 1. Stopped: DTR reaches this state by means of a Stop command and it can only leave this state by means of a Manual command or an Automatic command. 2.
-
Page 13: Excessive Operations Block
BLOQ. M. UNDER_V y BLOQ. M. OVER_I, which allow to consider or not the block condition. 2.1.7 QUICK LOWERING FUNCTION If the measured voltage exceeds the value set for Quick Lowering, Then the Operating Time becomes 0 s, and therefore the lowering tap operation is instantaneous. DTR Digital Tap Changer Controller GE—106305A... -
Page 14: Monitoring And Register Functions
2. OPERATION PRINCIPLES 2.2 MONITORING AND REGISTER FUNCTIONS 2.2.1 MEASUREMENTS The DTR system shows the following measurements: Tap: Current OLTC tap number. Current (Amp): Current module on the primary side of the transformer. Primary voltage (KV): Phase to phase voltage module on the primary side of the transformer. Secondary voltage (V): Phase to phase voltage module on the secondary side of the transformer. -
Page 15: Counters
Number of LOWERING OPERATIONS performed on the OLTC. Number of total OPERATIONS performed on the OLTC. These counters can be accessed by means of the HMI (display on the front of the relay) or by the GE_LOCAL communications software: DTR Digital Tap Changer Controller GE—106305A... -
Page 16: Internal Status
2. OPERATION PRINCIPLES 2.2.3 INTERNAL STATUS On the Internal Status, the system shows all the internal digital flags (inputs, pickups, alarms, etc.). The available signals in the internal status are grouped in 10 groups of 16 signals each. The last group is the ANDs group; these 16 AND gates may be used by the user to design logic circuits using GE_INTRO software. - Page 17 AUTOMATIC (automat status) TAP-DOWN TIME MANUAL TAP-DOWN = SUCCESS TIMING TAP-DOWN = FAIL TAP-UP PULSE TAP-UP TIME REM TRIP pulse TAP-UP = SUCCESS HOLD TRIP REM TAP-UP = FAIL group E-LOCAL REG INTERBLOCK-1 E-REMOTE REG INTERBLOCK-2 DTR Digital Tap Changer Controller GE—106305A...
- Page 18 2. OPERATION PRINCIPLES E-TRIP REM SUCCESSIVE OP. E-STOP REGULATOR ALARM E-AUTOMATIC MAXIMUM TAP E-MANUAL MINIMUM TAP E-TAP-UP IRREGULAR CHANGE E-TAP-DOWN EXCESSIVE OPERATIONS group AND1, AND9, AND2, AND10, AND3, AND11, AND4, AND12, AND5, AND13, AND6, AND14, AND7, AND15, AND8, AND16, COMMENTS ON INTERNAL STATUS PROGRAM INITIATE This signal becomes active when the DTR system has successfully passed all the internal Self-tests and initializations.
- Page 19 This signal becomes active when a trigger command is issued, either from the local HMI (keyboard and display on the front of the relay) or from the GE_LOCAL communications software. STOPPED This signal becomes active when the regulation automatism is stopped. DTR Digital Tap Changer Controller GE—106305A...
- Page 20 2. OPERATION PRINCIPLES AUTOMATIC This signal shows the operation mode of the regulation automatism, and it can be either Automatic or Manual. REMOTE This signal shows the mode of the OLTC, either Remote or Local. |DV| > ID This signal becomes active when the absolute value of the difference between the measured voltage (real voltage) and the setpoint is greater than the Insensitivity Degree, and therefore the DTR system has to start an operation on the OLTC.
- Page 21 This signal becomes active when the DTR system receives in a digital input (RTU) a signal to stop the regulation automatism. -E AUTOMATIC This signal becomes active when the DTR system receives in a digital input (RTU) a signal to change the regulation automatism to AUTOMATIC mode. -E MANUAL DTR Digital Tap Changer Controller GE—106305A...
- Page 22 2. OPERATION PRINCIPLES This signal becomes active when the DTR system receives in a digital input (RTU) a signal to change the regulation automatism to MANUAL mode. -E TAP-UP This signal becomes active when the DTR system receives in a digital input (RTU) a signal to increase the tap. -E TAP-DOWN This signal becomes active when the DTR system receives in a digital input (RTU) a signal to decrease the tap.
-
Page 23: Self-Checking Functions
These self-monitoring checks are carried out both when the unit is started up and during normal operation. The checks are carried out on the internal power supply, program memory (ROM), working memory (RAM), oscillographic memory (RAM) and settings and calibration memory (EEPROM). DTR Digital Tap Changer Controller GE—106305A... -
Page 24: Analysis Functions
2. OPERATION PRINCIPLES 2.3 ANALYSIS FUNCTIONS 2.3.1 EVENT REGISTER DTR system keeps a historical record with the last 165 events with the following information: date and time (1 ms resolution), event name (descriptive text), present measured voltages and internal status of the equipment. This event register is recorded in a non-volatile memory (EEPROM) and it is maintained even if the power supply is lost (independently from the duration of the external power supply interruption). -
Page 25: Signaling
Alternatively, it is possible to synchronize units by means of communications, using the GE_LOCAL communications software, or manually by means of the HMI. If the IRIG_B input is used, it has priority over time setting by communications, since the time read by IRIG_B is much more accurate. DTR Digital Tap Changer Controller GE—106305A... -
Page 26: Configurable Inputs And Outputs
2. OPERATION PRINCIPLES 2.4.5 CONFIGURABLE INPUTS AND OUTPUTS 2.4.5.1 DIGITAL INPUTS The DTR system has 35 digital inputs (5 groups of 7 inputs each with a common in each group). The inputs can be configured by the user using the GE_INTRO configuration program. One of the meanings shown in the following table can be assigned to any input (for further information about the configuration of the inputs please refer to the GE_INTRO instruction book). - Page 27 Once the AND gates have been configured, it is possible to create a second level with OR gates of 16 inputs limited to the established groups of bytes, and whose logical outputs are assigned to physical outputs of the unit. The external connections diagram in Figure 1 shows the default outputs configuration. DTR Digital Tap Changer Controller GE—106305A...
-
Page 28: Setting Tables
2. OPERATION PRINCIPLES 2.4.6 SETTING TABLES The DTR system includes 3 independent setting tables, stored in non-volatile memory (EEPROM), so that information is kept even when there is no auxiliary voltage. Only one setting table is active at a given time, which the system uses to run the different functions included in it. -
Page 29: User Interface And Communications
In this screen, the different elements can be selected (by means of the arrow keys) and the user can perform operations related to those elements. When the user selects an element that can be operated, the display shows the available options that can be selected with the F1.F4 keys. DTR Digital Tap Changer Controller GE—106305A... - Page 30 2. OPERATION PRINCIPLES ALARMS SCREEN This screen shows the alarms generated in the system with the following format: Alarm label Time when the alarm was generated with 1 ms resolution Date of the alarm MEASUREMENTS SCREEN This screen shows the real time measurements associated with the DTR system. GEK-106305A DTR Digital Tap Changer Controller...
- Page 31 DIGITAL INPUTS AND OUTPUTS STATUS SCREEN This screen shows the status of all the inputs and outputs. A dark background means that the input or output is activated. The following figure shows this screen: DTR Digital Tap Changer Controller GE—106305A...
-
Page 32: Remote Communications. Software
Fig8 shows how to make the connections to a personal computer. The communications protocol is the same as that used for the rest of the GE digital protection systems and requires the use of the GE_LOCAL software. The protocol is reliable and allows communication with different protection systems. - Page 33 2. OPERATION PRINCIPLES The functions that can be performed with each program are the following: GE-LOCAL: Display of Level 1 units status Display and change of settings Display of metering data Perform predefined operations Reading, display and reset of counters...
- Page 34 Configuration of control inputs and outputs Configuration of alarms Definition of operations and interlocking conditions Definition and configuration of switching elements Configuration of targets LED Configuration of the screens shown on the graphic LCD. GE-INTRO Screen GEK-106305A DTR Digital Tap Changer Controller...
- Page 35 2. OPERATION PRINCIPLES GE-POWER: Display of the single line diagrams of the substation Zoomed display of the single line diagrams of the bay Access to information as: Status Measurements Alarms Events Oscillography for each bay and for the complete substation...
-
Page 36: Settings
3. SETTINGS 3. SETTINGS 3.1 SETTINGS This section describes the settings incorporated in the DTR system, and the procedure for changing them. First a complete list of the DTR settings is shown, together with their limits, units and corresponding steps (the column marked DEFAULT indicates that this is the setting on the relay when it leaves the factory). - Page 37 OVERVOLTAGE 90-150 % of Vn UNDERVOLTAGE 0-120 % of Vn OVERCURRENT 0-200 % of In TIMERS OPERATION PULSE 0,02-60,00 sec 5 sec SUCCESS TIME 0,02-60,00 sec 10 sec SETPOINT SETPOINT 80-120 % de Vn DTR Digital Tap Changer Controller GE—106305A...
- Page 38 3. SETTINGS 3.2 COMMENTS ABOUT THE SETTINGS 3.2.1 GENERAL SETTINGS RELAY STATUS: This setting allows putting the system out or in service. If out of service, the system will never close any output, except the equipment alarm output, that will be continuously closed until the system is set to be in service. While out of service, the READY LED on the frontal plate will be red.
- Page 39 In order to approximate the relay measure to the real line measure in operating conditions, this setting is used to center the relay measure if any deviation is detected. The setting modifies the measured voltage value up to a ± 5% in steps of 0.1% DTR Digital Tap Changer Controller GE—106305A...
-
Page 40: X1.Regulation Settings
3. SETTINGS 3.2.2 X1.REGULATION SETTINGS X1.1 INSENSITIVITY: This setting is the voltage variation that DTR allows before the system generates an order to change the tap in the OLTC. It is set in % of the nominal voltage. X1.2 TIME FACTOR: This setting is the factor that multiplies the base time to get the operation time (see section 2.1.1) X1.3 ACCELERATED TAP-DOWN:... -
Page 41: X4. Voltage Setpoint
3.2.5 X4. VOLTAGE SETPOINT X4.1 SETPOINT: This setting is the required voltage level. This voltage level must be kept constant. It must be introduced in % of the rated voltage in accuracy steps of 0.1%. DTR Digital Tap Changer Controller GE—106305A... -
Page 42: Programming The Unit
4. PROGRAMMING THE UNIT DTR units incorporate inputs, outputs, and a graphical display, all of them programmable by the user. The programming of all these elements is used by means of GE-INTRO software (instruction manual GEK-105594). 4.1 INPUT CONFIGURATION Each programmable input can be assigned to the following values:... - Page 43 • Manual: Command for switching to the Manual operation mode. • Remote: Command for switching to the Remote operation mode. • Local: Command for switching to the Local operation mode. • Stopped: Command for stopping the regulation automatism. DTR Digital Tap Changer Controller GE—106305A...
- Page 44 4. PROGRAMMING THE UNIT • Remote Trip: Operation over the element associated to that input (either an output contact or an operation) independently from the relay operation mode. • Tap 1 to Tap 30: Used for informing the unit of the tap where the OLTC is located, using a consistent codification in a contact per tap.
-
Page 45: Output Configuration
Alarms screen). After 15 minutes without any of the keys being pressed, the display will turn off automatically in order to avoid unnecessary consumption. It will turn on again by pressing any of the keys. DTR Digital Tap Changer Controller GE—106305A... -
Page 46: Main Screen
4. PROGRAMMING THE UNIT 4.4 MAIN SCREEN The following diagram shows the main screen. It represents the bay scheme or mimic. When in stand-by, none of the elements in the display is selected. By pressing the keys on the left side, we can move through the elements on which we can operate (tap-up, tap-down, stop, automatic, manual). -
Page 47: Alarms Screen
This screen shows a list of alarms that have been generated in the substation. The maximum number of alarms that can be displayed is 12. Alarms are displayed as follows: Alarm label, that is, associated text defined in GE-INTRO software Time and date when the alarm was generated When an alarm is produced, the screen shows the previous information with a dark shadow and blinking. -
Page 48: Measures Screen
4. PROGRAMMING THE UNIT The help text shown at the bottom displays the possible actions that can be taken in that screen: Arrows are used from moving from one alarm to another By pressing F1, we move to the MEASURES screen By pressing F2, we acknowledge the selected alarm (when we are placed on an alarm, its colour is shown in negative). - Page 49 4. PROGRAMMING THE UNIT DTR Digital Tap Changer Controller GE—106305A...
-
Page 50: Technical Characteristics
Special model 01 incorporates, in addition to the BCD coded input tap changer, the possibility to use one contact per tap. There is no additional setting; instead, when programming (using GE-INTRO) inputs as Tap1, Tap2, etc. the unit assumes that the tap status will be made following the code “one contact per tap”. -
Page 51: Technical Characteristics
3.5 x Un Current circuits - Continuous: 4 x In - During 3 sec: 50 x In - During 1 sec: 100 x In • Temperature: - Operation: -20°C to +55°C - Storage: -40°C to +70°C DTR Digital Tap Changer Controller GE—106305A... - Page 52 5. TECHNICAL CHARACTERISTICS • Humidity : Up to 95% without condensing • Tripping contacts: Rated voltage, maximum 250/440 VAC opening voltage : - Rated current / closing current. 16/25A - Operation power 4000 VA - Mechanical life 3 x 10E6 ops •...
- Page 53 - Glass fiber optic ( port 2 Optional ) Type of connector : STA Typical emitted power: -17.5 dBm Receiver’s sensitivity: -24.5 dBm Wave length : 820 nm. - RS485 ( port 2 optional) DTR Digital Tap Changer Controller GE—106305A...
- Page 54 5. TECHNICAL CHARACTERISTICS STANDARDS DTR units comply with the following standards, including GE standard for isolation and electrical compatibility, and the standards required by community directive 89/336 for CE marking, according to harmonized European standards. They comply also with the low voltage European directive, and the environmental and operational requirements established under standards ANSI C37.90, IEC 255-5, IEC 255-6 and IEC 68.
- Page 55 5. TECHNICAL CHARACTERISTICS DTR Digital Tap Changer Controller GE—106305A...
-
Page 56: Hardware Description
6. HARDWARE DESCRIPTION 6. HARDWARE DESCRIPTION WARNING The DTR system incorporates electronic components that might be affected by electrostatic discharge currents flowing through certain components terminals. The main source of electrostatic discharges is human body, specially under low humidity conditions, with carpet floors or isolating shoes. If such conditions are present special care should be taken while manipulating DDS’s modules and boards. -
Page 57: Internal Construction
2. Slack the fixed frontal screws till they are untied and only fixed by their fastening sleeve. 3. Let the front part fall softly till the flat cable, that is connected to the communications board, is accessible, and unfasten the extreme connected to this board. 4. Remove the frontal module. DTR Digital Tap Changer Controller GE—106305A... -
Page 58: Magnetic Module
6. HARDWARE DESCRIPTION 5. Take out the internal bus board which fixes the different modules themselves. If this process is followed, every relay module can be accessed in order to be taken out, maintained or replaced. In order to assembly the relay again, the procedure is the contrary, that is to say: 1. -
Page 59: Protection Cpu Processing Board
Input modules (as well as the output ones), provide one selectable of 4 bits address, which allows to include several modules of each kind in the same DTR unit. DTR Digital Tap Changer Controller GE—106305A... -
Page 60: Digital Outputs Board
6. HARDWARE DESCRIPTION 6.1.9 DIGITAL OUTPUTS BOARD Each of the DTR output boards includes 12 heavy duty relays, 16 Amperes nominal continuous capacity and 4000 VA breaking capacity or signaling, of continuos nominal capacity of 8 Amp. Each of these relays has an only contact (NO). -
Page 61: Power Supply
During the testing, the A12 terminal should be to connected to ground for security reasons. It must be verified that connection to ground exists in the terminal C12. Apply gradually 2500 volts between all the terminals of a group, connected among themselves, and the box, during a second. 7.3 POWER SUPPLY DTR Digital Tap Changer Controller GE—106305A... - Page 62 Configure as trips all the configurable contacts. In this condition, check that the relay communicates correctly using a PC. Request the relay model using GE-LOCAL software. The minimum and maximum voltage values to be applied to each model are as follows: Model “G”...
-
Page 63: Metering
2. Check that the relay acknowledges as active each and every input 3. Apply to each input a voltage at 20% higher than the maximum admissible voltage for the input circuits. 4. Check that the relay acknowledges as active each and every input DTR Digital Tap Changer Controller GE—106305A... -
Page 64: Communications
7. ACCEPTANCE TESTS 7.6 COMMUNICATIONS Enter the hidden menu < 7169 > and set the following communication parameters: Relay number Local baudrate 19200 Remote baudrate 19200 Local stop bits Remote stop bits 1. Request the relay model through the front port, previously checking that the PC communication parameters are the same as the relay’s. -
Page 65: Verification Of Outputs, And Dtr Operation
Check the front switch in LOCAL mode and check that: S13 is active and S14 is inactive • Check the front switch in REMOTE mode and check that: S14 is active and S13 is inactive DTR Digital Tap Changer Controller GE—106305A... -
Page 66: Verification Of Rtu Outputs
7. ACCEPTANCE TESTS 7.8.2 VERIFICATION OF RTU OUTPUTS: IMPORTANT: For carrying out the tests using RTU inputs, it is essential that the LOCAL/REMOTE switch is set as REMOTE. Set the DTR as MANUAL mode, with a pulse in the “MANUAL” input. With the relay set as MANUAL, check that: S4 is active S3 is inactive... -
Page 67: Verification Of Undervoltage, Overvoltage, And Overcurrent Contacts
These instructions assume that the tap status information is sent to the relay in BCD format. INPUT FUNCTION TAP BCD1 TAP BCD 2 TAP BCD 3 TAP BCD 4 TAP BCD 5 TAP BCD 6 DTR Digital Tap Changer Controller GE—106305A... -
Page 68: Verification Of The "Number Of Operations
7. ACCEPTANCE TESTS 7.9.1 VERIFICATION OF THE “NUMBER OF OPERATIONS” Set the menu: GENERAL SETTINGS: Nº OPERATIONS Nº SUCCESSIVE OPERATIONS COUNTERS: Nº OPERATIONS Verify that after finishing the following sequence, S16 (EXCESSIVE OPERATIONS) activates. Before starting the sequence, apply a zero to inputs E1, E2, E3, E4, E5, and E6 1. -
Page 69: Verification Of The Number Of "Successive Operations
6. Apply a pulse to “TAP-UP” and wait for 20 s. 7. Deactivate E1 and E2, and activate E3 8. Apply a pulse to “TAP-UP” and wait for 20s. 9. Activate E1. 10. Apply a pulse to “TAP-UP” ; S15 should not operate. DTR Digital Tap Changer Controller GE—106305A... -
Page 70: Installation And Maintenance
7. ACCEPTANCE TESTS 8. INSTALLATION AND MAINTENANCE 8.1 INSTALLATION The relay should be installed in a clean, dry and dust-free place, with no vibrations. It should also be well-lit to facilitate inspection and testing. The relay should be mounted on a vertical surface. Figure 3 shows the diagram for panel drilling for panel mounting. Given that the design of the DTR unit is based on high performance digital technology it is not necessary to recalibrate the relay. - Page 71 8. INSTALLATION AND MAINTENANCE DTR Digital Tap Changer Controller GE—106305A...
-
Page 72: Keypad And Display
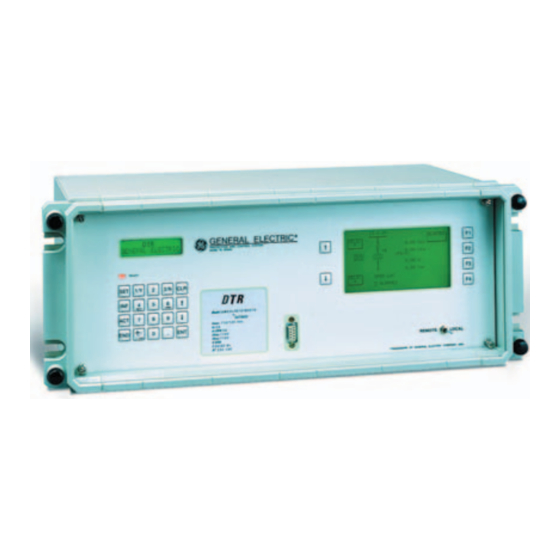
9. KEYPAD AND DISPLAY 9. KEYPAD AND DISPLAY The DTR incorporates a 20-key keypad and a liquid crystal display of 32 characters, divided in 2 lines of 16 characters each. The look of the DTR keypad is shown below: The keypad program uses menus to access the different relay functions. These functions have been divided into five groups, each of which can be accessed with a different key. -
Page 73: Menu Tree
AUTOMATIC REGULATOR • Command for stopping the regulator STOP REGULATOR • COMMUNICATIONS • Triggers a log by communications TRIGGER • Current • Displays the Phase A current in amperes referred to the primary side DTR Digital Tap Changer Controller GE—106305A... - Page 74 9. KEYPAD AND DISPLAY Group Level 1 Description • V-primary • Displays the phase voltage in kV referred to the primary side • Frequency • Displays the frequency value • Tap • Displays the tap position of the OLTC • Shows whether the unit is in/out of service RELAY STATUS •...
-
Page 75: Settings Group
TIME WINDOW Time window length 1 – 60 min OLTC minimum tap 1 - 40 MINIMUM TAP OLTC maximum tap 1 – 40 MAXIMUM TAP DIR/INV MODE Tap Operation mode DIR / INV TT CONFIGURATION DTR Digital Tap Changer Controller GE—106305A... - Page 76 9. KEYPAD AND DISPLAY Tabulated settings (repeated in 3 tables, selectable by digital input or communications) Level 1 Level 2 Level 3 Description Valid Range Insensitivity degree 0.5 – 5% Vn REGULATION INSENSITIVITY SETTINGS T1 DEGREE (TABLE 1) Multiplier for operation 1 - 100 Note: this TIME FACTOR...
- Page 77 SETTING OUT OF RANGE Some settings do not require the user to enter a numerical value, but they offer a choice of options instead. In these cases, the different options can be viewed using ←/→. DTR Digital Tap Changer Controller GE—106305A...
-
Page 78: Information Group
9. KEYPAD AND DISPLAY 9.3 INFORMATION GROUP This group provides information about the internal status of the DTR. It can be accessed by pressing the INF key. Once pressed, the relay will display the following message: STATUS By pressing the ENT key, we enter the status menu. Using ↑ and ↓ we can move along the menu, obtaining the status shown on the following table: Status Description... - Page 79 PROTECTION LINK Monitors the communication between the protection CPU and the communications IRIG-B LINK Monitors the reception of the IRIG-B satellite synchronization signal DATE AND TIME Displays the relay date/time DTR Digital Tap Changer Controller GE—106305A...
-
Page 80: Operations Group
9. KEYPAD AND DISPLAY 9.4 OPERATIONS GROUP This group allows to set the relay date and time, as well as increasing/decreasing the tap, switching to Manual / Automatic mode, stop the regulator or trigger an event. For accessing the operations group, we must press the ACT key from the stand-by screen: For modifying the date/time, follow the steps below: YEAR GENERAL ELECTRIC... -
Page 81: Single-Key Operation
STATUS ACTIVE TABLE Indicates which is the active settings table Displays the regulator status STOPPED AUTOMATIC Displays the regulator status Displays the regulator status REMOTE DATE/TIME Displays the relay date and time DTR Digital Tap Changer Controller GE—106305A... -
Page 82: Configuration Menu
DTR relays, as it does not intend to be a password, but a security measure to avoid accidental modification of the configuration. This code is 7169, which corresponds to the ASCII code of GE initials. Please refer to the example below:... - Page 83 9. KEYPAD AND DISPLAY DTR Digital Tap Changer Controller GE—106305A...
- Page 84 FIGURES FIGURE LIST Fig.1 : External connections for DTR units with taps coded in BCD Fig. 2 : External connections for DTR units with taps per contact. Fig. 3 : Panel mounting diagram Fig. 5 : RS-232 connection Fig. 6 : Dimensions diagram Fig.
- Page 85 FIGURES FIGURE 1 : WIRING DIAGRAM FOR DTR UNITS WITH TAPS CODED IN BCD DTR Digital Tap Changer Controller GE—106305A...
- Page 86 FIGURES FIG. 2 : WIRING DIAGRAM FOR DTR UNITS WITH TAPS BY CONTACT GEK-106305A DTR Digital Tap Changer Controller...
- Page 87 FIGURES FIGURE 3 : PANEL MOUNTING DIAGRAM DTR Digital Tap Changer Controller GE—106305A...
- Page 88 FIGURES FIGURE 4. RS-232 CONNECTION GEK-106305A DTR Digital Tap Changer Controller...
- Page 89 FIGURES FIGURE 5 : DIMENSIONS DIAGRAM DTR Digital Tap Changer Controller GE—106305A...
- Page 90 FIGURES FIGURE 6 : FRONT VIEW GEK-106305A DTR Digital Tap Changer Controller...
- Page 91 FIGURES FIGURE 8 : GENERIC REAR VIEW DTR Digital Tap Changer Controller GE—106305A...