Table of Contents
Advertisement
Quick Links
Advertisement
Table of Contents

Related Manuals for Toro 02710


Summary of Contents for Toro 02710
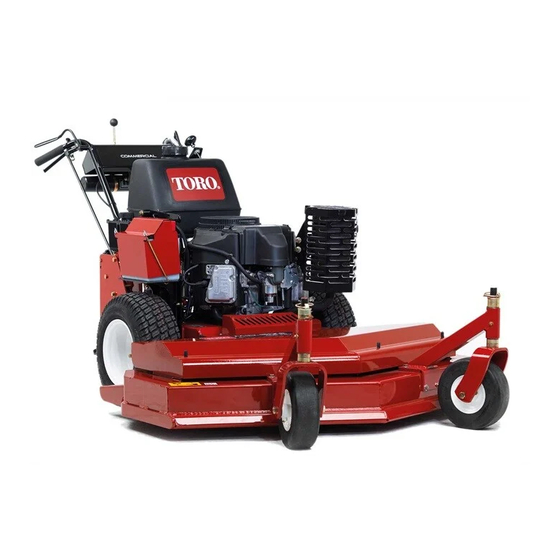
- Page 1 Form No. 3450-372 Rev A 81cm (32in), 91cm (36in), or 122cm (48in) Mid-Size Rear-Discharge Deck Model No. 02710—Serial No. 410000000 and Up Model No. 02711—Serial No. 410000000 and Up Model No. 02712—Serial No. 410000000 and Up *3450-372* Register at www.Toro.com.
-
Page 2: Table Of Contents
Whenever you need service, genuine Toro parts, or Safety-alert symbol additional information, contact an Authorized Service Dealer or Toro Customer Service and have the model and serial numbers of your product ready. Figure 1 identifies the location of the model and serial numbers on the product. -
Page 3: Safety
• Use only accessories, attachments, and replacement parts approved by Toro. • Do not put your hands or feet near moving parts of or under the machine. Keep clear of any discharge opening. -
Page 4: Safety And Instructional Decals
Safety and Instructional Decals Safety decals and instructions are easily visible to the operator and are located near any area of potential danger. Keep safety signs clear and visible, replace any decal that is damaged or missing. decaloemmarkt Manufacturer's Mark 1. -
Page 5: Product Overview
To ensure optimum performance and continued safety certification of the machine, use only genuine Toro replacement parts and accessories. Replacement parts and accessories made by other manufacturers could be dangerous, and such use could void the... -
Page 6: Operation
Operation Adjusting the Height of Cut You can adjust the height of cut from 26 to 108 mm (1 to 4-1/4 inches) in 6 mm (1/4 inch) increments. You can achieve this by adjusting the blade spacers, rear axle height, or front caster spacers. Use the Height-of-Cut Chart (page 8) to select the combination of adjustments required. - Page 7 Adjusting the Axle Height Adjusting the Caster Position Using the Height-of-Cut Chart (page 8), adjust Adjust the axle position to the selected height-of-cut the caster spacers to match with the axle hole setting. Refer to Height-of-Cut Chart (page selected (Figure Park the machine on a level surface, disengage the PTO, and engage the parking brake.
-
Page 8: Height-Of-Cut Chart
Height-of-Cut Chart Number of spacers Number of 1/4-inch blade spacers below the spindle below the caster 13 mm 5 mm Axle (1/2 (3/16 position inch) inch) 32 mm (1-1/4 38 mm (1-1/2 45 mm (1-3/4 26 mm (1 inch) 51 mm (2 inches) inches) inches) inches) -
Page 9: Maintenance
Maintenance Note: Determine the left and right sides of the machine from the normal operating position. WARNING If you raise the machine using only a jack to support it while you work under the cutting unit, the jack could tip, causing the mower deck to fall, crushing you or bystanders. -
Page 10: Lubrication
Lubrication Greasing the Mower Deck Service Interval: Every 100 hours—Grease the Figure 6 for locating the grease points on the blade-engagement bellcrank. machine. Grease the blade-engagement (PTO) bellcrank Grease type: No. 2 lithium or molybdenum grease (Figure Park the machine on a level surface, disengage the PTO, and engage the parking brake. -
Page 11: Belt Maintenance
Belt Maintenance Adjusting the Mower Belt Tension Checking the Belts Adjusting the Tension Service Interval: Every 50 hours/Monthly (whichever comes first) Service Interval: After the first 8 hours Check the belts for squealing when the belt is rotating, After the first 25 hours blades slipping when cutting grass, frayed belt edges, Every 50 hours burn marks and cracks are signs of a worn mower... - Page 12 Engage the PTO and check the belt tension. Check the blade brake adjustment; refer to Adjusting the Blade Brake (page 16). If there is no adjustment left in the turnbuckle and the belt is still loose, position the rear idler Adjusting the PTO Engagement pulley in the middle or front hole (Figure...
- Page 13 g001849 Figure 12 g001855 Figure 13 1. Assist arm 5. Assist arm link 2. Front assist arm stop 6. Yoke 1. Bellcrank 3. Switch mounting bracket 3. Rear assist arm stop 7. Hairpin cotter 2. Bolts and nuts 4. Switch body 4.
-
Page 14: Mower Deck Maintenance
Mower Deck Maintenance Blade Safety A worn or damaged blade can break and a piece could be thrown toward you or bystanders, resulting in serious personal injury or death. g006530 Figure 14 • Inspect the blades periodically for excessive wear 1. - Page 15 To ensure optimum performance and continued safety conformance of Note: Maintain the original angle. the machine, use genuine Toro replacement blades. Replacement blades made by other manufacturers Note: The blade retains its balance if the same may result in non-conformance with safety standards.
-
Page 16: Adjusting The Blade Brake
Adjusting the Blade Brake Storage Park the machine on a level surface, disengage Park the machine on a level surface, disengage the PTO, and engage the parking brake. the PTO, and engage the parking brake. Shut off the engine, remove the key, and wait Shut off the engine, remove the key, and wait for all moving parts to stop before leaving the for all moving parts to stop before leaving the... - Page 17 Notes:...
- Page 18 Notes:...
- Page 19 The Toro Company (“Toro”) respects your privacy. When you purchase our products, we may collect certain personal information about you, either directly from you or through your local Toro company or dealer. Toro uses this information to fulfil contractual obligations - such as to register your warranty, process your warranty claim or to contact you in the event of a product recall - and for legitimate business purposes - such as to gauge customer satisfaction, improve our products or provide you with product information which may be of interest.